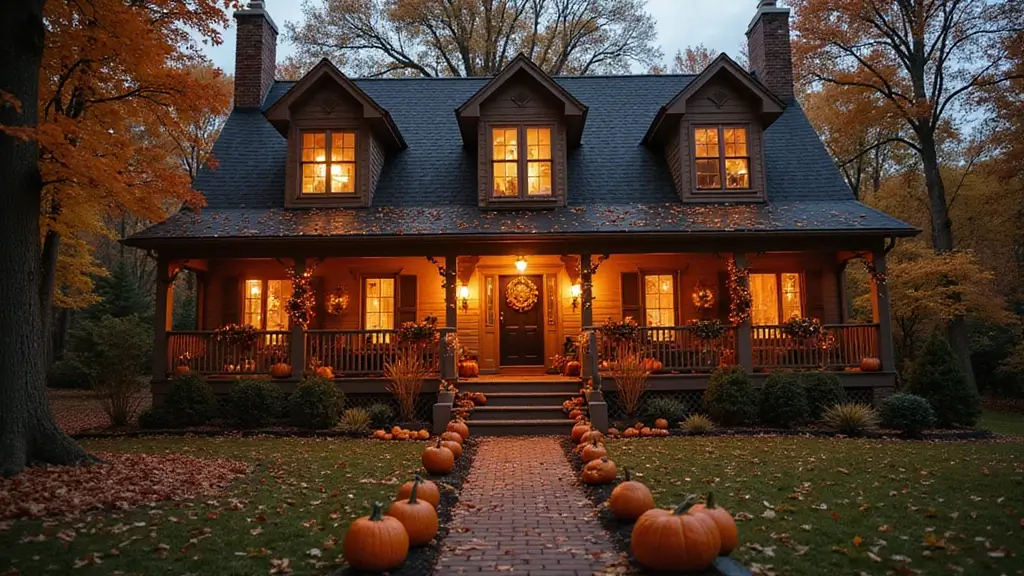
Okay, so I’ve been dramatic about finding cheap, wow-worthy Halloween yard ideas. My porch looks fine in daylight, but after dark it begs for a little magic. So I pulled together 24 DIY Outdoor Halloween Decorations Under $20 That Will Bewitch Your Neighbors. Yes, the cost stays under twenty bucks. Yes, you can grab most supplies from a dollar store, a thrift bin, or use things you already own. The goal is big impact with a tiny price tag.
Why I made this: I want everyone to have fun with Halloween, not miss out because they’re short on money. I’ve seen amazing yards that look high-end but weren’t expensive. I built this list to prove you can create that wow without draining your budget.
Who it’s for: If you love a DIY vibe, enjoy simple crafts, and want curb appeal that welcomes neighbors, this is for you. It’s for renters who want impact without nails, and for homeowners who want fast, reusable ideas. It’s for families who want a bit of spooky magic, but with easy steps.
What you’ll get: A complete collection of 24 ideas you can mix, match, and adapt. Each idea uses common, cheap materials and simple steps. You’ll learn quick builds, weather-safe tweaks, and fast displays that glow at night.
Picture a ghost made from a cheap sheet over a wire frame, a fence dotted with cardboard bat silhouettes, or jars that glow with a small LED inside. These kinds of ideas come together with basic supplies like fabric scraps, paint, tape, and a string of lights. You won’t need fancy tools or a full day to pull them off, just a little time and a lot of imagination.
Ready to get started? Grab a tote, line up a few supplies, and follow along. I’ll keep tips practical and simple—how to cut, glue, tape, and light up your space. By the end, your yard will feel spooky, friendly, and inviting, without blowing your budget.
Contents
- 1. Spooky Silhouettes
- 2. Pumpkin Planters
- 3. Ghostly Luminaries
- 4. Spider Web Entrapment
- 5. Broomstick Brigade
- 6. Insidious Inflatables
- 7. Witty Welcome Sign
- 8. Hauntingly Handmade Wreaths
- 9. Treasure Chest of Treats
- 10. Creepy Candle Holders
- 11. Witch Hat Yard Stakes
- 12. Scaredy-Cat Statues
- 13. Fall Harvest Display
- 14. Skeletons in the Yard
- 15. Monster Footprints
- 16. Frightening Fence Decor
- 17. DIY Mummy Jars
- 18. Floating Witch Hats
- 19. Scarecrow Greeting
- 20. Glow-in-the-Dark Stones
- 21. Rustic Hay Bales
- 22. Frightening Window Clings
- 23. Batty Garlands
- 24. Light-Up Skull Decorations
1. Spooky Silhouettes

If you want a quick and cheap way to make your yard feel spooky, try DIY spooky silhouettes.
All you need is black poster board or sturdy cardboard, a few sharp scissors, tape, and something to stake them with.
Cut out shapes like witches, bats, and ghosts.
Place the silhouettes against windows from inside, or pin them to the lawn with stakes.
When you shine light from behind, they cast eerie shadows on walls or the grass.
That backlighting makes a bigger, haunting impression than flat decor.
You can switch designs each year to fit new trends or your mood.
Mix up the sizes and angles for depth.
Secure them well with stakes or strong tape so they stand in wind.
Consider painting some silhouettes with glow-in-the-dark paint for a surprise after sunset.
Removable tape helps windows stay clean and keeps pieces easy to store flat.
This budget-friendly idea delights kids and grown-ups alike.
With a little planning, you can welcome trick-or-treaters with a spooktacular look under $20.
Keep a few extra cutouts ready for last-minute changes.
Store them in a sturdy box so the cardboard stays flat.
If weather turns bad, bring pieces inside to protect your work.
1. Spooky Silhouettes
Editor’s Choice

Artecho Glow in the Dark Paint 8 Colors, 20 ml / 0.7 oz Acrylic Paint fo…

24 Pack Garden Stakes, U-Shaped Tent Stakes, Galvanized Landscape Staple…
2. Pumpkin Planters

Turn your Halloween look from cute to clever with pumpkin planters. You can repurpose those pumpkins into bright, welcoming pots. Cut off the tops, scoop out the insides, and rinse the shells clean. Line each pumpkin with a plastic liner to keep soil from leaking. Fill with fresh potting soil and sturdy fall blooms like chrysanthemums or mini mums. Place them where guests will notice most, along the doorway or at the edge of your garden path.
What you need
– A few pumpkins in different sizes
– A serrated knife and a sturdy scoop
– Plastic liners or sturdy bags
– Potting soil and a few handfuls of mulch
– Seasonal flowers such as chrysanthemums, pansies, or asters
Steps
– Cut off the tops and scoop out the insides.
– Rinse the shells so they dry cleanly.
– Slide in a liner to hold soil in place.
– Fill with soil, then plant your chosen flowers.
– Water gently and place the planters where they get the right light.
– After Halloween, compost the pumpkins when they start to break down.
Styling tips
– Mix different heights to create a friendly rhythm at your doorway.
– Pair warm orange pumpkins with purple or yellow blooms for a striking contrast.
– Line up three pumpkins along a railing for a welcoming vignette.
Care and quick notes
– Check moisture a couple of times a week and water as needed.
– If a pumpkin rots, remove it and replace with a fresh one to keep the display tidy.
This idea is festive, low-cost, and doable in just a few steps—perfect for an inviting fall entry.
Transform your ordinary pumpkins into stunning planters that scream Halloween charm! With a little creativity and some fresh blooms, you’ll enchant your guests before they even step through the door.
2. Pumpkin Planters
Editor’s Choice


TRUEDAYS 20 Pack Plant Saucers (6 inch / 8inch / 10inch / 12inch) Clear …

Miracle-Gro Potting Mix, For Container Plants, Flowers, Vegetables, Annu…
3. Ghostly Luminaries

Ghostly Luminaries
You want a spooky walkway without breaking the bank. You can make ghostly lights with balloons and a tiny LED glow. Gather white balloons, battery LED tea lights, a black marker, and a few small weights. Inflate the balloons to a comfortable size and draw friendly or eerie faces with the marker.
Slip the battery lights under each balloon so a soft glow shines from below. Place the balloons along your path and anchor them with weights or small stakes so they don’t drift away. If the wind picks up, add a second light behind the balloon to keep the glow even and clear. Vary the expressions—smiling ghosts, sleepy ghosts, or surprised ones—for a fun mix along the sidewalk. Use only battery-operated lights for safety and easy cleanup after Halloween night. The result is a gentle, haunting aura that guides guests with a warm, ghostly shine. This setup is simple to store for next year. Try it this weekend for best results.
3. Ghostly Luminaries
Editor’s Choice

KOABY 12 Pack LED Tea Lights, Flickering Warm White Lights, Battery Oper…
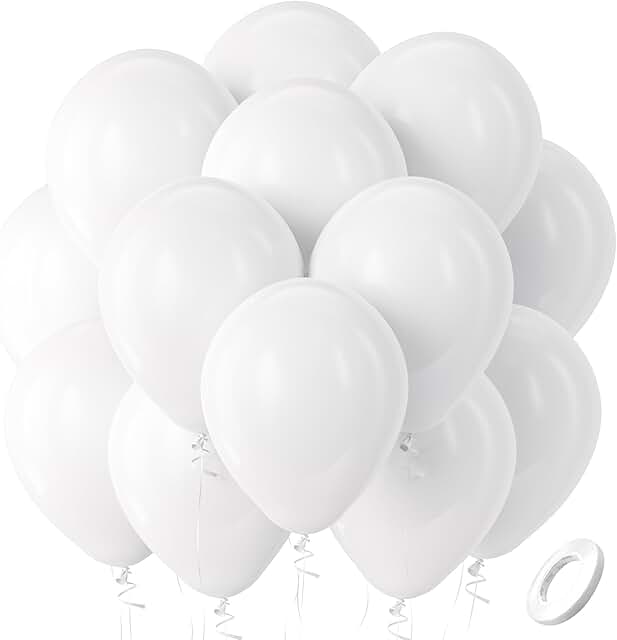
Bezente White Balloons Latex Party Balloons, 100 Pack 12 inch Round Heli…

Sharpie Permanent Markers Variety Pack, Includes Chisel, Fine, and Ultra…
4. Spider Web Entrapment

You want a haunting entrance that grabs attention without draining your wallet. Spider Web Entrapment gives you a creepy focal point with simple materials. You can use black yarn or a ready-made spider web kit to start. Decide where the web will shine the most—across your porch, between railings, or among nearby tree limbs.
What you need
– Choose black yarn or a ready-made web kit.
– Gather a few fake spiders to place on the web.
– Have lightweight fasteners like tape, twist ties, or small nails.
– Keep scissors handy for trimming and a few extra pins or staples for wood surfaces.
How to build it
– Pick the best spot that will draw the eye first.
– Mark two sturdy anchor points, such as railing posts or strong tree limbs.
– Stretch a few loose threads between the anchors to form the base.
– Weave in more threads to create a crisscross web.
– Make the center tight and the outer rings looser for different looks.
– Adjust density to change how spooky it feels.
Finish with flair
– Place 2–4 fake spiders along the web to add fright.
– Tuck one near the center for a focal point and place others along the edges.
– Pair the web with props like a skeleton, bats, or a tombstone to tell a small scene.
– Secure everything well; wind can pull it loose, and you don’t want it flapping away.
Tips and upkeep
– If wind is a concern, use a tighter web with shorter spans.
– For a grand look, keep some wider gaps in the design.
– After Halloween, fold or roll the web for easy storage and reuse next year.
This setup stays under $20 and adapts with the seasons, giving you flexible, budget-friendly spooky charm.
4. Spider Web Entrapment
Editor’s Choice

Lion Brand Yarn Basic Stitch Anti-Pilling Knitting Yarn, Yarn for Croche…
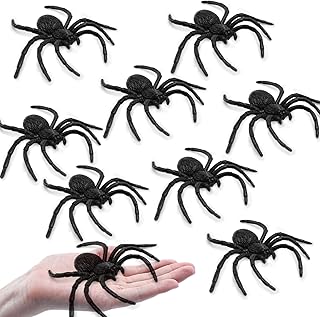
Plastic Spiders Halloween Decorations, Halloween Spider, Fake Spiders, 8…
5. Broomstick Brigade

You want a bewitching yard that guests remember, without spending a lot. This broomstick display fits that goal. Gather fallen branches from your yard or safe spots nearby. Tie the sticks into broom-like bundles with simple twine. Make the handle strong and the bristles spread into a fan. Leave some bundles plain and paint others in bold colors. A coat of orange, purple, or black paint adds pop without much cost.
You can hang the broom bundles from tree limbs for height. Lean some against a fence or prop others in sturdy pots. Vary the heights and widths to create visual rhythm. Add lights or ribbons to give a magical shine. A few tiny LEDs can twinkle along the bristles.
Place a row along your walkway to greet guests. The display feels friendly yet spooky when the wind brushes the ribbons. This project is fast, easy, and uses items you already have.
– Pro tips: use longer sticks in front and shorter ones behind.
Secure with a simple knot, or a dab of glue if you prefer. Store the pieces in a dry place after Halloween so they last for next year.
5. Broomstick Brigade
Editor’s Choice

Acrylic Paint Set, 24 Colors (2 oz/Bottle) with 12 Art Brushes, Art Supp…

Outdoor String LED Patio Lights – 100Ft 30M Outside Waterproof Light wit…

PerkHomy Natural Jute Twine 600 Feet Long Twine String for Crafts Gift W…
6. Insidious Inflatables

Want a big Halloween yard without a big price tag? Budget-friendly inflatables are a smart pick. You can grab a classic pumpkin or a playful ghost at discount stores. They bring big color and fun with little effort.
These inflatable decorations light up and rise at night for an instant wow. They’re quick to set up—plug in, inflate, and you’re done. They also create a strong focal point that draws neighbors and kids to your yard.
Here are simple setup tips:
– Choose light-up inflatables for nighttime magic.
– Anchor them with stakes or heavy bags so they don’t wander in the wind.
– Mix sizes and place taller pieces in the back and shorter ones in front to add depth.
– Keep cords out of walkways and use an outdoor-rated cord.
– Fully inflate each piece for clean shapes and bold colors.
– Store them in a dry bin when not in use and let them dry before putting them away.
A few safety notes: check the forecast, and bring inflatables in if heavy winds are coming. If you notice a leak, patch it or switch to a spare. With these tips, your yard will glow with friendly fright and stay easy on your wallet.
6. Insidious Inflatables
Editor’s Choice

Hourleey 5 FT Halloween Inflatables Outdoor Stacked Pumpkins with Witche…
7. Witty Welcome Sign

You want a welcoming sign that’s spooky, but affordable. With scrap wood and paint, you can make one for under $20.
Materials
– Use scrap wood or an old board to save money.
– Pick outdoor paint that lasts through the season.
– Gather brushes, sandpaper, and a pencil for layout.
– Have a stencil or plan for the letters you want.
– Add a weatherproof seal to protect your art.
– Bring rope, nails, or a hook to hang the sign.
Design ideas
– Pick a phrase that fits your mood, such as “Welcome, My Pretties!”
– Choose a font that matches the vibe.
– Use gothic for spooky or whimsical for friendly.
– Paint a dark base so the letters pop.
– Add bats or pumpkins for a playful touch.
Steps
– Sand the wood until smooth.
– Paint a base coat in your chosen color.
– Lightly pencil or stencil the letters.
– Fill in the letters with paint.
– Add decorative shapes like bats or pumpkins.
– Seal the sign with a weatherproof finish.
– Hang it where it’s easy to see.
This sign stays sturdy in wind and rain if you seal it well. Place it by your door for quick charm.
Tips
– Let each layer dry fully before the next.
– Place the sign where it’s sheltered from wind and rain.
Create a bewitching welcome with DIY outdoor Halloween decorations cheap! A little scrap wood and creativity can turn your front yard into a spooky sanctuary that welcomes all trick-or-treaters.
7. Witty Welcome Sign
Editor’s Choice

90PCS Premium Micro Detail Sander Kit, Updated 3-in-1 Mini Hand Sanding …
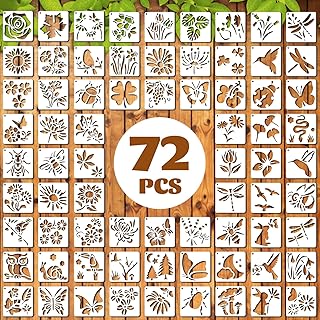
72 Pcs Botanical Stencils Set, Reusable Butterfly & Flower Painting Temp…
8. Hauntingly Handmade Wreaths

Want a spooky door that welcomes neighbors without emptying your wallet? This hauntingly handmade wreath is quick to make and under $20.
What you’ll need
– A foam wreath form keeps attachments simple.
– Gather faux cobwebs, small plastic spiders, orange ribbons, and dried leaves or twigs for texture.
– Wrap the ribbon around the form to create a bold base color.
– Layer in faux cobwebs to form a soft, eerie texture.
– Tuck in dried leaves or twigs for a seasonal touch.
– Position plastic spiders among the webs for tiny, spooky accents.
– Secure everything with hot glue or craft pins so it stays put.
– Finish with a bright orange or black bow for a friendly Halloween welcome.
Pro tip: If the weather is rough, reinforce with extra pins and a dab of clear glue at the edges to keep the look intact.
You can shop secondhand for cheap Halloween decorations, too.
For outdoor use, keep the wreath light and sealed from heavy rain. Let it dry after wet weather, check for loose pieces, and store flat when the season ends. If you want a different mood, switch ribbon color or add bats for a new look. Show your style with seasonal colors or mini decorations.
8. Hauntingly Handmade Wreaths
Editor’s Choice

1000 sqft Spider Webs Halloween Decorations Bonus with 30 Fake Spiders, …

Hot Glue Gun Kit with 30 Glue Sticks(130mm x 7mm), Fast Preheating Hot M…
9. Treasure Chest of Treats

Want a Halloween display that grabs kids and costs little? A treasure chest made from a simple box fits the bill. Build it fast, then keep it stocked all night.
– Shape and color the chest Start with a sturdy cardboard box. Paint it warm brown. Add a dark wash for depth. Glue on gold stickers to mimic metal bands. A small label on the lid invites closer look.
– Add a lock or handle Attach a small plastic lock or a toy chest handle. It adds authenticity and fun. A labeled key tag can read “Open for treats.” Consider tucking the key in a faux coin pocket for charm.
– Fill with treats and toys Stock the box with candy, mini toys, and stickers. Mix favorites with small surprises. Have non-candy options for allergies. Check it every few hours and restock as needed. Place a few extra goodies nearby for quick top-ups.
– Set the scene safely Put the chest on a stable porch surface. Keep glitter away from windy spots. A simple sign like “Treasure Inside” sparks curiosity. Make it visible from the sidewalk to invite kids to pause.
This playful setup thrills kids and invites neighbors to linger. It’s easy, budget-friendly, and boosts your Halloween vibe.
9. Treasure Chest of Treats
Editor’s Choice
Acrylic Paint Set, 24 Colors (2 oz/Bottle) with 12 Art Brushes, Art Supp…

Halloween Chains Lock Plastic Chains, 1 Piece, for Halloween, Christmas,…
10. Creepy Candle Holders

Need a spooky glow that fits your budget? These Creepy Candle Holders turn plain jars into eerie lanterns you can dot along the yard. They use safe LED candles, so there’s no fire risk near dry leaves. A mix of jar sizes makes your display feel alive along the path.
What you’ll need
– Choose mason jars in mixed sizes for height and variation.
– Use white, gray, and black acrylic paints for ghostly designs.
– Keep a small brush and a few cotton swabs for details.
– Opt for battery-operated LED candles for a steady glow.
– Add Spanish moss or fake spider webs to create texture.
– Use glue or a glue gun to secure moss or webs.
Steps
– Clean jars well so paint dries smooth.
– Paint simple faces or silhouettes; keep details bold and easy to read.
– Let each layer dry before adding a second coat.
– Glue on moss or wrap webs around rims to create a haunted feel.
– Place the LED lights inside and tuck the batteries behind the back.
Placement ideas
– Line them along your porch steps or walk with space between each jar.
– Group at different heights on a small trellis or stacked crates to vary the skyline.
– Keep some apart and save a few for a dramatic entrance glow.
All of this stays under $20 and still shines at dusk.
10. Creepy Candle Holders
Editor’s Choice

Ball Wide Mouth Glass Mason Jars with Lids and Bands, Used for Canning, …

Enido 12 Pc Flameless LED Candles with Remote & Timer, Outdoor Waterproo…
Acrylic Paint Set, 24 Colors (2 oz/Bottle) with 12 Art Brushes, Art Supp…
You might also like

11. Witch Hat Yard Stakes

Want a playful, affordable way to spread Halloween cheer in your yard? Witch hat yard stakes fit the bill. These tiny hats sit on garden stakes and stand up to light wind. Best of all, you can make them in an afternoon and keep costs under $20.
What you’ll need
– Black construction paper or cardstock
– Wooden garden stakes or dowels
– Tape or glue
– Scissors and a ruler
– Optional: colored bands, markers, LED lights
Easy steps
1) Cut a cone from black paper and tape the seam.
2) Cut a circle for the brim and tape it to the cone.
3) Attach the hat to a stake using tape or glue from underneath the brim.
4) Push the stake into the ground where you want the display.
5) Decorate with a bright color band or simple markers for detail.
6) Optional: add a small LED light under the brim for night glow.
Placement ideas
Group hats in clusters for bigger impact.
Vary the height to create a playful silhouette.
Line a path with hats to guide guests.
Put some along a fence, others by the door.
Care and safety
Choose weather-safe glue and sturdy stakes.
Secure hats well so they stand in light wind.
If storms hit, pull them out and store indoors.
Check them after windy nights.
They’re light, easy to move, and add cheer fast.
11. Witch Hat Yard Stakes
Editor’s Choice
Prang (Formerly SunWorks) Construction Paper, Black, 9″ x 12″, 50 Sheets
12. Scaredy-Cat Statues

Want a cute, spooky touch along your yard that doesn’t cost much? Scaredy-Cat Statues from painted rocks fit the bill. They’re friendly to kids and cheap to make, yet they stand out on a dark path.
– What you need
– Smooth rocks in different sizes
– Acrylic paint that’s weather-resistant
– Small brushes and a pencil for quick sketches
– Clear outdoor sealant
– How to make
1) Pick rocks with flat faces and wash them clean.
2) Let them dry, then sketch a simple cat face or a tiny spooky grin.
3) Paint the base color, add eyes, whiskers, and little fangs if you like.
4) Add a second coat for solid color, then seal all surfaces.
5) Wait for the sealant to cure before you place them outside.
– Where to display
Line your garden path, perch near steps, or flank the door with a mix of big and small stones. A touch of glow-in-the-dark paint makes them visible at dusk without shouting.
– Fun twist
Host a quick rock-painting session with friends. It’s a friendly, low-cost way to make your yard feel alive.
– Care tips
Weather can wear paint over time. Re-seal a few pieces each season and bring fragile ones inside during storms.
These rock cats charm neighbors and delight cat lovers alike.
12. Scaredy-Cat Statues
Editor’s Choice
Acrylic Paint Set, 24 Colors (2 oz/Bottle) with 12 Art Brushes, Art Supp…
Rust-Oleum 249859 Painter’s Touch 2X Ultra Cover Spray Paint, Semi-Gloss…

River Rocks for Painting 25 Pcs Large 2-3 Inch Flat Smooth Painting Ston…
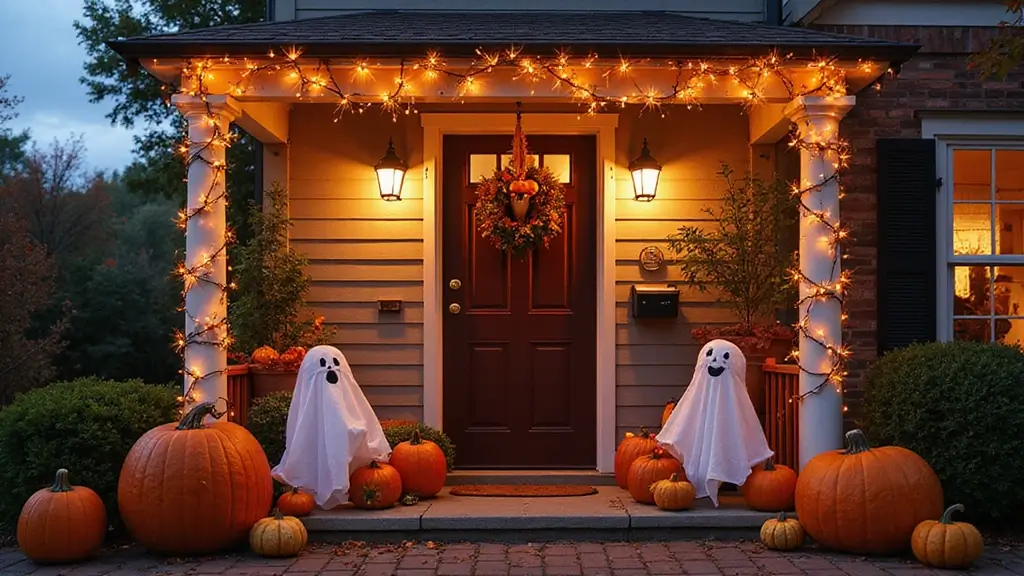
13. Fall Harvest Display

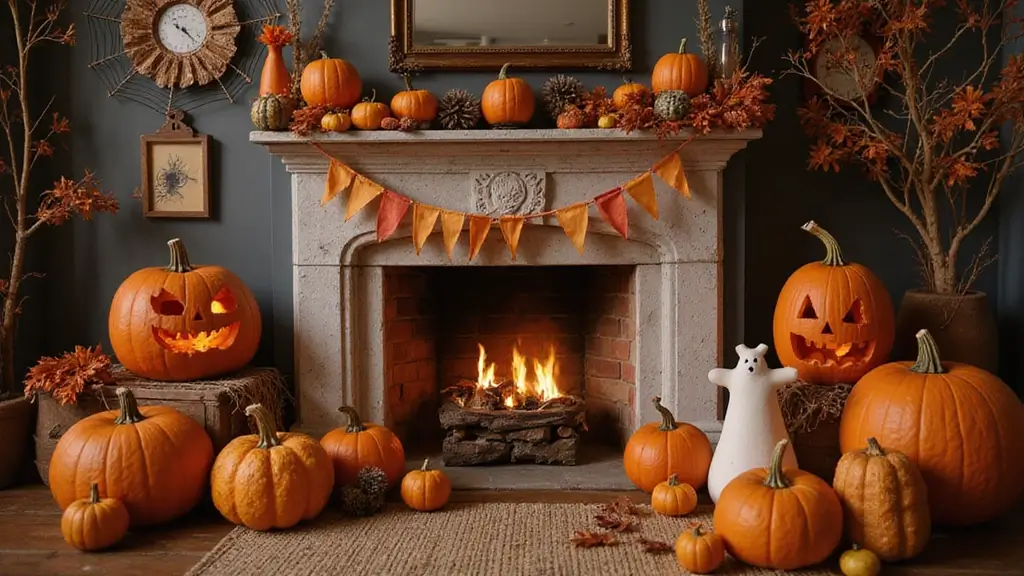
Fall Harvest Display
You want your porch or yard to feel warm and welcoming without spending a lot. A fall harvest display does that with simple items you already have or can buy cheap. Use hay bales, pumpkins, and corn stalks to create a cozy stage for Halloween and the rest of autumn. You can change it easily as the vibe shifts.
– Mix pumpkins of different sizes to add depth. Put the largest pumpkin at the back, then stack smaller ones on front steps or a hay bale.
– Add gourds or faux crows for a playful twist. A splash of color from gourds keeps the look lively.
– Use hay bales as seating or a stand for your display. They invite guests to pause and chat.
– Frame the display with corn stalks. Tie them with twine, creating a natural arch or border.
– Light up the scene with string lights or a lantern. A soft glow makes your display pop after dark.
– Create a small focal point, like a pumpkin centerpiece on a porch railing or a mini harvest stand.
This keeps the look simple, budget-friendly, and easy to update. You’ll gain curb appeal and a season-spanning vibe without a lot of work.
Transform your porch into a cozy fall haven with simple DIY outdoor Halloween decorations! A few pumpkins, hay bales, and corn stalks can create a warm and welcoming vibe that enchants every passerby.
13. Fall Harvest Display
Editor’s Choice

7 Pcs Assorted Sizes Artificial Fall Pumpkins Faux Orange Decorative Foa…
14. Skeletons in the Yard

You want a funny yard display that doesn’t drain your wallet. With a few cheap plastic skeletons, you can create a playful Halloween scene for under $20.
– Budget skeletons: Look for plastic skeletons on sale at discount stores, dollar sections, or after-Halloween clearances. Check online deals and multi-pack options to get more poses for less. You can stock up if you see a good price.
– Quick scene ideas: Plan a simple setup like a skeleton in a lawn chair or a skeleton hanging from a tree branch. Mix in a doorway pose to create a little story that visitors can follow. Tailor it to your yard size.
– Dress them up: Add a goofy hat, sunglasses, scarf, or tiny cape. Dress each figure to give personality and a sense of humor.
– Secure and light them properly: Use clear fishing line to suspend figures from branches or a sturdy stake to keep ground poses steady. Add a small LED light or lantern for a soft glow after dark. Keep cords and lines away from paths.
– Finish with little touches: Place a playful sign nearby and group two or three skeletons to form a tiny scene. The result should feel like a funny, inviting invitation to your yard. It’s easy to switch poses or rearrange figures as the season changes.
Your display will spark smiles and curiosity without costing much money.
14. Skeletons in the Yard
Editor’s Choice

CAMIRUS 6PCS Skeleton Halloween Decorations, 16 in Full Body Poseable Sm…

JMEXSUSS 100 LED Connectable Globe String Lights Indoor Bedroom, 33ft Wa…

Clear Fishing Wire, Acejoz 656FT Fishing Line Clear Invisible Hanging Wi…
15. Monster Footprints

Want a quick, affordable way to wow neighbors this Halloween? Monster footprints are a playful guide that leads guests from the yard to your door, while adding a spooky, kid-friendly vibe. You can do this in under an hour for less than $20.
What you’ll need
– Black washable outdoor paint
– A large sponge or foam brush
– Masking tape or cardboard to map the path
– Googly eyes for a goofy touch
– Glow-in-the-dark paint or accents (optional)
– A tray and paper towels for easy cleanup
Steps
1. Plan a short, direct trail from the lawn to the entry and mark edges with tape.
2. Dip the sponge in paint and stamp a toe print, then roll the heel to form a basic footprint.
3. Repeat to create a trail, spacing prints a few inches apart and following the path.
4. Vary footprint sizes and angles to add depth, and tuck a few googly eyes along the sides for whimsy.
5. If you want extra night visibility, add glow-in-the-dark accents or a soft outline with lighter paint.
6. Finish with a few tiny prints drifting toward the door to add a sense of movement.
Cleanup and tips
– Choose washable paint so cleanup is quick on the day after Halloween.
– Hose off the path or wipe it clean, and store supplies for next year.
– Test a small patch first to see how the paint dries on your surface.
– Place a small mat at the bottom of the path to keep guests from slipping.
15. Monster Footprints
Editor’s Choice

DIY Sidewalk Chalk Paint 6pk Kit – Non-Toxic, Washable Powdered Chalks -…

24 Pcs Foam Paint Brushes, Wood Handle Sponge Brushes for Painting, Stai…

560 Pcs Wiggle Googly Eyes with Self-Adhesive, 6mm 8mm 10 mm 12mm 15mm M…
16. Frightening Fence Decor

You want a fence that shivers up Halloween mood without draining your wallet. Frightening fence decor can turn a plain boundary into a neighborhood landmark.
Start with a simple plan. Pick a theme you can pull off with few pieces: bats in flight, friendly ghosts, or ragged fabric that dances in the wind. Keep it easy to install so you can finish fast.
What you’ll need (all under $20 if you shop smart):
– Store-bought cut-outs like bats and ghosts on sale.
– Handmade pieces from cardboard or painted paper.
– Weather-friendly fabrics such as old sheets or cheesecloth.
– Low-cost lights like solar strings or battery LEDs.
– Simple fasteners such as zip ties, twine, or outdoor hooks.
How to hang and arrange:
– Use sturdy ties to anchor pieces to rails or slats.
– Let lines of decorations sway, staggering heights.
– Place larger shapes up high and smaller ones at eye level.
Maintenance tips:
– Check after wind or rain and re-secure as needed.
– Replace tired pieces before trick-or-treat night.
Make it fun:
– Run a quick fence-decor contest on social media and invite neighbors to vote.
This fence display adds character, draws attention, and invites chatter on Halloween.
That boost saves money.
Neighbors notice, smile, too.
16. Frightening Fence Decor
Editor’s Choice

Large Vintage Halloween Decorations Cardboard Cutout Set of 12, Retro Sp…

ZYP 410 x 80 Halloween Creepy Cloth White Spooky Fabric Gauze Spooky Gia…
17. DIY Mummy Jars

Turn your empty jars into cute, spooky mummies that won’t stretch your budget. You’ll love how fast these come together. They’re quick, kid-friendly, and cheap.
What you’ll do:
– Gather jars in different sizes. You want variety for depth and charm.
– Cut cheesecloth or gauze into strips. Wrap the cloth around each jar, leaving small gaps for eyes.
– Glue the cloth with a dab of craft glue or hot glue so it stays put.
– Add one or two adhesive googly eyes in the gaps. Let the eyes peek out like tiny specters.
– Paint the lids to match your theme, or leave them white for a bright contrast.
– Pick a glow:
– Slip a battery-operated tea light or small LED candle inside. The soft glow makes the bandages glow without a fire risk.
– Add more jars along a table or line a path to guide guests.
Tips for better looks:
– Mix jar sizes and wrap styles for a playful forest of mummies.
– Try a light gray wash on some cloth for a dusty, ancient feel.
– Remove labels first so the wrap sticks cleanly.
That’s it—easy, cheap, and delightfully spooky. Your mummy jars will charm guests and set a friendly-yet-creepy mood this Halloween.
17. DIY Mummy Jars
Editor’s Choice
KOABY 12 Pack LED Tea Lights, Flickering Warm White Lights, Battery Oper…

Bflaae 764pcs Black Wiggle Googly Eyes Self Adhesive, 4mm 6mm 8mm 10mm 1…

Aleene’s All Purpose Tacky Glue, 8-Ounce, Clear (15599)
18. Floating Witch Hats

Want a spooky yard display that doesn’t drain your wallet? If you’re after DIY outdoor Halloween decorations under $20, floating witch hats fit the bill.
What you’ll need
– A few lightweight witch hats.
– A metal wire hanger bent into a light frame.
– Clear fishing line or thin nylon thread.
– Tape or zip ties.
– A small string of fairy lights (optional).
– Optional: glow-in-the-dark tape or paint for extra night visibility.
Step-by-step
1) Bend the hanger into a simple frame that can hold a hat, leaving a small loop at the top for hanging.
2) Slip the hat over the frame and secure it with a zip tie or a dab of tape to keep it from slipping.
3) Attach a short length of clear line from the frame to the hat to help it stay upright and balanced.
4) Tie the other end to a tree limb, porch beam, or hanging hook, and space several hats to create the look of a small, floating group.
5) Wrap a strand of fairy lights around the brim or tuck them inside the hat for a soft glow after dusk.
Tips for visibility and stability
– Choose warm white or soft amber lights for a friendly, spooky shine.
– If a hat tilts, adjust the line length or add a second line to keep it steady.
– Check wind conditions and gently tighten lines as needed to prevent wobbling.
Why this works
The hats appear to glide above your yard, catching the eye without heavy effort. It’s playful, easy to change, and fits tight budgets. In daylight, they sway with the breeze; at night, the glow draws lookers from the street. Ready to mix colors and sizes for a wider witchy flock?
18. Floating Witch Hats
Editor’s Choice
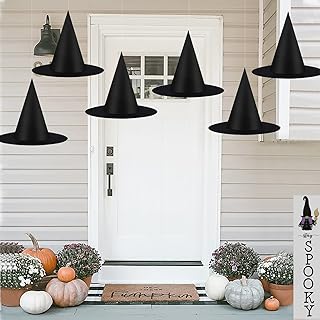
6 PCS Halloween Decorations Black Witches Hats Costume Accessory, Hangin…
Clear Fishing Wire, Acejoz 656FT Fishing Line Clear Invisible Hanging Wi…

20 Pack Fairy Lights Battery Operated, 3.3ft 20 LED Mini String Lights T…
You Might Also Like
19. Scarecrow Greeting

Scarecrow Greeting
Want a friendly porch that welcomes guests this Halloween without a big spend? A budget-friendly outdoor Halloween decor idea is a DIY scarecrow that greets visitors at the door. It’s simple, fun, and lighter on your wallet.
What you’ll need
– Gather old clothes you don’t mind using for this project.
– Find straw, batting, or soft stuffing to fill them.
– Use a pumpkin for the head, either carved or painted.
– Grab a scarf, a hat, and a few colorful accents.
– Add a small “Welcome” sign if you like.
How to build it
– Stuff the clothes with straw to form a relaxed torso and arms.
– Secure the stuffing so it keeps a friendly shape, not a lumpy mess.
– Set a pumpkin on top as the head. Carve or paint a friendly face.
– Dress the scarecrow with the clothes. Tie at the waist so it doesn’t sag.
– Add color with a bright scarf or hat. Let the colors pop in your yard.
– Place it on your porch or by the door. Lean it against a railing or set it on a small stand.
– Add a “Welcome” sign to greet guests as they arrive.
Tips for durability
– Keep lighter parts tight with string or zip ties.
– Use weather-safe fabrics and place it where wind won’t tug.
This friendly greeter makes Halloween feel warm and inviting for neighbors and guests alike.
19. Scarecrow Greeting
Editor’s Choice

Waterproof Canvas Fabric by The Yard 58″ W 600D Upholstery Polyester Mat…

FloraCraft Decorative Straw Bale 5 Inch x 6 Inch x 13 Inch Natural

Pumpkin Carving Kit Tools for Halloween – 13Pcs Professional Heavy Duty …
20. Glow-in-the-Dark Stones

Want a fast, budget-friendly way to light your outdoor Halloween path? Glow-in-the-dark stones fit the bill. They glow after sunset and add a playful touch to your yard. Best of all, you can do this for under $20 if you shop smart.
What you’ll need
– Smooth stones in a few sizes
– Glow-in-the-dark paint
– Clear acrylic sealant
– Small brushes
– Optional: a marker for outlining edges
Steps
– Wash and dry the stones until they are clean
– Paint in thin coats; let each coat dry before adding the next
– Seal with clear acrylic to protect from rain and wear
– Charge the stones by placing them in bright light for 30 minutes before use
– Arrange along your path with a gentle curve and mixed sizes to guide guests safely
Tips
– Keep some larger stones near the entrance to mark the start
– Rotate colors or patterns each year to refresh the look
– Enlist family or neighbors to paint stones; it’s a simple team project
– If glow fades, recoat every season
– Add dark edge lines around stones to make the glow pop at night
– Place stones not only on the path but also at corners to guide visitors
20. Glow-in-the-Dark Stones
Editor’s Choice
Artecho Glow in the Dark Paint 8 Colors, 20 ml / 0.7 oz Acrylic Paint fo…

Mod Podge Spray Acrylic Sealer that is Specifically Formulated to Seal C…

Pebbles Polished Gravel, Natural Polished Mixed Color Stones, Small Deco…
21. Rustic Hay Bales

Rustic Hay Bales for Outdoor Halloween Charm
You want easy, affordable outdoor Halloween decor. Rustic hay bales fit that need. They give seating and style in one. Use them to stack pumpkins or gourds for a fall focal point. They add warm color and texture to your yard. Best of all, they handle outdoor weather and are easy to move.
– Decorate with festive fabric, leaves, or flowers for color and texture.
– Stack pumpkins or gourds on top for a cozy focal point.
– Place hay bales to frame paths, seating areas, and the front door.
– Use them as a photo backdrop for Halloween selfies.
With hay bales, you create a rustic scene that invites guests. They double as seating for chats or quick photos. A light throw on top makes them comfy in cool weather. Keep them dry by brushing off straw and covering with burlap if rain is in the forecast.
Position bales to guide the eye: line a path, frame a doorway, or build a small step stack for height. Don’t place bales near open flames.
Your yard will feel autumnal and festive, and you’ll save money with this simple setup.
21. Rustic Hay Bales
Editor’s Choice
FloraCraft Decorative Straw Bale 5 Inch x 6 Inch x 13 Inch Natural

12Pcs Fall Cotton Fabric Bundles Maple Leaf Pumpkin Drinks Plaid Fabric …

40″ x15 Feet Gardening Burlap Roll – Multipurpose Natural Burlap Fabric,…
22. Frightening Window Clings

Spookify your windows with Halloween-themed clings! These decals are easy to apply and remove, making them perfect for a temporary seasonal display.
Look for designs that reflect your Halloween spirit, from creepy creatures to festive pumpkins.
– Mix and match sizes to create an interesting layout.
– Consider using some glow-in-the-dark options for extra surprise at night.
– You can even let the kids help pick out designs and apply them!
This decoration is an easy way to add fright without a lot of effort.
Transform your windows into a spooky spectacle! With DIY outdoor Halloween decorations cheap like frightful clings, you can create a haunting display that’s easy to set up and fun for the whole family!
22. Frightening Window Clings
Editor’s Choice

Whaline 6 Sheets Halloween Window Clings Vintage Ghost Evil Pumpkin Bat …

Glow in The Dark Halloween Window Clings Gel – 6 Sheets Gel Stickers wit…

CCINEE Halloween Window Stickers – 10 Sheets Window Clings Decals for Pa…
23. Batty Garlands

Batty Garlands
You want a spooky yard without spending much. A bat garland made from black card stock fits perfectly. It moves with the wind and adds life to your porch.
Materials
– Black card stock
– Scissors
– String, twine, or fishing line
– Tape or glue
– Optional: glitter or a white marker for eyes
Steps
– Draw a few bats in different sizes.
– Cut out two matching bats for each garland piece so you can make it double‑sided.
– Glue or tape fronts together, leaving a small tab to attach the string.
– Add eyes with a white marker. A touch of glitter makes them sparkle in light.
– Thread the bats onto your string. Space them a few inches apart.
Where to hang
– Line a porch railing, doorway, or fence.
– Let the garland sway in a breeze for extra creepiness.
– Try two rows at different heights for depth.
Tips
– Mix sizes for a fuller look.
– Use black paper on orange lights for contrast.
– Double‑sided bats look best when they swing.
– Hang near a light to cast moving silhouettes on walls.
Extra ideas
– Paint the edges with metallic or glow‑in‑the‑dark accents.
– Create a longer garland by joining multiple strands.
With this under‑$20 craft, you get charming, kid‑friendly Halloween décor that neighbors notice.
23. Batty Garlands
Editor’s Choice

30 Sheets Black Cardstock, 8.5 x 11 Card Stock, 92lb/250gsm Thick Cover …

PerkHomy 1100FT Jute Twine String 2mm 3ply Natural Thin Twine for Craft …

SFAIH Acrylic White Paint Pens – 8 Pack 2-3MM Medium Tip & 0.7MM Extra F…
24. Light-Up Skull Decorations

Light-up skull decorations give you a spooky glow without breaking the budget. You want a fast, visible cue for Halloween that won’t clutter your yard, and this idea fits.
What you’ll need:
– inexpensive plastic skulls
– small LED lights or battery-operated tea lights
– a touch of hot glue or clear silicone
– acrylic paint in white and gray shades
– a clear outdoor spray sealer
– optional glow-in-the-dark paint for extra emphasis
How to set it up:
– Place 2–4 skulls along your entry path or tucked in garden beds. Vary their heights for a layered look.
– Insert an LED light inside each skull. A tiny light shines softly and stays cool.
– Add color with paint. A white base with gray shading makes the glow pop at night.
– Seal the paint with a weatherproof spray so rain won’t wash it away.
– Create depth by using different skull sizes. Put a small one behind a bush and a large one in the open.
– Test the effect in dusk light. Move them a bit if the glow isn’t visible from the street.
Tips for a sharper effect:
– Choose a cool glow—blue or green works well for a ghostly vibe.
– Hide cords or choose wireless lights for a clean look.
– Use short, staggered placements rather than a straight line.
Why this helps:
It’s quick, cheap, and reusable. The glow draws eyes and adds a playful yet eerie touch that fits many outdoor spaces.
24. Light-Up Skull Decorations
Editor’s Choice
KOABY 12 Pack LED Tea Lights, Flickering Warm White Lights, Battery Oper…

Olympic WaterGuard 11 oz. Clear Exterior Waterproofing Wood Sealer Spray
Conclusion

Halloween doesn’t have to be an expensive affair; with these 24 DIY outdoor decorations, you can create a festive atmosphere that will enchant your neighbors and delight trick-or-treaters.
From spooky silhouettes to playful scarecrows, each of these ideas offers a unique way to express your Halloween spirit while keeping your budget intact.
Get crafting and make this Halloween spooktacular!
Note: We aim to provide accurate product links, but some may occasionally expire or become unavailable. If this happens, please search directly on Amazon for the product or a suitable alternative.
This post contains Amazon affiliate links, meaning I may earn a small commission if you purchase through my links, at no extra cost to you.
Frequently Asked Questions
What Are Some Easy DIY Outdoor Halloween Decorations That I Can Make for Under $20?
Absolutely! You can create a variety of fun and spooky decorations without breaking the bank. Some ideas include spooky silhouettes made from black poster board, ghostly luminaries using white balloons and LED lights, or pumpkin planters that repurpose real pumpkins as charming pots. Each of these projects is simple, cost-effective, and sure to delight your neighbors!
Where Can I Find Affordable Materials for My DIY Halloween Decorations?
Finding affordable materials is easier than you think! Check out local craft stores for discounts on supplies like poster boards, balloons, and paint. Additionally, thrift stores can be goldmines for items you can repurpose. Don’t forget to look around your own home for items you might already have, such as old jars or scrap wood, to help keep costs low!
How Long Will It Take to Create These DIY Outdoor Halloween Decorations?
Most of the DIY outdoor Halloween decorations listed can be completed in just a few hours! For example, projects like witch hat yard stakes or creepy candle holders are quick and fun to make, often taking less than an hour each. You can easily set aside a weekend afternoon to craft several decorations to enchant your yard!
Can Kids Help with These DIY Outdoor Halloween Decorations?
Absolutely! These DIY projects are perfect for family involvement. Kids can assist with tasks like painting scaredy-cat statues, helping to assemble batty garlands, or even creating monster footprints. Just make sure to supervise them with any sharp tools or materials, and enjoy the creative bonding time together!
How Can I Make My DIY Halloween Decorations Stand Out?
To make your DIY outdoor Halloween decorations truly stand out, consider adding elements like lights or motion. For instance, use glow-in-the-dark stones along your path or battery-operated lights in your ghostly luminaries. Additionally, think about creating a cohesive theme—like a spooky graveyard or a playful pumpkin patch—to give your decorations a professional touch!
Related Topics
diy outdoor halloween decorations
budget friendly decor
easy halloween crafts
spooky yard ideas
halloween decorations under $20
beginner friendly projects
creative outdoor decor
quick halloween projects
cheap outdoor decor
fall decorations
halloween crafts
frugal home decor
Leave a Reply