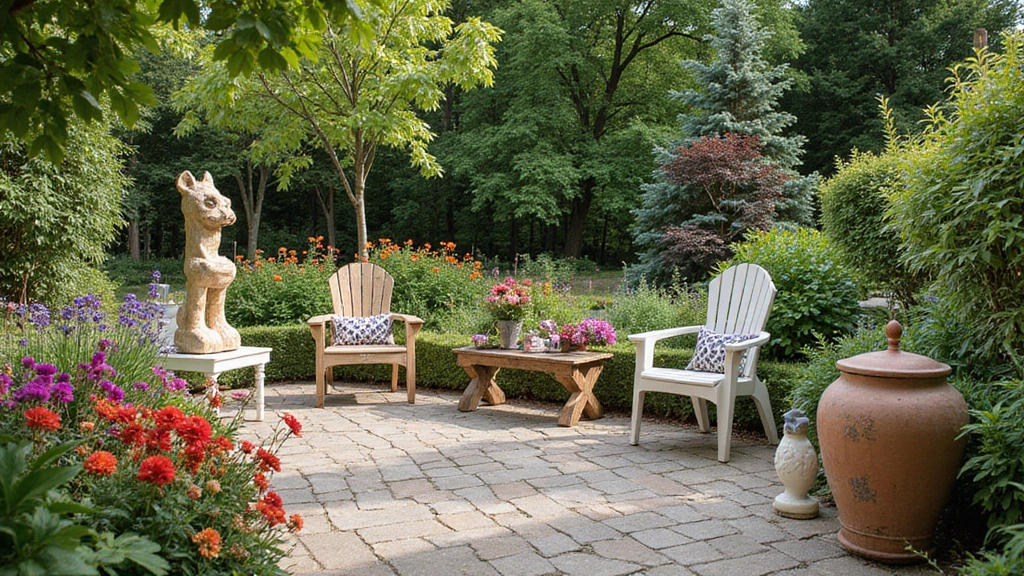
I put this post together because I want you to feel confident growing veggies in your own yard. Back yard vegetable garden designs can feel overwhelming with pages of ideas and fancy terms. These 30 backyard vegetable garden designs are simple, beautiful, and something you can nail. They fit real spaces, from a tiny balcony to a wide yard, and they stay easy to manage.
If you’re new to growing edible plants, short on time, or just want a space that looks neat with little work, this is for you. If you care about fresh meals and the taste of sun warmed tomatoes, you’ll love these layouts. These ideas are friendly to kids and pets too, with clear paths and sturdy beds that keep your garden orderly.
Inside you’ll find 30 designs described in plain language. Each one shows how the beds sit, where to put paths, and how much sun and water they need. You’ll see options like raised beds, simple squares, vertical walls, and handy containers. Plus practical tips on spacing, mulch, irrigation, and avoiding the curse of crowded soil.
These designs work in different climates, yards, and budgets. They’re modular, so you can mix ideas and start small, then add as you grow more confident. Even a beginner can sketch a plan, pick a layout, and see a fast harvest corner take shape. That means you can have a thriving garden without a big renovation.
You’ll save time choosing a plan and avoid common mistakes. You’ll learn how to place beds to catch sun, set up a simple watering plan, and choose crops that pair well. The goal is to get tasty veggies on your table sooner, with a space you enjoy tending.
Here is why these ideas work: they balance beauty and practicality. Next steps are simple: pick a design that fits your space, map it on paper, and gather a few materials. Take it slow, keep notes, and adjust as you see what grows best. Read on to find your perfect starting point and start turning your yard into a real food garden.
Contents
- 1. Classic Raised Bed Garden
- 2. Vertical Garden Oasis
- 3. Container Gardening Delight
- 4. Permaculture Design
- 5. Herb Spiral Garden
- 6. Edible Landscaping
- 7. Garden with Pollinator Plants
- 8. Square Foot Gardening
- 9. Companion Planting Strategies
- 10. Fruit and Vegetable Patch
- 11. Raised Bed with Decorative Borders
- 12. Sunken Vegetable Garden
- 13. Colorful Cherry Tomato Garden
- 14. Natural Stone Pathways
- 15. Greenhouse Vegetable Garden
- 16. Fruit Tree Espalier
- 17. Companion Raised Beds
- 18. Potato Tower Garden
- 19. Raised Bed with Built-in Seating
- 20. Easy Herb Wheel
- 21. Seasonal Rotation Garden
- 22. Shade Vegetable Garden
- 23. Decorated Fence Garden
- 24. Straw Bale Garden
- 25. Microgreens Garden
- 26. Urban Farming Patch
- 27. Rain Garden Design
- 28. Vegetable Spiral Garden
- 29. Mixed Borders Garden
- 30. Wildlife-Friendly Garden
1. Classic Raised Bed Garden

You want a garden that is easy to manage and still fruitful. The Classic Raised Bed Garden helps you get both. Built with simple wooden frames, these beds keep soil contained and plants tidy. You stay organized and you can reach your veggies without bending too much.
Why this design works: Raised beds warm up faster in spring, letting you plant earlier. You control the soil mix, drainage, and bed height, which makes gardening easier for beginners and kids too. This setup also cuts down on soil compaction because you don’t walk on the soil every day.
How to set it up: Pick a sunny spot. Use untreated wood to avoid chemicals. Shape the beds as rectangles or squares. Line the bottom with cardboard to slow weed growth. Fill with rich, organic soil and add seed packets or transplants. Water and harvest become straightforward, thanks to the raised height.
Tips: Choose wood that’s safe for gardens. Keep the top edge at a comfortable height. Paint for a playful look or leave it natural. Plant a border of flowers around the beds to attract helpful pollinators.
Next steps: Start with one 4×6 bed and a few easy veggies like lettuce, radishes, and bush beans. Enjoy the neat lines, simple care, and steady harvest.
1. Classic Raised Bed Garden
Editor’s Choice

Land Guard Galvanized Raised Garden Bed Kit, Galvanized Planter Garden B…

Back to the Roots Heirloom Organic, Non-GMO & USA Grown Seeds, 30ct Herb…

Back to the Roots 100% Organic Potting Mix (Value 12 Quart) | Premium Bl…
2. Vertical Garden Oasis

If your yard is small, a vertical garden can give you big harvests. Grow up, not out, and add life to a blank wall. A living wall saves space and adds color, scent, and texture to your backyard.
Ways to build a vertical garden
– Pallet wall: Grab a sturdy pallet and clean it well. Line the back with landscape fabric. Fill with a light soil mix and plant up the face. This creates a rugged, artistic backdrop for herbs and greens.
– Hanging pots: Use a wall rack and strong hooks. Hang fabric or plastic pots at varying heights. Pack in herbs or baby greens for quick bursts of flavor.
– Trellis or wire frame: Attach a trellis to a wall or fence. Train climbing plants like peas or beans to cover the frame. It looks lush and gives you tall, productive growth.
Best plants for a wall garden
– Climbing champions: Peas and beans grow fast and drape the structure with green vines.
– Fresh herbs: Mint and basil thrive in vertical setups and stay handy for cooking.
– Leafy greens: Lettuce, Swiss chard, and spinach work well in pocket planters or shallow pockets.
Smart watering and care
– Install a drip irrigation line or a soaker hose to keep soil evenly moist without mess. A simple timer helps you stick to a routine.
– Use a lightweight soil mix to keep weight down and make reshaping easier as plants grow.
– Place your wall where it gets several hours of sun. Check moisture in hot weather and trim back crowded growth to keep air moving.
Next steps: gather a pallet or two, pick a wall, and plan your first row of herbs. Your compact, up‑and‑covering garden is within reach.
Turn your walls into a harvest hub! Vertical gardens maximize space and add vibrant life to your backyard, transforming even the smallest areas into stunning vegetable oases. Grow up, not out!
2. Vertical Garden Oasis
Editor’s Choice

Amazing Creation Stackable Planter, Vertical Oasis Tiered Garden Planter…

230FT Drip Irrigation System for Garden with 40 Nozzles & Emitters, Gard…

Back to the Roots 100% Organic Indoor Potting Mix (6 Quart), Promotes He…
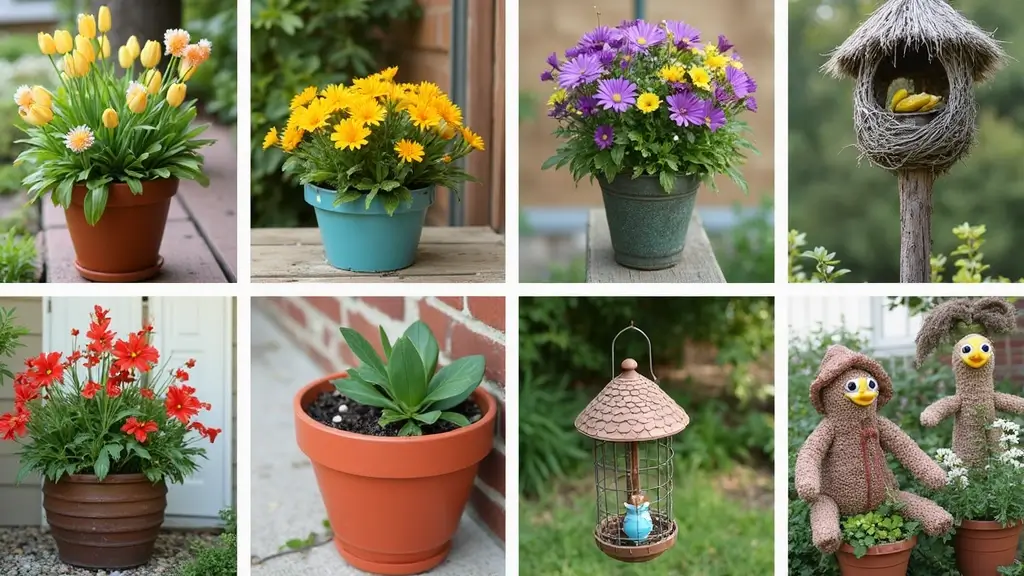
3. Container Gardening Delight

Container gardening helps you grow fresh veggies even if you have little space. It fits on a patio, balcony, or a small backyard. You gain quick access to tasty picks and a little, colorful garden you can move.
Here is why this works and how to start strong:
– Choosing pots Pick containers at least 12 inches deep for root vegetables. Make sure each pot has a drainage hole. Use a tray to catch extra water. A sun-warmed pot smells earthy when you water it.
– Plants to grow Cherry tomatoes, peppers, and herbs do well in pots. Mix a few kinds in one container to save space and boost flavor. If you are new to this, choose compact varieties.
– Layout and color Group your containers in a sunny spot to form a tiny garden wall. Place tall plants at the back and shorter ones in front. Add a touch of color with flowering companions.
– Care basics Water in the morning when the soil is cool. Use good potting mix, not garden soil. Check soil moisture daily in hot weather and adjust. Move pots so they get enough sun.
Next steps: pick a sunny corner, gather a few pots, fill with mix, and plant. Start small and build from there.
3. Container Gardening Delight
Editor’s Choice

Indoor Self Watering Planters with Drainage Holes and Saucers, 8, 7, 6.5…
Back to the Roots 100% Organic Potting Mix (Value 12 Quart) | Premium Bl…

Garden Tools Set, 8 Piece Gardening Tools Set with Non Slip Ergonomic Ha…
4. Permaculture Design

What permaculture design can do for your yard
Looking for a garden that stays healthy with less work and less waste? Permaculture design helps you build a small living system in your backyard. It works by listening to nature and letting it do much of the lifting.
A permaculture garden aims for a self-sustaining loop. Plants help each other, water is stored, and soil grows richer over time. You use companion planting to pair species that help each other, like tomatoes with basil. You plan with zones so tall plants shade smaller ones and guard the soil.
Key ideas to apply
– Zones near your home: zone 1 has high-use herbs and greens for quick access.
– Plant guilds: mix plants to support each other; include a root, a leafy top, and a vine.
– Water strategy: collect rain in barrels; mulch to slow evaporation and keep soil moist.
Practical steps
Build soil first: add compost, leaf mold, and a mulch layer. Mulch keeps heat down, holds moisture, and feeds soil life.
Start with a simple map of sun, water, and wind. Draft zones and guilds, then plant and watch. Adjust with the seasons. Observe results and note what works.
Benefits
Fewer pests, richer soil, and less water use. You also attract helpful insects and birds. You can start small this season.
4. Permaculture Design
Editor’s Choice

Utopia Kitchen Compost Bin for Kitchen Countertop, 1.3 Gallon Compost Bu…

50-Gallon ECO Rain Barrel Made with 100% Recycled Plastic, Flat Back Rai…

GardenStraw, 3 cu ft (20 lbs) Pack of 1 – All-Natural Mulch for Gardens,…
5. Herb Spiral Garden

You want a small herb garden that’s handy and pretty. A herb spiral garden can deliver both. The spiral of stones curves up from the ground, so you get more growing space in a tight yard. It creates tiny microclimates, with hot sun on the top, cooler shade on the inner coils, and better drainage. That setup helps herbs with different needs grow close together without crowding.
Here’s why it works for beginners. This setup makes care easy for a busy gardener. You can rearrange herbs as your yard grows.
Design Tips: Start with larger stones at the bottom and add smaller ones as you go up. Build a spiral that is easy to reach from either side. Use rich, well-drained soil for healthy growth. Plant rosemary, thyme, oregano, and parsley for fragrance and flavor. The height makes harvesting simple and keeps leaves clean.
Next steps:
– Place the spiral where it gets sun most days; about six hours is plenty for most herbs.
– Water deeply but let the soil dry a little between drinks.
– Mulch lightly to hold moisture and curb weeds.
– Plant strategy: rosemary on the outer rims, thyme and oregano in the mid layers, parsley toward the inner, shadiest spots.
5. Herb Spiral Garden
Editor’s Choice

Burpee, 9 Quarts | Premium Organic Potting Natural Soil Mix Food Ideal f…

9 Herb Indoor Garden Kit – Unique Kitchen Gift for Women, Men, Mom, Frie…

Brut Organic Aspen Mulch, 10 Quart, Odor-Free, Nutrient Rich, High Water…
6. Edible Landscaping

Edible landscaping that blends food with beauty
You want a yard that feeds you and still looks inviting. Edible landscaping helps you mix vegetables with beauty. It gives you a practical, easy way to enjoy fresh food all season. You set a plan that you can follow week by week.
Why it works for you
– Start with edible stars that blend with the look. Kale, Swiss chard, and sweet peppers add color and texture.
– Grow a few hardy herbs nearby. Basil, parsley, and thyme stay tasty and low maintenance.
– Add flowers that attract pollinators and hide crops. Marigolds, alyssum, and calendula give you color and scent while helping pests stay in check.
– Use raised beds or borders that match your home style. They keep soil loose, drain well, and stay tidy.
Layout and care basics
– Create simple paths with natural stones or wood chips. They make your yard easy to wander and clean.
– Place taller plants toward the back and smaller greens in front. This keeps access simple and makes beds feel full.
– Mulch after planting. A thin layer reduces weeds and preserves moisture.
– Plan for rotation. Swap greens with legumes or root crops each season to protect soil.
A quick plan you can try
– In a 6 by 8 foot corner bed, put kale at the back, Swiss chard mid, peppers at the sides, and a ring of marigolds around each bed.
Next steps: sketch your idea, pick a sunlit spot, and start small. Your space will feel inviting and alive.
Turn your backyard into a feast for the eyes and the palate! With edible landscaping, you can grow vibrant veggies that not only beautify your space but also nourish your body. It’s time to let your garden shine and feed you all season long!
6. Edible Landscaping
Editor’s Choice

Land Guard 8×4×2 ft Galvanized Raised Garden Bed Kit, Galvanized Planter…

Back to the Roots 25.7qt (1 Cubic ft) Organic Premium Mulch
9 Herb Indoor Garden Kit – Unique Kitchen Gift for Women, Men, Mom, Frie…
7. Garden with Pollinator Plants

Here is why a pollinator garden helps your veggies. When bees and butterflies visit, your flowers share pollen. This helps fruit set and may raise your yields. It also makes your yard look alive.
– What to plant: Sunflowers, coneflowers, and lavender are great choices. Add zinnias, black-eyed Susans, and oregano or sage. Native perennials in your area suit you well. A mix of tall and short plants shelters pollinators.
– Layout ideas: Put a flower border around your vegetable beds. Or tuck flowers between rows of carrots, peppers, or beans. Vary colors and heights so the bed feels layered. Leave room for pollinators to move. Mulch helps keep soil cool and moist.
– Care tips: Water in the morning. Deadhead faded blooms to keep flowers coming. Avoid harsh chemicals that harm bees. Mulch lightly to nourish soil and reduce weeds.
– The payoff: More pollinators, steadier fruit set, and a richer garden look. You get constant movement, color, and scent each season.
– Quick tips: Plant tall blooms toward the back or along borders so short crops still get sun. Choose varieties that bloom at different times for a steady food source.
Next steps: Start small. Pick 3 to 5 flowering varieties. Plant them at the edge of beds today. Watch as colors bloom and bees arrive.
7. Garden with Pollinator Plants
Editor’s Choice

Burpee Wildflower 25,000 Bulk, 1 Bag, 18 Varieties of Non-GMO Flower See…
Back to the Roots 25.7qt (1 Cubic ft) Organic Premium Mulch
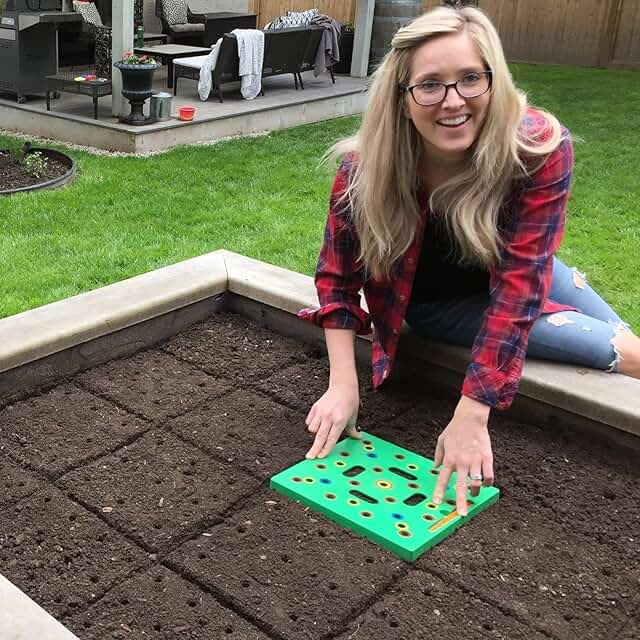
8. Square Foot Gardening

If you want to grow more in a small yard, square foot gardening can help. It keeps things simple and saves time. You get a tidy garden that’s easy to manage.
What square foot gardening is
The bed is split into tiny squares, each one foot by one foot. In each square you grow a different crop. This setup makes it easy to plant just what you need and to swap plants as the season changes.
Set up your grid
– Build a frame from affordable boards and lay it on the ground.
– Stretch string or use a light wire to mark every square.
– Use a mix of soil and compost in the bed. A well-drained blend helps roots grow fast.
Choosing crops for each square
Think about spacing and sun. Place small, fast growers in many squares—lettuce, spinach, radish, carrots, and herbs work well. Leave a few squares empty for flowering plants that attract good bugs. If you grow larger plants, give them a few squares or go vertical with supports.
Care and rotation
Rotate crops each season. This keeps soil healthy and reduces pests. Water evenly and mulch lightly to hold moisture. Label each square so you know what you planted where.
Kid-friendly ideas
Kids love the grid. It’s a game they can play with colors and labels. One square becomes a “fun salad,” another a “carrot corner.” It teaches planning and care in a friendly way.
Next steps: start with a 4-by-4 foot bed to test the system. You’ll see how neat, quick, and productive a small space can be.
With square foot gardening, you can maximize your harvest in just one square foot! It’s the perfect way to grow a variety of crops in a tidy, manageable space – ideal for any backyard vegetable garden design.
8. Square Foot Gardening
Editor’s Choice
Seeding Square – Patented Seed and Seedling Spacer Tool for Bigger Harve…
Back to the Roots Heirloom Organic, Non-GMO & USA Grown Seeds, 30ct Herb…

KINGLAKE 100 Pcs 6 x10cm Plastic Plant T-Type Tags Nursery Garden Labels
9. Companion Planting Strategies

If you want a garden that fights bugs and tastes better, companion planting can help.
Companion planting means growing different crops near each other so they help one another.
Some plants chase pests away, some fix soil, and some make flavors pop.
A classic pair is carrots with onions. The sharp scent crowds out many pests and both crops grow well side by side.
Tomatoes love basil nearby. Basil can help repel flies and boost tomato flavor.
Corn and beans work together too. Beans fix nitrogen, and they climb the corn stalks for support.
You don’t need a big plan to start.
Try 3 to 4 strong pairs first.
Tips for Beginners:
– Start with a few strong pairings such as tomatoes with basil.
– Pair corn with beans to use beans’ nitrogen.
– Plant carrots next to onions to slow pests.
– Plan a simple layout so you can care for and harvest pairs together.
– Keep notes on what works so you can adjust next season.
A well planned companion garden can be lively and productive.
You will notice fewer pests and better yields. Start small and build your plan as you learn.
9. Companion Planting Strategies
Editor’s Choice

Vegetable Companion Planting Guide Poster Garden Poster Vegetable Variet…

Bonide Captain Jack’s Neem Oil, 32 oz Ready-to-Use Spray, Multi-Purpose …
10. Fruit and Vegetable Patch

Want a fruit and vegetable patch that boosts harvests and looks inviting? You can mix fruit and veg in one area to save space and add color.
Here is why a simple plan helps. Pick a sunny site. Sketch a map. Divide the patch into zones: strawberries, dwarf fruit trees, and your main vegetables.
Choose companion plants that help each other. For example, plant rhubarb near strawberries for a tasty pairing. Raspberries can share space with leafy greens if you space them well. Let tall crops stay on the north side so short plants get sun.
Create clear pathways to reach every bed. This keeps weeds down and makes picking easy. Use decorative edging like bricks or wood to mark zones and hold mulch in place.
Get the soil ready. Mix in compost. Add a thick mulch layer to conserve water. Install a drip irrigation line or soaker hoses for efficient watering.
Keep care simple. Water in the morning. Check for pests. Prune canes after fruiting. Harvest berries and veg as soon as they turn ripe.
With a fruit and vegetable patch, you gain flavor, color, and steady harvests. It’s easy to start and grows with your skills. Start small.
10. Fruit and Vegetable Patch
Editor’s Choice

33ft. Galvanized Steel Landscape Edging (10-Pack) – 40″ Metal Edging for…
230FT Drip Irrigation System for Garden with 40 Nozzles & Emitters, Gard…
Farmer’s Secret Soil Revitalizer (32oz) – Organic (OMRI Listed) Dirt Hea…
11. Raised Bed with Decorative Borders

Raised beds with decorative borders turn a plain patch into a calm, tidy yard. You gain easy reach to the soil, clear lines, and a frame that makes colors pop.
Choose borders in stone, brick, or decorative wood. Stone feels cool to touch on hot days. Brick adds a warm glow at sunset. Wood borders smell earthy and stay sturdy for years. Borders define space and keep soil from creeping onto paths.
Design tips: Pick materials that match your house and fence. Think about a border that doubles as seating, built-in benches make weeding and chats easier. Leave a wide, clear path along the bed so you can move with a bucket and a trowel. Fill the beds with bright peppers, lettuce, tomatoes, and herbs. The greens and reds stand out against the dark soil and light border. Add a thin mulch cap to keep weeds down and give a neat finish.
Here is why this helps your garden: borders give you structure, cut maintenance, and a friendly look from the porch. This setup blends style with use and makes your yard feel like a small retreat for trying new veggies without a mess.
Next steps: plan your border color, pick one material, and sketch a quick layout.
11. Raised Bed with Decorative Borders
Editor’s Choice
Land Guard Galvanized Raised Garden Bed Kit, Galvanized Planter Garden B…
![Landscape Edging 33FT,Garden Edging Borders [Extra Tall 4IN High] Flexib...](https://m.media-amazon.com/images/I/616o5JwXoYL._AC_UL320_.jpg)
Landscape Edging 33FT,Garden Edging Borders [Extra Tall 4IN High] Flexib…
Back to the Roots 25.7qt (1 Cubic ft) Organic Premium Mulch
12. Sunken Vegetable Garden

If wind makes your garden rough, a sunken vegetable garden can steady it.
You dig down a few feet and shape a sheltered bowl that stays protected.
The low walls cut gusts, and the soil stays warmer and moister.
This setup is friendly for beginners who want quick wins.
Planting Ideas:
– Root crops like carrots and potatoes love the rich sunken soil.
– Add surrounding raised beds for color and tidy edges.
– Place stepping stones for easy access.
– Mulch with compost to feed the bed over time.
A sunken garden creates a small, calm microclimate.
Inside the bowl, air moves more slowly and moisture lasts longer.
That gentle climate helps tender plants grow even in open, windy spaces.
Here is how to get started:
– Choose a sunny, accessible spot and decide the size.
– Dig a shallow basin with smooth sides.
– Fill with a mix of topsoil and compost.
– Low edging with bricks or stone helps block gaps.
– Plant root crops in the center and greens around the rim.
– Create a simple path with stepping stones.
– Water regularly and check drainage after rain.
12. Sunken Vegetable Garden
Editor’s Choice

Fiskars Ergo Garden Trowel for Digging and Planting, Heavy Duty Gardenin…
Land Guard 8×4×2 ft Galvanized Raised Garden Bed Kit, Galvanized Planter…

3 Pack Sunflower Stepping Stone, 10 Inch Decorative Garden Step Stone fo…
You might also like


13. Colorful Cherry Tomato Garden

Want a cherry tomato garden that adds color and stays easy for beginners? Start with a few bright varieties. Yellow, red, and purple cherry tomatoes look cheerful and grow in small spaces. They’re quick to fruit, so you see results fast.
Here is why this choice works for you. You get a pretty display and a fast harvest without a huge garden. You can grow them in beds, containers, or hanging baskets. They are forgiving if you are still learning the basics.
– Color choices Pick at least three colors. A mix of yellow, red, and purple creates a lively look from spring to fall.
– Support and space Use stakes or cages to keep plants upright. Add a trellis for a vertical touch that saves ground space. Tie new growth gently as it reaches the support.
– Sun and water Plant in a sunny spot. Water regularly so the soil stays evenly moist. Mulch helps keep moisture in and cuts down on weed work.
– Flavor and pest control Plant basil between tomatoes. It boosts aroma and may help ward off common pests.
– Layout ideas For a small bed, group colors in clusters or run a color row along a trellis. This makes care simple and harvests easy to reach.
Next steps for you: map your space, pick 3 color varieties, and set up supports this weekend. Then you can enjoy a colorful, easy tomato garden that delivers fresh fruit faster than you expect.
13. Colorful Cherry Tomato Garden
Editor’s Choice

Garden Stakes 16 Inch 70 Pack, Diy 4ft 5ft 6ft 7ft 8ft Tomato Stakes Pla…
GardenStraw, 3 cu ft (20 lbs) Pack of 1 – All-Natural Mulch for Gardens,…
Zen Basil Seeds | edible basil seeds usda organic, kosher, non-gmo, lect…
14. Natural Stone Pathways

Natural stone paths can boost style and make your garden easier to use. You can walk right to the rows you need, grab herbs, or water without slipping on mud. Flat flagstones or tidy gravel give a simple, rustic vibe that pairs with lots of veggie beds.
Maintenance Tips: Set stones firmly with compacted sand or crushed stone. Check after heavy rain for moved stones and reset as needed. Edge the path with low-growing plants or thyme. A winding line feels natural and invites you to explore. Let herbs spill a little over the edge to soften the look.
Think about layout first. A curved path guides you through beds and reduces crowding. Use wide steps at busy spots to keep your feet safe. For wet areas, choose larger stones with a flat surface so you can dry your shoes before stepping into the bed.
Materials to consider:
– Flagstone or flat slate for a clean, sturdy feel
– Gravel with a weed barrier for quick setup
– Crushed stone for good drainage and a natural look
Next steps: plan, gather materials, and install in stages. With care, natural stone paths improve access and add long lasting charm to your backyard garden today too.
14. Natural Stone Pathways
Editor’s Choice

3 Pack Rubber Stepping Stones Outdoor Garden Rubber Pavers Pathway Walkw…

2LB Succulent and Cactus Gravel Pebbles, 1/5 Inch Natural Decorative Pol…

LAIDANLA Obsidian Crushed Stone Crystal Chips Bulk Natural Gemstones Hea…
15. Greenhouse Vegetable Garden

Want a bigger harvest even when nights turn cold? A greenhouse vegetable garden can help. It offers a warm, controlled space where you set the heat and humidity. You can grow tender veggies that need more time or frost protection. Start seeds early and push your harvest into the cooler months. Also plan for heat in winter and shade in summer. A simple thermometer helps you react quickly.
Design Ideas:
– Raised beds inside the greenhouse keep soil neat and make weeding easy.
– Shelves along the walls hold herbs and small plants, freeing floor space for bigger beds.
– Good ventilation with roof vents or small fans keeps air fresh and dampness down.
– A shade cloth helps on hot days so plants do not scorch.
– Drip irrigation gives even water with little waste.
With a greenhouse, you can harvest year-round. Here is why this helps beginners: you lower frost risk, protect seedlings, and learn on a small scale. Next steps: pick a sturdy frame that fits your yard, choose panels that suit your climate, and map crops by light and access. A little planning now pays off with steady, reliable yields.
15. Greenhouse Vegetable Garden
Editor’s Choice

8×12 FT Greenhouse for Outdoors, Polycarbonate Greenhouse with Roof Vent…

ThermoPro Hygrometer Thermometer for House TP350, Bluetooth Room Indoor …

CARPATHEN Adjustable Premium Complete Drip Irrigation System Kit for Gar…
16. Fruit Tree Espalier

If space is tight, you can still grow fruit. Train fruit trees to spread flat along a wall or fence. This espalier method saves space and makes a wall feel like a living book of leaves and fruit.
Choose dwarf fruit trees. Apples and pears fit well. Plums or figs work too if your climate supports them. Dwarf trees stay compact and still give you fresh harvests.
Design Tips:
– Install a sturdy trellis or frame. A metal cable system or a wooden lattice keeps branches from sagging.
– Train branches along vertical wires. Start with a main limb, then fan growth across the wall.
– Use soft ties to guide growth. Check yearly and adjust as the tree fills in.
– Give plenty of sun and good drainage. Aim for at least 6 hours of sun daily.
– Water deeply during dry spells. A slow soak is better than quick, light sprays.
– Prune lightly and regularly. In winter, trim to keep the fan shape and remove weak shoots.
Espalier takes a bit of care, but the payoff is clear: a neat wall of fruit you can reach from the yard or patio.
Common questions:
– Do I need a sunny wall? Yes, six hours of sun helps fruit form well.
– What if frost hits the tips? Protect new growth with light wrapping or plant away from cold pockets.
If you are new to this, start with one tree to test your wall. With steady care, you get a living piece of art that feeds you season after season.
16. Fruit Tree Espalier
Editor’s Choice

American Plant Exchange Apple Tree ‘Semi Dwarf Pink Lady’ – Live Fruit-B…

RUBFAC 94″ Metal Garden Arch Trellis for Climbing Plants Outdoor, Garden…

VELCRO Brand VEL-30071-USA ONE-WRAP Garden Ties | Plant Supports for Eff…
17. Companion Raised Beds

Your raised bed can do more than hold soil. It can host a small team that helps each other. Companion planting in raised beds boosts yields and cuts pest problems. You can run a neat grid or mix plants for a lively look. Either way, you get a healthier, easier garden that beginners can handle.
– Layout options: Choose a grid for tidy rows or a mixed layout for a wilder, more natural feel. A clear plan makes care simple.
– Plant pairings: Marigolds planted among vegetables can deter many pests and brighten the bed. Place basil near tomatoes to help repel thrips and add flavor. Nasturtiums lure aphids away from greens.
– Height and space: Put tall plants at the back or center so short herbs and lettuce get light. Use trellises for vining beans or peas.
– Watering groups: Group plants that drink the same amount of water together. Mulch to keep soil even and chores simple.
– Maintenance tips: Rotate beds yearly to keep soils healthy. Keep pests out with early checks, removable mulch, and quick plant spacing adjustments.
With these steps, your companion raised beds become a smart, simple way to grow more and waste less. Start small and watch how it evolves.
17. Companion Raised Beds
Editor’s Choice
Land Guard 8×4×2 ft Galvanized Raised Garden Bed Kit, Galvanized Planter…
Vegetable Companion Planting Guide Poster Garden Poster Vegetable Variet…
RUBFAC 94″ Metal Garden Arch Trellis for Climbing Plants Outdoor, Garden…
18. Potato Tower Garden

Potato towers help you grow a big harvest in a small yard. You stack soil and straw inside a frame to make a tall, neat garden. The layers stay dark, so potatoes form underground and stay clean. With this setup you can lift more potatoes from a tiny space than you might expect.
What you need
– A frame or box that can stand tall, like a wire cage or sturdy wood
– Straw or mulch to layer between soil fills
– Rich garden soil or compost
– Seed potatoes or potato slips
– A watering can or hose for steady moisture
How it works
Build a tall frame and lay a base of soil. Add a layer of straw to keep the next potatoes shaded. Plant your slips near the top. As vines grow, you add more soil and straw. The potatoes grow in the dark, protected from light and heat. This setup uses vertical space and keeps your soil from spreading all over the ground.
Step-by-step
1) Place the frame where it will get sun most days. 2) Fill the bottom with soil, then add straw. 3) Plant seed potatoes near the top. 4) When vines reach two fists tall, add another soil-straw layer. 5) Repeat until you reach your preferred height and wait for the greens to mature.
Care and harvest
Water regularly and keep the bed evenly moist. Watch for good drainage so root rot stays away. Harvest when the tops fade and die back. Dismantle the tower and lift the potatoes out carefully. Store them in a cool, dark place.
Tips
– Build a strong frame so it won’t wobble with weight.
– Keep the upper layers dark to stop greening.
– Try rotating the tower to new soil spots each season.
If you want more space, you can build two towers side by side. This is a simple, practical way to add fresh potatoes to your meals.
18. Potato Tower Garden
Editor’s Choice

Greenstalk Patented Large 5 Tier Vertical Garden Planter with Patented I…

Fingerling Certified Seed Potato Mix 2LB Whole Potatoes Great for Organi…
GardenStraw, 3 cu ft (20 lbs) Pack of 1 – All-Natural Mulch for Gardens,…
19. Raised Bed with Built-in Seating

Here is why a raised bed with built-in seating fits both your garden and your need for rest. It blends a sturdy growing space with a cozy spot to sit. You can enjoy your plants up close while you work or take a quick break.
Design tips
– Height matters. Sit comfortably without bending. Aim for about 16 to 18 inches of seat height and 28 to 36 inches of total bed height for a natural look.
– Materials should last. Use weather-resistant wood, fiber cement, metal, or high-quality composites. Seal wood to resist rain and sun.
– The wall becomes a bench. A flat top works as a seat and a shelf for pots, seed catalogs, or a cup of tea.
Comfort musts
– Add cushions made for outdoors. Pick fast-drying fabric. Keep cushions in a waterproof bag when not in use.
– Use screws and a smooth edge. No sharp corners. It keeps kids safe.
Practical setup
– Leave space to move. You should reach every bed without stepping on soil.
– Plan around irrigation. A drip line or soaker hose fits under the bench.
Next steps: pick a spot, measure, and sketch. Then choose materials and order cushions. With care, your garden becomes a place to tend and to linger.
19. Raised Bed with Built-in Seating
Editor’s Choice

Outdoor Seat Cushion Set, Waterproof & Fade Resistant Patio Chair Cushio…

Olympic WaterGuard 11 oz. Clear Exterior Waterproofing Wood Sealer Spray

Rain Bird DRIPKITBAG Drip Irrigation Repair and Expansion Kit
20. Easy Herb Wheel

– What is an easy herb wheel? It is a round bed split into wedge sections for herbs. Each slice holds a different plant. You can reach every leaf with a simple turn of your body.
– Why choose this circle garden? It uses a small space well. It keeps herbs neat and easy to pick. A simple center feature adds charm to your yard.
– Step by step to build it
1) Pick a size about 4 to 5 feet across. This is big enough to move around.
2) Add a border with stones or bricks. A clear edge keeps soil in place.
3) Fill with good soil and compost. Let roots breathe and grow.
4) Mark 6 to 8 equal wedges. You can draw them with chalk or string.
5) Plant taller herbs toward the back and shorter ones in front. This makes a neat, layered look.
6) Place a simple center feature, like a small pot, a birdbath, or a tiny fountain. It becomes a focal point you can admire.
– Herb plan ideas for each wedge Put kitchen staples in the wheel. Back row: rosemary and sage for tall growth. Middle rows: basil and oregano. Front row: thyme, chives, parsley, cilantro. This mix gives you easy access to flavors you use a lot.
– Care and harvest tips Water at the soil, not the leaves. Mulch to cut weeds and keep moisture. Prune every few weeks so plants stay full and tidy. Check for pests and pull them out by hand if needed.
– Common questions Can this fit in a small yard? Yes. A compact version works well near a sunny wall. Do I need irrigation? A drip line or soaker hose helps, but hand watering works too.
– Next steps Sketch your circle on paper, pick a sunny spot, gather stones, and lift the first shovel of soil. Plant and water the wheel this weekend. Fresh herbs will be ready sooner than you think.
20. Easy Herb Wheel
Editor’s Choice

EasyFlex No-Dig Landscape Edging with Anchoring Spikes, 2.7 in Tall Deco…
Burpee, 9 Quarts | Premium Organic Potting Natural Soil Mix Food Ideal f…
Rain Bird DRIPKITBAG Drip Irrigation Repair and Expansion Kit
21. Seasonal Rotation Garden

You want a garden that keeps giving. A seasonal rotation plan helps you harvest more and keep soil healthy.
Here is why it works: cool weather crops shine in spring and fall. Warm weather crops fill the summer. Move plants between beds so the soil gets a rest and pests stay on the run.
Planning Tips: Use a simple chart to track what sits in each bed and when it will move. Group plants with similar needs so you can water and feed them together. This approach keeps chores clear and makes every bed useful all year.
Next steps:
– Map your beds on paper. Note sun, water needs, and paths.
– Pick cool-season crops for spring and fall, and warm-season crops for summer.
– Create a rotation plan. Decide which bed gets the next crop so you know what to plant each season.
– Start small. A 3-bed layout is perfect for beginners.
Example for a 3-bed setup:
– Bed 1: lettuce and peas in spring, tomatoes later.
– Bed 2: carrots in spring, beans in summer.
– Bed 3: greens in spring, peppers in summer.
Common questions:
– Do I need soil rest? Yes, give soil a break by rotating crops each season.
– How long before the same crop returns? Rotate to a different family if possible.
Try this in one bed this year and expand as you learn. Give it a try. It fits small yards.
Rotate your crops for a thriving garden! A seasonal rotation not only keeps your soil healthy but also maximizes your harvest. Remember, a little planning goes a long way in your backyard vegetable garden design!
21. Seasonal Rotation Garden
Editor’s Choice

Garden Planner & Notebook: A 5-Year Garden Journal for Planning, Trackin…

Soil Test Kit, 2-in-1 Soil Moisture Meter, Soil pH Meter -Dual Dial-Simu…
Land Guard Galvanized Raised Garden Bed Kit, Galvanized Planter Garden B…
22. Shade Vegetable Garden

Your yard hides in the shade, but you can still grow tasty vegetables. Start with crops that like dim light. With the right pick, you’ll enjoy greens all season.
– Spinach
– Lettuce
– Kale (baby leaves)
– Swiss chard
– Cilantro
– Parsley
– Chives
– Mint
These plants tolerate partial sun and stay flavorful. Look for spots where the light is dappled most of the day. A patch under a tree or along a fence can be productive, not gloomy.
Layout ideas:
– Use vertical supports. Trellises and lattices let greens climb and save ground for roots and herbs.
– Build a couple of raised beds near a warm wall. The warm surface helps a bit with light reflection.
– Create clear paths so you can reach every plant without stepping on soil.
Care tips:
– Water consistently. Shade slows growth, so keep soil evenly moist.
– Mulch well to lock in moisture and cut down on weeds.
– Harvest often. Early picking keeps leaves tender.
Common questions:
– Will it taste good in shade? Yes. Many greens stay crisp even with less sun.
– How much light do I need? Aim for a few hours of filtered sun daily.
Next steps:
– Test a shady corner for a half-day sun window.
– Choose 3 crops from the list.
– Set up a simple trellis and a small 4×4 bed.
22. Shade Vegetable Garden
Editor’s Choice
Adorox 7.8ft Garden Arch Trellis for Climbing Plants, Metal Arch Frame, …
Land Guard 8×4×2 ft Galvanized Raised Garden Bed Kit, Galvanized Planter…
Back to the Roots 25.7qt (1 Cubic ft) Organic Premium Mulch
You Might Also Like
23. Decorated Fence Garden

Your backyard fence sits at the edge of your yard and often goes unused. You can turn it into a living part of your garden.
Here is why this design works: it adds height without taking up yard space, and it brings you fresh air and scent as you work nearby.
Design Tips:
– Install sturdy supports along the fence top or posts so climbing plants can spread. Use wire, twine, or a small trellis.
– Let cucumbers or pole beans wander up and across the fence. Train them with gentle ties so they stay neat.
– Hang pots at eye level for easy harvest. Fill with herbs like basil, thyme, or mint for quick snips.
– Mix in flowering pots to add color and attract pollinators. This boosts blooms and brings life to the fence.
Next steps: map your fence, measure length, and choose plants that like your sun. Group pots in staggered rows to create depth. Water regularly, trim vines that creep too far, and switch in new herbs as seasons change.
This setup saves ground space, adds texture, and makes a plain fence a cozy, useful feature.
Start small with a short row of pots and a simple trellis. Over time you can add more pots and wire lines as you gain confidence.
It fits vertical gardening in small yards.
23. Decorated Fence Garden
Editor’s Choice
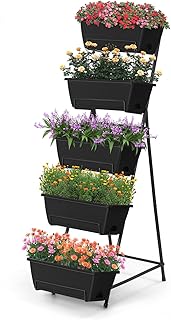
5 Tier Vertical Raised Garden Bed Planter Box, Vertical Raised Bed with …

Garden Obelisk Trellis for Climbing Plants Outdoor 6 Ft Rose Bush Round …

Set of 2-10 Inch Hanging Planters for Indoor Plants with Self-Watering I…
24. Straw Bale Garden

You want an easy, affordable way to grow vegetables. Straw bale gardening gives you a bed that’s ready to use. The bales drain well and keep roots warm when mornings are cool. Place them in a sunny spot, then soak them thoroughly. After a week of wetting and a light feeding, you can plant directly into the bale.
Growing Tips: Here is why straw bales work. Pick plants that thrive in straw beds. Squash, tomatoes, and peppers do well. Bales can also shape your garden as decorative borders or raised edges.
– Step 1: Set the bales on level ground in full sun. Stand them on the flat side with the cut ends up so you have a soft growing pocket.
– Step 2: Condition the bales. Water deeply each day and feed lightly for about 5 to 7 days.
– Step 3: Plant. Make a small hole in the bale, add a handful of soil, and tuck in a seedling or seeds. Gently pack the straw around the roots.
– Step 4: Care. Water in the morning. Check the top for dryness and keep the bale moist. Add mulch if you like to cut evaporation.
As the bales break down, they feed the soil beneath. You gain future soil, not just a harvest this season. It’s a smart option for beginners with a small yard.
Next steps: rotate crops in later seasons and try a second bale bed for herbs or greens.
24. Straw Bale Garden
Editor’s Choice
GardenStraw, 3 cu ft (20 lbs) Pack of 1 – All-Natural Mulch for Gardens,…

Burpee Organic Tomato & Vegetable Granular Plant Food, 4 lb
GardenStraw, 3 cu ft (20 lbs) Pack of 1 – All-Natural Mulch for Gardens,…
25. Microgreens Garden

If you want fresh greens fast and you only have a little space, microgreens are for you. These tiny plants still load the plate with flavor and nutrients. They work indoors or on a sunny balcony, so you can grow them almost anywhere.
Microgreens grow fast. Most varieties are ready to harvest in about 7 to 14 days after sprouting. They stay small but punchy in taste. Try radish, arugula, or basil microgreens for bold color and bright flavor.
What you grow
– Radish, arugula, and basil are popular starter choices.
– You can also experiment with broccoli, cilantro, or chives.
– Pick varieties that suit salads, sandwiches, or garnishes.
How to grow in four simple steps
– Use a shallow tray or container with a light layer of rich soil.
– Scatter seeds evenly and press them in gently; cover with a thin soil veil.
– Keep the soil damp and provide strong light. Put the tray on a sunny windowsill or under grow lights.
– Give your setup steady room temperature and 12 to 16 hours of light each day.
Harvest and use
– Clip greens with scissors when they reach 2 inches tall.
– Rinse lightly and dry before eating.
– Add to salads, sandwiches, wraps, or bowls for quick crunch and color.
– Store in the fridge for up to a week for maximum flavor.
Tips for success
– Start with clean trays and fresh seeds.
– Don’t let soil stay soggy; add water as needed.
– Label varieties so you can track what you planted and when it’s ready.
25. Microgreens Garden
Editor’s Choice

Organic Seed Sprouting Jar Kit – 2 × 32 oz Wide-Mouth Mason Jars with St…

Plant Grow Light, 48 LEDs Full Spectrum Grow Lights for Indoor Plants, H…

10 Plant Growing Trays (with Drain Holes) – 20″ x 10″ – Perfect Garden S…
26. Urban Farming Patch

City life can make gardening feel tough. You want fresh veggies without a big yard. An urban farming patch lets you grow greens and small fruits right where you live. With sun, good soil, and smart planters, you can harvest tasty produce all season.
Layout Ideas:
– Use planters made from recycled items like old buckets, wooden crates, or fabric grow bags.
– Place containers where they catch the most sun; taller plants go in the back.
– Add a trellis or wire for climbing crops such as beans or cucumbers to save space.
– Create a small corner for a shared compost area with neighbors.
– Use simple watering tricks like self-watering pots or a drip line to save water.
What to plant:
– Start with easy greens—lettuce, spinach, and chard.
– Add quick roots like radishes and green onions.
– Include herbs for flavor and quick harvests.
– Try one tomato or pepper plant on a sunny balcony.
Next steps:
– Gather containers from around the home and test sun spots.
– Fill with light potting mix plus a bit of compost.
– Set a regular, morning watering habit and keep an eye on pests.
– Share harvests with neighbors or start a small swap club.
26. Urban Farming Patch
Editor’s Choice

Gardzen 10-Pack 10 Gallon Grow Bags, 300G Thickened Aeration Fabric Pots…
Indoor Self Watering Planters with Drainage Holes and Saucers, 8, 7, 6.5…

10 Pack Stackable Plant Support Stakes, Climbing Plant Support Structure…
27. Rain Garden Design

Want to tame rainwater and still grow your vegetables? A rain garden can help you do both.
A rain garden is a shallow bowl tucked into your yard. It catches runoff after a storm, lets water soak in, and filters soil as it drains. It cuts erosion, slows flooding, and gives birds, bees, and butterflies a small home.
Planning Tips:
– Pick a spot where water naturally runs or near a downspout so you catch the flow.
– Dig a shallow basin, 3–6 inches deep at the center, with a gentle rim.
– Use well draining soil. If your soil is heavy clay, mix in organic compost and a little sand so water moves through.
– Choose native, wet-tolerant plants that can also handle dry spells. Think iris, coneflowers, switchgrass, rushes, and goldenrod to feed pollinators.
– Mulch lightly to keep weeds down and to slow down water.
– Create a safe overflow path to a lawn bed or planted area so extra rain has a clear exit.
Next steps are simple. Sketch the shape, mark the edges, and set plants in small clusters. After a heavy rain, peek at the basin and pull out any debris. With a little care, your rain garden supports your vegetables and your local wildlife.
27. Rain Garden Design
Editor’s Choice

Rain Bird GARDENKIT Drip Irrigation Raised Bed Garden Watering Kit


California Wildflower Mixture – Bulk 1 Ounce Packet – Over 7,000 Native …
28. Vegetable Spiral Garden

Growing a lot of veggies in a small yard is tough. A vegetable spiral garden can change that. It packs many plants into a tight space and still looks great.
How it works: You form a spiral bed with stones. The higher parts stay dry, which helps herbs and sun lovers. The lower pockets stay moist, perfect for leafy greens. The center catches sun and warms the soil a bit.
Design Tips: Build with sturdy stones that hold shape. Fill the bed with rich soil and compost. Mulch the surface to keep moisture even. The spiral acts as a natural centerpiece in your yard.
What to know before you start: Pick a sunny spot. Keep the spiral about 3 to 4 feet across so you can reach every plant.
Step-by-step setup:
– Place a circular outline with stones.
– Stack stones to form the spiral walls.
– Fill with a mix of topsoil and compost.
– Add mulch and give it a slow, even watering plan.
Planting ideas:
– Top and outer edges: thyme, oregano, basil.
– Middle and bottom pockets: lettuce, spinach, kale.
– Center: radish or cilantro.
Care tips:
– Water in the morning. Check soil moisture weekly.
– Harvest often to stay productive.
– Watch for pests and act early.
28. Vegetable Spiral Garden
Editor’s Choice
Back to the Roots 100% Organic Potting Mix (Value 12 Quart) | Premium Bl…
Back to the Roots 25.7qt (1 Cubic ft) Organic Premium Mulch

Gardening Tools Set of 10 – Complete Heavy Duty Garden Tools Set with Fa…
29. Mixed Borders Garden

You want a border that looks full of life and still gives you veggies. A mixed borders garden lets you plant vegetables among blossoms. You get color and fresh food in one view. The flowers lure pollinators, so tiny helpers zip from bloom to harvest with you.
Suggestions: Pick flowering plants that fit your vegetables. For example, try zinnias with tomatoes or marigolds with peppers. Make sure their light and water needs match. Space by height: tall blooms at the back, mid-size plants in the middle, and small edging flowers in front. This setup keeps the bed easy to care for and visually interesting.
How to set it up: Start with a sunny border that receives 6 to 8 hours of sun a day. Group plants that drink or dry out at similar rates. Use simple paths so you can reach veggies without stepping on the flowers. Add a thin mulch layer to keep weeds down and soil cool.
Care and tips: Water with drip lines for even moisture. Feed with a light, steady schedule rather than heavy feeds. Check soil often and pull any weeds quickly. Mulch helps protect roots and reduces watering needs.
What you gain: You enjoy a lively space that draws bees and butterflies while you pick tomatoes, peppers, and herbs. It’s practical, easy to manage, and kind to the garden bed’s rhythm—and you’ll see a steady harvest with a touch of beauty.
29. Mixed Borders Garden
Editor’s Choice
Rain Bird DRIPKITBAG Drip Irrigation Repair and Expansion Kit
Back to the Roots 25.7qt (1 Cubic ft) Organic Premium Mulch

XLUX Soil Moisture Meter, Plant Water Monitor, Hygrometer Sensor for Gar…
30. Wildlife-Friendly Garden

Want a garden that welcomes wildlife and helps your vegetables grow? A wildlife-friendly yard can do both. You get better pollination, fewer pests, and a calm, natural space to enjoy. You will see more color and hear more birds.
– Smart plant choices: Pick native species that fit your climate. Include flowering perennials and shrubs that bloom through spring, summer, and fall. A mix draws bees, butterflies, and birds. This makes your yard feel alive.
– Water and homes: A shallow birdbath, a small pond, or a dish invites visits. Refresh the water daily so it stays clean. Add a mud patch for frogs and toads. Mulch the soil to keep it cool and moist.
– Habitats in the yard: Create spaces that shelter wildlife. Dense shrubs give birds safe roosts. A nest box or two helps songbirds raise young.
– Garden layout: Three layers bring life. Canopy trees, mid-height shrubs, and groundcover plants keep the space lively. Leave some open ground for seeds and insect life. Let native grasses drift through borders.
– Care and safety: Use natural compost and avoid harsh chemicals. Let some pests stay if they do not harm your crops. You gain balance, not perfection. Your yard stays alive all year.
– First steps for beginners: Choose three easy native plants. Add a birdbath or shallow dish. Place rock seating near a planting bed to enjoy the scene.
Next steps: observe visitors, adjust plant choices, and enjoy a busy yard.
30. Wildlife-Friendly Garden
Editor’s Choice
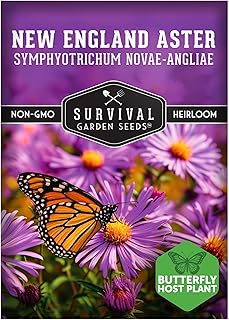
Survival Garden Seeds – New England Aster Seeds for Planting | Native Pu…

Daoeny 35In Metal Bird Bath for Outside, Vintage Freestanding Birdbaths …
Glitzhome 9.7″ H Hanging Bird House for Outdoor Patio Garden Decorative …
Conclusion

Transforming your backyard into a vegetable garden can be a rewarding experience, allowing you to grow fresh produce right at home.
With these 30 stunning designs, there’s something for everyone, whether you’re a seasoned gardener or just starting out.
Get inspired and start planning your perfect garden layout today—your future self will thank you for all the delicious meals to come!
Note: We aim to provide accurate product links, but some may occasionally expire or become unavailable. If this happens, please search directly on Amazon for the product or a suitable alternative.
This post contains Amazon affiliate links, meaning I may earn a small commission if you purchase through my links, at no extra cost to you.
Frequently Asked Questions
What are the easiest backyard vegetable garden designs for beginners?
If you’re just starting out, consider designs like the Classic Raised Bed Garden or Container Gardening Delight. These options are user-friendly and help you manage your plants easily while maximizing your harvest. Raised beds are particularly great for keeping soil contained and making it easier to access your veggies!
For those with limited space, container gardening allows you to grow fresh produce on patios or balconies, making it both practical and beautiful.
How can I make the most of a small backyard for vegetable gardening?
Don’t worry if your yard is on the smaller side! You can implement designs like the Vertical Garden Oasis or Vegetable Spiral Garden. These layouts allow you to grow upwards or pack more plants into a small area, ensuring you get a bountiful harvest without needing a large space.
Additionally, using square foot gardening techniques can help you maximize your gardening space efficiently!
What are some practical tips for maintaining a raised bed vegetable garden?
Maintaining a raised bed garden is straightforward! Ensure your beds are filled with high-quality soil and consider adding compost to enrich the nutrients. Water your plants regularly, especially during dry spells, and use mulch to help retain moisture.
Also, don’t forget about companion planting! This technique involves growing different crops together to enhance growth and deter pests, making your garden more productive.
Can I incorporate herbs into my backyard vegetable garden design?
Absolutely! Incorporating herbs is a fantastic way to enhance your backyard vegetable garden. You can create a dedicated Herb Spiral Garden or even plant herbs like basil and rosemary among your vegetables. These not only add flavor to your meals but also attract beneficial pollinators and deter pests, creating a healthier garden environment.
Plus, having fresh herbs on hand is a delightful perk for any home cook!
What should I consider when choosing a layout for my vegetable garden?
When selecting a layout for your backyard vegetable garden, consider factors like sunlight, space, and accessibility. Most vegetables thrive in full sun, so pick a spot that gets at least 6-8 hours of sunlight daily.
Think about using designs like the Sunken Vegetable Garden if you deal with wind or the Mixed Borders Garden if you want a blend of aesthetics and functionality. Plan for easy access to water and pathways to make your gardening experience enjoyable and efficient!
Related Topics
backyard gardening
vegetable garden design
easy gardening
raised beds
container gardening
beginner friendly
permaculture
edible landscaping
urban gardening
seasonal gardening
companion planting
small space gardening
Leave a Reply