I made this post because front yards should feel alive, not tired. A plain entry drags down the look of your whole house. Small, doable changes can spark real pride and make mornings brighter.
If you love a warm welcome at home and a bit of nature in your daily view, this is for you. You might have a small yard, a tight budget, or a busy schedule. You care about curb appeal that lasts through the seasons.
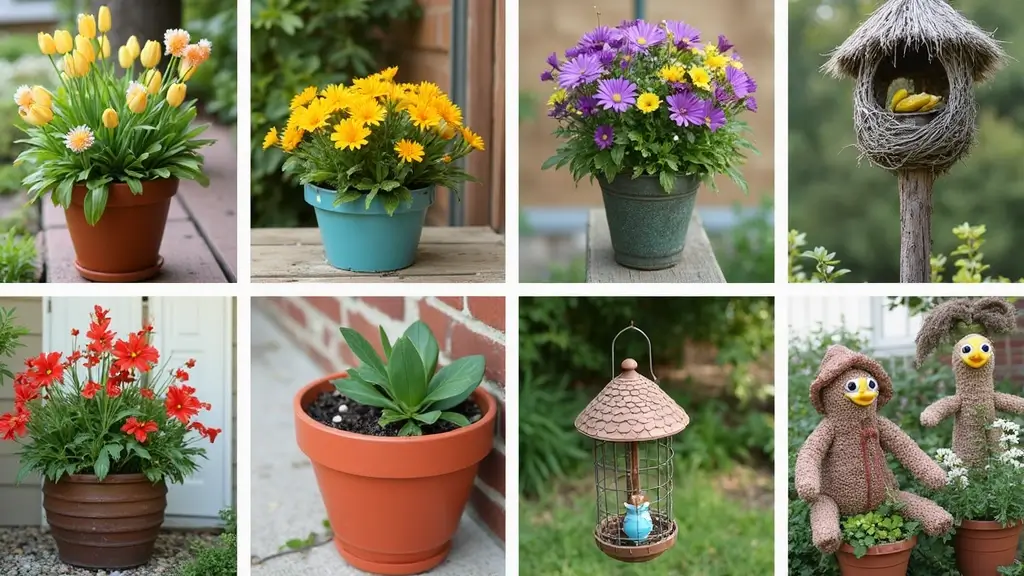
This post packs 20 gardening ideas for your front yard. They cover color, texture, and easy care. Each idea comes with simple steps you can try this weekend. The focus is on real-life results, not fancy gear.
You’ll learn how to pick plants that thrive in sun or shade. You’ll learn how to plan with soil, mulch, and water in mind. You’ll get tips on budget-friendly upgrades like containers and solar lighting. Even simple drip irrigation or a soaker hose can save you time.
From modern clean lines to cottage charm, these ideas mix with any home. You can swap in native perennials for better pollinators and longer seasonal interest. You’ll see how to build focal points with a burst of color or a tall planter.
Start with a quick plan. Measure the space, pick a color theme, and choose one or two ideas to begin. Set a small budget and a simple timeline. Try one idea this week, then add another as you see it come together. Your front yard becomes a space you enjoy and that others notice.
Contents
- 1. Floral Walkway
- 2. Vertical Gardens
- 3. DIY Planter Boxes
- 4. Rock Gardens
- 5. Garden Edging
- 6. Seasonal Displays
- 7. Herb Gardens
- 8. Garden Lighting
- 9. Garden Art and Decor
- 10. Raised Garden Beds
- 11. Container Gardening
- 12. Native Plant Landscaping
- 13. Seasonal Planters
- 14. DIY Garden Signs
- 15. Butterfly Gardens
- 16. Gazebo or Pergola
- 17. Lawn Alternatives
- 18. Garden Furniture
- 19. Grass Pathways
- 20. Seasonal Decor
1. Floral Walkway

You want a front yard path that welcomes guests with color and life. A floral walkway can make that entry feel warm and fresh.
Plan first. Measure the width of your path. Check how much sun it gets. Pick perennials that bloom at different times so the color stays strong.
Plant selection Start with lavender for scent, daylilies for bold color, and add salvia or echinacea for pollinators. Put tall blooms along the outer edges and shorter ones in the center. This setup creates a natural frame that guides the eye.
Texture and rhythm Mix textures to add depth. Pair spiky grasses with soft, rounded flowers. Use variegated foliage to catch light and add contrast.
Seasonal planning Choose plants that wake up in spring, peak in summer, and hold color into fall. Deadhead spent blooms to keep the line tidy. Leave some seed heads for winter interest.
Finishing touches Edge the path with decorative stones, bricks, or a neat mulch line. Mulch helps moisture and keeps weeds down. Water newly planted sections deeply until roots settle.
With a little time, you’ll create a welcoming entry that reflects your style. A floral walkway not only looks great; it supports pollinators and makes your front yard feel cared for and inviting.
1. Floral Walkway
Editor’s Choice

Back to the Roots 25.7qt (1 Cubic ft) Organic Premium Mulch
Landscaping Pebbles River Rocks Decorative Ornamental Pebbles Garden Lan…

Burpee Wildflower 25,000 Bulk, 1 Bag | 18 Varieties of Non-GMO Flower Se…
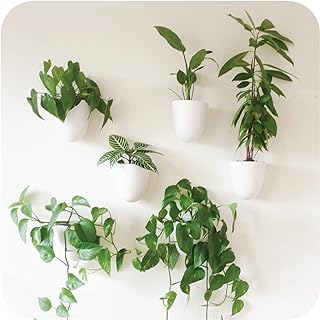
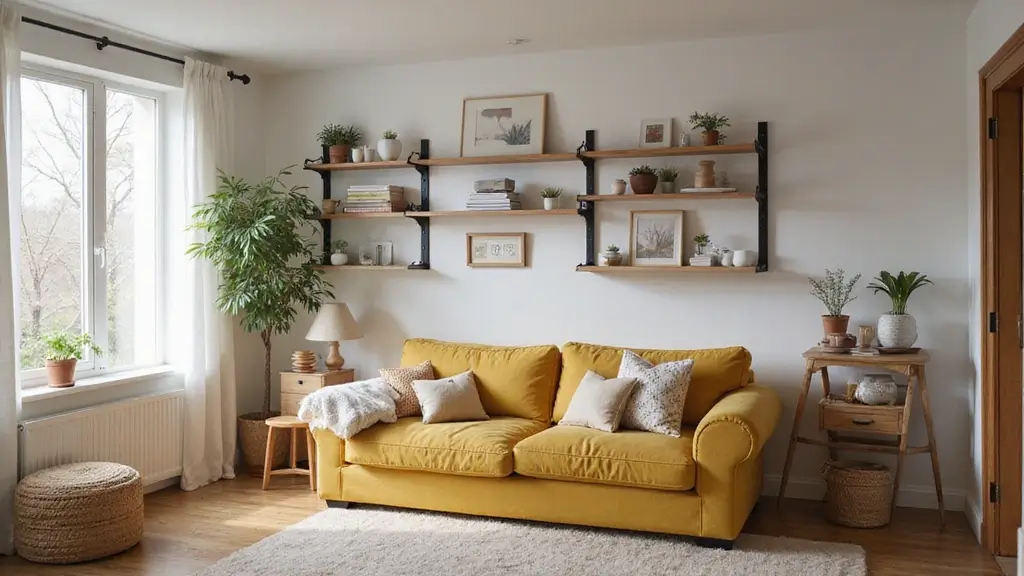
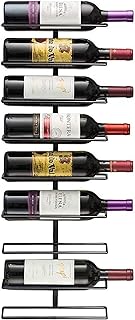
2. Vertical Gardens

Vertical Gardens: Space-Saving Beauty for Your Front Yard
Facing a tight front yard? A vertical garden puts greenery at eye level and adds charm without using ground space. You gain color, texture, and a focal point neighbors notice.
– Pick a sunny wall or fence. Bright light helps herbs, succulents, and trailing flowers thrive and spill over the edges.
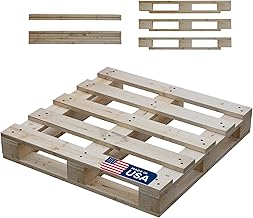
– Choose easy, affordable materials. Wooden pallets, trellises, and repurposed shoe organizers work well. Clean them first, then line with landscape fabric to hold soil.
– Build simple soil pockets. Secure the pallet to the wall or prop up the trellis. Fill pockets with a light mix of potting soil and compost. For shoe organizers, place small pots or sturdy fabric pockets.
– Plant smart. Try herbs like basil, thyme, and oregano. Add trailing succulents such as sedum. Mix in cascading flowers like sweet alyssum or creeping phlox to spill over the sides.
– Water and care. Use a drip line or a gentle watering can. Ensure drainage so roots don’t stay soggy. Check weekly and prune to keep it layered and full.
– Rotate and refresh. Swap out plants every few weeks or seasonally to keep color changing and dynamic. This keeps your vertical garden lively.
– Practical tips. Secure everything well with screws or brackets. Paint wood with exterior sealant for longer life. Reuse what you have to stay budget-friendly.
2. Vertical Gardens
Editor’s Choice
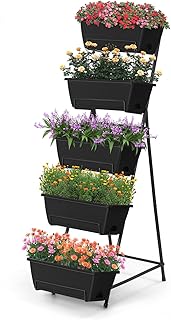
5 Tier Vertical Raised Garden Bed Planter Box, Vertical Raised Bed with …

6ftx300ft Weed Barrier Landscape 3.2oz Fabric Heavy Duty, Woven Weed Con…

Rain Bird DRIPKITBAG Drip Irrigation Repair and Expansion Kit
3. DIY Planter Boxes

You want a front yard that feels warm and inviting without a big price tag. DIY planter boxes can do that with simple steps and smart choices.
– Materials: Choose reclaimed wood or pallets for character and savings. Use outdoor-safe wood or seal all sides if you use new lumber. Add a liner or landscape fabric inside to protect soil and keep weeds out.
– Design: A rustic look comes from rough edges and weathered color. A sleek, modern box uses straight lines and a single coat of paint. Pick hues that echo your front door or trim for a cohesive feel.
– Building basics: Plan the size you need for your space. Cut boards to fit, then screw the box together with weatherproof fasteners. Drill several drainage holes in the bottom to keep roots happy.
– Functional perks: Add a trellis on one end for climbing plants like peas or morning glories. It boosts height and adds visual interest.
– Finishing touches: Sand rough spots, stain for warmth, or paint for a bold statement. Seal with an outdoor finish to resist rain and sun.
– Placement and care: Set the boxes on level ground or raised feet to prevent wobble. Fill with good potting mix, then plant herbs or flowers. Water deeply, let the top dry a bit, and check screws every season.
With a little care, these planters become a welcoming, stylish feature in your front yard.
Transforming your front yard with DIY planter boxes doesn’t just elevate your home’s charm; it creates a warm welcome for friends and neighbors alike. Get creative, save money, and watch your yard bloom with envy!
3. DIY Planter Boxes
Editor’s Choice

My Barnwood Frames Reclaimed Wood Planter Box with Metal Brackets (Mediu…

3ftx50ft Weed Barrier Landscape Fabric Heavy Duty,Weed Block Gardening G…

Olympic WaterGuard 11 oz. Clear Exterior Waterproofing Wood Sealer Spray
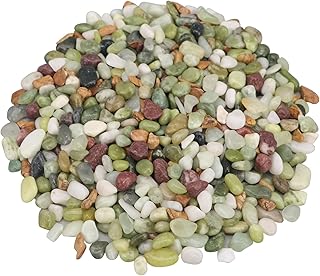
4. Rock Gardens

Why choose a rock garden
Want a front yard that feels calm and stylish without heavy upkeep? A rock garden can deliver. It uses less water and less care, yet it looks rich. You hear the gravel crunch and see the color of stones against green leaves. It stays neat through the seasons.
Simple steps to build
– Pick a focal rock and place smaller rocks around it.
– Layer stones to add depth; think small, medium, and large pieces.
– Create a winding stone path for easy access and charm.
– Splash in colorful gravel or sand to make plants stand out.
Plants that thrive here
Choose drought-tolerant options like succulents and sedums. Add low-growing groundcovers such as thyme or creeping thyme. A few compact perennials can give year-round color. Keep most plants small so rocks stay the star.
Care and maintenance
Set good drainage and a thin mulch layer to cut evaporation. Water only when the soil is dry, especially after planting. Remove weeds as they appear and edge the bed to keep lines clean. In sunny spots, favor sun-loving varieties; in shade, pick tolerant types.
Rock gardens look natural and bright. They show you care about the planet and make your front yard pop.
A rock garden is your front yard’s best-kept secret! It requires less water and maintenance while creating a stunning visual symphony of stones and greenery. Transform your space with easy DIY gardening ideas for the front of the house!
4. Rock Gardens
Editor’s Choice

Live Blue Echeveria Succulent Plant – Stunning Rosette Drought-Tolerant …

2LB Succulent and Cactus Gravel Pebbles, 1/5 Inch Natural Decorative Pol…

EasyFlex No-Dig Landscape Edging with Anchoring Spikes, 2.7 in Tall Deco…
5. Garden Edging

You want a front yard that looks tidy and inviting. Garden edging creates a clean line between lawn and flower beds.
Edging does more than add style. It keeps grass from creeping into your beds and helps you manage drainage and mowing.
Materials and styles to consider
– Bricks: neat, durable, and easy to stack for a classic look.
– Stones: natural and sturdy, great for a rugged, organic feel.
– Wood: warm, modern or rustic, works with many homes.
– Metal: slim profiles that give a contemporary edge.
– Recycled or upcycled options: for a green, rustic charm.
Why edging matters
– It stops grass from invading flower beds, so you spend less time weeding.
– It defines borders, making beds look larger and more intentional.
– It helps water and soil stay in place, aiding drainage and mulch retention.
How to choose and install
– Choose a style that matches your house and yard.
– Decide on a height that fits your bed and mowing height.
– Dig a shallow trench where the line will sit.
– Place the edging material in the trench and secure it.
– Backfill and tamp gently; add mulch up to the top edge.
– Maintain by trimming overgrown grass and checking for loose pieces.
Finish with a clean edge and a fresh mulch bed for a polished look.
5. Garden Edging
Editor’s Choice

Beuta Landscape Edging | Garden Edging Border | Faux Stone Bricks for La…
EasyFlex No-Dig Landscape Edging with Anchoring Spikes, 2.7 in Tall Deco…

33ft. Galvanized Steel Landscape Edging (10-Pack) – 40″ Metal Edging for…
6. Seasonal Displays

You want a front yard that looks fresh through every season. Seasonal displays help you keep the look without a big redo. With a simple plan, you can rotate colors, textures, and plants as the year turns. Your porch and entry stay inviting even on busy mornings.
Seasonal Display Tips
– Choose seasonal plants for each time of year, like spring tulips, summer zinnias, and fall chrysanthemums.
– Use pots or containers so you can move or swap plants without digging up the borders.
– Create a color palette that shifts from bright spring pastels to warm autumn tones.
– Add holiday decorations to show your style without hiding the garden’s natural charm.
– Vary plant height with tall accents, mid-height fillers, and low ground covers for depth.
– Light the display at dusk to make colors pop and draw the eye.
– Keep a simple rotation calendar and note when to refresh seasonal plantings.
– Care for containers with good drainage, fresh soil, and regular watering.
This approach gives your front yard a new feel with each season while staying easy to manage. With a little planning, neighbors will notice the thoughtful, welcoming space you create.
6. Seasonal Displays
Editor’s Choice

DeeCoo 3 Piece Ceramic Plant pots Indoor Pots Set with Drainage Holes, 5…

GIGALUMI Solar Lights Outdoor Waterproof, 6 Pack LED Solar Garden Lights…

Melphoe 25Pcs Mini Garden Hand Transplanting Succulent Tools Set, 39.4″ …
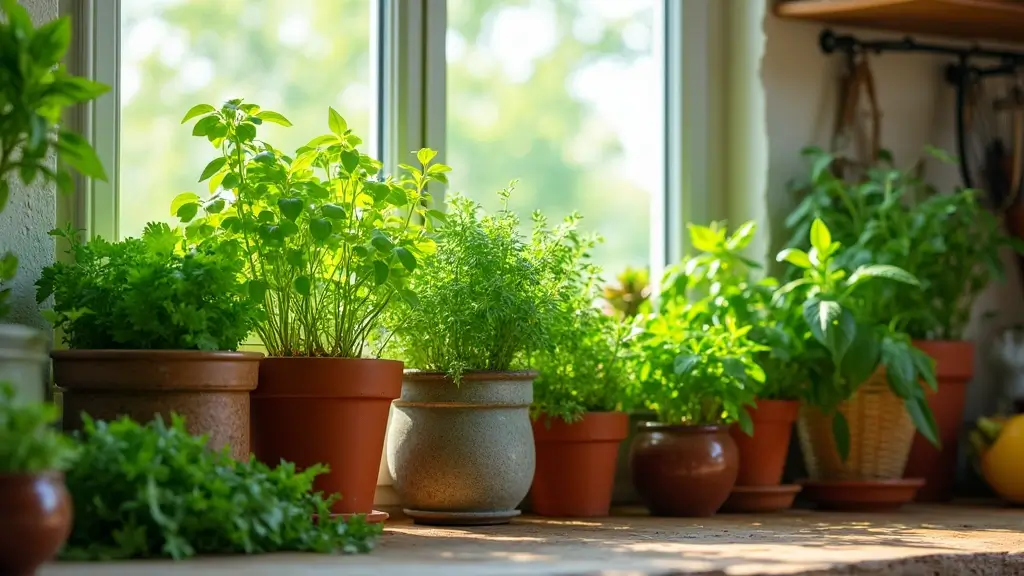
7. Herb Gardens

You want fresh herbs in your front yard, ready for cooking and for curb appeal. A small herb garden can deliver both with little effort.
– Choose a sunny spot. Most herbs need 6 to 8 hours of sun and fast drainage.
– If the soil is heavy or wet, use raised beds or sturdy containers. Good drainage keeps roots happy.
– Pick practical flavors: basil, rosemary, thyme, parsley, chives, and mint. Mint is powerful; keep it in a pot to prevent spreading.
– Decide on a layout: a compact bed about 2 by 4 feet or a row of decorative pots along a path.
– Use attractive containers with drainage holes. A mix of ceramic pots and wooden planters looks welcoming.
– Plan height and spill: tall herbs at the back, low or trailing ones in front for easy snips.
– Pair herbs with flowers that attract bees, like lavender or calendula. Pollinators visit while you harvest.
– Add small markers for each herb. A simple tag or stake adds charm and helps you remember what’s where.
– Keep soil healthy with light mulch and occasional feeding from a gentle fertilizer.
– Harvest regularly. Pinch leaves as you cook to keep plants producing and to keep fragrances strong.
– Protect through colder months. Bring containers indoors or cover beds with mulch when frost comes.
– For a quick start, try a small starter kit from a local nursery.
– You’ll learn what grows best in your light.
7. Herb Gardens
Editor’s Choice

9 Herb Indoor Garden Kit – Unique Kitchen Gift for Women, Men, Mom, Frie…

Gepege 6 Inch Beaded Ceramic Planter Set of 2 with Drainage Hole and Sau…

Artline Garden Markers, 0.8 mm Writing Width, Black, 12 Pack (EK-780)
8. Garden Lighting

Want your front yard to glow after dark? Good lighting adds curb appeal, boosts safety, and invites neighbors to pause and admire. Start with a simple plan that fits your space and budget.
– String lights: Hang them over trees or along a fence to form a warm canopy above seating and paths.
– Solar stake lights: Place low along the walkway or bed edges for steady, easy glow without wiring.
– Lanterns and lamps: Set on the porch, steps, or a low wall for a welcoming, homey feel.
– Spotlights: Aim a small light at a favorite plant, statue, or planter to make it stand out.
– LED candles: Use battery-powered candles for a soft, romantic effect with no open flame.
Choose a mood you like. Warm white bulbs feel cozy and classic. If you want a splash of color, use a few theater-style accents sparingly to avoid glare.
Make it work for you. Use timers or smart plugs so lights switch on at dusk and off by morning. Consider low-voltage or solar options to save energy while keeping you in control.
Place lights safely. Keep cords out of walkways and choose weatherproof fixtures. Check seals and lenses yearly, and clean them to keep glare low.
With layered lighting, your front yard becomes a safe, inviting night spot that still feels effortless.
8. Garden Lighting
Editor’s Choice

Brightever LED Outdoor String Lights 100FT Patio Lights with 52 Shatterp…

GIGALUMI Solar Lights Outdoor Waterproof, 12 Pack, Stainless Steel LED S…

Vinkor Flameless Candles Battery Operated Candles Real Wax Pillar LED Ca…
You might also like
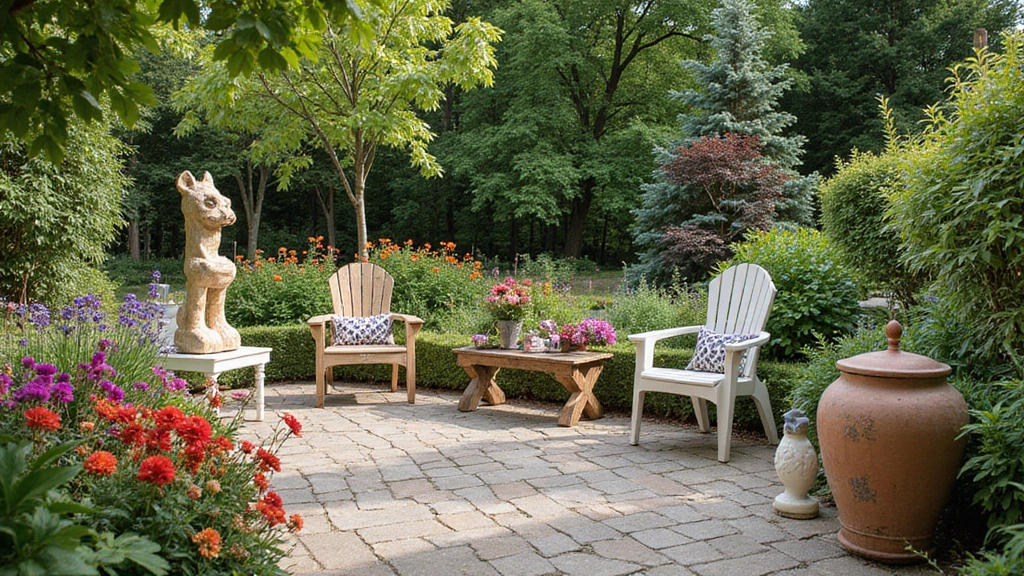
9. Garden Art and Decor

You want your front yard to greet guests with warmth and style. Garden art and decor give it personality without crowding your space. A few well-chosen pieces can turn a plain patch into a welcoming scene.
– Theme first Choose a style that fits your home—rustic, whimsical, or clean modern. Keep it simple so your yard doesn’t feel crowded.
– Pick a few standout pieces Let your yard breathe by selecting 2–3 pieces that grab attention and echo your theme. Place them near the path or door so they set the mood as you arrive.
– DIY accents Paint river rocks, make wind chimes from old keys, or assemble a pallet sign that says welcome. Use weatherproof paints and sealants so they last through rain and sun.
– Add mirrors for space and light A well-placed outdoor mirror bounces sun and makes the area feel larger. Try a wall-mounted or freestanding mirror at eye level, not directly facing the door.
– Use natural materials Driftwood, stones, and terracotta bring texture and a soft, earthy vibe. Balance rough surfaces with smoother planters for contrast.
– Think about placement Level eyes, sight lines, and balance to avoid clutter. Stand back and walk the path to see how it reads from street level.
– Weather-smart choices Pick weatherproof metal, ceramic, or resin pieces that can take rain and sun. Store or cover seasonal pieces to extend life.
– Maintenance matters Clean and seal wooden pieces and check for rust regularly. A quick wipe after storms keeps the look fresh.
9. Garden Art and Decor
Editor’s Choice

12 inch Acrylic adjustable traffic convex mirror, outdoor road safety wi…

VEWOGARDEN 360° Outdoor Wind Spinner, Wind Sculpture Spinner with Metal …
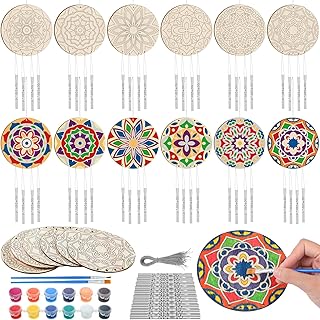
24 Sets Mandala Wind Chimes Craft for Kids Color Your Own Windchime DIY …
10. Raised Garden Beds

Front yards can look tired. Raised garden beds lift the look and fix water flow away from your house. You can grow flowers, herbs, or veggies in a small space and keep things tidy.
Materials and styles
– Wood beds offer warmth and are easy to build for you, but they need weather protection.
– Stone beds feel sturdy and classic, but they cost more and need a solid base.
– Metal beds stay sleek and durable, yet they can heat soil in strong sun.
Smart design tips
– Keep beds 3 to 4 feet wide so you can reach from both sides without stepping on soil.
– Aim for 12 to 18 inches of height for good drainage and easy maintenance.
– Add a trellis on one side to grow climbing plants and save space.
– Plan paths around beds with wide, smooth surfaces for clean access and a neat yard.
Practical setup
– Line the bottom with weed barrier and mix garden soil with compost for rich beds.
– Mulch the surface after planting to hold moisture and slow weeds.
– Install a simple drip or soaker system for steady, efficient watering.
Raised beds finish the yard with order and practicality. Plan the project and costs ahead. With time, your front yard becomes a quiet corner you love to show off.
10. Raised Garden Beds
Editor’s Choice

MIXC Wooden Raised Garden Bed with Legs, 48”L X 24”W, Elevated Reinforce…

Land Guard Galvanized Raised Garden Bed Kit, Galvanized Planter Garden B…

230FT Drip Irrigation System for Garden with 40 Nozzles & Emitters, Gard…
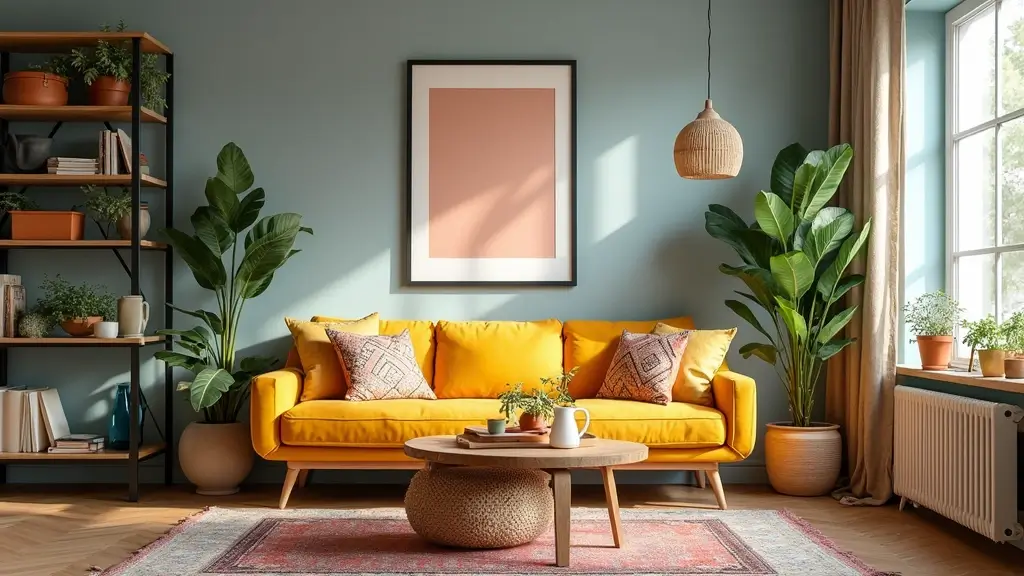
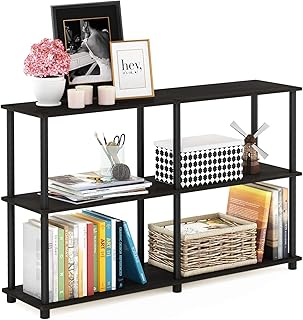
11. Container Gardening

If you want a burst of color in your front yard without digging or building new beds, container gardening is a smart choice. You can mix pots of different sizes and styles to make your entry stand out. You can grow flowers, herbs, small shrubs, or even dwarf trees in containers. With the right setup, you can change your look with the seasons and move plants around as you like.
– Choose the right pots: Move them easily with lightweight, weather-safe containers that have drainage holes.
– Group by sun: Place sun-loving plants in bright spots and shade lovers in cooler corners.
– Use a good soil mix: Use fresh potting mix that drains well and lets roots breathe.
– Drainage matters: Ensure pots have holes, a shallow saucer, and a small gravel layer for drainage.
– Move with the seasons: Swap in seasonal blooms or herbs to keep your display fresh all year.
– Water and feed smart: Water deeply when the top inch dries, then fertilize every 4–6 weeks with a balanced mix for containers.
– Mix textures and colors: Pair glossy leaves with textured greens and add color with different heights and blooms.
11. Container Gardening
Editor’s Choice

The HC Companies Eclipse Round Planter with Saucer – Outdoor & Indoor Pl…

Miracle-Gro Potting Mix, For Container Plants, Flowers, Vegetables, Annu…

Indoor Self Watering Planters with Drainage Holes and Saucers, 8, 7, 6.5…
12. Native Plant Landscaping

Native Plant Landscaping
Native landscaping helps your front yard look good while using less water. Native plants are built for your region’s climate and soil, so they handle heat and drought with less help. They attract local wildlife, bringing butterflies and birds into view as you walk up the path. You gain a yard that feels rooted in place and easier to care for.
– Research which plants stay healthy in your area and pick a mix that fits your space.
– Group plants that need similar amounts of sun and water so you can water once and keep them happy.
– Let some plants grow naturally instead of trimming them into perfect shapes for a softer, meadow-like feel.
– Put taller natives at the back and shorter ones in front for easy viewing from the curb.
– Add a mulch layer to retain moisture and cut weeds.
– Plan for seasonal color with shrubs or grasses that shine in different seasons.
– Check with a local extension office or native plant society for a verified list.
Native landscaping pays off over time: less watering, fewer pests, and a yard that helps pollinators.
12. Native Plant Landscaping
Editor’s Choice

The Northeast Native Plant Primer: 235 Plants for an Earth-Friendly Garden
Back to the Roots 25.7qt (1 Cubic ft) Organic Premium Mulch

XLUX Soil Moisture Meter, Plant Water Monitor, Hygrometer Sensor for Gar…
13. Seasonal Planters

Front yard curb appeal starts with simple, swap-in planters. Seasonal planters keep your space fresh as the year turns. You can change color, shape, and mood with just a few pots. It’s a practical way to keep your front yard lively without a big redo.
– Choosing the right containers. Pick planters that drain well and aren’t too heavy to move. Materials matter: ceramic looks neat, resin is easy to lift, and terracotta brings warmth. Make sure there’s a saucer or tray to catch extra water.
– Seasonal bloom ideas. In spring, go for bright pansies and violas. Summer loves sun-loving blooms like sunflowers, petunias, or geraniums. Fall shines with mums and asters. For winter, mix evergreen foliage with a few bright berries or small conifers for color.
– Color and texture. Pair a bold pot with softer greens, or mix leaf textures—glossy, fuzzy, and feathery. Vary heights and shapes to add depth and interest in a tiny front yard.
– Decoration and care. Add a seasonal ribbon, a small sign, or fairy lights for festive touches. Rotate accents as holidays change. Use a light mulch or decorative gravel to finish each display.
– Simple maintenance plan. Water when the soil dries, feed lightly once a month, and move containers out of harsh afternoon sun if needed. Check for pests and trim spent blooms to keep the display tidy.
Seasonal planters let you express your style, stay flexible, and keep your front yard inviting all year long.
Swap out your seasonal planters and watch your front yard bloom with personality! A simple change in pots can elevate your curb appeal and keep your garden fresh all year long. Let’s make those neighbors green with envy!
13. Seasonal Planters
Editor’s Choice
Gepege 6 Inch Beaded Ceramic Planter Set of 2 with Drainage Hole and Sau…

Classic Home and Garden Vogue Planter Pots w/Pottery Quality Finish – Mo…

4 Pack Solar String Lights Outdoor – 320LED 132FT Solar Fairy Lights Wat…
14. DIY Garden Signs

DIY Garden Signs
You want your front yard to feel welcoming and organized. DIY garden signs give that personal touch and keep plants easy to find. You can label beds, mark borders, or share a friendly message with visitors.
– Materials Pick wood, slate, or canvas that can handle weather. Consider reclaimed wood for a rustic look. Apply outdoor paint or stain for color. Seal with a weatherproof varnish for long life. Use stakes or hanging hardware to mount. Use big, simple fonts for easy reading.
– Styles and messages Write plant names, care notes, or short quotes. Label beds and borders so you know where each plant belongs. Try chalkboard signs for easy updates; keep the design simple and readable.
– How to make Plan your message on paper first. Transfer it to the sign with pencil or a stencil. Let colors dry fully before sealing.
– Placement and care Place signs along paths or at bed edges where they catch the eye. Face signs toward the path for easy reading. Keep signs at eye level and away from doors or driveways. Check after storms and re-seal when needed. Adjust signs after planting to avoid crowding.
– Maintenance Wipe signs with a damp cloth to remove dirt. Re-seal every year or when color fades. Keep signs small to avoid crowding and clutter.
14. DIY Garden Signs
Editor’s Choice

DecoArt Crafter’s Acrylic Patio Paint 24 Color Starter Paint Set, Outdoo…

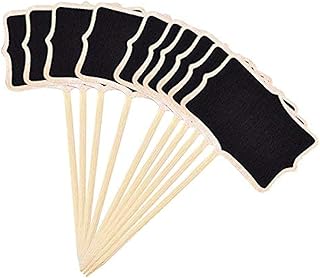
KINGLAKE 20 Pcs Wood Chalkboard Plant Tag, Wooden Stakes Plant Labels Bl…
15. Butterfly Gardens

Butterfly Gardens for Your Front Yard
You want a front yard that shines and invites butterflies. A butterfly garden adds color, life, and a tiny ecosystem in your space.
Nectar plants first. Pick easy bloomers: milkweed, coneflowers, and zinnias. They lure butterflies and feed them as they flutter by.
Give caterpillars a home. Plant host plants so the next generation has food. Monarchs love milkweed. Swallowtails use dill, parsley, or fennel. A small cluster works.
Set it up where sun rules. Choose a sunny spot with light air flow. Avoid harsh sprays; pesticides hurt your guests. For water, place a shallow dish with rocks so butterflies can land and sip without drowning.
Keep it simple and practical. Mulch to hold moisture and cut weeds. Group flowers in blocks; better for sight lines and for butterflies to find them. Check plants weekly, prune faded blooms, and replace tired specimens.
The payoff is real. Your front yard will glow with color, while you help local wildlife thrive. It’s an approachable project that fits most yards and budgets.
Start small with a 4-by-6 foot patch and grow as you see butterflies arrive. You’ll notice scent, color, and movement that make neighbors stop and smile.
It’s a refreshing yard upgrade. Grab a small watering can and start today. Your neighbors will notice faster, and you may inspire a small yard makeover. It feels rewarding.
15. Butterfly Gardens
Editor’s Choice

Wildflower Seeds Hummingbird and Butterfly Mix 1 Ounce, No Filler, 24 Va…

Chapin 47998: 2 Gallon Watering Can for Indoor & Outdoor Plants, 100% Re…

GardenStraw, 3 cu ft (20 lbs) Pack of 1 – All-Natural Mulch for Gardens,…
You Might Also Like

16. Gazebo or Pergola

You want a front yard that draws the eye and gives you a place to rest. A gazebo or pergola can be that focal point and a handy shade spot.
Two practical styles
– Gazebo offers full shade and a cozy, room-like feel.
– Pergola creates an open frame that welcomes light and balance with your garden.
Materials and match
– Pick wood, vinyl, or metal that matches your home’s style.
– Choose finishes that weather well in your climate.
Plan the space
– Size it to fit your walkway and the view from your front door.
– Place it where it frames the yard and blocks unwanted sightlines.
– It should feel natural here.
Plant for magic
– Let climbing plants like wisteria or honeysuckle weave up the sides for color and scent.
– Use trellises or lattice to guide vines and keep growth tidy.
Make it comfy
– Add a small bench or chairs and a weatherproof cushion set.
– Put in a low table for drinks or a book, and use a rug to define the space.
Seasonal touch
– Switch decorations with the seasons to keep the area fresh.
– Hang lights or lanterns for longer evenings.
Maintenance basics
– Check the structure yearly for loose boards or rust.
– Prune vines in winter and clean cushions regularly.
With a little upkeep, your front yard stays inviting year after year.
16. Gazebo or Pergola
Editor’s Choice
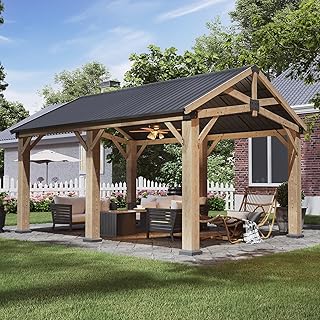
Aoxun 12′ x 16′ Outdoor Wood Gazebo, Hardtop Gazebo Permanent Wooden Pav…


Outdoor Seat Cushion Set, Waterproof & Fade Resistant Patio Chair Cushio…
17. Lawn Alternatives

Lawn alternatives for a front yard that still shines
Tired of mowing and a thirsty lawn? Lawn alternatives can give you a welcoming front yard with far less work. Consider clover, moss, or low-growing ground covers instead of regular turf. They stay green longer with less water and fewer chemicals, yet they still look lush. You’ll feel the texture under your feet and see color all year.
To start, check your climate and sun. Plan with these steps:
– Check climate and sun
– Choose two to three options to mix texture and color
– Plan a small test patch
– Add stepping stones for paths
Install is simple when you know your plan. Remove thick weeds, loosen the soil, and lay down mulch to slow weeds. Plant moss in damp shade, sow clover, or spread a slow-growing ground cover in sunny spots. Water gently at first, then ease back as roots take hold. After the roots settle, let rain and natural moisture do most of the work.
Notes you should know. Weeds may show up at first; pull them by hand. Clover can attract bees, which helps pollinators but may bother those with allergies. If you want a soft, private feel, mix in larger ground covers to create patches of shade and sun. This eco-friendly approach lowers water use and reduces mowing time.
17. Lawn Alternatives
Editor’s Choice

Outsidepride Perennial White Dutch Clover Seed – 2 lbs. Nitrocoated, Ino…

Small Value Fairy Garden Starter Kit Moss and Lichen for Terrarium, 5″x7…

3 Pack Sunflower Stepping Stone, 10 Inch Decorative Garden Step Stone fo…
18. Garden Furniture

Your front yard should invite people to linger, not just pass by. Garden furniture—think a garden bench, a small table, and a couple of patio chairs—turns a plain patch into a friendly space. It gives you a place to rest after work, share a coffee with a neighbor, or watch the kids play. The right pieces match your style and the yard’s size. Durable, weather-ready materials help you keep the look year-round.
– Style that fits your home. Pick a look that echoes your house and yard. A rustic bench can suit a cottage garden, while sleek metal chairs blend with modern lines.
– Weather-ready materials. Choose teak, powder-coated metal, or resin wicker. These hold up to sun and rain with less care. A simple rule: avoid fabrics that soak up water.
– Comfort that lasts. Deep cushions and soft backrests invite lingering. Pick quick-drying fabric and simple covers. Store cushions during heavy rain or winter.
– Smart placement. Put seating where you can enjoy a view or shade. Arrange a small chat group with a bench and two chairs. Leave a clear path so guests can move easily.
– Practical maintenance. Use weather covers when you aren’t using the yard. Clean surfaces with mild soap and water. Dry cushions before storing.
18. Garden Furniture
Editor’s Choice

Psilvam 2-Person Poly Lumber Outdoor Bench with 700 Lbs Weight Capacity …
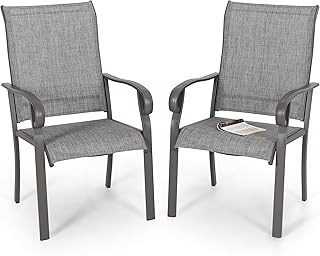
NUU GARDEN Patio Dining Chairs Set of 2, All Weather Textilene Patio Cha…

UDPATIO Outdoor Wicker Side Table with Storage Patio Rattan End Table Sm…
19. Grass Pathways

Grass Path Options
Your front yard can welcome guests with soft, green paths.
Grass paths guide visitors through your yard.
They add a calm, natural look.
Here are two practical options to try.
– Mow a curved strip to define the route.
– Keep the path 2 to 3 feet wide for easy walking.
– Edge the sides for a clean line.
– Place stepping stones on a compacted base for stability.
– Leave spaces between stones so grass can peek through.
– Fill gaps with soil and grass seed for quick growth.
– Make sure stones sit level and securely.
– Line the path with low flowers or decorative stones for definition.
– Use a thin border of mulch or edging to keep it neat.
– Keep the path wide enough for two people.
– Trim the edges every few weeks.
– Check after rain and adjust loose stones.
– Ensure good drainage so it doesn’t stay soggy in wet weather.
– A grass path adds charm and keeps your yard functional.
– If water is scarce, choose drought-tolerant grasses.
– Add color with low flowers along the edges for year-round charm.
19. Grass Pathways
Editor’s Choice
EasyFlex No-Dig Landscape Edging with Anchoring Spikes, 2.7 in Tall Deco…

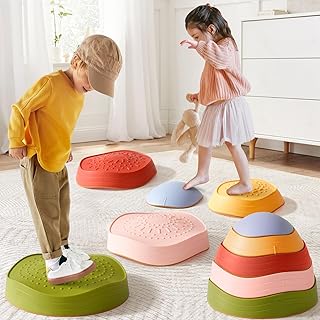
Tiny Land Stepping Stones for Kids, 5pcs Non-Slip Toddler Stepping Stone…
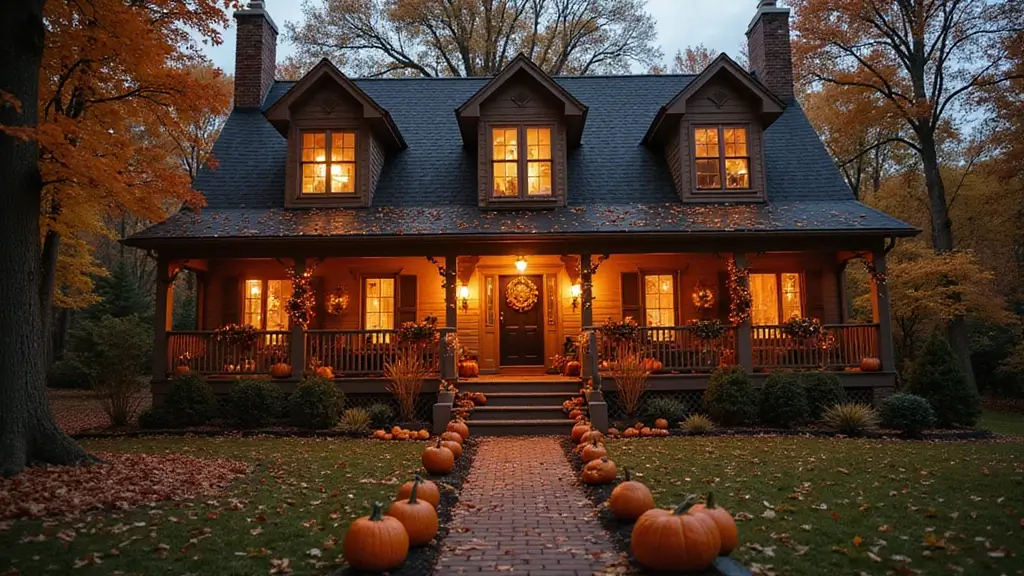
20. Seasonal Decor

You want a front yard that feels alive all year. Seasonal decor helps you get that with simple, smart touches. It invites guests without heavy work. Here are practical ideas you can use now.
– Color palette Pick 2–3 colors that fit your house. Keep those colors every season for a cohesive look. Choose planters in clay, ceramic, or resin to match your home.
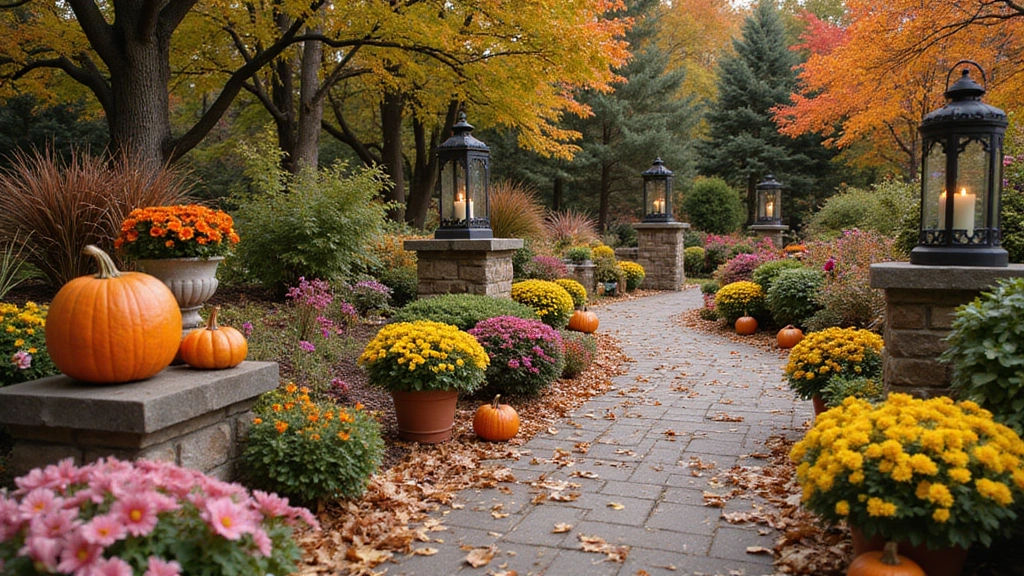
– Natural and durable mix Add pumpkins, mums, pine cones, and sprigs of greenery. Pair them with weatherproof stakes or metal accents. Place some items at varied heights for visual interest.
– Seasonal swap plan Change pieces as the calendar changes. Autumn brings pumpkins and warm wreaths. Winter adds lights and evergreen garlands. Use dried flowers and natural textures for a cozy look.
– Spring and summer tweaks Bring in fresh flowers, new planters, and bright greens. Use solar lights to keep energy easy and cozy.
– Placement and safety Put items where they guide visitors to the door. Keep walkways clear and cords tidy. Keep cords tucked under a porch railing to hide them.
– Maintenance tips Store decor when it’s not in use. Clean items before you pack them away. Label boxes so you find things quickly next season.
With these steps, your front yard stays inviting from porch to curb.
Seasonal decor is the secret ingredient to a front yard that shines year-round. With just a few thoughtful touches, you can make your home the envy of the neighborhood!
20. Seasonal Decor
Editor’s Choice

Classic Home and Garden Shaina Planting Pots – Lightweight Indoor & Outd…

FORUP Metal Plant Labels, 30 Pack Garden Label Markers, Weatherproof Gar…

Solar Lights Outdoor,12 Pack Waterproof Auto On/Off Solar Pathway Lights…
Conclusion

Your front yard is a canvas for creativity and personality, and with these 20 gardening ideas, you have the tools to make it truly spectacular.
From floral pathways to artful displays, each idea brings a unique touch to your home.
Let your garden reflect who you are, and don’t be afraid to try something new to impress the neighbors!
Note: We aim to provide accurate product links, but some may occasionally expire or become unavailable. If this happens, please search directly on Amazon for the product or a suitable alternative.
This post contains Amazon affiliate links, meaning I may earn a small commission if you purchase through my links, at no extra cost to you.
Frequently Asked Questions
What Are Some Easy DIY Projects for My Front Yard?
Looking to spruce up your front yard without breaking the bank? Some easy DIY projects include creating planter boxes, setting up a vertical garden, or adding garden art. These projects not only enhance curb appeal but also allow you to express your creativity and style in your outdoor space.
Plus, they can be tailored to fit any budget!
How Can I Create a Low-Maintenance Garden in My Front Yard?
If you’re dreaming of a beautiful front yard that doesn’t require constant upkeep, consider a rock garden or native plant landscaping. These options are designed to thrive in your local climate, using less water and care.
Incorporating perennials and herb gardens can also give you a vibrant, low-maintenance space that looks great all year round.
What Plants Work Best for a Front Yard Herb Garden?
Creating a front yard herb garden is a fantastic idea! Opt for sun-loving herbs like basil, rosemary, and thyme. These not only add flavor to your meals but also enhance your garden’s curb appeal.
Make sure to choose a spot with plenty of sunlight and consider using container gardening if space is limited!
How Can I Incorporate Seasonal Decor in My Front Yard?
To keep your front yard looking fresh through every season, think about using seasonal planters and decor. You can switch out flowers, colors, and even decorative items like pumpkins in the fall or festive lights during winter.
It’s an effortless way to add charm and keep your space looking lively without a complete overhaul!
What Are the Benefits of Adding Lighting to My Front Yard?
Adding garden lighting to your front yard is a game-changer! Not only does it enhance the beauty of your garden after dark, but it also improves safety and invites neighbors to admire your hard work.
Choose from solar lights, string lights, or spotlights to highlight features like pathways or plants, creating a warm and welcoming atmosphere.
Related Topics
home decor
front yard gardening
DIY projects
seasonal decor
container gardening
vertical gardens
budget friendly
easy gardening
curb appeal
outdoor living
garden art
sustainable landscaping


![4 Set [EXTRA LARGE] Hanging Wall Mount Storage Baskets with Adhesive Hoo...](https://m.media-amazon.com/images/I/812qykSTCXL._AC_UL320_.jpg)


![[ 12 Pack ] Plastic Storage Baskets - Small Pantry Organization and Stor...](https://m.media-amazon.com/images/I/81LwfO1xRKL._AC_UL320_.jpg)


![Joben Oligey 3 Set [Extra Large] Hanging Wall Baskets ,Wire Basket For S...](https://m.media-amazon.com/images/I/81wfSbFkk0L._AC_UL320_.jpg)


![6 Pack Magnetic Cable Clips [Cable Smooth Adjustable] Cord Holder, Under...](https://m.media-amazon.com/images/I/71z427f7WYL._AC_UY218_.jpg)


![12-Inch Non-Skid Turntable Lazy Susan Organizer [4 Pack] - Spinning Rack...](https://m.media-amazon.com/images/I/714x1t8YuSL._AC_UL320_.jpg)