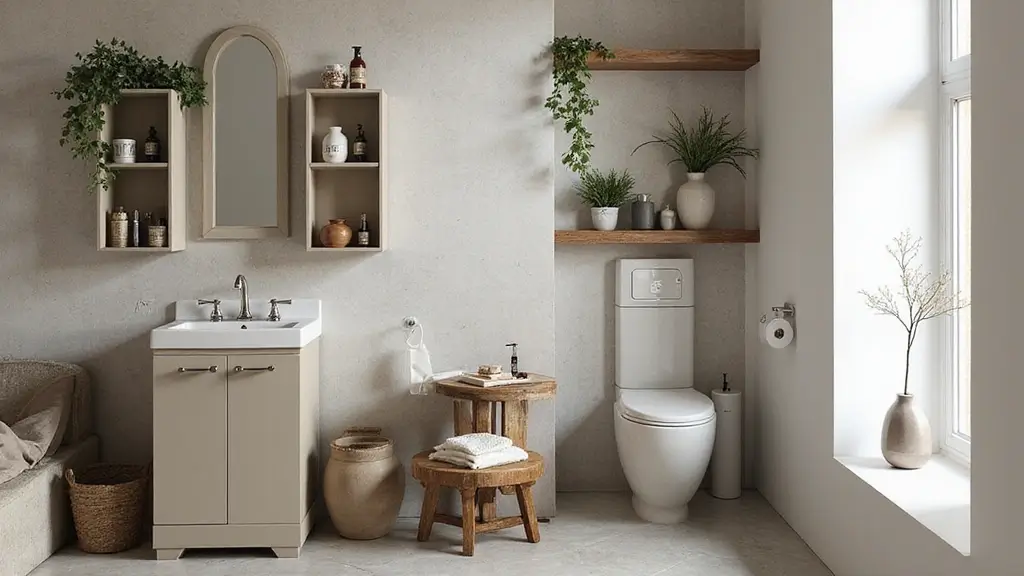
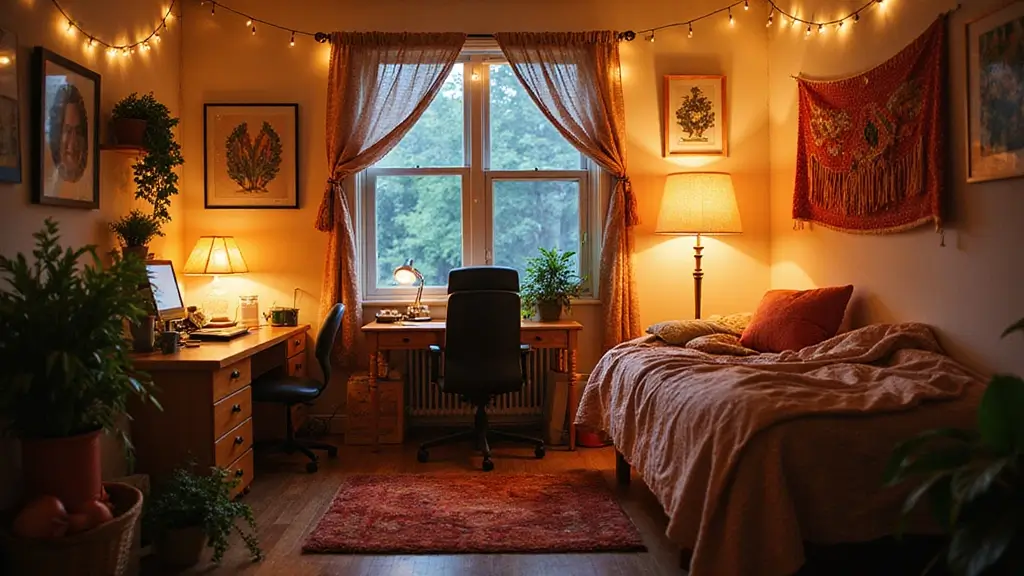
Small bedrooms can feel cramped, but cozy is possible with a few smart touches. A warm retreat can come from simple choices, not from a big remodel or a lot of money.
Why I made this post
Budget limits keep many of us from decorating the way we want. This post grew from watching friends juggle tight spaces and still crave warmth. I pulled together ideas that are affordable, practical, and easy to try in real homes.
Who it’s for
If you live in a tiny apartment, a dorm, or a spare room, this is for you. If you care about storage, soft light, and calm color, you’ll find tips that fit.
What you’ll get
You’ll get 30 cozy bedroom ideas for small rooms that won’t break the bank. These ideas are practical and simple to test this weekend. They cover color, lighting, storage, and furniture.
These ideas are designed to be realistic and easy to implement. You’ll learn small changes that make a big difference, like smart storage that hides clutter, warm lighting that hugs you in the evenings, and texture layers that make the bed look inviting. You’ll see how to pick a quiet color palette and place a mirror so light bounces around the room. You’ll also find ways to pair a compact nightstand with hidden storage and a bench that doubles as seating and a place to stash things. Each tip comes with a clear example you can copy, swap, or adapt to your space.
So go ahead and try what fits your room and your routine. These ideas aren’t about perfection; they’re about making a room that feels like you in a space you can actually enjoy. With a little planning and a few affordable swaps, your small bedroom can glow with comfort, warmth, and calm every day.
Contents
- 1. Layered Textiles
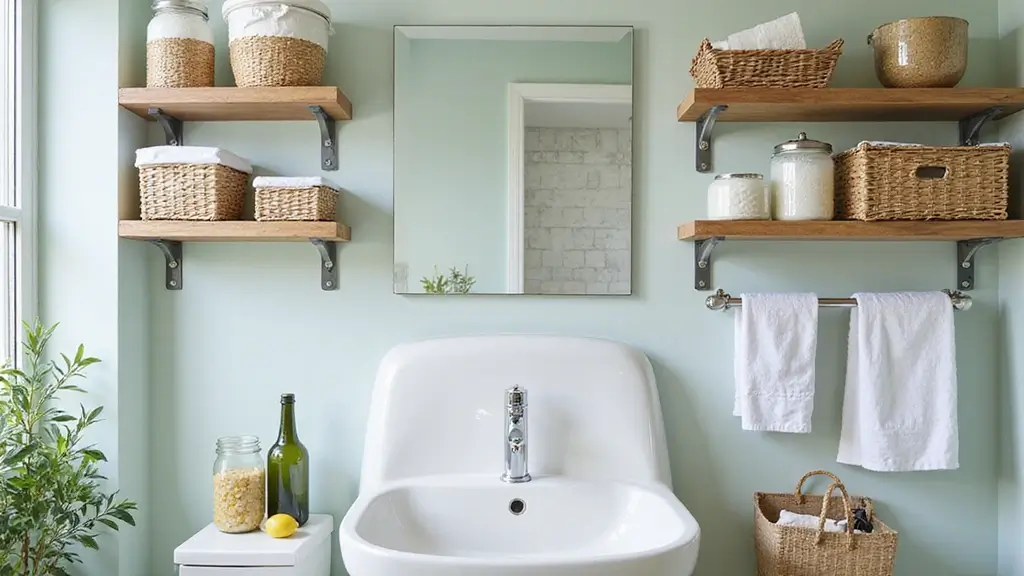
- 2. Floating Shelves
- 3. Under-Bed Storage Solutions
- 4. Soft Lighting
- 5. Bold Accent Walls
- 6. Minimalist Furniture
- 7. Nature-Inspired Decor
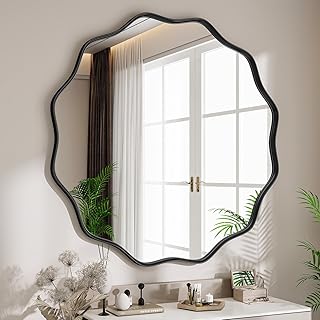
- 8. Use Mirrors Wisely
- 9. Personal Touches
- 10. Cozy Reading Nook
- 11. Warm Color Palettes
- 12. Vintage Finds
- 13. DIY Wall Art
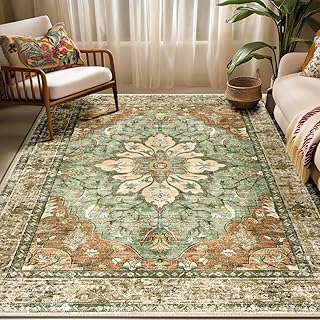
- 14. Rugs for Comfort
- 15. Utilize Vertical Space
- 16. Cozy Curtains
- 17. Compact Desks
- 18. Wall-Mounted Nightstands
- 19. Creative Storage Solutions
- 20. Accent Pillows
- 21. Corner Seating
- 22. Colorful Footwear Displays
- 23. Use Colorful Storage Bins
- 24. Wall Art Gallery
- 25. Decorative Trays
- 26. Simple Canopy Beds
- 27. Pop of Color with Accessories
- 28. Cozy Bedspreads
- 29. Soft Wall Textures
- 30. Seasonal Decor
1. Layered Textiles

Layered Textiles
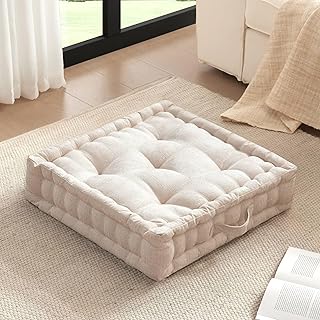
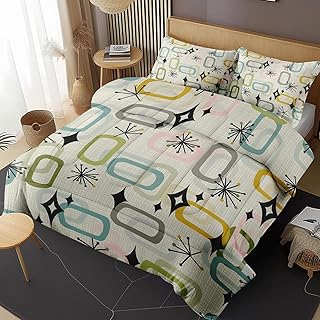
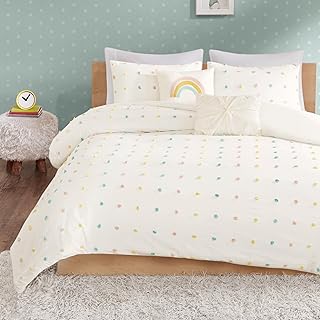
Your small bedroom can feel warm without a big makeover. Layering textiles adds depth and comfort in just a few pieces. With blankets, throws, and cushions, you lift the room without crowding it. The right mix of textures keeps the space inviting and simple.
– Start with a solid base color to ground the look and keep the eye calm.
– Add a chunky knit throw for instant texture and a cozy feel.
– Mix fabrics like cotton, wool, and faux fur to create depth and contrast.
– Pair bright accents with neutral tones to balance energy and space.
– Search thrift stores or end-of-season sales for affordable throws.
– Use cushions in varying sizes to invite lounging and add visual interest.
– Choose easy-care fabrics that are machine washable and durable.
– Don’t fear patterns; stripes, florals, or checks add character without clutter.
Finish with a light blanket draped at the end of the bed for a soft, layered touch.
As you mix and match, keep care in mind so they stay fresh and easy to wash.
That simple habit keeps the look tidy and ready for sleep.
1. Layered Textiles
Editor’s Choice

Bigacogo Chunky Knit Throw Blanket for Couch, 40×60 inches, 100% Hand Kn…

Utopia Bedding Throw Pillows (Set of 4, White), 18 x 18 Inches Pillows f…

Utopia Bedding Fleece Blanket Queen Size Grey 300GSM Luxury Anti-Static …
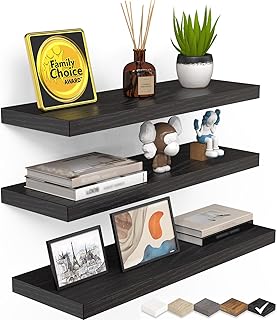
2. Floating Shelves

Floating shelves are a smart storage fix for your small bedroom. They hold your books, plants, and decor without stealing floor space. A clean, simple design helps the room feel bigger. Choose a finish that blends with your wall so the shelves look built in. Mix different shelf sizes and heights to create visual interest.
Smart placement and finishing details
– Place shelves at varying heights for a dynamic, eye-catching display.
– Use the space above your bed or near your desk to maximize wall storage.
– Add color with small plants or ceramic accents.
– Keep a few books organized by color for a chic, curated look.
– Secure each shelf properly with wall anchors or brackets and attach to studs when you can.
– Choose wood for warmth or metal for a clean, modern edge.
Care, safety, and quick upgrades
– Check the weight limit of each shelf and avoid overloading.
– Consider corner shelves to use odd spaces.
– Dust them regularly so they stay neat.
– If you want a bolder look, paint the back panel of the shelf the wall color or a contrasting shade.
– Pick a simple mounting system to keep installation quick.
– Start with a plan so shelves line up and stay level.
– You can adjust later.
– Floating shelves turn plain walls into practical art.
Elevate your small bedroom with floating shelves! They’re not just a storage solution; they’re a stylish way to showcase your favorite decor while keeping the space cozy and open.
2. Floating Shelves
Editor’s Choice

PHPH Wood Floating Shelves for Wall, Wooden Wall Shelves for Bedroom, Se…

120Pcs #8 Self Drilling Drywall Anchors and Screws kit #8 x 1-1/4”- Supe…

4 Pack Fake Plants Ceramic Mini Artificial Greenery Potted Plants for Ho…
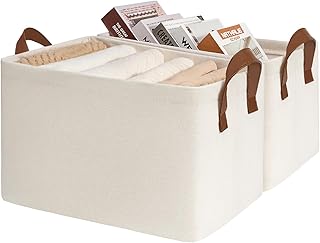
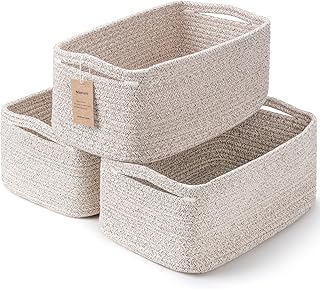
3. Under-Bed Storage Solutions

If you want more space in a small bedroom, under-bed storage helps. This hidden zone makes room for bins, drawers, or seasonal clothes without clutter. It keeps essentials easy to reach and out of sight at the same time.
– Smart storage picks Use bins or drawers that fit your bed height and slide in and out easily.
– Visibility wins Choose clear bins so you can see what’s inside at a glance.
– Labeling made easy Add simple labels to help you identify items fast.
– Raise the bed Put bed risers under the legs to gain space without changing your sleep comfort.
– Built-in options Consider a platform bed with built-in storage for a clean, seamless look.
– Style that serves Pick woven baskets or colorful bins to add texture and charm.
– Smart targets Use the space for seasonal clothes, shoes, luggage, or extra linens.
– Seasonal rotation Rotate items every few months to keep the space fresh and useful.
To plan well, measure your bed height and the size of the storage you want. Labeling helps you find things fast every day. Keep a small top layer of items you use often so mornings stay smooth. With these tips, under-bed storage stays neat and practical, even in a tight room.
Unlock the hidden potential of your small bedroom! With clever under-bed storage, you can keep essentials organized and out of sight, turning clutter into cozy efficiency.
3. Under-Bed Storage Solutions
Editor’s Choice

Budding Joy 90L Under Bed Storage Containers, Closet Organizers and Stor…

Utopia Bedding – Adjustable Bed Risers 3, 5, 8 Inch – Heavy Duty Furnitu…

Nelko Label Maker Machine with Tape, P21 Bluetooth Label Printer, Wirele…
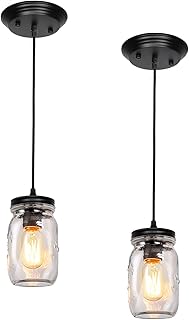
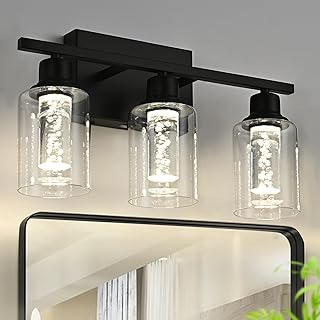
4. Soft Lighting

If your small bedroom feels cramped, the right lighting can change everything. Soft, gentle light makes a tiny room feel bigger, warmer, and calmer. You’ll feel more relaxed and sleep better when light is friendly to the eyes.
Layering light works best. Use several sources at once to avoid harsh shadows. Put some glow near eye level for tasks, and add a softer spread for atmosphere. Warmth matters, too. Warm white bulbs give a cozy feel that cool tones miss.
Practical lighting ideas you can use
– String lights draped along the headboard or around a window bring a gentle, twinkly glow. They feel magical without being bright.
– Table lamps with warm-toned bulbs and soft fabric shades create cozy pools of light you can adjust for reading or winding down.
– Wall sconces save surface space and give you hands-free light for getting dressed or tidying up.
– Dimmers let you tune brightness from a bright task lamp to a soft night light in seconds.
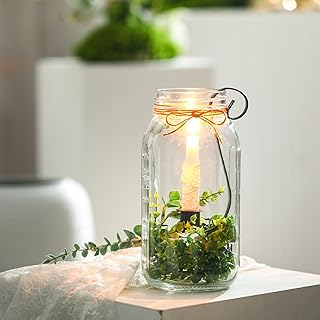
– LED candles give a safe, flickering glow that mimics real flame without risk.
– Accent lighting on art or shelves adds depth and draws the eye to your favorite pieces.
– A slim LED strip behind the headboard or under a shelf adds a subtle halo that makes the room feel airy.
Tips for choosing and placing bulbs: pick warm white (around 2700–3000K), and avoid cool blues that feel harsh in a small space. Diffusing lampshades soften the light so every corner stays inviting. With these ideas, your tiny bedroom becomes a cozy retreat you’ll love spending time in.
Soft lighting can turn your cozy bedroom ideas for small rooms into a serene sanctuary. Layer your light sources and let warmth embrace you, creating a space where relaxation flows and sleep comes naturally.
4. Soft Lighting
Editor’s Choice

JMEXSUSS 200 LED String Lights Indoor Outdoor Clear Wire, Connectable Wa…

Bell Lamp Shades Set of 2, 6″Top x 13″Bottom x 10″High, Beige Shade Repl…

ASD LED Indoor Wall Mount Light Fixture – 10 Inch Modern Interior Matte …
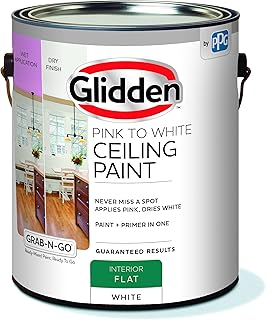
5. Bold Accent Walls

Is your small bedroom feeling cramped? A bold accent wall can fix that. It creates a clear focal point and adds warmth. Keep the rest of the room quiet so the wall stands out. One wall is enough to change the feel without crowding the space.
– Rich colors: Deep greens or maroons create a cozy, snug vibe.
– Removable wallpaper: Swap patterns when you want a fresh look, with no long commitment.
– Horizontal wood panels: Add texture and depth that catch the eye.
– Stenciled patterns: A simple motif gives personality without taking over.
– Color-coordinated decor: Match bedding and accents to the wall for a unified, calm look.
To make it work, plan before you paint or apply anything. Test color swatches on a small patch of the wall where the light hits most. See how the shade changes from morning to evening. Pick a finish that’s easy to wipe, like matte or eggshell. Keep the rest of your bedding and furniture simple so the wall shines. With a bold accent wall, your small bedroom feels warm, personal, and inviting.
5. Bold Accent Walls
Editor’s Choice

Art3d Smoothing Tool Kit for Applying Peel and Stick Wallpaper, Vinyl Ba…

Zinsser 02774 PERMA-WHITE Mold & Mildew Proof Interior Paint, Quart, Egg…

Stencils for Painting on Wood, Reusable Flower Stencils Painting Crafts …
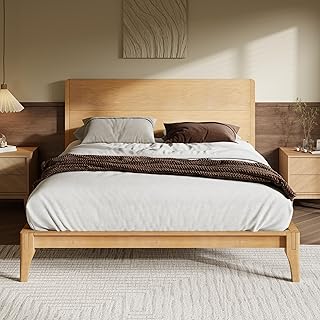
6. Minimalist Furniture

Small bedrooms can feel cramped fast. Clutter makes it tighter. Minimalist furniture helps you gain space without losing warmth. With the right pieces, you keep a calm, cozy vibe and still have what you need. Here are six practical moves for a small bedroom that stay friendly on your budget.
– Multifunctional furniture – Use pieces that do double duty, like a bed with drawers or a desk that also serves as a nightstand, to save floor space and reduce clutter.
– Furniture on legs – Choose slim, legged designs to reveal floor space and create air around the furniture, which makes the room feel bigger.
– Avoid oversized pieces – Favor compact, well-proportioned items that fit your floor plan and leave room for movement and daily life.
– Keep surfaces clear – Limit tops to daily essentials and store extras in drawers or behind doors so the eye travels smoothly.
– Light colors and finishes – Light woods, white finishes, and soft neutrals bounce daylight and help the room feel larger and calmer.
– Let natural light flow – Use sheer curtains, strategically placed mirrors, and window-friendly layouts that invite daylight to fill the space.
This approach, along with careful placement and tone, helps your small bedroom stay inviting. You’ll notice the room breathes easier when every piece has a purpose and every surface stays simple.
6. Minimalist Furniture
Editor’s Choice

ECACAD Multi-Functional Murphy Cabinet Bed, Queen Size Bed Frame Murphy …

Yoobure Narrow Dresser for Bedroom, LED Slim Nightstand with Charging St…

Dresser for Bedroom 6 Drawer Wood Dresser 58.3″ Wide, Large Chest of Dra…
7. Nature-Inspired Decor

In a small bedroom, you want calm, warmth, and space that feels bigger. Nature-inspired decor can deliver that without a big budget. It adds soft textures, earth tones, and a quiet, outdoor feel.
– Botanical prints and landscape photos add color without crowding walls. Pick frames that match your furniture for a cohesive, calm look.
– Natural wood accents—like a bedside tray, a small stool, or a frame—bring warmth and an organic vibe.
– Plants brighten shelves and windowsills. Choose low-maintenance options such as pothos, snake plant, or ZZ plant. They clean the air and soften straight edges.
– Woven baskets give you storage and texture, keeping clutter out of sight while staying light and airy.
– Layer textures with stone, wood, linen, and jute. A throw, rug, or curtain adds depth and warmth.
– Smart placement matters. Put plants where they get light, rotate them every few weeks, and pick compact planters to save space. Water sparingly to avoid fuss.
Note the light in your room. In sunny corners, go for pothos, philodendron, or peace lily. In dim shelves, pick snake plant, ZZ plant, or cast-iron plant. Reuse thrifted frames, baskets, and jars to save cash while keeping a cohesive look.
With these ideas, your small bedroom becomes a tranquil, budget-friendly escape that still reflects your style.
7. Nature-Inspired Decor
Editor’s Choice

97 Decor Vintage Botanical Wall Art – Vintage Botanical Prints Plant Pos…

Storage Baskets for Organizing, Woven Decorative Baskets for Shelves – B…

Costa Farms Golden Pothos Live Plant, Easy Care Indoor House Plant in Gr…
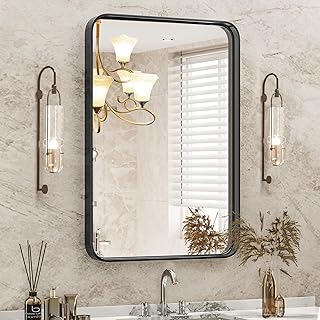
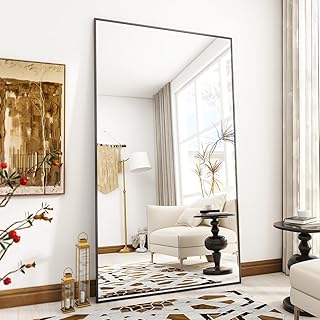
8. Use Mirrors Wisely

If your small bedroom feels tight, mirrors can give you more air and light. They do more than look pretty. They change how you see the space.
Place mirrors across from windows to bounce sunlight around. They reflect the outdoors and brighten corners all day. A well-placed mirror also makes the room feel deeper, which adds a cozy vibe.
– Large floor mirror becomes a bold focal point that draws the eye.
– Wall-mounted mirrors add airiness without stealing floor space.
– Small mirror gallery creates a playful, artful touch you can rearrange.
– Positioning mirrors to reflect a nice view outside or a favorite decor piece.
– Keep the count to one or two mirrors to avoid clutter.
Choose frames that fit your style, from warm wood to sleek metal or light acrylic. The frame matters as you want the mirror to blend with nightstands, bedding, and shelves. Secure heavy pieces to the wall for safety, especially in busy rooms. If glare is an issue, angle the mirror slightly or place it where it catches softer light.
With thoughtful setup, mirrors brighten your small bedroom, create depth, and still feel warm and inviting—without a big price tag.
8. Use Mirrors Wisely
Editor’s Choice

Full Length Mirror, 76″x34″ Oversized Arched Mirror Large Standing Mirro…
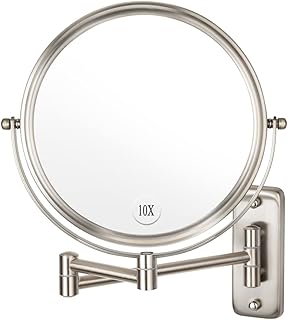
Wall Mounted Makeup Mirror – 10x Magnification 8” Two-Sided Swivel Exte…

Jetec 8 Pcs Small Handheld Hand Mirror Compact Travel Makeup Mirror Hand…
9. Personal Touches

If your small bedroom feels flat, personal touches can warm it up fast. These small ideas help you show who you are without making the room feel crowded. You’ll see how a few well-chosen items can boost comfort, not clutter.
– Display photos and mementos in frames that share a common color or style to help you establish a calm, cohesive look.
– Create a memory wall by arranging a small cluster of photos and mementos in one area for you, using a simple grid or organic layout.
– Use shadow boxes to showcase tiny treasures such as shells, tickets, or keepsakes for your shelves without crowding them.
– Choose cohesive textiles that reflect your personality, such as curtains, a bedspread, and cushions, and you stay within a 2–3 color range to tie the room together.
– Add sensory details by including soft textures for you to enjoy, such as a wool throw, a velvet pillow, and a lavender sachet in a drawer.
– Rotate and refresh items seasonally so your space feels fresh, letting you keep a few favorite pieces out while storing others neatly.
– Plan a swap-friendly display zone where you can swap pieces easily, keeping color balance, texture, and meaning clear.
With care, these touches make a small space feel like a real home you love to enter.
9. Personal Touches
Editor’s Choice

Americanflat 11×14 Shadow Box Frame with Shatter-Resistant Glass – Silho…

HORIMOTE HOME Quilt Set Queen Size Beige Bedspread, Modern Style Quilted…

EKTOS 100% Virgin Wool Blanket, 50″ x 60″, Perfect for Camping, Outdoor …
10. Cozy Reading Nook

You want a calm spot to read in a small bedroom. A corner can become a cozy reading nook.
– Chair choice: Pick a compact, comfortable seat that fits the corner, keeps open floor space, and supports your back.
– Side table: Add a small table at arm’s reach for your book, drink, and a tiny lamp.
– Green touch: A couple of plants and a slim bookshelf nearby boost calm, focus, and a homey feel.
– Soft lighting: Use warm bulbs and a dimmer to craft a gentle glow that won’t glare.
– Cozy layers: A warm throw blanket, plus a couple of cushions, invites you to linger longer.
– Plush cushions: Cushions add back support, knee comfort, and a welcoming, sink-in feel.
– Good lighting for nights: Ensure the area stays bright enough for late reads without waking the house.
– Sound control: A rug, thick curtains, and soft textiles soften footsteps and muffle outside noise.
– Smart placement: Tuck the nook in a quiet corner away from traffic, TV, and bright hall lights.
– Storage: Keep a small basket for current reads, a bookmark tin, and a slim wall shelf for books.
With these tweaks, your small bedroom gains a warm, easy-to-use reading nook you will reach daily.
10. Cozy Reading Nook
Editor’s Choice

Yaheetech Accent Barrel Chair, Boucle Fabric Club Chair, Furry Sherpa El…

VASAGLE Side Table, Small End Table, Tall Nightstand for Living Room, Be…

ROTTOGOON Floor Lamp for Living Room with 3 Color Temperatures LED Bulb,…
11. Warm Color Palettes

Warm Color Palettes
You want a small bedroom that feels cozy, not crowded. A warm palette helps. Soft yellows, earthy reds, and muted greens add life without shouting. Use paint on walls or swap in bedding, curtains, and decor to introduce warmth.
Balance matters. Pair bold tones with light neutrals so the room stays open.
– Use warm hues for accent pieces like pillows and throws to draw the eye.
– Try a feature wall with warm wallpaper or a painted panel in terracotta to add depth.
– Bring in wood furniture or flooring to add texture and a natural glow.
– Avoid stark white or cool blues and grays that can shrink the space.
– Layer fabrics: a knit throw, linen curtains, a wool rug to keep warmth visible from every angle.
– Test colors in daylight and at night, and pick one or two shades to keep the look cohesive.
A warm palette makes a small room feel intimate and inviting, not cramped. With the right mix, you create a calm, friendly retreat you can relax in after a long day.
To push warmth further, choose soft amber lighting. A wood-frame mirror can bounce light and echo your color.
11. Warm Color Palettes
Editor’s Choice

Whale Flotilla Extra Large Fuzzy Fleece Throw Blanket for Couch, 50×70 I…

Arched Mirror 24 x 36 Inch,Brown Wood Rustic Bathroom Tempered Wall Mirr…

Novelty Lights 11ft 50 LED Amber Christmas String Lights, 2.5″ Spacing o…
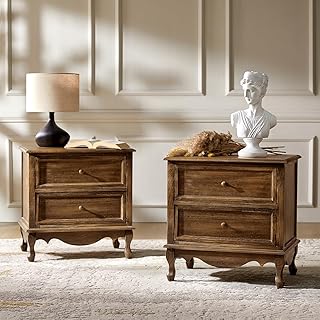
12. Vintage Finds

If your small bedroom feels a bit flat, vintage finds can warm it up without draining your wallet. They add character and a soft, lived-in vibe that new pieces often miss. They also keep your room feeling cozy through the seasons.
Thrift shops and flea markets are still gold mines. You’ll find antique lamps, retro dressers, and small accents that fit tight spaces. Look for pieces that fit your color and style so they feel intentional, not random.
– Use a vintage trunk for storage at the end of your bed.
– Add an old mirror or distressed frame as a wall accent.
– Mix vintage pieces with modern decor for contrast.
– Choose items with a story or personal connection.
– Refinish or repaint to refresh their look.
Before you buy, measure your room and plan a spot for each piece. Check for sturdy construction, secure finishes, and clean surfaces. Set a modest budget, haggle a bit, and bring color swatches to see what fits. Clean items with mild soap and water before bringing them home.
Vintage pieces bring warmth and a sense of history to a small bedroom. They also stay on trend by using warm woods, brass details, and upcycled designs. Start small, then grow your collection as you love what you find.
12. Vintage Finds
Editor’s Choice

Deco 79 Wooden Decorative Trunk Vintage Studded Woven Storage Decorative…

LOSOUR Decorative Wall Mirror-Distressed Wood Windowpane Mirror- Farmhou…

14.25″ Small Table Lamp for Living Room Farmhouse Bedside Resin Single L…
You might also like


13. DIY Wall Art

Your small bedroom can feel warm and personal with DIY wall art that costs little. You’ll get color, texture, and a sense of you, all in a few afternoons.
How to start
Choose a theme or color family so the pieces read as one gallery.
– Stenciling simple shapes on a canvas creates a bold, clean look you can achieve with a single stencil.
– Washi tape forms geometric patterns with no paint and peels off easily if you change your mind.
– Stretch fabric over a frame to make a soft, textured panel that feels like a textile.
– Create a photo collage with your favorite prints, cards, or magazine cutouts for a personal story.
– Frame inexpensive prints or thrifted art for a polished finish, and swap them out seasonally.
– Use wood or canvas panels to add real presence to a wall, giving depth.
– Create a chalkboard panel with chalkboard paint for playful, changing art and notes.
– Pin a corkboard or thin wire grid for rotating mini-prints and notes you can swap in.
Finish with cohesion
Keep a single color accent or shared mat color across pieces to tie the wall together.
– Mix sizes but space them evenly for balance.
– Add one personal piece, like a keepsake photo, to keep it intimate.
DIY wall art is affordable and totally you. Your room will feel bigger when the wall reads as a single, well-chosen project instead of many random pieces.
13. DIY Wall Art
Editor’s Choice

KEFF 24-Pack Canvas for Painting, 6 of 5×7, 8×10, 9×12,11×14 Painting Ca…

Mr. Pen- Washi Tape Set, 21 Rolls, Assorted Sizes, Floral Washi Tape for…

Large Cork Board Alternative | 15 Pack | Sizing Up to 59”x36”, Felt Wall…
14. Rugs for Comfort

A small bedroom can feel tight. A good rug gives warmth under your feet and pulls the room together. It can also add color and texture without stealing space.
– Define your space A rug creates a clear zone around your bed or seating, guiding the eye and making the room feel organized.
– Choose the right size In small rooms, pick a rug that fits under the main furniture you use, so the space stays open and balanced.
– Add round shapes Round rugs soften corners and fit neatly in tight layouts, helping traffic flow and making the room feel friendlier.
– Match texture and color A plush pile feels warm underfoot, and colors that echo your bedding tie the whole look together.
– Layer for depth Layering a smaller rug over a larger one adds texture and depth without crowding the space.
– Keep it easy to care Choose durable fabrics and easy-clean materials, and add a rug pad for grip and comfort.
– Put it in the right spot A rug under the bed anchors the space and keeps feet warm when you wake up.
– Care and safety A rug pad stops slipping and adds cushion, and regular vacuuming keeps fibers fresh and vibrant.
Try these ideas and you’ll notice the room feels warmer, calmer, and easier to use every day. If you shop now, look for wool or synthetic blends that resist stains and stay soft after cleaning today.
A cozy rug can redefine your small bedroom! Not only does it add warmth and style, but it also creates a sense of space that feels organized and inviting. Choose wisely, and let your floor do the talking!
14. Rugs for Comfort
Editor’s Choice

8×10 Area Rugs for Living Room Rug: Soft Fluffy Shag Gray Rugs for Bedro…

Ophanie Round Rug 4Ft Grey Circle Area Rug, Fluffy Fuzzy Bedroom Carpet,…

Veken Rug Gripper Pad for Hardwood Floors, Thick Cushion Non Slip Rug Pa…
15. Utilize Vertical Space

If your small bedroom feels crowded, you can still make it feel cozy. You can pull the eye up and gain floor space by using vertical space. This works because tall walls draw attention upward and create the illusion of a bigger room. Vertical space makes a small room feel bigger. Here are practical, affordable ways to do it.
– Tall shelving units stretch from floor to ceiling, so books, plants, and trinkets breathe without stealing floor space.
– Wall hooks and a peg rail let you hang bags, hats, and accessories right where you grab them.
– Vertical garden or wall-mounted planters add green without crowding your floor.
– Vertical wall art creates an eye-catching focal point and guides your gaze upward.
– Tall mirror on a wall reflects light and makes the room feel airier.
Keep the look cohesive by choosing a color or material that repeats across pieces. White, wood tones, or matte black pair well with most styles. Safety note: anchor tall shelves to the wall, and pick lightweight planters for easy changes. If you rotate items seasonally, you can refresh the space without buying more. With these ideas, your small bedroom gains cozy storage and a stylish lift.
15. Utilize Vertical Space
Editor’s Choice
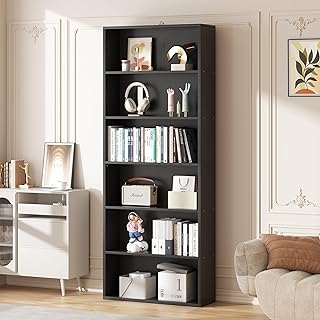
Vongrasig 6-Tier Open Bookcase and Bookshelf, Floor Standing Wood Displa…

Command 5 lb Large Utility Hooks, 7 Wall Hooks and 12 Command Strips, Da…

Ogrmar 36 Pockets Vertical Wall Garden Planter Plant Grow Bag for Flower…
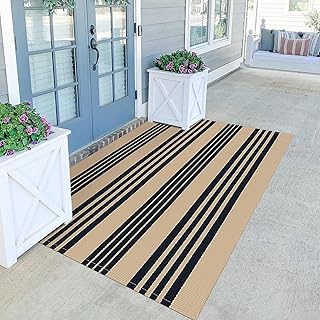
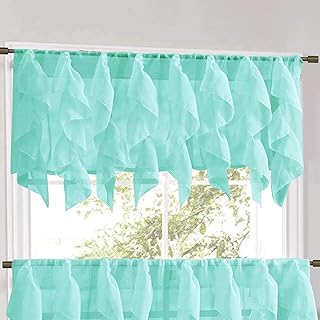
16. Cozy Curtains

Small bedrooms can feel cramped. Curtains can change that quickly. They give privacy and control light. They also add texture and warmth. Choose curtains by your need. Heavy drapes add warmth for cool nights. Light, airy curtains brighten the room. Colors and patterns should echo your decor. Texture gives depth in a small space. Hang curtains higher than the window frame. Let them extend beyond the sides to widen the view. Mount the rod wider than the window. This makes the window look taller and the room feel bigger.
– Layered curtains give you privacy and flexible light control.
– Tiebacks frame the window and let sun in when you want.
– Thermal or blackout options add insulation and improve sleep.
– Color coordination picks a shade that matches your bedding for a cohesive look.
– Cotton blends are budget-friendly and easy to wash.
– Linen keeps the room feeling light and airy.
– Velvet adds luxury and warmth but can weigh down a small room.
With the right curtains, you gain warmth, privacy, and a cozy vibe without overpowering the room.
16. Cozy Curtains
Editor’s Choice

Anytime Home Curtains Blackout and Sheer Layered Solid Window Curtain Pa…

Hion Magnetic Curtain Tiebacks Black 2pcs, Curtain Tiebacks Buckles Hold…

NICETOWN 100% Blackout Window Curtain Panels, Cold and Full Light Blocki…
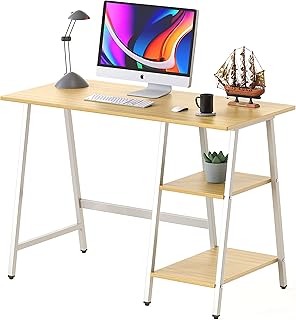
17. Compact Desks

In a small bedroom, you need a desk that fits without crowding the space. A compact desk gives you real work space and keeps the room calm. Choose pieces that do double duty to keep the vibe cozy.
Smart picks for a tiny bedroom
– Choose a compact desk with built-in storage.
– Opt for a wall-mounted or fold-down design to free floor space.
– Pick a desk that can also serve as a nightstand or wall shelf.
– Use organizers, pull-out trays, and small drawers to stay tidy.
– Pair a soft desk lamp with a warm bulb for comfy lighting.
– Choose a chair that tucks under the desk when not in use.
– Let the desk hold a plant, a photo, or a decorative bowl to feel inviting.
Materials matter. For small spaces, pick light colors and slim frames. Light wood or white surfaces read as bigger and calm the room. Metal legs stay light and match many styles. Look for secondhand desks that clean up well. A fresh coat of paint can revive an old piece. Test before you buy. Make sure the desk top is sturdy and the chair fits under it. A small plant or photo adds warmth without crowding.
17. Compact Desks
Editor’s Choice

ODK Small Desk, 27.5 Inch Computer Desk for Small Spaces, Compact Desk w…

Wall Mounted Folding Table 31.5”L x 15.7”W, Laundry Folding Table with H…

Bedside Table Lamp for Bedroom – 3 Way Dimmable Touch Lamp USB C Chargin…
18. Wall-Mounted Nightstands

A wall-mounted nightstand frees floor space in a small bedroom. It keeps a lamp, a book, and a glass within reach without crowding the bed. For safety, mount into wall studs; if you can’t, use strong anchors.
– Floating nightstands with storage — keep essentials tucked away within reach, while a recessed lip prevents items from falling.
– Match your style — choose clean lines for modern rooms or warm wood for rustic vibes, and pick finishes that keep the look calm.
– Top organization — a small tray holds keys, remotes, and glasses, helping you stay tidy.
– Built-in charging — USB ports keep phones and tablets ready without dangling cords.
– Right height — place the nightstand at arm’s reach when you lie down, not too high or too low.
– Cable care — hide cords with a simple wall channel or cord clips, keeping the bed area neat.
– Minimal decor — one plant or a photo helps the space feel calm and open, without crowding the room.
– Easy care — pick smooth surfaces that wipe clean and resist dust, so maintenance stays quick.
This setup makes your tiny room feel bigger, practical, and cozy. You still have a nightstand you can reach at night, and cleaning stays simple.
18. Wall-Mounted Nightstands
Editor’s Choice

Nathan James Jackson Wall Mounted Floating Bedroom Nightstand with Stora…

Nightstand Charging Station with PD 20W USB C, Nightstand Edge Power Str…
![6 Pack Magnetic Cable Clips [Cable Smooth Adjustable] Cord Holder, Under...](https://m.media-amazon.com/images/I/71z427f7WYL._AC_UY218_.jpg)
6 Pack Magnetic Cable Clips [Cable Smooth Adjustable] Cord Holder, Under…
19. Creative Storage Solutions

If your small bedroom feels crowded, smart storage can make a big difference. It frees space and keeps the room cozy. With simple ideas, you hide clutter and still enjoy your space.
– Under-bed storage: Use flat bins or shallow drawers that slide under the bed to hide seasonal clothes and spare blankets.
– Storage bench: At the foot of your bed, a bench provides seating and a hinged lid for blankets, pillows, or shoes.
– Bed with built-in drawers: A frame with drawers keeps daily items tucked away and easy to grab.
– Wall organizers: Install slim pockets, pegboard, or a grid to hold chargers, remotes, and small essentials.
– Storage headboard: A headboard with cubbies or shelves holds a lamp, a book, and bedtime basics within reach.
– Floating shelves: Narrow shelves above the dresser create space for glassware, perfumes, or a small plant.
– Baskets and bins: Place cotton or jute baskets on a low dresser or inside the closet to corral odds and ends.
– Closet tweaks: A compact system with slim rails, clear boxes, and a hanging organizer makes the closet feel bigger.
– Bed risers: Raise the bed a few inches to free space for shallow bins and easy under-bed storage.
With these ideas, your small bedroom stays calm, organized, and easy to live in.
19. Creative Storage Solutions
Editor’s Choice
Budding Joy 90L Under Bed Storage Containers, Closet Organizers and Stor…

SONGMICS MAZIE Collection – 43 Inches Folding Storage Ottoman Bench, Ott…

Fixwal Wall Floating Shelves for Room Decor, 4 Sets Floating Shelves for…
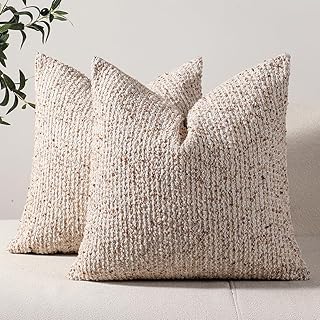
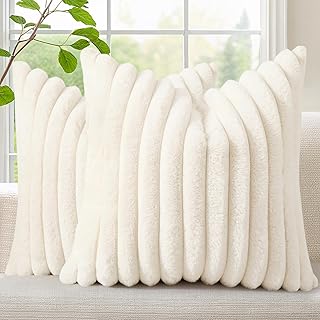
20. Accent Pillows

You want your small bedroom to feel warm and inviting without clutter. Accent pillows are a simple, affordable trick. They bring color, softness, and a lived-in feel to beds, chairs, and window seats. With the right plan, you can switch looks for seasons or moods in minutes. Here are practical ways to use accent pillows that fit a compact space. You can ease into this by starting with a single new pillow and adding more over time.
– Choose a calm base color Pick two main colors that match your bedspread and wall art to keep the look simple and unified.
– Add texture Combine cotton, linen, velvet, or faux fur to make the bed feel inviting. The mix also helps light bounce, so the room feels brighter.
– Mix sizes and shapes Use a 16×16, 18×18, and a 20×20 pillow, with the largest at the back.
– Limit the number Three to five pillows are plenty for a small bed; more can clutter the space.
– Seasonal refresh on a budget Swap pillow covers to change the mood, and wash or store inserts between seasons.
– Smart placement Layer from back to front on the bed or chair, so space feels cozy, not crowded.
– Care and storage Keep things tidy by storing off-season covers in a bin or little drawer.
Remember, small rooms crave restraint. Let each pillow serve two jobs: comfort and a tidy look.
20. Accent Pillows
Editor’s Choice

Topfinel Decorative Throw Pillow Covers Cushion Cases, Set of 4 Soft Vel…

Preboun 8 Pcs 18 x 18 Inch Fresh Colors Decorative Throw Pillow Covers M…

SLEEPING LAMB 120L Extra Large Blanket Storage Bags Breathable Clothes S…
21. Corner Seating

Your small bedroom can feel calm and inviting with a smart corner seating setup. It gives you a cozy nook to read, plan your day, or sip a warm drink. Pick a piece that fits the corner and your style. Keep it compact so you can move easily, and add small touches to boost comfort and function.
– Choose the right piece: Pick a compact chair, a small loveseat, or floor cushions that fit the corner without crowding it. Make sure it feels comfy and is easy to sit in and stand up from.
– Keep it practical: Add a small side table or shelf within arm’s reach for a drink, a book, or a charger. A low table keeps eye level open and space tidy.
– Layer for comfort: Fold in soft throws and a few pillows so the spot feels warm and inviting. Choose textures you love, like knit, velvet, or cotton.
– Decor for depth: Tuck a plant, a small art piece, or a photo nearby to add color and life without crowding. Pair with a light rug to anchor the corner.
– Light it right: Let natural light reach the seat and use light fabrics so the area stays bright. Add a small lamp for evenings and soft ambience.
– Plan the space: Leave at least two feet of clear floor around the setup to keep traffic easy and the corner feeling open. Use color and scale to keep the whole room balanced.
Now you have a cozy corner that makes a small room feel more open.
21. Corner Seating
Editor’s Choice

Yaheetech PU Leather Accent Chair, Mid-Century Modern Armchair with Soli…
VASAGLE Side Table, Small End Table, Tall Nightstand for Living Room, Be…

EDOW Throw Pillow Inserts, Set of 4 Lightweight Down Alternative Polyest…
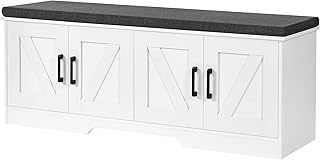
22. Colorful Footwear Displays

You want a punch of color without crowding a small bedroom. A colorful footwear display adds charm and keeps the room lively. Keep it neat so it reads as decor, not clutter. Here are practical ideas you can use today.
Colorful Footwear Displays — Quick Wins
– Arrange your shoes by color or style to create visual harmony.
– Choose a shoe rack that doubles as a bench for extra seating.
– Install wall-mounted shelves for a vertical, space-saving display.
– Rotate seasonal pairs so your display stays fresh.
– Use clear boxes or baskets to protect from dust while showing color.
– Add small LED lights or a warm strip to highlight each pair.
– Pair a low bench with a slim shelf to turn the display into seating.
Think about materials that fit your room. Wood for warmth, metal for a modern touch, or clear acrylic for a light, airy feel.
Keep the rest of the room calm with a low-profile display near a dresser or bed.
With careful care, a colorful footwear display boosts your cozy vibe and stays practical.
You can switch styles as seasons change. Your tiny room can feel big and bright.
22. Colorful Footwear Displays
Editor’s Choice

SONGMICS Shoe Rack Bench, 3-Tier Bamboo Shoe Storage Organizer, Entryway…

Homeiju Hanging Shoe Organizer,2 Pack Wall Mounted Shoe Rack Holds 12 Pa…

Sterilite 12 Pack Storage Box, 6 Quart Stackable Tote, Clear Plastic Con…
You Might Also Like


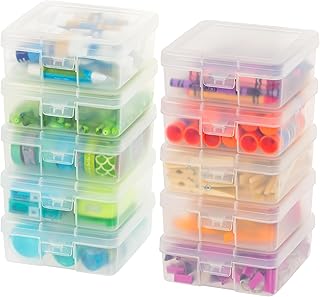
23. Use Colorful Storage Bins

If your small bedroom feels cramped, colorful storage bins can fix that. They add color, hide clutter, and fit in tight corners.
Choose bins that match your decor or bring a bright pop to neutral walls. They can hold clothes, books, toys, and everyday gear. Stackable bins help you use vertical space instead of wasting floor area.
– Decorative bins on shelves add to the look while staying useful.
– Label bins so you can find what you need fast.
– Mix sizes for a lively, varied display.
– Durable, easy-to-clean materials like plastic, coated fabric, or woven fibers stay tidy with little care.
If kids share the room, pick bins with rounded edges and lids for safety.
Set up your bins where you actually use them. Small bins on a short shelf keep eyes up and off the floor. Large bins on the floor hide daily clutter. Under-bed bins offer flat storage for off-season clothes.
Create a simple system to stay neat. Color code by category or family member. Do a quick weekly tidy to return items to their home. Wipe bins with a damp cloth to keep colors bright and surfaces clean.
Colorful storage bins make a small bedroom feel cozier, more organized, and easier to live in.
23. Use Colorful Storage Bins
Editor’s Choice

8 Pack Colorful Storage Bins with Lids Stackable Storage Container for O…

Brother P-Touch, PTD210, Easy-to-Use Label Maker Bundle (4 Label Tapes I…

Under Bed Storage Bins – Pack Of 4 Under The Bed Storage Containers For …
24. Wall Art Gallery

Struggling with a blank wall in a small bedroom? A wall art gallery can add color, texture, and personality without crowding the room.
Choose a simple theme or color palette first. Pick 3 to 5 colors that feel calm in the space. Let those colors show up in frames, mats, and prints.
Mix styles and sizes to keep things lively. You might combine clean line prints with soft photos, or add a favorite quote in a bold frame. Use a consistent frame color or finish to tie everything together.
Decide on your layout. A tight grid creates a modern, tidy look. A loose arrangement with different sizes feels more eclectic and cozy.
Test your plan by laying out paper templates on the wall. Or tape lightweight art with washi tape or mounting putty—no nails, no damage. Swap pieces with the seasons to keep the wall fresh.
Include personal photos alongside art prints for a truly unique story. Think of it as a mini gallery that shows your taste without overwhelming the room.
A well done wall gallery turns a blank space into a welcoming focal point and makes your small bedroom feel bigger and more lived-in. It’s budget friendly, too.
24. Wall Art Gallery
Editor’s Choice

eletecpro 12×12 Picture Frames Set of 9 Classic Gallery Wall Frame Set D…

Gold washi Tape for Wall Decor Decorative Tape Crafts Washy-Tape Mirror …

97 Decor Eclectic Wall Art Prints – 40 Small Eclectic Wall Collage Kit F…
25. Decorative Trays

Is your small bedroom cluttered? A decorative tray can fix that fast. It gathers loose items and adds texture to your space.
Where to place decorative trays
Set trays on your nightstand or dresser so you reach for them easily. They transform a surface full of odds and ends into a clean, intentional display.
– Use trays made of natural materials for a cozy feel.
– Experiment with different sizes and shapes for variety.
– Change the contents with the seasons for an updated look.
– Add a small plant or candle on the tray for warmth.
– A dresser tray creates a tidy surface and a focal point of your decor.
Materials and styles
Choose tray materials that match your room.
– Wood or bamboo adds warmth and a natural touch.
– Woven rattan or seagrass brings texture and character.
– Ceramic or metal can give you a modern or classy vibe.
– For a soft, cozy vibe, pick trays with rounded edges and matte finishes.
– For a clean, minimalist look, choose slim, flat trays in neutral colors.
– If you love a little sparkle, try brass or brushed-gold metal trays.
With the right tray, your nightstand or dresser becomes a neat stage for daily routines and small treasures. Fresh, simple trays can lift your mood and keep your small space calm.
25. Decorative Trays
Editor’s Choice

11.5 Inches Candle Holder Tray Home Decor, Round Wood Tray for Coffee Ta…

Coffee Table Tray Round Rattan Ottoman Tray Woven Serving Trays with Han…

10 x 5 Ceramic Bathroom Tray for Countertop, Decorative Vanity Tray for …
26. Simple Canopy Beds

Is your small bedroom feeling tight? A simple canopy bed can soften the space and give you a warm, inviting focal point without crowding you.
The trick is air. Use a lightweight frame and sheer or light fabric for the canopy so the bed stays airy. A slim silhouette makes the ceiling feel higher and the floor space feel bigger.
How to set it up
– Choose a bed frame with slim posts or a modern metal style for an open look.
– Drape sheer curtains or light fabric around the top to form a soft canopy.
– Pick light bedding in white, cream, or pale gray to boost the canopy effect.
– Keep drapes easy to open so you can catch the morning sun.
Decor tips that work
– String lights woven through the canopy add gentle magic without bulk.
– Use simple textures: a soft throw, a single decorative pillow, natural fibers.
– Choose fabrics that are easy to clean so you don’t worry about upkeep.
Practical considerations
A canopy bed in a small room feels intimate, not cramped. If you close the drapes fully, you may lose light, so tie them back when you want sun. With careful choices, a simple canopy bed becomes a cozy, budget-friendly centerpiece.
26. Simple Canopy Beds
Editor’s Choice

SHA CERLIN Canopy Bed Frame Full Size/Mattress Foundation with Metal Sla…

OWENIE White Sheer Curtains 84 inches Long 2 Panels Set, Sheer White Cur…

Minetom Globe String Lights, 33 Feet 100 Led Fairy Lights Plug in, 8 Mod…
27. Pop of Color with Accessories

Your small bedroom can glow with color without a big price tag. Accessories carry the mood, not a full remodel. You’ll get a lively, personal space that still feels calm.
– Anchor color: Pick one bright shade and carry it through 2–3 items like a pillow, a throw, or a lamp.
– Color in small furnishings: Add a vivid accent on a side table, a vase, or wall art to wake up a neutral backdrop.
– Seasonal updates: Swap pillow covers and a lightweight blanket a few times a year for a fresh feel.
– One or two statement pieces: Let a bold rug or artwork stand out against quiet furniture.
– Balance with neutrals: Pair bold colors with white, gray, or beige so the space stays calm.
If you worry about clutter, keep surfaces simple and place color in a few well-loved spots. A pop of color can make a small bedroom feel bright, welcoming, and styled without breaking your budget.
Practical notes: choose fabrics that feel nice, like cotton, linen, or velvet. Matte finishes help a room feel larger. Look for affordable color pops in lamps, vases, and cushions at thrift stores. If you DIY, swap covers or repaint a small tray. Save a quick color plan on your phone to keep items looking good together.
27. Pop of Color with Accessories
Editor’s Choice
Preboun 8 Pcs 18 x 18 Inch Fresh Colors Decorative Throw Pillow Covers M…

JONATHAN Y JYL1028G Anya 20.5″ Mini Glass LED Table Lamp, Transitional, …

Washable Area Rugs, 5′ x 7′ – 1/6 Thick – Stain & Water Resistant Non-Sl…
28. Cozy Bedspreads

If your small bedroom feels cramped, a cozy bedspread can change the mood. A soft cover wraps the bed in warmth and helps color and texture feel tied together. It adds comfort without crowding the space. These practical tips will help you choose and use a bedspread that fits every season and budget.
– Material matters — choose soft, inviting fabrics like cotton or plush fleece.
– Year-round warmth — use a base bedspread plus a lighter layer for summer and a heavier one for winter.
– Layering adds depth — start with a snug base, add a mid-layer, then a throw over the foot.
– Reversible options — pick two looks in one piece.
– Seasonal patterns — swap in stripes, plaid, or floral as the seasons change.
– Color anchors — choose shades that echo walls, furniture, and rug.
– Finish with texture — add a few plush pillows and a cozy throw to complete the look.
– Care basics — pick machine-washable fabrics that hold up to nightly use.
– Budget-smart picks — hunt for sales, thrift finds, or solid colors that last.
A well-chosen bedspread makes your small room feel warm, coordinated, and ready for rest.
28. Cozy Bedspreads
Editor’s Choice

Bedsure 100% Cotton Quilt Set – Queen Size Bedspread, Lightweight Soft B…

3 Pieces Quilt Set Full/Queen Size, Beige Floral Reversible Bedspread Co…

Bedsure GentleSoft Fleece Throw Blanket for Couch Grey – Lightweight Plu…
29. Soft Wall Textures

Soft wall textures make a small bedroom feel warm and welcoming. They add depth and soften edges, so the space seems calmer. Choose easy, removable options to keep your budget flexible. You can start with one feature wall and add texture later if you want more coziness. Textures are easy to change later as your style shifts. Renters can use removable options without leaving marks.
– Fabric panels: Fabric panels on the wall create a plush, cozy surface. Mount them with removable strips so you can swap colors later. You can pick a texture that matches your bedding.
– Wall decals: Wall decals add texture fast without heavy material. Apply them in a panel or along an edge to echo the room.
– Textured paint finishes: Textured paint gives depth on a single wall. Try sponge, rag roll, or a gentle stucco for subtle charm.
– Textured wallpaper: Peel-and-stick textured wallpaper is budget friendly. Choose grasscloth or embossed patterns to soften light. Let it guide your accents in rugs and pillows.
– Layer different materials: Layer two soft textures on one wall for depth. Add fabric panels plus a wood slat accent to tie it together.
– Color and lighting balance: Warm neutrals with a touch of color feel cozy. Pair soft lighting, like dimmable lamps, to deepen the textures. It also softens echoes in small rooms.
29. Soft Wall Textures
Editor’s Choice

Upholstered Wall Mounted Headboard, 3D Soundproof Wall Panels Peel and S…

Beige Grasscloth Peel and Stick Wallpaper Textured Contact Paper 15.7inc…
Bedside Table Lamp for Bedroom – 3 Way Dimmable Touch Lamp USB C Chargin…
30. Seasonal Decor

In a small bedroom, seasonal ideas pay off. When you shift the look with the seasons, the room feels fresh without a lot of work. You get variety, not clutter. Start with a simple base: a neutral duvet, plain curtains, and a clean wall. Then add a few seasonal notes that lift the space.
– Fall colors in October by swapping in a burnt orange pillow and a cozy rust throw.
– Spring brightness with soft pastels and a light plantscape to lift the mood.
– Holiday touches for special days, like a twinkling string light or a small table decor piece.
– Rotate candles, plants, and small wall art as the year changes, so the room shows a new face without bulky changes.
Keep a small open shelf or basket to hold your seasonal items. It keeps things simple and your bedroom neat. Store off-season decor in clear bins so swaps move fast.
Choose cozy fabrics like cotton throws and wool pillows. Tie colors to your base sheets—navy, cream, or sage. When you shop, buy one new piece each season—a cushion cover, a plant, or a candle.
Seasonal decor helps your cozy bedroom grow with you all year. Give it a try this week.
30. Seasonal Decor
Editor’s Choice

Bedsure Gentlesoft 100% Cotton Large Throw Blanket for Couch 50×70 inche…

Pack of 2 Corduroy Decorative Throw Pillow Covers 18×18 Inch Soft Stripe…

addlon 50FT LED Outdoor String Lights with Edison Shatterproof Bulbs, We…
Conclusion

Transforming your small bedroom into a cozy haven doesn’t have to be expensive or complicated.
With these 30 budget-friendly ideas, you can create a warm and inviting space tailored to your style.
Embrace the cozy vibes and let your small bedroom become your favorite retreat at home!
Note: We aim to provide accurate product links, but some may occasionally expire or become unavailable. If this happens, please search directly on Amazon for the product or a suitable alternative.
This post contains Amazon affiliate links, meaning I may earn a small commission if you purchase through my links, at no extra cost to you.
Frequently Asked Questions
What are some budget-friendly ways to make my small bedroom cozy?
You can create a cozy atmosphere in your small bedroom without spending a fortune! Start with layered textiles like soft blankets and cushions to add warmth. Incorporate soft lighting to create a calming ambiance, and consider using under-bed storage solutions to keep clutter at bay while maximizing space. These simple touches can transform your room into a warm retreat!
How can I use color to enhance the coziness of my small bedroom?
Color plays a vital role in making small rooms feel cozy! Opt for warm color palettes like soft yellows or earthy reds to add life without overwhelming the space. You can also add pops of color through accessories or accent pillows to brighten up your room while maintaining a calm vibe. Just remember to keep the overall balance to avoid crowding the area!
What are some creative storage solutions for small bedrooms?
Maximizing storage in a small bedroom can be both practical and stylish! Try using floating shelves to display books and decor without taking up floor space. Wall-mounted nightstands can also free up valuable room while keeping essentials accessible. Don’t forget to utilize colorful storage bins to organize items neatly while adding a fun splash of color to your decor!
Can DIY decor really make my small bedroom feel cozier?
Absolutely! DIY decor can add a personal touch and warmth to your small bedroom. Consider creating DIY wall art to showcase your style and bring color to the walls. You can also make decorative trays to organize loose items while adding texture to your space. These personalized elements not only enhance coziness but also make your bedroom feel uniquely yours!
What types of furniture work best in a small and cozy bedroom?
For small bedrooms, minimalist furniture is key! Look for compact pieces that serve multiple functions, such as a compact desk or a bed with built-in storage. Corner seating can create a cozy nook without crowding the space. By choosing furniture wisely, you can maintain a warm and inviting atmosphere while optimizing every inch of your room!
Related Topics
small bedroom decor
cozy bedroom ideas
budget friendly
DIY wall art
minimalist furniture
under-bed storage
soft lighting
warm color palettes
creative storage
vintage finds
easy updates
seasonal decor


![Joben Oligey 3 Set [Extra Large] Hanging Wall Baskets ,Wire Basket For S...](https://m.media-amazon.com/images/I/81wfSbFkk0L._AC_UL320_.jpg)