Here is why I made this post. A sunny front yard greets you before you step inside, and I want that warm, welcoming feeling to be available to more people. I know choosing which flowers to plant can feel overwhelming. This guide gives you a clear, doable plan with practical ideas you can start today. It speaks to real yards, real budgets, and real life.
Who this is for If you want a front yard that feels calm and colorful, this is for you. This guide is for busy homeowners, beginners, and renters who crave simple ideas that actually work outside the brochure. You’ll find styles that fit small spaces, full sun, or shady corners, with tips that stay practical and easy to follow.
What you’ll get A complete set of 28 flower bed ideas you can mix and match. You will see ideas broken down by style, space, and sun or shade so you can plan fast. Each idea includes plant suggestions, edging notes, and a rough maintenance plan that won’t overwhelm you.
Let’s break it down into a simple workflow. Start with a quick map of your space and a small budget. Choose a color palette that repeats across beds so everything ties together. Layer plants by height so tall blooms sit back and shorter ones fill in the front. Keep mulch and irrigation simple so you spend less time watering and weeding.
You can pick native and drought tolerant options to save water. The ideas cover cottage charm, modern clean lines, and playful pockets for pollinators. Real yards need real care, so I point out easy maintenance and smart timing. Plan for seasonal color with a mix of spring, summer, and fall bloomers so your front yard stays lively.
Ready to get started? Pick one bed or a couple of containers this weekend. Next steps are simple: map the space, choose a color plan, and plant. Use the tips here to build a front yard that feels alive, welcoming, and truly yours.
Contents
- 1. Cottage-Style Flower Bed
- 2. Zen Garden Flower Bed
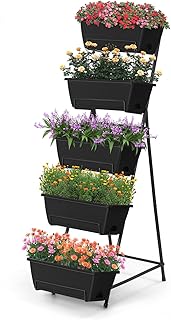
- 3. Raised Bed Gardens
- 4. Edible Flower Gardens
- 5. Modern Minimalist Flower Bed
- 6. Wildflower Meadows
- 7. Formal Flower Beds
- 8. Butterfly Gardens
- 9. Seasonal Flower Beds
- 10. Shade Flower Beds
- 11. Themed Flower Beds
- 12. Vertical Flower Beds
- 13. Pollinator-Friendly Flower Beds
- 14. Color Block Flower Beds
- 15. Drought-Tolerant Flower Beds
- 16. Vintage Flower Beds
- 17. Container Flower Beds
- 18. Rustic Flower Beds
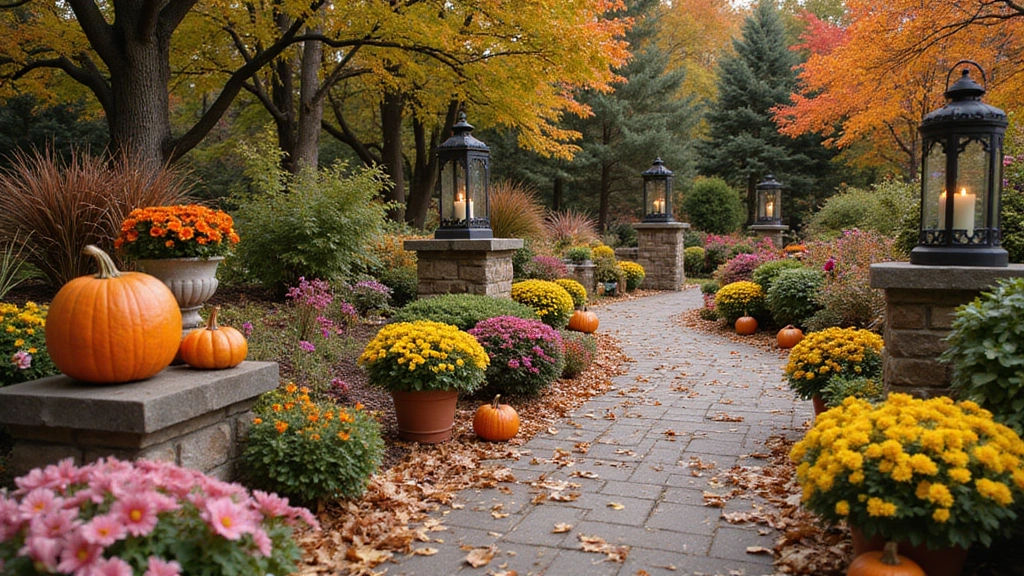
- 19. Colorful Border Flower Beds
- 20. Mixed Perennial Flower Beds
- 21. Mosaic Flower Beds
- 22. Fairy Gardens
- 23. Rock Gardens with Flowers
- 24. Seasonal Displays with Annuals
- 25. Creative Pathway Flower Beds
- 26. Luxury Flower Beds
- 27. Colorful Succulent Flower Beds
- 28. Whimsical Flower Beds
1. Cottage-Style Flower Bed

You want a front yard that feels warm and inviting. A cottage-style flower bed gives you that charm with little fuss. It relies on soft shapes, friendly colors, and a relaxed mood. You mix plants you love and let them mingle.
Here is why it works. The look stays casual but still stylish. Taller blooms go at the back, low growers at the front. You get depth without sharp edges.
Layer it this way. Place tall flowers like hollyhocks at the rear. Put mid-height choices in the middle. Crest the edge with creeping thyme, daisies, or low shrubs.
Mix and match for color and life. Perennials such as black-eyed Susans blend with annuals like marigolds. Add herbs for scent near a path or seating area. A touch of lavender or rosemary makes the air feel fresh.
Tips for a Cottage-Style Flower Bed:
– Choose a variety of shapes and sizes for plants.
– Include a few herbs for added fragrance.
– Allow plants to self-seed for a natural look.
This approach makes your front yard feel cozy and welcoming all season.
1. Cottage-Style Flower Bed
Editor’s Choice

EasyFlex No-Dig Landscape Edging with Anchoring Spikes, 2.7 in Tall Deco…

Back to the Roots Organic Flowers Seeds Variety (5-Pack)

Ahopegarden Indoor Garden Hydroponics Growing System: 10 Pods Plant Germ…
2. Zen Garden Flower Bed

You want calm in your front yard. A Zen garden flower bed gives you a peaceful corner you can enjoy daily. It relies on clean lines, a soft color scheme, and just a few hardy plants. The look stays tidy with simple materials like stone and gravel. You’ll feel the quiet as you walk past.
Here is why it works. It keeps clutter away while using space well. It’s easy to care for and stays fresh with only a little work. The design invites slow, mindful moments in your busy day. You can enjoy the texture of gravel, the scent of hardy plants, and the gentle sway of ornamental grasses.
Key elements for a Zen garden
– Low-maintenance plants that stay neat
– Rocks and gravel outline beds and paths
– A small bench or seat for quiet moments
– A tiny water feature to add gentle sound
– Edge with a slim border to keep lines crisp
To keep the space feeling calm, pick a simple color palette and use different plant heights to add depth. A clean, uncluttered look works best.
Next steps
– Measure your space and choose a sun or shade spot
– Gather stones, gravel, a bench, and a light edging
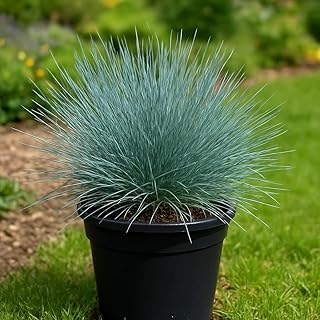
– Pick easy plants like sedum, blue fescue, thyme
– Place two large rocks as anchors, then fill in with smaller stones
– Add a simple seating area for rests
With a Zen bed, your front yard becomes a quiet, welcoming place that fits any home.
Create a Zen garden flower bed in front of your house to invite tranquility. Just a few hardy plants, clean lines, and soft colors can turn your yard into a peaceful retreat with minimal upkeep!
2. Zen Garden Flower Bed
Editor’s Choice

2LB Succulent and Cactus Gravel Pebbles, 1/5 Inch Natural Decorative Pol…

Garden Bench,Outdoor Benches,Iron Steel Frame Patio Bench with Mesh Patt…

31.9″ S-Shaped Water Outdoor Fountain–Modern Cascading Waterfall Feature…
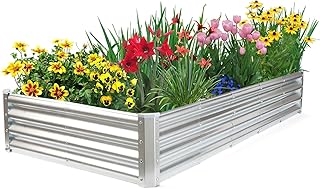
3. Raised Bed Gardens

Here is why raised bed gardens fit busy yards. You want a front yard that looks neat and stays easy to care for. Raised beds do that. They guard against soggy ground and dry patches. They make planting simple for beginners and pros alike.
You can use wood, bricks, or stones. Wood adds warmth. Bricks give a clean line. Stone adds a natural touch. Each option improves drainage and soil quality. Fill them with blooms or mix flowers with vegetables for a small kitchen garden.
Benefits of Raised Beds:
– Easier on your back and knees when you bend to plant.
– You control soil quality and drainage.
– They fit nearly any space, big or small.
A raised bed makes your yard look tidy and inviting.
Here is how to set one up. Aim for a height of 12 to 18 inches. Keep it 3 to 4 feet wide so you can reach the center. Length should fit your space.
Fill with a simple mix: two parts topsoil, one part compost, and a touch of perlite or sand. Mulch on top keeps moisture in and weeds out. A drip hose or soaker hose makes watering easy on hot days.
Next steps: plan your layout, choose a material you love, and mark the edges in your yard. Start small if you’re new to beds, then expand later.
3. Raised Bed Gardens
Editor’s Choice

Land Guard Galvanized Raised Garden Bed Kit, Galvanized Planter Garden B…
Gilmour 5/8″ x 50′ Round Weeper Soaker Hose for Garden Beds, Drip Irriga…

Michigan Peat Compost and Manure Blend, Garden Magic Mix with Odor-Free …
4. Edible Flower Gardens

Here is why edible flower gardens make sense for a front yard. They lift curb appeal and give you small delights you can taste. Nasturtiums, pansies, and violets brighten the beds beside traditional flowers. They look cheerful and offer a gentle peppery or sweet note in foods. You can snack on a few petals or use them as pretty garnish for salads and desserts. This approach keeps your yard lively and useful.
Let’s break it down. Start with plants that fit your climate and sun. Mix edible flowers with herbs for a fresh look and easy care. Plan where to harvest so you can reach the flowers without bending too much.
Growing Tips:
– Use organic soil and compost to feed the plants.
– Plant edible flowers with herbs for a colorful, mixed bed.
– Learn which parts are edible and how to harvest safely.
– Water at the base to avoid wet leaves and diseases.
Incorporating edible flowers can boost both your cooking and your home’s first impression. You get color, scent, and flavors you can share at the table. Next steps: choose a few easy options, set a small test patch, and watch them bloom. Try a simple bed this season and notice the difference.
4. Edible Flower Gardens
Editor’s Choice

Back to the Roots 100% Organic Potting Mix (Value 12 Quart) | Premium Bl…

9 Herb Indoor Garden Kit – Unique Kitchen Gift for Women, Men, Mom, Frie…

Fiskars Ergo Cultivator for Digging, Aerating Soil, and Weeding, Heavy D…
5. Modern Minimalist Flower Bed

You want a front yard that looks fresh with less work. A modern minimalist flower bed can give you that. It uses clean lines, simple shapes, and a calm color scene. Here is why it works: it blends with most home styles and stays easy to maintain.
– Design basics Start with a footprint that has straight edges. Let the bed run parallel to your house or sidewalk. Keep gaps small so the bed feels tidy.
– Color discipline Pick white, greens, and one accent color. This keeps the look quiet and classy.
– Plant choices Choose 3 to 5 plants with strong forms. Try white peonies for a soft bloom, deep purple irises for contrast, and evergreen boxwood or compact grasses for year‑round shape.
– Arrangement Group plants in simple blocks or neat rows. Let air spaces guide the eye and avoid clutter.
– Textures Use smooth planters and flat stones or a quiet wood edging. The contrast adds depth without crowding the scene.
– Care Mulch to keep soil cool and tidy. A light drip line or timer helps you water just enough.
With these steps, your front yard gains a calm, stylish look that still feels welcoming. Next steps: measure the space, sketch a plan, choose 2–3 plant types, and set up edging and planters.
5. Modern Minimalist Flower Bed
Editor’s Choice

EasyFlex No-Dig Landscape Edging with Anchoring Spikes, 2.7 in Tall Deco…

Rain Bird DRIPKITBAG Drip Irrigation Repair and Expansion Kit

Window Box Planter, 7 Pack Plastic Vegetable Flower Planters Boxes 17 In…
6. Wildflower Meadows

You want a front yard that stays lively without taking over your weekends. A wildflower meadow can do that. It adds color and life to your steps outside while you spend less time on upkeep. You’ll attract bees, butterflies, and birds, all while your yard looks inviting.
Benefits of Wildflower Gardens:
– Very low maintenance once established
– Attracts pollinators and wildlife
– A wide mix of color through the seasons
Here is why it can fit your home: native plants grow well in your climate, they use less water, and they improve your curb appeal with a natural, soft look.
Next steps to get started:
– Pick a sunny patch that gets at least six hours of sun each day
– Choose a native seed mix plus a few perennials for color year after year
– Prepare the soil by clearing weeds and loosening the top 6–8 inches
– Sow seeds evenly or plant plugs, then press lightly and water gently
– Mulch with a thin layer to keep moisture in and reduce weeds
– Care in the first season: keep the bed moist but avoid standing water
– After blooms fade, mow only once a year, in late winter or early spring, to refresh growth
If you wonder about how it will look, know this: a diverse mix fills in over time and stays neat with a simple routine. If you have pets, choose sturdy natives that can handle light traffic and occasional nibbling. With steady care, your front yard gains beauty and a friend in local wildlife.
6. Wildflower Meadows
Editor’s Choice

Burpee Wildflower 25,000 Bulk, 1 Bag, 18 Varieties of Non-GMO Flower See…

Sun Joe Electric Corded Garden Tiller & Cultivator, Steel Tines, 13.5 Am…
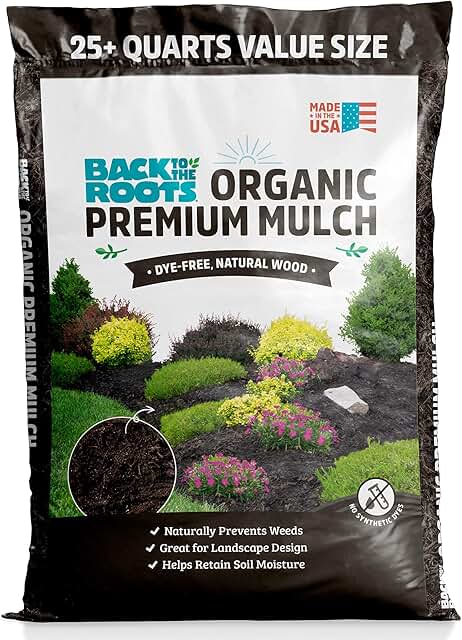
Back to the Roots 25.7qt (1 Cubic ft) Organic Premium Mulch
7. Formal Flower Beds

You want a front yard that feels calm and orderly. A formal flower bed can give you that look. It relies on straight lines, clean borders, and careful plant choices. Picture boxwoods framing bright tulips or roses tucked into a neat grid. The effect is timeless and confident, like a well-kept entry that welcomes guests. You gain year‑round shape that reads as a single design. It isn’t flashy all season, but it stays crisp from spring through fall. If you love planning and keeping things tidy, this style fits you.
Creating Formal Flower Beds:
– Use evergreen shrubs to form the backbone, such as boxwoods, yews, or hollies. They hold their shape and give you steady structure.
– Create straight lines and balanced sections with stakes and string. Do the layout first, then plant to the plan.
– Pick a simple color plan and repeat textures to keep a calm rhythm. Limit color to two or three hues.
– Trim and edge regularly to keep the lines clean and symmetry intact. Prune gently to maintain shape without fighting growth.
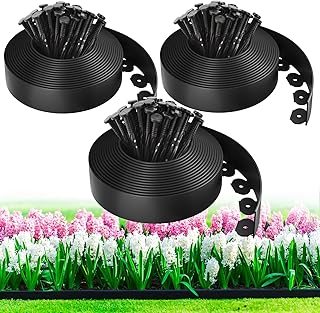
– Add a clean edge with brick, metal, or sturdy plastic to keep the borders sharp. Mulch after planting to hold soil and moisture.
Formal beds add curb appeal with quiet authority. They frame your home and guide the eye to the entry.
Next steps: map your space, choose plants, and start with a small border to practice. With time, the lines will feel right and your front yard will look ready for guests.
7. Formal Flower Beds
Editor’s Choice

Wintergreen Boxwood – Includes Planting Kit (1 Gallon (8-Pack))
![Landscape Edging 33FT,Garden Edging Borders [Extra Tall 4IN High] Flexib...](https://m.media-amazon.com/images/I/616o5JwXoYL._AC_UL320_.jpg)
Landscape Edging 33FT,Garden Edging Borders [Extra Tall 4IN High] Flexib…
Back to the Roots 25.7qt (1 Cubic ft) Organic Premium Mulch
8. Butterfly Gardens

Butterflies brighten any yard. If you want color that moves, a butterfly garden is for you. You’ll invite fluttering guests all season long.
Here is why it helps your landscape. Butterflies pollinate flowers and help other wildlife show up. They move pollen and make blooms thrive. Choose native plants when possible; they fit your climate and pull in more local butterflies.
Start with nectar-rich plants. Choose a mix that keeps butterflies fed and your beds lively. Good picks are butterfly bushes, coneflowers, and milkweed. Add a few flat stones so they can bask, and a small water feature for a quick drink.
Butterfly Garden Essentials:
– Plant a steady stream of blooms for continuous color.
– Keep the garden chemical-free to protect butterflies.
– Choose sunny spots and add some shelter from wind and cold nights.
A butterfly garden is more than color. It becomes a tiny habitat that boosts pollinators and helps your yard feel alive.
Next steps:
– Place your bed in full sun most of the day.
– Space plants so butterflies can land and move easily.
– Include native varieties to attract local species.
– Use a shallow dish or small fountain to provide water.
With a little care, your butterfly garden welcomes wings to hover by, adds season-long color, and supports the local ecosystem.
8. Butterfly Gardens
Editor’s Choice


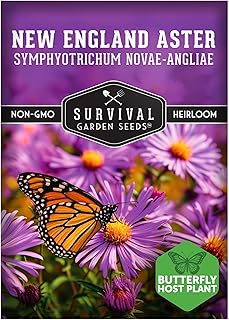
Seed Needs, Milkweed Seed Packet Collection to Attract Monarch Butterfli…

Daoeny 35In Metal Bird Bath for Outside, Vintage Freestanding Birdbaths …
9. Seasonal Flower Beds

You want flowers that stay fresh in your front yard all year. Seasonal flower beds make that possible. Start with bulbs for spring. Add summer annuals for bright days. Finish with fall perennials that come back. The result is steady color and texture through every season.
Here is why it works: you keep the look you love while changing only a few plants.
What seasonal flower beds do for you:
– Year round color with three simple layers: spring bulbs, summer annuals, fall perennials.
– Easy care because perennials stay in place and annuals fill gaps.
– Creative mood and style by swapping colors each year.
Seasonal Flower Bed Tips:
– Plan ahead for seasonal changes so you are never surprised.
– Mix early, mid, and late bloomers for continuous color.
– Rotate plants each year for variety and to test new combinations.
– Choose a simple color palette and repeat it across seasons to tie the look together.
– Group plants by sun and water needs to keep care easy.
– Mulch, feed soil with compost, and water deeply but infrequently.
– Add a lightweight border to guide the eye and define beds.
Changing the beds keeps your front of house fresh with every season.
9. Seasonal Flower Beds
Editor’s Choice
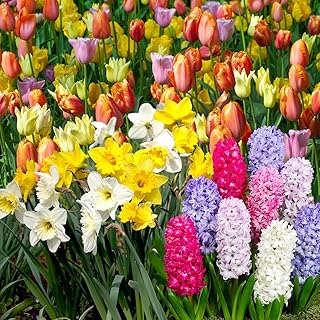
Complete Spring Flower Bulb Garden – Mixed Tulips, Daffodils & Hyacinths…
Burpee Wildflower 25,000 Bulk, 1 Bag, 18 Varieties of Non-GMO Flower See…

Russell Lupine Seeds Perennial – Grows 40″ Tall – Perennial Wildflowers …
10. Shade Flower Beds

Struggling with a shady yard? You can still grow a colorful, welcoming flower bed. Shade spaces can glow with color if you plan well and pick the right plants.
Here is why shade beds work. They stay cool in hot weather, make a calm yard corner, and add texture with bold leaves and soft fronds. Next steps are simple and doable.
– Plan a color story. Pick two or three shade-friendly hues you like and stick to them so the bed feels cohesive.
– Choose shade lovers. Hostas give big leaves, ferns add movement, and astilbes bring pinks and whites. Add heuchera for leaf color and pulmonaria for patterned foliage.
– Layer for depth. Put tall plants at the back, medium height in the middle, and ground covers in front so every plant shows.
– Lighten the space with pale blooms. Whites and pale pinks bounce what light you have and brighten the shade.
– Use containers. Moveable pots at the edges bring extra color and design. Choose planters that tolerate low light.
– Mix textures. Pair glossy leaves with airy fronds and bouncy flower stems to keep the bed interesting all season.
– Finish with mulch and simple edging. A neat edge helps the bed look polished.
Next steps: prep the soil, add compost, and water regularly. Deadhead spent blooms to keep things tidy.
With the right plants and layout, your shade flower bed can be a vivid part of your front yard.
10. Shade Flower Beds
Editor’s Choice

100+ Hosta Seeds for Planting Outdoors, Rare Perennial Flower Seeds, Sha…

PL00BK Classic Traditional Plastic Urn Planter, Black

Back to the Roots 25.7qt (1 Cubic ft) Organic Premium Mulch
11. Themed Flower Beds

Want a front yard that feels personal without a lot of work? Themed flower beds let you tell a small story with color, shape, and texture. They guide your plant choices and keep maintenance simple. A clear mood boosts curb appeal and makes your yard feel inviting.
Three starter themes
– Tropical theme: Think bold greens and bright flowers. Plant hibiscus, bird of paradise, and croton for pops of color. Add driftwood or smooth stones to echo a breezy sea vibe. This look thrives in full sun and warm spots.
– Vintage garden: Soft pinks, whites, and classic blooms like roses and foxglove shine here. Use chipped terracotta pots and a weathered bench for charm. Keep a restrained color palette for a timeless feel.
– Rustic garden: Native grasses and wildflowers create a relaxed field edge. Pair with rough-edged stones and a piece of rough wood. Choose drought-tolerant perennials for easy care.
Here is why these ideas work for many homes. They use simple materials and fit small or large spaces. They also offer easy paths for adding seasonal color.
Next steps: map your space, pick one theme, and gather key accents. Start small this weekend, then expand as you like.
11. Themed Flower Beds
Editor’s Choice

4 Inch Terracotta Pot with Saucer – 6 Pack Small Clay Plant Pots with Dr…

Drought Tolerant Wildflowers Mix – Bulk Quarter Pound Bag – Over 30,000 …
You might also like


12. Vertical Flower Beds

Facing a tight front yard? Vertical flower beds let you grow more blooms without stealing ground space. They use wall planters, trellises, or hanging pots to hold plants up and away from the soil. You gain height and drama, plus color that catches the eye from the curb.
What to plant? Start with climbers. Morning glories, climbing roses, or clematis climb skyward and bring instant drama. For a softer touch, choose trailing plants that spill over the edge in a color cascade.
Vertical Gardening Tips:
– Make sure taller plants get enough sunlight so they stay strong.
– Mix leaf shapes, sizes, and textures for visual interest.
– Use light-colored walls, mirrors, or reflective mulch to bounce more light onto the blooms.
Vertical beds are surprisingly versatile. They work on fences, brick walls, or the side of a garage. They keep soil healthy by letting you tailor watering and drainage. With the right setup, you can swap in seasonal blooms to suit the year and your style.
Plus you can run a simple drip line to reach every level.
Be mindful of weight on walls and use sturdy brackets and anchors.
Next steps: plan your space, pick a sturdy mounting option, and test a few plant pairings. Start small and expand as you learn what thrives in your yard.
Transform your front yard with vertical flower beds! They let you unleash vibrant blooms without taking up precious ground space. Elevate your garden game and watch your curb appeal soar!
12. Vertical Flower Beds
Editor’s Choice
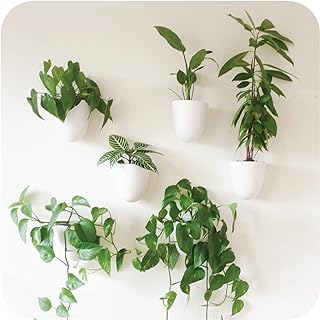
PlantPod Luxe – Self-Watering Wall Planters (Set of 6) – Easy to Water a…

Garden Obelisk Trellis for Climbing Plants Outdoor 6 Ft Rose Bush Round …
Rain Bird DRIPKITBAG Drip Irrigation Repair and Expansion Kit
13. Pollinator-Friendly Flower Beds

Want a front yard that hums with life? A pollinator-friendly flower bed can do it. You get color, motion, and help for local bees and birds.
– Start with plants that attract bees, butterflies, and hummingbirds.
– Zinnias, bee balm, and salvia are easy starters.
– Add natives like blanketflower, echinacea, and agastache if you have room.
– Plant in tight clusters so blooms read from the street.
Layer your bed for year-round interest. Tall plants go in back, mid-height in the middle, and low edging in front. This layout is simple to care for and looks polished.
Add a water source. A shallow dish with smooth stones gives tiny visitors a safe sip.
Pollinator Garden Tips:
– Avoid pesticides to keep pollinators safe.
– Choose native plants for best results in your area.
– Provide a mix of shapes and colors to feed different species.
– Offer shelter with a small shrub, grasses, or a log pile for resting.
A pollinator-friendly bed boosts curb appeal and brings a busy, lively feel to your home.
If space is tight, start with a narrow border bed near the doorway. You still get color and pollinators.
Mix annuals for quick color and perennials for staying power.
13. Pollinator-Friendly Flower Beds
Editor’s Choice
Burpee Wildflower 25,000 Bulk, 1 Bag, 18 Varieties of Non-GMO Flower See…

PSW Pot Collection AP25C 10-inch Plastic/Stone/Wood Composite Plant Sauc…

14. Color Block Flower Beds

Are you hoping for a front yard that catches eyes with less work? Color block flower beds can do that. You group flowers in clean blocks or stripes. From the curb, they read as a bold yet tidy design.
Plan your color blocks
– Pick 2–4 colors that work well together and keep a simple palette.
– Choose plants that bloom around the same time so one block stays lively longer.
– Add variety in leaves and stems to keep each block interesting after the blooms fade.
Layout and edges
– Plant in straight rows, squares, or wide stripes for a crisp look.
– Use a clear edge, with brick, metal, or wood, to separate blocks.
– Keep plant sizes similar and space blocks evenly for a neat rhythm.
Care and timing
– Start with good soil and a light mulch. This helps roots grow strong.
– Water deeply as the bed establishes, then steady as needed.
– After blooms fade, replace with fresh flowers or switch to a matching foliage plant.
Common issues
– Sun and shade vary by spot. Choose sun-loving plants for sunny areas and shade-tolk erant ones where light is scarce.
– If a color looks thin, swap in a matching plant to keep the block balanced.
Next steps: sketch a quick plan on paper, note sun and shade spots, and visit a local nursery for color-block options. With a bit of planning, you’ll have a front bed that looks fresh and polished all season.
14. Color Block Flower Beds
Editor’s Choice

Amazon Basics Landscape Edging Coil, pack of 10 Stakes, 5 inch x 40FT, B…
15. Drought-Tolerant Flower Beds

If you want a front yard that looks great and uses less water, drought-tolerant flower beds are a smart pick. Start with plants that love dry soil. Native varieties and succulents shine in hot weather, such as lavender, sedum, and agave. They drink water slowly and need little care. Add decorative stones or mulch to slow moisture loss and keep roots cool. The result is color, texture, and a calm feel without heavy irrigation.
Here is how to set it up.
What to plant
– Group plants with similar watering needs together.
– Try xeriscaping to save water and make upkeep easier.
– Plan for seasonal changes so the bed stays pretty all year.
Drought-tolerant beds bring curb appeal and practical benefits. They reduce water use, lower maintenance, and still give you a lively front yard. With a little planning, you’ll enjoy blooms through heat and drought without a lot of work.
Transform your front yard into a stunning oasis with drought-tolerant flower beds! Choose native plants that thrive in dry conditions, and enjoy a beautiful, low-maintenance landscape that saves water and time.
15. Drought-Tolerant Flower Beds
Editor’s Choice

15 lbs White Rocks for Landscaping, 1-2 inch Decorative Rocks for Plants…

Garden Weed Barrier Landscape Fabric,Weed Block Fabric Heavy Duty 3.2OZ,…
16. Vintage Flower Beds

You want a front yard that feels warm and alive. Vintage flower beds give that look. They echo the past and fit your home today. This style fits small spaces too and boosts curb appeal. If you are new to gardening, start with one bed, then grow. Keep colors soft and avoid too many flashy pieces. Let the garden age with you.
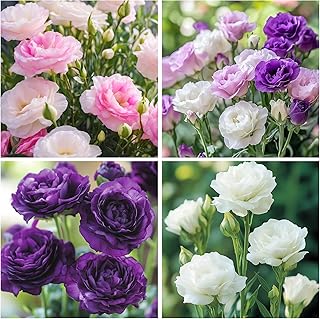
Here is why they work. Choose classic blooms like peonies, hollyhocks, and delphiniums. Pair them with rustic touches like old garden tools, chipped pots, or a weathered trough. Soft pinks, creams, and lavenders blend softly.
Tips for Vintage Flower Beds:
– Choose heirloom varieties for a true old-time look.
– Use rustic containers and simple decorations.
– Keep the layout informal to stay inviting.
Put it into practice:
– Plant tall blooms at the back, mid-height in the middle, and low spreads in front for depth.
– Mix bloom times so color lasts from spring to fall.
– Add a small touch, like a bench or a weathered edge, to nod to old gardens.
Care tips:
– Keep tools organized and avoid clutter.
– Mulch to slow weeds and keep colors bright.
Next steps:
– Scout a sunny spot, gather a few weathered pieces, and start with one small bed.
With a little care, this vintage look stays inviting for years.
16. Vintage Flower Beds
Editor’s Choice

HOME GROWN 𝗨𝗦𝗔 𝗣𝗥𝗘𝗠𝗜𝗨𝗠 Zinnia Dahlia Seeds Pack for 2026 – 524…
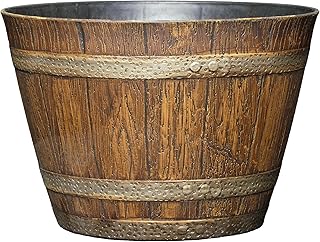
Classic Home & Garden Whiskey Barrel Planters – Wooden Finish Flower Pla…

Kynup Garden Tools 7-Piece, Gardening Hand Tools, Gardening Tools Set Cu…
17. Container Flower Beds

Stuck with a small yard or no soil at all? Container flower beds give you a real garden feel in a tight space. Use pots, barrels, or hanging baskets to build a living wall or a colorful tabletop display. These beds move with you, so you can change the look when you want.
Here is why they work:
– They fit small spaces and can cover a bare corner.
– They let you mix plants for a bold splash or keep a calm color scheme for a cohesive look.
– They lift flowers up to eye level, so you can enjoy blooms and scent from the doorstep.
Container tips:
– Ensure containers have proper drainage so roots stay happy.
– Use good potting soil, not just garden soil.
– Change flowers seasonally for freshness. Mix spring blooms with summer greens and fall textures.
Container beds add charm and flexibility to your front yard. They welcome guests with color and scent, even if you can’t dig a big garden.
Next steps: pick one sturdy container, fill it with potting soil, and plant a few easy options like petunias, herbs, or small geraniums. Group a few pots at the path edge or hang a basket on a porch post. Rotate plants as the seasons shift to keep things lively.
17. Container Flower Beds
Editor’s Choice

Indoor Self Watering Planters with Drainage Holes and Saucers, 8, 7, 6.5…
Back to the Roots 100% Organic Potting Mix (Value 12 Quart) | Premium Bl…

10 inch Hanging Planters for Indoor Outdoor Plants, 2 Pack Hanging Flowe…
18. Rustic Flower Beds

Your front yard deserves a look that feels simple and true. Rustic flower beds deliver that vibe. They blend with the ground and stay easy to care for.
Choose honest materials: wood, stone, and reclaimed brick. Use them as edging, steps, or a small border. They age well and add texture that makes the bed feel warm and real.
Pick plants that fit your area. Wildflowers and native perennials thrive with less work. Add a few grasses or low groundcovers for movement and year-round flavor. The mix helps the bed look natural, not tidy.
Here is how you start. Sketch the bed shape on paper, then walk your yard to see sun and shade. Note where water collects after a rain. Choose 2 or 3 main plants and a couple of fillers.
Building a Rustic Flower Bed:
– Follow natural curves and uneven edges.
– Mix textures and colors for depth and interest.
– Let plants fill in and grow together rather than strict rows.
Care and Maintenance:
– Lay out stones first to guide shape.
– Prepare good soil and mulch to hold moisture.
– Water in the morning and avoid overwatering.
– Seasonal pruning keeps the bed loose and neat.
A rustic bed adds charm to your front yard and stays friendly to your time and wallet.
Rustic flower beds in front of your house bring a warm, inviting touch to your yard. Embrace nature with simple materials and native plants for a low-maintenance beauty that thrives through the seasons!
18. Rustic Flower Beds
Editor’s Choice

Beuta Landscape Edging | Garden Edging Border | Faux Stone Bricks for La…

California Wildflower Mixture – Bulk 1 Ounce Packet – Over 7,000 Native …

100% Natural Cedar Shavings | Mulch | Great for Outdoors or Indoor Potte…
19. Colorful Border Flower Beds

Want a front yard that greets guests with color? Colorful border flower beds frame your path, brighten the entry, and invite a closer look. Here is why this works: you get steady color by mixing bloom times, and tidy edges keep things neat.
Border Flower Bed Tips:
– Pick plants that bloom at different times for nonstop color.
– Place taller varieties at the back and shorter ones in front.
– Use a simple color group for a clean, cohesive look.
Colorful border beds lift curb appeal and make your yard feel welcoming.
Let’s map this out in a few easy steps. Decide on a color story (warm or cool). Choose a practical mix of annuals and perennials so the bed looks full most of the year. Pick pollinator-friendly plants to help bees and butterflies.
Try these additions: petunias, marigolds, snapdragons, salvias, alyssum, cosmos, and impatiens. Mix in textures: soft blooms with spiky greens for interest.
Keep the bed neat. Use edging like brick, stone, or metal to define the line. Prep the soil with compost and mulch about 2 inches deep. Water in the morning with a slow drip hose.
Maintenance is simple: deadhead fading blooms and replace any plants that lose color.
Next steps: sketch a quick plan, choose 2–3 base colors, and buy plants in small groups for faster filling.
19. Colorful Border Flower Beds
Editor’s Choice
EasyFlex No-Dig Landscape Edging with Anchoring Spikes, 2.7 in Tall Deco…

Back to the Roots 25.7qt (1 Cubic ft) Organic Premium Compost
Gilmour 5/8″ x 50′ Round Weeper Soaker Hose for Garden Beds, Drip Irriga…
20. Mixed Perennial Flower Beds

If you want a front yard that stays pretty with less work, mixed perennial beds are your best bet. These plants come back year after year, giving you steady color.
Try echinacea, daylilies, and hostas together. Mix heights and leaf shapes. Short ground covers at the edge, tall blooms in the center, and broad leaves at the back create depth you can see from the curb.
Perennial Flower Bed Tips:
– Plan bloom times to keep color from spring through fall.
– Use mulch to hold moisture and slow weeds.
– Check each plant’s mature size so you space them well.
– Group plants with similar water needs.
Next steps.
– Pick a style that fits your home, such as a soft cottage look or neat lines.
– Choose three or four plants with different bloom windows for ongoing color.
– Check sun and soil, and place sun lovers where they will get full light.
With careful planning and regular care, a mixed perennial bed can brighten your home’s curb appeal for many seasons.
20. Mixed Perennial Flower Beds
Editor’s Choice

Wildflower Seeds Hummingbird and Butterfly Mix 1 Ounce, No Filler, 24 Va…
Back to the Roots 25.7qt (1 Cubic ft) Organic Premium Mulch

Field Guide to Urban Gardening: How to Grow Plants, No Matter Where You …
You Might Also Like


21. Mosaic Flower Beds

You want a front yard that reads like art. Mosaic flower beds let you turn color into a picture. You arrange different colored flowers to make a pattern or image. Pick bold colors for drama or soft hues for calm.
Mosaic Flower Bed Tips:
– Plan your design on paper first. Draw a simple grid and map where each color will go.
– Choose flowers that bloom together. A shared bloom window keeps the picture lively longer.
– Think about height and spread. Put tall plants at the back or center, shorter ones around the edges.
– Test color contrasts. Hold color swatches next to each other or snap a quick photo to see how it reads.
– Leave room for changes. If a color looks off, swap in a different plant or move a group to a new spot.
Mosaic beds turn your yard into a small work of art. They work best in a compact patch or along the walk where passersby can notice the details up close. Use sturdy edging, good soil, and regular care to keep the image crisp. Expect blooms to shift with the season, and have a few backup colors ready for a quick swap.
Next steps: sketch, pick a few flowers, line the bed, and plant in color blocks.
21. Mosaic Flower Beds
Editor’s Choice

Beuta Landscape Edging | Garden Edging Border | Faux Stone Bricks for La…

Floret Farm’s Cut Flower Garden: Grow, Harvest, and Arrange Stunning Sea…
Burpee Wildflower 25,000 Bulk, 1 Bag, 18 Varieties of Non-GMO Flower See…
22. Fairy Gardens

Fairy gardens bring a tiny world to your front yard. They spark imagination and charm. You can build a fairy flower bed with small plants, soft blooms, and decorations that look like they came from a storybook. It feels playful, and it greets visitors with a warm welcome.
Fairy Garden Tips:
– Use dwarf plants to keep the scene tiny and clear.
– Add fairy doors, miniature chairs, and a winding path of tiny rocks or gravel.
– Build a small scene with a theme like woodland, seaside, or cottage garden.
A fairy garden adds charm and invites neighbors to pause and smile as they peek into a tiny world.
Next, practical steps you can take this weekend:
– Choose a spot in sun or light shade. Fairy plants love gentle light.
– Pick ground covers and tiny plants that stay small, such as moss, creeping thyme, and tiny grasses.
– Create a tiny path with pebbles and a mini bench for your pretend guests.
– Keep a small watering routine and prune with care so the scene stays tidy.
With a little care, your fairy garden becomes a place for kids to play and adults to unwind. It adds a friendly look to your curb.
22. Fairy Gardens
Editor’s Choice

Fairy Garden Accessories, 7 Pieces Squirrel & Hedgehog Resin Figures wit…

MOCCUROD 100 Seeds Indoor Cherry Tomato Dwarf Red and Yellow Tomato Rare…

Fairy Garden Walkway Path Miniature Pathway,Stone Pathway, Mini Path Roa…
23. Rock Gardens with Flowers

You want a front yard that looks strong but uses less water. A rock garden can do that. It blends rough stones with bright flowers. The result is texture and color in a small, calm space. It feels natural and easy to care for.
Rock gardens shine for practical reasons too. They use less water and need less upkeep. You can enjoy a colorful display without a lot of work. This style fits small yards and busy lives. Here is why it works so well in front spaces.
Creating Rock Gardens:
– Use varying sizes of rocks for visual interest.
– Plant flowers that can thrive in rocky conditions.
– Design with drainage in mind to avoid water pooling.
Rock gardens lift the look of your front yard while staying low effort. Pick drought-tolerant blooms like sedum and alyssum to pair with stones or gravel. Add herbs such as thyme or lavender for scent. A few sempervivum rosettes can bring neat green shapes amid the gravel. Keep soil lean and let rocks do the work. In sunny spots, the colors pop all season and you gain a calm, natural vibe.
Next steps. Inspect your site, map sunny spots, and choose a mix of stone sizes. Start small with a 4 by 6 foot bed, then expand as you learn what blooms best.
This design stays tidy and sunny from spring to fall, too.
23. Rock Gardens with Flowers
Editor’s Choice

Drought Tolerant Wildflower Seeds – 4oz, Open-Pollinated Bulk Flower See…

20 lbs Natural River Rocks Mexican Beach Pebbles, 2-3 Inch Decorative Ri…

8 Herb Seed Starter Kit – Grow a Variety of Fresh Culinary Herbs – Non-G…
24. Seasonal Displays with Annuals

If you want a front yard that changes with the seasons, seasonal displays with annuals can keep it fresh all year. You can swap color schemes as the year goes by. Plant petunias, geraniums, and marigolds. They grow fast and fill beds quickly.
Annual Flower Bed Tips:
– Choose varieties that bloom all season long.
– Plan for seasonal color transitions.
– Deadhead regularly to keep blooms coming.
– Group plants by sun needs for steady growth.
– Water in the morning to help roots dry and stay healthy.
– Fertilize lightly every 4-6 weeks during peak bloom.
Here is why this approach works for your space.
– Place taller plants at the back and lower ones in front for easy views.
– Use containers plus beds to switch colors fast.
– Start with good soil and a light layer of mulch to hold moisture.
– Mix a pop of a trailing variety for soft edges.
Next steps to get started.
– Sketch a simple layout for spring colors, then adjust as the season changes.
– Pick two or three core annuals to mix, then add a trailing variety for interest.
– Buy a few extra plants so you can fill gaps after the first month.
Seasonal displays with annuals let you refresh the look without a big change.
With a little planning, your front yard stays colorful and neat all year.
24. Seasonal Displays with Annuals
Editor’s Choice

Miracle-Gro Organic Outdoor Potting Mix, for Outdoor Container Plants, C…

Miracle-Gro Water Soluble All Purpose Plant Food, Fertilizer for Indoor …

Fiskars Bypass Pruning Shears, 5/8-Inch Cut Capacity Garden Clippers, Ga…
25. Creative Pathway Flower Beds

Want a front yard that welcomes people and leads them to your door? Creative pathway flower beds can do that with simple steps. They frame the walkway, add color, and leave a nice scent in the air. You gain curb appeal without big changes.
Pathway bed planning Start by picking flowers that handle foot traffic. The path will see rain, mulch, and busy feet. Go for lavender, daisies, creeping thyme, and low-growing sedums. Keep tall plants set back from the edge so guests can see the path.
– Plant low-growing varieties along the edge for visibility
– Use sturdy perennials that bloom most of the season
– Put a few scent-rich options like lavender near the entry
Edge with care Create a tidy border with brick, stone, or metal edging. This keeps soil and mulch from wandering onto the path and makes mowing easier.
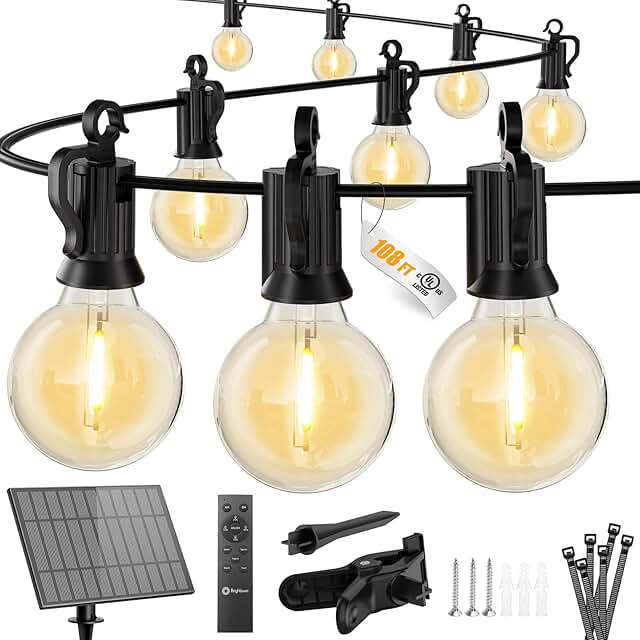
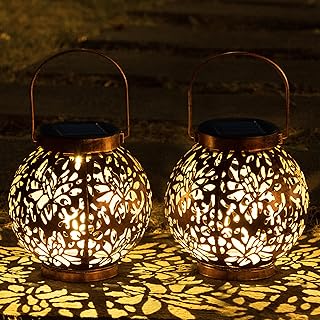
Light the way Add gentle lighting. Solar stake lights or low-voltage path lighting makes evening visits feel safe and welcoming.
Maintenance tips Mulch twice a year, water deeply in dry spells, and deadhead spent blooms. A simple routine keeps colors vibrant.
Next steps: sketch the space, pick three focal colors, and buy a few tough plants. Pathway flower beds turn your front yard into a warm, guiding welcome for every visitor.
25. Creative Pathway Flower Beds
Editor’s Choice
EasyFlex No-Dig Landscape Edging with Anchoring Spikes, 2.7 in Tall Deco…
Wildflower Seeds Hummingbird and Butterfly Mix 1 Ounce, No Filler, 24 Va…
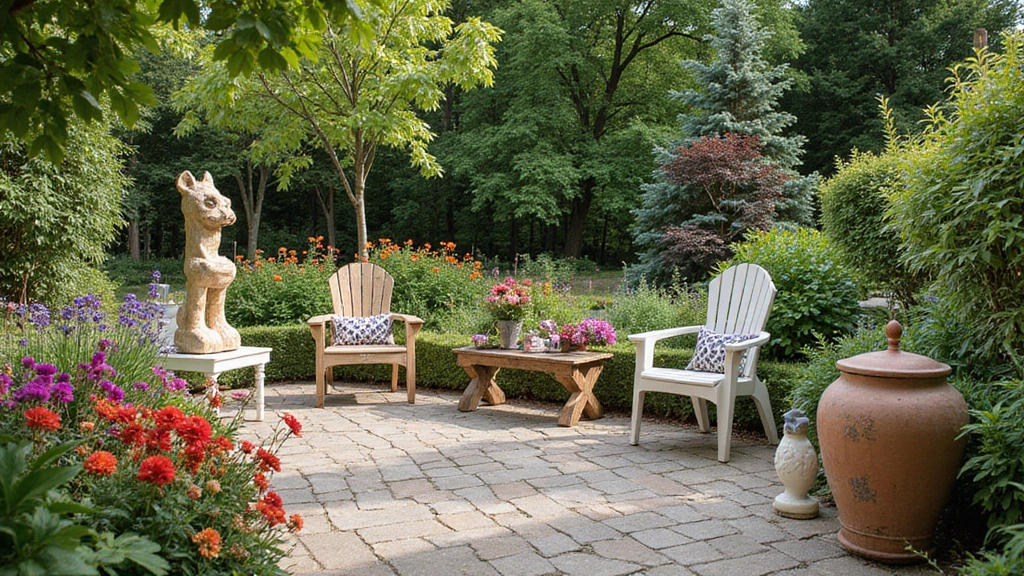
26. Luxury Flower Beds

Want a front yard that turns heads and stays fresh year round? Luxury flower beds can give your yard a premium, welcoming look. They blend refined style with smart planting.
Here is how to build them. Start with a solid base: premium soil and balanced fertilizers. Good soil holds moisture and feeds roots, helping blooms last longer. Feed plants in spring and midseason to keep colors bright.
Choose graceful planters and elegant edging. Materials like stone, copper, or black metal make a big difference. Use color and texture to create contrast against the house and walkway.
Pick flower varieties that shout quality. Classic roses bring perfume and form. Orchids work best in sheltered spots or large containers for a touch of luxury. Include a few rare bloomers as accents to catch the eye.
Plan the layout with care. Put taller plants toward the back or center, shorter ones along the edge. Think about bloom times so color changes through the seasons. Add a focal point like a small statue or a quiet fountain. A simple seating area nearby can extend the beauty.
Luxury flower bed tips:
– Use premium soil and fertilizers.
– Pay attention to plant placement for maximum visual impact.
– Include features like elegant statues or fountains for added interest.
Maintenance is easier with mulch and regular pruning. Do a quick yearly refresh to keep the bed feeling fresh and timeless.
26. Luxury Flower Beds
Editor’s Choice

Premium Potting Soil Mix with Peat Moss, Vermiculite, Perlite (Made in U…

Espoma Organic Flower-Tone 3-4-5 Natural & Organic Plant Food; 4 lb. Bag…

Worth Garden Plastic Urn Planters for Outdoor Plants, Tree 22” Tall 2 P…
27. Colorful Succulent Flower Beds

Colorful succulent flower beds brighten your front yard with less work. Here is why they fit busy lives. They use small, sturdy plants that stay neat. They tolerate heat and long dry spells. You can mix shapes and colors for eye catching edges. You can place them in a wooden crate or set them in a spiral design for instant impact. The textures catch light and add depth along a path. Try a mix of rosettes, columnar and trailing succulents for year round color. These beds look good all season with little effort. White gravel around the bed makes the colors pop. If you want extra style, set them in a shallow spiral or stack them in a crate garden. The color shifts with sun, making your front yard look alive from morning to night.
Let’s break it down.
Succulent Bed Tips:
– Ensure well-draining soil.
– Mix plant sizes for visual interest.
– Group similar light requirements together.
A colorful succulent flower bed brings a fresh, easy look to your front yard while staying inviting.
Next steps help you start fast.
– Pick a sunny spot.
– Build a gritty soil mix.
– Arrange in groups of three or five.
– Water sparingly and let roots settle.
27. Colorful Succulent Flower Beds
Editor’s Choice

Back to the Roots 100% Organic Succulent & Cacti Mix (6 Quart) | Made in…

Winlyn Rustic Wooden Planter Box 17.3″ L x 3.9″ W x 3.9″ H Brown Rectang…

45LB Natural White Rocks, 1/4″-3/4″ Garden River Rock,Decorative Pebbles…
28. Whimsical Flower Beds

Whimsical flower beds make your front yard feel joyful. They mix bright colors with playful shapes, and they invite guests to smile as they walk by. You get a space that tells a story, not a plain mix of blooms.
Here is how to build one you love.
Whimsical Flower Bed Tips:
– Plan a simple layout. Use curved lines or neat patches so you can see the fun patterns from the street.
– Pick a color palette with 3 or 4 tones. Bright pinks, sunny yellows, fresh greens, and a pop of violet work well together.
– Choose flowers with interesting textures and shapes. Think ruffled petals, tall spires, round balls, and speckled leaves. Good options include celosia, snapdragons, zinnias, rudbeckia, and alliums.
– Create themed zones within the bed. A corner can tell a story with colors and plant choices.
– Add quirky decor. Gnomes, painted stones, wind chimes, and colorful garden art fit the look without crowding the beds.
Whimsical beds bring smiles and make your front yard feel welcoming. They are easy to start, but you should keep plan and soil in mind. Next steps: test soil, pick a spot, and start a trial bed to see how it grows.
28. Whimsical Flower Beds
Editor’s Choice

YODY Solar Garden Statues Outdoor Decor- Yard Decorations for Patio, Bal…

UNIME Glow in The Dark Garden Pebbles Stones Rocks for Yard and Walkways…
Conclusion

With these 28 stunning flower bed ideas, you’re well-equipped to transform your front yard into a beautiful garden oasis.
Whether you prefer a structured look or a more whimsical feel, there’s something here for everyone. Embrace your creativity and enjoy the process; your front of house will thank you for it!
Note: We aim to provide accurate product links, but some may occasionally expire or become unavailable. If this happens, please search directly on Amazon for the product or a suitable alternative.
This post contains Amazon affiliate links, meaning I may earn a small commission if you purchase through my links, at no extra cost to you.
Frequently Asked Questions
What Are Some Easy Flower Bed Ideas for Beginners?
If you’re just starting with flower beds in front of the house, consider simple designs like the Cottage-Style Flower Bed or Container Flower Beds. These styles require minimal fuss and can be customized with easy-to-care-for plants. Start with a mix of perennials and annuals for year-round color, and don’t forget to choose flowers that thrive in your local climate!
How Can I Increase My Front Yard’s Curb Appeal with Flower Beds?
To boost your home’s curb appeal, focus on vibrant and well-structured flower beds. Try Color Block Flower Beds or Mixed Perennial Flower Beds to create eye-catching designs. Additionally, incorporating a variety of heights and textures can add depth and interest to your front yard, making it more inviting for guests and passersby.
What Flowers Should I Choose for Different Seasons?
Great question! For a stunning seasonal display in your flower beds in front of the house, start with bulbs like tulips and daffodils for spring, followed by vibrant summer annuals like petunias or geraniums. As fall approaches, consider planting perennials like asters or chrysanthemums to keep your front yard looking beautiful year-round!
How Do I Maintain My Flower Beds for Longevity?
To ensure your flower beds stay stunning for years, regular maintenance is key! Water your plants consistently, especially during dry spells, and consider mulching to retain moisture and suppress weeds. Deadheading spent blooms encourages more flowers, while pruning and seasonal clean-ups keep your beds tidy and healthy—this way, your front yard can truly shine!
What Are Some Unique Flower Bed Themes I Can Try?
If you’re looking for creativity, themed flower beds can be a fun way to express your style! Consider a Butterfly Garden with plants that attract pollinators, or a Whimsical Flower Bed filled with brightly colored flowers and playful decorations. You could even design a Zen Garden Flower Bed for a calming effect—there are endless possibilities to explore!
Related Topics
flower beds in front of house
curb appeal
garden decor
cottage style
edible gardens
drought-tolerant
vertical gardening
seasonal flowers
beginner friendly
modern minimalist
pollinator gardens
whimsical designs


![4 Set [EXTRA LARGE] Hanging Wall Mount Storage Baskets with Adhesive Hoo...](https://m.media-amazon.com/images/I/812qykSTCXL._AC_UL320_.jpg)


![[ 12 Pack ] Plastic Storage Baskets - Small Pantry Organization and Stor...](https://m.media-amazon.com/images/I/81LwfO1xRKL._AC_UL320_.jpg)