I keep thinking about how much time I waste when a cabinet door sticks and a jumble of lids falls into my lap. Lids topple, jars clink, and I waste minutes searching. Why I made this is simple: to spare you the same mini frustrations I hit. I wanted to share ideas that feel doable, not perfect, and that you can start this weekend.
If you care about a kitchen that works as hard as you do, this is for you. Who it’s for are people who want practical, no-nonsense storage ideas. If you cook for a busy family, live in a small apartment, or simply hate rooting through shelves, this one is for you. These hacks focus on real life: cheap, adjustable, and easy to implement. You’ll see changes you can feel in minutes and a big difference in a week.
I pulled together 25 kitchen cabinet organization hacks that are simple, affordable, and durable. What you’ll get covers how you lay out shelves, how you store lids, how you corner spice jars, and how you use clear containers. You’ll turn wasted space into a tidy control center for pans, bottles, and dry goods. Each tip includes a concrete first step you can try today.
Start with one cabinet and measure. Pick a solution that matches your space and style—slim pull-out baskets for tall bottles, a lazy Susan for corners, or clear canisters for dry goods. The goal is to see every item at a glance, so you stop buying duplicates and stop wasting time. Most fixes use things you already own or can grab cheaply.
These hacks work with different cabinet depths and setups. If you have deep bases, adjustable dividers shine. If you bake a lot, labeled jars and a spice wall keep you on track. The ideas blend practical trends with doable steps you can implement without a lot of fuss.
Ready to reclaim your cabinets? Pick one or two ideas and test them this week. You’ll notice less mess, faster cooking, and more confidence when you open a door. This introduction to 25 mind-blowing hacks gives you a toolkit you can tailor to your home.
Contents
- 1. Pull-Out Shelves
- 2. Magnetic Spice Jars
- 3. Vertical Dividers
- 4. Lazy Susans
- 5. Tiered Organizers
- 6. Drawer Organizers
- 7. Clear Storage Bins
- 8. Over-the-Door Organizers
- 9. Customizable Shelf Risers
- 10. Baskets for Grouping
- 11. Adjustable Cabinet Shelves
- 12. Pull-Out Trash Bins
- 13. Lazy Susan for the Fridge
- 14. Cork Board Inside Cabinet Doors
- 15. Under-Shelf Baskets
- 16. Clear Canisters
- 17. Stacking Storage Bins
- 18. Spice Drawer Inserts
- 19. Use Tension Rods
- 20. Display Your Cookbooks
- 21. Use Hooks for Utensils
- 22. Designate a Baking Zone
- 23. Utilize Wall Space
- 24. Create a Coffee Station
- 25. Seasonal Decor Storage
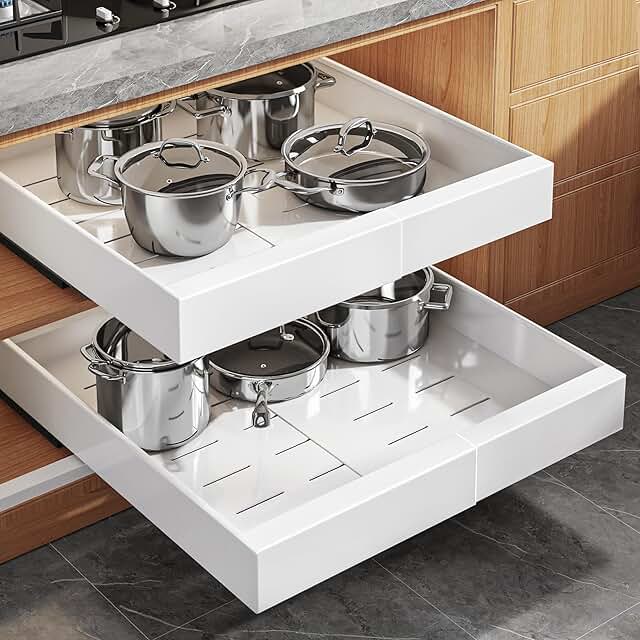
1. Pull-Out Shelves

If you keep items to the back, you waste time. Pull-out shelves fix this. They slide out so you can see every item at a glance. Pots, pans, and cans become easy to grab. No more bending or hunting.
These shelves fit many cabinet sizes and styles. A deep shelf works well for large pots. You can mix widths to fit your space.
How to pick the right set: measure your cabinet’s inner width, height, and depth. Look for full-extension slides with soft-close options. Choose sturdy materials that match your cabinet finish.
Installation can be a weekend project. Attach the slides to the cabinet sides. Mount the shelf on the runners. Use a level and a drill. If you’re unsure, hire a pro or ask a friend for help.
Organization ideas: group similar items together. Put daily-use items at the front. Move rarely used pieces to the back. Use small bins or dividers for lids and utensils.
Care and upkeep: wipe tracks regularly. Lubricate with silicone spray every few months. Check screws and joints for looseness.
Limitations: some narrow or shallow cabinets won’t fit full shelves. In tight spaces, consider half-width or corner pull-outs. The payoff is faster access.
1. Pull-Out Shelves
Editor’s Choice

2Pack Expandable Pull Out Cabinet Organizer 21″Deep With Raising Pad for…

SONGMICS Cabinet Organizer Shelf, Set of 2 Kitchen Counter Shelves, Kitc…

WD-40 Specialist Silicone Lubricant with SMART STRAW SPRAYS 2 WAYS, 11 OZ
2. Magnetic Spice Jars

If you hate digging through spice jars, magnetic spice jars can fix it.
They cling to a fridge door, a metal spice board, or a wall strip.
You get quick sight of what’s inside and easy reach for cooking.
Labeling is simple and helps you spot the spice fast.
Clear jars show freshness and make the setup look clean.
With a touch of style, you can match lids to your kitchen color.
This approach reduces cabinet clutter and adds a modern vibe.
Tips to pull it off
To pull it off well, pick jars with wide mouths for easy filling and a good seal.
Use clear glass or acrylic so you can see spice powder and grains, not just color.
Label on the lid or a small chalk label helps.
Keep the jars away from heat and sun, and they stay fresh longer.
Group spices by use or cuisine for faster access.
Arrange near the stove for frequent spices like salt, pepper, paprika.
Simple setup steps
Quick steps: measure space, buy jars, mount a magnetic strip or board, label, fill, and test reach.
2. Magnetic Spice Jars
Editor’s Choice

20 Set Magnetic Spice Jars for Refrigerator, Hexagon Glass Magnetic Spic…

Metal 4 Pack Magnetic Spice Storage Rack Organizer for Refrigerator and …
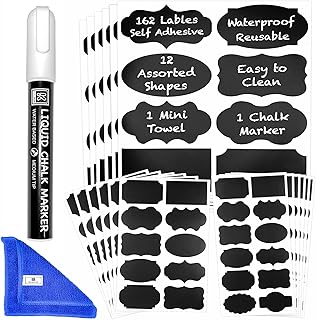
Chalkboard Labels for Jars 162pcs – Waterproof Reusable Chalk Sticker La…
3. Vertical Dividers

Vertical dividers free up precious cabinet space. They keep baking sheets, cutting boards, and pot lids standing upright so you can grab what you need in a flash. No more rummaging through a pile—everything has a place. With the right setup, you see what you own and reach for it quickly. Adjustable options fit tight spots and grow with your kitchen.
– Right fit matters — Choose dividers that match your cabinet height. Make sure the depth is enough for the items you store. If you have shallow shelves, pick shorter dividers to avoid crowding the front. For extra grip, look for a small lip that holds items in place. Test them in place before loading heavy trays.
– Go adjustable — Adjustable dividers let you reconfigure as your collection grows. They fit tight spots and can be moved without tools. They save space and you won’t buy new pieces every year.
– Sort and section — Group similar items together. Bake sheets stay upright in one zone, cutting boards in another, and pot lids in a ready-to-grab stack. Keep the edges clear so you can slide items out with a smooth pull.
– Choose sturdy materials — Metal or thick hard plastic lasts longer than thin plastic. Look for rust-resistant metals and a slim finish. Non-slip bases help dividers stay put when you open the cabinet.
– Easy installation — Secure the dividers to cabinet walls or the floor with screws or brackets. Use a level to keep them straight. Mark drill spots with a pencil, then install. Leave room to slide items in and out without snagging.
With vertical dividers, your kitchen feels calmer and faster to use.
3. Vertical Dividers
Editor’s Choice

SIMPLE HOUSEWARE Expandable Pan Organizer Rack, 10 Adjustable Compartmen…

Rev-A-Shelf 18″ Baking Sheet Shelf Organizer for Wall and Base Kitchen C…

6 Set Trim-to-Fit Wood Tray Dividers for Cabinet, Cookie Sheet Organizer…
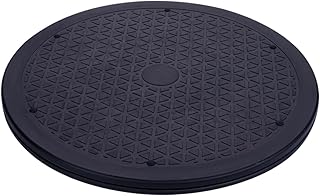
4. Lazy Susans

Clutter in your kitchen cabinets makes every reach feel rough. A Lazy Susan fixes that with a simple spin. You grab condiments, jars, and little items in one clean rotate, not by digging.
Choosing the right size and finish
– 12-inch turntables work on tight shelves and in awkward corner spots.
– 16-inch turntables fit most base cabinets and pantry shelves.
– 20-inch turntables handle larger jars and heavier items.
– Materials vary; wood adds warmth but needs care, acrylic stays clear and fast to see, metal is sturdy and easy to wipe.
How to set one up
– Place a turntable in a corner cabinet or a wide shelf where you need quick access.
– Add a non-slip liner so items don’t shuffle and fall during spins.
– Group similar items together: sauces with sauces, spices with spices, snacks with snacks.
– Put heavy jars low, light items high, and keep the most-used items at the front.
Tips and limits
– Clean the surface regularly to keep the turntable smooth.
– Don’t overload it; keep the weight balanced so it spins well.
– In very deep cabinets, use a second turntable or a double-tier model for better reach.
Your mornings feel smoother with less rummaging.
4. Lazy Susans
Editor’s Choice
![12-Inch Non-Skid Turntable Lazy Susan Organizer [4 Pack] - Spinning Rack...](https://m.media-amazon.com/images/I/714x1t8YuSL._AC_UL320_.jpg)
12-Inch Non-Skid Turntable Lazy Susan Organizer [4 Pack] – Spinning Rack…

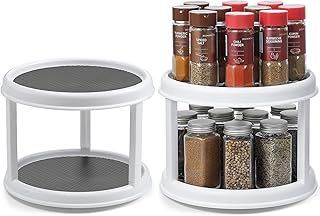
2 Pack, 2 Tier 10″ Turntable Lazy Susan Spice Organizer – Rotating Seaso…
5. Tiered Organizers

Are your cabinets crowded and hard to scan? With so many items, you miss products at the back. Tiered organizers pull every item into view and save space.
A tiered organizer stacks two or more shelves on a single base. This turns a shy shelf into three levels of storage. The top tier sees more light; the bottom stays stable. You can see all items at a glance.
Put spices on a tiered rack arranged by type. Canned goods on the next level. Small kitchen gadgets like peelers or bottle openers on another. Even snack packs and tea bags fit neatly.
Choose adjustable or modular tiers so you can fit tall bottles later. You can move or remove levels to fit items. This is good for changes in your cooking gear.
Measure your cabinet height and width before buying. Pick a finish that matches your other shelves: wire, clear plastic, or solid acrylic. Add non-slip feet or shelf liners to keep things steady. Keep frequently used items on the front tier.
Group similar items together. Label the edges or use color tags. Rotate stock so spices stay fresh. Keep the system clean by wiping with a damp cloth.
They aren’t great for very tall jars or heavy pots. Don’t overload any single tier. If you follow these tips, it lasts long.
5. Tiered Organizers
Editor’s Choice

Dial Industries 3 Tier Adjustable Canned Goods Shelves for Kitchen Cabin…

Yieach 3 Tiered Acrylic Display Stands for Cupcake Stand,Perfume Shelf O…

Copco 3-Tier Non-Skid Spice Rack Organizer for Kitchen Cabinet or Pantry…
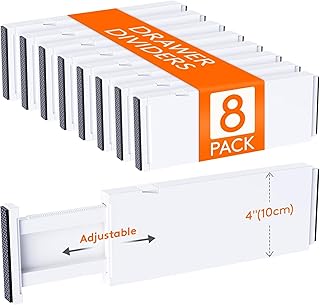
6. Drawer Organizers

Tired of rummaging through a messy drawer? Drawer organizers turn chaos into order. They come in plastic, bamboo, metal, and silicone. Pick a setup that fits your drawer and your daily habits.
– Measure the drawer’s width and depth, and note any lips or obstructions so you know what fits.
– Choose adjustable dividers that slide or reconfigure to adapt as your toolkit changes.
– Group items by task, placing everyday utensils in one zone and specialty tools in another to cut the time you spend searching.
– Add a label or color code so you can grab what you need in a flash.
– Leave space for expansion by picking expandable organizers that grow with your collection.
– Clean as you go by wiping plastic and wood after use, then snap the pieces back in securely.
– Keep a small tray for loose objects like bottle caps, measuring spoons, or clips to prevent clutter.
– For deep drawers, stack two shallow trays to create two levels of space.
– If others reach into the drawer, label zones so they know where things go.
– Set aside five minutes each week to tidy and keep the system working.
– Keep a small trash bag handy to remove scraps from the drawer and maintain a neat space.
6. Drawer Organizers
Editor’s Choice

SpaceAid Bamboo Drawer Dividers with Inserts and Labels, Kitchen Adjusta…

4 PCS Drawer Divider, 17″-22″ Adjustable Bamboo Drawer Dividers Organize…

Vtopmart 25 PCS Clear Plastic Drawer Organizers Set, 4-Size Versatile Ba…
7. Clear Storage Bins

Is your pantry full of items you can’t find? Clear bins give you instant visibility, keep shelves neat, and protect freshness. This simple approach saves time, reduces waste, and makes cooking stress-free. They also help you spot expired items before they cause waste. Here’s how to use them well.
– Choose clear, food-grade plastic bins with airtight lids so snacks stay fresh and spills stay contained.
– Pick a mix of sizes: tall bins for bags, wide bins for boxes, and shallow bins for jars and cans.
– Group like items together—snacks, baking supplies, cereals—so you can grab what you need fast.
– Label boldly with simple words or icons, and use washable labels so you can update them easily.
– Stack smartly: place the most-used items at eye level and stack bins to maximize shelf height.
– Keep up with the system by wiping spills, rotating stock, and adjusting the setup as your pantry changes.
A quick tune-up now and then keeps this setup reliable. With clear pantry bins, you’ll shop less often for forgotten items and cook with what you see.
Want more ideas? Label by date or add color-coded lids for faster grabs. It’s easy to tweak as your stock changes.
Clear storage bins are your kitchen’s best friend! They simplify organization, protect freshness, and make it easy to spot what’s hiding at the back of your pantry. Say goodbye to wasted food and hello to stress-free cooking!
7. Clear Storage Bins
Editor’s Choice

Vtopmart 6 Pack Clear Stackable Storage Bins with Lids, Large Plastic Co…

L LIKED 350 Stickers Dissolvable Food Labels 1×2 inch for Containers 350…

Akro-Mils 30235 AkroBins Plastic Storage Bins, Space-Saving Stackable Bi…
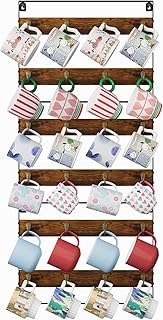
8. Over-the-Door Organizers

Door space can pile up fast. Over-the-door organizers turn that clutter into quick, usable storage. They slide over the top edge of a cabinet door and add slim shelves, pockets, and hooks. You get easy access to daily items without crowding your countertops.
– What they hold: Cutting boards, lids, foil, parchment, towels, sponges, and small tools fit neatly in these units. The inside of doors becomes a compact command center.
– Choosing the right one: Check door thickness and weight needs. Metal wire units last long and wipe clean. Fabric pockets are light and grab light items. Clear pockets help you see contents fast. Ensure the unit can handle what you plan to store.
– Style and fit: Pick finishes that match your cabinet hardware. A dark metal blends well with bronze accents. A light unit can brighten a deep cabinet. Make sure it doesn’t block the door from closing fully.
– Placement tips: Put the door you use most on top for quick access. Place daily items in the top pockets. Use deeper pockets for taller boards or bottles. Keep cleaners separate from food zones and wipe spills right away.
8. Over-the-Door Organizers
Editor’s Choice

JARLINK Over The Door Organizer Storage, 5 Shelf Hanging Door Organizer …

2 Pack 36 Pockets Classroom Pocket Chart for Cell Phone Calculator Holde…

Adjustable Over The Door Organizer, Metal Hanging Door Organizer with 5 …
9. Customizable Shelf Risers

Are your cabinets a tangle of dishes and jars? You want quick access and more usable space. Customizable shelf risers fix this by adding extra levels inside the cabinet. They let you stack smartly and keep sight of what you store.
Materials matter. Metal wire models are sturdy and budget-friendly. Clear acrylic keeps the stack visible. Wood adds warmth and a steady feel. Choose options with a non-slip base so items stay put when you open the door.
How to use them:
– Place one riser on a shelf for the bottom level.
– Use the bottom level for plates or bowls.
– Put cups, jars, or spice bottles on the top level.
– Adjust the height as needed.
– Add a second riser for more layers if the shelf has room.
– Move the risers as you re-stack or swap items.
Practical tips:
– In upper cabinets, a two-tier setup makes glassware easy to grab.
– Use risers to separate lids from containers and keep small items visible.
– Label zones near each riser so family members know where things belong.
Limitations to watch for:
– Some cabinets are shallow or tall and may not fit tall risers.
– Always measure depth and clearance before buying.
This solution helps you see more at a glance and store more on the same shelf. And it grows with your kitchen needs.
9. Customizable Shelf Risers
Editor’s Choice

SONGMICS Spice Racks, Set of 2 Metal Cabinet Shelf Organizers, Counterto…
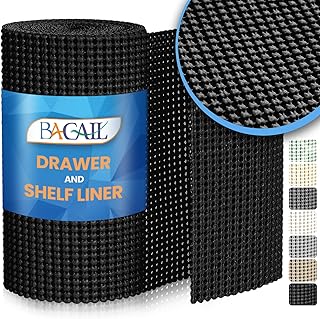
BAGAIL Drawer and Shelf Liner, 12 in X 10 Ft Non-Adhesive Shelf Liners f…

Brother PT-M95 P-Touch Monochrome Label Maker Bundle (4 Label Tapes Incl…
10. Baskets for Grouping

Struggling to keep snacks, fruits, or kitchen tools tidy inside crowded cabinets? Baskets can fix that. They group like items and make the space feel calmer. This approach helps kitchen cabinet organization feel simple and reachable. They also keep crumbs off your shelves.
Baskets work as a calm, flexible storage system. They add charm and cut clutter at the same time. Use a mix of sizes to fit your shelves and your habits. They work in pantries and tall cabinets too.
– Choose the right sizes.
– Mix shapes and textures to match your cabinet style.
– Label or color-code to find items fast.
– Put heavy items on the bottom shelf for stability.
– Line baskets with easy-to-clean liners.
– Choose baskets in materials you can clean easily.
Put baskets where you reach them most. Place a fruit basket on a middle shelf for quick sight lines. Keep a snack basket near the pantry door for easy grabs. Use shallow baskets for lids or measuring cups, deeper ones for jars. Wipe spills quickly with a damp cloth.
Baskets aren’t magic. They won’t solve every problem overnight. Start with a few and adjust as you go.
Baskets are your kitchen’s best-kept secret! Grouping items not only declutters your cabinets but also adds a touch of charm. Embrace calmness in chaos with this simple kitchen cabinet organization hack!
10. Baskets for Grouping
Editor’s Choice

Storage Baskets for Organizing, Woven Decorative Baskets for Shelves – B…

Akro-Mils 30235 AkroBins Plastic Storage Bins, Space-Saving Stackable Bi…

Brother P-Touch, PTD210, Easy-to-Use Label Maker Bundle (4 Label Tapes I…
You might also like

11. Adjustable Cabinet Shelves

Tired of shelves that stay the same no matter what you store? Adjustable cabinet shelves give you real control. You can fit tall items like a blender, tall bottles, or big mixing bowls. You can move them as your needs change. This small update makes your whole kitchen feel easier to use.
Key benefits
Choose shelves that can hold real weight. Sturdy metal tracks or thick wood boards work best in daily use. A good weight rating helps you avoid sagging and keeps your doors opening smoothly.
– Step 1: Empty the cabinet so you can see the space clearly.
– Step 2: Measure item heights, bottle widths, and the depth you need.
– Step 3: Pick an adjustable system that fits your cabinet and weight needs.
– Step 4: Install the tracks or peg holes at the right heights.
– Step 5: Set each shelf, load items, and tweak positions as you go.
Practical setup tips you can use today
Place heavier items on the lower shelves to lower the risk of bending or sag. Add a center support if you have long shelves. Use shelf liners to keep small items from sliding and to protect the wood or metal. Routine checks every few months will keep the system strong and your items easy to grab.
With flexible shelves, you shape the space for daily use and big new purchases alike.
11. Adjustable Cabinet Shelves
Editor’s Choice
SONGMICS Cabinet Organizer Shelf, Set of 2 Kitchen Counter Shelves, Kitc…

HOME MASTER HARDWARE 12 inch x 8 inch Heavy Duty Shelf Brackets, Load Ca…

Beautysaid Shelf and Drawer Liner for Kitchen Cabinet, Non Adhesive Non …
12. Pull-Out Trash Bins

Want a cleaner kitchen and easier waste control? Pull-out trash bins hide the mess and keep waste at hand. They sit inside a cabinet, so counters stay clear. You can run a single bin or a twin setup for trash and recycling.
– Size matters: Measure your cabinet opening. Check height, depth, and door clearance. If the fit is off, you waste space and miss the point.
– Slides that glide: Look for soft-close or sturdy ball-bearing slides. They move smoothly and stay quiet.
– Materials and style: Stainless steel bins wipe clean and resist smells. Plastic is lighter, and wood fronts can match your cabinet style.
– Double-bin setups: A separate trash and recycling bin helps sorting as you cook. Some models even add a small compost bin.
– Cleanup made easy: Removable bins and washable liners cut messes. Rounded interiors prevent gunk and make cleaning fast.
– Placement and use: Put the unit near the sink for quick rinsing and easy sorting. Make sure doors swing open freely.
– Installation basics: Measure space, attach the slides, mount the bin, and test. Tighten screws and check for wobble.
– Budget and maintenance: Prices vary by size and features. Expect occasional liner replacements; a simple wipe keeps things fresh.
12. Pull-Out Trash Bins
Editor’s Choice

Rev-A-Shelf Polymer Replacement 35 Quart Trash Bin Recycle Waste Garbage…

simplehuman 35 Liter / 9.3 Gallon Dual Compartment Under Counter Kitchen…

VEVOR Pull Out Trash Drawer 13.4″W x 25.7″H x 19.6″D Lower Sliding Rails…
13. Lazy Susan for the Fridge

You want your fridge to be easy to scan and quick to grab from. A shallow Lazy Susan on a shelf makes condiments and small snacks easy to reach. Spin the tray and you lift items from the back to the front. You won’t hunt for a bottle hiding in the back anymore.
– Choose the right tray. Pick a shallow Lazy Susan that fits your shelf width. Clear acrylic helps you see every item.
– Measure and prep. Check shelf depth and width before buying. Add a non-slip mat so it stays put.
– Organize by use. Put daily items at the front edge. Group like items together to keep it tidy.
– Use it right. Spin to spot what you need. Load it light and keep tall bottles back so it spins freely.
– Care and limits. Wipe spills quickly. If it jams or is crowded, split items to a second tray.
This simple upgrade can save you minutes and cut waste in the fridge.
13. Lazy Susan for the Fridge
Editor’s Choice

4 Pack 9 Inch Clear Acrylic Lazy Susan, Non-Skid Turntable Organizer for…

GORILLA GRIP powerGRIP Drawer Shelf and Cabinet Liner, Thick Strong Hold…

Stackable Refrigerator Organizer Bins, 6 Pack Clear Kitchen Organizer Co…
14. Cork Board Inside Cabinet Doors

Frustrated by lost notes and recipe scraps? A cork board inside cabinet doors could be the simple fix you need. It gives you a dedicated spot for what you reach for every day. You’ll keep essential info at eye level and off the counter. The board adds a friendly splash of color and helps your kitchen feel calmer. It’s a small change with big payoff.
How to set it up
1) Pick a cork board that fits the door. A slim sheet or a ready-made cork panel works well.
2) Clean the door interior. Wipe away grease so the board sticks and stays put.
3) Attach the board. Use strong adhesive strips for a clean look or small screws if you have a wood door. Press firmly and let it set.
4) Add pins and color. Use bright pins for recipes, grocery lists, and family notes. Keep a tiny scissors or a note pad nearby for quick updates.
What to post
Post a weekly meal plan, a shopping list, or a message from a family member. Color-code by type so you can skim and act fast. When you close the door, the notes stay visible but out of the way. If your door is metal, magnets work too.
Tips and limits
Choose a board with a sturdy backing and replace cork when it wears down. Don’t overload it with heavy papers. Place it away from heat and steam near the sink to keep pins and paper in good shape. With the right setup, this cork board inside cabinet doors becomes a smart, ongoing kitchen helper.
A cork board inside your kitchen cabinets can turn clutter into creativity! Keep your favorite recipes at eye level and watch your kitchen transform into an organized oasis. Small changes lead to big smiles!
14. Cork Board Inside Cabinet Doors
Editor’s Choice

Quartet Cork Tiles, Bulletin Board Cork Panels 12″ x 12″ x 3/16″, Natura…

Cork Board for Walls – 8 Pack Felt Pin Board Bar Strips – Self-Adhesive …

50 PCS Colorful Push Pin with Wooden Clips, Durable, Decorative Pushpins…
15. Under-Shelf Baskets

Your kitchen cabinets feel crowded. Under-shelf baskets add extra storage right where you need it. They slide onto the bottom of a shelf and stay in place. They keep everyday items within sight instead of buried in the back. Spices, small jars, tea bags, and packets fit neatly in each basket.
Appearance matters Choose baskets that match your shelves for a seamless, tidy look. Easy setup Look for baskets with a shallow depth and smooth rims so they slide on quickly. Smart arrangement Keep the top basket for items you reach often and the bottom one for jars and cans. Clean and sturdy Pick plastic that wipes clean or metal that resists rust. Check the weight rating before loading. Budget-friendly Under-shelf baskets are affordable and quick to install.
Placement tips Place baskets on shelves you bend to reach every day. Keep the top edge visible so you can grab items fast. Stack two baskets on a tall shelf to double your space. Label the fronts with a small sticker to keep things organized. Review every few weeks and swap items to keep freshness high.
15. Under-Shelf Baskets
Editor’s Choice

Tebery 4 Pack White Under Shelf Wire Basket Hanging Storage Baskets, Sma…

Nelko Label Maker Machine with Tape, P21 Bluetooth Label Printer, Wirele…
16. Clear Canisters

Is your pantry hard to read at a glance? Clear canisters make food easy to find. See-through pantry jars let you spot flour, sugar, pasta, and snacks in seconds. You’ll waste less and keep shelves neat. Group similar items and label each jar so you always know what’s inside.
What to look for when picking containers:
– Airtight seals to lock in freshness
– Clear glass or BPA-free plastic
– Wide mouths for easy pouring
– Uniform sizes that stack neatly
– Durable labels you can read from afar
How to set them up:
Place canisters where you cook most often. Keep baking staples near the oven, snacks near the prep area, and everyday ingredients at eye level. A simple label makes restocking fast.
Tips for use:
Fill jars to about 3/4 full. That leaves room to scoop and helps keep air out. Group items by category and rotate older products to the front.
Care and reminders:
Wash before first use. Dry completely. Check lids and seals every few months. Keep canisters out of direct sun to prevent cloudy glass or faded labels.
Limitations:
Glass can break if dropped. Plastic can stain or scratch. Weigh options with your kitchen space and budget.
Clear canisters do more than keep food fresh — they cut clutter and add a clean, modern look to your cabinets.
16. Clear Canisters
Editor’s Choice

Oggi Large Clear Canister with Clamp Lid, 72 oz – Large Airtight Food St…

Brother P-Touch PT-N20 Personal Desktop Label Maker, Portable, Handheld …

Rubbermaid 16-Piece BPA-Free Plastic Food Storage Set, Red Vented Lids -…
17. Stacking Storage Bins

Your kitchen feels crowded and you waste time looking for items.
Stacking storage bins add vertical space.
They let you see what you have without digging through piles.
Use them for snacks, spices, lids, or tools that live in drawers.
interlock bins help them stay steady to avoid wobble when you stack.
Go for clear plastic so you spot contents at a glance.
Put bins on pantry shelves, inside cabinets, or under the sink to make every inch count.
Label the front with a simple sticky note or a label maker.
For best fit pick a variety pack: short for spices, tall for packets, wide for tools.
Tips for setup: clean the space, place the heaviest bins on bottom, keep lids handy.
Limit how much you stack. Don’t overload a bin or stack beyond stability.
If a bin slips, adjust placement or use a small rubber mat.
Regularly sort every few weeks to keep it tidy.
If you store heavy jars, use the wide bins with a solid base.
Plastic is cheap and easy to wipe, and BPA-free options stay safe.
A small tray on top catches drips and makes a neat look.
Stacking bins fit in a coffee nook, baking shelf, or kid snack station.
Keep a clear label on each bin so you find things fast.
17. Stacking Storage Bins
Editor’s Choice
Vtopmart 6 Pack Clear Stackable Storage Bins with Lids, Large Plastic Co…
Nelko Label Maker Machine with Tape, P21 Bluetooth Label Printer, Wirele…
18. Spice Drawer Inserts

Spices belong in reach, not in a tangled drawer. You waste time hunting for the right lid or jar. A spice drawer insert keeps jars upright, easy to grab, and easy to see.
A good insert fits your drawer and your spice collection. Look for tiered pockets that lift taller bottles, and adjustable dividers that hold jars of different shapes. Clear acrylic helps you read labels at a glance, while bamboo or metal options add style and durability. Pick a finish that matches your kitchen vibe.
What to plan before you buy
To set it up, start with measuring.
– Measure the inside length, width, and depth of your spice drawer.
– Check the tallest jar in your stash so you don’t clip the lid.
– Choose an insert that leaves a little wiggle room for easy closing.
Install and arrange
Place the insert, adjust any dividers, and drop in your jars. Stand back and test. You should be able to grab a spice without moving others. Label lids or tops if your jars look alike.
Care and upkeep
Wipe spills, rotate older jars forward, and group spices by use. Consider color coding lids or keeping common staples in front. This keeps your kitchen calm and fast.
18. Spice Drawer Inserts
Editor’s Choice

Spice Drawer Organizer 4 Tier, Acrylic Seasoning Organizer Rack, Clear S…

Oizeir Clear Spice Rack (2-Pack) – 3-Tier Acrylic Organizer for Cabinet …

SpaceAid Bamboo Spice Drawer Organizer, (Need 3″ Deep Drawer) Expandable…
You Might Also Like

19. Use Tension Rods

Facing crowded cabinets and lost space? Tension rods are a simple fix that fits any budget. They clamp between shelf sides and hold tight with just pressure. No tools, no screws, no mess. With a few quick placements, you’ll see a calmer, easier-to-use kitchen.
– Horizontal storage for sprays and cleaners Set a rod across a shelf to steady spray bottles and cleaning liquids. It keeps them in one neat line and frees up drawer space for towels or tools. Make sure the rod fits snugly so bottles don’t wobble when you open the door.
– Vertical racks for lids, boards, and pans Place a shorter rod upright to create a slim slot. Stand pot lids, cutting boards, or baking sheets in it. You’ll reach what you need without digging through a jumble. Choose a rod that fits tightly between the cabinet walls for solid support.
– Double-duty for cups and utensils Add a second rod closer to the first to corral measuring cups, tiny lids, or silicone tools. It creates a compact mini-rack that keeps things easy to grab and easy to see.
– Adjustable fit matters Look for adjustable tension rods that can handle different shelf depths. A snug fit is safer and reduces rattling. If it’s loose, it won’t do much good.
– Move and test After you place each rod, load a few items and test the setup. Open and close the cabinet slowly to watch for slipping. Fine-tune as needed.
You get more usable space with less clutter. Tension rods are quick to install and easy to adjust as your needs change.
19. Use Tension Rods
Editor’s Choice

Black Shower Curtain Rod 31 to 80 Inch,1 Inch Diameter Adjustable Spring…

1500LBS Vertical Bar Rack Standing Storage Rack, 47″ W x 24″ D x 60″ H S…
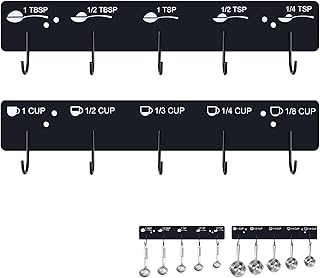
Premium Measuring Cups and Spoons Hanging Rack, Measuring Cup Organizer …
20. Display Your Cookbooks

You want your cookbooks close by without making a mess. A visible display can inspire meals and keep your kitchen calm. Let’s set up a plan that works with real life.
– Choose a dedicated space Pick a spot you pass often. A slim shelf on the wall or end of the counter works well. Use a sturdy bookend to keep titles upright.
– Show them off the right way Let cookbooks face you. A front-facing row on a shelf makes it easy to grab one. Leaning a book against a wall or wall-mounted rack is okay for quick access.
– Group by color or size Arrange spines by color or height. The rack looks neat, and the shelf becomes a mini gallery. This simple touch adds style and makes you smile.
– Keep it fresh and useful Rotate titles with the season. Add a small label like “This week” to guide meals. Place a pencil nearby for quick notes.
– Care and practicality Dust monthly and check for humidity. Re-shelve after cooking so the collection stays tidy and easy to browse.
Visible cookbooks invite you to cook more. Start with one shelf today, and watch how your kitchen feels more welcoming. This plan fits tight kitchens and busy mornings well.
20. Display Your Cookbooks
Editor’s Choice

MyGift Rustic Burnt Solid Wood and Industrial Matte Black Metal Magazine…

MaxGear Premium Matte Painted Book Ends, Heavy Duty and Sturdy Bookends …
Nelko Label Maker Machine with Tape, P21 Bluetooth Label Printer, Wirele…
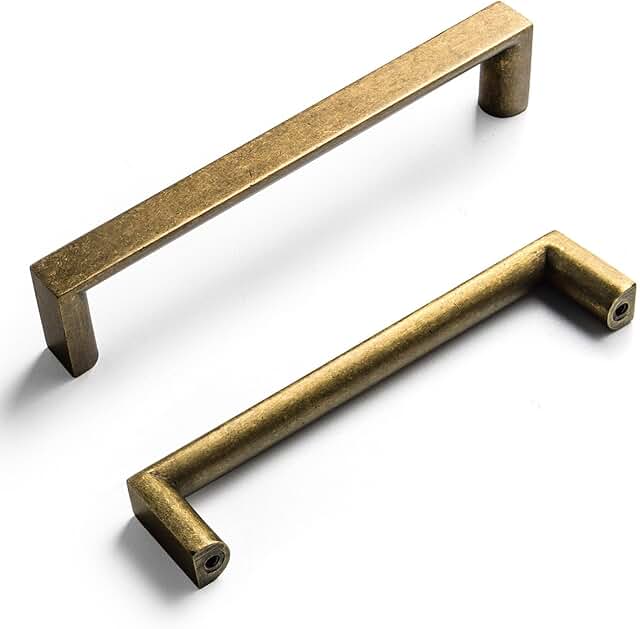
21. Use Hooks for Utensils

Hooks for utensils: a quick fix for messy counters
Tired of utensils crowding the counter? Hooks solve that fast. Put hooks inside cabinet doors or on the cabinet side. Your tools stay dry and ready to grab.
Where to place them
– Inside cabinet doors: a row of hooks frees counter space.
– Cabinet sides: run a strip along the edge you prep at.
– Wall or magnetic strips: put hooks where you cook most, for speed.
Choose the right hooks
Pick sturdy metal or solid wood. Choose finishes that match your style—brushed nickel, matte black, or brass. Check weight limits and use screws for heavy tools. For lightweight utensils, strong adhesive hooks work, but avoid heavy pans on the same strip.
Install with care
Measure so all hooks line up at the same height. Mark, drill small holes, and mount. Group tools by task: spoons with spoons, spatulas with spatulas, tongs together.
Care and tips
Wipe hooks after spills. If a door feels crowded, swap in shorter hooks. Don’t overload a single hook; spread the load. Decorative hooks add style and keep you organized.
That small change frees counter space and speeds your prep. Your utensils are always within reach.
21. Use Hooks for Utensils
Editor’s Choice

20 Pack 3.4″ S Shaped Hooks Stainless Steel Metal Hangers Hanging Hooks …

FOTYRIG Heavy Duty Adhesive Towel Hooks Stick on Towel Hanger Wall Holde…

Magnetic Knife Strips(15 Inch X Set Of 2) Magnetic Knife Storage Strip, …
22. Designate a Baking Zone

A cluttered bake space wastes time and patience. When you bake, you reach for the same tools again and again. Designate a baking zone in a kitchen cabinet to keep all your bake gear in one spot. Open the cabinet and you’ll see flour, sugar, measuring cups, mixing bowls, and parchment paper at a glance.
– Keep flour and sugar in clear, labeled bins so you can see amounts at a glance.
– Tuck measuring cups, spoons, and a whisk into a small labeled tray so they stay together.
– Stack mixing bowls and baking pans on a shelf with a lip to hold them in place.
– Place parchment paper, silicone mats, and cooling racks in a shallow bin or on a nearby rack.
Label each bin clearly so you know what sits inside. Use durable labels that wipe clean and stay readable. Keep the zone tidy by returning items to their spot after you bake. Do a quick two-minute tidy after every session to keep it neat.
– Choose clear acrylic bins for a clean, modern look that helps you spot items quickly.
– Use stackable shelves to fit more in a tight cabinet.
– A small lazy Susan helps you reach spices and flavorings without digging.
– Store oils, vanilla, and extracts in a tiny rack so they stay upright and easy to grab.
A well-organized baking zone can save you time and sanity! Keep your essentials in clear view and watch your baking skills soar as you whip up treats with ease.
22. Designate a Baking Zone
Editor’s Choice
Vtopmart 6 Pack Clear Stackable Storage Bins with Lids, Large Plastic Co…

SONGMICS Cabinet Organizer Shelf, Set of 2 Kitchen Counter Shelves, Kitc…

Set of 4, 10 Inch Non-Skid Lazy Susan Organizers – Turntable Rack for Ca…
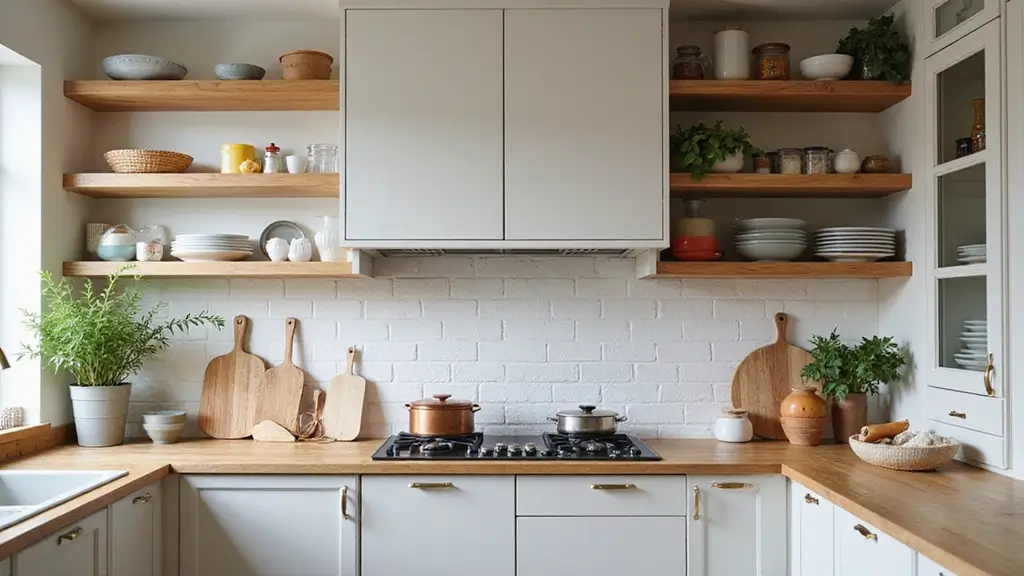
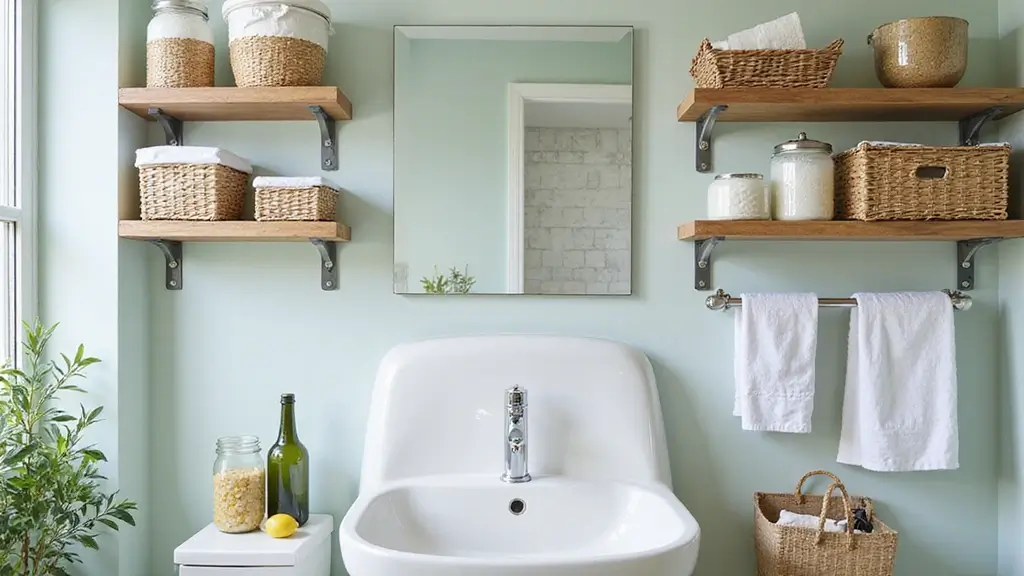
23. Utilize Wall Space

1. Open wall shelves
Open shelves free up cabinet space and show off daily dishes. Choose a shallow depth to keep the counter clear. Mount shelves directly into wall studs for strength. Put the items you use most at eye level.
2. Pegboard and rail systems
Pegboards add flexible storage for utensils, pans, and lids. Install a pegboard with hooks, baskets, and metal rails to fit your cooking style. Wipe the board regularly to keep it clean and neat.
3. Display and color coordination
Display dishware in grouped colors or sizes for a calm look. Arrange items by use so you can grab a mug or bowl fast. Leave space between pieces for airflow and a tidy feel.
4. Wall-mounted pot racks
Wall or ceiling pot racks bring heavy pans within reach. Choose a rack that fits your space and can bear weight. Secure it to studs or joists to stay safe when you load it.
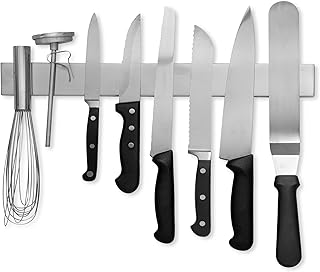
5. Magnetic strips and spice rails
Magnetic strips hold knives safely and free up drawer space. Spices on a wall rail stay visible and easy to grab. Keep the most used jars within arm’s reach.
6. Practical tips
Pick finishes that match your kitchen style. Label baskets so you know what’s inside. Don’t overdo it; too many items make walls feel crowded.
7. Quick-start plan
Measure the wall and find studs. Start with one shelf and a pegboard as a trial. Move daily items to the new spots and enjoy the extra space.
23. Utilize Wall Space
Editor’s Choice

DINZI LVJ Long Wall Shelves, 47.3Inch Wall Mounted Shelves Set of 2, Ext…

300-Piece Pegboard Hook Set, Pegboard Organizer Accessories for Hanging,…
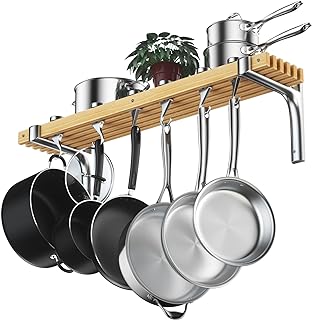
Cooks Standard Wall Mounted Wooden Pot Rack, 36 by 8-Inch
24. Create a Coffee Station

Start with the problem you want to fix
Want a quick, calm morning start? A coffee station keeps your brewer, mugs, and supplies in one place. This makes your routine smoother and your counters cleaner.
Pick the right spot
Choose a small corner, a spare counter, or a rolling cart. Near power and water helps. A corner wall shelf works, too. Keep the layout simple.
Group and display
Set up a simple tray or basket to hold the brewer, filters, and spoon. Match the materials to your kitchen: wood for warmth, metal for a modern look, or glass for a clean vibe. Place mugs on a rack or hooks to save space. A small dish holds sugar and packets.
Smart storage for pods and accessories
Tuck a compact drawer or bin for coffee pods, lids, and stoppers. Label the bins so you grab what you need. Use clear containers so you can see supplies at a glance.
Finish with a personal touch
Add a tiny plant, a chalkboard tag with today’s brew, or a decorative tray. A good coffee station invites you to sip slowly and smile.
24. Create a Coffee Station
Editor’s Choice

Amazon Basics Coffee Pod Storage Organizer Drawer for K-Cup Pods, 36 Pod…
Mug Racks for Wall, Coffee Mug Holder Wall Mount Up to Hold 24 Mugs, Cof…

11.5 Inches Candle Holder Tray Home Decor, Round Wood Tray for Coffee Ta…
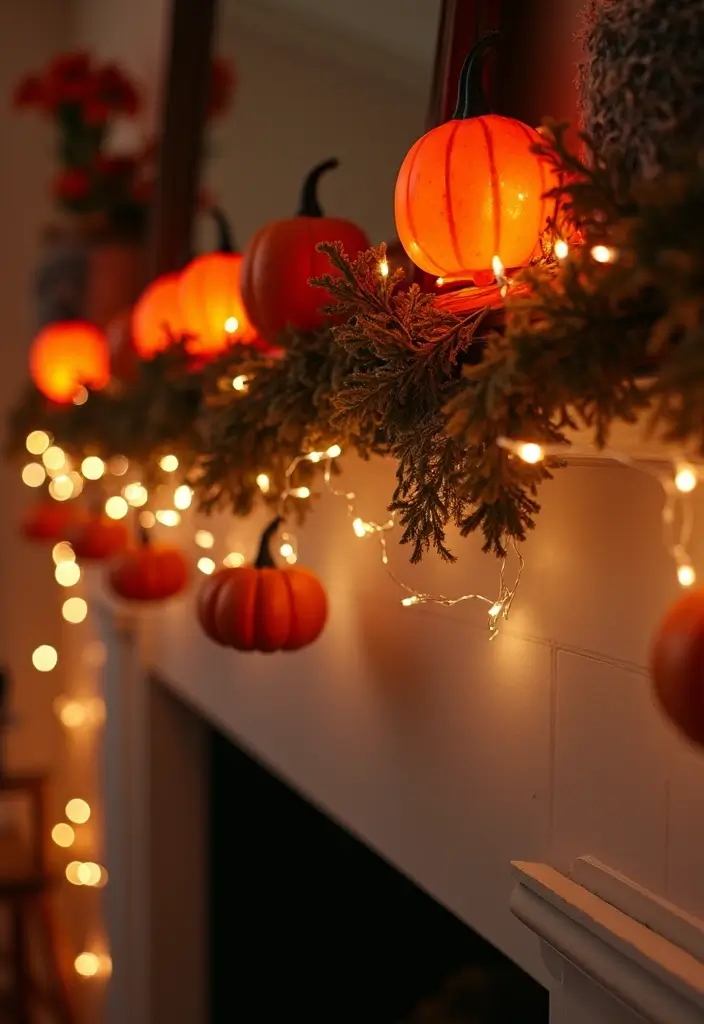
25. Seasonal Decor Storage

Seasonal decor tends to take over your kitchen cabinets. You want it organized, quick to grab, and simple to switch with the seasons. Use these steps to store it smartly.
– One clear home Designate a single area in a cabinet or a labeled tote for all seasonal items. Group holiday dishes, napkins, mini figurines, and decor accessories. This prevents clutter and speeds changes. Choose sturdy, easy-glide containers to move sets with one hand.
– See at a glance Use clear bins or pretty boxes so you can spot what you need without digging. Add a color code for each season, and label both the bin and its contents for quick restocking.
– Season-by-season labeling Label bins by season or holiday. Use big, bold labels and a date sticker for rotation reminders. Use durable labels, and keep a spare tag for updates. Use bold, large type and place labels on the front.
– Front-and-center access Keep the current season near the cabinet door. Put it on a lower shelf or a shallow bin so you can grab it without moving other items. This speeds daily routines.
– Protect and prepare Wrap fragile pieces in tissue or bubble wrap. Use stackable, ventilated bins for plates and tableware. Keep a few spare lids handy. Choose bins with lids to protect from dust.
– Rotate regularly Rotate twice a year. At season change, swap what’s in use. Tidy shelves and refresh worn items.
25. Seasonal Decor Storage
Editor’s Choice
Vtopmart 6 Pack Clear Stackable Storage Bins with Lids, Large Plastic Co…
Nelko Label Maker Machine with Tape, P21 Bluetooth Label Printer, Wirele…

Duck Brand Small Bubble Cushioning Wrap for Moving & Shipping – 175 FT B…
Conclusion

With these 25 fabulous kitchen cabinet organization hacks, you’re now armed to tackle even the messiest of cabinets!
These ideas not only promote organization but also add a touch of style to your cooking space.
Take the plunge, try out a few hacks, and enjoy a more efficient and inviting kitchen!
Note: We aim to provide accurate product links, but some may occasionally expire or become unavailable. If this happens, please search directly on Amazon for the product or a suitable alternative.
This post contains Amazon affiliate links, meaning I may earn a small commission if you purchase through my links, at no extra cost to you.
Frequently Asked Questions
What are some quick and easy kitchen cabinets organization hacks I can try?
If you’re looking for quick fixes, consider using pull-out shelves for easy access to items in the back, or magnetic spice jars that save space and make spices easy to grab.
Another fantastic option is over-the-door organizers that maximize unused door space and keep your kitchen clutter-free!
How can I declutter my kitchen cabinets effectively?
To effectively declutter your kitchen cabinets, start by removing everything and categorizing items. Use baskets for grouping similar items, and consider clear storage bins for visibility.
Don’t forget to utilize vertical space with tiered organizers to ensure everything is easy to see and access, helping you maintain organization!
What are the benefits of using tiered organizers in kitchen cabinets?
Tiered organizers are game-changers for kitchen cabinets! They allow you to stack items vertically, making it easy to see everything at a glance.
This way, you won’t miss out on items hiding at the back, which saves time when cooking and helps you keep your kitchen cabinets organized and clutter-free!
Can I use any DIY solutions for kitchen cabinets organization?
Absolutely! DIY solutions like using tension rods to create dividers or repurposing old containers for spice drawer inserts can be budget-friendly and functional.
Additionally, you can create a cork board inside cabinet doors for notes and recipes, adding a personal touch to your organization!
How do I maintain my kitchen cabinets organization after implementing these hacks?
Once you’ve organized your kitchen cabinets, maintaining that order is key! Regularly check for items you no longer use and declutter them.
Create a habit of returning items to their designated spots after use, and consider setting seasonal reminders to reassess your kitchen cabinets organization every few months!
Related Topics
kitchen organization
storage solutions
declutter hacks
pull-out shelves
magnetic spice jars
easy organization
small space storage
DIY kitchen tips
clear storage bins
tiered organizers
beginner friendly
home decor