Mid century modern living rooms catch the eye with clean lines and warm wood. I made this post because I want you to feel confident mixing classic pieces with today’s comfort. It can be easy to miss the balance between bold style and everyday ease. This guide gives you a practical path to that look.
Who it’s for If you care about rooms that look thoughtful and stay comfy, this is for you. If you love teak wood, brass details, and soft fabrics, you’ll find ideas that fit. Whether your space is small or large, these ideas work in real life and on real budgets.
What you’ll get A collection of 25 living room ideas that mix layout, color, lighting, and texture. You’ll learn how to pick sofa size so it fits, how to balance wood with metal, and how to hang art that pops. You will get clear steps you can act on this weekend.
Here is how to use the ideas. Start with a simple mood board. Pick a color palette like olive, teal, cream, and walnut. Add one bold piece such as a sculptural lamp or a geometric rug. Then layer textures with a cozy rug, linen cushions, and a leather chair.
Materials and textures that shine Mid century loves natural wood, metal, glass, and bright fabrics. Expect teak or walnut, brass hardware, terrazzo, linen, and leather. Mix subtle patterns with solid blocks of color to keep the room calm. A few statement pieces can anchor the space.
These ideas fit real homes today. They help spaces feel bigger, lighter, and more inviting without losing soul. You can adapt them to your space step by step. Ready to start? Let’s dive into the 25 ideas and pick the ones that fit you best.
Here is why your living room needs a bold focal point. In a mid century space, one or two statement pieces wake up the whole room. Think of a chair with a bold shape, like the classic Eames lounge chair. Or a teak sideboard that shines from wall to wall. These items are more than ones you sit on. They add curves, sharp lines, and a touch of art.
Here is how to pick them without panic. Choose pieces that fit your space and match your color story. They should stand out, but not drown the rest of the room. Let their shape guide the mood and pace of your space.
Tips for choosing statement pieces:
– Pick pieces with rich wood tones or bold upholstery to bring warmth.
– Check the size. A huge piece can crowd a small room.
– Mix materials. Pair wood with metal or fabric for texture.
Placed well, one or two standout pieces change a room from plain to memorable. They give your eyes a place to land and work with softer textiles and clean lines. Start with one bold seat or a striking cabinet, then finish with simple accents to keep the look balanced.
1. Statement Furniture Pieces
Editor’s Choice
🛍️
Chaise Lounge Chair with Ottoman Genuine Leather High-Resilience Foam Cu…
If you want a living room that feels fresh but not loud, bold color palettes are your ally. Mid Century Modern shines when you mix jewel tones with neutrals. Think emerald green, sapphire blue, and mustard yellow. These hues pop when you balance them with light walls and clean lines.
Apply color in layers. A color-blocked wall, a sofa in a strong shade, or cushions and art that echo one or two hues can make a big impact.
Tips for using color:
– Start small with accents, then bring in larger bold pieces.
– Use color theory to guide choices; complementary colors create contrast, while analogous hues harmonize.
– Mix patterns such as stripes, geometric shapes, and florals if they share a color.
Keep a leash on your palette. Limit to two or three main colors plus neutrals to avoid a crowded look. If a wall feels too strong, swap to a softer shade and let textiles carry the color.
Next steps: scan your room, pick one bold hue as the anchor, then add cushions and art that echo that color in small, thoughtful ways.
With the right balance, bold color feels warm, inviting, and true to your style. Give it a try this weekend.
Bold color palettes can transform your mid century modern living room into a stunning visual experience. Layer jewel tones with neutrals for a fresh look that speaks volumes without shouting!
Here is why geometric patterns fit your Mid Century Modern living room. They add rhythm to soft furniture and art, guiding the eye and adding depth. You get a space that feels both playful and calm.
Where to use patterns
– Try a chevron or herringbone rug to anchor the floor.
– Add hexagon or circle shapes in curtains or a throw pillow set.
– Let one wall showcase a simple geometric art piece or a slim patterned clock.
How to balance patterns
– Choose one main patterned piece and keep the rest solid.
– Use colors that contrast but stay within your palette.
– Mix small patterns with bigger solid blocks for harmony.
Color and texture tips
– Black and white patterns pop against warm wood frames.
– Introduce a second texture such as linen or wool to soften line work.
– Keep the pattern scale in mind; larger shapes feel bold, smaller shapes feel subtle.
Next steps
1) Pick a rug with a clear geometric design.
2) Add two solid cushions and one patterned pillow.
3) Choose curtains or a wall piece that ties the colors together.
4) Review the room; remove anything that competes with the pattern.
Geometric patterns sharpen your Mid Century Modern vibe without crossing into busy. You get a space that stays timeless and eye-catching.
3. Geometric Patterns
Editor’s Choice
🛍️
SAFAVIEH Adirondack Collection Area Rug – 6′ x 9′, Ivory & Black, Modern…
If you want a warm, timeless Mid Century Modern living room, natural materials are your best tool. They add warmth and a sense of calm without losing clean lines. Wood, leather, and textiles give depth and a fresh, earthy feel you can live with every day.
Natural materials show up in many places. Teak, walnut, and oak are favorites for sturdy furniture. Leather brings soft, comfortable seating. Textiles on throws or curtains soften light and add cozy texture.
How to incorporate natural materials:
– Choose sustainably sourced wood to boost beauty and lower environmental impact.
– Mix hard surfaces with soft textures to keep the space comfy and approachable.
– Add plants to bring life, color, and a breath of fresh air.
Here is why this works in practice. A wood coffee table grounds the room. A leather chair invites you to sit. Wool or cotton textiles catch the eye without shouting.
Next steps for a balanced look:
– Keep finishes matte to maintain that quiet, classic vibe.
– Vary wood tones but stay within the same family so things feel connected.
– Let nature help with color ranges: greens, creams, and warm browns feel at home.
The right mix of natural materials creates a grounded, welcoming living room you’ll want to linger in.
Lighting can be the make or break in a mid century living room. It does more than light a space. It sets mood and shows off the wood, metal, and clean lines you love.
In this style, let light be a feature. Think iconic pieces like the Arco floor lamp or the Sputnik chandelier. They do more than glow. They become a focal point and a talking point for guests.
Tips for selecting lighting:
– Pick fixtures with a sculptural shape so they add interest even when they are off.
– Layer your light. Use ambient, task, and accent lighting to create a warm, inviting glow.
– Use dimmers. They let you soften brightness for movie nights or brighten up for games.
– Match materials and finishes to your room. Brass, smoked glass, or warm wood ties the look together.
– Place lights to highlight art and seating areas. A wall sconce beside a painting or a floor lamp by the chair makes the space feel curated.
– Think about bulbs. A warm tone (around 2700 Kelvin) feels cozy and true to mid century style.
Great lighting choices can change how your living room feels and how you use the space.
Start with one statement piece and build from there. Your room grows with you as you add lighting.
5. Iconic Lighting Fixtures
Editor’s Choice
🛍️
Teamson Home Arquer 68.1″ Arc Floor Lamp for Living Rooms, Home Offices,…
If you want a calm, stylish Mid Century Modern living room, start with less. Minimal decor puts the spotlight on clean lines and the room’s best pieces. You choose what matters and give it space to breathe.
Let negative space do some work. A simple wall, a slim sofa, and a single, well-placed piece can feel bigger. A small vase, one plant, or one piece of art can look bold when it isn’t crowded.
Tips for minimalist decor:
– Limit decor items to what you truly love and need, focusing on quality over quantity.
– Use multifunctional furniture pieces, like an ottoman that doubles as storage.
– Stick to a cohesive color palette to maintain a serene environment.
Here is how to build a minimal look you can live with. Start with three to five essential items. Check their scale with your seating and how they feel from different angles. Keep finishes similar—wood tones, metal, and glass should harmonize. Leave space around each piece so the room can breathe.
Next steps. Add texture with a soft rug, natural fabrics, and a touch of warmth from wood. Keep surfaces clean and empty of clutter. This approach makes your Mid Century Modern bones stand out and makes the space truly yours.
6. Minimalistic Decor
Editor’s Choice
🛍️
COLAMY Fabric Round Storage Ottoman with Reversible Tray Lid – Multi-Fun…
Want a living room that feels bigger and inviting? Open layouts do that by removing walls and letting spaces breathe. In a mid century modern home, this flow makes rooms feel connected. Natural light moves from window to window, and the space seems brighter. You can talk with someone in the seating area while others move freely without bumping into furniture. Here is why this works. Let’s break it down.
Open layout tips:
– Use area rugs to define different zones within an open plan.
– Arrange the sofa and chairs to invite conversation while keeping walkways clear.
– Choose a unifying color palette and materials to link each area.
– Leave space near windows for plants or a reading nook.
An open layout can make your living room feel larger while capturing Mid Century Modern style.
Next steps. Start by mapping your plan on paper. Mark where the sofa sits and which chair faces it. Check the walking paths from door to windows. Leave at least 3 feet of space for comfortable movement. If you add a rug, make sure it covers the main area and ties the seats together.
Focus on comfort as well as style.
7. Open Layouts
Editor’s Choice
🛍️
Black Rugs for Living Room Fluffy 4×6 ft Bedroom Rug Non-Slip Area Rugs …
Your mid century modern living room can feel sleek but impersonal. Vintage accessories give it character and a hint of history. Picture a retro clock ticking on a clean wall, a poster from a past era, or a simple ceramic bowl with curved lines. These pieces spark memories and invite guests to learn your story.
Here is why vintage finds work: they ground a room and spark easy conversations. When you hunt for them, you widen your choices and your style.
Where to look? Thrift stores, flea markets, and careful online shops are good bets. Pick pieces that speak to you, not just fit a trend. They should feel right in your hands and on shelves.
Next steps. Mix with care. A few vintage items can shine when paired with clean, modern pieces.
Start with one bold piece, then layer in smaller finds.
Tips for integrating vintage accessories:
– Balance vintage pieces with contemporary elements to keep the room fresh.
– Group accessories in odd numbers for an eye-catching display.
– Mix different eras to create an eclectic yet cohesive style.
Vintage accessories add depth and a personal touch, making your living room feel uniquely yours.
Take your time and enjoy the hunt. Your room will speak your story.
Bold focal points like Eames lounge chairs or teak sideboards
$549.99 – $520.00
Bold Color Palettes
Mix jewel tones with neutrals for a fresh look
N/A
Geometric Patterns
Use patterns in rugs and cushions to add rhythm
N/A
Natural Materials
Incorporate wood, leather, and textiles for warmth
$235.00 – $269.99
Iconic Lighting Fixtures
Use sculptural lamps and layered lighting for ambiance
$164.95 – $246.99
Vintage Accessories
Add character with retro clocks and artwork
$9.89 – $36.88
Floor Cushions
Extra seating options that are easy to move
$25.99 – $48.99
9. Layered Textures
If you want warmth in a Mid Century Modern living room without losing its clean lines, layer textures. You mix soft fabrics with smooth wood and sleek metal. The result is depth and comfort you can feel.
Start with a focal piece that speaks to the style. A plush velvet sofa catches the eye and invites you to sit. Pair it with a natural fiber rug that you can see and touch. The rug’s rough texture contrasts with the velvet and adds a tactile pulse to the room. Add cushions in different textures and sizes so your seating looks inviting, not flat.
A knitted throw draped over the sofa adds softness and warmth. Woven baskets in corners give touch and storage without clutter. A leather pouf or a cotton quilt can introduce another material and color without breaking the look.
Texturing tips:
– Use a mix of finishes: matte, glossy, and soft to create dimension.
– Add tactile elements like woven baskets or knitted throws for a cozy feel.
– Mind your color choices; complementary hues lift the texture.
Layering textures makes the space feel inviting and lived in, while still keeping that mid century vibe. Here is why it works: the eye catches different surfaces, and your hands enjoy the same variety.
9. Layered Textures
Editor’s Choice
🛍️
Best Choice Products 77″ Mid Century Modern Velvet Loveseat Sofa, Couch,…
You want a living room that feels artful and useful. Functional art lets you get both in one piece. It blends form and function so a room looks bright and feels easy to live in.
Think of items that are more than decor. A sculptural coffee table that you can set drinks on. A wall clock with a bold shape. A bookcase that stands as a sculpture. A lighting fixture that acts as a hanging sculpture and brings soft light to the couch. These pieces carry your style and light up the space at the same time.
Here is why it works: it creates a conversation starter and keeps your space practical. You don’t have to choose between beauty and use. You get both in a single object.
Choosing functional art tips:
– Pick pieces that fit your current colors and furniture style.
– Choose quality materials that last, like solid wood, metal, or ceramic.
– Go bold with one standout piece to anchor the room.
Next steps: map your room. Find a spot where a sculptural shelf or a statement light can shine. Place it where it draws the eye but does not crowd your seating. Keep scale in check, and let the rest of the pieces support the look.
10. Functional Art
Editor’s Choice
🛍️
Modern Fiberglass Coffee Table with Sculptural Curved Design, Durable Be…
Greenery in a Mid Century Modern living room brings life without crowding the space. Plants add color and texture, and they can lift the mood as you relax. They also make the air feel fresher, even on busy days.
Start with a few easy care plants. Look for low-maintenance options that fit your light. Pick planters that match your style, such as sleek ceramic or brushed metal. Think about hanging planters to keep the floor clear and create a new visual line.
Greenery tips:
– Pick low-maintenance plants such as snake plant, pothos, or ZZ plant.
– Stack varied heights and leaf shapes to create a layered look.
– Put greens near windows or bright spots to keep them thriving.
Place green friends where they can soften hard edges. Vary heights to add depth. A tall plant in a corner, a fern on a stand, and a small succulent on a shelf work well. Let some vines trail down from a hanging basket to draw the eye.
Here is why. Plants pull the room together and keep it calm.
Next steps are simple: choose a focal plant, test spots, and adjust as you go.
Then tweak placements as light shifts with the seasons.
A Mid Century Modern living room thrives on greenery! Just a few easy-care plants can uplift your mood and refresh your space without overcrowding it.
11. Greenery Galore
Editor’s Choice
🛍️
Live Snake Plant, Sansevieria trifasciata Superba, Fully Rooted Indoor H…
If you want a focal point in your Mid Century Modern living room, an accent wall is a simple, effective trick. It adds depth and shows your style without overdoing the space. Pick a wall that naturally draws the eye, like the one behind your sofa or around a fireplace.
Choose a material that fits your vibe. Bold wallpaper with geometric shapes works with the 1950s look. A deep paint color like navy or forest green brings calm luxury. Wood paneling adds warmth and texture that mirrors mid century finishes. The key is harmony with your furniture, rug, and lighting.
Accent wall tips:
– Use wallpaper with geometric patterns to tie into the Mid Century Modern theme.
– Paint options like deep greens or navy can evoke a sense of sophistication.
– Highlight the wall with carefully selected artwork or decor to make it pop.
– Consider texture or wood panels to add warmth.
Next steps: start small and test your ideas. Pick one wall to begin. Order a few paint swatches or wallpaper samples and view them in morning and evening light. Move furniture around to see how the wall works with daily use. If the wall feels loud, scale back by keeping other walls neutral. This keeps your space balanced and inviting.
12. Accent Walls
Editor’s Choice
🛍️
Livelynine 17.5×276″ Retro Peel and Stick Wallpaper Geometric Mid Centur…
Are you trying to add a personal touch to your Mid Century Modern living room? Personalized artwork helps you express who you are. It can be a bold canvas, a set of prints, or a sculptural piece. It brings warmth and character without stealing the room.
Here is why a well made gallery wall works: it holds several pieces in a calm rhythm. Mix sizes and textures but keep a shared color family.
Art selection tips:
– Mix originals and prints for depth.
– Match scale to your furniture. Big pieces work with large sofas; smaller ones suit chairs and side tables.
– Pick frames with clean lines. Wood tones or sleek metal fit Mid Century Modern. Skip ornate frames.
Next, practical steps you can apply now:
– Choose a color family that echoes your sofa, rug, and accents.
– Start with 3 to 5 pieces. A large focal piece with two or three smaller ones often looks best.
– Test spacing before mounting. Use paper cutouts or painter’s tape.
Here are quick buying tips:
– Combine budget prints with a few originals to stay affordable.
– Keep frames consistent. A single frame style helps cohesion.
– Consider one statement piece with supporting works in similar tones.
Next steps: with a simple plan, your wall will tell your story and stay calm.
13. Personalized Artwork
Editor’s Choice
🛍️
16 PCS Framed Eclectic Wall Art Decor, Modern Maximalist Home Gallery Wa…
Textiles tie your whole room together. In a mid century modern living room, fabric choices matter as much as furniture. You can feel it in a soft rug under your feet, or in the way curtain folds catch the light. Look for geometric shapes or bright colors that echo mid century vibes. Textiles help tell your story without loud tricks.
Layering fabrics changes the mood. A patterned rug right under a plain sofa, or cushions in solid color on a busy chair, adds depth. A textured throw over a smooth sofa makes the space feel cozy. Different textures keep the eye moving and the room from feeling flat.
Textile tips:
– Choose fabrics that last and still look fresh after daily wear.
– Let textiles bring color without crowding the room.
– Don’t shy away from bold patterns; they define the mid-century look.
– Pick natural fibers like cotton, wool, linen or blends.
– Let a patterned rug anchor the seating area and use solid cushions to echo a color.
– Mix textures such as wool, velvet, cotton, and jute for depth.
Well-chosen textiles boost comfort and style, turning a living room into a welcoming space. Start small, then grow your look with easy swaps.
Textiles are the unsung heroes of a mid century modern living room. Layer them thoughtfully, and watch your space transform into a vibrant story of comfort and style!
14. Textiles That Pop
Editor’s Choice
🛍️
HOMFINE Washable Modern Area Rug – Geometric Style 5×7 Rugs for Living R…
You’re looking for a living room that works for work, play, and guests. A mid century modern vibe loves clean lines and warm wood. You can keep that look while making the room do more than one job.
Here is how to plan it so your space stays calm and useful.
– Choose furniture that changes roles. A sofa that becomes a bed helps when friends stay over. A coffee table that lifts into a desk gives you a tiny work spot.
– Define zones with rugs and shelves. Put a low bookcase or a slim console between seating areas. A rug marks the living area and another rug marks the work zone. This helps the space feel open.
– Keep flow clear. Put seating so you can move from one area to another without squeezing past a chair.
– Add light and texture. A floor lamp or table lamp brings warmth. A throw and a few cushions add comfort without crowding.
– Tie it together. Use the same wood tone, metal accents, and colors in every corner so it feels one room.
What you gain is a home that serves more than one need. It stays calm, not busy. It fits real life, not just a photo shoot. Next steps. Sketch your space, pick a sleeper piece, and set two zones.
15. Multi-Functional Spaces
Editor’s Choice
🛍️
Ball & Cast L-Shape Reversible Sectional Sleeper Sofa Bed 4 in 1 Pull Ou…
Your Mid Century Modern living room needs storage that keeps the space light. Floating shelves deliver just that. They add vertical space and help rooms feel open. They also give you a place to show items that fit your style. With slim lines and clean edges, these shelves work with teak, walnut, or sleek metal.
Where you place them matters. Put shelves at different heights to create a simple rhythm. Let their tops follow the line of nearby furniture for a tidy look. Leave room for a small plant, a row of books, or a favorite sculpture. This approach makes the room feel organized and calm.
Floating shelf tips:
– Pick lightweight yet sturdy options like thin wood boards or slim metal for a clean, modern feel.
– Color the shelves to match the wall or blend with your furniture for a smooth look.
– Show a few well chosen items. A plant, a few books, and one keepsake go far.
– Install carefully. Use studs when you can, level the path, and keep supports hidden if possible.
Floating shelves add practical storage without stealing space. They suit a mid century modern living room and keep your style on point.
You want a mid-century modern living room that feels warm and easy to live in. Retro appliances can give that vibe and still keep daily life smooth. A vinyl record player adds music and a hint of the past. A pastel fridge or chrome coffee maker pulls the era into today. The glow from a vintage lamp makes the room feel cozy, and metal bits catch the light.
Retro appliance tips:
– Look for mid-century shapes like curved edges, chrome accents, and warm wood.
– Choose colors that fit your palette; teal, mint, apricot, and olive work well.
– Use appliances as decor that still works for coffee, music, or a cold drink.
– Try retro-inspired models that mimic the look but use safe modern internals.
– Keep cords hidden and place items on a slim, sturdy console.
Integrating retro appliances adds personality to your space. Start with one showpiece and add smaller touches around it. This keeps clean lines and still leaves room for real use. With care, you blend the old and the new without clutter. Plan a small mixing area near seating so guests notice the look.
17. Retro Appliances
Editor’s Choice
🛍️
Vinyl Record Player Turntable with Built-in Bluetooth Receiver & 2 Stere…
Here is a simple plan to light a Mid Century Modern living room for every moment. Layered lighting uses three kinds of light: ambient, task, and accent. Ambient fills softly. Task helps you read. Accent draws attention to art.
Here is why it works. A pendant or ceiling fixture anchors the room. A floor lamp near the sofa gives easy reading light. Small table lamps and wall sconces add warmth and depth. Together they make the space feel bigger and cozier.
Layered lighting tips:
– Use a mix of floor lamps, table lamps, and wall sconces to create depth
– Position lights to highlight decor like a bold rug or art
– Choose warm bulbs for a cozy feel
Next steps: plan three light zones. The seating area, an art wall, and a reading corner. Put ambient light in the ceiling, a floor lamp by the sofa, and a wall light beside the art. Add a table lamp on a side table for balance.
If you want control, add dimmer switches. They let you lower glare in the evening and raise it for gatherings.
LED bulbs save energy and stay cool, but pick a warm tone for comfort.
Small tweaks bring big mood shifts fast.
18. Layered Lighting
Editor’s Choice
🛍️
LEPOWER Wood Tripod Floor Lamp, Mid Century Standing Lamp, Modern Design…
Your living room can feel flat without texture. Textures add depth and invite your eyes and hands to explore. In a Mid Century Modern space, soft fabrics meet clean surfaces to keep the look warm, not cold.
Here is why textures matter. They break long lines and add warmth to the room. You feel it when you sit on a chair, touch a rug, or run a hand over wood grain and metal.
Texture ideas:
– Velvet for seating or cushions
– Wool throws and knitted accents
– Leather details
– Boucle or chunky knits
– Linen curtains and woven throws
– Wood grain with brushed metal accents
Here is how to mix textures. A smooth leather chair pairs well with a chunky wool throw. Add a plush rug in a different texture and layer in soft linen curtains. Let wood, brass, and matte metal finish the space.
Texture tips:
– Use a variety of materials to balance the room
– Include different textures in furnishings and decor for depth
– Don’t fear contrast; different textures keep the space lively
With careful texture choice, your living room gains warmth and visual interest without losing that clean Modernist feel.
Next steps: pick a key fabric for a chair, add a throw, and choose a rug that carries a second texture.
19. Modernist Textures
Editor’s Choice
🛍️
MIULEE Velvet Throw Pillow Covers 18×18 Inch, Pack of 2 – Dark Blue, Sup…
You want a Mid Century Modern living room that tells your story. Personal touches add warmth and life to the space. Family photos, travel souvenirs, and kept items show who you are. When the pieces fit, the room breathes and invites you in.
Here is why you should curate, not clutter. Pick items that fit the space and shine without shouting. A single large photo in a clean frame can be a strong focal point. A trio of small mementos in a neat row makes a quiet, friendly display. Keep a simple color note so items feel tied to the rest of the decor.
Tips for personalizing your space:
– Choose scale wisely: large pieces anchor the room; small items work in groups.
– Create small vignettes: pair a photo with a keepsake and a plant for life and texture.
– Rotate pieces seasonally to keep it fresh and easy to live with.
Next steps:
– Pick a bold wall photo or a 60s style clock as a focal point.
– Keep the rest in a simple palette of wood tones, teal, and warm orange.
– Place items at eye level for easy viewing.
If a piece feels out of place, move it to a different wall.
Personal touches turn a cold room into a warm space you want to step into.
20. Personal Touches
Editor’s Choice
🛍️
AELS 4×6 Inch Vintage Scalloped Picture Frame, Mid Century Modern Antiqu…
Want to add color to your Mid Century Modern living room without a big remodel? Vintage wallpaper can do it. It creates a bold backdrop that ties furniture, art, and light. One wall can become the room’s anchor.
Here is why it works: era patterns echo clean lines you love, and color brings items together. Use it on an accent wall or behind shelves to frame treasures and make them pop.
Wallpaper tips:
– Choose patterns that reflect the Mid Century look, with bold colors and strong shapes.
– Match scale to space: large motifs fill open rooms; small prints suit compact areas.
– Coordinate with your furniture: pull colors from your sofa, rug, or wood tones.
– Consider material: vinyl for high-traffic walls; traditional paper for softer vibes; peel-and-stick for renters.
– Balance a busy wall with simple art and solid neutrals nearby.
Try this: teal and ochre geometric wallpaper on the feature wall behind a walnut console and a tan leather chair. The pattern adds life while the wood keeps the room grounded.
Next steps: order samples, prep the wall, and plan lighting. If you rent, pick peel-and-stick. If you own, use traditional wallpaper with paste. Keep the rest of the room calm.
21. Vintage-inspired Wallpaper
Editor’s Choice
🛍️
Art3d Smoothing Tool Kit for Applying Peel and Stick Wallpaper, Vinyl Ba…
If your Mid Century Modern living room feels a bit boxed, a mirror can help. Mirrors bounce light and create the sense of space. When placed well, they highlight your art and unique furniture instead of just filling a wall.
Choose mirror styles that fit the look. Look for sunburst frames, geometric metal shapes, or frames with clean lines in brass, gold, or black. These pieces act as decor and a focal point at the same time.
Mirror placement tips:
– Position a mirror opposite a window to flood the room with natural light.
– Use mirrors to reinforce a focal point; angle them to reflect a plant, a sculpture, or a bold rug for added depth.
– Check the scale. A mirror should feel balanced with your furniture, not overpower it.
Next steps:
– Start with one statement mirror, then add a second small piece if you need more brightness.
– Hang mirrors at eye level for easy viewing, or a touch higher above a console table.
– Keep reflections clean by wiping with a soft cloth.
Using mirrors wisely, you brighten the room and open the sight lines. You’ll notice the space feels airier and more welcoming.
If you have a tall ceiling, try a tall vertical mirror. For small spaces, lean the mirror against the wall for a casual, changeable look.
Your living room needs a coffee table that feels alive in a Mid Century Modern space. A unique piece acts as a centerpiece and a work surface. Look for tables with clean lines, tapered legs, and wood or glass that lets the room breathe.
Here is why a standout table helps: it anchors seating and adds texture without stealing the show from your couches.
Unique coffee table tips:
– Choose materials that play well together; wood and glass blend cleanly for a fresh, timeless look.
– Pick a table with storage or shelves to keep remotes, magazines, and kid art out of sight.
– Check the size and height. The table should sit close to the seat height and not crowd the flow.
– Look for era details like slender legs, gentle curves, or parquet patterns that nod to the period.
– Think about the surface pattern. A subtle inlay or grain can catch the eye without shouting.
Next steps: place the table in your room, test with a few throws or trays, and adjust as needed. A one-of-a-kind coffee table brings charm and practical use to your living space.
If you want an easy upgrade, start with a classic wood top and add a glass insert later.
A unique coffee table isn’t just furniture; it’s the heartbeat of your mid century modern living room, adding character and anchoring your space with style and grace.
23. Unique Coffee Tables
Editor’s Choice
🛍️
Coffee Table, 39.4″ Mid Century Modern Coffee Tables for Living Room, Co…
Here is why you need floor cushions in a mid century modern living room. They add extra seating without bulk. They also keep the room airy and easy to rearrange. You can move them to where guests gather or to create a quiet corner for reading.
Think about choosing cushions that fit your space. Pick shapes and sizes that echo your sofa and rug. Round cushions feel soft and friendly; rectangular ones feel structured. Mix solid colors with prints that match your palette. Layer cushions on a woven rug for texture and warmth.
Here is how to use them. Create a casual lounge zone near a coffee table. Place a couple by the sofa for a comfy pull-up seat. For big gatherings, spread cushions around the edges of the seating area so people can spread out.
Care and setup are simple. Choose cushions with removable covers for easy cleaning. If you can, pick cotton, denim, or wool blends that wear well. Keep a few spare covers in a cabinet.
Floor cushion tips:
– Choose cushions with removable covers so you can clean them.
– Mix colors and textures to keep the look playful.
– Place cushions near seating to invite lounging.
Floor cushions fit the mid century vibe. They boost comfort and add a relaxed, lived-in feel.
24. Floor Cushions
Editor’s Choice
🛍️
Washable Floor Pillow Cushion for Adults, Meditation Cushion Pillow, Lar…
In a mid century modern living room, you can get style that respects the planet. You get clean lines, warm textures, and furniture that lasts. Here is why sustainable choices fit your goals: they stay timeless, cut waste, and keep air clean.
Start with furniture. Pick pieces built with certified sustainable materials and designs meant to endure. Look for FSC wood, low-VOC finishes, and sturdy frames. Reclaimed wood adds character and saves trees. For textiles, choose organic cotton, linen, or recycled fabrics. They feel soft, breathe well, and wear gracefully.
Bring in plants. They add life, color, and better air. A tall plant next to a chair or a shelf becomes a focal point. Let sunlight fall on them to keep leaves bright.
Support local makers. Handcrafted pieces carry a story and fit your space with real character. You might find a teak sideboard that ages with grace or a woven chair with a quiet charm.
Sustainable tips:
– Select furniture made from certified sustainable materials to last.
– Use eco-friendly textiles; look for organic cotton or recycled fibers.
– Buy from local artisans for unique, handcrafted pieces that tell a story.
By weaving these choices into your room, mid century style shines while you care for the Earth.
25. Sustainable Elements
Editor’s Choice
🛍️
Coffee Table with Storage, Boho Dining Table with Rattan Drawer and Soli…
Mid Century Modern living rooms are all about blending style, comfort, and creativity. From statement furniture to layered textures, these ideas provide countless ways to breathe new life into your space. Each trend captures the essence of this timeless design style, inviting warmth and personality into your home.
Explore these concepts and let them inspire your own Mid Century Modern oasis! Remember, the beauty is in the details—so take your time to curate a space that reflects your unique style.
Note: We aim to provide accurate product links, but some may occasionally expire or become unavailable. If this happens, please search directly on Amazon for the product or a suitable alternative.
This post contains Amazon affiliate links, meaning I may earn a small commission if you purchase through my links, at no extra cost to you.
Frequently Asked Questions
What are the key elements of a Mid Century Modern living room?
A Mid Century Modern living room is all about clean lines and functionality. Key elements include statement furniture pieces, such as iconic chairs and tables with tapered legs. You’ll also want to incorporate bold color palettes that mix jewel tones with neutrals, and add natural materials like wood and leather for warmth. Don’t forget about geometric patterns and iconic lighting fixtures to complete the look!
How can I incorporate vintage accessories into my living room decor?
Adding vintage accessories is a fantastic way to infuse personality into your Mid Century Modern living room! Look for unique items like retro clocks, vintage artwork, or even a classic record player. These pieces provide character and a sense of history without overwhelming the space. Just remember to keep your decor minimalistic to let those vintage finds shine!
What are some effective ways to use color in a Mid Century Modern living room?
Color plays a vital role in a Mid Century Modern living room. To keep it fresh yet cohesive, mix bold color palettes with jewel tones like emerald green or sapphire blue alongside neutral shades. You can also create an accent wall with vintage-inspired wallpaper or paint to draw attention without overpowering the room. Layering colors through textiles like cushions and rugs can also add depth while staying true to the style.
How do I create a functional space in my Mid Century Modern living room?
Creating a functional space in your Mid Century Modern living room is all about smart design choices! Opt for multi-functional furniture, like a coffee table that doubles as storage, or use floor cushions for additional seating without bulk. An open layout can help your space feel larger and more inviting, allowing for easy movement and flow. Don’t forget to incorporate layered lighting for different moods!
What types of plants work best in a Mid Century Modern living room?
In a Mid Century Modern living room, greenery can really elevate the space. Look for low-maintenance plants like snake plants, pothos, or peace lilies that thrive indoors and add a pop of life without crowding the area. Use sleek, modern planters that complement your decor, and consider grouping plants in varying heights for visual interest. Greenery not only enhances the aesthetic but also improves air quality, making your space feel fresh and inviting!
This time of year always makes me think of Sunday afternoons spent in a warm, easy living room. I find myself craving soft light, wood tones, and fabrics that invite you to sink in. A space that looks clean but feels lived in, where you can breathe easy and enjoy a quiet moment.
If you’re someone who loves mid century design but also wants a room you can truly relax in, this one’s for you. You care about texture, lighting, and a space that feels like home, not a showroom. You want style that fits real life, with chairs you can sit in and rugs you can spill coffee on and still love.
I pulled together 20 cozy mid century modern living room ideas that blend form with comfort. You’ll find tips on warm woods, curved silhouettes, easy color palettes, and soft textiles. These ideas are practical, not fussy, and ready to try in a real home.
Think layers of light, a rug that anchors the space, and art that tells a story. You’ll learn how to mix wood with brass accents, velvet with wool, and how to keep lines clean while adding warmth. Each idea includes simple ways to adapt it to your room, whether it’s small or large.
Start with a focal piece, like a walnut sofa or a sculptural chair. Then add two or three layers of lighting—a floor lamp, a table lamp, and a soft ceiling glow. Bring in texture with throw blankets, cushions, and a cozy rug. If you want, shop smart, mix new and vintage, and swap in a few plants for life.
Ready to turn ideas into action? This guide aims to give you clear steps you can use this weekend. You’ll get mix-and-match tips, budget-friendly swaps, and a plan to make your space feel welcoming without losing the mid century charm. Read on, and see how these ideas fit your home and your life.
Start with your needs: you want a living room that feels warm, inviting, and easy to live in. Earthy tones do that. They echo nature and suit a mid century modern vibe.
Here is why this palette works: base shades of terracotta, olive green, and mustard yellow create a soft backdrop. They pair well with the clean lines of mid century furniture.
– Keep a classic anchor piece. A low, curved sofa in a warm tan or clay color reads as vintage without looking dated.
– Add retro accents. Think an Eames lounge chair, a geometric rug, or a sunburst clock. These pieces nod to the era while staying timeless.
– Bring life with plants. A tall fiddle-leaf fig, a group of small succulents, and a trailing pothos add texture and fresh green pops against the earthy walls.
– Use wood furniture to maintain warmth. Walnut, teak, or oak side tables and shelves blend with the color story.
Next steps: choose a rug that ties the room together, then place the chair and sofa so guests face each other. Layer textiles like a wool throw and cotton cushions to soften edges. You’ll feel cozy without losing clean lines.
Tip: Select wood finishes with warm undertones to keep the room cohesive and inviting.
1. Earthy Tones with Retro Accents
Editor’s Choice
🛍️
Kingfun 65.2″ W Loveseat Sofa, Mid Century Modern Decor Love Seat Couche…
Here is why minimalism helps a mid century living room feel calm. You want space to breathe. You want warm textures without clutter.
Let’s break it down.
– Start with a clean base by choosing 3 to 5 key pieces that fit well. This simple setup keeps life easy.
– Look for clean lines and smooth edges to stay calm. Avoid heavy shapes that feel busy.
– Pick furniture with tapered legs. It keeps the floor visible and the space open.
Next, layer textures for warmth. A soft wool throw on a leather sofa adds contrast. A chunky knit pillow on a sleek chair adds depth. Mix linen, wool and cotton to catch light.
– Use a natural flat weave rug to ground the space.
– Add a leather or suede accent for texture.
– Include light textiles in curtains or cushions to soften walls and reduce echo.
Finish with a quiet color plan. Keep neutrals in warm gray and sand. Let wood tones show for a natural feel.
Tip: Proportions matter. Let each piece have space to shine.
Next steps. Review your room, swap a piece, and test the feel.
Notice how your space breathes with the added texture. Keep this habit for a warm, easy room.
Your living room may feel flat without a focal point. A bold lighting fixture can center the space. In a mid-century modern room, the right light acts like a piece of sculpture you can walk under.
Choose a fixture that nods to the era. Look for bold pendants or sculptural floor lamps that echo clean lines and warm wood tones.
– A large globe pendant that hovers over a sectional.
– An arc floor lamp that bends over a chair or coffee table.
– A dramatic sculptural floor lamp that doubles as art and task light.
Place the fixture where you gather. A pendant over the sofa draws the eye. An arc lamp beside a reading chair adds function without crowding the room.
Consider materials and color. Brass, smoked glass, matte black, or warm wood blends with mid-century palettes.
Layer your lighting. Combine ambient light from the ceiling with task light for reading and a touch of accent glow behind your seating.
Tip: Use dimmers to adjust the mood. Bright and lively by day, soft and cozy in the evening.
This approach creates warmth and a welcoming atmosphere while keeping the mid-century vibe intact.
Think of this as a flexible feature. You can swap fixtures later as you refresh the look.
3. Statement Lighting Fixtures
Editor’s Choice
🛍️
Modern Globe Pendant Light Mid Century Opal Glass Hanging Light Fixture …
Is your living room missing that warm, lived-in feel without looking dated? Try mixing vintage mid-century pieces with contemporary accents. Here is why it works: vintage shapes bring character, while current pieces keep the space easy to live in.
Practical steps to try
– Start with one authentic vintage piece, like a sofa or a chair.
– Pair it with clean, modern art or a simple metal lamp.
– Scan thrift stores for small treasures, such as a retro teak coffee table or a bright vase to spark charm.
To make it feel tied together, repeat a few simple cues.
– Choose a shared color palette and repeat it across chairs, cushions, and art.
– Mix textures so wood, metal, and ceramic warm the room.
– Keep scale balanced with a statement piece plus calm, low-profile items.
Next steps: lay out a simple plan and shop with a purpose.
– Set a budget and time frame so you do not waste hours.
– Finish with lighting that softens wood and highlights color.
Will it feel busy? Not if you limit the number of bright pieces.
– It helps to keep one bold piece as a focal point and let the rest stay quieter.
Next steps are simple. Start small, and swap one piece at a time. You will learn what works for your space.
Mixing vintage charm with contemporary flair transforms a cozy mid century modern living room into a welcoming retreat. Start with one authentic piece, and let your creativity flow!
4. Mixing Vintage and Contemporary
Editor’s Choice
🛍️
Kingfun 65.2″ W Loveseat Sofa, Mid Century Modern Decor Love Seat Couche…
You want a cozy living room that stays clean and modern. A soft rug underfoot can make that real.
Choose plush area rugs in wool or microfiber for comfort. Geometric patterns or bold colors tie a mid century modern look to your space. Rugs define seating areas and add warmth to hardwood or tile floors.
Tip Layer rugs for texture. Put a large neutral rug on the floor and place a smaller colorful rug on top to create depth.
Here is why layering works. It adds dimension and makes a simple room feel richer without crowding the space.
Next steps
– Layer a big neutral rug with a smaller colored one on top to add texture and interest.
– Let the big rug sit under the sofa and chairs so the front legs rest on the rug.
– Leave 8 to 18 inches of bare floor around the edges to keep the room airy.
Care and upkeep keep the softness. Vacuum weekly to remove dust and crumbs. Rotate the rug every few months to even wear. Blot spills right away with a clean cloth and mild soap if needed.
With these moves, your feet stay comfy and your living room looks polished and welcoming.
5. Soft Rugs for Comfort
Editor’s Choice
🛍️
8×10 Area Rugs for Living Room Rug: Soft Fluffy Shag Gray Rugs for Bedro…
You want a warm, calm living room. Built-in bookshelves give a cozy library vibe. They hold books, photos, and plants on one neat wall. With the right setup, the space feels quiet and inviting.
Choose color carefully. Paint the shelves a soft shade that blends with your walls, or keep natural wood for a classic mid‑century look. A pale gray, creamy white, or warm sand stays gentle next to bold furniture.
Add a reading nook near the shelves. A low chair, a couple of cushions, and a soft throw invite you to linger. A small lamp by the seat adds a warm glow. Tip: Use this spot to curl up with a book.
Here is how to make it work:
– Step 1: Measure the wall and plan shelf height.
– Step 2: Choose about 10 to 12 inches of depth.
– Step 3: Pick adjustable shelves for future changes.
– Step 4: Add a slim light, like a wall sconce or LED strip.
Finish with balance. Clean lines and warm wood keep the look calm. If you cannot install built-ins, use tall freestanding shelves and trim to mimic the feel.
Not all spaces suit built-ins. If you rent, this freestanding approach still fits a mid-century vibe.
Next steps: mark the space, pick a style, and start planning your shelves.
6. Built-In Bookshelves for a Cozy Library Feel
Editor’s Choice
🛍️
5-Shelf Bookcase with Adjustable Shelves, Open Storage Shelf, 11.65 x 24…
You want a cozy living room that still feels clean and stylish. Art helps you tell your story without shouting. In a mid-century modern space, pick pieces that fit the line.
Abstract art, vintage posters, or geometric prints work well. Let a piece set the mood and pull the colors for cushions and rugs.
Create a gallery wall to add drama. Mix frames and sizes, but keep an eye on spacing. Lay them out on the floor or tape the wall to plan before hanging.
Tip: Use art to anchor the room and guide what you buy next. A bold blue piece can cue teal cushions, a mustard print sparks warmth. Keep most pieces calm so the room stays cozy.
Add personal touches. A few well-placed items show you live here. Try one family photo in a slim frame or a wood sculpture. Add a handmade textile draped on a chair. Let these sit beside the art.
Practical steps to begin. Start with one large focal piece above the sofa. Add two smaller works to balance. Choose frames in warm wood, black, or brass. Keep spacing even or use a simple grid. Pull colors from art into cushions and a rug.
7. Incorporating Art and Personal Touches
Editor’s Choice
🛍️
97 Decor Eclectic FRAMED Wall Art Set – Colorful Eclectic Decor, Retro C…
Soft fabrics give your mid-century modern living room a warm, welcoming feel. They invite your hands and eyes to slow down. With the right textures, the space looks calm and lived in.
Layer cushions in different textures and colors on your sofa. Start with a few larger shapes, then tuck in smaller ones. The mix should feel cozy, not cluttered.
Here is why textures work in mid-century modern spaces.
– Choose two or three base colors that go with your wood tones and wall. Neutrals like taupe or a soft gray work well, and you can add a pop with one accent shade.
– Add textures such as velvet for richness, cotton for softness, and linen for breathability. The mix makes the sofa feel alive and inviting.
– Mix patterns with care. A striped pillow can pair with a floral one if you keep their scale different and leave space between them.
– Vary sizes. Put tall pillows at the back and flatter ones in front. Let some hang over the edge for a casual look.
Quick Tip: Anchor with two solid cushions and sprinkle patterned ones in 10 to 15 inch sizes for balance.
Too many motifs can feel chaotic. Keep your mix calm. When you sit, cushions should support your back and invite you to relax.
Soft fabrics and layered cushions are the secret ingredients to a cozy mid-century modern living room. Embrace textures that invite relaxation and create a space you’ll love to unwind in!
8. Soft Fabrics and Cushions
Editor’s Choice
🛍️
MIULEE Velvet Throw Pillow Covers 18×18 Inch, Pack of 2 – Dark Blue, Sup…
Here is why your seating plan matters. A cozy living room lets you talk, relax, and feel welcome. With the right setup, you save space and cut clutter.
– Plan a simple circle around a coffee table. Put two or three seats close enough for eye contact, but not crowded. A small sofa, two easy chairs, and a bench can form a warm ring.
– Leave clear paths. Walkways should stay at least 2 feet wide. Measure doorways first so you can move easily without bumping into furniture.
– Pick the right size pieces. If the room is small, choose slim arms and low backs. If it’s bigger, add a couple of lounge chairs and a longer sofa. Mid century pieces with tapered legs feel light.
– Use multi function pieces. An ottoman with a tray can be a coffee table and extra seat. A storage coffee table hides throws, remotes, and games.
– Define zones with a rug. A soft rug anchors the seating group and adds warmth. It keeps chairs from sliding away and makes the space feel tidy.
– Think about light and tech. Place lamps near seating. If you have a TV, angle seating so everyone can see without craning their necks.
Next steps: test your layout by moving cushions and chairs in a few ways. Live with it for a day, then tweak.
This setup fits mid century modern style with clean lines, warm wood, and practical surfaces. Try it this weekend.
9. Functional Furniture Arrangements
Editor’s Choice
🛍️
Coffee Table, 39.4″ Mid Century Modern Coffee Tables for Living Room, Co…
Warm, inviting colors like terracotta and olive green.
$234.11 (Sofa)
Wood (walnut, teak), fabric (cotton, wool)
Use plants for texture; layer textiles.
Minimalist Approach with Layered Textures
Clean lines with layered textures for warmth.
$102.99 (Rug)
Wool, leather, cotton
Keep proportions balanced; use light textiles.
Statement Lighting Fixtures
Bold lighting as a focal point.
$110.49 (Pendant Light)
Brass, glass
Use dimmers for mood control; layer lighting.
Mixing Vintage and Contemporary
Combine vintage pieces with modern accents.
$234.11 (Loveseat)
Wood, metal, ceramic
Choose a shared color palette; start with one vintage piece.
Soft Rugs for Comfort
Plush area rugs to add warmth.
$49.99 (Rug)
Wool, microfiber
Layer rugs for texture; vacuum regularly.
Built-In Bookshelves for a Cozy Library Feel
Bookshelves create a library vibe.
$39.99 (Bookcase)
Wood
Use adjustable shelves; add a reading nook.
Incorporating Art and Personal Touches
Art adds personality and warmth.
$69.99 (Art Set)
Frames, canvas
Create a gallery wall; mix frame styles.
Soft Fabrics and Cushions
Layered cushions for a cozy feel.
$9.99 (Pillow Covers)
Velvet, cotton, linen
Mix patterns carefully; anchor with solid cushions.
Functional Furniture Arrangements
Seating arrangements for conversation.
$103.50 (Coffee Table)
Wood, metal
Plan clear paths; use multi-functional pieces.
Vintage Accessories for Character
Accessories add warmth and history.
$14.99 (Clock)
Ceramic, wood
Choose items that tell a story; limit total items.
10. Vintage Accessories for Character
You want a cozy living room that feels personal. Vintage accessories can add warmth and a touch of history. A ticking clock, a ceramic vase, or a small sculpture tells a story without shouting. These pieces stay quiet, but they make the room feel lived in. They mix well with new furniture and soft textiles.
Here is why it works: you don’t have to redo the whole room. A few well-chosen items add texture, color, and character. They catch the eye in a calm, friendly way. You can swap them out as your taste changes, keeping the space fresh without buying all new furniture.
– Where to shop: flea markets, antique shops, estate sales, and online vintage stores.
– What to look for: smooth edges, good patina, and clean lines that fit mid century vibes.
– What to avoid: heavy wear that can look broken or messy.
Tip: Choose accessories that tell a story or link to your memories. A clock that remembers a family moment or a vase from a memorable trip adds real charm.
How to display: group two or three pieces on a shelf, coffee table, or console. Vary the heights and colors. Keep a simple color palette so the vintage pieces feel cohesive.
Next steps: pick one or two items this weekend. Place them where you spend the most time. Notice how the space feels more inviting and personal.
10. Vintage Accessories for Character
Editor’s Choice
🛍️
Vintage Retro Analog Alarm Clock, 4 inch Super Silent Non Ticking Small …
If you want a cozy mid-century living room, warm wood tones are your best friend. They soften clean lines and invite you to linger. With the right pieces, you can get that easy, lived-in feel without losing design focus. Small changes add up fast.
– Choose wood with a natural finish Pick pieces that show the grain. Choose a natural satin finish that stays warm. Avoid glossy coatings that read cold. Natural finishes age nicely and feel honest. Choose wood that ages well in your space.
– Let the grain shine Keep the grain visible on tables, shelves, and lamp bases. The texture adds depth you can feel. It helps the room look inviting and real.
– Anchor the room Place a wood coffee table in the center. This piece grounds the seating and creates a focal point. It makes movement around the room feel natural.
– Balance with textures Add soft fabrics like wool or linen. They soften the wood while keeping the mid-century vibe. Pair brass or black metal to add contrast.
– Care for the wood Dust weekly to prevent buildup. Wipe with a damp microfiber cloth and dry right away. Avoid harsh cleaners that can dull the finish. Keep humidity steady to protect the finish.
– Light the wood well Use warm bulbs around 2700K to 3000K. The glow makes the wood look rich. Balance the lighting with soft textiles and warm wall colors.
11. Warm Wood Accents
Editor’s Choice
🛍️
Coffee Table, 39.4″ Mid Century Modern Coffee Tables for Living Room, Co…
Here is why you want a cozy corner. You need a quiet space to read, sip coffee, and unwind. A corner nook by a sunny window gives you that calm moment without stealing the whole room. It fits the mid-century modern vibe with clean lines and warm wood.
Here is how to set it up.
– Sunlit window seat: Choose a window that gets good light in the morning. Use a built-in bench or a low seat with clean lines and tapered legs.
– Cushions and color: Layer plush cushions in soft fabrics. Pick sizes that support your back. Stick to a mid-century palette: creams, light grays, and warm wood tones.
– Soft throw: Add a cozy throw within reach. It adds texture and comfort for cool evenings.
– Table or shelf: Place a slim side table or a compact bookshelf. Use it for books, coffee, or a small lamp.
– Lighting: Tip: A warm lamp or a wall sconce creates inviting glow after dark.
– Grounding detail: Tuck a simple geometric rug underfoot and a small plant nearby to anchor the space.
Next steps: keep the area neat. Remove extra clutter. If space is tight, opt for a wall-mounted seat or a window chair to save floor area.
You want a coffee table that fits your mid century modern living room and feels special. Your table should do more than hold things. A distinctive piece adds warmth and sparks conversation.
– Shape matters: pick a round glass top on wooden legs for an airy, open feel that makes the room breathe.
– Mix materials: walnut, teak, terrazzo, or clear acrylic fit a vintage look and still clean easily.
– Finish matters: warm wood tones or matte black with brass accents suit mid century and blend with most sofas.
– Size and height matter: aim for a table near sofa height so you can reach without stretching.
– Keep the surface clean: use a small tray for remotes and coasters to stay organized.
– Display ideas: stack 2 books, add a candle, and place a small plant for instant life.
– Placement matters: leave space around the table for easy movement and quick passing.
Tip: A light tray helps keep remotes and coasters in place.
With these ideas, you can create a distinctive coffee table that anchors the room. Start by picking one feature you love, then build around it. Measure space and check clearance to stay comfortable. You will end up with a cozy focal point that feels timeless and personal.
13. Distinctive Coffee Tables
Editor’s Choice
🛍️
Modern Glass Coffee Table, 32.3″D×25.6″W×15.8″H-Abstract Unique Mid Cent…
Layered lighting helps you switch moods without changing rooms. You get brightness for chores and warmth for winding down.
Start with a main ceiling fixture. Pick a clean mid-century modern living room style that spreads light without glare. Then add three kinds of light: table lamps, floor lamps, and wall sconces. This mix lets you control the feel with ease.
Put a floor lamp by the sofa to frame the seating. A tall corner lamp adds height and a glow. Place two table lamps on the coffee table or on side tables. Their warm glow makes a welcoming circle around you.
Add wall sconces near art or beside a reading chair. They give gentle light without stealing focus from the main lamp. Use warm bulbs around 2700K, and choose dimmable LEDs if you can. Dimming helps you soften the room for movie night or dinner.
Keep the layout simple. Favor warm finishes like brass or wood tones that match mid-century style. Avoid too many lights in one spot; aim for balance. Finally, test the setup during the day and at night to fine tune.
Here is why this setup helps: layered lighting adds depth, reduces glare, and makes your living room feel bigger and cozier.
14. Layered Lighting Sources
Editor’s Choice
🛍️
Dimmable Small Mid Century Modern Flush Mount Ceiling Light with Acrylic…
If you want a cozy mid-century modern living room that still feels bright, start with a calm neutral base. Soft greys or warm whites on walls and big pieces set a quiet stage. Here is why: neutrals make the room feel larger and they let wood and textures shine.
– Base neutrals – Soft greys or warm whites on walls and big pieces set a clean, inviting stage. You feel calmer and the wood grain pops.
– Color pops – Pick one or two accents. Deep blues, sea greens, or warm oranges add life without clutter.
– Placement – Put color on cushions, throws, rugs, and art. This guides the eye and keeps balance.
– Texture and materials – Mix linen, cotton, wool, and a touch of velvet. Pair with walnut or teak for that mid-century feel.
– Lighting and testing – Let daylight in, then use warm lamps. Test swatches in morning and evening light.
– Common pitfalls – Too many colors can feel chaotic. Repeat the accent color in two spots to anchor the room.
– Quick-start plan – 1) choose a neutral base; 2) pick an accent; 3) add two cushions, a rug, and one art piece in that color.
– Real-world checks – Look at your room in daylight and at night. Adjust brightness and color balance until you feel at home. This approach stays fresh for years without losing the cozy mood.
A cozy mid-century modern living room thrives on balance: start with soft neutrals to create a serene backdrop, then let your favorite colors shine through for that perfect pop of personality!
15. Neutral Palettes with Pops of Color
Editor’s Choice
🛍️
Cream Farmhosue Decorative Throw Pillow Cover 20×20 Set of 2, Floral Neu…
You want a living room that feels cozy now and can shift for family time or a party. Flexible furniture makes that easy. It stays warm while you switch uses.
Tip: Choose lightweight pieces you can lift and move.
Here is why flexible furniture helps:
– Ottomans that double as seating or a small table. They slide easily, letting you reconfigure a circle fast.
– Nesting or folding tables. Add surface space when you need it, then tuck extras away.
– Modular sofas or benches. Rearrange sections for movie night or a reading nook.
Next steps:
– Check weight and grips. Pick pieces you can lift with one hand.
– Pick simple fabrics in neutral tones. They hide wear and mix with color accents.
– Plan two zones. A cozy seating area can flip to a game corner in minutes.
Limitations: too many light pieces can feel flimsy. Keep a couple of sturdy anchors in place.
For mid century style, mix wood, metal, and clean fabrics. A round table keeps traffic smooth. A low shelf holds books and remotes.
If you try this, your room will feel cozy and flexible. You can move a stool and shift the mood in minutes. No fuss required today.
You can start with one movable piece and build from there. Keep it simple and change it later.
Soft color accents make a mid-century modern living room feel warm and welcoming. They add light and life without stealing the scene from your furniture. When you pick gentle pastels and muted tones, the space stays calm, not crowded. You can enjoy texture, wood grain, and clean lines without losing a cozy vibe.
Here is why soft color accents work in this style. They brighten the wood and help the furniture breathe. The result is a cohesive look that feels calm and spacious.
– Start with a calm base: walls in ivory or light gray, and big pieces in warm wood.
– Use items like cushions, throws, vases, artwork, and lamps to carry those colors.
– Repeat colors in small doses across different spots to create balance.
On a walnut sofa, lay a blush throw. Place a pale blue ceramic vase on the coffee table. Hang a soft green print above the mantel. Choose a light shade for a lamp shade so its glow echoes the wall color.
Tip: test color swatches on a throw pillow before buying larger items.
Next steps. Gather a few fabric swatches and wall art that include your chosen hues, then layer them over two to three weeks.
17. Soft Color Accents
Editor’s Choice
🛍️
Bedsure GentleSoft White Throw Blanket for Couch – Cozy Blanket for Wome…
A fireplace can make a living room feel warm and inviting. It gives light, heat, and a clear focal point you can build around.
If you have a real fireplace, treat the mantel like a small gallery. Display a couple of framed photos, a simple bowl, and one piece of art you truly love. Keep items to a few well-chosen pieces so the space feels calm.
If you don’t have a traditional fireplace, an electric option can give you the glow without the work. Look for a model that shows realistic flames and offers a gentle heat setting. A wall-mounted unit or a freestanding insert with a clean surround works well in a mid‑century modern room.
Here is why this works and how to do it:
– Make the fire the main seating anchor. Pull chairs or a sofa around the hearth so people face the glow.
– Add warmth with texture. A soft rug, wool throws, and cushions in earthy tones keep the space cozy.
– Choose simple, clean lines. Pick finishes in wood, brass, or matte metal that echo mid‑century style.
– Light it well. Use warm bulbs and subtle lamps to blend with the firelight, not overwhelm it.
Mantel decor tips:
– Keep a slim, curated display. Rotate items by season to keep the look fresh.
– Add a natural touch. A small plant or a sculptural branch piece brightens the mantel.
– Use a single statement piece as a focal point, and let other items support it.
For a truly welcoming setup, ensure seating forms a circle or gentle arc around the fire. Place a low coffee table within easy reach and keep pathways clear. If heat is needed in winter, choose a model with safe, adjustable settings.
Next steps: measure your space, pick a fireplace style that fits your room’s scale, and test different seating layouts until you find the most relaxed arrangement. Your cozy retreat is within reach.
18. Cozy Fireplaces
Editor’s Choice
🛍️
Touchstone Smart Electric Fireplace-The Sideline 50″ Wide-in Wall Recess…
Your living room should feel warm and alive. Indoor plants make that happen with little fuss. They bring color, soften sharp lines, and polish the air. Here is how plants act as grounding elements in a mid-century modern space.
Here is how to ground your space with greenery:
– Pick three easy houseplants. Snake plant, pothos, and philodendron work well indoors.
– These plants handle indoor light and dry air, so they stay healthy with simple care.
– Place them where you sit or walk. Try corners, shelves, and a windowsill.
– Group plants in odd numbers. A trio looks natural and welcoming.
– Use planters that fit the mid-century look. Ceramic pots with clean lines or matte glazes, plus slim metal stands, work well. Tip: choose pots with drainage.
– Add simple care rules. Water when the top inch of soil dries; skip extra water in winter.
If your room is dim, pick low-light plants. Pair greens with warm wood furniture to keep the room feeling cozy.
Next steps:
– Start with two plants and one matching planter.
– Find a sunny spot and place them there.
– Check moisture weekly and adjust as needed.
Plants can live with a busy life. Keep an eye on soil and leaf color to spot problems early. They help too.
Indoor plants don’t just beautify your cozy mid century modern living room; they breathe life into it! A few easy greens can transform your space into a tranquil oasis where you truly feel at home.
19. Grounding Elements Like Indoor Plants
Editor’s Choice
🛍️
Live Snake Plant, Sansevieria trifasciata Superba, Fully Rooted Indoor H…
Your mid-century living room should feel warm and personal. Personal mementos show your life. They add texture and a sense of home to a clean, retro look. You want them to shine without turning the room into a crowded museum. Here is why this works and how to pull it off.
– Pick a small display area on a shelf or table where items can shine without feeling crowded.
– Choose 4 to 8 keepsakes such as travel souvenirs, family photos, and heirlooms, and place them in a simple rhythm.
– Group items by color, texture, or story so the display feels intentional rather than random.
– Use frames, stands, or a shallow shadow box to create a clean gallery vibe.
– Add warm light with a tiny lamp or an LED strip to bring colors to life.
– Build depth with a mix of heights—tall frames, short photos, and an anchor item on a calm shelf.
– Rotate pieces every few months to keep the look fresh and exciting.
– Keep the surface neat by using a dedicated display tray or a shallow box.
– Limit the total items to a handful so the space breathes and feels calm.
– Choose durable mid-century friendly materials like wood, brass, or glass to fit the style.
– If you share the space with kids, pick hardy items and avoid fragile pieces.
Next steps: gather a few favorites and start today.
20. Personal Mementos
Editor’s Choice
🛍️
Califortree 8×8 Shadow Box Frame with Soft Linen Back – Push Pins Includ…
Creating a cozy mid-century modern living room is all about blending warmth, style, and personal touches.
Whether you prefer earthy tones, vintage accessories, or unique furniture arrangements, each element contributes to a space where you can truly feel at home.
Embrace these ideas and let your living room reflect your personality while inviting relaxation and comfort.
Note: We aim to provide accurate product links, but some may occasionally expire or become unavailable. If this happens, please search directly on Amazon for the product or a suitable alternative.
This post contains Amazon affiliate links, meaning I may earn a small commission if you purchase through my links, at no extra cost to you.
Frequently Asked Questions
What Are the Key Elements to Create a Cozy Mid Century Modern Living Room?
To create a cozy mid century modern living room, focus on incorporating earthy tones, layered textures, and soft fabrics. These elements work together to evoke warmth and relaxation. A few statement pieces like a unique coffee table or bold lighting fixture can serve as focal points, enhancing the inviting atmosphere while maintaining that sleek mid-century aesthetic.
How Can I Mix Vintage and Contemporary Decor in My Living Room?
Mixing vintage and contemporary decor is a fantastic way to add character and warmth to your cozy mid century modern living room. Start by choosing a few standout vintage pieces, like a classic armchair or a retro lamp, and pair them with modern accessories, such as sleek cushions or contemporary art. This blend creates a harmonious look that feels personal and lived-in without appearing outdated.
What Types of Lighting Work Best in a Cozy Mid Century Modern Living Room?
For a cozy mid century modern living room, consider using layered lighting sources. Begin with a statement ceiling fixture to act as a central focal point. Then, add table lamps and floor lamps to create a warm ambiance. This combination allows you to adjust the mood based on the time of day or activity, making your space feel inviting and versatile.
How Important Are Textiles in Achieving a Cozy Living Room Atmosphere?
Textiles are crucial in creating a cozy atmosphere in your mid century modern living room. Incorporate soft fabrics for cushions, throws, and rugs to invite comfort. Layering textures, such as plush rugs and patterned cushions, adds depth and warmth, making the space feel welcoming and lived-in. Don’t shy away from mixing patterns and colors to add a personal touch and vibrancy!
What Role Do Personal Mementos Play in a Cozy Living Room Design?
Personal mementos play a significant role in making your cozy mid century modern living room feel like home. Incorporating items that tell your story, such as travel souvenirs, family photos, or unique art pieces, adds warmth and character to the space. These personal touches not only enhance the aesthetic but also create a sense of belonging, making your living room a true reflection of your personality.
I put this together because many readers want a living room that blends boho warmth with mid century clean lines. It feels relaxed and stylish, not fussy, and it fits busy days. I pulled together 25 ideas that are practical, affordable, and simple to pull off.
If you love warm textures, natural wood, and plant life, this post is for you. If you want spaces that mix bold shapes with soft comfort, this one is for you. You may be juggling a small room, a big wall to fill, or a budget that asks for smart choices.
Here are 25 ideas that blend boho charm with mid century mood. You’ll find color palettes, textures, and furniture combos that work in any living room. These tips cover furniture placement, lighting, textiles, and small accents you can swap seasonally.
Let the space feel warm as sunlight hits a woven rug. Start with a warm base like cream, sand, or soft taupe. Add wood tones and curved silhouettes to echo mid century design. Layer textiles such as a woven rug, a velvet throw, and linen cushions for depth. Bring in plants and brass accents for a boho glow.
Some rooms may need clever storage or scale changes. Not every idea works in every home, but you can mix and match to fit your space. Small changes can deliver big impact without a full makeover.
Ready to steal a few looks and make them yours? Keep reading and discover how to tailor these ideas to your place. This guide is for real rooms and real budgets, not showroom fantasies.
If you want a calm, grounded living room, start with an earthy color palette. Warm browns, muted greens, and soft terracotta set the tone.
These earth tones echo nature and soften the clean lines of mid-century furniture. Use the colors on walls for a warm backdrop, or let a sofa or accent chair wear a rich earth tone. Pair these hues with patterned pillows and a textured rug to add depth. Natural materials shine here: wood, rattan, and jute bring a grounded feel.
Here is why this approach works: earthy hues build warmth, reduce glare, and connect your space to the outdoors. It also lets bold prints and metal accents stand out without shouting.
What to try first
– Test warm colors with paint samples in different light so you see how they read in morning sun, midday light, and evening glow.
– Bring in life with plants. A tall fiddle-leaf fig or pothos softens corners.
– Choose earth-toned artwork, landscapes or abstracts in terracotta, olive, stone.
– Layer textures to add coziness. A linen sofa, a wool throw, a jute rug, plus a wood coffee table.
Next steps: plan a quick mood board, gather swatches, and lay out a mockup of sofa and rug to check harmony before you buy.
1. Earthy Color Palette
Editor’s Choice
🛍️
FoamPRO 120 Color Tester Sample Board – Paint Sample Boards for Comparin…
Layered Textiles for a Cozy Boho Mid-Century Modern Look
Layering textiles is the easiest way to warm a living room. You get a soft, inviting space with a boho vibe. Mix throws, pillows, and rugs to add depth.
Here is how to do it.
– Start with a base rug. Place a large jute rug under the coffee table. Layer a smaller Persian or kilim rug on top for warmth.
– Build from the floor up. Drape blankets in layers. Choose a chunky knit, a plush velvet, and a woven throw. Fold one over the sofa back and keep another at the foot.
– Create pillows that pop. Use pillows in different sizes: 18×18, 20×20, and a slim lumbar. Mix bold patterns with solid colors. Pair textures like velvet with linen for contrast.
– Keep color calm and balanced. Limit patterns to 2-3 hues. Let textiles echo wood tones, art, and metal accents in the room.
– Give pieces a story. Pick items with meaning or cultural touch. Check care guides so the look stays neat with time.
– Refresh with the season. Swap in lighter fabrics in warm months and switch to knits and velvets when it turns cool.
Layering is affordable and flexible, and it changes with you.
Enjoy the cozy glow you create.
3. Layered Textiles
Editor’s Choice
🛍️
nuLOOM 6×9 Rigo Jute Hand Woven Area Rug, Natural, Solid Farmhouse Desig…
If you want your boho mid-century modern living room to feel warm and personal, wall decor is your best trick. It lets you show art, texture, and color in one bold move.
A gallery wall works great here. Mix frames, art prints, macramé hangings, and even small carved wood pieces. Use different textures and styles, but keep a common vibe so the wall reads as one piece.
Here is how to put it together:
– Start with a larger piece as the focal point, then place smaller art around it. This keeps the eye moving.
– Stick to a color palette that matches your room. It ties prints, photos, and textiles together.
– Use a mix of mediums: paintings, photographs, and textile art. Balance is key.
– Add mirrors to reflect light and make the space feel bigger.
– Think about height. Hang art so the main piece is near eye level, not above the sofa.
– Leave some empty space. A little air makes the wall feel calm and fresh.
Tips for success:
– Use removable wall hooks or picture ledges so you can rearrange easily.
– Plan on paper first and measure before you drill. This saves time and wall damage.
4. Artistic Wall Decor
Editor’s Choice
🛍️
97 Decor Eclectic FRAMED Wall Art Set – Colorful Eclectic Decor, Retro C…
If you want a calm, inviting living room, nature is your best ally. It softens the clean lines of mid-century furniture and adds warm, boho charm. You don’t need a big swap to get results. Start with plants you love and textures that speak to your style.
– Mix plant heights and leaf shapes to create depth. A tall fiddle leaf fig beside the sofa and a mid-size monstera on a stand work well.
– Put some greens on stands or wall shelves to add dimension and easy visual movement.
– Choose pots with earthy textures or warm colors that match your palette. Terracotta, clay, or matte stone tones are great bets.
– Add nature-inspired decor like wood accents, stone sculptures, and botanical prints. These pieces tie the space to the outdoors without crowding it.
– Rotate your arrangement every few weeks. A small swap can refresh the whole room.
Here is why this works. Plants bring life and color to the room. They soften mid-century lines and boost a cozy, lived-in feel. Plus, they improve air quality in a simple way.
Starter plan you can try this weekend. Place one tall plant by the sofa, one mid-height on a teak stand, and three small plants on a shelf or coffee table. Use one wood bowl or stone sculpture to echo your furniture.
Next steps. Pick a spot with good natural light, choose two or three plants you love, and let them guide the rest of your decor.
5. Nature-Inspired Decor
Editor’s Choice
🛍️
Costa Farms Fiddle Leaf Fig, Live Indoor Ficus Lyrata Floor Plant, Tropi…
You want a cozy nook in your living room that fits boho mid century modern style. Here is a practical plan to make it calm, personal, and easy to use.
– Seat choice: Pick a plush armchair in a corner or by a window for a private retreat.
– Personal touches: Layer warm textiles and keep a small shelf with a few favorite books.
– Light and view: Choose a warm lamp and, if possible, face the nook toward a window.
– Texture and life: Add a plant nearby and layer textures with a knit throw and a jute rug.
– Soft base: Choose a soft base color like cream or sand. Add warm accents with a kilim rug, a woven cushion, or a tasseled throw.
Why this works: a comfy chair plus soft light invites you to slow down. A window view and natural fiber rugs boost calm. Personal touches make the space feel like yours.
Next steps: place the chair, set up the lamp, and test the sightline to the window. Tweak until it feels right.
This concise and actionable approach creates a relaxing reading nook that fits the Boho Mid Century Modern vibe.
Your cozy corner can grow with you as your style changes.
6. Cozy Nooks
Editor’s Choice
🛍️
Chenille Oversized Armchair, 38.6″ Wide Accent Chairs for Living Room & …
You want your boho mid-century living room to feel warm and inviting. Good lighting makes that true, without stealing the scene.
– Statement fixtures Pick a floor lamp with a bold silhouette or a natural pendant. It must catch the eye without overpowering the room by design.
– Layered lighting Layer your ambient, task, and accent lights. Let a soft floor lamp glow near the sofa, then add string lights or candles for cozy evenings.
– Practical choices Choose pieces that fit your style. Try mixing metals like brass and matte black. Keep cords tidy and test glow in day and night.
– Controls Install dimmer switches to shift mood from bright to cozy. Start with a dimmer on the main light, then add smart plugs for easy control.
– Placement Hang pendants at different heights to create visual interest. Place table lamps on side tables for warmth. Move lights along walls to test where colors pop.
– Shade choice Choose diffused shades that soften the glow. The light should feel welcoming, not harsh. Fabric or paper shades spread light gently at night.
– Materials and care Look for natural materials like wood, rattan, and woven fibers. They fit boho mid-century styles and stay timeless. Pair with ceramic bases for texture.
Next steps: plan a quick lighting swap this weekend.
7. Unique Lighting Fixtures
Editor’s Choice
🛍️
Arc Floor Lamps for Living Room Rattan Boho Floor Lamp with Remote Contr…
If you want a boho mid-century living room that feels lively but not chaotic, pattern mixing is your friend. Here is why: it adds texture, warmth, and a sense of playful energy. You can pull it off with a simple plan.
– Color base: Choose one main color and two accent colors. Let these colors run through fabrics, wall art, and accessories. Test fabric swatches in natural light to see true tones. This helps the room feel tied together.
– Different scales: Pair a bold stripe with a small floral or a tiny geometric. The contrast creates depth without clashing.
– Ground with solids: Use solid cushions, a solid sofa, or a plain rug to ground the space. Solids give your eye a place to rest.
– Limit patterns: Aim for three patterns in a room. Too many can feel busy.
– Textile layering: Pillows, throws, and curtains are easy to swap and layer. They let you test new looks without a big change.
– Height with curtains: Patterned drapes can draw the eye upward and make windows feel larger.
– Cultural textiles: A mix of Ikat, kilim, or Moroccan motifs adds texture and depth.
– Next steps: Start with one patterned piece, then add a second, and finish with a solid anchor. You’ll see the room come alive with this restrained mix.
Embrace the art of pattern mixing in your boho mid-century modern living room! A playful blend of textures and colors will create warmth and energy, making your space feel effortlessly vibrant.
9. Mix and Match Patterns
Editor’s Choice
🛍️
Aeckself Boho Throw Pillow Covers 18×18 Inch Set of 2, Farmhouse Decorat…
You want a living room that feels warm, easy to live in, and a touch retro. Mid-century modern accents can be the steady backbone you need. They bring function and spark quiet conversations.
Here is why they work: clean lines carry the eye, so bold boho textiles have room to breathe. A well chosen mid-century piece stays stylish for years, not months.
– Signature pieces – Seek items with timeless silhouettes, like an Eames chair, a walnut coffee table, or a slim credenza. They anchor the room and invite talk.
– Boho balance – Pair these with texture and color. Think woven rugs, tasseled throws, macrame, and leafy plants. The mix feels lively but not loud.
– Personal fit – Pick pieces that match your taste. The aim is harmony and comfort, not a perfect museum look.
– Practical tips –
– Read about mid-century designers for ideas and what shapes you love.
– Check thrift shops and vintage stores for good deals.
– Refresh old pieces with new stain, fresh hardware, or reupholstery.
– Watch the lines and shapes; straight, rounded, and angled forms should play well with your boho textiles.
Next steps: start with one anchor piece this weekend, then add color and texture gradually to finish the look.
10. Mid-Century Modern Accents
Editor’s Choice
🛍️
Chaise Lounge Chair with Ottoman Genuine Leather High-Resilience Foam Cu…
Want to give your boho mid-century modern living room a bold punch? A statement wall can do the job. Bold wallpaper draws the eye and adds depth you can feel. It sets a warm, artistic tone for the whole space.
– Choose large-scale patterns like large florals or bold geometrics. These grab attention without needing loud colors.
– Use an accent wall to keep the room balanced. Apply it on one wall and keep others calm.
– Try removable or peel-and-stick options for a low-commitment change. You can switch vibes with the season or mood.
– Pair with simple furniture so the walls shine. Clean lines and neutral tones keep the look fresh.
– Let the wall guide color choices for furniture and accessories. Pull from the wallpaper so everything feels connected.
– Pick durable materials like vinyl or washable wallpapers if kids or pets are in the home.
– Watch the lighting. Dark walls need more light. Add a bright lamp or two to avoid a cave feel.
– Balance bold with calm pieces. Neutral sofas and wood accents help.
– Explore textures such as foil or grasscloth for depth without overwhelming color.
Bold walls can lift a room, but keep the rest simple so the look stays chic.
11. Bold Wallpaper Choices
Editor’s Choice
🛍️
Art3d Smoothing Tool Kit for Applying Peel and Stick Wallpaper, Vinyl Ba…
Storage in a boho mid-century living room should clean up without stealing its charm. The goal is to hide clutter while adding texture and warmth.
– Storage ottomans lift open. They hide blankets and remotes while staying a comfy seat. Choose a model with a soft top so guests can sit without noticing the lid.
– Decorative baskets store everyday items. Weave them in seagrass or rattan for a natural look. Pick sizes that fit shelves and corners.
– Open shelving displays books and decor. Use a mix of sizes to add depth without clutter. Leave a few gaps for air and lighting.
– Vintage trunks make a unique coffee table. They add history and hidden space. Line the top with a soft rug for comfort.
– Concealed media storage keeps cords out of sight. A cabinet with closed doors hides electronics. Label cords so you can find them fast.
– Smart layout keeps bulky items tucked away. Place large pieces behind furniture to feel roomier. Use vertical space with tall storage near the wall.
With these pieces, your home stays warm, not crowded. Start with one idea and grow. Try one idea this week. Measure the space, pick a texture, and shop with intent. You can swap pieces as your style shifts.
12. Functional Storage Solutions
Editor’s Choice
🛍️
DUMOS 30in Foldable Storage Ottoman Bench, Storage Chest, End of Bed Foo…
You want a living room that feels like you, not a catalog. In a boho mid-century modern space, the best decor is the stuff you genuinely love. Let travel souvenirs, framed photos, and handmade crafts take center stage.
Tell your story with items that mean something. A quilt your grandma stitched, a ceramic bowl from a local potter, postcards from trips, or a favorite mug collection all add warmth. These pieces spark smiles and conversations the moment guests walk in.
Practical ways to use them:
– Change up pieces every few weeks to keep the room fresh.
– Make sure each item has meaning. If it doesn’t, swap it for something that does.
– Create visual rhythm with shelves. Mix tall vases, frames, and bowls at different heights.
– Let personal pieces mingle with other decor. Pair a family photo with a clean lamp or a textured throw.
Want a simple display idea? Start with a small gallery on one wall: three to five frames, balanced and calm, with a sculpture or woven basket nearby.
Here is why it works: personal touches give depth, tell your story, and make the room feel lived-in, friendly, and uniquely yours.
Facing a room that looks flat? Scale can fix that. In a boho mid-century living room, big pieces grab attention while small accents keep the feel calm. When you mix them well, the space gains depth and warmth.
Here is how you use scale on purpose to shape the room.
– Anchor with a bold, large piece: Start with a wide sofa or a statement chair. Let it ground the seating area and give your eye a starting point.
– Pair the big with the tiny: Add miniature plants, slim lamps, or petite cushions near the large piece. The contrast helps each item shine.
– Make a single oversized focal: Choose one oversized artwork or a tall plant on a clear wall to create height and drama.
– Scale textiles for coziness: Use a roomy area rug under a modest coffee table. The rug wraps the seating and makes the space feel snug.
– Let lighting lead the eye: A floor lamp with a wide shade or a pendant becomes a visual anchor from floor to ceiling.
– Create depth with layout: Put the biggest furniture first. Nestle smaller pieces around it to form layers and pathways.
Check proportions often: step back, look, and swap sizes if something feels off.
Next steps: try one large piece this week, then add two small touches.
Mixing bold statement pieces with delicate accents in your boho mid-century modern living room adds layers of depth. Remember, it’s the dance of scale that transforms a flat space into a cozy retreat!
16. Play with Scale
Editor’s Choice
🛍️
Christopher Knight Home Sabbo 87.50″ Boucle Upholstered Couch, Oversized…
If you want your living room to feel part of the outdoors, you are in the right spot. A boho mid‑century modern vibe shines when light, texture, and flow come together. Here is how to make it work.
– Big windows or glass doors flood the room with light and offer clear views of your garden or balcony.
– Wicker or rattan furniture fits inside and out. Pair it with cushions that stand up to sun and rain.
– Indoor plants link the two spaces. Place a tall plant by the doorway and line the edge of the opening with smaller pots.
– Lighting matters after dark. Use outdoor-rated string lights or lanterns to add warmth without harsh glare.
– Pick durable rugs and fabrics for zones used by kids or pets. Look for indoor‑outdoor materials that stay fresh.
– Create a welcoming outdoor seating area with a low sofa, two chairs, a small table, and a cozy throw.
– Keep color and texture steady across rooms. Match wood tones and woven fabrics to preserve the boho mid‑century mood.
Next steps: measure your openings, sketch a simple layout, and choose a light, earthy palette. Then bring in one new piece at a time to test the vibe.
Bringing the outdoors in can transform your boho mid-century modern living room! Flood your space with light, and let nature’s beauty flow seamlessly with your decor.
You want a living room that feels warm and inviting. Soft, ambient lighting is the fastest way to get there. Here is a simple plan for a boho mid-century modern space.
– Dimmable ceiling lights set the mood.
– Wall sconces at seating height create a gentle glow around the room.
– Table lamps on side tables give cozy light for reading.
– Candles or string lights add a touch of magic after dark.
– Choose warm bulbs around 2700K for a friendly glow.
– Place lights at different heights to add depth.
– Lampshades diffuse light for a softer beam.
– Layer lighting by combining ambient, task, and accent sources.
– Opt for fixtures with natural materials like wood, rattan, or woven textures.
– Position lights to highlight art, textures, and plants.
– Floor lamps near seating fill dark corners with soft light.
– A backlit mirror can bounce glow and open the room visually.
– Use a glass tray or polished surface to reflect light.
– Add a small LED strip under a shelf to give a subtle halo.
– For safety, keep candles away from fabrics and use LED lights instead.
– Test the setup at night and adjust brightness until the room feels calm.
18. Soft, Ambient Lighting
Editor’s Choice
🛍️
Brightever 4Pack LED Flush Mount Ceiling Light Fixture, 12 Inch 24W, Sup…
If you want your living room to feel alive without looking crowded, plants are your best friend. They add color, soft lines, and fresh air to a mid-century modern space. They also fit a boho vibe without stealing the room’s clean feel.
Here is how you can use plants creatively in a mid-century modern living room.
– Hanging planters let greenery float near the ceiling, freeing floor space for furniture.
– Plant stands add height and texture beside your sofa, drawing the eye upward.
– Wall-mounted arrangements create a green backdrop on blank walls without taking up a square inch of floor.
– Tray of mini plants on the coffee table builds a cozy, green vignette you can easily tweak.
– One tall plant near a doorway or window acts as a natural divider in open layouts.
– Clustered greens on a shallow shelf form a simple wall mural that feels intentional.
Care and selection worries, solved. Pick plant types that suit your indoor light and humidity. Good bets include snake plant, pothos, ZZ plant, and monstera. Match pots to your style with warm wood, matte white, or black ceramic to keep the look cohesive. Water when the top inch of soil feels dry, and empty any saucers after a drink. Wipe dusty leaves to keep them thirsty for light.
Next steps: pick one placement idea this week, set it up, and watch your room come alive.
Your living room can breathe when you use natural materials. Wood, stone, and clay add warmth and a calm vibe. In a boho mid‑century space, these textures connect you to nature. Here’s how to bring them in with style and care. These tips stay personal.
What to pick and why
– Use reclaimed wood for tables and shelves in your space to give a weathered, authentic look and rich texture.
– Pair wooden pieces with stone accent tables to create contrast and balance in your living room.
– Choose clay pots or vases with visible grain, slip marks, or imperfections to add handmade charm to your shelves.
– Mix wood, stone, and other natural fibers like rattan or jute, while you keep a cohesive color palette.
– Look for handmade items that carry a small story for your space, not mass‑made shine.
– Opt for raw or matte finishes that let natural textures stand out on your furniture.
– Add a natural fiber rug, such as jute or sisal, to soften the floor and anchor your furniture.
– Bring in plants or dried botanicals to reinforce the nature vibe without clutter around you.
– Choose sustainable options and skip cheap plastics to keep your space timeless.
– Let finishes be clear or warm to reveal the grain and color of wood.
– Avoid overcrowding; place pieces where natural light makes textures pop.
20. Natural Materials
Editor’s Choice
🛍️
Martin Svensson Home Monterey Solid Wood Coffee Table, Reclaimed Natural
Why vintage textures matter in a boho mid century space
Textural depth adds warmth and character to clean mid-century lines. Vintage fabrics bring color, pattern, and a soft touch you can feel. They help your space feel cozy, not cold.
Here is what to look for:
– Kilim rugs add warm color and graphic pattern that anchors the floor.
– Handwoven throws bring softness and a lived-in vibe.
– Embroidered pillow covers offer tiny details that catch the eye.
– Natural textiles like jute, linen, or wool create contrast with smooth wood and metal.
How to layer textures
Here is a simple plan you can follow:
– Start with one anchor textile on the floor or sofa. Let it set the mood.
– Mix a rough texture with a smooth surface. The contrast makes each piece pop.
– Add a soft fabric to balance a bold print. This keeps the room comfy.
– Rotate textiles by season. A lighter set in spring, a cozier mix in winter.
Practical care and quick tips
– Vacuum rugs regularly and spot-clean stains.
– Fold and store off-season textiles in breathable bins.
– Keep sunlight from bleaching delicate fabrics.
Next steps: pick one vintage textile today and test it with your mid-century furniture. You may be surprised how fast the room gains depth. Texture makes rooms feel alive.
21. Incorporate Vintage Textures
Editor’s Choice
🛍️
SAFAVIEH Area Rug 8×10 – Kilim Collection – Large – Natural & Black, Han…
A bold accent wall can give your boho mid-century living room a clear focal point. You can create it with paint, wallpaper, or wood paneling to define space and mood.
– Choose the right wall Pick a wall that naturally catches the eye, like the one behind the sofa or opposite seating.
– Pick a method Use bold paint, a graphic wallpaper, or warm wood panels to add texture.
– Select colors or patterns Let colors or patterns speak to your furniture and textiles, not fight them.
– Backdrops Let this wall sit behind the sofa as a dramatic backdrop or behind the TV to help it pop.
– Decor and layering Add art, a slim shelf, and a few plants to create depth.
– Light it up Use wall lights or a focused spotlight to highlight the wall after dark.
– Keep it harmonious Make sure the wall’s color or pattern works with nearby walls for a smooth transition.
– Practical tips Don’t crowd the wall; leave room for negative space.
– Maintenance Wipe painted walls with a damp cloth and replace wallpaper if it peels.
– Budget and DIY If you paint yourself, test a small area first and use painter’s tape for clean lines.
With care, your accent wall stays fresh for years. Take time to match textures with other decor. This keeps your space calm and easy to live in. Try a tiny sample first and adjust until it feels right.
If you crave a warm, personal boho mid-century look, curated collections can do the most. They spark curiosity and tell your story. A dedicated display boosts your living room and guides the eye.
Choose a spot that fits your decor, like a slim shelf, a corner cabinet, or a shallow display cabinet. It should feel part of the room, not hidden away. Keep the space clean so items shine.
Pick what to show. Start with 1 to 3 themes like vintage records, travel keepsakes, or handmade ceramics. Let color and texture tie them together beautifully.
How to display your collection
– Use containers to display your finds, like decorative bowls, trays, and glass domes.
– Group items in sets of 3 to 5 on each shelf for balance.
– Vary heights and shapes to create visual rhythm.
– Rotate items every season to keep the display fresh.
– Leave breathing room between pieces so the shelf feels calm.
– Mix different items within a theme for subtle variety.
– Choose a bold centerpiece to anchor the collection.
– Stick to a soft color palette to unify diverse pieces.
Next steps: start with a single shelf, pick three items, and arrange with care.
This approach keeps your room calm, warm, and alive.
23. Curated Collections
Editor’s Choice
🛍️
Samhita Mango Wood Decorative Bowls for Home Décor, Decorative Long Wood…
If your boho mid-century living room feels flat, geometry can bring it to life. Shapes guide the eye and create a rhythm you notice as you move through the space. You can mix curves with straight lines to add depth without crowding the room. Start with a few simple choices and build from there.
– Mix rounds with angular shapes A round coffee table paired with a rectangular sofa feels fresh. Add a curved accent chair to balance the straight edges. Place a geometric rug under the seating to anchor the look.
– Geometric textiles and rugs Choose cushions, throws, and rugs with triangles, hexagons, or lattice patterns. Let the colors be calm and repeat on other pieces so the room reads as one set.
– Geometric art and wallpaper Hang wall art or install wallpaper that shows clear shapes. Repeat a favorite shape across several items to tie the space together.
– Mirrors in bold shapes A mirror with a round, hex, or polygon frame reflects light and adds space. Place it where it can bounce daylight or lamp glow.
– Small geometric accents Add vases, bowls, or sculptures in crisp geometric forms. These small pieces are easy to swap as your style shifts.
– Keep balance Let one big geometric piece be the star. Keep other patterns simple so nothing competes with it.
Try one idea at a time and see how it feels in your room.
Geometry is your boho mid-century living room’s best friend! Mix curves with straight lines to create a rhythmic flow that invites movement and breathes life into your space.
24. Play with Geometry
Editor’s Choice
🛍️
SAFAVIEH Adirondack Collection Area Rug – 6′ x 9′, Ivory & Black, Modern…
If your boho mid-century modern living room feels busy, minimalism can bring calm you can feel. Here is why it works: it gives space for the lines you love. Next, let’s make it easy to apply.
– Keep surfaces clear
Clear the coffee table, the console, and the shelves. Display only items you truly need or love. Less clutter helps your boho pieces stand out and makes cleaning a breeze.
– Choose multifunction furniture
Pick furniture that hides clutter, like a storage ottoman or a slim credenza with drawers. This keeps storage out of sight and leaves more room for seating and flow.
– Use a calm color palette
Select warm neutrals, soft whites, and natural wood tones. These hues slow the eye and let textures and shapes do the talking.
– Let boho shine with restraint
Display one bold textile or art piece, plus a live plant or two. This anchors the room without piling on patterns or excess clutter.
– Embrace natural materials
Incorporate jute, linen, and rattan to add warmth and texture. Keep patterns simple so the mix feels intentional, not chaotic.
– Plan lighting thoughtfully
Choose a clean-lined lamp or a minimal fixture with warm light. Good lighting makes the space feel open and welcoming.
If you try these steps, you keep the mid-century lines and boho texture while cutting chaos. Next steps: pick one area to declutter this week and see how it changes the room.
25. Embrace Minimalism
Editor’s Choice
🛍️
DUMOS 30in Foldable Storage Ottoman Bench, Storage Chest, End of Bed Foo…
Blending boho and mid-century modern styles creates an enchanting living room atmosphere that is both stylish and comfortable. From earthy color palettes to vintage textures, there are countless ways to incorporate these ideas into your home. Let your personality shine through and enjoy the process of creating a space that feels uniquely yours.
As you experiment with these ideas, don’t hesitate to mix and match to find what works best for your lifestyle. Happy decorating!
Note: We aim to provide accurate product links, but some may occasionally expire or become unavailable. If this happens, please search directly on Amazon for the product or a suitable alternative.
This post contains Amazon affiliate links, meaning I may earn a small commission if you purchase through my links, at no extra cost to you.
Frequently Asked Questions
What Are Key Elements of a Boho Mid Century Modern Living Room?
A boho mid century modern living room blends earthy color palettes with clean lines and cozy textiles. To achieve this look, focus on statement furniture pieces, layered textiles, and artistic wall decor that reflect your personality. Incorporating vintage finds and nature-inspired decor can also add warmth and character to the space.
How Can I Incorporate Vintage Finds in My Living Room Decor?
Incorporating vintage finds is a fantastic way to add charm and history to your boho mid century modern living room. Start by visiting local flea markets or antique shops. Look for unique pieces like vintage furniture, decorative items, or artworks that resonate with your style. These treasures can serve as conversation starters and give your living room a soul of its own!
What Are Some Tips for Layering Textiles in My Living Room?
Layering textiles is a simple yet effective way to create a cozy atmosphere in your boho mid century modern living room. Mix and match throws, pillows, and rugs in various textures and patterns. Don’t be afraid to play with scale—larger pieces can anchor the space, while smaller accents can add interest. Aim for a harmonious balance that feels inviting and warm.
How Can I Add Plants to My Living Room Without It Feeling Crowded?
Plants are a perfect addition to a boho mid century modern living room, adding life and color without overwhelming the space. Opt for various heights and sizes to create visual interest. Use hanging planters or tall floor plants to draw the eye upward. You can also group smaller plants together on a shelf or table to create a curated look that feels intentional and inviting.
What Lighting Should I Use to Enhance My Boho Mid Century Modern Space?
Lighting is crucial for setting the mood in your boho mid century modern living room. Choose soft, ambient lighting with options like dimmable ceiling lights or statement floor lamps. Consider incorporating unique lighting fixtures that reflect your style—think geometric shapes or vintage-inspired designs. This will create a warm and inviting atmosphere perfect for relaxation and gatherings.
I put this together because choosing living room curtains can feel overwhelming. The right pair can change a space in minutes. Curtains shape light, color, and mood. A soft drape can warm a chilly room. This post shows you how to pick curtains that welcome you home.
If you’re decorating on a budget, renting, or you simply want a quick, noticeable update, this will help. You might juggle kids or pets, or just want a calm, cozy space. You want a look that feels easy to live with day after day. This guide sticks to practical ideas you can use in real rooms.
Inside you’ll find 24 living room curtain ideas that cover a range of textures, colors, and finishes. From light, airy sheers to rich velvet drapes, there is something for every style. You’ll see options in linen, cotton blends, and blackout fabrics for night movies. The ideas include layering and mixing tones to create depth without shouting. The goal is a space that looks pulled together and feels soft to touch.
Think about the materials you actually want within reach of your daily life. Linen for a casual vibe, velvet for warmth, cotton for easy care. Sheer curtains soften sunlit mornings, while blackout linings bring quiet evenings. You can mix and match to control light, privacy, and sound in a room that hosts talks, work, and meals. This guide helps you pick textures and colors that blend with your existing furniture and walls.
Real world tips cover measuring, hardware choices, and simple hacks that don’t require a full remodel. Measuring window width and height is the first step, then you add extra for a generous hang. Choose hardware that fits your style and holds up over drafts. If you rent, consider easy swaps like tension rods or clip-on panels. Practical care tips keep fabrics looking fresh through seasons.
By the end, you’ll know how to turn plain windows into a cozy retreat with confidence. You’ll have ideas that fit different rooms, budgets, and lifestyles. And you’ll feel ready to pick a set that makes evenings feel calmer and mornings brighter. Keep reading to find the perfect curtains that make your living room feel like home.
Are you trying to warm up a living room without heavy drapes? Soft linen curtains can be your easiest fix. They’re light and airy, so they invite natural sunlight while keeping a touch of privacy in the room.
The natural texture of linen adds quiet elegance. You’ll notice subtle depth from the weave, which makes plain walls feel cozier. Linen catches light in a friendly way and softens the room without shouting for attention.
Color matters with linen. From off-white to earthy tones like sand, oat, or stone, there’s a shade to fit your furniture. Light hues help small rooms feel bigger, while warmer neutrals create a snug, inviting vibe.
Two styling tricks you’ll love:
– Layer them with sheer curtains for a dreamy, multi-dimensional look.
– Pair linen with simple furniture and natural fibers for a calming, cohesive space.
Linen drapes work well with different aesthetics. They’re a natural fit for minimalist setups, where clean lines meet soft texture. They also suit bohemian rooms that mix patterns and plants. The fabric’s versatility makes it easy to swap looks without replacing curtains.
Tip: Opt for a slightly wrinkled finish to get a laid-back, lived-in vibe. The casual texture reads stylish rather than sloppy.
Why they work: Linen helps create a tranquil atmosphere. It feels gentle against the skin and lies softly over furniture, inviting you to curl up with a book or a mug of tea.
Practical ways to pick and use linen curtains
– Length and rise: choose floor-length curtains for a grand feel, or sit them just above the floor for a tidy look. If your ceiling is low, go a bit shorter to avoid crowding the space.
– Width and fullness: measure your rod and aim for 1.5 to 2 times fullness for a light, flowy drape.
– Hardware: a simple rod with rings or clips keeps the look clean. Go with warm metal tones to echo natural fibers.
– Placement: in bright rooms, sheer layers help soften glare while keeping privacy. In shared spaces, heavier linen can shelter you from neighbors’ view at night.
– Care and longevity: linen holds up well with regular use. Wash in cold water on a gentle cycle, then air dry. Iron if you want a crisp look, or leave out to retain its natural wrinkles.
Common questions you might have
– Do linen curtains block light? They filter light softly but won’t blackout the room alone. Pair with a sheer underlayer for adjustable privacy.
– Will linen shrink? Linen can shrink a bit after the first wash. Pre-wash before hanging to minimize changes.
– How do I refresh the feel over time? A quick shake outdoors, gentle steaming, or a light iron helps the fabric look fresh again.
With soft linen curtains, you get a calm, welcoming space without heavy styling. They’re simple to choose, easy to care for, and endlessly adaptable. Add them to your living room and notice the difference in how the room breathes—light, texture, and comfort all in one.
1. Soft Linen Curtains
Editor’s Choice
🛍️
MIULEE Natural White Linen Curtains 84 Inch Long for Bedroom Living Room…
If you want a room that feels alive but still put together, bold geometric curtains can do the trick. They grab the eye and give your space a clean, modern vibe.
What to choose
– Pattern types: Chevron, hexagons, lattice, interlocking squares, and abstract tessellations. These shapes repeat in a rhythm that makes the room feel orderly.
– Color ideas: Let the pattern pull in colors you already use. Try a bright yellow with neutral furniture, or a deep blue against light walls. Black-and-white combos feel crisp. A softer background helps the pattern breathe in smaller rooms.
– Scale matters: Large shapes read bold from across the room. Small shapes feel playful up close. Pick a scale that matches your sofa size and wall height.
Balancing the look
– If the curtains dominate, keep other furnishings calm and solid. A plain sofa, simple chairs, and minimal art let the pattern shine.
– Bring in other geometric accents. Throw pillows, a rug, or a lamp shade with a matching motif create harmony without overloading the space.
Practical steps to get it right
– Measure carefully. Know your window width and how much you want to stack the curtains when they’re open.
– Choose fabric and light. Cotton and linen feel breezy. Velvet adds depth and warmth. A sheer layer behind them softens daylight.
– Install smartly. Use a sturdy rod. Longer curtains can make the room seem taller and more open.
Tips and cautions
– Tip: Use a bold pattern in a lighter color to brighten a dark room.
– Why they work: Geometric patterns add energy and polish, helping the living room feel fresh and inviting.
Care and upkeep
– Check fabric care before washing. Cotton and linen wash well. Velvet may need dry cleaning or gentle handling.
Common questions
– Will bold patterns make the room feel smaller? Not if you keep walls light and balance the pattern with solid pieces. Use the pattern as a focal point and leave other areas calmer.
End note
Bold geometric curtains offer a quick, effective refresh. They bring modern energy and a touch of artful style to your living space.
2. Bold Geometric Patterns
Editor’s Choice
🛍️
MIULEE Decorative Back Tab Linen Curtains with Geometric Pattern for Liv…
Layer with sheer curtains for a multi-dimensional look
Bold Geometric Patterns
Cotton, Linen
$35.99
Keep other furnishings calm and solid to let the pattern shine
Rustic Jute Curtains
Jute, Linen
$17.99
Pair with sheer white curtains for a softer look
Elegant Velvet Drapes
Velvet
$36.89
Use metal accents to boost the luxe feel
Playful Floral Prints
Cotton, Linen
$N/A
Mix with solid furniture to keep the look grounded
Minimalist Sheer Curtains
Voile, Cotton blends
$35.99
Layer with heavier drapes for light control
Coastal-Inspired Curtains
Cotton, Linen
$36.99
Use in sunlit living rooms for a breezy touch
3. Rustic Jute Curtains
You want a living room that feels warm and calm, not sterile or loud. Rustic jute curtains can give you that cozy retreat without shouting. They bring a natural texture that makes any space feel grounded. And they work with more than just country decor. Modern rooms can gain depth, warmth, and a relaxed vibe when you add these earthy panels.
– What makes jute curtains special: Jute is a natural fiber with a soft, grainy look. The color sits in warm, earthy tones that pair with wood, stone, and greenery. The texture catches the eye in a quiet, friendly way, so your window becomes a focal point without overpowering the room.
– Style without the fuss: You don’t need heavy embellishments to get impact. Jute carries its own charm. It’s durable, easy to wear day after day, and fits casual, rustic, or modern spaces. If your walls are light, the curtains add a subtle contrast. If your walls are darker, they bring a touch of warmth to balance the space.
– Layering for depth: For a softer look, pair jute with sheer white curtains. The sheer layer softens the natural texture and invites daylight while keeping privacy. The result is a layered, multi-dimensional feel that still reads calm and simple.
– Color and texture options: Natural beige is classic, but you’ll also find warmer taupe or slightly tinted oats. Choose a shade that harmonizes with your furniture and rug. A slightly thicker weave looks more rugged; a lighter weave reads more breezy.
– Practical setup tips:
– Measure accurately: measure window width and decide if you want a full, gathered look or a sleek, flat panel.
– Rods and hardware: choose a simple wood or matte metal rod that echoes your furniture.
– Length: floor-length curtains (just kiss the floor or a centimeter past) feel grounded; slightly shorter can read fresh and modern.
– Layering: add a sheer panel on the inside or front for light control and texture.
– Care and maintenance: Vacuum gently with a brush attachment to remove dust. If you spill, blot quickly and spot clean with a mild soap solution. Keep them out of harsh direct sun when possible to minimize fading. Allow air to circulate to avoid musty smells in humid spaces.
– Why they keep working: Jute slows the eye and slows sound a touch, creating a calmer room. The natural fibers invite touch and bring a sense of nature indoors. They’re honest materials for real life—easy to live with, easy to style.
– Honest limitations: Jute can shed a little at first and may fade over time in strong sun. It’s not the best for high-moisture bathrooms or kitchens. If you love bold color or ultra-sleek fabrics, you might mix in other textiles to keep your space lively without losing the cozy feel.
In short, rustic jute curtains give you warmth, texture, and flexibility. They bridge rustic charm with modern ease, turning any living room into a true retreat you’ll want to come home to.
Rustic jute curtains are your secret weapon for a warm, inviting living room. They add natural texture and earthy tones, making your space feel cozy and grounded—perfect for any decor style!
3. Rustic Jute Curtains
Editor’s Choice
🛍️
YoungsTex Burlap Linen Curtains 63 Inch Length 2 Panels for Bedroom, Tof…
Craving a touch of luxury that also keeps your room cozy? Velvet drapes can deliver both. They bring a sense of richness and polish that makes a living room feel like a calm retreat.
Velvet isn’t just fancy. It has texture you can see and feel. The soft pile catches light in a way that adds depth and warmth to your space. In bright rooms, velvet colors glow with life. In rooms with less sun, they add mood and richness.
Choose jewel tones to make the most of velvet. Emerald greens, sapphire blues, ruby reds, and royal purples look dramatic when the sun hits them. If your walls are light, these shades stand out beautifully. If your walls are dark, velvet creates a luxurious contrast that makes furniture pop.
Pair velvet with metal accents to boost the luxe feel. Gold or brass hardware — curtain rods, rings, or tiebacks — reflect light and echo the drape’s grand look. This pairing works best when the metal isn’t too shiny; a brushed or antique finish blends better with velvet.
For warmth, go deep. Burgundy, forest green, and midnight navy are great choices. They calm a space and invite you to relax on the sofa after a long day.
Tip: Use curtain tiebacks to pull velvet open and showcase its lush texture. When tied back, the fabric plays with light and adds a touch of drama to your room.
Why velvet works Velvet is thick. It helps block drafts and dampen outside noise a bit, so your living room feels quieter and cozier. The fabric also helps with light control, letting you darken the room for movie nights or brighten it for a lazy Sunday morning.
How to implement velvet drapes without overdoing it:
– Measure correctly: aim for curtains that sit wider than the window and longer than the sill for a full, puddled look or a clean floor sweep.
– Layer thoughtfully: pair velvet with sheer curtains during the day. Sheers soften the light and soften the room’s edges.
– Choose the right hardware: a sturdy rod and good brackets are essential for heavy velvet. Consider a double rod if you want to layer with sheers.
– Mind the scale: large windows need longer, broader panels; small windows look best with lighter, slightly shorter panels to avoid overwhelming the wall.
Care and maintenance to keep velvet looking rich:
– Vacuum with a soft brush to remove dust and debris.
– Check the label for cleaning instructions; many velvet drapes need professional cleaning.
– Protect from strong sunlight to prevent fading. Rotate colors if you have multiple windows to keep wear even.
Potential drawbacks to note:
– Velvet is heavy. It requires strong hardware and a solid mounting point.
– It can show wear sooner than lighter fabrics if sun-exposed, so rotate or replace panels as needed.
– Cleaning can be pricier; plan for occasional professional care if you want the fabric to stay pristine.
With these tips, velvet drapes become more than decor. They transform a room into a warm, elegant retreat you’ll enjoy every day.
Struggling to breathe life into your living room? Playful floral prints can turn a plain space into a bright, welcoming room fast. These curtains add character without saying too much. You can use them as a single statement or mix them with simpler pieces for balance.
There are two main vibes to choose from. Bold, large floral prints feel fresh and modern. Think big petals in punchy colors on a light background. Delicate, vintage-style florals give a classic, cozy mood. Tiny rosebuds or tiny ditsy prints on cotton or linen read as timeless and calm. Your choice sets the tone for the whole room.
Seasonal energy matters too. Floral curtains shine in spring and summer, brightening the room as the sun shifts. In fall, they can still work if you pick softer tones or richer backgrounds. Pair them with solid furniture and neutral walls to keep the look grounded. To keep the vibe from feeling busy, add a few plain cushions in colors that come from the curtains.
How to pick the right floral curtain for your space
– Scale matters: Large florals fit big rooms with plenty of light; small florals work well in tighter spaces or rooms with low ceilings.
– Color palette: Choose a background color that matches your wall or furniture, and pick a few accent hues from the print for cushions or decor.
– Light and fabric: Sheer options soften a room, while cotton or linen drapes give a clean, casual feel. Velvet or lined fabrics add drama and privacy.
Practical setup tips
– Start with one panel on a single rod, then add a second panel if the space calls for more fullness.
– Pair floral curtains with solid furniture to keep the look balanced. If you love prints, mix in one other subtle pattern in the same color family.
– Don’t fear white walls. A light backdrop makes blooms pop and keeps the space feeling open.
Tip: Use a floral print to guide your room’s color choices. Let one color from the pattern lead your wall paint, rug, or throw pillows.
Why they work: Floral prints bring joy and calm. They lift the mood and give you a relaxing backdrop for everyday life.
Common questions you might have
– Will florals overwhelm a small room? Choose lighter fabrics and smaller prints to keep the space airy.
– How do I clean them? Check care labels, but most cotton or poly blends wash well in a gentle cycle.
– What if I want versatility? Choose muted florals on a neutral background for a timeless feel that still adds charm.
Limitations to know
Busy patterns can feel loud if the room already has many strong colors. If your space is small, opt for lighter tones and simpler furniture to avoid visual clutter.
Ready to try floral curtains? Start with a swatch, imagine the hue in daylight, and test how the print makes you feel. Then pick one practical pair and watch your living room transform into a fresh, cozy retreat.
6. Minimalist Sheer Curtains
You want a living room that feels bright, calm, and easy to live in. Minimalist sheer curtains can give you that without making the space look cold or crowded. They let sunlight filter in softly while keeping the view gentle. You get a clean, open feel with none of the heaviness of thick drapes.
What they do for your space
– Light pours in without glare.
– Edges stay soft and the room appears larger.
– They fit well with modern and Scandi styles.
– They stay flexible as your decor changes.
Materials and looks to consider
Most sheer curtains come from voile, light cotton blends, or airy polyester. Look for a weave that feels delicate but sturdy. Colors range from creamy white to warm gray to pale beige. Neutral tones blend with almost any sofa, rug, and wall color. A subtle sheen can add a premium touch without shouting. If you like texture, try a linen-look sheer for depth.
Layering for more control
Pair sheer panels with heavier drapes. In the daytime, keep the sheers drawn for brightness and a soft silhouette. In the evening, close the drapes for privacy and extra warmth. This two-layer setup gives you real flexibility in a single window.
How to install them for best effect
Install the rod higher than the window frame to visually lift the ceiling. Let the rod extend a few inches beyond each side so the curtains open fully and frame the view. Aim for fullness about 2x the window width so the panels look lush, not flat. For large or tall windows, use multiple panels to maintain even coverage.
Care you can actually use
Choose machine-washable options. Use a gentle cycle and mild detergent. Avoid high heat when drying; air dry or tumble on low. Iron on low heat if you see wrinkles. With regular care, the fabric keeps its soft feel and light glow.
Common questions, simple answers
– Do sheer curtains block light at night? They don’t block all light. Layer with opaque drapes inside for full privacy after dark.
– Can I still see outside with sheers? You’ll see shapes and movement, not clear detail.
– Do they fit every window? They work well with many sizes and styles, especially tall or wide windows.
Tip: For extra privacy, add a light gray or ivory drape behind the sheers. It creates a layered look that’s easy to switch up.
Minimalist sheer curtains are your secret weapon for a bright, airy living room. Let the sunshine in while keeping your space feeling open and inviting – a cozy retreat awaits!
6. Minimalist Sheer Curtains
Editor’s Choice
🛍️
102 Inches Long White Pinch Pleated Sheer Curtains with Hooks,Back Tab S…
You want a living room that feels calm, bright, and cozy. Coastal-inspired curtains can make that happen without a full remodel.
Colors and patterns set the mood. Start with soft blues, clean whites, and sandy beige. These tones echo the sea and the shore. Add subtle stripes or wave-like motifs for a touch of movement without loud graphics. If your walls are white, try a pale blue or warm beige curtain to introduce color softly. For a bolder look, mix a white panel with a navy tie-back or border.
Materials that breathe. Choose fabrics that light up the room rather than weigh it down. Cotton, linen, and voile let air flow through. They cut glare and keep the space feeling open, even on sunny days. Lighter fabrics also catch a gentle breeze, which enhances the coastal vibe.
Layer for depth and flexibility. Use sheer curtains close to the window to soften daylight. Add a second panel in a solid or softly patterned fabric on top for privacy when needed. This layering gives you options, from sheer brightness in the morning to more coverage in the evening.
Where to use these curtains. They work best in sunlit living rooms, bedrooms with large windows, and even open-plan spaces that need a breezy touch. If you have a lot of wood furniture, coastal curtains help tie the room together. In rooms with strong color or dark walls, light curtains can lift the space and feel refreshing.
Pattern ideas and textures. Stripes remind you of beach huts. Wave-inspired prints mimic the sea’s rhythm. Shell motifs add a small, nature-inspired detail. Pair patterns with plain fabrics to prevent visual overload. Use natural textures—linen blends, cotton, or jute accents—to reinforce the seaside look.
Practical tips for care and setup. Choose a length that just brushes the floor for a clean line or slightly puddles for a softer feel. Opt for rust- or brass-colored hardware to add a beachy touch without shouting. If you have pets, pick fabrics labeled pet-friendly and easy to wash.
Common questions and clear answers. Do coastal curtains block light? Layering with sheer plus a top panel gives you light control and privacy. Are they hard to maintain? Most coastal fabrics wash well, but check care labels. Do they fit all rooms? Yes, they adapt to living rooms, bedrooms, and kitchens with the right color and weight.
Limitations to consider. Very bright sun can fade some fabrics over time. Lighter colors show marks more easily, so you may choose durable, washable fabrics in high-traffic rooms. They work best when you balance light, privacy, and maintenance.
Implementation quick-start. – Measure windows accurately to know panel width and length. – Choose a light, washable fabric in coastal colors. – Layer with sheer plus a top panel for flexibility. – Pick hardware in natural metal or wood to match your room.
This approach gives you a cozy retreat with a touch of the sea. You get easy maintenance, flexible light, and a style that stays fresh season after season.
7. Coastal-Inspired Curtains
Editor’s Choice
🛍️
Patterned Farmhouse Curtains for Living Room,Light Blue Floral Toile Cou…
You want a living room that feels warm, layered, and a little dramatic. Rich tapestry curtains can give you that in one simple swap. They use heavy fabrics with intricate designs and classic motifs. The result is depth, history, and a regal touch that stays in view every day.
These curtains work well in traditional or eclectic spaces. They pair beautifully with antique or vintage furniture and invite you to sit and stay awhile. If your style leans modern, you can still use tapestry curtains—just balance them with clean lines, metal accents, and solid colors to keep the room feeling fresh.
Tip: Choose bold colors or strong contrasts to make the curtains pop. A single striking hue can frame your windows like a piece of art. Why they work: They warm the room and make it feel like home.
How to pick the right tapestry curtains
– Look for heavy fabrics such as damask, brocade, or jacquard. These weave patterns stay sharp and look luxurious.
– Add a lining. A good lining adds weight, blocks light, and helps the colors stay vibrant longer.
– Check the color and pattern at scale. Large motifs work on big windows; smaller patterns work for smaller ones.
– Consider the room’s lighting. For a bright space, you can go with a slightly lighter tapestry. For a dim room, a richer weave with a stronger color will brighten the feel.
Practical setup ideas
– Mount a sturdy rod and rings that can handle the weight. The rod should be strong enough to hold the fabric without sagging.
– Hang curtains close to the ceiling and let them fall to the floor. This length adds drama and makes ceilings look higher.
– Use two panels per window for fullness. In a living room with a long window, two panels create richer folds and better coverage.
– Layer with a sheer behind them. Sheer curtains soften daylight while the tapestry steals the show in the evening.
What’s trending and realistic now
– Jewel tones are popular—deep greens, navy blues, and rich burgundies feel luxurious without shouting.
– Damask and vintage-inspired motifs get updated with modern color palettes and cleaner lines.
– Eco-friendly and durable fabrics are kinder to the home and easier to keep looking great.
– Texture matters; you’ll notice the light catching the raised patterns and the soft touch when you pass by.
Maintenance and honesty about limits
– Many tapestry curtains can be dry-cleaned, but some are machine-washable. Always check the care tag.
– Vacuum lightly with a soft attachment to remove dust. Rotate and re-hang seasonally to keep the folds looking fresh.
– They’re heavier, so plan for sturdier hardware and a bit more setup time. If you’re renting, ask about lightweight alternates or temporary rods.
Quick-start plan to get you going
1) Define the mood you want—classic, cozy, or bold.
2) Pick a color family that fits your room.
3) Measure window width and desired length.
4) Choose a lining type for light control and warmth.
5) Select a hardware kit rated for heavy fabric.
6) Hang, adjust, and enjoy the new depth of your space.
8. Rich Tapestry Curtains
Editor’s Choice
🛍️
NICETOWN Curtains & Drapes for Door Tapestry, Sound Noise Canceling Room…
You’re after a clean, calm window look that still feels warm. Classic Roman shades give you that balance. They lift in neat folds and tuck away to keep the view uncluttered. You control light and privacy simply by raising or lowering them.
These shades come in a wide range of fabrics and colors. That means you can match any room, from sleek modern to cozy traditional. For a snug vibe, choose soft fabrics in warm tones or textures. Think cotton blends with a gentle weave, linen-like fabrics, or a plush touch that softens hard edges. Darker tones can make a living room feel intimate; lighter shades invite air and ease into a bedroom.
Roman shades work well on their own, or they can be layered with curtains for extra depth. If you want more texture, pair them with light drapery panels that frame the window without shouting for attention. A patterned fabric adds personality while keeping the clean lines that a Roman shade brings. Tip: A subtle geometric or organic pattern can wake up a neutral room without stealing the show. Why they work: They bring a refined, uncluttered look that still feels warm and lived-in.
How to choose and use Roman shades in your space
– Measure the window: record width and height, and note sill position so you know how high to mount.
– Decide on light control: choose light-filtering for a soft glow or room-darkening for more privacy and better sleep.
– Pick a lining: lining adds privacy, improves insulation, and helps fabrics keep their shape.
– Consider color and texture: match wall tones for a seamless feel, or add contrast with a slightly darker shade.
– Plan mounting: install above the window frame to maximize light when you raise them.
– Select hardware: a clean headrail or slim side-w panels keeps the look tidy and modern.
Care and upkeep
– Dust regularly with a soft cloth or brush.
– Spot clean with a mild soap solution; avoid harsh cleaners.
– Rotate and adjust seasonally to keep the fabric looking fresh and even.
Common questions
– Do Roman shades block light well? They can, especially with a room-darkening lining.
– Are they easy to clean? Yes, with gentle dusting and occasional spot cleaning.
– Can they be used in kitchens or bathrooms? Yes, but choose moisture-resistant fabrics and ensure proper ventilation to prevent warping.
With the right fabric, color, and layer, Classic Roman shades deliver a poised look that feels both chic and welcoming. They’re a practical choice for light control, privacy, and a tidy, cozy vibe that lasts.
9. Classic Roman Shades
Editor’s Choice
🛍️
CHICOLOGY Roman Shades for Windows , Window Treatments , Roman Shades , …
If your living room windows look bare or feel chilly, rustic barn door curtains can help. They add warmth and character to a modern space.
Barn door curtains are sliding panels hung on a track. They open and close with a simple push. This gives you immediate control over light and privacy. They work great on large windows or wide openings. Regular drapes can feel small next to big frames.
Choosing rustic barn door curtains brings texture and personality. Wood or wood-look hardware anchors the room. The fabric adds softness to balance hard surfaces. This mix creates a cozy retreat you’ll want to spend time in.
Tip: Mix fabrics and wood for depth. Try a linen or cotton panel with a wood-toned bar. You’ll notice how the rough and smooth surfaces play off each other.
Why they work: They blend charm and function. Close them to quiet noise or open them for a view. The track system keeps the look clean and intentional.
Materials and styles to consider:
– Wood or faux-wood panels for the doors
– Fabrics such as linen, cotton, or burlap in warm neutrals
– Black, brass, or oil-rubbed bronze hardware for a modern rustic touch
– Full-length panels that skim the floor for drama
– Layering with sheer panels for soft morning light
How to implement in your space:
– Measure carefully. Aim for panels that cover the opening plus extra for fullness.
– Mount the track above the window frame for a clean line.
– Choose a length that just touches the floor to look intentional.
– Pair with other wooden accents—coffee tables, frames, shelves—to anchor the look.
Care and limitations:
– Dust regularly and spot-clean fabrics as needed.
– Light vacuuming works well on textured fabrics.
– If you have pets, pick sturdy fabrics that resist wear.
– Tracks cost more than basic drapes and need wall space. If you rent, check for removable tracks.
With the right choice, rustic barn door curtains frame your view and wrap the room in warmth. They’re a practical upgrade that can redefine your living space.
10. Rustic Barn Door Curtains
Editor’s Choice
🛍️
SMARTSTANDARD 6.8FT Barn Door Hardware Kit, Sliding Barn Door Track -Smo…
Want a simple way to turn your living room into a cozy art space? Canvas curtains can do that in a single move.
These window coverings are more than fabric. They showcase designs painted by hands or printed with original scenes. When you open the windows, you see a tiny gallery every day.
Canvas curtains bring color and character to the room. They suit eclectic and bohemian looks best, but they can work in lots of styles if you pick the right design. Soft, muted tones can calm a busy room. Bright prints can wake up a shy palette.
How to use canvas curtains in your space
– Pick a design that mirrors your room’s color story. A shared color across walls, rug, and sofa helps the curtains feel part of the whole.
– Decide how bold you want to go. A large mural makes the window a focal point. A smaller, subtle print adds texture without shouting.
– Hang them with clips or rings so the artwork stays visible and easy to swap out when you want a fresh look.
– Layer with texture. Add cushions and a layered rug to pull in the colors from the curtains and create a cozy, lived-in vibe.
– Think about light. Heavier canvas blocks more sun for a darker room. Lighter canvas lets more daylight in, which can brighten a small space.
Pro tip: Clip the panels so the art stays front and center. It’s easier to admire and switch up when you want a new mood.
Why artistic canvas curtains work
Why they work: They personalize your space. A painting or print on a curtain turns a plain window into a story you tell with color. The result is a living room that feels lively and real, not generic.
Materials and options to consider
– Hand-painted canvases for a true one-of-a-kind look.
– Printed art on durable cotton or linen blends for easy care.
– Bold graphic designs for a modern twist or soft pastels for a calm vibe.
– Light-blocking or sheer options, depending on how much sun you want to filter.
Care and maintenance
– Check the label before washing. Some canvas curtains are machine washable; others need spot cleaning.
– Use a gentle cycle with cold water and mild detergent.
– Air dry or tumble on low heat if allowed. Avoid high heat that can shrink fabric or fade colors.
– Spot clean stains quickly to keep the art looking fresh.
In short, artistic canvas curtains are a practical way to add personality without losing function. They bring color, texture, and a hint of gallery flair to your living room. If you want a space that feels both creative and comfortable, give them a try.
If your living room looks flat, pinch pleat curtains can add polish. They bring a clean, tailored line to your windows. The evenly spaced folds create structure and texture. You’ll notice how the room feels steadier and more finished.
Why pinch pleat curtains work
Pinch pleats look refined. They suit formal spaces and can lift a casual setup. The design hides hardware and gives a neat silhouette. They hold their shape well, even when the sun moves across the room. With the right fabric, they add quiet drama without shouting.
Fabric options
– Lightweight linen or cotton blends keep the room airy and fresh.
– Medium-weight fabrics like cotton twill add form without feeling heavy.
– Rich velvet or velour bring warmth and a touch of luxury for cooler seasons.
Layering for depth
Pair pinch pleat panels with sheer curtains. The sheer softens the light while keeping the folds visible. Layering adds dimension and makes the space feel larger. Choose a sheer that matches or lightens the panel color for a cohesive look.
How to pick length and width
Measure your window carefully. For a floor-length look, let the panels just kiss the floor or puddle slightly. If you prefer a modern edge, hang above the sill. Aim for panels that are at least twice the window width so they stack nicely when open.
Installing tips
– Use a sturdy rod with rings or a hidden track for smooth movement.
– Space brackets evenly to prevent sagging and ensure clean lines.
– Plan for 8 to 12 pinch pleats per panel, depending on the panel width.
– Keep the header straight so the top line stays crisp when you close them.
Care and upkeep
Linen and cotton blends usually wash well on a gentle cycle. Air dry to avoid shrinking. Velvet often needs dry cleaning or professional care. Regular light brushing helps keep velvets looking rich and less dusty.
Quick styling ideas
Two panels per window create a full, balanced look. Use a lighter sheer to brighten the room while keeping privacy. For a cozy retreat vibe, pair dark velvet with lighter wall colors. Add a simple tieback to keep folds neatly open when you want more light.
If you want a room that feels polished yet comfortable, pinch pleat curtains are a strong, practical choice. They blend form and function in a way that works with many decorating styles.
12. Chic Pinch Pleat Curtains
Editor’s Choice
🛍️
Pinch Pleated Linen Curtains 96 Inches Long for Living Room 2 Panel Set …
Is your living room feeling a bit dull, and the walls look flat? Vibrant ombre curtains can fix that fast. They fade from one color to another, giving your windows a smooth, color-rich look. The flow of color adds life without shouting. Your room feels brighter, warmer, and more inviting.
Start with a color plan. Pick a top shade that fits the mood you want. Let the bottom shade soften or deepen the gradient. You can run a lighter edge at the top and a stronger hue at the bottom or pick a strong top and pale bottom. The key is to keep the palette simple and let the gradient do the work. Bright and pastel tones tend to sing in most living rooms.
Fabric matters
– Linen or cotton keeps things light and airy. The color shifts nicely as sun moves through the room.
– Velvet or a satin weave brings a richer feel. The ombre looks bolder in the shadows and light.
– Sheer linings can soften the transition and help with privacy when you need it.
Length and fit
Let the curtains touch the floor for the strongest ombre effect. Floor-length panels add a long vertical line that makes ceilings feel higher. If your ceilings are short, a slightly shorter hem still shows off the fade while staying tidy on the floor.
How to place them with your furniture
– Pair them with simple, solid furniture so the colors can stand out.
– Tie the bottom shade to cushions or a throw in the same area for a cohesive feel.
– If your sofa has a busy pattern, choose a light top shade and a subtle bottom tone to balance it.
Practical tips you can use
– Measure from the rod to the floor to get the right length. Add an inch for a small puddle if you like that look.
– Hang curtains where the sun hits so you can see the gradient shift all day.
– If you want more privacy or light control, add a lining.
Why they work—and when they might not
Ombre curtains create a moving focal point that energizes the room while staying calm enough for everyday life. They mix well with many decor styles and are easy to update with a new shade. If your room has strong patterns or dark walls, pick a soft top with a lighter bottom to keep the gradient from competing.
If you want a living room that feels warm and personal, patchwork curtains can be your best move. They turn a plain window into a bright, inviting feature.
What they are
– They fuse different fabrics and patterns into one curtain. This creates a lively, layered look that draws the eye.
– They fit bohemian and eclectic rooms well, adding a handmade feel. They can be a bold focal point or a soft backdrop, depending on your color choices.
Why they work
– Patchwork curtains add texture and color without a full remodel. You get depth, warmth, and character in one piece.
– They reflect your personality and taste, making your space feel truly yours. The mix of fabrics can tell a story you love.
Choosing fabrics and colors
– Start with a dominant color to tie all pieces together.
– Mix textures like cotton, linen, velvet, and denim for depth and interest.
– Balance large patterns with smaller ones so the curtain doesn’t overwhelm the room.
– Limit the number of fabrics to keep the look cohesive and calm.
– Consider a neutral backdrop on walls or furniture to let the patchwork shine.
Practical styling ideas
– Hang them high and wide to make windows look bigger and brighter.
– Layer with a sheer panel or a solid drape for light control and privacy.
– Pair with natural wood tones, woven baskets, and soft rugs to anchor the vibe.
– In a small room, choose a more uniform color family to avoid a crowded look.
Care and maintenance
– Check fabric labels and wash on a gentle cycle when possible.
– Air dry or use a low heat setting to protect colors and textures.
– Spot clean stains quickly to keep patterns sharp and vibrant.
Common questions
– Will patchwork curtains look busy in a small space? If you keep the color family tied together, they won’t overwhelm the room.
– Do they block light? Some blocks more light than others; add a sheer or a blackout lining if you need more control.
– How do I pick patterns for a calming effect? Choose one large motif and several smaller ones in related colors.
Tip: Use a mix of textures for a layered effect that feels welcoming and current.
14. Eclectic Patchwork Curtains
Editor’s Choice
🛍️
Greenland Home Antique Chic Authentic Patchwork Curtain Panel Set, 84 x …
Is your living room looking flat and chilly? You want warmth without heavy walls of fabric. Cozy knit curtains can do that. They bring texture, touch, and a calm morning-light glow to any window.
What makes knit curtains work
– They feel cozy. The yarn creates a soft surface you can almost touch with your eyes. It invites you to sit and stay.
– They insulate a bit. Knit fabric traps a small layer of air between the room and the outside. It helps keep heat in during colder months.
– They add visual interest. The knit pattern—ribbed, cable, or a simple weave—gives depth that plain panels lack.
Materials, styles, and colors to consider
– Chunky knit for a bold, warm look. Think big stitches you can almost hear as you move.
– Fine knit for a lighter touch. These read modern and calm.
– Natural fibers work best. Wool blends are warm, cotton blends breathe easy, and blends with acrylic can be budget-friendly.
– Choose colors to fit your room. Neutrals like cream, taupe, and gray blend with most schemes. Vibrant shades bring a pop of color without fighting with other decor.
– Matching styles: rustic or modern farmhouse pairs nicely with knits. But you can also use them in contemporary rooms for texture and warmth.
How to use knit curtains in your space
– Layer for better insulation. Pair knit curtains with heavier drapes to trap more warmth in winter.
– Use as a window accent. A single rod and a generous length can frame a view and soften sharp angles in a room.
– Mix textures. Combine knit with smooth linen or velvet for contrast and balance.
– Consider room mood. Lighter knits feel airy in sunlit rooms; darker knits feel snug in the evening.
Practical tips for choosing and caring
– Measure carefully. Note width and desired fullness. Knit curtains can look best when they have some body.
– Check care needs. Some knits are easy to wash; others need dry cleaning or spot care. Read the label first.
– Watch for shedding. Loose fibers may collect on furniture until you settle in. Regular gentle brushing helps.
– Think about light. Knits soften harsh sun but rarely block it completely. Pair with blackout liners if you need more privacy or darkness.
Quick guide for picking and installing
1) Decide the vibe: chunky for bold warmth, fine for sleek calm.
2) Pick neutrals for flexibility, or a bold shade for a focal wall.
3) Measure and order the right length, with a touch of pooling or a clean break at the floor.
4) Install a sturdy rod and use rings or clips that suit knit fabric.
5) Layer as needed and enjoy a quicker, cozier transformation.
What if you’re unsure? Start with one pair on a key window. See how the knit texture changes the room before buying more. Cozy knit curtains won’t fix every cold spot, but they add a welcoming, lived-in feel that makes your space feel homey and inviting.
15. Cozy Knit Curtains
Editor’s Choice
🛍️
WINYY Boho Curtains for Living Room Vintage Handmade Crochet Farmhouse H…
If you want a softer, brighter living room without glare, soft gradient sheer curtains can help. They bring a gentle glow that stays light and inviting.
What gradient soft sheer curtains do
– They start light at the top and fade to a deeper shade toward the bottom, creating a quiet shimmer as sun moves through the room.
– They diffuse strong sun rays, reducing glare and hot spots while keeping your walls from washing out.
– They preserve privacy without fully blocking the view, so your space feels open and connected to the outdoors.
– They add depth and warmth to your windows when paired with heavier drapes, giving you an easy, layered look.
Materials and gradient directions
– Choose lightweight fabrics like voile, chiffon, or a cotton-linen blend for a soft drape.
– These fabrics catch light and move with a gentle sway, adding texture.
– Gradient can run top-to-bottom or bottom-to-top.
– Top-to-bottom is common for a soft, airy feel.
– Bottom-to-top creates a bolder focal point near the floor.
– Look for a smooth finish and tight hems so the gradient stays even as it hangs.
– Pick colors that blend with your room and let the gradient do the talking.
Color ideas and how to style
– Neutrals like cream, ivory, or beige work in almost any scheme and make rooms feel larger.
– Soft blues, sage greens, or warm taupe bring calm and complement natural wood or wicker.
– If you lean modern, pair a light-to-dark gray gradient with crisp white walls.
– For a cozy look, choose warm ivory tones and layer with charcoal or navy panels.
How to install and layer
– Start with the right rod or track that supports light fabrics and easy movement.
– Measure width carefully for a full, even hang and to avoid gaps.
– Let the gradient face the room or the window depending on your lighting goals.
– Add a second, heavier curtain panel on a separate rod for blackout options when needed.
– Keep the tiebacks simple so the gradient remains visible in daylight.
Care and maintenance
– Wash on a gentle cycle in cold water to preserve color fade.
– Use mild detergent and skip bleach or fabric softener.
– Air dry or tumble dry on low heat; iron on low if needed.
– Check the hems occasionally to keep the fade neat.
Quick-start checklist
– Measure width and length; pick the right gradient direction.
– Choose a light fabric with a smooth finish and a clean hem.
– Select a double-curtain setup for easy layering.
– Match colors to your walls and furniture for harmony.
You want a warm, natural look in your living room. Patterned bamboo shades give you that vibe with real advantages. They’re eco-friendly and sturdy. With patterns ranging from leafy motifs to clean geometric lines, you can match many styles. The result feels both modern and timeless. They install easily on standard curtain rods.
They filter light softly and add a warm glow. They block harsh sun without washing out the room. You can still see through to the outside while reducing glare. Layer them with fabric curtains to add texture and depth. The woven texture brings a touch of nature you can feel. They also help with privacy during bright days.
What to look for
– Pattern options include floral, geometric, or nature-inspired designs.
– The weave should balance light control and privacy.
– Color tones range from light honey to dark espresso to fit your furniture.
– Pair with other window treatments for a layered look.
– Durability matters; choose finishes and coatings that wipe clean.
How to use them
Measure your windows carefully before buying. Inside mounts give a crisp edge; outside mounts cover trim. Install with the included hardware or get help if you’re unsure. For a bright room, pick a lighter shade. For a cozier feel, pair with a sheer behind and a heavier drape on top. Consider how the sun moves through your room and plan which time of day you want more or less light.
Care and quick tips
Dust weekly with a soft cloth or microfiber duster. Wipe with a damp cloth if needed, then dry right away. Avoid soaking the bamboo shades and skip harsh cleaners. Check the cords or the operating system every so often. If you have kids or pets, consider cordless options. Store a spare shade or two if you’re moving rooms.
Why they work
They bring a natural element into any space, making it feel calm and alive. They’re simple to update when your style shifts. They pair well with wood furniture, rugs, and plants for a cozy retreat. They’re a budget-friendly way to refresh a room without ripping out existing window treatments.
17. Patterned Bamboo Shades
Editor’s Choice
🛍️
CHICOLOGY Bamboo Blinds , Shades Roman for Windows Window Home Patio & S…
You want a living room that feels cozy and open at the same time. Lace curtains can help you get both.
They soften bright sun into a warm glow. The result is a romantic, lived-in look that doesn’t block the view too harshly. You get privacy without heavy layers.
Lace brings a gentle, nostalgic feel. It works well with vintage furniture and floral decor. The room feels inviting, almost like a memory wrapped in fabric.
How lace curtains work in real rooms
Lace is a sheer fabric. It lets in light through small holes. That light scatters across walls. You see shapes and colors, not a solid shade. In the afternoon, your sofa glows with soft, even light. In the evening, they keep silhouettes private while still showing off your lamps and art.
Choosing the right lace
– Choose cotton or cotton-blend lace for a lightweight, breathable touch.
– A linen-blend or synthetic lace adds durability and a crisper texture.
– Look for small, tight patterns for more privacy.
– Large patterns shade more; they look breezier but filter less.
– Consider color. White and cream brighten. Ecru and beige soften the space. A soft gray lace pairs with moody walls.
Length and layering
– Floor-length lace looks elegant and makes rooms feel taller.
– Shorter panels work in small windows or busy rooms.
– Layer lace with solid drapes in a complementary color to add warmth and depth.
– Use a light lining if you want more privacy or a touch of blackout on busy days.
Placement and care
– Hang with a simple rod and rings so they move easily.
– Choose a track system if you want a clean, modern look.
– Clean gently. Hand wash or machine wash on a delicate cycle.
– Air dry to keep the lace looking fine.
Practical tips
– Start with one window to test the mood before committing to all rooms.
– Mix a floral pattern in the room with plain lace to balance the vibe.
– Pair with soft textures like a cotton throw or velvet pillow for a cozy feel.
18. Vintage Lace Curtains
Editor’s Choice
🛍️
Off White Lace Curtains 84 Inches Long,Vintage Victorian Cotton Light Fi…
Are you craving a warmer, calmer living room without buying loud decor? Natural fiber curtains can deliver. They bring softness and texture with a simple, honest feel.
Why they work in your space
Natural fiber curtains add warmth to any room. They are breathable, which helps your space feel comfortable all year round. They soften bright light just enough to keep evenings cozy without blocking the view. These curtains pair well with wood furniture and earthy tones, so your room reads relaxed and grounded.
Materials to consider
– Hemp: strong, durable, and naturally textured. It ages to a soft, sun-washed look.
– Cotton: light to medium weight, smooth, and easy to care for.
– Linen blends: a touch of roughness that adds character while staying breathable.
– Jute or sisal: a bold texture for a natural, rustic vibe.
Colors and textures to plan for
Natural fiber curtains come in creams, beiges, warm grays, and soft greens. Light fabrics show a casual, airy vibe, while deeper tones add depth. Mix textures by layering a sheer liner with a thicker fiber panel. Do this if you want privacy without losing light.
Practical styling tips
– Pair with wooden trims or rattan furniture to reinforce the organic look.
– Use earth-toned walls to let the fabric shine.
– Try layering: an airy sheer behind a textured fiber panel for depth.
– If your space is small, keep colors light to make the room feel bigger.
How to choose for your room
– Consider light: if your windows get a lot of sun, choose a lighter fabric to avoid overheating.
– Think about privacy: a light-lined option gives daytime openness and nighttime privacy.
– Measure carefully: width should be 1.5 to 2 times the window for fullness; length should hit just above the floor for a clean line.
Caring for natural fibers
Most natural fibers wash well, but follow the care label. Air dry when possible to prevent shrinkage. If you iron, use a low heat setting. Spot clean small stains quickly to keep texture intact.
What to expect in your space
You gain warmth, texture, and a cozy feel. The right natural fiber curtain helps soften harsh lines and makes your living room feel inviting. It’s a sustainable choice that fits into many styles, from casual to rustic.
Tip: Choose a light fabric for a casual, airy vibe.
Why they work: Natural fiber curtains promote sustainability while adding a cozy, inviting touch to your space.
19. Natural Fiber Curtains
Editor’s Choice
🛍️
D’Moksha Homes Cream Hemp Curtain 84 Inches Long – 52 x 84 Inch 1 Panel …
You want your living room to feel warmer and more inviting. Textured chenille curtains can help you get there with ease.
What they are
Chenille curtains use a soft, fuzzy pile. The fabric has a plush feel that you can see and almost hear when you brush it with your hand. The texture adds depth to plain walls and dull furniture. They handle daily use well.
Why they work
They bring warmth and coziness to the room. The thick pile acts like a tiny blanket around the windows. They also soften sound, so movie nights feel calmer. They drape beautifully, giving a luxurious look without fuss.
Color and texture options
Chenille comes in many hues. For drama, pick darker shades like forest green, navy, or charcoal. For versatility, choose warm neutrals such as ivory, taupe, or soft gray. The texture keeps the curtain interesting even when you use solid colors. Textured surface hides light dust and lint between cleanings.
Styling ideas
Pair chenille curtains with simple, solid furniture to balance the look. Layer them with a sheer panel behind for privacy and light control. Hang the rod higher than the window frame to create the illusion of taller ceilings. Choose a sturdy rod and a classic rod-pocket or hidden header for clean lines. If you have kids or pets, darker colors hide stains better.
Practical tips for choosing and using
– Length matters: measure carefully and let the curtains graze the floor or pool slightly.
– Fullness counts: aim for curtains with generous fullness so they look lush when closed.
– Light control: darker colors block more light; lighter shades brighten the room.
– Handling: check the care label. Many chenille curtains wash gently or dry clean.
– Want extra privacy or more light control? Add a blackout liner.
Care and durability
Dust weekly with a soft brush or a vacuum attachment. Treat small stains quickly with a mild cleaner. Avoid harsh chemicals that can weaken the fuzzy pile. With steady care, they stay soft for years. Air them out every few weeks to keep the fabric fresh.
Frequently asked questions
– Do chenille curtains block light? They can, especially in dark colors.
– Are they durable? Yes, but be gentle to prevent snagging the pile.
– Can I wash them at home? Many can be washed on a gentle cycle. Always follow the label.
– Can I layer chenille with other fabrics? Yes, layering works well with sheer or cotton for different light levels.
Bottom line
If you want a cozy, inviting focal point, textured chenille curtains fit the bill. They offer warmth, style, and practical use in one simple update.
Transform your living room with textured chenille curtains – they’re like a warm hug for your windows! Cozy up your space and create a retreat that invites relaxation and comfort every day.
20. Textured Chenille Curtains
Editor’s Choice
🛍️
INK+IVY Imani 100% Cotton Single Panel Curtain Tufted Chenille Stripe Ge…
Feeling unsure how to finish your living room with style that isn’t too loud? Monochrome stripe curtains can be the answer. They bring clean lines and a fresh, modern feel without stealing the spotlight. You get a polished look that still works with real life—family traffic, pets, and busy mornings. With stripes, you control the vibe by choosing size, direction, and color. They calm noise and add order to a space that feels a little off-kilter.
Stripe direction changes the room’s feel. Vertical stripes lift the eye and can make ceilings look higher. Horizontal stripes widen a narrow room and give a sense of breadth. If your ceiling isn’t tall, pick vertical stripes to draw the eye up. If your windows sit close to the sofa and you want a room that reads bigger, go for horizontal stripes. Simple switches like this can make a big difference.
Color choices set the mood. Bold black-and-white stripes feel very contemporary and energetic. Softer gray on white creates a quiet, timeless backdrop. Muted taupe or ivory tones pair nicely with warm woods and natural textures. For a cohesive look, balance the boldness of the stripes with solid pieces—think a plain sofa, a solid rug, and minimal wall art. The goal is contrast where you want focus, not clutter.
How to style them in practical steps
– Measure and plan: measure window width and height. Aim for curtain panels that are 1.5 to 2.5 times the rod width for fullness.
– Decide length: full-length curtains that just touch the floor feel clean; slightly puddled hems read cozy and luxe.
– Choose fabric: cotton or linen gives a fresh vibe; velvet or blends add depth and warmth. Consider how much light you want to pass through.
– Pick hardware: slim, sleek rods suit a modern room; add simple rings or hidden fixtures for a minimalist look.
– Build a color plan: let stripes do the talking. Use 2–3 solid colors in cushions, a rug, or artwork to tie the room together.
– Care and maintenance: check washing instructions. Lighter fabrics need more frequent cleaning, while sturdy blends handle daily life with less fuss.
Why they work
Why they work: Monochrome stripes inject an elegant, modern edge into your space. They offer a structured pattern that guides the eye, making a room feel more intentional. The versatility is a true strength: you can switch up the mood by swapping pillows or a rug while keeping the curtains as a consistent base.
Tip: Mix with solid-colored accessories to maintain a cohesive look. This keeps the stripe pattern from dominating and allows your other decor to shine.
Common questions you might have
– Will stripes overwhelm a small room? Not if you keep the color contrast calm and the rest of the décor simple.
– Which stripe size should I pick? Larger stripes feel bolder; smaller stripes feel subtler. Choose based on ceiling height and how much you want the pattern to stand out.
– Are there good fabric choices for busy homes? Yes. Linen blends and cotton blends balance ease of washing with a crisp look. Velvet adds luxury but needs more care.
With these ideas, you can implement monochrome stripe curtains that boost style and comfort. The result is a living room that feels organized, calm, and inviting—ready for everyday life and small celebrations alike.
21. Monochrome Stripes
Editor’s Choice
🛍️
jinchan Linen Curtains for Living Room Taupe Grey on Beige Striped Curta…
You’re after a look that adds warmth without clutter. Classic checkered curtains deliver just that. They bring a timeless touch that fits a cozy farmhouse, an inviting cottage, or a clean, modern room.
What these curtains bring
– A welcoming vibe: the familiar pattern makes a room feel lived-in and friendly.
– Easy style: checks pair with many colors and textures, so you can swap decor without changing curtains.
– Budget-friendly impact: you get personality and depth without a big price tag.
How to pick the right checkered pattern
– Pattern scale matters: large checks make a bold statement; small checks read subtle and refined. If your space is small, start with smaller checks to avoid feeling busy.
– Color matters: choose two main tones that match your walls, furniture, and rug. Earthy browns and creams suit a farmhouse look; black and white works in modern rooms; blues and greens fit coastal or casual spaces.
– Material and care: cotton, cotton blends, or linen blends wash well and wear well. Look for easy-care fabrics if you want low maintenance curtains.
Layering and texture
– Layer with solid drapes: put a solid, heavier curtain in front of a lighter check to add depth and hide the pattern when you want a calmer look.
– Add texture: pair checks with textures like wood, leather, or a chunky knit throw on the sofa. The mix makes the room feel rich without shouting.
– Use sheer underlayer: a light sheer behind the checkered panels can soften daylight and keep the room bright.
Small-space tip
– In tighter rooms, keep the checks modest in size and pair them with a light wall color. The result is an inviting, roomy feel rather than a busy look.
Practical setup and care
– Install smartly: hang curtains about 4–6 inches above the window frame and extend the rod 2–3 inches beyond each side. This makes windows look wider and rooms feel taller.
– Width and fullness: use the window width as a guide. For a rich look, choose curtains that are 2x the window width when closed and 2.5–3x when open.
– Care basics: check the label for washing instructions. Most cotton blends handle machine wash on a gentle cycle.
Common questions
– Will checkered curtains feel busy? Choose smaller checks and pair with solid walls or a single bold accent color to keep the look calm.
– Can I mix patterns? Yes, but keep one element consistent, like color, to maintain harmony.
– Are they suitable for every room? They work well in living rooms, dining areas, and dens. In bedrooms, go with softer colors and lighter fabrics for a serene vibe.
With thoughtful color, smart layering, and careful sizing, classic checkered curtains become a warm, inviting retreat you’ll love coming home to.
22. Classic Checkered Curtains
Editor’s Choice
🛍️
Black and White Window Drapes Curtain Checkered Flag Racing Race Car Lin…
Your living room needs a glam lift that doesn’t shout. Metallic curtains give you that warm, reflective glow you want. They catch daylight and lamp light and turn it into a cozy halo. The fabrics range from soft shimmer to bold shine, so you can pick a mood that fits your decor. You get light control plus style in one easy update.
– What metallic curtains bring
Metallic curtains catch daylight and lamp light, then bounce it around the room. The shine shifts as you move or as the sun travels. You’ll notice a glow on walls and a hint of luxury on your sofa. They give your space a focal point without adding a bulky piece of furniture. In a small room, this glow can make the space feel open and inviting.
– Choosing the right finish
Start with a color that fits your palette. Silver and pewter work well with cool tones and a modern vibe. Gold and brass lean warm, which suits earthy spaces. You can pick a matte finish for a low-key look or a high-shine fabric for a bold statement. Test samples in your room’s natural light, then compare how they look by day and night.
– Styling for balance
Pair metallic curtains with softer pieces. Plush sofas, velvet cushions, and wool throws tame the shine. Keep walls neutral and the floor calm. In eclectic rooms, mix metals with wood and fabric textures for depth. Let the curtains be a centerpiece, then let other decorations stay quiet.
– Placement and sizing
Hang curtains high to stretch the eye upward. Let the rod extend 4 to 6 inches beyond the window frame on each side. Let the drapes fall to the floor for a clean line. If your windows are wide, use panels that look full when closed. Linings add warmth and keep the metallic surface from looking sheer in bright light. Measure carefully and choose a rod that fits your track or hooks.
– Care and maintenance
Check the label for care rules. Some metallic fabrics are washable; others need dry cleaning. Use a gentle cycle with cold water if allowed. Avoid harsh detergents and bleach. Wipe metal threads with a soft cloth to remove dust. Rotate panels from year to year to keep wear even. If you notice snagging, fix it before it worsens.
If you want a touch of glam without glare, layer these curtains with a sheer underlay. The sheer softens the light, while the metallics keep the room feeling chic. This combination works in modern rooms and cozy, eclectic spaces alike.
Whimsical Colored Pom Pom Curtains: A Playful, Cozy Accent
You want a touch of fun in your living room without losing its comfy feel. Whimsical colored pom pom curtains give you that balance. They look light, friendly, and full of personality. The yarn pom poms march along the edge like tiny glittery beans, catching the light as you move. Colors range from bold primaries to soft pastels, or a mixed rainbow for a bold statement.
What they are
Pom pom curtains are lightweight panels with extra yarn balls sewn along the bottom or edge. The texture adds movement and charm. When the sun shines, the pom poms play with the light and create little specks of color on the floor. You can hang them in a living room, a family room, or a kid’s corner for a cheerful vibe.
Why they work
– They lift the mood without shouting. The bright or mixed colors feel lively but not loud.
– They pair well with casual furniture. A comfy sofa, a woven rug, and a few colorful cushions look intentional together.
– They’re easy to swap with the seasons. Change to warmer tones in fall, cooler ones in spring, and you’ve got a fresh look without a full redo.
How to choose colors
– Start with a simple palette. Pick two or three colors that repeat in cushions, throws, or art.
– If your walls are neutral, go for brighter pom poms to punch up the room.
– For a calmer feel, choose soft pastels or muted tones that blend with wood tones.
– Think about light. Rooms with a lot of sun can handle bolder colors; dim rooms may glow with lighter hues.
Styling ideas and practical use
– Pair with solid curtains. A plain backdrop makes the pompoms stand out.
– Layer with sheer panels. A sheer behind lets soft light filter through and still shows the fun edge of the pompoms.
– Match with accessories. Cushion covers, throws, and wall art in the same color family tie the room together.
– Use in a kids’ area or reading nook. The playful texture invites you to settle in with a good book.
Care and maintenance
– Check the label first. Some fabrics are machine washable; others need gentle hand wash.
– Dust lightly with a soft brush or vacuum attachment. The pompoms collect dust just like any yarn.
– Avoid heavy sun all day. Prolonged sun can fade colors, so rotate windows or swap curtains seasonally.
Quick-start installation plan
– Measure your window width and determine curtain length.
– Choose a color scheme that fits your room.
– Pick a rod and clips that hold lightweight panels securely.
– Hang the curtains and adjust the pompoms so they sit evenly along the edge.
These curtains offer a simple path to a brighter, more inviting living space. They bring texture, color, and a friendly feel without overwhelming your existing decor. Ready to try a pop of whimsy? Start with one window and let the rest of the room follow your lead.
Add a playful twist to your living room with whimsical colored pom pom curtains! They’re not just a decorative accent; they create a cozy atmosphere that invites happiness and warmth into your space.
Choosing the right living room curtains can dramatically change the atmosphere of your space.
From soft linens to playful pom poms, each option brings its unique charm and coziness, turning your living room into a true retreat.
Consider your personal style, room color scheme, and desired ambiance when selecting your new window treatments. Happy decorating!
Note: We aim to provide accurate product links, but some may occasionally expire or become unavailable. If this happens, please search directly on Amazon for the product or a suitable alternative.
This post contains Amazon affiliate links, meaning I may earn a small commission if you purchase through my links, at no extra cost to you.
Frequently Asked Questions
What Factors Should I Consider When Choosing Living Room Curtains?
Choosing the right living room curtains is all about balancing style, function, and mood. Think about the amount of natural light you want to let in—sheer curtains might be perfect for brightening up the space, while heavier drapes can offer privacy and warmth. Consider your room’s color scheme and existing decor as well; bold patterns can make a statement, while soft textures can create a cozy retreat. Ultimately, it’s about finding a balance that reflects your personal style and meets your practical needs.
How Do Living Room Curtains Affect the Overall Atmosphere of My Space?
Living room curtains can dramatically transform your space! They shape not only light but also color and mood. For instance, soft linen curtains can create a warm, inviting environment, while bold geometric patterns can energize a room. The right choice can make your living room feel more spacious, cozy, or even luxurious, depending on the style you select. So, think of your curtains as an essential element in crafting the perfect atmosphere!
What Are the Benefits of Using Natural Fiber Curtains in My Living Room?
Natural fiber curtains bring a unique warmth and texture to your living room. They are not only eco-friendly but also help to create a calm environment. Curtains made from materials like jute or cotton can soften harsh sunlight, providing a gentle glow that enhances your interior. Additionally, they can be a part of your home styling, aligning with sustainable practices while adding a touch of rustic charm. It’s a win-win for both your decor and the planet!
Can I Mix and Match Different Curtain Styles in My Living Room?
Absolutely! Mixing and matching curtain styles can create a personalized and eclectic vibe. Just ensure that the colors and textures complement each other to maintain a cohesive look. For example, pairing playful floral prints with minimalist sheer curtains can provide a fun contrast while keeping the room light and airy. Don’t be afraid to experiment; your living room should reflect your unique style and make you feel at home!
How Do I Maintain My Living Room Curtains to Keep Them Looking Fresh?
Maintaining your living room curtains is crucial for preserving their beauty and functionality. Regularly dust them to prevent buildup and consider washing or dry cleaning them according to the fabric care instructions. For sheer curtains, a gentle cycle in cold water often does the trick! Also, be mindful of sunlight exposure, as it can fade colors over time. With a little care, your curtains will continue to enhance your cozy retreat for years to come!
I put this post together because I want your backyard to feel alive and practical. Fresh vegetables, herbs, and flowers should be easy to reach and easy on the eyes. When a space is laid out well, gardening feels calmer, not overwhelming. A good plan turns guesswork into a simple map you can follow.
If you’re a busy homeowner, a beginner gardener, or someone who loves a pretty, productive yard, this one is for you. If you care about water-wise choices, soil health, and easy harvests, you’ll find ideas that fit your life. You’ll see layouts that work in small spaces and larger yards alike.
Think of 30 layout designs you can mix and match. From raised beds and square-foot grids to curved borders and herb spirals, these ideas cover many styles and climates. I talk about sun and shade, how to place paths for easy reach, and how to group plants to save water and boost yields. You’ll also see tips for adding mulch, drip irrigation, and simple trellises.
What you’ll get goes beyond looks. You’ll learn how to choose a layout that matches your space, climate, and how you use your garden. You’ll gain a practical plan you can start this weekend. Think steps like measure your area, mark sun spots, pick a bed type, and draft a rough map before buying soil or wood. You’ll find ideas that reduce maintenance and improve soil health.
Of course not every design fits every yard. Some layouts may need more water in hot summers or more trellis work for climbing plants. That’s okay—these designs are a toolbox, not a rulebook. You can start with one simple layout and expand as you learn what plants thrive in your soil and sun.
Ready to transform your backyard? Grab a cup of tea, measure your space, and picture your first harvest. This collection gives you real, doable options that look great, keep things organized, and help you grow more of what you love. Let’s find the perfect vegetable garden layout for your space and start turning your yard into a garden you’re proud of.
Are you frustrated with soil that won’t drain, beds you can’t reach, and plants that seem to stall no matter what you do? Raised beds can change all that. They create clear, easy-to-care-for spaces and help you grow more with less effort.
Raised beds are frames filled with good soil. They can be built from wood, stone, brick, or even repurposed materials. They drain better than a flat bed and warm up earlier in spring, giving you a longer growing season. That means healthier roots and tastier vegetables.
To design a welcoming garden, group several beds together and add paths between them. Use gravel, mulch, or flat stepping stones so your feet stay clean and the soil stays undisturbed. Keep the paths wide enough for a wheelbarrow or a small cart.
Think about sun and wind. Place tall crops on the north side and shorter ones on the south. For example, position tomatoes or peppers up high and lettuce, radishes, or carrots lower down. This setup helps every plant get enough light without shading its neighbors.
A border of flowers or herbs around the edges adds color and function. Choose plants that attract pollinators or repel pests, like marigolds, sages, or basil. They can improve yields while making your bed look tidy.
Raised beds fit any yard. You can scale them up for a large backyard or shrink them for a compact patio garden. You can also adjust the height to suit your back and knees, so you don’t have to bend as much.
– Benefits of raised beds: Better soil control, easier access, and less back strain.
– Design tip: Use wood, stone, or composite materials for a clean, lasting look.
– Planting idea: Mix vegetables with companion flowers to deter pests naturally.
Getting started is simple. Pick a rough size, then build a frame to your space. Fill with a soil mix of good topsoil, compost, and a pinch of sand for drainage. Mulch between plants to cut weeds and keep moisture steady. A light drip irrigation line can water evenly without wetting leaves. With a little planning, raised beds become an easy, reliable way to grow more food in any yard.
1. Raised Bed Paradise
Editor’s Choice
🛍️
Land Guard Galvanized Raised Garden Bed Kit, Galvanized Planter Garden B…
Use a companion planting chart, group plants by needs
2. Vertical Vegetable Garden
Voice your need for more growing space, and I’ll show you a clean fix. A vertical vegetable garden uses walls, fences, and tall shelves to grow up, not out. It’s ideal for small backyards or sunny patios. You get more harvest without crowding the ground.
How to set it up is simple. Mount planters on a wall, lean a sturdy trellis, or stack durable shelves. Make sure each level has a way for water to drain and air to move. Use lightweight, sturdy containers so you can reach every plant without straining your back.
Key plants for vertical gardens:
– Choose compact cucumber varieties that climb a trellis and stay easy to manage.
– Grow determinate or bush tomatoes on a strong vertical support.
– Plant peas or pole beans on a tall frame for quick, tasty picks.
– Add herbs in wall pots for quick, fresh flavor at your fingertips.
Strong sun and smart layout matter. Place your vertical garden where it can receive about 6–8 hours of sun daily. Space your pots so leaves don’t shade each other too much. Use good drainage material and light potting mix. Keep the base dry and the tops moist for a healthy balance.
Caring for a vertical garden:
– Check plants for pests regularly and swish away any bugs with water or a gentle spray.
– Keep an eye on sunlight gaps. If a plant looks pale, tilt the planter or adjust its spot.
– Water in the morning, not the heat of midday, to reduce evaporation.
Layout ideas that boost both beauty and yield. Layer your planting boxes so you can harvest from different heights. Use wall-mounted planters at eye level for easy snipping. Put pots in colors you love to make a vibrant green wall.
Design and sustainability tips:
– Build with recycled materials or pallets to tell an eco-friendly story.
– Add fairy lights or small solar lamps to make the space feel magical after dark.
– Mix in decorative pots that coordinate with your house color and garden theme.
This approach gives you a practical, space-saving garden that’s fun to grow and easy to maintain. You’ll see fresh herbs within reach, and climbing veggies climbing toward a greener yard. Start small, upgrade gradually, and watch the vertical garden transform your outdoor space.
2. Vertical Vegetable Garden
Editor’s Choice
🛍️
5 Tier Vertical Raised Garden Bed Planter Box, Vertical Raised Bed with …
If you want a garden that looks great and serves your family, a circular design could be just what you need. A round bed feels welcoming in any yard and makes the most of your space. It keeps plants easy to reach without stepping on soil, which helps prevent soil compaction and weak plants. A circular layout also shines as a focal point when you pair it with colorful flowers or tidy borders. You get beauty and work that fits the way you move in your yard.
A circular garden uses concentric rings that wrap into a smooth circle. You walk a continuous path to reach each bed, so you don’t waste steps or strain your back. The center can host tall crops that rise above others, while the outer rings stay friendlier for smaller plants. Pick a sunlit spot with good drainage, and you’ll set up a space that shows off your plants without crowding them. This layout works well in many yards, from small patios to roomy backyards, and it adapts to different styles.
– Planting suggestion: Place taller plants at the center, such as sunflowers or corn, and arrange shorter crops like radishes and herbs on the outer edges. This creates a natural height progression that is easy to manage.
– Design tip: Create a small seating area in the middle. It gives you a peaceful spot to rest, watch pollinators, and tune in to how your plants are doing.
– Path and ring layout: Use clear, defined paths between each ring. This keeps soil intact and makes weeding and harvesting easier.
– Path materials: Choose stepping stones, gravel, or brick that drain well and match your yard style. A neat path makes you want to spend more time tending the beds.
– Maintenance idea: Install a simple drip irrigation around the rings or run a soaker hose under mulch. Mulch helps keep soil moist and cuts down on weeds.
– Companion planting benefit: Group plants that help each other side by side. Flowers near veggies attract beneficial insects and boost pollination.
– Limitations and practical notes: Circular layouts need careful planning and enough space to breathe. They work best where you can set out the rings with clear sun and easy access for maintenance.
With thoughtful planning, a circular vegetable garden becomes a living sculpture that grows food and smiles back at you. It’s not a magic trick, but the result is a yard that’s easy to care for and a joy to visit.
3. Circular Garden Design
Editor’s Choice
🛍️
3 Pack Sunflower Stepping Stone, 10 Inch Decorative Garden Step Stone fo…
You want fresh herbs ready when you cook, not a weekly hunt for a few sprigs. A kitchen garden with herbs makes that simple. It combines tasty greens with fragrant scents and a dash of color in one easy spot.
This layout is small enough for a backyard, yet big enough to feel useful. You mix a few vegetables with easy-care herbs so your meals have flavor at hand. Place the herb section close to the house or kitchen door. That way you can snip parsley, basil, or thyme while you stand at the counter. A nearby herb bed saves trips to the far end of the yard and keeps you cooking more often.
The look should be tidy and inviting. Color from basil green, rosemary gray, and cilantro brightens the space. Herbs spill over decorative pots, raised beds, or neat in-ground rows. A soft path between beds helps you walk through to harvest and prune without stepping on plants. You want a layout that feels like a small kitchen in the yard—functional and pretty at the same time.
– Herb pairing for stronger growth: plant rosemary with carrots to keep pests away; basil with tomatoes for richer flavor and healthier fruit.
– Design tip: use colorful pots and reclaimed kitchen items as planters. A vintage teapot or copper bucket adds charm without a big price tag.
– Maintenance suggestion: harvest herbs often. Regular clipping makes plants stay green and tender, not woody. Pinch tips to encourage new growth and keep flavors bright.
What to plant and where
– Choose a mix of herbs that cook with your favorites: basil, cilantro, parsley, thyme, rosemary, chives, and mint. If you’re unsure, start with three to five that you use most.
– Add a few easy vegetables nearby, like lettuce, cherry tomatoes, or peppers. They complement herbs and fill the space quickly.
– Think about sun and water. Most herbs love sun for at least six hours, and you’ll water when the soil feels dry to the touch.
How to set it up this weekend
1) Map a small, sunny corner near the kitchen.
2) Build a low herb bed or place sturdy pots at knee height.
3) Fill with light, rich soil and a splash of compost.
4) Plant your selections, labeling each one.
5) Keep a small trimming schedule and harvest every few days.
With this layout, fresh flavors stay nearby. Your cooking becomes faster, more vibrant, and a little more fun.
4. Kitchen Garden with Herbs
Editor’s Choice
🛍️
9 Herb Indoor Garden Kit – Unique Kitchen Gift for Women, Men, Mom, Frie…
Square foot gardening helps you grow more in a small space. You cut the bed into 1-foot squares. Each square can hold a different plant. Raised beds or a grid marked on the ground both work. This setup makes planting, spacing, and harvesting simple. It fits beginners and people with limited mobility. Plus, it adds color and variety to your yard.
– Step 1: Pick a sunny spot that gets about 6 to 8 hours of sun each day.
– Step 2: Build a bed about 4 by 4 feet, or another small, reachable size. Stay within arm’s reach from all sides.
– Step 3: Create the grid using twine, string, or wood slats. Keep each square exactly 12 inches wide.
– Step 4: Fill the bed with a light, rich mix. A common blend is compost, coconut coir, and a little sand for drainage. The soil should drain well but still hold moisture.
– Step 5: Plan your crops with a planting chart. This shows how many plants fit per square. For example, you might place one tomato plant in a square or four radishes in one square.
– Step 6: Plant by season. Start with quick growers like lettuce and spinach, then add slower crops as space opens up.
Design tip: Make the grid look neat and fun. Use twine or thin wooden sticks for the lines. Color the labels or paint the edges to see squares from a distance.
Maintenance note: Water evenly and keep the soil moist, not soggy. A drip line or soaker hose works well in this setup. Mulch the surface to cut weeds and hold moisture. Check each square for weeds during regular watering. Rotate crops yearly so the soil stays healthy and pests stay away.
Thinking through what you grow helps you plan smart. This method saves space, lowers weed trouble, and makes harvests quick and satisfying. Start small this weekend: measure a patch, collect soil mix, and mark your grid. Your first harvest could come sooner than you think.
5. Square Foot Gardening
Editor’s Choice
🛍️
Land Guard Galvanized Raised Garden Bed Kit, Galvanized Planter Garden B…
A spiral garden helps you get a bold look and more growing space in a small yard. It blends style with smart growing. You build a curved bed using stones, bricks, or paver edges. Start at the center and curl the bed outward in a smooth coil. The center is higher than the edge, so plants sit on different levels. Tall plants go near the center; shorter ones fill the outer rings. This height stack creates tiny rooms for each plant.
The design works in several ways. Different heights give each plant its own microclimate. Water runs down the spiral, so you need less daily care. The inner warm spots are good for sun lovers; outer spots stay a bit cooler and drier. You can fit a lot more into a small footprint without crowding.
Plus, the spiral looks great. It becomes a conversation piece in your backyard. You can tuck herbs at the top for easy cooking. The scent rises as you pass, making the space feel alive.
– Design setup: Use sturdy stones or bricks. Build a compact, even spiral with a gentle slope. Consider a uniform color for a clean look or mix textures for character.
– Planting plan: Place tall plants at the center (sunflowers, tall oregano, or ornamental grasses). Put medium-height veg in the middle rings (lettuce, kale, peppers). Grow low herbs and flowers on the outer rim (basil, thyme, nasturtium, marigold). Reserve the top edge for quick-access herbs you grab while cooking.
– Watering and care: Install a small drip system at the top. It feeds down the spiral, keeping soil evenly moist. Check for weeds and pests on a regular basis. Add a light mulch to reduce evaporation and hold moisture.
– Plant selection tips: Choose a mix of edible and beneficial flowers. Flowers like marigold invite beneficial insects. Pollinators love sun-loving herbs and blooms. Rotate plant groups so soils don’t get tired.
– Maintenance reminders: Keep the path clean and the edging intact. Refill mulch as needed. Watch for soil gaps that let weeds creep in.
This approach works in many climates. It’s not a magic fix for every yard, but it gives you a strong layout that saves space and boosts yields. Ready to sketch your spiral bed? Start with a simple plan, map the center plants, and lay out the outer rings.
Transform your small yard with a spiral garden design: it’s not just about growing vegetables, it’s about creating beautiful, layered spaces that inspire and delight!
6. Spiral Garden Design
Editor’s Choice
🛍️
Beuta Landscape Edging | Garden Edging Border | Faux Stone Bricks for La…
If you want healthier vegetables with less pest trouble, companion planting helps. This plan pairs plants that support each other in small, natural ways. You get stronger plants, fewer pests, and richer soil.
Planning works best when you map it out. A simple companion chart shows where each crop goes and which partners fit together. Put flowers among your vegetables to lure helpful insects and break up pest scenes. The result is a garden that looks alive and smells fresh.
How to design your layout:
– Make a basic companion planting chart on paper or in a note. Mark every bed and note good pairings.
– Choose pairs that share space, water, or nutrients. Put strong friends near each other.
– Add flowering partners. Color and scent attract bees and hoverflies that chase pests.
– Leave air space. Good airflow helps plants stay healthy.
– Use vertical space. Trellises or cages lift climbers up so you save ground.
Practical pairing ideas:
– Tomatoes and marigolds. Marigolds help deter pests; keep a basil plant nearby to aid flavor and add another layer of protection.
– Cucumbers and beans. Beans fix nitrogen and help soil, while cucumbers enjoy the shade from leafy beans.
– Beans and squash. Squash shades the soil and slows weeds; beans add nitrogen that feeds both.
– Carrots and onions. Onions help repel carrot flies; carrots loosen soil for easier rooting.
– Lettuce and radishes. Radishes break up the bed early, giving lettuce room to grow.
Design and maintenance tips:
– Plan trellises for climbing plants to save space and add vertical interest.
– Watch growth closely and adjust if a pair starts fighting for nutrients or space.
– Rotate crops each season to keep soil healthy and reduce pests.
This layout adds function with color and scent. It gives you a garden that works with itself, not against it. A simple chart helps you plan now so you can enjoy a steadier harvest later.
Edible landscaping lets you enjoy a yard that looks beautiful and feeds you. You don’t have to pick beauty over usefulness. You can mix food and flair in the same space.
What edible landscaping is
This approach blends fruits, vegetables, and herbs with your existing plants. It makes the garden feel like a natural part of your home, not a separate patch. You see color, texture, and scent, along with items you can harvest.
Practical layouts that work
– Berry borders: Plant berries along a fence or path to create a living edge that also gives fruit.
– Herb borders: Border beds with edible herbs like thyme, chives, and oregano for scent and flavor.
– Climbing accents: Set up a trellis for beans or cucumbers beside seating to save space.
– Mixed borders: Pair flowers with leafy greens for a space that pleases eyes and palate.
– Raised beds and planters: Build raised beds for neat, accessible growing spots on patios or uneven ground.
– Edible groundcovers: Plant creeping strawberries or thyme between stones to fill gaps and curb weeds.
Design tips
– Height and texture create depth in the plan. A tall shrub with low herbs makes a natural focal point.
– Colors match the season. Yellows and purples pop in spring and fall.
– Mulch and compost feed soil. Healthy soil helps beauty and harvest.
– Smart irrigation helps a lot. A drip system saves water and keeps roots happy.
– Keep paths clear. Walkways should invite you to sample and stroll.
Maintenance and harvesting
– Plan for seasonal color shifts as plants grow.
– Prune, trim, and tidy edges regularly.
– Harvest fruits and vegetables often to encourage more production.
Benefits at a glance
– Edible landscaping boosts biodiversity and supports pollinators.
– It lowers food costs and adds practical food sources.
– The look stays inviting, and neighbors often strike up conversations about the garden.
Ready to start?
– Pick one small corner and test a few edible ideas this season.
– You’ll see how food and beauty can grow together.
8. Edible Landscaping
Editor’s Choice
🛍️
Land Guard 8×4×2 ft Galvanized Raised Garden Bed Kit, Galvanized Planter…
Container gardening helps you grow fresh vegetables in small spaces. It fits on a patio, balcony, or narrow yard. You control soil, drainage, and sun for every pot. You can move pots to chase sun or shield plants from wind. This method blends practicality with style.
Benefits of Container Gardening
Container growing keeps your garden flexible. You can place it where you want it. You get better soil control in each pot. You can change crops quickly with the season. You see results fast, even if space is tight.
What you need
– Containers: choose pots, planters, hanging baskets, or vertical pockets with drainage holes. Each pot should be large enough for the plant’s roots.
– Soil: use a high-quality potting mix with compost. It stays light and drains well.
– Sun and water: know your sun hours and plan a watering routine.
– Tools: a small trowel, a watering can, and a tray to catch drips.
Choosing crops and placements
– Build deep containers for root veggies like carrots and beets. They need room for roots.
– Plant herbs in small to medium pots for quick harvests.
– Greens such as lettuce and spinach do well in mid-size pots.
– Beans and tomatoes need larger pots and a stake or trellis.
– For hanging baskets, choose compact herbs or cherry tomatoes.
Design ideas
– Mix sizes and colors for a lively display.
– Use a tiered stand so herbs are easy to reach.
– Add wall planters or a vertical system to save floor space.
– Choose pots that complement your outdoor style for a cohesive look.
Planting tips
– Fill pots to about one inch below the rim to leave space for watering.
– Add slow-release fertilizer in the soil and feed every few weeks.
– Plant seeds or transplants at the right depth and water gently after planting.
Maintenance and care
– Check soil moisture daily in warm weather. Containers dry out faster than ground beds.
– Mulch the soil surface to cut evaporation and keep roots cool.
– Look for signs of overwatering, pests, or nutrient gaps and fix quickly.
– Move pots as needed to protect from strong winds and to chase sun.
9. Container Gardening
Editor’s Choice
🛍️
Indoor Self Watering Planters with Drainage Holes and Saucers, 8, 7, 6.5…
You want a community garden layout that brings neighbors together and grows tasty vegetables. The right design makes it easy to share space, learn from each other, and keep everyone safe and happy. A smart plan also keeps paths clear and beds easy to reach, so beginners feel confident from day one.
Shared plots and welcoming spaces
– Assign each neighbor a plot with clear borders or markers that let them personalize their area without blocking others.
– Build wide, smooth paths that are at least 4 feet across so people in wheelchairs or with wagons can move easily.
– Include a central communal space where gardeners can gather, chat, and watch demonstrations.
– Add a small herb garden that everyone can use, a shaded picnic spot for breaks, and simple educational signs about planting and care.
– Use low borders or natural edging to keep beds tidy while still inviting people to move around.
Planting layout that saves steps and helps crops thrive
– Group plants by their needs. Put root veggies in one zone and leafy greens nearby to cut down on walking and soil wear.
– Think about height. Place taller plants to the back or north so they don’t shade smaller plants.
– Color-code markers or labels for quick identification. Use pictures or icons so kids and new gardeners can read them easily.
– Plan for seasonal changes. Leave space for fall crops and spring seedlings, and think about how beds look year-round.
– Keep water access close to beds. A faucet or rain barrel near the plots saves trips and waste.
Maintenance and community building
– Schedule regular group workdays. A small crew fixes fences, moves compost, and tidies paths together.
– Create a simple tool shed and a compost bin. A designated area keeps tools organized and available.
– Add educational signs that explain best planting times, water-saving tips, and composting basics.
– Encourage shared responsibilities. Rotating roles—like watering, weeding, or record-keeping—builds trust and skills.
– Think about accessibility all year. Provide seating, shade trees or umbrellas, and cooling water stations for hot days.
How to start and implement
1. Survey your space and mark entry points, plots, paths, and the central area.
2. Decide how many plots you can offer and how to border them.
3. Draw a rough map that shows paths, beds, and the communal zone.
4. Add the herb garden, picnic spot, and signs.
5. Set up a small shed and a compost area near the back.
6. Create a simple schedule for regular workdays and seasonal tasks.
7. Start with a pilot season and adjust based on feedback.
A well-planned community garden layout invites sharing, learning, and growth. You’ll see neighbors helping each other, kids learning where food comes from, and vegetables filling every bed. This approach stays practical, affordable, and easy to manage while creating a lively, sustainable space for your whole neighborhood.
10. Community Garden Layout
Editor’s Choice
🛍️
Gardening Tools 9-Piece Heavy Duty Gardening Hand Tools with Fashion and…
You want a yard that feeds your veggies and looks good too. A pollinator garden can do that. It invites bees, butterflies, and other helpers to your veggie beds. When these guests visit many flowers, your crops set fruit and grow stronger.
What you gain is simple. More pollinators means more fruit. A steady mix of blooms keeps color in your yard for many months. Native plants fit your soil and climate, so your garden stays healthy with less work. It also brings local wildlife closer, which makes your backyard feel alive.
Design ideas that work
– Bloom at different times. Pick plants that wake up in spring, blaze through summer, and sparkle again in fall. This keeps nectar available for pollinators most of the year.
– Plant in clusters. Group three to six of each plant together. Pollinators notice big patches more than single plants.
– Favor native species. Native plants toughen your garden against local pests and drought. They also support native bees and butterflies best.
– Add a water source. A shallow birdbath, a saucer with rocks, or a tiny pond gives thirsty visitors a safe drink.
– Use bright colors and varied shapes. Nectar lovers like bold yellows, purples, and blues. Mix tall stalks with low groundcovers for shelter and movement.
– Keep chemicals out. Skip most sprays. If pests show up, try hand-picking or soap sprays before you reach for harsh chemicals.
A practical plan you can use
– Step 1: Find a sunny spot. Most pollinators love at least 6 hours of sun each day.
– Step 2: Choose a six-to-eight plant line-up. Include early bloomers, mid-season plants, and late bloomers.
– Step 3: Create color blocks. Plant in small groups rather than one-by-one gaps. This looks garden-smart and draws more pollinators.
– Step 4: Add water and shelter. Place the water feature where it’s easy to reach, and add a few low branches or a brush pile for shelter.
– Step 5: Maintain with care. Mulch to hold soil, water deeply but not often, and avoid chemical sprays. Check plants for disease and remove the ones that fail.
– Fall favorites: aster, goldenrod, mums (identify non-toxic varieties)
Care and upkeep tips
– Water at ground level to protect bees and save water.
– Mulch to keep moisture and feed soil life.
– Watch for pests but choose gentle fixes first.
– Prune dead stems after blooming to keep air flowing and new growth strong.
Common questions you’ll probably ask
– Do I need to change my soil? Most pollinator plants thrive in average soil with good drainage.
– How much space should I give each plant? Clusters of 3–6 plants fit well in most yards.
– Will bees stay if I plant near my vegetable beds? Yes. Pollinators move between flowers and crops, helping both.
Take a small step today. Pick one plant that blooms next season and add it in a sunny corner. Watch for visitors and let your garden grow from there.
A vibrant pollinator garden isn’t just pretty – it’s essential! Invite nature’s helpers to your veggie beds, and watch your crops flourish with color and life.
11. Pollinator Garden
Editor’s Choice
🛍️
Northeast Wildflower Seeds – Extra Large 1 Ounce Packet – Over 7,500 Nat…
You’re looking for a vegetable garden that feels calm and easy to care for. A Zen vegetable garden can give you that peace while you grow fresh food right outside your door.
This style blends simple ideas with real function. It uses clean lines, a soft color palette, and uncomplicated shapes. You get a space that looks tidy and stays easy to work in.
Think of a layout with raised beds filled with vegetables, set among quiet gravel paths. The gravel makes a low, soothing sound when you walk and helps keep weeds down. It also creates clear routes so you don’t trample seedlings or spill soil where you don’t want it. The overall look stays uncluttered—no busy fences or loud colors.
Natural borders are key. Use stone or weathered wood to frame each bed and define the space without shouting. These materials age well and blend with the garden’s calm vibe. If you want height without distraction, place a few slender bamboo accents or tall grasses at the corners to draw the eye upward.
Planting for mood matters here. Choose crops that feel quiet and steady to look at, such as leafy greens and soft purples. Think lettuces, spinach, Swiss chard, kale, and beets with pale stems. Herb varieties like mint, dill, and thyme add fragrance as you tend them. The goal is a palette that stays soothing as you work: mostly greens with touches of lavender or purple.
To make the space truly serene, add small, gentle features. A light rock arrangement can imply balance, while a shallow water feature adds a cooling sound and a reflective surface. A bamboo screen or a single ornamental plant can give privacy without crowding the view. Keep these elements subtle so they don’t compete with the growing beds.
If you’re building this yourself, here’s a straightforward plan you can follow.
– Step 1: Pick a sunny site with good drainage and a view you enjoy.
– Step 2: Sketch a simple layout that places raised beds on a grid and leaves space for paths.
– Step 3: Build or install raised beds with natural materials like cedar or stone.
– Step 4: Lay down gravel paths, keeping them wide enough for a wheelbarrow.
– Step 5: Add borders around beds and any vertical accents in a cohesive tone.
– Step 6: Fill beds with vegetables that fit your climate, then mulch to cut down on watering.
Maintenance stays light. Keep paths clear so you can tend plants with a relaxed pace. Water at the base of each plant and check for thirsty spots during dry spells. Periodic pruning helps air flow and keeps the bed looking neat.
A Zen vegetable garden offers real benefits: less stress as you garden, easier upkeep, and a space that invites you to slow down. It works well in small yards and large lots alike, and it adapts to many climate zones. You get a place to grow food, find calm, and enjoy the simple act of tending your plants.
12. Zen Vegetable Garden
Editor’s Choice
🛍️
Land Guard Galvanized Raised Garden Bed Kit, Galvanized Planter Garden B…
You want a garden that feeds you and feels warm at the same time. A cottage garden blend does just that. It pairs vegetables with ornamental plants for a friendly, eclectic look. You get color, scent, and texture in one space.
This style shines because it blends form and function. The beds hold edible crops while blooming perennials and wildflowers brighten the scene. It looks like an English countryside corner, yet it works in a real backyard. You’ll see pollinators buzzing by and you’ll taste herbs and greens in the same mix.
Plan the layout with flow in mind. Imagine winding paths that invite you to wander and discover. Let beds curve gently instead of using rigid lines. A soft, natural rhythm makes the space feel inviting rather than chore-like.
– Design goal: Mix vegetables, herbs, and flowers in the same beds for year-round interest. Keep color and texture in mind so the patch feels cohesive, not scattered.
– Plant palette: Choose practical veg like lettuce, spinach, beans, and carrots. Add herbs such as thyme, oregano, and chives. Include flowering companions like calendula, nasturtium, and alyssum. Edible flowers can be bright accents.
– Structure: Use rustic features to anchor the look. A low picket fence, a simple trellis for climbing plants, or a stone border helps define space without shouting. Path materials can be gravel or brick to keep the vibe relaxed.
– Planting ideas: Create color drifts by repeating a few hues across beds. Plant herbs between vegetables to help with flavor and pest control. Let a few perennial blooms stay in place for ongoing structure, while annuals shift with the seasons. Mix tall plants at the back and shorter ones in front for easy viewing.
– Maintenance: Stay practical. Weeding can be lighter in this style, since some wild growth adds charm. Mulch to slow weeds and keep moisture. Harvest regularly to keep beds tidy and productive.
Implementation steps to try this season:
1) Map your space and note sun spots. 2) List 6–12 preferred plants (veg, herbs, and a few flowers). 3) Sketch curved beds and plan a simple path network. 4) Set up a low fence or trellis as a backbone. 5) Plant in drifts, repeat colors, and tuck in herbs between veg.
Practical tips:
– Keep a seating area near the garden so you can enjoy the view and the scent.
– In small yards, use vertical supports and compact varieties to save space.
– Regularly deadhead flowers and pinch herbs to promote fuller growth.
This cottage blend works even in modest spaces. It gives you a live, colorful landscape and fresh picks for the table. Start small, then let the beds expand with the seasons.
13. Cottage Garden Blend
Editor’s Choice
🛍️
RUBFAC 94″ Metal Garden Arch Trellis for Climbing Plants Outdoor, Garden…
You want a backyard that gives you fruit and beauty. A fruit orchard garden can deliver both. It blends trees, bushes, and vines with edible groundcover. You get bright spring blossoms, shade in summer, and fresh berries and fruit through the seasons. Combine color, scent, and flavor in one space.
Think of this layout as a small farm that fits your yard. You plant a mix of tall fruit trees, mid-height trees, and low shrubs. You add climbing vines on a trellis to save space and add height. Edible groundcover, like strawberries or creeping herbs, fills gaps between beds and boosts harvest. Create paths between rows with stepping stones or gravel so you can reach every tree without stepping on the beds. Soft mulch around the bases keeps moisture and slows weeds.
Design tip: Place taller trees in the back and shorter bushes in front for a tidy, tiered look. This helps you see all the fruit and makes picking easy.
Maintenance hint: Prune trees each year. Regular pruning keeps shape, health, and fruit production strong. Water deeply during dry spells so roots reach far. Add compost or well-rotted manure in spring to feed your soil. Mulch the beds to conserve moisture and tame weeds. Check for pests and use natural controls first, like beneficial insects or homemade sprays.
Harvesting suggestion: Start a simple picking calendar. Note when each fruit tends to ripen and plan harvest days. Pick fruit when color is vivid and the fruit gives slightly to the touch. For berries, pick in the cool morning to keep flavor bright. After harvest, use fruit the same day or freeze or dry for later treats. Stagger your varieties if possible so you have fruit over a longer season rather than all at once.
Getting started today
1) Step 1: Find a sunny spot with at least six hours of sun each day.
2) Step 2: Test the soil and mix in compost to improve texture and nutrients.
3) Step 3: Choose fruit that fits your climate and yard size.
4) Step 4: Sketch a simple layout with space for beds, trees, and paths.
5) Step 5: Start with a few trees and a berry patch so you can learn as you grow.
With thoughtful planning, your backyard fruit orchard rewards you with fresh picks, beauty, and a sense of accomplishment. It’s a place to learn about seasons and to share fruit with family and friends.
You want a garden that feeds you and helps wildlife. A wildlife-friendly design can do both. You get a healthier veggie space and a richer, livelier yard.
Why this works
– Birds eat pests, keeping your vegetables safer.
– Butterflies and bees pollinate, boosting harvests.
– Small mammals tidy up fallen fruit and leaves, letting soil breathe.
– A calm, natural backdrop makes you enjoy your garden more.
What you need to start
– Native plants that fit your climate. They need less water and attract local insects.
– A mix of plant heights: low ground covers, mid shrubs, and a few small trees.
– Simple shelter features: birdhouses, bat boxes, and insect hotels.
– Habitat builders: rock piles, fallen logs, and a shallow water dish or tiny pond.
– A little space kept wild. Let some corners stay untamed for wildlife.
Layout ideas that work with veggie beds
– Create natural borders with native shrubs. They calm the edge and give birds safe perches.
– Plant in layers. Ground covers under taller plants protect soil and invite small creatures.
– Place birdhouses and bat boxes where they’re sheltered from strong winds but easy to see from your garden.
– Put insect hotels in sunny spots near your veggie beds. They attract pollinators and beneficial insects.
– Add a small water feature if you can. A shallow bird bath or pond draws life without much work.
Planting plan that draws in wildlife
– Include a variety of flowering plants that bloom at different times. This feeds bees and butterflies all season.
– Mix in nectar-rich shrubs and a few native trees for shade and shelter.
– Choose host plants for caterpillars and larvae. They might draw more birds later.
– Keep a corner of bare soil or leaf litter. Some insects nest there and teach your soil to stay healthy.
Maintenance that supports wildlife
– Let some areas stay a little wild. It’s home to helpful insects and ground dwellers.
– Mulch lightly and feed with compost. Healthy soil feeds both veggies and wildlife.
– Water during dry spells, but avoid soggy spots. A shallow dish works well and is easy to clean.
– Prune with wildlife in mind. Don’t cut all shelter at once; give critters places to hide.
Practical steps you can take this weekend
1) Map sun and shade in your yard.
2) Pick 8–12 native plants with different bloom times.
3) Add a birdhouse, a bat box, and an insect hotel.
4) Build a small rock or log pile for shelter.
5) Install a shallow water feature or bird bath.
6) Leave a corner to grow a little wild.
Common questions, quick answers
– Will wildlife steal veggies? Some may nibble, but the trade-off is better pest help and pollination.
– How much care is needed? Light, regular checks plus seasonal pruning keep it balanced.
– Can this fit a small garden? Yes. Start with one habitat area and grow from there.
With these steps, your garden can feed your family while inviting nature to stay. A lively, productive space awaits you.
15. Wildlife Friendly Garden
Editor’s Choice
🛍️
STARSWR Bird House for Outside,Bird Houses Outdoor, Natural Wooden Bird …
You want more growing space in a sloped yard. A tiered garden layout makes that possible. It turns a hill into flat beds you can reach without a bad back. It also helps water move away from roots and keeps your work manageable.
What a tiered garden design is
A tiered or terraced garden uses steps cut into the hillside. Each level is a small, flat bed. Stone walls, brick edging, or wooden steps mark the edges. The result looks natural and lasts for years.
Why this design helps your garden
– It gives you more growing room without heavy digging.
– It guides water down the slope, cutting erosion and drying roots evenly.
– It makes weeding, watering, and harvesting easier because you stay close to the plants.
– It creates a layered view that blends rocks, wood, and greens.
Planning steps
1) Check the slope and note how the sun moves across your yard.
2) Decide how many tiers you want and how wide each bed should be.
3) Pick materials that fit your style and budget—stone for a classic look, wood for warmth, or brick for a tidy edge.
4) Plan safe paths between levels so you can move easily.
5) Ensure each bed has room for the crops you choose and enough soil depth.
Building and care
– Use sturdy edges to keep soil in place.
– Stone walls stay strong for decades.
– Wooden steps look inviting but need proper treatment.
– Add drainage with a slight slope and a shallow trench to guide water away.
– Install a simple irrigation line or soaker hose that reaches every bed.
– Fill beds with loose, well-drained soil and mix in compost.
Planting ideas by tier
– Lower tiers for deep-root crops like carrots, potatoes, beets, onions, and garlic.
– Upper tiers for shallow-root crops such as lettuce, spinach, radishes, herbs, and bush beans.
– Place taller plants toward the back of each bed so sun reaches the smaller plants.
– Use trellises for climbers on beds where space allows.
Maintenance tips
– Mulch helps keep moisture even.
– Mulch reduces weeds.
– Prune edges to keep lines neat.
– Check after heavy rain for erosion and fix quickly.
You want fresh veg all year. A four-season garden layout can make that happen. It pairs crops with the weather you get and uses simple tools to stretch growing time. You’ll enjoy a steady harvest and fewer gaps in your plate.
– Season-by-season crop choices: In early spring, sow peas and radishes. They pop up quickly and fill empty beds. For summer, plant tomatoes, cucumbers, peppers, and beans. These crops love long days and sun. Come fall, add pumpkins, squash, kale, and broccoli. They handle cooler nights and keep producing. In winter, grow hardy greens like kale, chard, and spinach, plus herbs in a protected bed. Rotate families so one bed doesn’t stay tired.
– Extend your season with protection: A cold frame or small greenhouse traps warmth and protects early or late crops. A row cover can shield plants from light frost. Mulch thickly to lock in moisture and warmth. Ventilation matters, so open it on warm days to avoid damp mold.
– Smart planting schedule: Make a simple calendar for sowing, transplanting, and harvest times. Plan for succession planting so one crop follows another in the same bed. Rotate crops each year to keep soil healthy and slow pests. Note which varieties work best in your spot and stick with them.
– Design and layout tips: Group crops by season in easy-to-reach zones. Put taller plants at the back or on the north side to cut shade on smaller beds. Use wide paths for a wheelbarrow and good airflow. Mark beds with seasonal signs so you know what’s growing where at a glance. A sunny wall can act as a warm microclimate to give a head start when it’s chilly.
– Maintenance and care: Check soil health every few weeks and add compost to feed soil life. Keep irrigation steady and avoid overwatering. Mulch to suppress weeds and retain moisture. Look for pests early and use simple traps or row covers to keep them away. A quick garden walk helps you catch trouble fast. Keep a small notebook to track what works.
– Quick-start plan for this weekend: Map your beds and mark spring, summer, fall, and winter zones. Choose one crop for each season to test first. Install a cold frame or row cover for the first weeks of spring. Start a simple garden journal to record results and ideas.
17. Four-Season Garden Layout
Editor’s Choice
🛍️
Outsunny 9′ x 3′ x 3′ Mini Greenhouse with Zippered Doors & Roll-up Wind…
Shade in your yard can feel like a wall when you want to grow vegetables. But you can turn that wall into a quiet, productive corner. A shade garden can be calm and fruitful with a clear plan. You’ll harvest greens longer into the season and enjoy a cooler, easier-to-care-for space.
Start by mapping the light. Watch how sun slips through the trees from morning to late afternoon. Some spots get a few bright hours; others stay dim all day. Note where the best shade-loving crops will thrive. This helps you place beds, containers, and paths so you use every inch wisely.
Layout options give you many chances to shape the space. Raised beds are great for shade because their soil stays loose and drains well. Build one long bed along a fence or stack several shorter beds in a corner. Or use sturdy containers—deep pots, half-barrels, or wooden boxes—that you can move as the sun shifts. Put taller plants like pole beans or a trellis near the back or along a wall so light reaches the greens in front. This keeps the space open and easy to walk through. A small seating nook lets you enjoy the patch while you pick.
What to plant in a shade garden? Choose crops that tolerate softer light. Leafy greens shine here: lettuce, spinach, and Swiss chard stay tasty even when the sun isn’t strong. Add radishes for quick, crisp harvests. Herbs such as parsley, chives, and cilantro handle dim light and still taste bright in meals. If you want a touch of variety, try peas or bush beans where the sun breaks through a bit more in the morning. Start with a small test patch to learn what grows best in your yard, then expand.
Soil and care matter more in shade. Use a rich mix: equal parts compost and garden soil, plus a little perlite to keep drainage open. Mulch to keep roots cool and stop weeds. Water slowly at the base so roots soak in moisture without soggy leaves. A simple drip line or soaker hose makes steady moisture easy to manage.
Make the space inviting and easy to tend. Shade gardens deserve color and texture too. Add a bench, a soft light, a bird bath, or a sculpture to create a focal point. Reflective surfaces, pale mulch, or light stones brighten the area and lift the mood. A well-planned path helps you move with ease and keeps leaves dry.
– Planting tip: Place all shade-tolerant crops in one zone so you can water, prune, and harvest without stepping into every corner.
– Design hint: Use light-colored materials for paths to brighten the shaded areas.
– Maintenance suggestion: Regularly monitor moisture levels as shaded areas may retain water longer.
18. Shade Garden Layout
Editor’s Choice
🛍️
Land Guard Galvanized Raised Garden Bed Kit, Galvanized Planter Garden B…
Is your yard cluttered with plants that slow you down? A minimalist garden design can give you calm, order, and fresh harvests. It sticks to clean lines, a small plant list, and a quiet color mix. You use raised beds or slim containers to create even rows. Gravel paths and a simple wooden trellis add structure without feeling busy. The look is modern, and the upkeep is easier. You can focus on a few crops and still get variety through texture and height. This approach works well in small yards and on balconies where space is precious.
Start with a plan. Pick 4 to 6 crops that grow well in your climate and taste good together. Place them in a neat grid or a single long row. Use uniform containers or raised beds to keep the feel tidy. Stick to a restrained color palette—green, white, gray, and natural wood.
Design tip: Choose a small set of crops that complement each other and fit your space.
Planting suggestion: Interplant herbs and vegetables in a clean, organized grid so you see order rather than chaos.
<Maintenance note: Regularly clear away debris to keep paths and beds neat.
Layout specifics help you move fast in the garden. Beds about 2 to 3 feet wide let you reach the center from either side without stepping on the soil. Keep all edges straight and even. Use the same wood type for framing and the same color planters for a cohesive feel. Plant textures matter as much as colors. Mix leafy greens, herbs, and compact vegetables to add variety without crowding.
Paths and edges play a big role. A gravel path feels soft underfoot and hides spills after a light rain. Edges in wood or metal keep the border clear and clean. If you want a touch of warmth, add a small seating area with a simple bench near the edge.
Irrigation and care keep the look simple and productive. A drip irrigation line or soaker hose delivers water directly where it’s needed. It saves water and cuts weekly chores. Mulch lightly to hold moisture and slow weed growth. Check the beds every week for peeling bark, broken stems, or stressed leaves. A quick prune or stake can maintain the tidy silhouette you want.
Common questions and honest limits. Won’t minimalist feel cold or stark? You can it with texture: vary leaf shapes, use different greens, and add one soft accent plant. Will it limit your harvest? Not if you plan well. Choose crops that fit your space and harvest window.
Take your time to sketch a simple plan on paper. Start small with one raised bed and a couple of containers. Add more as you learn what works for your light and soil. With steady care, your minimalist garden will stay calm, productive, and easy to enjoy.
19. Minimalist Garden Design
Editor’s Choice
🛍️
Land Guard Galvanized Raised Garden Bed Kit, Galvanized Planter Garden B…
A rustic farmhouse garden brings a warm, welcoming feel to your yard. It looks lived-in and cozy, yet it remains practical for daily life. You’ll enjoy a space that supports vegetables, herbs, and flowers without feeling fussy.
– Design idea: Build raised beds from reclaimed wood. Old crates make great borders and extra planters along a fence line. Let a few vintage tools grace a wall for character that’s not busy.
– Materials and texture: Choose natural tones and rough finishes. Stone paths, gritty gravel, and weathered wood blend with green beds. A little bare soil here and there keeps the look calm and honest.
– Planting mix: Combine edibles with bloomers and herbs. Heirloom tomatoes and beans sit next to lavender, sage, and calendula. The colors stay soft, like a cozy quilt you can walk through.
– Layout strategy: Put tall plants in the back or center to shade smaller crops. Create small seating spots near a flower bed so you can pick and rest. A curved path invites you to wander and enjoy the space.
– Maintenance approach: Keep care simple and steady. Let some grasses or wildflowers fill small pockets for a natural look. Mulch to hold moisture, and water early in the day when it’s cooler.
– Seasonal planning: Start cool-season crops in spring, then switch to warm-season crops as the weather warms. Harvest often to keep your garden busy and productive. Rotate crops so soil stays healthier year to year.
– Decoration ideas: Add a weathered bench, a rain barrel, and a simple bird feeder. These touches bring life and tiny moments of joy without crowding the space.
Why this works for you
– It’s adaptable. You can scale up or down based on your yard size.
– It stays approachable. Natural materials and simple layouts cut upkeep.
– It stays stylish. The farmhouse vibe never feels out of date when you balance texture, color, and greenery.
Practical steps to start today
– Scout corners for light and water access. Pick a sunny rise for herbs and leafy greens.
– Gather materials you already have. Reuse crates, pallets, and old tools for a personal touch.
– Sketch a simple plan. Put beds on a gentle curve and mark a walking path with stones.
With these ideas, your rustic farmhouse garden becomes a friendly, practical retreat. You’ll grow food, enjoy flowers, and keep a look that’s true to country charm.
20. Rustic Farmhouse Garden
Editor’s Choice
🛍️
Land Guard Galvanized Raised Garden Bed Kit, Galvanized Planter Garden B…
You want a veggie garden, but space is small. An urban garden design solves that. It turns balconies, rooftops, and tiny backyards into productive green spaces. You get fresh flavors, color, and a sense of calm right outside your door.
Start with a simple plan. Check how much sun your space gets from morning to late afternoon. Note where walls can hold a trellis and where concrete or wood makes a good base for containers. Think about access: you want herbs and veggies close to your kitchen for easy picking.
Build smart zones. Put the high-need plants in places that get the most light. Use walls for vertical growing so you don’t waste floor space. Create a small cooking corner with a stool or bench nearby to make harvest and prep quick. Keep a tidy edge for easy maintenance.
Choose containers you can move and stack. Here are easy starting options:
– Lightweight fabric bags for herbs and greens. They drain well and are simple to switch out.
– Deep plastic boxes or ceramic pots for tomatoes, peppers, or bush beans.
– Wide, shallow trays for leafy greens like lettuce, spinach, and arugula.
– Stylish, compact planters that blend with your urban décor.
Add vertical and railing ideas. Vertical planters give you a lot of green in a small footprint. Think lattice panels, stacked pots, or hanging baskets on a balcony railing. Wall-mounted trellises work great for cucumbers, peas, and small cherry tomatoes. A vertical herb tower keeps basil, thyme, and oregano within reach.
Pick crops that thrive in tight spaces. Opt for compact varieties and fast harvests. Good bets include:
– Leafy greens: lettuce, kale, chard.
– Small tomatoes and peppers.
– Bush beans and radishes.
– Fresh herbs: basil, parsley, cilantro, chives.
– Compact strawberries for a splash of sweetness.
Learn easy care tricks. Use a lightweight potting mix with good drainage. Add a thin layer of mulch on top to hold moisture. Install a simple watering plan with a drip line or a careful hand-watering schedule. Check soil moisture daily in hot weather; containers dry out quickly. Observe sun patterns as seasons shift and adjust plants accordingly.
Maintenance feels lighter when you keep a simple routine. Water consistently, feed every few weeks with a balanced mix, and prune as needed. Rotate crops so soil stays lively. If a space goes unused, tuck in a compact herb patch or a container filled with cherry tomatoes to bring life back quickly.
Small spaces can deliver big harvests when you design with purpose. Start with one balcony, one vertical setup, and a handful of containers. Grow what you love, and you’ll taste the difference in every bite.
You want fresh greens in a small space. A hydroponic garden layout can help you get them. In a soil-less system, plants drink a nutrient-rich water mix instead of soil. It saves space and cuts mess. The setup can look clean and modern in any home.
How to design your hydroponic layout
– Layout options: Tiered shelves, vertical towers, and wall frames let you stack plants and grow up rather than out.
– Lighting for indoors: If you grow inside, pick bright LED grow lights. Run them about 12 to 16 hours a day.
– Materials and style: Choose sleek, sturdy materials like white plastic, glass, acrylic, or powder-coated steel for a clean look.
What to plant and how to start
– Starter crops: Lettuce, spinach, arugula, and fresh herbs grow fast in hydroponics and give you quick harvests.
– Planting tips: Keep roots shallow, use a light growing medium, and space plants so they get air and light.
– Nutrient management: Use a ready-to-use hydroponic nutrient solution and follow the label. Check the reservoir regularly for levels and temperature.
Maintenance and steady results
– Maintenance plan: Check nutrient levels weekly and adjust pH to about 5.5–6.5.
– Keep it clean: Clean the reservoir and lines monthly to prevent algae.
– Watch the movement: Inspect pumps and airflow to keep water moving smoothly.
A practical setup you can copy
On a sunny balcony, mount a two-tier shelf against the wall and add a compact vertical tower beside it. This combo fits a small space and makes harvesting easy. You’ll see a quick, clear difference in how fast greens grow compared with soil beds. The colors of fresh leaves bring a lively look to your space.
Know the limits so you stay on track
Hydroponic systems use electricity for pumps and lights, so plan for costs and reliability. They can require more upkeep than traditional beds. If you skip nutrients, pH, or cleaning, plants won’t perform well.
Quick-start plan
– Pick a sunny spot or a bright balcony.
– Choose a simple, starter-ready hydroponic kit.
– Start with lettuce and herbs; add leafy greens as you gain comfort.
– Set a weekly check routine for nutrients, pH, and clean components.
With a smart hydroponic garden layout, you bring fresh produce into a tight space. It feels high-tech and is surprisingly attainable. Start small, learn as you go, and watch your backyard transform into a vibrant, productive green space.
22. Hydroponic Garden Layout
Editor’s Choice
🛍️
Hydroponics Growing System Indoor Garden: Herb Garden Kit Indoor with LE…
If you want a garden that shows your personality, artistic garden design can help. It blends art with edible plants so you can enjoy color and flavor in one space. You guide the vibe, and the garden does the rest.
This style uses color, shapes, and clever layouts. It invites your eyes to travel from one point to the next. You can make paths of mosaic tiles or paint containers in colors that fit your mood. The goal is a space that feels intentional, not random.
Your garden can tell a story or carry a clear theme. You might aim for a quiet cottage look, a bold modern feel, or a nostalgic farm vibe. Set a mood, then let the plants and décor reinforce it.
– Design hint: Use plants with striking colors and textures to create visual interest.
– Planting suggestion: Mix traditional crops with ornamental plants for a vibrant, usable display.
– Maintenance note: Regularly step back and check the overall balance, so the art stays alive.
– Design hint: Create focal points like a bright trellis, a colorful sculpture, or a painted container that draws the eye.
– Planting suggestion: Place taller plants at the back or center of beds to frame the scene and keep paths clear.
– Maintenance note: Refresh with small plant swaps each season to keep the palette fresh.
Plan with purpose. Start by choosing a theme you love—zesty, calm, or playful. Pick a color palette and stick to it. Decide where you want your main sights to appear. Let a maker’s eye guide you, but keep practicality in reach.
– Color strategy: Pair two to four main colors and use lighter shades for contrast.
– Texture mix: Combine smooth leafy greens with fuzzy herbs or lacy flowers.
– Pattern idea: Try a simple checkerboard or a winding, natural-feel path to add rhythm.
Planting ideas that balance beauty and bite. Mix herbs, edible flowers, and compact vegetables. Use ornamental grasses as borders to soften edges. Choose containers that contrast with your beds—bright ceramics or dark metal—to frame the plants.
– Container tips: Repaint or decal planters to echo your theme.
– Garden edge: A low wall or a row of decorative stones can separate art from edible beds.
– Vertical accents: Trellises and arbors support climbers and add height.
Maintenance basics you can actually keep. Schedule a quick monthly walk through to remove tired plants and tidy paths. Prune to maintain color balance and shape. Keep a small palette of core plants handy so you can swap in fall or spring.
Five practical steps to start now:
1) Pick a theme you truly love. 2) Choose a 2–4 color palette. 3) Sketch a simple path or bed layout. 4) Select a mix of vegetables and ornamentals. 5) Set up a light, easy maintenance plan.
Readers often ask: Can I mix edible crops and art every season? Yes, with thoughtful color and height balance. Will this slow harvest? Not if you plan smart and keep the beds tidy. A garden that looks like art can still feed your table and your imagination.
You want a garden that feels wild and real, yet it still feeds your family. Naturalistic garden design fits that goal. It blends a meadow-like feel with practical growing spaces. You’ll invite birds, bees, and butterflies while you harvest fresh vegetables. The beds mix with grasses and native wildflowers so the space looks like a small corner of nature, not a rigid grid.
Biodiversity is the heart of this style. A natural landscape draws pollinators and helps keep pests in check. You can grow food while letting nature handle part of the work. Paths help you wander without breaking the look. Choose materials that age gracefully and fit the scenery.
– Design tip: Group plants by water and sun needs to keep the system balanced and easy to care for.
– Planting suggestion: Mix annuals and perennials so you see color through the year and attract pollinators.
– Maintenance note: Let some spots grow a little wild to boost habitat and cut down on weeding.
Now think about paths and the edges of beds. Create winding routes with natural materials like bark chips, rounded gravel, or flagstones. The paths invite you to stroll, touch leaves, and smell herbs as you pass.
Choose plants that fit a natural rhythm. Native grasses can form a soft backdrop, while wildflowers add color and motion. Add vegetables where they belong, especially in sunny pockets. A simple rule helps: place plants by soil moisture and light so each area stays steady.
– Path and edge ideas: Use natural materials that blend with the landscape.
– Plant mix ideas: Pick a blend of native perennials, small grasses, and a few annuals for constant color.
– Wildlife focus: Leave space for self-seeding and little patches of woodland for beneficial insects.
Getting started can be easy with a quick plan.
– Step 1: Observe how sun and shade move through your yard during the day.
– Step 2: Note where rain pools and where the soil stays dry.
– Step 3: Mark a few veggie beds near the heart of the garden.
– Step 4: Choose native plants that fit those spots and mix in a few herbs.
– Step 5: Lay out paths with natural materials so you can walk without tripping over roots.
With steady attention, your garden becomes a living landscape that still nourishes your table.
24. Naturalistic Garden Design
Editor’s Choice
🛍️
Back to the Roots Heirloom Organic, Non-GMO & USA Grown Seeds, 30ct Herb…
You want a veggie garden that feels like a story. A fantasy garden design blends food with magic and fun. You can mix bright colors, playful textures, and tiny scene touches. This plan makes gardening feel like a creative game you can control. You’ll see fresh vegetables beside artful, eye-catching accents.
– Lighting and pathways: String tiny fairy lights along winding paths to glow softly after dusk, guiding your steps and creating a dreamlike mood.
– Color and texture: Group bold flowers with unusual vegetables to craft a vibrant, otherworldly palette you can enjoy from morning to night.
– Unique crops: Choose vegetables with strange colors or shapes—purple carrots, striped zucchinis, blue potatoes—to surprise the eye and spark chatter at harvest time.
– Garden features: Add a small sculpture, a miniature bridge, or a wooden arch to anchor the theme, then place seating nearby so you can savor the scene.
– Planting plan: Place tall sun lovers at the back, mid-height crops in the middle, and ground covers at the edges to create depth like a stage for your edible performers.
– Seasonal color and care: Rotate colors with the seasons by swapping fast-growing greens and annual flowers, keeping the style fresh all year.
– Maintenance and care: Regularly prune, weed, and tidy decorations to keep the look sharp, and check irrigation to prevent trouble before it starts.
How to start in four steps
1) Survey your space to note sun, shade, water access, and traffic flow.
2) Pick a simple color theme and a few unusual vegetables to begin the magic.
3) Sketch a basic layout that places tall plants at the back and gives your beds a natural rhythm.
4) Add one lighting feature and a small decorative element, then refine as seasons change.
Why this approach works for you
– It makes gardening a playful, inviting hobby that still yields fresh food.
– It helps you stand out with a memorable look your friends will notice and ask about.
– It stays flexible, so you can swap plants or decorations as your yard grows.
– It scales with your budget, starting small and expanding when you’re ready.
Tips for success
– Start with two or three focal areas to avoid clutter.
– Use color to guide eye movement and keep your garden feeling united.
– Choose unusual vegetables that suit your climate and soil.
– Keep notes on what thrives so you can repeat wins next season.
A fantasy garden design can transform any backyard into a magical edible landscape. With simple steps, bold colors, and a touch of whimsy, your vegetables become part of a living story you can taste and share.
You want a space that helps you relax while you garden. A therapeutic garden blends calm with purpose. It fits hospitals, schools, and homes alike. The goal is to boost mood and still give you a place to grow vegetables.
Why this design helps
You get a retreat from stress. You also gain a place to harvest fresh food. The design supports movement, breathing, and focus. It works with your daily routines, not against them.
Layout ideas for calm and function
– Soft, rounded pathways guide your steps and reduce tension.
– A short walking meditation path invites slow, mindful steps.
– A quiet seating area invites breaks and breathing space.
– A fragrant herb border awakens the senses as you pass.
– Raised or accessible beds keep vegetables easy to reach.
Plant choices that soothe and satisfy
– Lavender and chamomile offer gentle scents that calm the mind.
– Lemon balm and rosemary add brightness and year-round color.
– Mint and thyme bring fresh aromas but stay in check with borders.
– Native grasses and soft perennials move in the breeze, adding texture.
– Choose colors like soft greens, blues, and purples to feel tranquil.
Paths, seating, and small water features
– Use non-slip pavers or swept gravel for safe, clean paths.
– Place a sun or shade bench where you can see the beds while you rest.
– A tiny fountain or birdbath adds soothing sound without chaos.
– Keep sight lines clear so you can notice vegetables at harvest.
Practical steps to design your therapeutic space
1. Set your goals — calm, health, or social time with others.
2. Map your area and measure walkways, beds, and seats.
4. Pick materials that suit your climate and care level.
5. List plants for scent, color, and easy maintenance.
6. Install with safety in mind and start a simple care routine.
Maintenance and care tips
– Mulch beds to lock in moisture and cut weeds.
– Water deeply but not wastefully; use drip irrigation if possible.
– Prune herbs after blooms to keep growth neat.
– Check soil every season and amend as needed.
Putting it into practice
Start small and test one corner first.
Build a gentle path and a simple bench.
Plant a few sensory herbs near the fence.
Watch your mood improve as you work.
A therapeutic vegetable garden layout design can turn your backyard into a sanctuary. Harvest fresh food while nurturing your mind and spirit – relaxation and purpose can bloom together!
26. Therapeutic Garden Design
Editor’s Choice
🛍️
VINGLI 38.5″ Patio Park Garden Outdoor Metal Rose Bench,Cast Iron Cast A…
You want a garden that uses less water but still gives you plenty of veggies. A water-wise layout helps you do just that. It blends simple design with smart choices so your garden stays productive in hot, dry weather.
What makes a water-wise garden work
– Smart plant choices. Pick crops that handle less water once they’re established. Herbs like rosemary, thyme, and oregano are great. Leafy greens that stay moist with mulching also perform well.
– Efficient irrigation. Use drip lines or soaker hoses. They deliver water directly to the roots and cut waste. A simple rain barrel can top off your supply in a dry spell.
– Mulch and soil health. Mulch cools the soil, slows evaporation, and feeds soil life. Stones and dark mulch both work well in this layout. Healthy soil drinks in water and feeds plants longer.
– Native and drought-tolerant plants. Native perennials and drought-tolerant vegetables thrive with less care. They create a calm, low-water backbone for your bed.
– Low-water raised beds. Build beds with stone or rock edges to reduce evaporation and keep soil moisture where you want it.
How to design your space
– Map your yard. Note where the sun is strongest and where wind cools the soil. Place thirstier plants in spots that get morning sun and afternoon shade if possible.
– Group by water needs. Put plants that require similar water together. It makes watering simpler and more precise.
– Choose the right crops. Include herbs like thyme or rosemary, squash varieties that tolerate drier conditions, and greens that respond well to mulch and slower watering.
– Add a smart irrigation plan. Run a drip system in the beds and a short hose for quick, spot watering. Attach a simple timer to keep schedules steady.
– Layer mulch on every bed. Use a 2–4 inch blanket of mulch. It keeps soil cool, slows evaporation, and hides dry patches.
Maintenance that keeps it working
– Check soil moisture. Look for soils that feel barely damp far below the surface. If it’s bone dry, water a little more that day.
– Watch plant signals. Wilting during heat means you may need to water earlier or adjust the timer. No leaves turning yellow means you’re on the right track.
– Refresh mulch yearly. Replenish to keep the soil cool and moist. It also helps suppress weeds that steal water.
Practical tips to get started
– Start small. Build one or two utility beds first, then add more as you get comfortable.
– Choose durable materials. Natural stone, compact gravel paths, and sturdy edging hold up well in sun and rain.
– Track results. Note which crops seem happiest with your watering plan. Use that data to fine-tune next season.
Common questions you might have
– Can a small yard work with this layout? Yes. Start with a compact bed, a drip line, and a rain barrel. You’ll see the system becomes easier to manage over time.
– What about very hot summers? Mulch is your best friend then. It keeps the surface cool and makes every drop count.
– Do I need fancy gear? Not at first. A basic drip kit, a timer, and a simple mulch routine go a long way.
Bottom line
A water-wise garden layout saves water without sacrificing yield. With careful plant choices, smart irrigation, and steady mulch, you get a vibrant, low-maintenance vegetable space you can enjoy all season.
27. Water-Wise Garden Layout
Editor’s Choice
🛍️
Rain Bird DRIPKITBAG Drip Irrigation Repair and Expansion Kit
You want a garden that teaches as you grow. A community education garden puts learning at the heart of your space. You show how soil, water, and care work together. Visitors see real lessons in action: a child turning compost, a neighbor comparing mulch layers, and a student reading a simple guide by a sign. The layout should feel welcoming and doable for beginners while proving that good gardening comes from steady practice.
What it looks like matters. A winding path ties the beds together. A small shelter or bench gives people a place to sit and study. Clear signs by each area explain what to do and why it matters. You can place a compost area, a demonstration bed for permaculture, and a veggie plot side by side so every visitor learns by doing. This setup invites questions, not just observations.
Design tip: Set up a small learning hub near the beds to host classes and workshops.
Planting suggestion: Plant a diverse mix of crops that illustrate techniques such as companion planting and crop rotation.
Maintenance note: Schedule monthly community workdays so the garden stays lively and cared for.
Getting started is easier if you break the work into simple steps. Use a quick map of your space and write down what you want visitors to learn first. Pick three demo areas that cover soil, water use, and plant care. Put up signs with plain language and friendly pictures. Reach out to locals who want to help, like a nearby school or a neighbors’ group. They will bring people, energy, and ideas.
Steps to launch:
1) Map your space and decide what you want learners to see first.
2) Choose three demo areas, such as composting, water-wise irrigation, and different bed styles.
3) Install simple signs with clear, friendly language to explain each area.
4) Invite neighbors, schools, or clubs to join and build a steady group of volunteers.
Benefits come through steady practice. You’ll see kids pick up composting steps, adults learn drip irrigation, and seniors share tips on pruning. The garden becomes a living classroom that fits many lives—after-school projects, weekend workshops, and casual visits. This isn’t a luxury feature; it’s a practical way to grow skills and build community.
Keep expectations realistic. A community education garden grows best with clear goals, a simple layout, and regular, friendly input from volunteers. It takes time, but the payoff is a yard that teaches, feeds, and connects people every season.
If you want a space that helps people heal and feel cared for, a therapeutic community garden can do that. It blends social time with gentle healing, so everyone benefits. You design it with accessibility in mind, and that makes your yard usable for neighbors of every age and ability.
– Design priorities: wide, smooth paths that are easy to roll on; raised beds you can reach from a standing or seated position; benches and shaded corners for rest and talk; and safe, flat surfaces that cut tripping risks.
– Plant choices: a mix of textures, scents, and colors that people can enjoy with hands, noses, and ears.
– Engagement: spaces that invite conversation, calm work, and shared success.
Layout ideas help the space feel welcoming and easy to use. Create a looped path so you never feel stuck. Put a central gathering area with a few benches where people can chat or plan activities. Use raised beds in a ring or a simple grid so volunteers with mobility aids can work side by side with others. Add a small shaded corner with seating for quiet moments. A sensory corner works well near the entrance to set the mood.
Sensory plantings bring the healing power to life. Choose easy-to-care-for varieties that can be touched, smelled, and heard. Examples include soft lamb’s ear, fragrant rosemary, mint to crush in your hands, and lavender for a calm scent. Use herbs near paths for fragrance, and add textured plants like grasses or velvety leaves for contrast. Keep color gentle and inviting, not busy.
Practical steps to get started:
– Assess your space and set a clean, low-cost plan. Measure the yard and mark path routes with simple stakes.
– Map accessible routes. Make all main areas reachable from a wheelchair or walker.
– Pick beds that fit your space and comfort level. Aim for 24–30 inches (60–75 cm) in height.
– Select a sensory plant list. Plan a mix of touch, smell, and sight experiences.
– Add seating and shade. Place benches near plant displays and a few trees or umbrellas for relief.
– Create a simple maintenance plan. Rotate volunteers, set monthly tasks, and keep a shared note for notes and ideas.
Maintenance and inclusion go hand in hand. Invite neighbors and families to join in. A regular, friendly schedule builds ownership and pride. Keep tools and supplies ready, and use a small sign-in to track who helped and when.
Common questions you may have:
– How much money is needed to start? Start small with a few raised beds and a bench. Expand as you gain volunteers.
– How do I recruit volunteers? Host a monthly work day and offer short tasks that anyone can do.
– What if someone can’t weed but can plant? Offer shifting roles so everyone can contribute.
This layout centers on people. It respects limits while exposing everyone to the full joy of gardening. With care, your therapeutic community garden becomes a steady source of relief, connection, and growth for your block.
29. Therapeutic Community Garden
Editor’s Choice
🛍️
Land Guard Galvanized Raised Garden Bed Kit, Galvanized Planter Garden B…
You want a garden that feeds you through more than one season. A Seasonal Harvest Garden makes that possible. It blends crop rotation with smart season planning so your veggies stay fresh and abundant. You’ll split your space into spring, summer, fall, and winter sections, and you can add covers or a small greenhouse to push the growing window when needed. This approach cuts waste, boosts soil health, and gives you a wider variety of produce all year long.
With this layout, your main goal is simple: harvest often, not all at once. You plant to match each season’s weather, light, and soil mood. You group crops by when they thrive. Then you move them around the beds to keep soil happy and pests off guard. The result is steady harvests and less surprise gaps in your table.
How to set up your Seasonal Harvest Garden
1) Map your climate and dates. Write down last frost and first frost dates. This helps you plan when to start seeds and when to transplant.
2) Pick crops by season. Spring shines with greens, peas, and radishes. Summer loves tomatoes, peppers, beans, and cucumbers. Fall favors brassicas, root vegetables, and leafy greens. Winter options include hardy greens and stored vegetables you can catch in the pantry later.
3) Plan a rotation. Move plant families to new beds each year. This keeps soil from wearing out and lowers disease risk. A simple rule is to rotate families every season or every year, depending on your space.
4) Use season extenders. Row covers, cold frames, and small greenhouses help you protect tender crops. They speed up growth and protect harvests when nights stay chilly.
5) Build a smart calendar. Mark planting dates, transplant days, and harvest windows. A clear schedule keeps you from missing the best picking times.
6) Practice succession planting. After one crop finishes, plant another that fits the season and space. This fills beds and keeps output steady.
7) Keep soil healthy. Add compost, mulch, and occasional feeding to support crops through rotations. Healthy soil means bigger harvests with less water and effort.
Implementation tips you can try this weekend
– Design tip: create four seasonal zones in your yard and label what to plant where.
– Planting suggestion: include a mix of fast growers and longer-season crops for each period.
– Maintenance note: check beds weekly for gaps, pests, and thirsty plants. Adjust irrigation and shade as needed.
A Seasonal Harvest Garden is honest about limits. It won’t give you nonstop sunshine, but with season extenders and careful planning, you’ll enjoy fresh produce most of the year. It’s practical, attainable, and surprisingly simple once you map your climate and start small.
Transform your backyard into a Seasonal Harvest Garden, where every season brings fresh flavors! Enjoy a bountiful variety of produce all year long while nurturing your soil and minimizing waste.
30. Seasonal Harvest Garden
Editor’s Choice
🛍️
Garden Netting, Jevrench Durable Ultra Fine Garden Netting, Garden Plant…
From raised beds to vertical gardens, the possibilities for vegetable garden layout designs are truly endless.
Each design offers unique benefits and aesthetics, enabling you to transform your backyard into a flourishing oasis of color and nutrition.
Embrace your creativity and find the layout that fits your space, style, and gardening goals. Happy gardening!
Note: We aim to provide accurate product links, but some may occasionally expire or become unavailable. If this happens, please search directly on Amazon for the product or a suitable alternative.
This post contains Amazon affiliate links, meaning I may earn a small commission if you purchase through my links, at no extra cost to you.
Frequently Asked Questions
What Are the Best Vegetable Garden Layout Designs for Small Backyards?
If you’re dealing with limited space, consider designs like the vertical garden or container gardening. These layouts maximize your growing area without taking up too much ground. Vertical gardens can utilize walls and fences, while containers allow you to move plants around for optimal sunlight. These options can transform any small backyard into a vibrant vegetable paradise!
How Can I Incorporate Herbs Into My Vegetable Garden Layout?
Integrating herbs into your vegetable garden layout is a fantastic idea! A kitchen garden design can make fresh herbs readily accessible while adding beauty and fragrance to your space. Plant herbs like basil, parsley, and thyme alongside your vegetables for both culinary delights and pest-repelling benefits. This way, cooking becomes a breeze, and your garden looks stunning!
What Is Companion Planting and How Can It Benefit My Vegetable Garden?
Companion planting is a clever technique where certain plants are grown together to enhance each other’s growth and reduce pests. For example, pairing tomatoes with basil can improve flavor and deter harmful insects. In your garden layout, consider a companion planting layout to create a healthier ecosystem. This method not only boosts your yield but also makes gardening more sustainable!
What Are Some Creative Vegetable Garden Layout Ideas for Families?
For families, engaging children in gardening can be a delightful activity. Opt for a cottage garden blend that combines vegetables with colorful flowers, making it visually appealing for kids. You could also create a spiral garden design that adds a fun element while maximizing space. These layouts encourage family participation and make the gardening experience joyful and educational!
How Can I Make My Vegetable Garden More Sustainable?
To enhance sustainability in your vegetable garden, consider a water-wise garden layout that conserves water while producing a bountiful harvest. Utilize native plants and implement drip irrigation systems to minimize waste. Additionally, incorporating a wildlife-friendly garden design can help attract beneficial insects and pollinators, creating a balanced ecosystem. This way, your garden thrives while being kind to the environment!
I put this together because I know how a tiny bathroom can feel crowded and chaotic. You want a space that breathes, not a drawer full of chaos. When the counters are crowded and the shower shelves glare back, a small change can make a big difference. Why I made this is simple: I want you to feel calm when you step into the room.
Who it’s for: If you’re a renter with limited storage, a student sharing a bathroom, or a busy parent, this post is for you. You care about clean lines, easy access, and a space that supports your day, not adds stress.
What you’ll get: 25 small bathroom organization hacks that actually work in real homes. These ideas are budget-friendly, practical, and easy to try in an afternoon. From vertical storage to door organizers and clever bins, you’ll find space-saving solutions that fit tight spaces and busy routines.
And yes, you won’t believe #12. It uses a simple item in a new way to double your storage without big changes. Picture a towel bar becoming a tiny spice rack or a tension rod turning into a second shelf.
These hacks are built for real life. No heavy tools or costly remodels. Start small by picking one corner to test. Add a shelf riser in a cabinet, swap in clear bins, or hang a slim over-the-door rack for towels and brushes. Each idea is described plainly so you can grab it and run.
Ready to get started? Measure your space, pick two ideas to try this week, and see how much you reclaim. You’ll feel the relief as clutter drops and your routine speeds up. This post gives practical, proven steps that help you maximize your space and keep your bathroom neat all week.
You feel the squeeze in a small bathroom. There is no room to spread out a pile of toiletries. Vertical shelves can fix that. By growing storage up, you gain space for towels, brushes, and daily items without crowding the floor. Floating shelves above the toilet or near the sink put daily items within easy reach.
Tips for vertical shelving:
– Choose lightweight materials like thin wood, metal, or acrylic. Easy to mount and less likely to sag.
– Use baskets or fabric bins on the shelves. They hide clutter and keep items contained.
– Color-code or group items by use. One color for daily items, another for extra supplies.
Floating shelves turn a bare wall into a slim, useful display. They let you show a small plant, a pretty jar, or a favorite mug, while keeping your essentials close at hand.
– Materials and sizing
What to look for: Choose depth around 6 to 8 inches. Measure wall space first. If space is tight, opt for 12-inch long shelves that run along the wall instead of one long unit.
– Placement ideas
Place shelves directly above the toilet to use dead space. Install a pair at sink height for daily items like toothpaste, brushes, and soap. A tall, narrow shelf can fit in the corner near the tub for towels or extra toilet paper.
– Installation basics
Mark where the studs are if you can. Use wall anchors if you can’t reach a stud. Level the shelves before you tighten screws. Use screws that match the wall and shelf material.
– Styling and safety
Keep heavy bottles toward the center so the shelf stays balanced. Put lighter items on the ends. Use one bin for loose items like cotton balls and q-tips. Clean shelves regularly to prevent dust buildup.
A simple setup might be two slim shelves above the toilet, a small basket for towels, and a few labeled jars for cotton swabs and cotton balls. This combo is easy to adjust as your needs change.
– Common questions
How much weight can these hold? With proper anchors into studs, most slim floating shelves carry about 20–30 pounds. Always check the manufacturer’s specs.
– Quick customization ideas
– Try a pair of slim shelves in the same finish above the toilet for symmetry.
– Put a small plant or glass jar on the top shelf to add life to the space.
– Label bins and keep the most used items in front for fast grabs.
Keep this approach in mind as you plan. Vertical shelving can make a tiny bathroom feel bigger and more organized without changing the room’s floor space.
1. Go Vertical with Shelving
Editor’s Choice
🛍️
upsimples Floating Shelves for Wall, Wall Shelves for Decor Storage Set …
Struggling to keep towels off the sink in a compact bathroom? You’re not alone. A smart towel rack can transform a crowded space. It uses vertical room and keeps towels dry and ready at hand. With the right setup, you’ll feel the difference every day.
Benefits of a multi-tier towel rack:
– Frees up counter space by stacking towels cleanly.
– Lets you hang different items on separate levels for quick access.
– Adds vertical depth to your bathroom, giving it a neater look.
A multi-tier rack isn’t just about towels. Each tier acts like a small shelf for folded washcloths, small towels, or a few accessories. The side hooks offer extra spots for brushes, loofahs, or a robe. And the top bar can hold a travel bag or a bathrobe that you want close by but off the counter.
Choosing and placing your rack
– Pick a material that fits your bathroom. Stainless steel or brushed nickel resist humidity well. Matte black adds a modern vibe. If you prefer warmth, a wood or wood-trimmed rack can blend with a cozy look.
– Aim for three tiers if you have decent vertical space. Two tiers can work in tighter rooms, but three gives you more room to separate items.
– Check its width and depth. You want a rack that fits between walls or above a toilet without crowding the door.
Smart placement tips
– Mount at a comfortable height for you—usually around 42 to 50 inches from the floor. That lets towels hang without touching the floor or getting in the way.
– Install where you dry off after a shower or near the sink. Close by means you’ll grab towels faster.
– Use the side hooks for everyday items like a hand towel, scrub brush, or a small bag. The top bar is great for a robe or a spare towel you want handy but off the counter.
Staying practical and tidy
– Don’t overload a single tier. Even with three levels, heavy towels on top can tip the rack and feel awkward.
– Keep the rack clean. Wipe down weekly with a mild cleaner to avoid rust spots or water stains.
– Match the rack to your color scheme. If your fixtures are chrome, go with chrome or brushed finishes. If your room uses warm tones, a brass accent can work—just keep the hardware cohesive.
Limitations to know
– A tall rack can feel bulky in a tiny bath. If your space is very small, consider a compact or narrow model that leans or mounts flat to the wall.
– Heavy items should stay distributed across levels. Don’t pile a heavy bathrobe on the top bar.
With the right towel rack, your small bathroom gains organization, quicker towel drying, and a cleaner look. It’s a simple swap that makes daily routines smoother and space feel bigger.
2. Smart Use of Towel Racks
Editor’s Choice
🛍️
3 Tier Towel Racks for Bathroom Wall Mounted, 24 inch Bathroom Shelf wit…
Small bathrooms feel tight, but you can get more from every inch. Clear storage containers help you see what you have and grab it fast. They stack neatly and fit in cabinets or on shelves without sticking out. Use them for items from first aid supplies to makeup and hair care.
Advantages of clear containers:
– Easy visibility means less time searching.
– They come in various sizes to fit all spaces.
– Helps maintain a tidy look and avoids clutter spills.
Labels can boost order, too. Keep them simple and put them where you can read them at a glance.
Labeling tips:
– Keep labels minimal and bold.
– Use a dry-erase label for items you move often.
– Put the label on the front edge so you can read it without moving the container.
How to pick and set them up:
– Start with a basic set of 6–8 containers in different heights and widths.
– Choose stackable designs with matching lids for a clean line.
– Look for clear plastic or glass that lasts in a humid bathroom. If you store personal items, pick options that are BPA-free.
– Maintain the system by keeping lids attached to bases when you stack.
Practical placement ideas:
– Store in a tall cabinet above the sink for daily items.
– Line shelves with a few flat containers to create open space in the middle.
– Use under-sink organizers if you have a plumbing box; add a slim bin for smaller items.
Care and upkeep:
– Wash containers with mild soap and warm water.
– Dry them completely before stacking to stop mildew.
– Rotate items every few months to keep things fresh and easy to reach.
Common questions you might have:
– Are clear containers better than opaque ones? They help you spot items quickly, which saves time.
– Can I use them in the shower? Choose clear plastic or glass that resists moisture.
– How do I prevent labels from peeling? Use a label maker or good, clear tape on a dry-erase label.
With the right clear containers, your bathroom can stay tidy with less effort. You gain visibility, save time, and keep a calm, clean look that makes daily routines smoother.
Start small today and feel the difference. You’ll see your shelves become calm and easy to use.
3. Clear Storage Containers
Editor’s Choice
🛍️
Vtopmart 6 Pack Clear Stackable Storage Bins with Lids, Large Plastic Co…
Use vertical shelves to store toiletries and decor.
$24.99
Wood, Metal, Acrylic
Place above toilet or sink.
Smart Use of Towel Racks
Multi-tier towel racks to keep towels organized.
$34.99
Stainless Steel, Wood
Mount at comfortable height.
Clear Storage Containers
Use clear containers for visibility and organization.
$28.82
Plastic, Glass
Label containers for easy access.
Utilize the Inside of Cabinet Doors
Attach hooks and organizers to cabinet doors.
N/A
Adhesive Hooks, Magnetic Strips
Use for small items like brushes.
A Cart for Mobile Storage
Rolling cart for easy access to toiletries.
$25.97
Plastic, Metal
Place beside sink or shower.
Bathroom Ladder Shelf
Vertical ladder shelf for additional storage.
$66.13
Wood, Metal
Use in corners for space-saving.
Seasonal Storage
Store off-season items in labeled bins.
$17.49
Plastic Bins
Use clear bins for easy identification.
4. Utilize the Inside of Cabinet Doors
Your bathroom needs more space. Shelves fill up, but the inside of cabinet doors stays empty. That wasted space can change how you move through your morning routine. It’s simple to fix and it pays off fast.
Try these door tricks. Each one is easy, quick, and built to last in a humid room. You’ll feel the difference right away.
– Adhesive hooks or small racks: Attach them to the door to hang brushes, combs, hair ties, and tiny cosmetics. This keeps daily-use items in reach and frees shelf space. Clean the door first, press firmly, and let the adhesive cure before loading items.
– Magnetic strips for tiny metal tools: A slim magnetic strip holds tweezers, nail clippers, and small scissors. It keeps metal tools visible and easy to grab. Choose a bathroom-grade strip that resists moisture and won’t rust.
– A slim caddy for deodorant and perfume: A door-mounted caddy fits deodorant sticks, travel sprays, and perfume bottles. It keeps tall items from tipping over on the shelf. Look for a curved lip or shallow well to cradle tall bottles securely.
– Pocket organizers for compact storage: A fabric or vinyl pocket organizer attaches with clips or adhesive. Clear pockets let you see what’s inside. Use it for cotton swabs, bandages, lipstick, and travel-size lotions. It keeps loose items grouped and easy to locate.
Smart setup tips. Use bathroom-safe adhesives made to handle humidity. Start light and add weight gradually. Place items by how often you use them—daily items on top, rarely used ones lower down. If your bathroom is damp, wipe the door occasionally to keep adhesives strong.
What to know before you start. Not every item belongs on the door. Avoid heavy bottles that strain the hinges. Use this method mainly for small tools, cosmetics, and travel-size products. For heavier needs, keep them on sturdy shelves.
A quick installation plan. Clean and dry the door completely. Mark where each organizer will sit. Attach using the method you chose and press firmly. Let adhesives cure as directed, then test by gently tugging on items. If something slips, switch to a stronger solution or move it to a shelf.
With these ideas, the inside of cabinet doors finally helps you organize. The space feels calmer, and finding what you need is faster. Your bathroom becomes easier to use every day.
Unlock hidden potential in your small bathroom! The inside of cabinet doors can be a game-changer for organization, turning wasted space into a haven for your essentials.
5. A Cart for Mobile Storage
Your bathroom is small, and clutter steals space. A rolling cart can change that. It moves where you need it and stores what you use most.
Benefits of a rolling cart:
– Keeps essentials at hand, even in tight spots.
– You choose a finish or color that matches your vibe and decor.
– Wheels let you move it for cleaning, guests, or a quick tidy-up.
Pick a cart that fits your look and your space. Let it shoulder the storage load so you don’t feel crowded.
How to pick the right cart
– Size matters: measure your space and door clearance. A cart that’s too big will feel crowded.
– Material choice: plastic holds up in damp rooms, metal lasts longer, bamboo adds warmth. Pick what fits your bath’s humidity and style.
– Shelves and baskets: aim for two or more levels. Include a small bin or tray for tiny items.
– Wheels and feet: lockable wheels give safety, smooth rollers make moving easy. A bump-free cart is a joy to use.
– Height and reach: top shelf should be comfortable to reach while standing. If you share the space, consider a cart with adjustable shelves.
Practical setups you can use
– Top shelf: towels, a soap tray, daily skincare items.
– Middle shelves: daily toiletries, toothbrushes, toothpaste, and meds in a small container.
– Bottom: cleaners, extra toilet paper, or a folded bath mat. Keep heavy items on the bottom for balance.
Placement ideas
– Put the cart beside the sink so you grab what you need without stepping away.
– Tuck it in a corner near the shower. It stays out of the way but is still easy to reach.
– If you have a narrow vanity, slide the cart under a counter when you don’t need it.
Maintenance and styling tips
– Wipe spills right away to avoid stains. A quick wipe keeps it fresh.
– Use a liner or non-slip mat on shelves to prevent items from sliding.
– Add a couple of decorative baskets for small items. They hide clutter while staying handy.
– When you’re not using it, store the cart in a closet or behind a door to free up space.
With these steps, you gain real space without losing access. A rolling cart is a practical upgrade for any small bathroom, blending function with style and making daily routines smoother.
5. A Cart for Mobile Storage
Editor’s Choice
🛍️
Sywhitta 3-Tier Plastic Rolling Utility Cart with Handle, Multi-Function…
The space under your sink is easy to ignore, yet it hides real storage potential. It can store more than you think when you arrange it right. These under-sink storage ideas boost bathroom organization and cut clutter. The goal is to keep the area clean, visible, and easy to use every day.
Tips for under-sink organization:
– Choose a mix of clear, stackable bins for small items and taller containers for sprays and bottles, so you can see everything at a glance.
– Create simple zones by grouping cleaners at the back, toiletries in the middle, and spare towels toward the side, so you reach the right item in seconds.
– Place frequently used items toward the front to cut hunt time during busy mornings and keep daily routines flowing smoothly.
– Install a slim tension rod under the shelf to hang spray bottles, freeing shelf space and preventing bottles from tipping into clutter.
– Add a pull-out tray or slim metal rack to corral tall bottles and cleaning tools without moving other items.
– Use a small basket for grab-and-go items like wipes, spare sponges, or extra soaps so they stay together.
– Label each bin with a simple tag or tape so anyone in your home can find what they need fast.
– Line the cabinet with a moisture-resistant mat or liner to protect bins, reduce rust, and keep things dry in damp spaces.
– Choose transparent bins and labels so contents are easy to spot at a glance, which saves time and cuts mess.
– Measure your cabinet depth, door swing, and plumbing clearances before buying so you don’t waste money on ill-fitting organizers.
– If space is tight, mount a door rack or pocket organizer on the inside of the cabinet door for extra pockets.
– Keep a simple cleaning caddy with your most-used products close at hand to speed up routine tasks.
With these tweaks, your under-sink area becomes a calm, functional station you actually enjoy using. Take small steps today, measure what you have, and start with one or two organizers. Small changes add up fast, and a tidy under-sink setup lasts. Start today with one tidy bin and watch the difference grow.
6. Under-Sink Solutions
Editor’s Choice
🛍️
Vtopmart 6 Pack Clear Stackable Storage Bins with Lids, Large Plastic Co…
Struggling to keep small bathroom items from disappearing into the shadows of the sink? A simple hook setup can change everything. By giving jewelry, hair accessories, and tiny bags a home, you gain quick access and less clutter. It’s fast to install, inexpensive, and helps your space feel calmer.
Why hooks are great:
– They make items easy to reach and see at a glance.
– They add a little style to your bathroom wall.
– They stop small pieces from piling up on counters and shelves.
Hooks work for more than just keys. They’re perfect for earrings, hair ties, bracelets, and even travel-sized bags you grab on your way out the door.
Where to put your hook system
– Wall-mounted hook boards are common and tidy. Put them near the vanity so you can grab what you need while you get ready.
– The back of the door is a handy spot if you’re short on wall space. An over-the-door rack can hold many items without drilling.
– Peg rails give you flexibility. You can move hooks around as your collection changes.
– Magnetic strips can hold metal pieces, like certain necklaces or metal barrettes, if humidity isn’t a problem in your bathroom.
– Choose materials that stand up to moisture. Stainless steel, powder-coated metal, or solid wood with a water-resistant finish last longer in a humid room.
Choosing the right setup and hooks
– Look for moisture-resistant finishes and rust-free hardware. You don’t want corners that corrode after a few showers.
– Pick a style that matches your bathroom. A sleek metal rail feels modern; a wood board adds warmth.
– Decide how many items you want to hang. A small board works for a few necklaces, while a larger rail handles many hair accessories.
How to install in simple steps
1. Pick a spot that’s convenient for daily use and out of direct spray from the shower.
2. Measure the space and mark where screws or adhesive strips will go.
3. If you’re drilling, use a level so the board sits straight. If you rent, use sturdy adhesive hooks or an over-the-door solution.
4. Attach the board or rail securely to the wall or door.
5. Hang items and test the setup with a light pull to ensure it’s stable.
Organizing tips that actually work
– Group items by type: jewelry on one section, hair accessories on another, small bags on a third. This makes things fast to find.
– Use a mix of hook types. Short hooks for clips, longer hooks for necklaces, and small pegs for bracelets.
– Color-code or label sections to keep a routine. For example, silver tones near the sink, gold tones a bit farther away.
– Leave a tiny tray or dish for items you wear every day so nothing gets misplaced.
Maintenance and care
– Wipe metal hooks with a damp cloth to remove soap residue. Dry them to prevent rust.
– Check that screws stay tight every few months. If you see wobble, tighten and re-secure.
– Reorganize as your collection grows or changes with the seasons.
A quick-start plan
– Start with a small wall board near your mirror.
– Add a few versatile hooks for daily items.
– Expand gradually as you discover what items tend to go missing.
With this approach, your bathroom stays neat, and you won’t lose track of tiny accessories again.
If you have a small bathroom, every inch counts. Tiny items spill out of drawers and sit on the counter. Hanging organizers can fix that without stealing space you don’t have. You can mount them on a door or on a wall. They turn vertical space into real storage.
Benefits of hanging organizers:
– They free shelf space and keep items easy to reach.
– They add style while staying functional.
– They install quickly and come off without a mess.
– They come in many colors and designs, so you can match your vibe.
Hanging organizers work best when you use them for small items. Think hair products, daily toiletries, travel-size bottles, or cleaning supplies. The pockets hold grab-and-go items, so you spend less time digging. You’ll notice a calmer counter and a neater vanity in minutes.
Choosing the right organizer is simple. Start with size. Measure the door or wall area you plan to use. Pick a model that fits without blocking handles or the sink. Material matters, too. Fabric options feel soft and light and can be washed. Plastic or vinyl pockets are easy to wipe clean. Clear pockets let you see what’s inside at a glance. Mesh styles breathe and drain if you spill liquids. If you splash-proof your space, choose sturdy plastic with strong seams.
Color and design matter, but so does fit. If your bathroom is bright, a bold color can pop. If it’s calm, go for a neutral shade that blends in. Look for multiple pocket sizes. Tiny pockets are great for bobby pins and razors. Larger pockets hold brushes, bottles, or jars. A few transparent pockets help you spot items fast.
Placement matters. The back of the door is perfect for towels, brushes, and sprays. Wall-mounted units stay out of the way and keep things within reach. Avoid placing organizers where they block air flow or light. Install with simple screws or over-the-door hooks. Most setups won’t require tools. In minutes, you can have a tidy system ready to go.
Smart setup tips you can use today:
– Group similar items together. Hair care with hair items, skin care with skin items.
– Keep daily items in the most accessible pocket. Put backups in a higher pocket.
– Label pockets if you switch items often. A small tag helps you remember what’s inside.
– Clean the fabric or wipe the plastic every week. Quick care keeps it looking fresh.
Common questions:
– Will these hold heavy bottles? Choose models with strong seams and wide straps. If in doubt, use larger pockets for heavy items.
– Can I remove and rehang them? Yes. Most options come off with no damage.
Real-life examples:
– A door organizer stores shampoo, conditioner, and shaving cream in one place.
– A wall unit holds cotton swabs, bandages, and travel bottles in easy reach.
– A clear pocket system shows toothbrushes, toothpaste, and floss at a glance.
Bottom line: hanging organizers are a practical, affordable way to reclaim space. They’re flexible, easy to install, and simple to use every day. Your small bathroom can feel bigger and more organized starting now.
8. Hanging Organizers for Small Items
Editor’s Choice
🛍️
AOODA 2 Pack Over the Door Organizer, Large Capacity Closet Door Hanging…
Feeling a bit overwhelmed with bathroom clutter? Decorative baskets can fix that. They add style and hide mess at the same time. You get calm space and quick access, all in one.
Why choose baskets?
– They fit many decors, from bright and airy to warm and earthy.
– They’re light and easy to move when you need a clear surface.
– They hide everyday stuff like towels, toiletries, and skincare, keeping counters clean.
Mix and match different sizes and textures. A layered setup looks dynamic and still serves a purpose. You’ll see the shelves come alive with depth, not dust.
How to use baskets in real life
– Roll towels and stack them in a tall woven basket near the shower. It looks neat and you’ll grab towels fast.
– Place backup toiletries in a shallow basket on a shelf. Labels or a simple tag keep items easy to find.
– Put small skincare products in one fabric basket inside a larger basket. It cuts clutter and makes weekly routines faster.
– Use a big basket on the floor for extra toilet paper or bath mats. If space is tight, it slides out of the way when guests visit.
Choosing the right basket for your bathroom
– Pick moisture-friendly materials. Woven options like rattan, water hyacinth, or a plastic-coated wicker resist damp air.
– Consider finishes. Natural tones bring warmth; painted options add a pop of color; smooth lacquered looks feel sleek.
– Size matters. Measure shelves, sinks, and corners before buying. A basket that’s too big crowds the view; one that’s too small leaves items exposed.
– Think liners. A simple liner keeps cosmetics and small items contained and easier to wipe clean.
Placement ideas that maximize space
– Group two or three baskets on open shelves for a tidy display and quick access.
– Use a basket under the sink as a hidden drawer for cleaning supplies or extra toilet paper.
– Put a low basket next to the vanity for daily-use items like toothpaste, toothbrushes, and brushes.
– Place a decorative basket by the tub or shower to hold washcloths or bath sponges.
Care and upkeep tips
– Wipe baskets with a damp cloth weekly. Dry them completely to prevent mold.
– Rotate items seasonally so you don’t carry products you won’t use.
– Lift and move baskets instead of dragging them across the floor. It protects both the basket and the surface.
Fast trends that actually help
– Combo sets: small, medium, and large baskets create a layered look that’s easy to maintain.
– Natural textures with a modern twist keep bathrooms feeling fresh.
– Neutral tones with a single bold basket as an accent to draw the eye.
With the right baskets, your bathroom becomes both prettier and more practical. You’ll notice the space feels bigger, cleaner, and easier to keep that way every day.
9. Decorative Baskets for Style and Storage
Editor’s Choice
🛍️
Storage Baskets for Organizing, Woven Decorative Baskets for Shelves – B…
If your shower feels crowded with bottles, a simple caddy can fix it. It keeps essentials in reach and clears the floor. You’ll feel the difference every time you step inside.
Why a shower caddy makes sense
– It stops bottles from piling up on the shower floor. Less clutter means fewer slips.
– You can grab soap, shampoo, and conditioner without reaching into a spray zone.
– It’s easy to move for a quick clean of the shower walls.
– You’ll see what you have at a glance, so you won’t forget refills or deals on new products.
– It cuts down on water drips around the tub or stall, keeping the area a touch drier.
Choosing the right caddy
Think about how your bathroom looks and how you use it. The right caddy blends style with fit.
– Materials: Look for rust-proof options like stainless steel or durable plastic. Bamboo feels warm but needs a dry spot to avoid warping.
– Types: Hanging caddies on a shower rod, wall-mounted units, corner caddies for tight spaces, or over-the-showerhead shelves. If you rent, a no-drill option is worth a try.
– Size and weight: Pick a model with enough shelves for your daily items but not so large it crowds the shower. Heavy bottles should be kept on sturdy shelves.
– Installation: Suction cups work on smooth tiles, but tension rods and wall mounts are stronger in busy showers. Follow the maker’s instructions and test with a light load first.
– Style: Match fixtures and hardware—polished chrome, matte black, or white plastic all work with modern, rustic, or minimal bathrooms.
Placement and setup tips
Measure the space before you buy. Place the caddy where you can reach it without bending or twisting. Keep it away from the direct spray so items don’t loosen.
Steps to set up:
– Clean the wall or rod area; dry it completely.
– Attach the caddy firmly, then test its weight with a few bottles.
– Adjust height if you can reach everything easily while standing straight.
Smart usage tips
– Group items by type: hair care on one shelf, body wash on another, razors in a small basket.
– Use small, removable bins for travel sizes—great for guests or gym trips.
– If space is tight, choose a compact hanging caddy with two shelves and a hook for a washcloth.
Maintenance and honest limits
Wipe the caddy weekly to prevent soap scum and rust spots. Dry after showers to keep metal parts shining. If your shower is very small or uneven, a caddy may feel crowded; in that case, add a slim wall shelf or corner unit instead.
Common questions you might have
– Will it rust? Choose rust-resistant metal or sturdy plastic; check coatings regularly.
– Are suction cups strong enough? They work well on clean, smooth tiles. Re-check after a few weeks.
– How do I clean it? Rinse shelves, wipe with a dry cloth, and remove items for a quick scrub every so often.
With the right shower caddy, your space feels bigger, cleaner, and easier to use. It’s a small change that pays off day after day.
Color-code your storage to fix clutter and cut down on search time. In a small bathroom, color acts like a shortcut for your brain. You’ll grab what you need without digging through a heap of bottles. Plus, you get a cleaner look that still feels calm.
How to set up color-coded storage in your bathroom
– Step 1: Pick a simple color map. Choose 4 colors that go with your decor. For example, blue for skincare, green for hair care, white for cleaners, and gray for tools. Keep it steady—this makes every item easy to find.
– Step 2: Choose containers that show the color well. Use colored bins, baskets, or lids that match your map. Clear bins with colored lids work great because you can see contents while still getting the color cue.
– Step 3: Group items by color zones. Put all skincare in the blue bin, all hair products in green, cleaners in white, and tools in gray. Put the bins within easy reach of your sink or shower so you won’t stretch or bend too much.
– Step 4: Label each bin with both color and text. A small sticker or card that says “Skincare” makes it clear. You’ll thank yourself later when you’re in a hurry.
– Step 5: Keep a visual system tidy. When you add new products, match them to the right color zone. If you run out, swap items into the correct bin so the system stays clean.
Why color-coding works
– Advantages of color-coding: It helps you find items fast when you’re in a rush.
– It adds a playful touch that can blend with your bathroom style.
– It reduces clutter because each item has a home you can see at a glance.
Practical tips to keep it working
– Use sturdy, moisture-resistant containers. Bathrooms are humid, so pick plastics that won’t warp or stain.
– Keep the most-used colors at eye level. That makes grabbing the right bin feel quick and natural.
– Refresh the system as your kit changes. If you add a new color or a new category, expand the map rather than letting things mound up.
– Pair color with simple labels. Even faint text helps you confirm the category, saving seconds and confusion.
Make color-coded storage your default routine. It blends function with style, helps you stay organized, and gives your bathroom a cleaner, more intentional look. With a small setup, you gain calm, quick access, and a space that actually reflects how you use it.
11. Color-Code Your Storage
Editor’s Choice
🛍️
8 Pack Colorful Storage Bins with Lids Stackable Storage Container for O…
Struggling to keep a small bathroom tidy? Your door can become a hidden storage spot that actually works for you. An over-the-door organizer sits right where you need it, without taking up counter space. It turns wasted door area into quick-access storage for daily items and long-used supplies.
Key Benefits:
– Free up counters and floors by tucking items into organized pockets.
– Simple to install and easy to rearrange as your needs change.
– Comes in many materials and looks, so you can match your style from minimalist to bold.
With so many options, you’ll find one that fits your personality and boosts function without clutter.
Choosing the right over-the-door organizer is about three things: how you plan to use it, what your door can handle, and how it looks in your bathroom.
– Material matters: Fabric pockets are soft and quiet, plastic pockets are clear and see-through, metal and wire options are sturdy and easy to wipe. If you have moisture, pick materials that dry quickly and resist mold.
– Pocket design: Look for wide pockets for bigger items like toothpaste and lotion, plus smaller sections for razors, brushes, cotton swabs, and makeup. A mix of deep and shallow pockets helps you see and grab what you need fast.
– Size and fit: Measure your door width and the space above the top of the door. Choose a model that won’t block the door handle or light switch. If your door swings inward, pick a low-profile organizer so it doesn’t get in the way.
How to set it up for real use
– Clear the door area first. Wipe the frame so it sticks cleanly and won’t slide.
– Decide a daily zone. Put toothpaste, toothbrushes, and soap in the top pockets. Put backups like extra toothpaste tubes in the middle. Reserve the bottom for brushes, razors, and larger items.
– Keep one pocket for cleaning supplies or towels. A small lint roller or wipes find a home there.
– Label items or group by task. Seeing “face” near skin care or “soap” near the sink helps you grab fast.
– Try a glass-clear pocket for tiny items like floss picks or bobby pins. Visibility makes a quick grab obvious.
Installation tips that last
– Use removable hooks or over-the-door kits designed for bathroom humidity.
– If your door is thin, line the top edge with a small pad to protect the door and reduce slipping.
– Check weight limits. Don’t overload a single pocket; distribute weight evenly to prevent sagging.
Limitations and care
– Some pockets may snag when opening doors quickly. If that happens, switch to smoother fabrics or shallower pockets.
– Wipe down weekly to prevent mold and soap residue. Let any damp fabric dry fully before hanging again.
Over-the-door organizers are a practical, stylish way to create order in a small bathroom. They offer fast wins—clear counters, quick access, and a clean look—that you can customize as your routine changes.
Transform your small bathroom with an over-the-door organizer! It’s the hidden gem that turns clutter into convenience, freeing up your counters for a serene space.
12. Over-the-Door Organizers for Maximum Storage
Editor’s Choice
🛍️
ULG 1 Pack Over Door Organizer with 5 Large Pockets 10 Mesh Side Pockets…
Small bathrooms often feel cramped. A magnetic spice rack can change that. It sticks to a metal wall or a magnetic board and holds small containers for toiletries or makeup. You’ll free up counter space and grab what you need in a flash.
Benefits of a magnetic spice rack:
– Keeps items visible and within reach.
– Saves counter and drawer space.
– Adds a clean, modern touch to your bathroom decor.
Keep things neat by choosing small, clear containers. Clear jars let you see what’s inside at a glance, so you don’t hunt for products.
What you’ll need
– Small, clear containers with magnetic bases or lids.
– A steel strip, magnetic board, or a metal-backed panel.
– Mounting hardware (screws) or extra-strong adhesive for walls.
– Labels or tape to mark contents.
– Optional: a tiny microfiber cloth for quick wipe-downs.
How to set it up
1) Pick a spot near the sink or mirror. A height that’s easy to reach matters.
2) Make sure the wall surface is magnetic. If not, install a thin magnetic board on tile or paint, or attach a metal strip to a stud.
3) Attach the steel strip or board securely using screws or strong adhesive.
4) Fill the containers with your toiletries or makeup. Label each jar so you can tell them apart fast.
5) Place jars on the rack, keeping frequently used items at eye level for quick grabs.
6) Test the setup. If a jar slips, swap to a stronger magnet or a smaller container.
Smart tips for best results
– Use several small, clear jars instead of one big bottle. They’re lighter and easier to swap.
– Color-code lids or rims to match your bathroom palette.
– Keep moisture-prone items in sealed jars to reduce dampness on surfaces.
– Clean the rack weekly with a quick wipe to prevent buildup.
– Add a few extra magnets if you plan to store heavier items.
Common questions
Q: Can I use this in a rental?
A: Yes, with removable strips or adhesive that won’t peel paint. If you must drill, use a small, unobtrusive anchor and patch later.
Q: Will humidity mess with the magnets?
A: Some magnets can lose grip in damp air. Choose strong, rust-resistant magnets and lightweight containers.
Limitations and alternatives
– It won’t hold heavy bottles or large items. Use a separate shelf for those.
– If the wall isn’t magnetic, add a slim magnetic board or a metal-backed panel to create a surface you can mount jars on.
– For renters, consider temporary adhesive strips or magnetic tins that cling to a painted metal sheet you can remove later.
This setup keeps your bathroom tidy and practical. It’s simple to install, easy to reorganize, and surprisingly stylish. Give it a try, and you’ll notice the room feels bigger the moment you step in.
Small bathrooms don’t have to feel cramped! A magnetic spice rack keeps your essentials visible and saves precious counter space—making your morning routine a breeze!
13. Magnetic Spice Rack for Small Spaces
Editor’s Choice
🛍️
Metal 4 Pack Magnetic Spice Storage Rack Organizer for Refrigerator and …
If your small bathroom feels crowded, you’re not imagining the problem. You need space that works. The simplest fix often sits right in your home. Repurposing items you already own can add charm and clear clutter. It’s budget-friendly and practical. You’ll see space open up, fast.
– Use an old ladder as a towel rack. Lean it against the wall or mount it with brackets. Hang towels and robes easy. Add a few hooks for washcloths if you want extra spots.
– Turn a wine crate into a towel and linen keeper. Stand it on the floor or mount it on a wall. Roll towels and tuck them into the cubbies. Stain or paint it to match your bath style.
– An old shelf can hold baskets and jars for extra toiletries. Place it at a comfortable height. Put small baskets on each shelf for hair products, soaps, and creams.
– Decor boxes become hidden storage. Put lids on top to hide clutter. Use the inside for small items like spare toothpaste, floss, and mini soaps.
– Reused jars are tiny storage heroes. Label them with a marker. Fill with cotton balls, swabs, q-tips, or bath salts. Line them on a tray or shelf for a calm look.
– A hanging shoe organizer on the back of a door or inside a cabinet becomes extra shelves. Clear pockets hold brushes, razors, makeup, and travel bottles. You’ll see what you need at a glance.
– A small wire rack from the kitchen or a metal basket fits on a sink ledge or inside a cabinet. Use it for daily items and to cut clutter. Clip or hook items to keep them from tipping.
Smart plan helps you win space fast. First, pick a spot and measure it. Then choose one repurposed item that fits. The goal is simple: more room, less mess.
– Create a quick mood board to guide color and style. Choose natural wood, whitewashed finishes, matte black, or soft gray.
– Label everything. When you know where things belong, you’ll return items there every time.
– Check moisture and wear. Some repurposed pieces aren’t built for damp spaces. Seal wood. Use jars with tight lids. If something wears out, swap it for a purpose-built piece.
With a few tweaks, your bath looks cleaner and feels bigger. You’ll appreciate the extra space—and you’ll notice the difference soon.
14. Repurposed Items for Unique Storage
Editor’s Choice
🛍️
Simple Houseware 24 Pockets – Crystal Clear Over The Door Hanging Shoe O…
Your small bathroom needs breathing room. The shower curtain rod sits in plain sight. You can turn it into extra storage with a few simple moves.
Benefits of rod storage
– Keeps items off the floor and within easy reach.
– Uses vertical space without crowding the room.
– Lets you swap in new hooks or caddies to fit your decor.
– Is cheap and quick to set up.
– Is easy to remove if you need to change the layout.
Best of all, you can do this without drilling or buying big shelves. It fits renters and homeowners alike, and it adapts as needs change.
Small tweaks make a big difference. You can add a pop of color with bright hooks or keep it sleek with brushed metal. Either way, your shower becomes neater and calmer.
Steps to set it up
– Measure the space between the curtain rod and the ceiling to pick a good height for a second rod or hooks.
– Choose a setup. Option A uses a second tension rod above the curtain rod. Option B uses S-hooks on the existing rod.
– Install the rod or hooks.
– Test the setup by gently tugging at the items. Make sure it stays in place.
– Decide what goes where. Place washcloths and brushes on the second rod. Put small bath products in a pocket caddy or basket on the edge.
– Choose materials that won’t rust in a damp bathroom.
What to hang on the rod
– Washcloths on S-hooks for quick drying and easy grabbing.
– Loofahs, bath brushes, and razors on hooks that won’t snag skin.
– A slim, waterproof caddy for shampoo, body wash, and soap bars.
– A tiny rack or pocket organizer for razors, lotion, and extra blades.
– A towel or two if you have space.
Style and care
– Choose rust-resistant metal or sturdy plastic. Match finishes to your faucet or hardware.
– Use color coded hooks to help family members find their items fast.
– Keep baskets lightweight and easy to wipe down. Rinse and dry them weekly.
– Clean the rod and hooks every couple of weeks to prevent mildew.
Limitations to keep in mind
– Heavy products can pull on the rod and loosen the grip.
– Not all bathrooms have wall space for a second rod. You may need a simple set of hooks.
– If the curtain can’t move freely, test the setup before adding heavy items.
15. Stylish Shower Curtain Rod Storage
Editor’s Choice
🛍️
Black Shower Curtain Rod 31 to 80 Inch,1 Inch Diameter Adjustable Spring…
If your small bathroom feels crowded, a ladder shelf can fix it. It uses vertical space and stays slim on the floor. You get extra storage without blocking the room. It’s easy to move if you ever rework the layout.
Benefits of a bathroom ladder shelf:
– Vertical storage that saves precious square feet.
– An inviting, warm look that blends with many styles.
– A perfect spot to display pretty bottles, soaps, or tiny plants.
– Easy access to everyday items, so you don’t hunt for towels or extras.
Place it in a corner to make a practical feature that also looks intentional.
Materials and style to consider
– Wood shelves bring warmth. Think teak, bamboo, or painted pine with a moisture seal.
– Metal ladders stay sleek and modern. Powder-coated finishes resist humidity.
– A mix of wood and metal can blend rustic and contemporary vibes.
– Pick finishes that dent and warp less in damp air. A simple seal or varnish helps.
Where to put it and how to load it
– Choose an inside corner near the sink or toilet for quick access.
– Install against a wall, ideally near studs for strength. If you can’t, use strong wall anchors.
– Top shelves should hold light items first. Reserve heavier bottles for lower rungs.
– Don’t overfill. Keep the look clean and safe by avoiding top-heavy stacks.
Practical ways to style it
– Top shelf: a small plant, a scented candle, or a decorative bottle.
– Middle shelves: rolled towels or small fabric baskets.
– Lower shelves: extra toilet paper or cleaning supplies tucked in a basket.
– Add a non-slip mat at the base if the ladder sits on a tile floor.
Setup and safety tips
– Secure the ladder to the wall with an anti-tip strap if you’re near a high-traffic area.
– Use soft, non-scratch feet to protect your floor and keep the shelf steady.
– Check screws and brackets every few months. Tighten loose parts right away.
– If moisture is a lot in your bath, choose seals and finishes that resist mold and swelling.
Common questions you might have
– Will a ladder shelf fit in a tiny bathroom? Yes, if you pick a narrow unit and measure the corner first.
– Can it hold heavy items? Look for models with reinforced joints and a strong wall mount. Use lighter items on the top and medium weight on the middle.
This ladder shelf is a practical upgrade that adds storage and style. It keeps your bath neat, calm, and easy to use every day.
16. Bathroom Ladder Shelf
Editor’s Choice
🛍️
Homykic Bamboo Bookshelf 4-Tier Ladder Shelf, 49.2” Freestanding Open Bo…
If your tiny bath feels crowded, a small stool can become your best helper. It gives you a surface you can see and touch, plus a place to stash items. A stool with a clean line or a warm wood tone can fit many styles, from modern to cottage. It’s not just decoration; it’s a practical tool you’ll reach for every day.
Advantages of using a stool:
– Extra seating when you need a quick sit-down.
– Storage that sits quietly in a corner or beside the vanity.
– Adds a layered, finished look to your bathroom.
Choose a stool that fits your space. Think about how you use the room and pick a size that feels right. The best stools stay sturdy but aren’t hard to move. If you have children or a slippery floor, look for non-slip feet and rounded edges.
How to use it for display
– Make the top a tiny stage. Roll a towel into a neat bundle, place a small plant, and add a pretty soap dish or candle. The mix of textures—a soft towel, a smooth ceramic dish, and a live plant—creates warmth.
– Keep it simple. Use two or three items that share a color or material to avoid clutter.
– Change with the season. Swap in a scented candle for winter, a vase with a fresh bloom in spring, or a minimal sculpture for summer.
How to store with it
– Put a slim basket under the stool seat or on a lower shelf to hide small items like makeup wipes or razors.
– Use the space around the legs for low-profile storage bins or rolled towels stacked in a neat row.
– Group items by use—bath, face, hair—so you grab what you need in one motion.
Materials and styles to consider
– Wood: warm, timeless, and easy to pair with wood vanities.
– Metal: sleek, modern, and sturdy; look for a rust-resistant finish in chrome, brass, or black.
– Rattan or resin: light, easy to wipe clean, and beachy in feel.
– Cushioned tops: a soft touch that also softens a room’s vibe.
Safety and care
– Check stability before every use.
– Wipe down with a damp cloth to remove moisture after showers.
– Protect the finish with a light coat of furniture wax or a bathroom-safe wipe.
Your bathroom stool should feel like a natural part of the room. It stores what you need and shows off small decorative accents. Try a stool you can pull into view when you get ready, then tuck away when guests arrive.
17. Use a Bathroom Stool for Display & Storage
Editor’s Choice
🛍️
Dreambaby Step Stool for Kids – Non-Slip Base and Contoured Design for T…
Struggling to keep bathroom drawers tidy? Drawer dividers can turn a cluttered spot into calm, easy-to-use space. You’ll know exactly where to reach for every item.
Benefits of using drawer dividers:
– Keeps everything in its place, so chaos fades away.
– Makes finding items a breeze, since each piece has its own slot.
– Adjustable to fit your drawer and changing needs.
– Protects items from rubbing and bumping as you open and close.
With the right dividers, you gain real breathing room in a small bathroom.
– Adjustable plastic dividers work well in most drawers. They bend to fit odd widths and stay put.
– Expandable bamboo dividers bring a natural look. They handle humidity and add warmth to the space.
– Clear acrylic trays help you see every item at a glance. They’re sturdy and easy to clean.
Materials and care
Choose dividers that resist humidity. Acrylic or coated plastics hold up well in a damp bathroom. If you like wood, opt for sealed bamboo and wipe it down weekly. A thin non-slip liner keeps items from sliding when you open the drawer.
Practical placement ideas
Use the space for small items that tend to vanish. Lipsticks and eyeliners stay upright in slim sections. Cotton pads and swabs fit neatly in shallow troughs. Razors and travel bottles go in wider compartments. Think about your morning routine and place the items you grab first at the front.
Sizing and setup tips
– Measure the inside width, depth, and height of the drawer. Note any curved edges.
– Plan zones for makeup, toothbrushes, and bath products.
– Add a non-slip liner to keep dividers and items in place.
Installation steps
1) Empty the drawer and wipe it clean. 2) Place the dividers where you want each zone. 3) Adjust to snug fits. 4) Return items, spreading weight evenly. 5) Open and close several times to test.
Maintenance and tweaks
Dust regularly and wipe spills quickly. If a section feels loose, reconfigure or swap in a different divider. Change your setup as your routine evolves.
Common questions
– Do I need a drill or screws? Most people succeed with adjustable, no-drill options.
– How can I handle oddly shaped items? Flexible dividers adapt to tougher layouts.
Quick wins to try now
– Create a lipstick and compact area with tall, slim dividers.
– Make a cotton and swab pocket in a shallow tray.
– Reserve a wide space for travel bottles for trips and at-home touch-ups.
18. Drawer Dividers for Easy Organization
Editor’s Choice
🛍️
Vtopmart 12 Pack Drawer Dividers for Clothes, 4″ High 10.2″-16.6″ Adjust…
Your vanity is a hidden gold mine. With the right storage, you gain space, not clutter. Here’s how to make compact vanity storage work for you.
Plan before you buy
Measure the depth, width, and height of each drawer. Note the top surface too. A simple sketch helps you see what fits. Plan around your everyday items so you don’t overfill.
Choose compact organizers
Look for slim, stackable bins that fit inside drawers. Clear acrylic helps you spot products at a glance. Bamboo or metal options add style and durability. Avoid bulky trays that block the whole drawer.
Organize inside the drawers
Use dividers to separate cosmetics, hair products, and skin care. Stack bins to create levels so you can see everything. Place the items you use most often at the front.
Make the top surface useful
Keep just daily essentials on top: toothbrush, toothpaste, a small lotion, a mirror. Use a slim tray or a shallow caddy to gather items. Move rarely used products off the top to the drawer or a cabinet.
Label and maintain simplicity
Label bins or sections so you know where to return items. Do a quick weekly sweep to keep the system tidy. If something doesn’t fit, rethink the layout rather than buy more.
Match materials and style
Pick finishes that match your bathroom: matte plastic for a modern look, glass for a crisp vibe, wood for warmth. The right finish makes the space feel calm, not crowded.
Realistic limits and smart tweaks
Not every vanity has drawers, and not every item fits the same way. When drawers aren’t an option, add slim shelves, or a slim wall-mounted organizer next to the vanity. You can still gain space without buying a full redesign.
This approach yields a calm, easy-to-use vanity. You’ll save time getting ready, and you’ll notice the space look cleaner right away. With a little plan and smart choices, compact vanity storage turns chaos into calm.
Your vanity is a hidden gem! With compact organizers, you can turn clutter into clever storage solutions. Measure, plan, and watch your small bathroom organization transform into a stress-free oasis!
Countertops in a bathroom can fill up fast. A single decorative tray helps you give every piece a home. You’ll keep daily essentials within reach and still leave space to move.
Place the tray where you wash up—on the vanity or near the sink. Group items by use: soap, lotion, hand cream, a toothbrush mug, a small plant, a candle, or a decorative pebble. The tray becomes a tiny stage that makes each item easy to grab and put back.
Benefits of using trays:
– Creates visual order on surfaces
– Keeps similar items together for quick use
– Adds a touch of style to your decor
Choose a tray that fits your space without crowding it. Look for a flat base for easy cleaning and rounded edges for safety. Pick a material that cleans well in a damp room and matches your style.
– Materials to consider: ceramic, glass, wood, bamboo, metal, or a mix
– Sizes range from small to large. A small tray holds soap and a tube of lotion. A larger tray can cradle a bottle of sanitizer, a candle, and a plant
– Styles stay popular: modern, rustic, coastal, and minimalist metal
How to use decorative trays effectively:
– Start with one tray in view where you wash hands or brush teeth
– Group items by habit: daily care, fragrances, and décor
– Limit to 4–5 items so the surface doesn’t feel crowded
– Keep it clean by wiping spills as soon as you notice them
– Wash the tray every week or two
Placement ideas that work:
– On the bathroom vanity, under a mirror, with soap, lotion, and a small plant
– On a bathroom shelf, using a longer tray to line up items in a neat row
– By the tub or shower niche, for towels and bath products, as long as the tray resists moisture
Care and maintenance:
– Wipe with a damp cloth, then dry completely
– Use a coaster under any wet item to prevent rings
– If you choose wood, treat it with a sealant to resist water
Common questions:
– Will a tray trap moisture? It can stay tidy if you choose a water-safe material and wipe spills promptly
– How many items should a tray hold? Start with 4–5 daily essentials and add only if space allows
– Can you switch trays seasonally? Yes. A lighter basket in summer and a solid ceramic tray in winter refresh the look
Limitations:
– A tray helps, but a crowded drawer or shelf still needs decluttering
– It won’t replace honest cleaning and daily organization habits
With the right decorative tray, your countertop becomes a calm, easy-to-use space. It makes daily use simple and fast.
20. Decorative Trays for Countertops
Editor’s Choice
🛍️
Travertine Tray, Small Ceramic Vanity Tray for Bathroom Counter Decor, R…
That blank spot above the toilet wastes space you could use. It doesn’t have to stay empty. A slim shelf, a small cabinet, or a decorative ladder can turn that wall into a handy storage zone. You’ll keep towels, boxes, or even a tiny plant within easy reach. Plus, it adds height and a simple focal point to your bathroom.
Why use this space
– It makes use of area most people skip.
– It brings vertical interest to your room.
– It adds storage without crowding the floor.
Choose items that serve a purpose and look good with your bathroom’s style.
Ways to store up high
– Slim floating shelf across the wall. It holds towels, rolls of TP, or a few decorative boxes.
– A narrow cabinet with doors to hide clutter neatly from sight.
– A decorative ladder to drape towels or display small plants.
– Baskets or bins stacked on a small, sturdy shelf for quick access.
How to install it without a hitch
1) Measure the space. Note the width above the toilet and how high you want the items to sit.
2) Pick a style. Decide between open shelves, a closed cabinet, or a ladder look.
3) Choose moisture-friendly materials. Bamboo, sealed wood, metal, or acrylic work well in damp bathrooms.
4) Secure it properly. Fasten into wall studs when possible. If you can’t hit a stud, use wall anchors rated for bathrooms and heavy items.
Practical setup ideas you can use today
– Roll towels and washcloths in a chic basket so they’re easy to grab.
– Keep extra toilet paper in a slim rack or a decorative bin.
– Add a small plant or a faux plant to bring a fresh touch without extra maintenance.
– Use decorative boxes or organizers for wipes, cotton swabs, and first-aid supplies. Just don’t store medicines in this space; keep them in a medicine cabinet or chest height.
Tips for staying tidy
– Put a lightweight tray on the shelf to corral small items.
– Check the hardware every few months; tighten screws if you hear rattle or feel looseness.
– Dust weekly and wipe surfaces with a quick spray and cloth.
Is it worth the effort? If you want more storage without adding bulky furniture, yes. This space can dramatically improve how clean and organized your bathroom feels. Start small, pick one option, and test what works best for you.
21. Utilize Above the Toilet Space
Editor’s Choice
🛍️
BAYKA Floating Shelves for Wall, Wall Mounted Rustic Wood Shelves for Ba…
Feeling overwhelmed by cleaning gear scattered around the bathroom? You don’t have to be. A dedicated cleaning supply station puts everything in one safe spot, so you can clean faster and with less stress. You’ll see the difference as soon as you open the cabinet or pull up the cart. Everything you need is within reach, and nothing gets in your way.
Why have a cleaning supply station?
– It cuts the time you spend hunting for products.
– It makes cleaning feel smoother because tools are in clear groups.
– It hides clutter while keeping items easy to grab.
A well‑made station helps you stay on task. You’ll know exactly where to find disinfectant, cloths, and brushes every time.
What to include in your station
– Disinfectants and spray bottles in one bin or caddy.
– Rags, microfiber towels, and sponges in another.
– Gloves, scrub brushes, and a small squeegee in a third.
– Paper towels or wipes, trash bags, and spare spare handles or clips.
– Extra tools like a small brush, lint roller, and a spare cloth for quick touch‑ups.
Keep each category in its own container so you can grab what you need without digging.
Best setup and layout
– Pick a housing that fits your space: a slim caddy, a clear bin, or a compact rolling cart.
– Use multiple bins or baskets to separate tasks—one for daily wipes, one for deep cleaning, one for tools.
– Label each bin with simple words so you can see what’s inside at a glance.
– Place the station near the sink or by the bathroom door for easy access when you start or finish a cleaning round.
If you have kids, store cleaners out of reach and consider a small lockable bin. Safety first.
Placement, safety, and routine
– Mount or tuck the station where it won’t tip or spill. Keep liquids capped.
– Choose containers that are easy to wipe down. Plastic bins are forgiving and affordable.
– Do a quick weekly check: recycle old rags, toss expired products, and wipe the interior shelves.
A realistic routine keeps your station useful. For example, use the spray and cloth for quick daily cleans. Reserve a weekly slot for deep scrubbing with brushes and tougher products.
Money and maintenance tips
– Use inexpensive containers you already have, or grab affordable bins at the dollar store.
– Keep a small, reusable label maker or simple tape with a marker for quick labeling.
– Refresh the look with a fresh wipe-down every month; it keeps the space feeling neat.
Step-by-step implementation
– Step 1: Measure your space and choose containers.
– Step 2: Gather items you regularly use and sort them.
– Step 3: Arrange into labeled bins near your sink or door.
– Step 4: Do a quick test clean. Adjust placement if you reach for something and it’s not handy.
– Step 5: Do a monthly check to refresh and reorganize if needed.
With a Cleaning Supply Station, you reclaim time, cut mess, and keep your bathroom tidy and ready for action. Start small, stay consistent, and watch clutter fade away.
Is your shower squeezing every ounce of space from a tiny bathroom? Here’s a simple fix that actually works: use shower hooks for extra storage. They’re cheap, easy, and move with you if you switch layouts later. Hang daily items within reach, and you’ll notice a cleaner counter and a calmer vibe in seconds.
Benefits of shower hooks
– Keeps items off the floor and neatly arranged.
– Lets you grab what you need without rooting through baskets.
– Adds style with different looks—from chrome to matte black to pastel plastics.
Choosing the right hooks
– Materials matter. Stainless steel and brass resist humidity better than cheap plastic. Silicone options stay flexible and rust-free.
– Finishes count. Pick a finish that matches your faucet and hardware for a cohesive look.
– Weight limits matter. Use hooks for light items like loofahs, washcloths, and small pouches. Skip heavy bottles.
Where to place them
– On a towel rod or the edge of a shower rod for easy reach.
– On tiled walls with strong adhesive hooks or removable suction hooks for renters.
– Inside the shower door frame if you have one. It’s often the calmest spot and keeps items visible.
Quick-start setup
– Clean the surface well. A dry, clean spot helps hooks grip longer.
– Measure and mark. Space hooks evenly so items don’t crowd each other.
– Install and test. Press into place or screw in gently. Hang items and give a light tug to check weight.
– Tidy any drips. Wipe away water to prevent rust on metal hooks.
Smart organization ideas
– Create zones. Put body care items in one area, beauty products in another, towels and cloths in a separate section.
– Use small breathable pouches. Place razors, combs, and tiny bottles inside. Mesh bags work great here.
– Color code. Use color to identify items at a glance. For example, blue pouches for body wash, white for skincare.
– Dry between uses. Let items dry after showering to prevent mold and odors.
Care tips to keep hooks lasting
– Dry hooks after use to slow rust or corrosion.
– Replace worn or loose hooks right away. A loose hook can slip and spill items.
– Avoid overloading. If you notice sagging, move some weight to another hook or switch to a stronger option.
Common questions
– Will hooks damage tiles? Use lightweight items and proper anchors. Avoid forcing hooks into grout or delicate surfaces.
– How many hooks do I need? Start with 4 to 6 for most showers. Add more if you have long walls or lots of items.
– Can I remove them easily later? Yes. Choose removable adhesive hooks for renters, and clean the area before removing.
This simple strategy makes your shower feel bigger and your routine easier. With the right shower hooks, you gain real storage without sacrificing style.
If your bathroom feels crowded, seasonal storage can be a lifesaver. You don’t need to cram more into the space you have. You just need to move what you don’t use right now out of sight. With the right bins, swapping items as the seasons change becomes quick and easy.
Why seasonal storage helps:
– It frees space for the things you reach for every day, like soap, toothpaste, and daily towels.
– It keeps the room looking clean and uncluttered, so you feel calmer when you walk in.
– It makes it simple to swap in off-season items without digging through piles.
Getting started is simple. Here are five practical steps you can follow this weekend.
– Step 1: Do a quick inventory. Separate what you use year-round from what you only reach for during certain months or holidays. Put the rest in a pile for seasonal storage.
– Step 2: Decide which seasons you’ll store by. Common choices are winter, spring, summer, and holiday decor. Pick a system that matches how you actually use your bathroom all year.
– Step 3: Choose the right containers. Opt for clear or semi-clear bins so you can see what’s inside. Use stackable versions with tight lids to keep moisture out. Consider fabric bins with lids for a softer look, but make sure they’re sturdy.
– Step 4: Pack by season and label clearly. Put all towels, decor, or bulk items for one season into a bin. Use waterproof labels or tape to mark the season and contents. Put heavier items on the bottom and lighter ones on top.
– Step 5: Find a dry, accessible spot for storage. A high shelf in a linen closet, a garage cabinet, or a tall pantry works well. If your bathroom stays damp, avoid putting boxes directly on the floor. Keep a small daily-use bin in the bathroom for moment-to-moment items, so you don’t have to open the seasonal stash every day.
Smart tips to keep the system working
– Use clear bins so you can spot items fast. If you must hide color, use color-coded lids or labels.
– Protect textiles by folding neatly and using vacuum-sealed bags for bulky towels or blankets. Don’t store damp items.
– Keep a short, rotating list. Each season, swap in the next batch and remove anything you no longer need.
– Add a slim over-the-door organizer for things you reach for weekly, like floss, razors, and spare soaps.
What you gain from seasonal storage is real. Your sink area stops dripping with clutter. Your counter stays calm and clean. When the weather shifts, you can rotate items in minutes without chaos. Give it a try this weekend, and you’ll feel the difference every morning as you get ready.
In a small bathroom, every inch matters. You need space for basics and a calm look. Multipurpose furniture makes this possible. A bench that hides things. A cabinet that also serves as a seat. These pieces add storage without crowding the room.
Benefits
– Flexible in tight spaces.
– Makes the most of your square footage.
– Two jobs in one piece save clutter and keep the floor clear.
Practical examples
– Storage bench at the end of the tub or by the vanity. Lift the lid to stash towels, washcloths, or cleaners. It doubles as a seat when you need to reach a high shelf.
– Wall-hung cabinet with a cushioned top. Sit on it while you dry hands or apply lotion. The seat feels soft; the cabinet stays neat underneath.
– Compact vanity with built-in drawers and a hidden compartment. It hides brushes, toothpaste, and small bottles. Some models add a recessed shelf to keep items in reach.
– Folding stool that tucks behind a vanity or door. Use it for shaving, applying makeup, or drying hands. Slide it away when not needed.
Materials and styles to consider
– Moisture-resistant finishes like vinyl, sealed wood, or coated MDF. They last in humid baths.
– Soft-close hinges on drawers cut noise and wear.
– Neutral colors mix with most tiles. Or pick a bold piece to stand out.
How to choose the right piece
– Measure your space first. Note door swings and light.
– Check weight limits. You’ll sit or lean on it, so make sure it can handle daily use.
– Think about your daily routine. If you shower first, place towels where you can reach them.
Placement ideas
– Put a bench where you stand most for dressing or drying off.
– Mount a cabinet above the sink to free floor space.
– Use a corner shelf with a seat for a tight corner.
– Keep the floor clear so the room feels bigger.
Maintenance tips
– Wipe surfaces daily to avoid soap scum.
– Tighten screws every few months.
– Clean fabric cushions as directed.
With multipurpose furniture, you get style and function in one piece. You save space and still have what you need close at hand. It helps a small bathroom feel calm and organized.
25. Invest in Multipurpose Furniture
Editor’s Choice
🛍️
DUMOS 30in Foldable Storage Ottoman Bench, Storage Chest, End of Bed Foo…
Maximizing space in a small bathroom doesn’t have to be a daunting task! With these 25 organization hacks, you’re well-equipped to turn your cluttered sanctuary into a beautifully organized retreat. From clever storage solutions to creative decor ideas, every square inch can contribute to a serene atmosphere.
Get inspired and tackle your bathroom organization today!
Note: We aim to provide accurate product links, but some may occasionally expire or become unavailable. If this happens, please search directly on Amazon for the product or a suitable alternative.
This post contains Amazon affiliate links, meaning I may earn a small commission if you purchase through my links, at no extra cost to you.
Frequently Asked Questions
What Are Some Simple Storage Solutions for Small Bathrooms?
If you’re looking for effective storage solutions in your small bathroom, consider going vertical with shelves or using the inside of cabinet doors for extra space. You can also utilize clear storage containers to easily see and access your items, or try decorative baskets that combine style with functionality. These hacks will help keep your bathroom organized and clutter-free!
How Can I Maximize Space in My Tiny Bathroom?
Maximizing space in a tiny bathroom can be achieved through space-saving tips like using a rolling cart for mobile storage or hanging organizers for small items. Don’t forget to utilize above-the-toilet space with slim shelves or cabinets. Each inch counts, so think creatively about how you can use vertical and hidden spaces to your advantage!
What Are the Benefits of Using Clear Storage Containers in a Small Bathroom?
Clear storage containers offer a great way to organize your bathroom without adding visual clutter. They make it easy to see what’s inside, which speeds up your morning routine. Plus, they can be stacked neatly in cabinets or on shelves, making the most of your available space. Say goodbye to chaotic drawers and hello to streamlined organization!
How Do I Create a Cleaning Supply Station in My Bathroom?
Creating a cleaning supply station is simple and effective for managing clutter! Dedicate a specific area, like a cabinet or a shelf, for all your cleaning supplies. Use small bins or caddies to keep items grouped together, making it easy to grab what you need without rummaging through other items. This not only saves time but also keeps everything tidy and accessible!
Can Seasonal Storage Help Reduce Clutter in a Small Bathroom?
Absolutely! Seasonal storage is a fantastic way to reduce clutter in a small bathroom. By moving out items you don’t frequently use, like heavy towels or seasonal decor, you can free up valuable space. Consider storing these items in bins or under the sink to keep your bathroom feeling spacious and organized year-round!
I put this together because a clean, calm bathroom counter can start your day on the right foot. If you live in a small space or share a bathroom with others, clutter on the counter can slow you down. Why I made this post is simple: I want to share twenty practical bathroom countertop organization hacks you can try this week, without breaking the bank.
Who it’s for includes anyone who wants a neat space but hates complicated setups. From tiny apartments to busy family bathrooms, this guide is for you. This set of ideas stays practical and realistic, not a big, fancy overhaul.
What you’ll get is real help you can use today. You’ll learn how to carve out zones on the counter, pick the right trays, and keep everyday items within reach. Plus, number 5 will surprise you.
We cover materials and styles that fit most baths, like clear acrylic organizers, bamboo trays, and soft silicone mats. These tricks blend function with style, so your counter looks neat and still holds the products you use every day.
Each idea comes with simple steps you can try in minutes. You’ll see how to group items, label containers, and keep the system going with a quick daily reset.
Not every hack fits every space, and that’s okay. Try one or two at a time, test what works, and tweak as needed. Your bathroom can feel bigger, calmer, and more organized when you take these small actions.
Is your bathroom counter crowded with bottles, brushes, and tubes? A busy surface wastes time and adds stress. Tiered storage trays help you reclaim space and speed up routines. They use vertical space so you can see and reach what you need.
These trays stack items in clear levels, so you see what you own at a glance. You can group things by routine, which makes morning skincare, makeup, and hair tools easier to grab. When items sit on different shelves, clutter stays off the counter and out of sight until you need them.
Styles that fit different bathrooms
A rustic wood tiered tray brings warm farmhouse charm. A sleek metal or clear acrylic tray looks clean and modern. Match your counter by color or choose a contrasting finish to add a playful accent.
– Group your products by type or daily use to speed up routines.
– Label each tier with a simple name or icon so you know exactly where to reach.
– Pick colors that complement your bathroom decor to keep the scene calm.
– Choose moisture-resistant materials if your counter is near a sink.
– Make sure the tray base is stable and level to prevent spills.
Practical setup ideas
Place the tier near the mirror or sink for quick access during your routine. If you have a small counter, keep the top tier for the most-used items. Put less-used products on the lower levels to stay organized without crowding your view. Experiment with height so the top shelf is easy to reach while you stand straight.
Maintenance keeps it looking new. Wipe the trays regularly with a mild cleaner to remove soap scum. Dry after cleaning to avoid water marks. Check the weight limit and avoid overloading one shelf.
What’s trending and worth trying
Modern trends favor compact, stackable designs that save space. Look for trays in bamboo, matte black metal, or clear acrylic to create a light, airy feel. These materials stand up to moisture and wipe clean easily, so you stay organized with less hassle.
Ready to test this approach? Here’s a quick setup plan.
– Step 1: Measure your counter space to know what size tray fits without crowding the sink.
– Step 2: Pick a tray material and finish that resists moisture and fits your decor.
– Step 3: Arrange items by routine and place the most-used items on the top level.
– Step 4: Label each tier and test stability, then adjust as needed.
With a few small changes, you gain a cleaner counter and a smoother start to your day.
1. Tiered Storage Trays
Editor’s Choice
🛍️
VAEHOLD 2 Tier Lazy Susan Turntable Spice Rack Organizer for Kitchen Cab…
If your bathroom counter always looks crowded, you’re not alone. You want space for the basics and a place that feels calm. Floating shelves above the counter give you both. They add usable storage and become a small showcase for decor. Wood shelves bring warmth. Glass shelves give a light, modern look. Pick what fits your space and mood.
Think about moisture when you choose. Wood with a durable finish handles splashes better. Glass is slick and easy to wipe. If you share the room with kids or guests, go with sturdy brackets and a solid mounting plan. The goal is clean lines, less clutter, and a shelf that lasts.
How to pick the right floating shelves
– Material matters: warm wood, clear glass, or metal for an urban vibe.
– Depth and length: match the shelf to the counter area and what you plan to store.
– Weight capacity: heavier items need stronger hardware and solid studs.
– Finish and edge: smooth edges protect against bumps and water splashes.
– Color or texture: choose a tone that blends with your vanity or creates a bold contrast.
Installation basics you can do this weekend
– Find wall studs: shelves stay solid when anchored into studs.
– Gather proper hardware: choose mounting brackets or a dedicated floating-shelf system rated for bathroom use.
– Level the shelf: a quick look with a level saves you from tilting items later.
– Drill pilot holes: start small to keep the wall intact.
– Attach brackets or the mounting rail: tighten evenly so the shelf sits flat.
– Place and secure the shelf: check again for level, then fasten all screws.
– Add a little sealant if needed: a thin line at the edges helps keep moisture away.
Practical ways to use floating shelves
– Use attractive baskets: they hide daily clutter like cosmetics, razors, and cotton rounds.
– Display items on purpose: place a couple of white candles, a small plant, or a few favorite books.
– Group by use: keep daily items together so you can grab them fast.
– Balance the look: lighter items on one end, a heavier decor piece on the other to keep the shelf stable.
Maintenance and safety tips
– Wipe spills quickly with a soft cloth; moisture is your enemy over time.
– Check the mounts every few months and tighten if needed.
– Keep heavy items toward the center to reduce sway.
Common questions you might have
– Will wood warp in a humid bathroom? Choose a sealed or painted finish and dry the shelf occasionally.
– Do glass shelves crack? Use tempered glass and avoid banging objects on the edge.
– How high should they be? Put them where you reach easily—near the sink but not in the way of every daily motion.
Floating shelves can turn storage into a design element. They’re simple to install, easy to style, and surprisingly durable when built for bathroom use. Start with one set, and you’ll see the space open up in seconds.
Floating shelves are the secret ingredient to a clutter-free bathroom countertop! They not only add storage but also showcase your style—choose wood for warmth or glass for a sleek look.
2. Floating Shelves
Editor’s Choice
🛍️
BAYKA Floating Shelves for Wall, Wall Mounted Rustic Wood Shelves for Ba…
If your bathroom counter feels crowded, clear acrylic organizers can fix it. They keep items in sight and within reach. They give the space a clean, upscale look. Their transparency helps you see what you have at a glance.
Key benefits
– Easy to clean and maintain.
– Clear visibility helps you spot when you’re running low.
– Small items stay visible and don’t get buried in clutter.
Practical setup tips
– Measure your space first. Note width, depth, and height. Then pick a few organizers that fit without crowding.
– Group items by use. Put skin care in one tray, makeup in another, and cotton swabs in a shallow bowl.
– Mix tall and shallow pieces. Tall trays suit serums and bottles. Shallow organizers work well for cotton pads and tools.
– Leave a little space between pieces. Air flow keeps everything looking tidy and easy to wipe down.
– Think in layers. Put the items you reach daily at the front, behind them place backups or less-used products.
– Use labels on the outside if helpful. A small note can remind you what goes where, without clutter.
Storage ideas that actually work
– Cotton swabs, cotton rounds, and floss picks in slim, shallow trays.
– Serums and small bottles in a nested set of cubed organizers.
– Q-tips and bandages in a tiny, clear dish for quick access.
– Lip glosses and small makeup items in a shallow, long tray to keep them from rolling away.
– Jewelry or hair ties in a tiny sectioned box to stop tangling.
Placement and care
– Place the organizers near the sink or mirror for easy grab-and-go use.
– Keep them away from direct water splashes to protect the surface and the items.
– Clean weekly with mild soap and water. Wipe dry to avoid streaks.
– For fingerprint smudges, use a microfiber cloth. A quick wipe keeps the glassy look.
Common questions
– Are they durable? They hold up well when you handle them gently. Avoid dropping them on hard tiles.
– Do they fit every style? Yes. Clear acrylic blends with wood, metal, and ceramic accents.
– Will they feel flimsy? They’re sturdy, but pick the right thickness for your load. If you stack a lot of heavy bottles, choose a sturdier set.
Limitations to know
– They show every smudge. Regular wiping helps keep them pristine.
– They can trap water on the edge if you place them too close to the sink. Keep a small gap to let moisture escape.
Trends and style tips
– Pair with natural wood or soft metals for a balanced look.
– Choose sets with varied depths to create visual interest without clutter.
– Keep the color palette simple. Clear pieces let your products stand out.
Take a few minutes to plan your layout. Then you can enjoy a calmer, more organized counter every day.
Struggling with a crowded bathroom counter? Repurposed containers can fix that fast. Using jars, tins, or old mugs gives you affordable storage with a personal touch. It’s a simple swap that clears clutter and adds character to your space.
What to gather
Think about what you already own. Glass jars, metal tins, and ceramic mugs are all good options. They should be clean, dry, and easy to reach. Your goal is quick access for everyday items without creating a mess. Keep a small tray or shallow dish handy to group similar containers together. This makes the whole setup feel intentional, not random.
Creative ideas you can try
– Paint jars in colors that match your bathroom theme. A fresh coat can tie the room together.
– Use vintage tins for a rustic or retro vibe. They look great on a simple metal or wooden tray.
– Decorate containers with ribbons or twine for a charming finish. A small label or chalkboard sticker helps you spot what’s inside at a glance.
– Mix shapes and heights. Tall jars work great for brushes or toothpaste, while short jars hold cotton rounds or q-tips.
– Put a few containers in front of a mirror or under a wall-mounted cabinet. You’ll free up counter space and keep essentials close.
Practical setup steps
1) Empty and clean everything. Let items dry completely before you reuse them.
2) Decide roles for each container. For example, toothbrushes in a tall jar, cotton balls in a shallow dish, makeup brushes in a wide mug.
3) Pick a color or finish that fits your style. If you choose paint, use a water-based product that’s easy to clean.
4) Add liners or soft padding inside jars if you plan to store items with rough edges. This protects brushes and keeps things quiet.
5) Group your containers on a small tray or organizer. Place it near the sink for easy access and quick cleanup.
6) Label lids or edges with a chalk label. It helps you identify contents fast and swap items as needed.
Durability and hygiene tips
Glass and ceramic are easy to wipe down, but they can break. If you share the drawer with lively kids, keep heavier items in sturdy mugs rather than tall glass jars. Avoid porous materials that soak up moisture or odors. Clean weekly, and dry everything well after washing. If steam is a problem, choose containers with lids or use spill-proof designs.
Limitations to keep in mind
Repurposed containers work best for light, everyday items. They may not hold large toiletries or heavy tools. If space is very damp, some finishes can wear faster. In those cases, switch to sealed containers or choose materials designed for bathrooms.
The payoff
You gain a tidy, personalized counter in minutes. It costs little and lets your style shine. Plus, you’ve got a simple DIY project that you can tweak anytime. Repurposed containers turn everyday items into smart storage—and they look great doing it.
Repurpose what you already own! Transforming jars and mugs into bathroom countertop organization solutions not only clears the clutter but adds a personal touch to your space. It’s amazing what a little creativity can do!
4. Repurposed Containers
Editor’s Choice
🛍️
Anchor Hocking Heritage Hill 1 Gallon Glass Jar with Lid, Set of 2
Struggling with a cluttered bathroom counter? A magnetic strip might be the quick fix you’ve been looking for. It uses vertical space so the countertop stays clean and calm. You can mount it where you need it most and reach for items without digging through drawers.
What you gain from this small upgrade
– Save counter space by going vertical. A slim strip on a cabinet door or wall keeps daily tools out of the way but in sight.
– Prevent loss of tiny items. No more fishing for tweezers or small scissors under a stack of makeup.
– Easy to customize with different lengths and mounting options. You can pick a strip that fits your space and style.
– Simple installation that doesn’t require a pro. Use screws for durability or strong adhesive for quick setup.
This approach gives you instant access to what you use every day while preserving surface area for taller bottles and brushes.
Where to put it and what to mount
– Place it inside a cabinet door for a hidden, neat look. It hides the hardware and keeps items out of sight until you need them.
– Mount it on the wall near your vanity. That way you can grab what you need before you sit down, without bending over a sink.
– Choose a location away from water splashes. A dry, steady spot helps keep magnets strong and items in place.
Choose the right strip for your load. If you store heavier tools, pick a high-strength option with wider spacing between magnets. For light items like tweezers, nail clippers, and small makeup tools, a mid-range strip will work fine.
What to store on the strip
– Tweezers, small scissors, and nail clippers. Keep them clean and dry so they stay sharp and rust-free.
– Hair pins, bobby pins, and small brushes. These stay visible and easy to grab when you’re in a rush.
– Lip balms and metal-tinish tubes. If a product has metal accents, a magnet helps it stay put rather than roll away.
– Spare metal tools from your kit. Anything small and metal that tends to disappear can live here.
Keep items light enough for the magnets to hold firmly. Rotate tools as your mornings change so you always know where to find them.
Care, safety, and a few practical tips
– Clean the strip and the mounting surface before sticking or screwing it on. A clean base makes the hold last longer.
– If humidity is high, opt for stainless steel magnets and a coated strip to resist rust. Hardware that wears well in a bath concludes a longer life.
– Don’t crowd the strip. Leave room for each item to sit flat. Crowding can cause items to tilt and fall.
– Check the fit every few weeks. If a magnet loosens, reattach with a stronger mount or move to a new spot.
Limitations? Magnets work best for metal items. Very light or non-metal items won’t cling reliably. If you have fragile glass containers, keep them away from the strip to prevent accidents.
With a well-placed magnetic strip, your bathroom quickly feels more orderly. It blends clean design with practical use, turning chaos into easy, everyday access.
5. Magnetic Strips
Editor’s Choice
🛍️
Magnetic Tool Holder Storage Organizer: 7-Piece Garage Wall Mount Rack O…
Is your bathroom drawer a grab bag of face creams, brushes, and cotton swabs? It can feel like a mini storm each morning. Drawer dividers give you calm by creating neat pockets in each drawer. You’ll reach for what you need without digging through a pile.
– Measure first. Know your drawer’s width, depth, and height before you buy. No guesswork. If you buy too tall, you’ll block closing. If you buy too wide, you’ll waste space.
– Sort by use. Create zones for skincare, haircare, and tools. A small zone for cotton pads, another for razors, another for brushes. The goal is quick access, not empty space.
– Pick adjustable options. Look for modular or expandable dividers that can slide into place as your collection grows. Clear dividers are handy because you can see items at a glance.
– Choose the right material. Clear acrylic blends with almost any style. Bamboo adds warmth to a wooden vanity. Plastic is budget-friendly. Metal is sturdy for heavy tools.
– Add a liner. A thin mat or shelf liner keeps items from sliding. It also protects the drawer bottom from spills and marks.
Pro tips
– Use adjustable dividers to create different heights. Short ones for small jars, tall ones for combs and brushes.
– Leave tiny pockets for tiny items. A few small inserts hold bands, clips, and spare contacts.
– Consider labeling, but keep it simple. A tiny sticker or a faint outline works.
Maintenance matters
– Wipe the dividers weekly. Rotate items every month or two so things don’t get stuck in one pocket.
How this looks in real life
– In a 12-inch wide drawer, place two long dividers to create three zones: skincare, tools, and cotton goods.
– In a shallow 8-inch drawer, use several short dividers to hold cotton swabs, razors, and tiny bottles.
Common questions
– Do I need dividers in every drawer? Not always. Use them in the drawers that get crowded first.
– Can I DIY this? Sure. If you’re handy, build simple wooden or foam inserts that snap into place.
Limitations to note
– Very deep drawers may require extra-tall or multiple rows of dividers.
– Heavy items can press on dividers; make sure they’re secured.
With the right dividers, your bathroom routine feels smoother. You’ll save time and keep surfaces clear, too.
Is your bathroom counter crowded with bottles and tubes? A decorative tray can turn clutter into calm, usable space. It keeps the items you reach most in reach, without making the surface feel crowded.
Trays do more than hold things. They group perfumes, lotions, and daily tools into tidy, easy-to-find setups. They also add a touch of style, so your counter looks pulled together, not chaotic.
Choose trays that match your style and space. Start with a simple plan before you shop.
– Size and space: Measure your counter from edge to edge and pick a tray that fits with room to spare. Don’t crowd the sink or the edges of the counter.
– Materials and vibes: Wood adds warmth, metal brings a modern shine, and ceramic offers color. Pick what fits your bathroom’s mood.
– Texture and contrast: Mix finishes and hues to keep the look lively. Pair a smooth ceramic with a rough wood edge for depth.
– Shape matters: Rectangular trays work well along the back line, oval trays soften the space, and round trays make a small plant feel at home.
– Care and durability: Choose trays that wipe clean easily and won’t warp near moisture. Check seams and rims for real durability with daily use.
Now, let’s talk about arranging on the tray. A good setup feels intentional and easy to repeat.
– Create small groupings: Place a perfume bottle, a lotion, and a tiny jar together in one corner so each item has its own space while acting as one scene.
– Vary heights: Put a taller bottle behind a shorter item to add vertical interest and keep the layout from looking flat.
– Add a focal point: A small plant or a scented candle draws the eye and softens the look of hard plastics.
– Keep essentials visible: Put items you use daily in front for quick grabs, and tuck back less-used products toward the back.
Placement tips help the tray work with your daily routine. Put it where you naturally reach for things each morning.
– Placement: Center the tray on the counter or tuck it in a corner where it visually ties the space together.
– Maintenance: Wipe the tray weekly with a damp cloth and dry it thoroughly; rotate products seasonally to keep things fresh.
Why this approach helps: decorative trays reduce clutter instantly and create a calm, cohesive look. They let you see what you have at a glance and keep your favorite items ready to use. With the right tray, your bathroom can feel organized, stylish, and easier to navigate every day.
7. Decorative Trays
Editor’s Choice
🛍️
11.5 Inches Candle Holder Tray Home Decor, Round Wood Tray for Coffee Ta…
You want more storage without crowding the counter. Wall-mounted baskets give you space where you need it most. They hang on the wall, so you can grab what you need without a cluttered sink in sight. They keep towels, brushes, and bottles within reach and off the surface.
Choose baskets that stand up to humidity. Woven options like rattan or bamboo feel warm and natural, while metal baskets with a powder-coated finish look clean and modern. Each style fits a different vibe, from rustic to industrial. Pick a look that matches your faucet, mirrors, and vanity.
What to store and where
– Towels and washcloths you reach every day. Fold them neatly so a dry towel is easy to grab.
– Everyday toiletries, like soap, lotion, toothpaste, and sunscreen, placed in small matching baskets.
– Hair tools, brushes, and combs so they don’t sit loose on the counter.
– Extra toilet paper or a few compact books for a quick read in a powder room.
– Cotton swabs, cotton balls, and tiny bottles in a shallow tray basket.
How to install
– Pick a spot above eye level on the wall near your sink or shower.
– Measure spacing between baskets, usually 12 to 18 inches.
– Mark holes.
– Drill and insert anchors if you’re not hitting a stud.
– Use sturdy screws that hold the weight you plan to put inside the baskets.
– Mount baskets securely.
– Adjust for level.
– If needed, add a dab of clear sealant where the frame meets the wall to keep moisture out.
Styling and maintenance tips
– Vary the heights to add visual interest.
– Label baskets for quick grabbing. A small card or tape helps when contents change.
– Color code for a cohesive vibe. Use one color for towels, another for toiletries, a third for grooming tools.
– Line the bottom with a thin liner to catch drips. It keeps spills from soaking the wood or metal.
– Choose rounded edges and smooth surfaces to prevent snagging.
Practical benefits
– You gain counter space instantly. The sink stays clean and ready for use.
– It’s flexible. Move baskets if you rearrange the room.
– It’s affordable. Start with a pair and add more later.
Ready to try it? Pick a couple of baskets you love and plan their spots. In a week, you’ll notice a calmer, easier-to-use bathroom. The counter mess will fade away.
8. Wall-Mounted Baskets
Editor’s Choice
🛍️
3 Tier Wall Mounted Woven Hanging Basket, Over the Door Hanging Basket w…
Your bathroom counter gets crowded fast. Towels, brushes, lotions, and gadgets pile up. Hooks can end the clutter. They lift items off the counter and put them where you can reach them quickly. Here’s a simple plan to pick hooks that fit your space and draw the room together.
– Material matters Choose hooks that resist moisture and corrosion because bathrooms stay damp; stainless steel lasts for years, brass adds warmth and shine, and ceramic can blend with your tiles for a cohesive look.
– Where to install Place hooks on the side of the vanity or on an adjacent wall so towels dry faster and daily items stay in reach; if space is tight, install a slim wall rack instead.
– Spacing and height Space hooks about 6 to 12 inches apart, and mount them at a height that every family member can reach without bending or standing on tiptoes; this makes grabbing items simple.
– Use multi-hook racks A rack with two, three, or four hooks keeps a hand towel, a washcloth, a loofah, and a robe in one neat cluster, reducing trips to find the right item.
– Weight and installation Don’t hang heavy towels on small hooks; test the load first, secure into studs or use strong wall anchors, and predrill to keep screws straight and reduce splinters.
– Style coordination Match the hook finish to your faucet, cabinet handles, or lighting so the space feels cohesive; a coordinated hardware set makes a small bath look larger.
– Practical tricks Use a hook behind the door for travel bottles or a spare towel when guests visit; it creates a handy extra station you might not notice at first.
– Care and maintenance Wipe metal hooks with a soft cloth to stop water spots, dry around the screws after showers, and tighten loose screws every few months to keep them secure.
– Trending ideas Matte black, brushed brass, and natural wood accents give modern or rustic vibes; if you’re on a budget, look for mixed-material sets that still feel premium.
With the right hooks, you reclaim counter space and keep daily items within reach. Start with one good spot, then grow your setup as needed. Your sink area will feel calmer and cleaner in no time.
9. Hooks for Towels and Accessories
Editor’s Choice
🛍️
8 Pcs Stainless Steel Hooks for Hanging, Heavy Duty Hook, Wall Hooks Key…
Mount away from water splashes; check weight limits.
Drawer Dividers
Acrylic, Bamboo, Plastic
$19.99
Sort by use; wipe regularly.
Decorative Trays
Wood, Metal, Ceramic
$9.99
Create small groupings; vary heights.
Wall-Mounted Baskets
Woven, Metal
$20.98
Label baskets; vary heights for visual interest.
10. Glass Canisters
If your bathroom counter feels crowded, glass canisters can fix it. They turn small items into a tidy display and make daily routines quicker.
Why glass canisters work
Clear glass lets you see what’s inside at a glance. You won’t waste time hunting for cotton balls or bath salts. The simple look adds a clean, modern touch to any style, from beachy to spa-like. When you fill them right, they stay dust-free and easy to lift. They work on a bathroom shelf, vanity, or inside a cabinet.
Key Benefits
– See-through design helps you grab what you need fast.
– Glass keeps items clean and protected from dust.
– A range of sizes fits different items, from tiny swabs to large bath salts.
– The bright, simple style pairs with many decor ideas, from chrome to matte black.
What to store and how to arrange
Use small jars for cotton balls, cotton swabs, and facial rounds. Put bath salts and bubble bars in mid-sized canisters to show off colors. Large jars fit cotton balls, hair ties, or bath salts sacks. Place like items together so your routine feels natural: vanity items near the sink, extra supplies in a cabinet, and weekly-use items in the middle.
Choosing the right canisters
Look for glass with solid lids that seal well. Airtight lids protect moisture-loving items and keep powders fresh. You’ll find options with cork, metal, or silicone seals—pick one that’s easy to open with wet hands. Consider sets that come in three to five sizes so you can group items by use. If you want a pop of color, choose lids in soft pastels or metallic finishes.
Practical setup ideas
– Use a small tray or a shallow basket under the jars to catch spills and make cleaning easier.
– Label the lids or use a tiny tag so you know what’s inside without lifting every jar.
– Group items by task: skincare, bath, and hair care. This saves steps and keeps your counter calm.
– Mix heights by stacking a few jars on a shallow riser so you see every item at a glance.
Care and durability
Wash glass canisters with warm, soapy water. Rinse well and air-dry completely before refilling. Put them where they won’t be knocked over by daily use. If you drop one, replace it quickly—glass can break, and safety comes first.
Common questions
– Do these canisters keep items dust-free? Yes, when lids seal well.
– How do I clean them without leaving water spots? Use a soft cloth and mild soap, then dry with a lint-free towel.
– Are glass canisters good for humid bathrooms? They are, as long as lids seal and items aren’t moisture-heavy.
Quick start guide
1) Empty a few items you want to organize.
2) Measure shelf space to choose three to five canisters.
3) Pick clear glass with airtight lids in a consistent style.
4) Put items in groups, label if you like, and place on a tray.
Try glass canisters today and watch your bathroom turn into a calm, easy-to-use space.
10. Glass Canisters
Editor’s Choice
🛍️
Anchor Hocking Heritage Hill 1 Gallon Glass Jar with Lid, Set of 2
Your bathroom counter is crowded, and you waste time hunting for creams and brushes. A rotating tray can fix that. Put a Lazy Susan on the counter and spin it to find what you need in seconds. It fits narrow spaces and can hold many items, from skincare bottles to hair products, makeup, and cotton pads. The smooth turn lets you reach items without moving everything.
Benefits:
– Efficiency – spin to grab what you need fast.
– Space-saving design makes small bathrooms feel bigger.
– Style options let you match metal, glass, or wood to your décor.
This simple tool can turn a cluttered counter into a calm, easy-to-use surface.
How to set it up:
– Choose the right size. Measure the counter and pick a unit that leaves room to open drawers or cabinets.
– Pick a material that fits your style. Metal and glass look sleek; bamboo brings warmth; acrylic blends in.
– Group items by use. Put daily items at the front. Keep multiples together in small organizers on top.
– Add non-slip padding. A soft mat keeps the tray from sliding and protects the counter.
– Keep it clean. Wipe with a damp cloth weekly to prevent water marks and soap buildup.
Tips for real life:
– Use a mini tray on top of the Lazy Susan for tiny items like q-tips, clips, and bands.
– Put tall bottles toward the back so they don’t block rotation.
– Label clear containers so you know where each item lives.
– Check labels often. Move older products to the front so you use them before they expire.
– Spin once a day as part of your routine to stay ahead of clutter.
Common questions:
– Will it fit on a small counter? Yes. Measure carefully and choose a compact model.
– Can I use it for lots of items? Yes. Group similar products together so you can grab a group in one spin.
– Is it hard to clean? Not if you wipe it weekly and avoid getting water under the turntable.
– Can it handle wet spots from splash? A quick wipe after use keeps it looking good and prevents slipping.
Why this works now:
– It matches current trends toward simple, tidy spaces.
– It’s easy. You can set it up in minutes.
– It scales. Add more organizers or swap it as your stash changes.
This approach saves space, speeds up routines, and keeps the counter looking neat with little effort.
If your counter feels crowded, you’re not alone. Water, toothpaste, and brushes stack up fast. A sink-side caddy puts the essentials right next to your faucet. You grab what you need, then keep the rest tidy.
What a sink-side caddy does for you:
– Holds daily items in one spot: toothbrush, toothpaste, soap, sponge.
– Cuts mess by keeping things upright and controlled.
– Speeds up cleanup when the caddy is within arm’s reach.
What to look for when choosing:
– Compartments that separate items so brushes don’t touch toothpaste.
– Water- and stain-resistant materials. Plastic, stainless steel, ceramic, or sealed wood all work.
– A slim profile that fits beside the sink without crowding the faucet.
– A non-slip base to stay put on wet counters.
Materials and styles that fit many looks:
– Plastic or resin: affordable, easy to wipe, and comes in colors that match your decor.
– Stainless steel: clean, durable, and naturally moisture resistant.
– Bamboo or wood blends: warm style; sealants help, but avoid standing water.
– Glass or clear acrylic: makes a small area feel open and neat.
How to set it up in your bathroom:
– Place it on the side you use most when you stand at the sink.
– Leave room for a soap dispenser or sponge beside the caddy.
– Only keep items you reach for daily. Change weekly to avoid clutter.
Care and maintenance:
– Wipe with a damp cloth after splashes.
– Dry the bottom to prevent mildew.
– Check for loose parts and tighten or replace when needed.
Common questions:
– Do I need a lid? Open designs dry faster and stay easy to reach.
– Can I mount one? Some caddies clip to the sink or fit on the lip for extra stability.
– Will it clash with my style? Pick a finish that matches your faucet or cabinet hardware.
Bottom line: a sink-side caddy makes daily routines smoother. It adds order, reduces mess, and keeps the counter clean. Start with a simple design and upgrade as your space grows.
12. Sink-side Caddies
Editor’s Choice
🛍️
OXO Good Grips Stronghold Suction Sinkware Organizer – Gray, One Size
Your bathroom sink area tends to get crowded fast. It often feels dark, damp, and hard to reach. With the right baskets, you can turn that space into a neat, quick-access zone. You’ll spend less time digging for stuff and more time using it.
Choose baskets that handle moisture
– Pick moisture-resistant containers, like sturdy plastic or resin bins, that fit the cabinet’s depth.
– Avoid wicker that can get mildewy; if you love a natural look, add liners or tuck wicker into a covered spot.
– Look for smooth interiors you can wipe clean in seconds.
You want baskets that stay neat after spills. They should be easy to wipe and move. When you can reach for what you need without wading through a pile, your mornings go smoother.
Balance size, shape, and space
– Measure the cabinet height, width, and door clearance before buying.
– Use a mix of tall, medium, and short baskets to fill every inch cleanly.
– If you have a higher shelf, add a second level with a slim pull-out bin or stackable pieces.
A smart mix lets you use vertical space. It prevents large bottles from tipping and keeps towels dry and off the floor.
Organize items by use and habit
– Create zones: cleaning supplies, spare toiletries, and towels each get their own basket.
– Put the items you reach most in the front for quick grabs.
– Use small baskets inside larger ones for tiny items like sponges or cotton swabs.
Grouping by use cuts search time. It also helps you see when a bucket is running low and needs a refill.
Label for quick finding
– Label each basket so you never have to guess where stuff is.
– Use waterproof labels or simple tape with clear words.
– Color-code by category if you like a strong visual cue.
Labels keep your system simple. They make maintenance after a spill or cleaning easy.
Make the setup easy to maintain
– Do a quick wipe-down once a week to keep moisture from building up.
– Reassess every month and move items you don’t use often to the back basket.
– Don’t overfill; leave space so you can grab items without a mess.
A little habit goes a long way. A clean basket system stays nice longer and helps you stay on track.
Practical ideas you can use today
– Place a small bin for rags and cleaning cloths near the front.
– Use a tall basket for extra towels if the space is deep.
– Add a shallow tray on top of a basket to catch drips from bottles.
With these simple steps, your under-sink area becomes a calm, efficient part of your bathroom. You’ll save time, cut clutter, and keep cleaning supplies ready for whenever you need them.
13. Use Baskets Under the Sink
Editor’s Choice
🛍️
Sterilite 4-Pack Gasket Box, Weather-Resistant Storage Bins with Latchin…
If your bathroom feels crowded, a smart furniture piece can change everything. Multi-purpose furniture gives you seating and storage in one compact item. A storage ottoman or a stool with a hidden compartment makes a small room feel bigger and more usable. You’ll sit comfortably and still have a place to tuck towels, toiletries, or washcloths out of sight.
What to look for
– Size that fits your space. Measure before you shop. You want something that leaves room to move and doors to open.
– Hidden storage with enough depth. A good storage compartment should hold bulky towels or several bottles without feeling tight.
– Moisture resistance. Pick materials that handle bathroom humidity. Think sealed wood, water-repellent fabric, or sturdy resin/plastic finishes.
– Style that matches your decor. Choose colors and textures that blend with tile, vanity, and cabinets. A smooth, clean look often works best in small baths.
– Comfort and safety. A well-padded seat that isn’t too high helps you sit easily. Look for a lid that closes softly to avoid slams.
How to choose and use
– Start with a real test. Put the piece in the spot you’ll use most—near the sink, at the end of the tub, or by the towel rack. Check that you can stand, sit, and reach stored items without bending awkwardly.
– Check the lid or top. A hinged or lift-top lid is handy. Soft-close actions feel nicer and prevent fingers from getting pinched.
– Think about how you’ll load it. If you store heavy towels, pick a sturdy base and avoid flimsy legs. A wider footprint can feel steadier.
– Pick a dual purpose piece. A stool can double as a small side table for a tray of daily items. An ottoman can hold a basket inside for quick access to everyday supplies.
– Consider materials. Wood with a water seal lasts long. Bamboo stays light and is easy to wipe. Fabric should be moisture-resistant or vinyl-backed.
Placement ideas
– Place beside the vanity for quick towel grab-and-go.
– Use at the end of the tub to keep a seating option while you dry off.
– Tuck near the toilet for extra seating without blocking flow.
– Put a low shelf inside the storage area for smaller items so they stay organized.
Maintenance and tips
– Wipe surfaces weekly with a mild cleaner. Dry any damp spots to prevent mold.
– Check the hinges or lid mechanism every few months. Tighten screws if needed.
– Rotate stored items to keep the most used things easy to reach.
Quick-start plan
1) Measure your target space.
2) Choose one multi-purpose piece with hidden storage that matches your decor.
3) Test it in place and confirm it doesn’t block doors or drawers.
4) Stock the inside with towels and toiletries, keeping like items together.
5) Enjoy a chair-ready surface and tidier shelves without losing square footage.
With the right piece, your bathroom gains function, style, and calm.
Are you tired of a crowded bathroom counter that hides your daily essentials? Color-coded bins offer a simple fix. They turn chaos into order and give kids an easy map for where things belong. The result is a counter that looks tidy, and a routine that actually sticks.
How color-coded bins work for your space
Color codes create quick, visible organization. Different colors tell you where items live at a glance. You can assign colors to family members or to types of products. When everyone knows the colors, items go back where they belong. The whole bathroom feels calmer because you’re not hunting for what you need.
Set up in 6 practical steps
1) Pick your colors and groups. Use 3 to 5 colors. For example, blue for dad’s razors, pink for kids’ hair ties, green for daily meds and toothpaste. Keep the system simple so kids can read it.
2) Choose sturdy, clear bins. Clear plastic shows content at a quick glance, while solid colors help hide messes. Get bins with low sides so small items don’t get lost.
3) Create zones near the sink. Put a bin for daily items in easy reach. Add a spare bin for weekly or seasonal items that don’t need daily access.
4) Label with big, easy-to-read text or icons. Use strong labels that survive splash water. Add simple pictures if your kids can’t read yet.
5) Make a color rule and practice it. Tell everyone, “If it’s blue, it goes in blue bin.” Do a quick run-through together the first week so everyone understands.
6) Maintain with a 5-minute weekly reset. Check for stray bottles, old makeup, or empty containers. Put back items, toss trash, and wipe down the bins.
Tips to fit any bathroom
– If space is tight, hang slim organizers on the door or mount bins on the wall. This keeps the countertop clear and still within reach for kids.
– For shared bathrooms, assign a color to each person and one color for shared items. It reduces confusion at busy times.
– Use a mix of materials. Fabric bins soften the room, while sturdy plastic bins handle damp surfaces.
– Keep labels visible but not overwhelming. A simple icon plus name is enough.
What to expect and common questions
You’ll notice faster morning routines and less mess. Kids learn responsibility without a big lesson. If colors feel overwhelming, start with 2–3 colors and add more later. Some bathrooms are small; try wall-mount options or a slim set of bins on a shelf.
Final thought
Color-coded bins are a practical, friendly path to better countertop organization. They blend style with function and turn a cluttered space into a daily helper you can actually keep up with.
Color-coded bins can turn your chaotic bathroom countertop into a sanctuary! With a splash of color, everyone knows where their essentials belong, making tidy routines a breeze.
15. Color-Coded Bins
Editor’s Choice
🛍️
Nicunom 6 Pack Small Cubby Bins Storage Bins with Lids, 5 Qt Plastic Sto…
You want a clean bathroom counter where towels are easy to reach. A towel ladder offers a simple fix. It stands against the wall and lets towels hang freely. You get space back on the counter, and your bathroom feels more open.
– Frees up surface area on sinks and counters.
– Adds texture and style, from cozy boho to sleek modern.
– Makes seasonal towels easy to switch without crowding a rack.
A towel ladder blends function with style. It can make small baths feel larger and calmer.
Choosing the right ladder
Materials matter. Wood brings warmth. Metal adds a cool, contemporary vibe. Bamboo gives a natural, eco-friendly look. Pick a finish that matches fixtures in your bathroom. Think about height and spacing: you want towels to hang without rubbing each other.
– For compact bathrooms, a shorter ladder close to the wall works best.
– For larger spaces, a taller ladder gives you more towels and options.
– Wider rungs help thick bath sheets stay in place.
Where and how to place it
Lean the ladder against a dry wall or tile, near the shower or sink. Make sure it has room to breathe. If you’re worried about slipping, add soft felt pads between the ladder legs and the floor or wall. You can prop it near a towel bar to corral extra pieces. Place the ladder where you can reach it with a simple twist or stretch, not when you’re wet.
Daily use and care
Hang towels after use so they dry quickly. Stash light hand towels on the upper rungs and heavier bath towels on the lower ones. If you like seasonal decor, swap in towels with color changes to match the season. Wipe the ladder occasionally to remove shampoo, soap, and dust.
Tips and limits
A towel ladder works best for cotton or microfiber towels. It may not handle heavy, bulky bath robes on every rung. If your space is tight, lean carefully and avoid blocking doorways. Regularly check the ladder’s lean angle and wall contact.
Start with a simple, one-rung ladder and test fit. Move to a taller option as your towels grow.
16. Use a Towel Ladder
Editor’s Choice
🛍️
HOOBRO Blanket Ladder for Living Room and Bedroom, 5-Tier Wall Leaning T…
Is your bathroom counter crowded with razors, brushes, and bottles? Hidden containers can change that. They tuck items away while keeping them easy to reach. Here’s how to choose and use them for a cleaner look and a smoother morning.
– Match your color scheme Choose boxes that blend with your tile, towels, and vanity so they disappear into the background. This keeps the surface calm and makes the room feel larger.
– Size and shape matter Measure the space on your counter or shelf before you buy. Pick long, slim boxes for razors or curling tools, and squat, wide jars for daily tools you reach for often.
– Easy access is a must Make sure lids open smoothly and containers stay put when you grab items. Avoid boxes with stiff hinges or hard lids that slow you down in the morning rush.
– Material choices Acrylic looks clean and modern, glass adds elegance, bamboo brings warmth, and fabric hides the messy stuff. Think about moisture and cleaning—some materials wipe clean, others need gentler care.
– Hidden yet handy placement Put boxes on a high shelf for rarely used tools, and keep a smaller tray within reach on the counter for daily items. This creates a tiered setup that feels organized and simple to maintain.
– Labeling helps quick finding Use small labels or simple icons on the front so you know what sits where. Labels stay neat and make resets fast, even on busy mornings.
– Personalize the look Add a pop of color with a patterned lid, or swap lids with the seasons. Personal touches make the space feel like yours and inspire you to keep it tidy.
– Care and maintenance Wipe boxes regularly to stop soap film and water spots from building up. Dry them after showers, and check for warping or loose pieces so everything stays sturdy.
These tips elevate hidden containers from mere storage to a real upgrade for bathroom countertop organization. You’ll notice less clutter, easier mornings, and a calmer space that still holds all your daily essentials within reach. By choosing the right materials, sizes, and placements, you can keep your décor cohesive while enjoying practical beauty in everyday use.
17. Hidden Containers
Editor’s Choice
🛍️
Clear Stackable Plastic Storage Bins with Magnetic Lid, Dustproof Book &…
Your bathroom counter gets crowded fast. Hair tools, bottles, and brushes spill over the edge. You want easy access, but you also want a clean, open surface. S hooks offer a simple fix you can set up in minutes.
What they are and why they work
S hooks are small, curved metal or plastic hooks. You slide them onto a rod, rack, or towel bar and hang items from them. They keep things off the counter and in easy reach. The result is a room that feels bigger and more intentional.
Where to put S hooks
– On a towel bar near the sink for brushes, combs, or a small cosmetic bag.
– On a shower rack or a metal rail to hold a hairdryer with its cord neatly looped.
– On a slim over-the-sink rack to hold daily-use items like cotton rounds or facial masks.
What to hang with S hooks
– Hairdryers, curling irons, and straighteners (use a dedicated hook if the cord is long).
– Brushes, combs, and razors for quick grabs.
– Small travel bottles, face wash, or lotion tubes you reach every day.
– A lightweight mirror or accessory bag that you want within arm’s reach.
Choosing the right S hooks
– Pick hooks that can hold more weight than your heaviest tool. A few sturdy hooks beat many flimsy ones.
– Choose a finish that fits your style. Matte black, brushed nickel, or brass hooks blend with most decors.
– Pick the right size. Bulky items need larger hooks; tiny items do fine on standard hooks.
– Look for smooth edges. Sharp edges can scratch powder bottles or cords.
Placement and use tips
– Start near the mirror so you grab what you need without bending down.
– Group items by use. Put drying tools together, then day-to-day items in another spot.
– Manage cords. Let cords hang down instead of piling them on the counter. This cuts clutter and lowers the chance of pulling items off the shelf.
– Test weight after you install. If a hook wobbles, move it to a sturdier spot or use a stronger hook.
Common mistakes to avoid
– Overloading a single bar. Spread weight across several hooks or bars.
– Using cheap hooks on damp metal. They can rust or slip over time.
– Blocking essential outlets or reducing air circulation around a dryer. Keep safety in mind.
Quick setup plan
1) Pick a bar or rack you already have. 2) Buy 6–8 sturdy S hooks that fit your items. 3) Hang hooks in a high-traffic area near the sink. 4) Move items around after a week if something feels awkward.
With a few hooks, your bathroom stays tidy and efficient. It’s a small change that makes a big difference in how easy your mornings feel.
18. Use S Hooks
Editor’s Choice
🛍️
12 Pack S Hooks Heavy Duty Vinyl Coated Large S Hooks 6 inch Non Slip 7m…
Traveling or hosting guests can turn your bathroom into a clutter zone fast. A portable bathroom caddy helps you stay organized, pack faster, and keep your items safe in transit. With the right caddy, you have a neat kit you can grab on the go or leave as a stylish decor piece at home.
Why a travel caddy makes sense
A dedicated caddy keeps all your essentials in one place. It shields liquid bottles from spills and makes unpacking a breeze. It also doubles as a handy travel kit you can move from a hotel room to a guest bathroom without hunting for items. Look for a design that looks good in your space and travels well.
What to look for when buying a travel caddy
– Size and compartments: Pick a caddy that fits your daily routine, with a roomy main pocket and several smaller pockets for small items. A good mix helps you group items by type—face care, hair care, and meds—so you can grab what you need in seconds.
– Waterproof materials: Choose hard plastic, coated fabric, or silicone that wipes clean and resists leaks. Durable shells protect contents during bumps and jostles in transit.
– Leak protection: A lined interior or a removable, washable liner helps catch spills and makes cleanup quick. Look for a seal or tight zipper to cut down on drips.
– Portability: Look for sturdy handles, a comfortable strap, or a small carabiner so you can clip it to a bag or hang it in a shower area. Easy carrying cuts the hassle of moving a full kit.
– Style and care: Choose a color and finish that matches your home or hotel vibe. Pick fabrics or shells you can wipe down fast after a trip.
How to pack and use your travel caddy
– Start by gathering a daily set of items you actually use every trip, not the whole bath stock.
– Transfer liquids into travel bottles and label them; keep them in a clear bag if you fly.
– Place heavier bottles at the bottom and lighter items on top to prevent spills and breakage.
– Close the caddy securely and slide it into your suitcase, tote, or overnight bag for easy access.
– In a hotel or guest bathroom, set the caddy near the sink so you can reach toiletries without digging through a suitcase.
Maintenance and care tips
– Wipe the liner after each trip and let it air dry completely before the next use.
– Clean the outer shell with a damp cloth to remove soap residue or water stains.
– Store the caddy in a dry spot to prevent mold and funny smells from lingering.
Common questions about travel bathroom caddies
– Is it TSA friendly? Yes, if you keep liquids in small travel bottles and place them in a clear bag as required.
– What if I don’t travel with liquids? You can still use the same caddy for dry items like combs, brushes, makeup, and mini medicines.
Realistic limits and honest tips
A travel caddy won’t replace a full vanity, but it makes trips smoother. If you stay in extreme climates or have many users, opt for a larger model with more compartments. You can also carry two slim caddies—one for daily essentials and one for backup items.
By choosing the right travel bathroom caddy and keeping it ready, you turn packing into a simple, fast task. Your essentials stay organized, your hotel routine stays calm, and your bathroom stays tidy—every trip, every guest visit.
19. Bathroom Caddy for Travel
Editor’s Choice
🛍️
Tiawudi Portable Shower Caddy, Caddy Organizer with Handle, Plastic Show…
Feeling clutter on the bathroom counter? You want better order and a calmer look without losing style. Natural elements can deliver both. They bring texture, warmth, and a simple, organized feel to your daily routine.
Wood, stone, and plants work together to shape a calm, practical space. Wood adds warmth and a sturdy feel that stands up to daily use. Stone gives a cool, earthy touch that grounds the room. Plants bring life and a touch of humidity balance, which helps many bathroom items last longer. Put together, these elements create a spa-like mood you can see and sense every day.
Ideas to Try:
– Add small potted plants that thrive in humidity. Choose pothos, spider plants, or ferns that handle steamy air. Put them where they get gentle morning light and clear of splashes. They stay fresh with a quick weekly check for trimming brown tips.
– Use natural wood for trays and organizers. Look for teak, bamboo, or maple that can stand damp air. Seal the wood to resist water spots and mold. Wipe the surfaces with a damp cloth and dry them after each big shower.
– Integrate stones or pebbles in decorative containers. Pebbles add an earthy vibe and can keep small items in place. Try a clear jar or bowl with stones under cotton rounds or makeup pads. Rinse stones every now and then to remove soap residue.
– Mix textures with wicker baskets or ceramic vessels. Open-weave baskets hide clutter while staying easy to reach. Put daily items in ceramic jars for a simple, clean look. Match the colors to your tile or countertop for cohesion.
– Create a small stone or wood tray for soap, brushes, or daily essentials. A steady tray catches drips and keeps items from rolling around. It also makes your minimal routine feel organized and intentional.
Practical care helps these ideas last. Place plants where they won’t sit in standing water. Use a plant saucer or coaster to protect wood from spills. Keep wood trays sealed and wipe them weekly to stop water stains. Clean pebble containers with warm water and a soft brush to remove soap film. Rotate items on the trays seasonally to keep the display fresh and useful.
Putting natural elements in your bathroom isn’t a luxury—it’s an easy way to boost organization and mood. With wood, stone, and plants, you gain usable storage and a unique style. The result is a calmer space that still does the work you need every day.
Natural elements like wood, stone, and plants can turn your bathroom countertop into a serene oasis, bringing warmth and organization to your daily routine. Embrace nature and watch your clutter vanish!
20. Natural Elements
Editor’s Choice
🛍️
Costa Farms Golden Pothos Live Plant, Easy Care Indoor House Plant in Gr…
Transforming your bathroom countertop doesn’t need to be overwhelming. By implementing these 20 bathroom countertop organization hacks, you can create a space that’s not only functional but also beautiful. Remember, the key is to find solutions that fit your style and needs, allowing you to enjoy a clutter-free oasis.
Which hack are you excited to try first? Share your favorites and let’s keep the conversation going!
Note: We aim to provide accurate product links, but some may occasionally expire or become unavailable. If this happens, please search directly on Amazon for the product or a suitable alternative.
This post contains Amazon affiliate links, meaning I may earn a small commission if you purchase through my links, at no extra cost to you.
Frequently Asked Questions
What Are Some Easy Storage Solutions for Bathroom Countertop Organization?
If your bathroom counter feels cluttered, don’t worry! There are plenty of easy storage solutions to help you declutter. Consider using tiered storage trays to maximize vertical space or clear acrylic organizers to keep essentials visible and accessible. You could also use repurposed containers like jars and tins for a personal touch. These hacks not only tidy up your space but also add a stylish flair!
How Can I Use Floating Shelves for Better Bathroom Countertop Organization?
Floating shelves are a fantastic way to enhance your bathroom countertop organization! They provide extra storage without taking up counter space. Simply install them above your sink or toilet to keep items like toiletries or decor items within reach but off the counter. This creates a clean, calm look while allowing you to display your favorite bathroom items beautifully!
What Are Some Creative Ways to Declutter My Bathroom Counter?
Decluttering your bathroom counter can be both fun and creative! Try using decorative trays to corral smaller items, or wall-mounted baskets for easy access to essentials without crowding your surfaces. You can also implement hooks for towels and accessories to lift items off the counter, creating an open and organized feel. These hacks make decluttering a breeze while adding style to your space!
How Do I Choose the Right Storage Solutions for My Bathroom?
Choosing the right storage solutions for your bathroom depends on the space you have and your specific needs. Start by assessing what items you use daily and what can be stored away. For frequently used products, consider sink-side caddies or lazy Susans for easy access. For hidden storage, hidden containers work wonders! Don’t forget to mix aesthetics with functionality to maintain a beautiful yet organized space.
Can I Use Natural Elements in My Bathroom for Both Style and Organization?
Absolutely! Incorporating natural elements into your bathroom not only enhances the aesthetic but also contributes to organization. Think about using wooden trays or wicker baskets to store items. These elements bring warmth and texture to your space while keeping everything tidy. Plus, they can make your morning routine feel more serene and enjoyable!
Your living room should feel like a warm hug after a long day. If you crave that cozy, earthy vibe but aren’t sure where to start, you’re in the right place. This post shares 25 stunning rustic home decor ideas for your living room that blend rough wood, soft textiles, and natural light to create spaces that feel simple, welcoming, and stylish.
Why I created this post: Rustic style has a quiet power. It makes a room feel grounded, calm, and lived in in a good way. I wanted to show real, doable ways to bring that warmth into your home without a big budget or fancy tools.
Who it’s for: If you love warm neutrals, exposed beams, plaid throws, and earthy textures, this one’s for you. If comfort and character matter more than flashy trends, you’ll find ideas that fit your taste and space.
What you’ll get: A curated mix of ideas that are easy to try, practical, and ready to use this weekend. I describe materials and how to combine them—wood, stone, linen, jute, and metal—plus lighting and textiles that make a room feel larger and cozier.
Each idea comes with simple steps you can take now. You’ll learn how to balance rough surfaces with soft fabrics, add color with nature tones, and keep clutter out while adding personality. The tips work in apartments and houses, small rooms and big living rooms.
Think of this as a friendly guide you can lean on as you decorate. By the end, you’ll have a clear plan, a few quick projects you can finish soon, and a living room that feels warm, inviting, and uniquely you.
You want a warm, eye-catching piece for your living room. A reclaimed wood coffee table helps. Reclaimed wood can come from barn beams, old shelves, or river docks. Each source gives a different grain and set of marks. A distressed finish adds vintage charm. It’s sturdy and built to handle daily use.
To choose well, check the joints for solidity. Look for a flat, level top. Make sure the wood is stable and free from wobble. Inspect the surface for big cracks or loose nails. Pick a size that fits your seating line and allows easy traffic. A matte or satin finish reads rustic and hides fingerprints.
Style it with natural touches. A woven basket with magazines keeps the surface organized. A vintage book or simple tray adds character. Pair the table with metal accents for warm contrast. A wrought iron candle holder works well with wood.
– Tip: Use metal accents like a candle holder to add contrast.
– Trick: Place coasters made from wood slices to protect the top.
This centerpiece can set the tone for your living room and make your rustic decor feel effortless.
1. Reclaimed Wood Coffee Table
Editor’s Choice
🛍️
Martin Svensson Home Monterey Solid Wood Coffee Table, Reclaimed Natural
Textiles are the heart of rustic living rooms. They bring warmth, texture, and a lived-in feel.
– Base color and throws: Start with a sofa or chair in a gentle, natural tone. Add a few throws in muted earth colors like oat, taupe, or olive to layer warmth.
– Texture layering: Drape a chunky knit over linen for a soft, tactile contrast. Layer in wool, cotton, and a burlap throw for depth.
– Patterns that calm: Experiment with patterns that read as texture, like plaid or herringbone on pillows. Balance a bold print with solid cushions so the room stays calm.
– Natural motifs: Choose natural motifs such as leaves, pine cones, or animals on pillows. Small embroidered accents keep the rustic vibe without overpowering the space.
– Handmade and vintage: Seek handmade or vintage pieces; a hand-knit throw or quilt carries history. These pieces age gracefully and gain character from small flaws.
– Care and rotation: Rotate textiles by season for a fresh look. Care for them by following labels, and store off-season fabrics in breathable bins.
With the right mix of fabrics, your living room becomes a warm retreat you’ll love spending time in.
2. Cozy Textiles Galore
Editor’s Choice
🛍️
Bigacogo Chunky Knit Throw Blanket for Couch, 40×60 inches, 100% Hand Kn…
Your living room can look flat without the right light. Farmhouse lighting adds warmth and a touch of charm. It acts as both practical light and a design feature you’ll notice every day.
To pick well, consider size, height, and materials. A large chandelier can be the room’s anchor, while smaller pendant lights add sparkle without crowding the ceiling. Think about the finish, too. Wrought iron, black metal, or warm brass fit different tones and moods.
– Tip: Add dimmer switches to your existing lights for adjustable ambiance.
– Trick: Layer lighting with table lamps featuring natural wood bases for a soft, inviting balance.
– Style note: Choose a centerpiece fixture such as a wrought iron chandelier or rustic pendant to anchor the room.
– Lighting tone: Use warm-hued bulbs (2700–3000K) to boost coziness and highlight wood and stone textures.
– Placement: Hang a larger fixture over the seating area and pair it with floor lamps in corners for depth.
– Maintenance: Keep fixtures clean to preserve the rustic look.
Start with one bold piece, then add softer lighting around it. With these farmhouse lighting ideas, your living room gains warmth and rustic charm you can enjoy for years.
3. Farmhouse Lighting Fixtures
Editor’s Choice
🛍️
Ganeed French Country Chandeliers,6 Lights Candle Wrought Iron Chandelie…
Check joints for solidity; style with natural touches
Cozy Textiles
Layered fabrics for warmth and texture
$39.99 – $24.99
Wool, cotton, linen
Rotate textiles by season; use natural motifs
Farmhouse Lighting Fixtures
Warm and charming lighting options
$106.00 – $39.99
Wrought iron, metal
Add dimmer switches; layer lighting sources
Natural Wood Accents
Wooden elements for warmth and texture
$308.99 – $22.82
Natural wood
Mix wood tones; use wooden trays for organization
Vintage Accent Pieces
Unique decor items that add character
$12.90 – $68.99
Wood, glass, metal
Look for pieces at flea markets; group smaller items for display
Earthy Color Palette
Warm colors for a calm atmosphere
N/A
Natural pigments
Use natural fabrics; test color swatches in different light
Comfortable Seating Arrangements
Inviting seating for relaxation
$25.99 – $169.99
Linen, cotton, faux fur
Arrange seating to face a focal point; layer throws and cushions
4. Natural Wood Accents
If you want a living room that feels grounded and warm, natural wood accents help.
Wood brings the outdoors inside without shouting.
Think about visible beams on the ceiling, a sturdy coffee table, or decorative wood slices tucked on shelves.
These elements add warmth and texture, making the space feel calm and real.
The grain and tiny flaws in wood give real charm and tell a story.
Wood tones can tie other colors together and keep the look cohesive.
Easy places to start
– Mix wood tones – Pair light woods with darker accents for a lively contrast.
– Show off wooden shelves – Install a shelf unit to display books, plants, and keepsakes.
– Use wooden trays – Place trays on the coffee table to corral remotes and coasters.
– Decorate with wood slices – Use slices as wall art or stacked on a mantel for rustic flair.
Maintaining wood is easy. Check for loose joints occasionally. Dust with a soft cloth. Wipe spills promptly with a damp cloth, then dry the surface. Avoid excess moisture to keep the finish intact.
You can swap in new pieces easily as your style changes.
Natural wood accents elevate rustic vibes without overwhelming the room, inviting guests to pause and notice the small details.
4. Natural Wood Accents
Editor’s Choice
🛍️
Natural Wood Coffee Tables for Living Room, Rectangle Cocktail Table Woo…
If you want your rustic living room to feel warm and personal, vintage accent pieces are your secret tool. They add history without making the room feel old-fashioned. You’ll see texture, charm, and a conversation starter all in one.
– Antique clocks bring a steady heartbeat to a mantle or shelf.
– Vintage mirrors bounce light and add depth to seating areas.
– Retro picture frames showcase memories and create a warm gallery feel.
Tip: Look for these pieces at local flea markets or thrift shops. You can also check estate sales or online auctions for a fair price. Don’t rush—the right patina shows character.
Trick: Group smaller vintage items on a dedicated shelf, tray, or coffee-table display. Vary heights and textures so the eye moves naturally. Pair a worn clock with a sleek planter or a modern lamp to keep the look balanced.
Choose pieces that feel sturdy and well made. Look for warm wood tones and gentle wear.
Add texture with leather, glass, or wood. Place them where you sit most often to enjoy their glow.
If a piece doesn’t feel right, move it.
Vintage pieces do more than decorate. They anchor the rustic vibe and make your living space feel lived-in and loved.
5. Vintage Accent Pieces
Editor’s Choice
🛍️
Abdurey Small French Retro Decorative Wall Clock,Antique Gold Round Vint…
If you want a rustic living room that feels calm and inviting, start with color. An earthy palette uses warm browns, soft greens, deep oranges, and muted reds. These hues blend on walls, furniture, and decor to create a smooth, cohesive look.
Think about an accent wall. Paint it in a deep earthy shade to add warmth and depth. Let other elements tell the rest of the color story with textiles, artwork, and plants.
– Suggestion: Use natural pigments for painting to boost the organic feel in your space.
– Tip: Add pops of color with accessories like vases, pillows, and wall art that echo the outdoors.
Test color swatches on a large board in the room at different times of day to see how light shifts. Choose matte finishes to keep colors soft; gloss can feel harsh. Pair browns with olive greens or dusty blues to stay earthy yet fresh. Use natural fabrics like wool, cotton, and jute to carry color softly. Add texture with stone, wood, and ceramic accents. With these steps, your rustic living room stays calm and inviting.
Keep the palette grounded by repeating hues in small doses across textiles, frames, and decor items. Your space will feel warm, natural, and ready for everyday life.
Want a rustic living room that feels fresh and organized? Open shelving can be your answer. Wooden shelves bring warmth, and the open space between items keeps the room from feeling crowded. You’ll see your decor every day, and you’ll reach what you need in seconds.
– Plan your layout. Decide which wall will hold the shelves and how high they should sit for easy reach.
– Choose sturdy, rustic shelves. Pick solid wood and brackets that fit your style, like reclaimed pine and matte black metal.
– Mix items in odd groups. Books, plants, and decor look best in clusters of three or five.
– Use baskets for storage. Woven baskets in jute or seagrass keep remotes, cords, and throws tucked away.
– Seasonal updates. Swap a few pieces each season to keep the display fresh without buying more.
– Light it well. Add warm light with a slim LED strip or a small wall sconce to highlight favorites.
Open shelving isn’t just storage—it’s a chance to tell your room’s story. With care, it becomes a focal point that blends form and function.
Open shelving is not just storage; it’s a chance to showcase your personality while keeping your rustic living room organized and inviting. Embrace the beauty of display and enjoy the art of easy access!
8. Open Shelving Displays
Editor’s Choice
🛍️
Wood Floating Shelves for Wall Set of 3, 17 Inch Wide Rustic Wooden Floa…
You want a rustic living room that feels alive. Natural greenery brings life, color, and a soft touch of nature. Plants brighten dull corners and soften hard wood tones. They also help you breathe easier by refreshing indoor air. Your room will feel inviting and calm.
– Hardy, low-maintenance picks: Snake plant tolerates low light and little water, making it perfect for busy homes.
– Easy adapters: Pothos adapts to bright or dim rooms and climbs well on shelves.
– Resilient options: ZZ plant survives neglect and dry air, staying upright for months.
– Rustic planters: Choose terracotta, galvanized metal, or reclaimed wood planters to echo rustic textures.
– Creative displays: Let plants hang from the ceiling, rest on shelves, or sit on a sunlit window sill to vary height.
– Functional greenery: Plant a small herb patch by a sunny window for decor and fresh flavor in meals.
These choices keep your decor simple and sturdy. Place taller plants in corners to balance the room’s silhouette. Use a mix of textures—ceramic, metal, and rough-hewn wood—to reinforce the rustic vibe. Keep plant sizes varied to create visual depth without clutter.
Care basics help you keep greenery bright. Water sparingly and check soil moisture weekly. Wipe leaves gently with a soft cloth to remove dust. Rotate plants every few weeks so they receive light evenly.
Natural greenery makes your space welcoming without overpowering your rustic style. With steady habits, you can enjoy a lively focal point that lasts.
9. Natural Greenery
Editor’s Choice
🛍️
Live Snake Plant, Sansevieria trifasciata Superba, Fully Rooted Indoor H…
Your living room deserves a focal point that speaks in a warm, rustic voice. Statement wall art does that, pulling the room together with personality. Start with a single, bold piece—like a sweeping landscape—or build a gallery wall that blends rustic-themed art, vintage prints, and nature scenes. Size matters: go large enough to grab attention but balanced with furniture and wall space.
Textures matter, too. Choose wooden frames, frame mats, or canvas prints to echo the cabin-like feel. Reclaimed wood panels or metal frames can add depth and a handmade touch. This art becomes a backdrop for seating, guiding the eye toward the fireplace or a comfy sofa.
– Tip: Create cohesion with a limited color palette across your artworks. Stick to browns, greens, blues, and earthy neutrals so the pieces feel like one story.
– Trick: Add 3D elements. Think carved plaques, metal accents, or a few framed pieces on a shallow ledge for layered interest.
With smart placement, statement wall art can elevate your living room and leave a memorable impression on guests. Start by selecting one anchor piece, then expand with complementary pieces that keep the tone warm and inviting.
With this approach, you’ll feel cozy and proud of your space.
10. Statement Wall Art
Editor’s Choice
🛍️
SESEAT 8×10 Picture Frame Rustic Brown, Display Pictures for Wall and Ta…
Your rustic living room needs a warm, welcoming hearth. A good fireplace does more than heat the room. It invites people to sit, talk, and stay a while. If you have a wood-burning fireplace, wrap it in natural stone or reclaimed wood to pull in rustic texture.
Decorating the mantel makes the hearth glow. Pair simple candles with family photos in weathered frames. Add pinecones, evergreen sprigs, or a small bundle of dried branches for scent and color. If you don’t have a traditional fireplace, install a slim electric unit with a sturdy wooden frame to get the same mood.
Layout and lighting matter. Place seating to face the fire so conversations flow. Use soft, warm lighting—lamps with amber bulbs or candles—to keep the glow gentle as evening falls. Keep the space practical, so you actually enjoy it every evening, too. Keep the mantle clear of clutter so the firelight stays the focus.
– Tip: Arrange seating around the fireplace to encourage conversation and warmth.
– Trick: Use soft lighting to create a cozy atmosphere, especially in the evenings.
A good fire can become the home’s best feature.
11. Cozy Fireplace Setup
Editor’s Choice
🛍️
R.W.FLAME 60″ Recessed and Wall Mounted Electric Fireplace, Low Noise, F…
Your living room should feel warm and welcoming. Mixing patterns and textures gives you a layered look that stays cozy, not chaotic.
Don’t fear plaid, stripes, or floral prints. These patterns add warmth and character to a rustic space. Limit yourself to two or three patterns so the room feels calm. Choose a small color set to tie everything together. A cohesive palette helps patterns work in harmony.
Texture matters as much as color. Texture adds depth and makes you want to touch the room. A rough jute rug anchors the floor. A soft plush armchair invites you to sit and stay awhile. Wood, fabric, and natural fibers all play a part in the feel of rustic charm. Mix rough surfaces with smooth ones to keep the room balanced.
– Tip: Introduce texture through throws, cushions, and curtains.
– Trick: Layer rugs to add color and warmth beneath your feet.
– Start with an anchor piece, like a leather sofa or a linen sofa cover, in a neutral shade.
– Add two supporting patterns in varying scales so one never competes with the other.
– Finish with a few textured accessories that you can swap easily seasonally.
By mixing patterns and textures, you craft a rustic look that feels both curated and comfortable.
12. Mixing Patterns and Textures
Editor’s Choice
🛍️
nuLOOM 6×9 Rigo Jute Hand Woven Area Rug, Natural, Solid Farmhouse Desig…
You want warmth and character in your rustic living room. A vintage rug can tie the space together and add real comfort. It brings warm color and a hint of history. You’ll notice how it contrasts with sleek modern furniture or blends with other vintage pieces.
Place it where people gather. The rug under the coffee table or in the seating area defines the zone. It makes the room feel cozy and inviting.
Size matters. A larger rug can make the room feel more expansive. Let the rug extend beyond the seating edges so ankles brush softly when you sit. If you have a small room, a medium rug works too, but balance is key.
– Size matters: A larger rug expands the space and anchors furniture.
– Pattern and color: Look for intricate patterns in warm tones that echo old textiles.
– Placement tips: Center the rug under the coffee table or extend it under sofas for a cohesive look.
– Layering for texture: Layer a neutral base rug with a smaller patterned one to add depth.
– Material and condition: Wool and cotton are durable options; wear adds charm, but check for damage.
– Care and longevity: Vacuum gently, rotate seasonally, avoid direct sun, and have it cleaned by a pro when needed.
14. Vintage Rugs
Editor’s Choice
🛍️
Loloi Loren Collection LQ-02 Plum/Multi 5′-0″ x 7′-6″ Area Rug
You want a rustic living room that feels warm and truly yours. Personal touches let your space tell your story and invite guests to linger. Here are practical ideas you can use to add heart without clutter.
– Gallery wall of rustic frames Choose family photos, travel prints, and heirlooms in mismatched wood frames to form a gallery that feels balanced, warm, and easy to update.
– Shadow boxes for keepsakes Create a wall or shelf of shadow boxes with small keepsakes—shells, medals, keys, dried blooms—to add depth and tell your personal story.
– Seasonal rotations Rotate items seasonally, swapping textiles, metal accents, and souvenirs so the room stays fresh without spending a lot.
– Theme or color groups Group items by color or motif, letting earth tones and textures guide the eye to a simple, cohesive collection.
– Natural materials Incorporate natural materials like rough-hewn wood, wrought iron, leather, burlap, or linen to boost texture and rustic charm.
– Eye-level placement Place displays at eye level on walls or shelves so your personal touches are easy to notice and discuss.
– Old and new mix Mix old treasures with new finds, keep surfaces uncluttered, and use soft lighting to soften edges and invite coziness.
– Color pull Color pull in beige or moss green to tie items together.
With these personal touches, your rustic living room tells your story and feels like a warm, lived-in home.
15. Personal Touches
Editor’s Choice
🛍️
8×10 Picture Frames Set, Set of 4 Wooden Picture Frames Real Tempered Gl…
If you want a warm, inviting living room without major renovations, rustic wall paneling is a smart move. Wood panels and beadboard add texture and charm. Choose a finish that fits your color plan—distressed looks for a farmhouse vibe, or whitewashed hues for a brighter feel.
Decide how bold you want to go. Cover an entire wall for a strong backdrop, or pick a feature wall for a focused moment. Wainscoting gives a clean, timeless edge without overpowering the room. If you aren’t sure, start small with a half-wall or a single panel section.
Color and finish matter. Paint the paneling in soft earthy tones like taupe, sage, or warm gray for a contemporary touch. A light whitewash brings out the wood grain while keeping the space airy. Pair the panels with natural wood furniture and simple textiles to keep the look cohesive.
DIY options are friendly for many homeowners. For real panels, use pine or plywood planks cut to height, sand edges, and screw into studs. Beadboard goes on with horizontal planks and a chair rail. If you want less work, try peel-and-stick faux panels or fabric-backed wallpaper with a panel pattern. Finish with a clear sealant to protect from humidity and sun.
– Tip: Paint the paneling in a soft earthy hue for a modern twist.
– Trick: Use wall sconces to enhance the paneling, creating a warm and welcoming glow.
Rustic wall paneling creates a cozy backdrop that lifts your living room’s style.
You want a living room that feels warm, honest, and truly yours. Handcrafted decor adds that personal touch and makes the room feel alive. It also supports local artisans and threads real stories into your space.
Focus on these artisanal forms:
– Pottery with earthy textures and natural glazes.
– Handwoven textiles like throws, blankets, and wall hangings.
– Carved wooden decorations such as bowls, signs, or small statues.
Place these pieces on shelves, coffee tables, or mantels where they can be noticed. Let a standout item lead a small display, then add supportive pieces nearby. Mix rough textures with smooth ones so the group feels balanced.
Tip: Choose items that resonate with your tastes for a cohesive look.
Trick: Pair handcrafted pieces with simple store-bought items to create contrast.
Keep care simple: dust lightly, avoid direct sun, and rotate pieces as seasons change. Start with one statement piece, then bring in a few smaller accents over time. With this approach, handcrafted decor adds authenticity without clutter and fuss.
If you shop locally, you’ll meet the maker and learn about materials. This connection often yields better quality and a story you can share.
Handcrafted decor breathes life into your living room, supporting local artisans while weaving their stories into your space. Embrace the warmth of rustic home decor ideas and make your home truly yours!
17. Handcrafted Decor
Editor’s Choice
🛍️
Ceramic Flower Vase, 5.3 inch Off-White Farmhouse Rustic Vase, Handcraft…
You want a tidy living room that still feels warm. Functional rustic storage helps you get there. Choose wooden crates, wicker baskets, or metal bins. These pieces blend with rustic decor and add texture. You can tuck them under the coffee table or on shelves. They also work as decorative accents along walls or at couch ends. The right mix holds clutter while keeping your style.
Start with a simple plan. Step 1: pick three pieces that fit your space. Step 2: assign a job to each piece, like a blanket tote, a toy bin, or a mail tray. Step 3: vary textures and heights to create depth. Place crates under the coffee table for hidden storage. Put wicker baskets on shelves for easy reach. Use metal bins near the entry to corral remotes and chargers.
Tip: Label bins with vintage tags for a charming touch. Trick: Use decorative boxes to conceal smaller items, keeping everything neat and stylish.
With functional rustic storage, you keep a neat look and celebrate the warm, earthy vibe of rustic design. You gain space without crowding, and you create a room that feels lived in yet organized. That calm, simple setup stays fresh with light seasonal tweaks.
Transform clutter into charm! With just three functional rustic storage pieces, you can keep your living room tidy while enhancing your cozy style. Remember: it’s all about blending functionality with flair!
18. Functional Rustic Storage
Editor’s Choice
🛍️
Wooden Storage Crates Nested Crates Set of 3 (Large,Medium,Small),Farmho…
Are you craving more personality in your rustic living room? Whimsical decor accents can do that job without stealing the scene from sturdy wood and stone.
They bring a touch of playfulness—quirky sculptures, one-of-a-kind wall art, or a few playful throw pillows—that shows your style. Use them as accents, not as the whole room. One or two standout pieces are enough to keep things balanced.
– Tip: Pick a consistent color palette. Let each whimsy item echo earthy tones like forest green, sand, brick red, or deep blue.
– Trick: Rotate items with the seasons. A new pillow cover in winter, a quirky wall piece in spring keeps the room fresh.
Choose pieces that feel tactile and real. A carved wooden figure, a metal sculpture with simple lines, or a ceramic wall plaque adds texture as well as personality. Pair them with sturdy rustic basics—a chunky wood coffee table, wool throws, and a woven rug—so whimsy doesn’t shout.
In practice, place one bold item where the eye lands first, then add smaller accents around it. Keep the rest of the room quiet. This makes guests notice the charm without crowding your space.
Whimsical decor accents make your living room feel inviting and unique, a place where friends and family want to linger.
19. Whimsical Decor Accents
Editor’s Choice
🛍️
Funny Middle Finger Resin Garden Statue, Home Decoration Sculpture for O…
Want rustic charm in your living room without buying new furniture? Repurposing saves money and gives your space a warm, lived-in feel. Each repurposed piece carries history you can sense in the wood.
– Old doors into coffee tables: Stand a door on legs, sand the surface, and seal it. The grain and patina tell a quiet story, while the table holds books and coffee.
– Painted mismatched chairs: Give all chairs a unifying coat, or mix colors and age the finish for character.
– Crates as side tables: Stack crates, add a glass top, and you have a practical resting spot with quirky storage.
– Ladders as bookshelves: Lean a vintage ladder or mount it. Use the rungs for display—plants, books, or photos.
– Suitcases for storage: Stack worn suitcases to form a rustic cabinet or small table. Their texture brings warm history.
– Pallet boards as shelves: Sand, seal, and mount as wall shelves or a low table. Natural wood shines.
– Glass jars and metal tins: Use as candle holders, vases, or organizers. They add light and tidy up small items.
Repurposing items gives your living room a unique story. Transform old doors into coffee tables or paint mismatched chairs for a cozy, rustic vibe that won’t break the bank!
20. Repurposed Items
Editor’s Choice
🛍️
Varathane Premium Fast Dry Wood Stain, Half Pint, Dark Walnut
You want a warm rustic living room that feels inviting. Soft ambient lighting does that without shouting for attention. Start with a mix of lighting sources so every corner feels cozy.
– Use table lamps to frame seating and add friendly pools of light.
– String lights bring a gentle glow that softens rough textures.
– Wall sconces throw light upward and create depth along walls.
– dimmable fixtures let you adjust mood or time of day.
With dimmers, you can shift brightness for gatherings or movie nights. Place lights to highlight key decor like a wood mantel or woven rug. Create cozy nooks by tucking a lamp near a reading chair. Layer light by combining sources at different heights. This adds depth and avoids flat, single-beam lighting.
Add candles or lanterns for a classic rustic touch. Try warm white bulbs so the room feels cozy, not clinical. Mix metal, wood, and fabric lamp shades to echo your style. Keep cords tucked away and place switches where you reach them easily.
With careful placement and layering, your rustic living room becomes a warm retreat. Experiment with dimming first to test mood changes. Then add a lamp to finish the scene. Trust your eyes.
21. Soft Ambient Lighting
Editor’s Choice
🛍️
Bedside Table Lamp for Bedroom – 3 Way Dimmable Touch Lamp USB C Chargin…
You want window treatments that boost your rustic living room while keeping privacy and warmth. Use natural fabrics like linen or cotton in earthy tones so the room feels cozy. Texture matters, and simple patterns work best.
Try wooden blinds or lace curtains that filter soft light, adding charm. Layer sheer curtains with heavier drapes to add depth and visual interest.
– Tip: Use natural wood curtain rods to tie in with your overall rustic look.
– Trick: Choose treatments that are easy to clean and maintain for a practical yet stylish solution.
Rustic window treatments finish your living room by keeping comfort at the center, while matching wood, fabric, and wall color. They shape mood—warm, calm, and inviting. With the right mix, you control privacy, light, and style in one simple update. Start with a light linen or cotton panel, then add a textured layer.
Keep colors earthy—taupe, sand, olive—and let wood tones shine. Measuring matters: measure your windows and choose rods that fit. Rustic window treatments can complete your living room decor while ensuring comfort and warmth.
Your windows feel warmer.
If you want a softer look, choose sheer panels in a lighter shade. For a bolder touch, pick heavier woven fabrics in deep earthy colors.
22. Rustic Window Treatments
Editor’s Choice
🛍️
MIULEE Natural White Linen Curtains 84 Inch Long for Bedroom Living Room…
Want to give your rustic living room a bold, welcoming feel? Start with statement furniture that acts as a focal point. Think oversized coffee tables in reclaimed wood, unique armchairs, or shelves that catch the eye while staying true to rustic charm. These pieces set the mood before you add textiles. You can mix styles within rustic to add contrast.
These pieces do more than fill space. They create energy and draw people in.
– Bold, oversized coffee tables in reclaimed wood anchor the room.
– Eye-catching shelving with mixed textures adds height and function.
– Storage-backed benches or ottomans hide throws and keep surfaces clean.
Measure your space so the piece fits without crowding. Match the finish to your room’s wood tones for harmony. Scale matters; pick a table and chairs that balance your sofa and rug. Test a bold color or texture in a small way to avoid clutter.
Tip: Mix rugged pieces with soft textiles to soften the look.
Trick: Choose furniture with built-in storage to keep the room tidy.
With these choices, your rustic living room gains energy and personality.
23. Statement Furniture Pieces
Editor’s Choice
🛍️
Martin Svensson Home Monterey Solid Wood Coffee Table, Reclaimed Natural
You want your rustic living room to feel fresh in every season. Seasonal decor changes make that easy. Plan a simple swap instead of a full redo. Start with a neutral base: wood tones, burlap, linen.
Fall brings warmth. Add pumpkins, warm oranges and browns. A plaid throw, a wool blanket, and a few pine cones. Swap in amber lighting and a textured rug. You get cozy charm fast.
Winter adds comfort. Layer soft blankets and a few lanterns. Pine sprigs go on the mantel. Keep to soft whites and deep greens. Use LED candles for safety and glow.
Spring brightens the room. Fresh flowers and lighter fabrics wake the space. Pale greens and whites keep it airy. Choose light wood or white furniture to breathe room. Add a breezy throw to finish.
Summer cools the mood. Bring vibrant greenery and linen cushions. Use airy fabrics and a jute rug.
– Store seasonal items in decorative boxes to stay organized.
– Use interchangeable decor pieces that adapt with the season: cushion covers, wall art, garlands, table runners.
– Keep a small anchor set of materials like wood, metal, and jute to tie the look.
Spend a couple hours swapping pieces. Create a season kit with a few items per season.
24. Seasonal Decor Changes
Editor’s Choice
🛍️
Decorative Storage Boxes with Lids – Set of 2 Beautiful Fluted Cardboard…
If you crave rustic warmth but hate clutter, embrace minimalism. A clean living room makes the wood grain glow and the textures pop. Choose a few strong pieces and leave space for air to move. This keeps your space breathable and inviting. You will notice it feels calmer and more lived-in.
– Choose a few standout pieces Pick 2–3 key items that show rustic charm, like a rugged coffee table, a weathered lamp, or a leather chair. Let these pieces guide the look.
– Keep surfaces clear Clear the coffee table, mantels, and shelves. Use a simple tray to group objects and place one fresh bouquet for life.
– Stick to a calm color palette Use neutral tones—creams, stone, soft gray—and let warm wood tones do the talking.
– Texture over clutter Bring in rough wood, woven rattan, linen, and soft wool. Skip busy patterns so the room feels open.
– Smart storage ideas Hide extras in baskets or cabinets. Choose furniture with built-in storage to keep the look clean and easy.
– Warm, inviting lighting Choose soft, amber bulbs. A single statement pendant or a couple of lamps can glow without shouting.
With a few careful choices, your rustic living room becomes cozy, organized, and alive.
25. Embrace Minimalism
Editor’s Choice
🛍️
OLIXIS Wooden Coffee Table, Lift Top Coffee Table with Large Hidden Comp…
Transforming your living room with rustic home decor can create a warm and inviting sanctuary that reflects your personal style. Each of these ideas, from vintage accents to earthy palettes, can breathe life into your space, making every gathering a memorable experience.
Consider which elements resonate with you the most, and don’t hesitate to mix and match for a truly personalized touch. Embrace the beauty of rustic living and let your home tell its story.
Note: We aim to provide accurate product links, but some may occasionally expire or become unavailable. If this happens, please search directly on Amazon for the product or a suitable alternative.
This post contains Amazon affiliate links, meaning I may earn a small commission if you purchase through my links, at no extra cost to you.
Frequently Asked Questions
What Are Some Key Elements of Rustic Home Decor for My Living Room?
To achieve that stunning rustic look in your living room, focus on a few key elements. Start with reclaimed wood for furniture pieces like coffee tables or shelves, as they add warmth and character. Incorporate cozy textiles like wool or cotton throws to create a welcoming atmosphere. Don’t forget about natural accents like wooden beams or vintage decor that tell a story and enhance the rustic vibe!
How Can I Make My Living Room Feel Cozier with Rustic Decor?
Creating a cozy atmosphere is essential in rustic home decor! Begin by using an earthy color palette with warm browns, soft greens, and muted reds to evoke a sense of calm. Add plush seating options and layered textiles, such as cushions and throws, to invite relaxation. Incorporating natural greenery will also breathe life into the space, making it feel homely and inviting.
Are There Affordable Ways to Incorporate Rustic Decor in My Living Room?
Absolutely! You can achieve a beautiful rustic look without breaking the bank. Consider repurposing items you already own, like turning an old ladder into a bookshelf or using vintage crates for storage. Thrift stores are treasure troves for vintage accent pieces. Just keep an eye out for unique finds that add charm and character. Simple DIY projects can also transform basic pieces into stunning rustic decor!
What Lighting Should I Use for a Rustic Living Room?
Lighting plays a crucial role in setting the mood for your rustic living room. Opt for farmhouse lighting fixtures like pendant lights or wrought iron chandeliers, which add a touch of charm. Consider using soft ambient lighting with table lamps or wall sconces to create a warm glow. Layer your lighting sources to ensure every corner feels cozy and inviting, making your living room a perfect place to unwind.
How Can I Personalize My Rustic Living Room Decor?
Personal touches can make your rustic living room truly yours! Incorporate handcrafted decor from local artisans or display family heirlooms that tell your story. You might also want to mix and match vintage pieces with modern accents for a unique look. Adding personal artwork or photos in rustic frames can also create a warm, inviting atmosphere while showcasing your personality.
I put this together because I love how a 1950s kitchen can feel sunny and welcoming. The pastel walls, chrome shiny surfaces, and little details make me smile. This post collects 20 vintage kitchen decor ideas from the 1950s that you can use today. They bring back that warm glow and maybe even make you exclaim, “Take Me Back!”
Who is this for? If you love retro color palettes, diner vibes, or a kitchen that feels cozy and bright, this one’s for you. It’s for renters and homeowners who want small, affordable updates that make a big difference. It’s for people who care about textures, patterns, and those tiny touches that turn cooking into a memory.
What you’ll get: you’ll find practical ideas that fit real life. Easy swaps for paint, hardware, lighting, storage, and textiles. Tips on choosing materials that stand up to busy mornings, like Formica, chrome, enamel, and vinyl. A path to mix 1950s charm with modern needs without losing function.
Imagine a kitchen where a checkerboard floor meets a domed sunburst clock, where glass jars line open shelves and a diner-style stool pulls up to a compact dining nook. You might picture pastel dishware, enamel pots, and a neat row of labeled canisters that make you smile every time you open the cabinet. These details are small, but they carry a big retro mood that feels fresh again.
Getting started is simpler than you think. Start with a quick paint refresh and new hardware. Try a peel-and-stick backsplash or a set of retro canisters to swap in without a full remodel. Look for second-hand finds with clean lines, then give them a wipe down or a light coat of paint to make them feel new again.
Ready to step back in time while staying practical? Keep reading to discover these ideas and how to adapt them to your space. You’ll see how to balance bold colors with calm neutrals, and how to keep daily cleaning simple. Pick one idea to try this week and watch your kitchen mood shift.
Want a kitchen that captures the 1950s vibe? Start with a bold color plan.
In that era, color brightened rooms. Think mint green, soft pink, and buttery yellow leading the way. Choose a pastel shade for your cabinets or add a colorful wall tile as the centerpiece. Pair these hues with chrome or stainless steel for that classic mid-century shine. Finish with bright accessories to pull the look together.
Choose a color trio by selecting a main wall color, a cabinet shade, and a small accent.
Create contrast by pairing light walls with deeper cabinets for a retro pop.
Show off color with open shelves displaying colorful canisters and cheerful dishware.
Move metal in with chrome hardware and bar handles to echo mid-century metal.
Textile accents include gingham and polka dots on table linens and chair cushions.
Tile anchor a checkerboard floor or a colored wall tile on a feature wall to ground the palette.
With these steps, your kitchen feels playful yet balanced. The colors do the talking, while simple accents keep the space practical for everyday life.
1. Retro Color Palettes
Editor’s Choice
🛍️
Tupperware Heritage Collection 10 Piece Nested Canister Set in Vintage C…
You want a kitchen that feels lively without losing function. Cheery retro appliances do that in a snap. Think pastel refrigerators, bright red toasters, cobalt blue mixers. These pieces pop visually and still serve you every day. Modern versions copy the old shapes but add quiet motors, safer cords, and better energy use. The nostalgia is real—memories of family meals, pancake mornings, and stories shared around the stove.
When you shop, follow simple rules.
– Where to shop:
– Look for brands that specialize in retro designs.
– Try thrift stores or flea markets for real vintage pieces.
– Or choose newer models that offer vintage aesthetics with updated tech.
Balance is key. Set one bold appliance as a centerpiece, then pair it with calm colors in cabinets and counters. Pick finishes that mix well, like satin chrome, enamel, and glass. Keep cords tidy and outlets accessible.
Practical steps help you get it right. Measure your space before buying. Check the power needs, height, and clearance. Add a splash of color with a simple backsplash that ties the room together. Let the retro piece shine without clutter.
2. Cheery Retro Appliances
Editor’s Choice
🛍️
Frigidaire EFR756, 2 Door Apartment Size RETRO Refrigerator with Top Fre…
Want a fast, 1950s kitchen makeover? Classic checkerboard flooring is a bold, timeless choice. The contrast of black-and-white squares brings energy and a touch of retro charm. A glossy finish makes colors pop; a matte finish softens the look and hides fingerprints a bit better.
Material options are simple. Ceramic tiles last long and wipe clean. Vinyl tiles feel softer underfoot and are easy to install. Either choice fits a checkerboard layout and keeps upkeep reasonable. Pick the one that fits your lifestyle.
Styling tips
– Use mats or area rugs with a similar check pattern to reinforce the look.
– Pair with vintage-style furniture for a cohesive feel.
– Try bright wall colors to keep the room lively and inviting.
Care and maintenance
– Sweep daily to reduce grime and scratches.
– Mop with a mild cleaner; avoid harsh chemicals that dull the shine.
– If you use ceramic tiles, reseal the grout every couple of years to keep it fresh.
How to install in your space
– Measure the area and sketch the layout before you buy tiles.
– Order extra tiles for cuts and repairs.
– Dry-fit several rows to check alignment, then snap tiles into place with proper adhesive.
– Mark straight chalk lines to keep rows true.
– Grout carefully and wipe away excess with a damp cloth.
Step back into the 1950s with classic checkerboard flooring! This bold choice not only energizes your space but also blends timeless style with modern practicality—perfect for your vintage kitchen decor dreams!
3. Classic Checkerboard Flooring
Editor’s Choice
🛍️
Vinyl Flooring Peel and Stick Floor Tile/Coverings 12in×12in Easy to Ins…
You want your kitchen to feel warm and personal, even without a full remodel. A display of vintage cookware can do that in an instant, adding color, texture, and a hint of history.
Think of open shelves as a tiny gallery. The right arrangement makes every piece feel intentional, useful, and ready to tell a story.
– Choose a core set like colorful mixing bowls, a cheerful tea set, and nostalgic bakeware that tell a small story.
– Line open shelves by color for a playful rainbow or by size for a clean, gallery-style rhythm.
– Keep frequently used pans within easy reach, while placing decorative pieces on higher spots to balance the scene.
– Source smartly at estate sales, flea markets, and thrift shops for one-of-a-kind finds that spark joy.
– Rotate a few pieces seasonally and wipe down rims and handles so every gleam feels fresh.
– Add texture with enamel, ceramic, glass, and metal, plus a simple counter-top accessory to complete the look.
This approach makes your kitchen feel lived-in, not staged. It keeps you practical and playful as trends shift. With these ideas, your vintage cookware becomes a living part of your kitchen, a warm centerpiece guests notice and you enjoy every day.
6. Vintage Cookware Displays
Editor’s Choice
🛍️
Lareina Ceramic Mixing Bowls for Kitchen, Large Nesting Mixing Bowl Set …
You want a vintage feel in your kitchen without clutter. A bar cart helps you pull it off. It gives you a playful focal point and a handy spot for drinks, glassware, and color.
Choose a cart with a clean chrome frame or a warm wood body. Brass accents give a true 1950s glow. Wheels make it easy to roll into the party zone and back. Three-tier designs give you extra storage for bottles, mixers, and glassware.
Fill it with retro staples. Start with these:
– Retro cocktail glasses and a colorful ice bucket
– A shaker, a decanter, and a few mixers
– A small tray for grouping items
Here are quick styling ideas:
– Group items on a decorative tray to keep the surface tidy
– Add fresh fruit or a short bouquet for color
– Keep a small card with easy drink ideas nearby
Placement and upkeep:
– Put the cart where guests can reach it but it doesn’t crowd counters
– Wipe surfaces after use and dust the metal weekly
Be practical with space. A bar cart fits well in open kitchens or dining corners. Look for secondhand pieces or simple metal frames to save money and still get that 1950s vibe. If you keep it clean and rotate pieces, the cart stays fresh.
7. Charming Bar Carts
Editor’s Choice
🛍️
Bar Cart Serving Wine 3 Tier Home Rolling Rack with Wheels Mobile Kitche…
Want a kitchen that feels like a 1950s page? A whimsical wall clock can do that. In that era, clocks used fun shapes, bright colors, and playful faces. Choose a clock that tells time and adds character. Look for starbursts, retro diner styles, or clocks with cartoon characters. These pieces bring charm to daily meals.
What to look for
– Shape matters: starbursts grab attention.
– Color and finish: bold hues or glossy bakelite.
– Size: fit wall space; avoid overpowering.
– Movement: quiet quartz for a calm kitchen.
– Durability: metal or sturdy plastic lasts.
Where to find
– Thrift stores and flea markets hide unique finds.
– Online shops and estate sales widen your picks.
– Check for face glare and rust before buying.
How to style
– Hang it as a focal point.
– Pair with other mid-century pieces like metal racks or enamel signs.
– Create a small wall vignette with coordinating pieces.
– Balance color by choosing one bold clock and coupling tones.
Placement tips
– Hang at eye level or slightly above the counter.
– Center it over the main work area for balance.
– Check glare from windows and adjust.
– If space is small, one large clock works better.
Start your hunt this weekend and watch your kitchen glow with vintage charm. With a starburst or diner clock, your space feels brighter, friendlier, and more personal.
8. Whimsical Wall Clocks
Editor’s Choice
🛍️
FIELDY Large Wall Clock 22 Inch Mid Century Wall Clocks Starburst Clock …
Choose a trio of colors; use open shelves for display.
Cheery Retro Appliances
$349.00
Pastel refrigerators, bright toasters
Look for vintage designs; balance with calm colors.
Classic Checkerboard Flooring
$16.49
Ceramic or vinyl tiles
Use mats to reinforce the look; keep it clean.
Vintage Cookware Displays
$35.99
Ceramic, enamel, glass
Arrange by color; keep frequently used items accessible.
Farmhouse-Style Dining Sets
$286.06
Solid wood, mismatched chairs
Use a round table for cozy seating; add a floral centerpiece.
Whimsical Wall Clocks
$19.88
Metal or plastic, various shapes
Hang at eye level; pair with mid-century decor.
Nostalgic Recipe Cards
$16.99
Sturdy, acid-free paper
Display in a decorative box; rotate favorites weekly.
9. Colorful Kitchen Linens
You want a brighter kitchen without a full remodel. Colorful linens are a quick, affordable way to get that retro glow. They add texture, catch light, and nod to the 1950s in a single move.
Choose lively fabrics like checkered towels, gingham, pastel aprons, and patterned tablecloths. These textiles are practical and serve as easy decor updates you can swap with the seasons.
When picking fabrics, look for cotton or cotton blends that wash well. Pick colors that fit your kitchen’s story and feel, not just what’s popular. Favor classics—checks, stripes, polka dots, and retro florals that read vintage yet feel fresh.
Layer them for warmth—towels on hooks or the oven handle, tablecloths on the table. Add a coordinating napkin or placemats to tie the look together.
Care and display tips: Durable, washable fabrics last longer and keep their color after wash. Colorfast prints stay bright if you follow the care label. Display ideas are simple: hang towels near the sink, drape an apron over the oven handle, set a folded cloth on a shelf, or lay a cloth runner along the table.
– Durable, washable fabrics withstand daily use.
– Choose colors that complement walls and cabinetry.
– Display ideas: hooks, oven handles, and tabletop layouts.
Brighten your kitchen with colorful linens! These vibrant touches not only nod to vintage kitchen decor from the 1950s farmhouse but also transform your space effortlessly – no remodel required!
9. Colorful Kitchen Linens
Editor’s Choice
🛍️
Hand Towels 5 Pack – Cotton Face Towels Soft, Absorbent, and Decorative …
Your kitchen feels crowded, and you want vintage charm without chaos. You can have both with smart storage ideas that nod to the 1950s. Vintage storage isn’t just pretty; it keeps you organized while you cook.
– Repurpose old crates or wooden boxes for shelves and bins, so pantry items stay visible.
– Mix canister styles to create a playful, eclectic look across the counter and shelf.
– Label jars with chalkboard labels or wooden tags to speed up meal prep.
– Use mason jars to store dry goods with airtight lids, showing contents clearly.
– Stack and display on a rolling cart or wall rack for easy access.
– Add baskets for fruit, snacks, or towels to soften metal and glass.
Start with a small display on the counter. A tray helps keep jars in one neat spot. Pick two or three colors to tie the look together. Label items so you grab the right one fast. Wipe jars clean after use to maintain shine. Rotate items to stay fresh and avoid waste.
This approach brings order and charm. Your kitchen feels organized and lively, just what vintage lovers want.
Vintage kitchen decor from the 1950s isn’t just about looks—it’s about smart storage that brings harmony to your space. Get creative with repurposed items and let your kitchen shine with both charm and organization!
10. Vintage Storage Solutions
Editor’s Choice
🛍️
Wooden Storage Crates Nested Crates Set of 3 (Large,Medium,Small),Farmho…
Want to bring a splash of 1950s charm to your kitchen without creating clutter? Retro utensil holders do just that. They add color, character, and a practical home for every spoon and spatula.
Look for patterns that whisper old-school style—polka dots, cheerful florals, or simple vintage stripes. Materials matter too. Ceramic gives a warm, glossy look that fits a farmhouse feel, while metal cans add a sleek, retro edge. You can mix both for a layered, dimensional display.
Placement makes a big difference. A sturdy ceramic holder sits proudly on the counter, keeping tools within easy reach. A metal option can hang on the wall for a cleaner, showroom-like vibe. Either way, choose a piece that works with how you cook and how your kitchen looks.
To pick the right holder, keep these ideas in mind:
– Ensure it has space for all your go-to utensils.
– Pick a finish and color that complement your kitchen theme and colors.
– Don’t be afraid to blend textures—stoneware with metal or wood accents adds depth.
Tip: think about what you actually reach for. A roomy, well-placed holder helps you cook faster and keeps your counters neat.
With the right retro utensil holder, your kitchen feels cozy, organized, and proudly nostalgic.
11. Retro Utensil Holders
Editor’s Choice
🛍️
FUN ELEMENTS Kitchen Utensil Holder, 7.2″ Super Large Utensil Crock Heav…
You want a kitchen that nods to the 1950s while staying easy to live with. A vintage spice rack can do that. It adds charm and keeps flavors close at hand.
Choose a rack that fits your space. Wood brings warmth and a classic feel. Metal or enamel gives a sharper retro touch. Look for clean lines and sturdy shelves that hold glass jars well. Let clear jars show off bright spices.
– Easy reach for daily cooking — Keep the rack near your prep area so you grab spices in a pinch.
– Color and size grouping — Arrange jars by hue or height for a clean, scannable look.
– Vintage labels — Use old-style fonts or handwritten tags to boost nostalgia.
Place the rack where you cook most. On the wall, by the stove, or on a back-splash shelf works nicely. Pair the jars with a small tray for olive oil, salt, and pepper to complete the scene.
How to set it up quickly: measure the space, pick a rack, and buy uniform jars. Label each jar clearly and fill with spices you use often, like paprika, cumin, garlic powder, and oregano. Keep the lineup tidy by rotating spices every few months so colors stay bright and flavors stay fresh.
12. Classic Spice Racks
Editor’s Choice
🛍️
Bocuse Small Vintage Spice Rack | 15″ L x 4 3/4″ W x 21 1/2″ H
Want to bring a 1950s sparkle to your kitchen table? Retro tableware can do that with small cost and effort. Colorful plates, cups, and glasses in classic 50s patterns set the mood fast. Look for pastel tones as well as brights—teal, coral, avocado, and sunny yellows. Polka dots, atomic stars, and florals pair well. Mix and match different designs to keep the look lively while staying cohesive. These pieces work as everyday dinnerware and also glow as decor when shown in open cabinets or on a sideboard.
\n\n
To build a thoughtful collection:
– Find sets with a story behind them Look for patterns tied to a shop, a town, or a small memory.
– Include one or two bold statement pieces A large teal platter or a ruby sugar bowl can lift the table.
– Coordinate colors with your kitchen Pick pieces that echo your wall color, cabinets, or countertops for a unified feel.
\n\n
Mixing patterns is easy when you pick a shared color or edge style. Use a calm solid to balance busier prints. Display a few favorites in open cabinets or on a tray to create a small retro vignette on your table.
\n\n
Care and practicality:
Choose durable materials like ceramic, porcelain, or tempered glass. If you cook with a dishwasher, make sure items are labeled dishwasher-safe. Hand wash delicate pieces to keep colors bright. Store extras in a rack or box to avoid chipping.
\n\n
With a small, well-chosen collection, your dining area can echo the past without feeling crowded. You don’t need to replace all your dishes; a handful of bright pieces can do the job.
13. Retro Tableware
Editor’s Choice
🛍️
Gibson Elite Capetown Assorted Color Reactive Glaze Round Stoneware Dinn…
You want a kitchen that feels warm and playful, like a 1950s scene. A cozy nook gives you that vibe without crowding the space. Start with a small bistro table and two retro chairs to anchor the corner. Add a colorful cushion, a tiny vase of flowers, and a vintage radio for nostalgia. That nook becomes your morning coffee spot or a quick bite. It also makes the room feel inviting and relaxed. To shape the look, pick warm wood for furniture and add chrome touches for a true midcentury edge.
– Position the nook near a window to catch natural light.
– Choose bold cushion colors to boost the retro mood.
– Add books or magazines to invite leisurely moments.
– Use warm woods with chrome accents for a classic 1950s touch.
– Lay a small rug underfoot to boost warmth and define the corner.
– Use soft lighting to mimic diner glow.
– Keep wall colors warm neutrals or pastel accents.
– Avoid clutter so the nook stays calm.
– If space is tight, swap the chairs for a slim bench and still keep the look.
– Consider a wall shelf to display a few favorite mugs or tiny plants.
With these steps, your 1950s cozy corner is ready to enjoy.
A cozy nook isn’t just a spot for coffee; it’s where memories brew. Embrace the warmth of vintage kitchen decor from the 1950s and turn your corner into a charming retreat!
14. Cozy Nooks
Editor’s Choice
🛍️
3 Piece Bistro Set, Anti-Rust Table and Chairs Set of 2, Waterproof Retr…
Your kitchen can feel neat and nostalgic with a pot rack. It saves space and shows off your cookware with a touch of 1950s charm. A good rack holds more than pots; it tells a story of family meals and easy gatherings. You can shape the look with simple choices in materials and placement.
– Wrought iron for farmhouse grit A wrought-iron pot rack carries sturdy lines and classic charm that echo a 1950s kitchen.
– Warm wood for a softer glow A wooden rack adds warmth and pairs nicely with pine or maple cabinets.
– Mix metals for eclectic charm Pair iron with copper hooks or brass accents to add depth and color.
– Hang at the right height Position the rack where you can reach pots easily and keep space to move around the stove.
– Layer in herbs and plants A few fresh herbs or small pots soften metal and bring a pleasant scent.
– Light it to highlight shine A slim overhead light or pendant casts a warm glow on your cookware.
– Keep it practical Put the most-used pans at the front and check screws regularly.
– Get started now Measure your wall, choose a sturdy mounting method, and set a realistic goal for how many pots you want on display.
15. Unique Pot Racks
Editor’s Choice
🛍️
OROPY Wall Mounted Pot Pan Rack 21” Set of 2, Industrial Utensils Wall …
Your kitchen deserves a glow that feels warm and playful, just like the 1950s. A retro light fixture does more than brighten a room. It becomes a focal point and sets the mood. You’ll notice the space feel friendlier when you pick the right piece.
Think in layers. Start with a main pendant or chandelier that catches the eye. Add under-cabinet lights to illuminate prep surfaces. A small accent light elsewhere adds depth and charm.
Key ideas:
– Choose a central fixture that matches your color palette and acts as a true statement for a bold first impression.
– Use shades and finishes that echo mid-century style—glass globes, milk glass, brass, or copper.
– Mix shapes, but keep practicality in mind. Cone, dome, and globe shades work well together.
Practical tips:
– Hang a island or table fixture 28–34 inches above the surface. Keep clearances for safe movement.
– Pick warm bulbs, around 2700–3000K, and use a dimmer for mood and brightness control.
– Prefer LED options for energy and low maintenance. Clean shades regularly.
Finishing touches:
– A clustered arrangement adds cafe vibes, while a single bold piece can anchor the room.
– Make sure the fixture style works with your cabinets and appliances for a cohesive look.
16. Retro Light Fixtures
Editor’s Choice
🛍️
Modern Large Pendant Light 19.68 inch, 2 Tiers Matte White Shade, Natura…
You want a kitchen that feels warm, inviting, and a touch playful. A vintage breadbox does that for you. It keeps loaves soft longer. It adds a bright pop of 1950s style to your counter. When you pick one, you bring home function plus personality. It also gives you extra space to corral bread bags and keep counters clean.
Choosing the right vintage breadbox
Pick a box that fits your counter and bread habits. Materials range from tin and enamel to wood, each with a different feel.
– Size matters: Choose a breadbox that fits your counter.
– Color and pattern: Look for bold retro hues or classic white.
– Materials: Tin, enamel, or wood each feel different and clean up easily.
– Seal quality: Check for a snug lid to keep bread fresh.
– Style match: Pair with enamel canisters and a retro kettle.
A well-chosen breadbox can become the daily hero of your kitchen.
Set it where you bake or snack most often. A nearby breadbox makes grabbing slices quick and keeps the kitchen looking tidy. Wipe it with a damp cloth and dry it right away. Keep it simple, friend.
With a little care, a vintage breadbox adds warmth and practical storage to your 1950s kitchen decor.
17. Vintage Breadboxes
Editor’s Choice
🛍️
Vintage Bread Box for Kitchen Countertop – Retro Brown Bread Storage Box…
You’re looking for extra storage that still fits a 1950s kitchen. A rolling cart gives you a portable surface and a touch of retro charm.
These carts roll on small casters, so you can move them from counter to dining area in seconds. They save space and make entertaining easier.
Choose a cart that fits your style
Pick a cart that matches your decor—chrome and wood for a mid-century vibe, soft pastel enamel for a sunny retro look, or bold color to add personality.
– Material and finish matter: brushed chrome with wood shelves, powder-coated metal, or pastel enamel.
– Size and scale: aim for a surface big enough for plates, a few cookbooks, and a drink station.
– Storage features: shelves, hooks, and a small drawer or basket to hold utensils and napkins.
Use it as a mini prep zone. Top holds essentials; shelves store staples. At parties, roll it out as a serving cart.
Care and placement
Wipe spills quickly to avoid stains. Line shelves with a soft cloth to protect wood. Put it near the prep area, but avoid direct heat or steam.
With a rolling cart, you gain flexibility and vintage flair. Measure your space and pick a finish you love. This practical piece invites people to gather.
Take one practical step today. You got this.
18. Classic Rolling Carts
Editor’s Choice
🛍️
Vintage Rolling Bar Cart on Wheels Industrial Mobile Serving Cart Metal …
Charming Pot Holders: Color, Texture, and Retro Vibe
You want a pop of color and a hint of nostalgia in your kitchen. Charming pot holders do that and more. Look for fabrics with classic patterns or vintage graphics. These small, heat-safe touches protect your hands while brightening the counter. Hang them in a visible spot for easy cooking and a touch of retro style. Matching sets can pull the whole space together. Here’s how to use them well.
– Choose colors that tie in with your theme. A single palette makes the room feel calm and pulled together.
– Hang them on hooks near the stove for quick use and quick looks at their patterns.
– Mix and match designs for a playful, eclectic vibe that still reads cohesive.
– Pick materials that balance softness and heat resistance. Cotton or quilted blends feel good in the hand and last longer.
– Opt for vintage motifs—gingham checks, cherries, utensils, or bold retro graphics—that nod to the 1950s.
– Keep a few bright pieces as focal accents and tuck the rest where they’re handy but visible.
– Care tips: wash with similar colors, line-dry to prevent shrinking, and check edges for wear.
With these pot holders, your kitchen gains personality without losing its function. Classic, colorful, and easy to love.
19. Charming Pot Holders
Editor’s Choice
🛍️
VHC Brands Tea Cabin Pot Holder Patchwork 8×8 Log Cabin Country Rustic L…
You want a kitchen that feels warm and lived-in, not sterile. Nostalgic recipe cards bring that memory-rich vibe into your décor. Display them in a decorative box or on a twine line with clothespins. Organize cards by family or occasion and print them on sturdy, acid-free paper for long life.
Here’s a complete recipe you can showcase on a card:
Grandma’s Banana Bread
– Ingredients:
– 3 ripe bananas
– 1/2 cup melted butter
– 1 cup sugar
– 2 eggs
– 1 1/2 cups all-purpose flour
– 1 teaspoon baking soda
– 1/2 teaspoon salt
– 1 teaspoon vanilla extract
– Steps:
1. Preheat oven to 350°F (175°C). Grease a 9×5 loaf pan.
2. Mash bananas until smooth.
3. Stir in melted butter.
4. Mix in sugar, eggs, and vanilla.
5. Add flour, baking soda, and salt; stir until just combined.
6. Pour into pan and bake 60–65 minutes, until a toothpick comes out clean.
7. Cool 10 minutes in pan, then turn out onto a rack.
Display tips: frame the card, slide it into a pocket, or clip it to a wall. Rotate favorites weekly for variety, then pair with vintage spoons or a faded apron.
Why this works: recipe cards feel personal and inviting. A small box or string keeps recipes reachable, so family stories become part of every meal.
20. Nostalgic Recipe Cards
Editor’s Choice
🛍️
Dahey Wooden Recipe Box White Recipe Organizer with 100 Recipe Cards and…
Transforming your kitchen with vintage decor from the 1950s can create a warm and inviting atmosphere that reflects your personality.
Whether it’s through colorful appliances, charming tableware, or playful artwork, each piece tells a story and sparks joy.
Embracing these vintage elements will not only enhance your kitchen’s aesthetic but also make every meal a delight. So go ahead and bring a touch of nostalgia into your home!
Note: We aim to provide accurate product links, but some may occasionally expire or become unavailable. If this happens, please search directly on Amazon for the product or a suitable alternative.
This post contains Amazon affiliate links, meaning I may earn a small commission if you purchase through my links, at no extra cost to you.
Frequently Asked Questions
What Are the Key Characteristics of Vintage Kitchen Decor from the 1950s?
The 1950s vintage kitchen decor is all about bright colors, playful designs, and functional charm. Think pastel-colored appliances, classic checkerboard flooring, and quirky wall art that adds personality. This decor style aims to create a warm and welcoming atmosphere, perfect for family gatherings and nostalgic vibes.
How Can I Incorporate 1950s Farmhouse Decor into My Modern Kitchen?
Incorporating 1950s farmhouse decor into your modern kitchen can be fun and easy! Start with a bold color palette featuring pastels, add retro appliances, and consider vintage cookware displays. Don’t forget to include a classic farmhouse dining set for that inviting touch. These elements can bring a charming vintage vibe to your space without overwhelming it.
Are There Affordable Ways to Achieve a Vintage Kitchen Look?
Absolutely! You can achieve a vintage kitchen look without breaking the bank. Focus on small changes like colorful kitchen linens, whimsical wall clocks, and retro utensil holders. Thrift stores and flea markets are great places to find unique pieces at reasonable prices. Remember, it’s all about the details that bring that 1950s charm into your home.
What Are Some Essential Vintage Decor Items for a 1950s Kitchen?
Key items for a 1950s kitchen include pastel-colored appliances, retro tableware, vintage cookbooks, and classic spice racks. Adding elements like charming bar carts and whimsical wall clocks can also enhance the nostalgic feel. These items not only serve practical purposes but also infuse your kitchen with a delightful retro atmosphere.
How Do I Balance Vintage Decor with Modern Functionality in My Kitchen?
Balancing vintage decor with modern functionality is all about thoughtful integration. Choose vintage-inspired appliances that offer modern efficiency, and select decor items that serve a purpose, like vintage storage solutions. Incorporate nostalgic elements like colorful linens or retro wall art while ensuring your kitchen remains functional and easy to navigate. This blend will create a space that’s both charming and practical!
Warm light spills across the counter, and the air carries a hint of toast and old wood. If your kitchen feels a little too clean and a little too quiet, you’re not alone. I’ve been chasing a simple goal: make the place where you cook feel warm, welcoming, and a little nostalgic. That spark led to this post: 20 Vintage Kitchen Decor Ideas That Will Make You Want to Cook Every Day. It’s not about perfect replicas, it’s about a mood that pull you back to the joy of home cooking.
Why I made this post This post grew from a small obsession with the little details that make a space feel lived in—the enamelware mugs, copper pots, and shelves full of jars. I kept collecting pieces and watching how they change the way a room feels. I want to share ideas that help you capture that same calm, cozy vibe without breaking the bank or turning your kitchen into a museum. Practical, affordable, and easy to try, these ideas are built for real kitchens and real cooks.
Who it’s for If you love a warm, homey kitchen—whether you lean toward cottage charm, farmhouse vibes, or a splash of mid-century flair—this post is for you. If you enjoy thrift finds, handmade touches, or simple ways to make a space feel special, you’ll likely connect with these ideas. No matter your cooking routine, these vintage-inspired touches are doable for small layouts, big renovations, and everything in between.
What you’ll get You’ll discover 20 ideas that blend vintage style with everyday practicality. Think enamelware on open shelves, gleaming copper pots, and jars that keep dry goods within easy reach. Picture a checkerboard floor, a soft pastel palette, or a tile backsplash that nods to the past while staying clean and fresh. Each idea comes with simple steps you can copy, plus tips on sourcing, care, and lightweight swaps that won’t overwhelm your space. You can take one idea at a time or weave several into a cohesive mood.
Start small and build from there. Begin with one corner you love—maybe a spice wall or a mug rack—and let that energy guide the rest of the room. Pick two or three colors that feel nostalgic but not muddy. Mix one vintage piece with your everyday essentials so the space stays usable while you enjoy the charm. If you’re unsure where to start, a thrift store trip or a quick online search for enamelware and glass jars can spark a real makeover without a big price tag.
I hope these ideas spark a daily urge to cook and to gather around a table that feels like a memory you’re re-creating. The goal isn’t to chase perfection, but to invite a softer, slower pace into your kitchen. With a few well-chosen pieces and smart swaps, you’ll see how atmosphere can lift your cooking, your meals, and your mood. If you’re ready, let’s turn these vintage sparks into daily warmth in your own kitchen.
If you want a kitchen that feels warm and nostalgic, color can be your best tool. A retro color scheme uses soft pastels—mint green, butter yellow, pale pink—paired with white for a fresh, airy look. You can apply this vibe with paint, cabinets, or small touches like dishware and wall art. A thoughtful pastel palette lifts the mood and makes cooking feel like a friendly, creative moment.
– Pastel-colored appliances add a playful focal point without overpowering the room.
– Two-tone cabinetry brings depth and visual interest to the space.
To use these colors well, start with balance. Let whites or very light neutrals cover walls and ceilings, then introduce color through cabinets, backsplashes, and accessories. Keep the large surfaces calm and let color live in smaller, intentional spots. Test a swatch on a small area before committing, and consider the room’s lighting—soft morning sun reads pastels warmer, while bright noon light can make them feel sharper.
With careful color choices, your kitchen can exude vintage charm with every meal.
A vintage kitchen shines brightest with a touch of pastel magic! Embrace soft colors like mint green and butter yellow to spark joy and creativity every time you cook.
1. Retro Color Schemes
Editor’s Choice
🛍️
Ambesonne Green Stand Mixer Cover, Retro Style Themed Pattern with Littl…
Your kitchen can glow with a display of vintage cookware. When enamel pots gleam beside cast-iron skillets, your space feels warm and lived-in. These pieces aren’t just decor; they prove you cook with care and style. You can mix function with beauty in a way that suits daily life. This display adapts to small spaces and big kitchens alike.
How to create a vintage cookware display
– Choose a display method. A ceiling rack adds drama, while open shelves keep pots within easy reach.
– Arrange by color or finish for a calm, cohesive look that guides the eye.
– Mix styles: enamel, iron, and patterned plates to build an eclectic, lived-in vibe.
– Use hooks, rails, or a grid to keep favorites accessible and organized.
– Group similar pieces together to build a gallery feel and make your tools pop.
– Light it well. Small LED strips or spotlights highlight shine and details.
– Rotate pieces seasonally so your display stays fresh and useful.
– Mind safety. Secure heavy pots with sturdy hardware and store lids where you can grab them fast.
– Clean simply. Wipe with a damp cloth and dry to avoid dull spots.
A thoughtful display makes cooking feel inviting every day.
2. Vintage Cookware Displays
Editor’s Choice
🛍️
Cooks Standard NC-00269 Standard, Single Bar, 36-Inch Ceiling Mounted Wo…
Your vintage kitchen should feel warm and welcoming. Farmhouse-style furniture does that with sturdy wood and clean, simple lines. You want a space where family and friends want to gather, chat, and cook together. Start with a few key pieces that fit your room and stand up to daily use.
Key farmhouse pieces
– Choose a large reclaimed wood table for family meals.
– Add a weathered bench along one wall to seat guests.
– Mix in mismatched chairs for a cozy, lived-in look.
– Use a side cabinet to display vintage dishware or cookbooks.
– Add a sturdy hutch or base cabinet to store pots, pans, and linens.
Finish matters. Opt for matte stains or natural oils to highlight the wood grain. Stay away from high-gloss laminates that feel too modern for a farmhouse vibe. Place your table near a window for natural light, and layer with a simple rug and soft textiles to soften the room.
Pair these pieces with warm metals, neutral paints, and quiet textiles. This balance keeps the space bright yet grounded. With the right farmhouse furniture, your kitchen becomes a welcoming place that nudges you to cook and share more often. Start with one table upgrade this week, then grow your collection gradually.
A vintage kitchen isn’t just about decor; it’s about creating a warm space where memories are made. With farmhouse-style furniture, you’ll inspire family gatherings and joyful cooking every day!
You want a kitchen that feels warm and personal, not crowded. Charming vintage accessories add personality in small, thoughtful doses. Start with a few pieces you truly love, then add slowly so the space stays calm. Let each item tell a tiny story you can see and touch every day.
Choosing the right pieces
Pick items that fit your style and the room’s size. Look for ceramic canisters, a vintage recipe box, or a piece of wall art. Choose finishes that blend with your cabinets, like warm cream, soft brass, or light wood. Check for age with a gentle patina rather than chips. Pick colors and materials that stay in harmony.
Smart displays
– Create a small display on a shelf or counter.
– Group items on a tray to form a tiny scene.
– Use a focal piece, such as a retro sign, to draw the eye.
– Mix heights with stands, wall hangings, and picture frames.
– Keep a few bright accents to wake up the space.
Care and placement
Place favorites where they are easy to reach while you cook. Avoid blocking the stove or prep area with fragile pieces. Rotate your collection every few weeks to keep the look fresh. Clean regularly with a soft cloth to preserve color and shine.
Charming accessories bring joy and invite you to cook more at home.
Charming vintage accessories aren’t just decor; they’re little reminders of the stories we cherish. Choose pieces that resonate with you, and let your kitchen tell a tale that inspires every meal!
4. Charming Vintage Accessories
Editor’s Choice
🛍️
Kitchen Canisters for Countertop Set of 4 – Patterned Iron Kitchen Canis…
You want meals that feel special without spending a lot. Vintage tableware adds warmth, color, and stories to your table. Look for Fire-King, Pyrex, and Spode to add nostalgia.
How to build a charming vintage tableware set
– Choose 2-3 patterns from Fire-King, Pyrex, or Spode to build a base, then repeat a unifying color or motif across pieces.
– Mix patterns with solid plates or plain whites to give the eye a calm resting place.
– Add mismatched glassware for charm, but keep rims and heights balanced for easy serving.
– Layer a vintage tablecloth or runner to set the mood and unify the scene.
Serving and entertaining tips
– Use varying plate sizes for settings to accommodate each course and keep the table lively.
– Let one unifying detail tie patterns together, like a shared rim color or edge.
– Keep linens neutral so the dinnerware shines.
– Include vintage flatware to finish the look without clutter.
– Display a few favorite pieces when not in use to keep the decor alive.
Care and display
– Hand wash delicate pieces or use a gentle cycle with cool water.
– Dry them with a soft towel and store on padded shelves.
– Rotate your collection for holidays or weekly meals so you see new combos.
With careful use, classic tableware becomes a living art on your table. Enjoy the process.
5. Classic Tableware
Editor’s Choice
🛍️
Famiware Moonlight Plates and Bowls Sets, 12 Pieces Stoneware Dinnerware…
Your kitchen walls can tell your story with vintage wall decor that speaks to your style. Vintage wall decor adds charm and a sense of history. Smart choices keep walls lively without crowding the space.
– Gallery wall idea Create a gallery wall by pairing a mix of vintage frames in varying sizes and finishes.
– Chalkboard touch Add a chalkboard for weekly menus or a few playful quotes to guide your day.
– Plate art Display simple vintage plates as art by hanging them on a slim rack or directly on the wall.
– Mirror light Place a vintage mirror to reflect light and make the room feel bigger.
To pull it off, start with one anchor piece near the sink or stove. Then bring in a mix of frames in metal, wood, and glass. Keep a simple color palette to tie the display together. Use removable picture hooks so you can rearrange as you collect. Space out pieces so the wall breathes, not crowds. Rotate a plate or print seasonally for a fresh feel. Dust frames and wipe glass monthly to keep glare down. If space is tight, start with a slim gallery rail.
With patience, your walls become a warm, useful gallery. Your space will feel inviting and ready for daily cooking.
Want a kitchen that feels warm and inviting, not cold and clinical? Unique light fixtures can do the trick. They add character, guide your eye to the heart of the room, and make cooking feel fun. Think about how each fixture speaks to your style—metal, glass, or playful shapes—and how it lights your tasks from prep to plating.
– Bold vintage pendant over the island helps anchor the room and draws the eye.
– Edison bulbs for a warm, retro glow cast a welcoming light that nods to classic kitchens.
– Under-cabinet lighting for task and mood gives you bright work surfaces and a soft backdrop.
– Chandeliers or wall sconces in the dining nook bring character without clutter.
– Mix metal finishes with care to keep the look cohesive and interesting.
– Thrifted or salvaged fixtures can add unique charm, but check wiring safety first.
– Size and scale matter—measure ceiling height and cabinet depth before buying.
– Layer your lighting with a couple of sources for depth and balance.
– Choose adjustable designs for flexibility during tasks and meals.
– Finish and material choices should match faucets and hardware to tie the space together.
10. Unique Light Fixtures
Editor’s Choice
🛍️
Glass Pendant Light Vintage Light Fixtures, Glass Pendant Lights Kitchen…
You want a kitchen that feels warm and always smells bright. A vintage herb garden gives that, plus fresh flavor for your meals. You can set it up in minutes with mason jars, tin cans, or wooden crates. Put the jars on a sunny window or an open shelf so herbs stay strong.
Herb Vinaigrette Recipe
– Ingredients:
– 1/4 cup extra-virgin olive oil
– 2 tablespoons white wine vinegar
– 1 teaspoon Dijon mustard
– 1 garlic clove, minced (optional)
– 1/4 cup chopped fresh herbs (basil, parsley, chives, thyme)
– Salt and black pepper to taste
– Steps:
1. Whisk olive oil, vinegar, mustard, garlic, salt, and pepper in a small bowl until smooth.
2. Stir in chopped herbs.
3. Let it rest 5–10 minutes so flavors blend.
4. Drizzle on salads, vegetables, or grilled meats.
Your herb setup doubles as decor and flavor. Label each jar with a small vintage tag so you know what you planted. Use different heights on a shelf to create a colorful display. Pick herbs you actually cook with—basil, thyme, mint, and parsley are reliable favorites. This little garden helps you reach for fresh ingredients more often and makes daily cooking feel simpler.
11. Vintage Herb Gardens
Editor’s Choice
🛍️
4 Pcs Kitchen Wall Decor Mason Jar Set Wooden Rustic Home Decor Inspirat…
If you want a stylish, practical focal point in your kitchen as part of vintage kitchen decor ideas, a retro bar cart is the answer. It invites people to gather. It makes serving drinks and snacks easier during parties.
Choose a cart with an antique finish or a unique design that fits your decor. Look for wood, metal, or glass that complements your cabinets and countertops. Consider size and mobility—wheels make it easy to move.
– Stock it with retro glassware, vintage cocktail shakers, and decorative bottles for a playful vibe.
– Use the cart for serving drinks or snacks when you host guests.
– Decorate the cart with seasonal touches like flowers or fruit.
– Position it near your kitchen island so you can reach everything in a step or two.
A retro bar cart adds a nostalgic touch that makes your kitchen feel welcoming. It encourages friends and family to settle in for memorable evenings.
Pro tips:
– Keep the cart clean by wiping surfaces after use.
– Rotate glassware and bottles to refresh the look.
– Choose a color palette that echoes other metals or woods in the room.
A slim, wheeled model works in tight kitchens and still looks great. Keep it as a daily showpiece and a handy bar when guests arrive.
12. Retro Bar Carts
Editor’s Choice
🛍️
Bar Cart, Bar Carts for The Home, 3 Tier Serving Cart with Wheels, Home …
You want a kitchen that feels warm and organized. Nostalgic wall calendars offer both. They bring color, charm, and a hint of retro style that fits many vintage looks. You’ll see the art, the dates, and a little daily motivation all in one place. It’s a simple swap that changes how you start your day in the kitchen. You get function and style in one tidy package.
Nostalgic wall calendars in practice
– Choose calendars with vintage illustrations or cheerful graphics to match your kitchen vibe.
– Hang them in a bright, easy-to-reach spot so you can glance at it while you cook.
– Rotate the calendar monthly to keep the look fresh and the planning fresh too.
– Pair with a vintage frame to add a touch of elegance and tie the piece to nearby decor.
– Make it a focal point in a small gallery wall with other kitchen finds like enamel plates or spice tins.
– Use the calendar to map meals for the week, note grocery runs, and mark special dates—keeping a pencil or erasable marker handy helps you update it quickly.
Nostalgic wall calendars bridge function and beauty. They make your cooking space feel inviting and practical at the same time.
You want a kitchen that feels warm and inviting. Vintage recipe collections bring texture, color, and history to your daily cooking. Old cookbooks, handwritten recipe cards, and antique boxes tell stories with every page. They’re conversation starters and fuel ideas for your own meals.
Display them on open shelves or in a small nook, and let them spark cooking ideas.
– Use a decorative stand to showcase a favorite cookbook.
– Create a small reading corner with a vintage chair for recipe exploration.
– Rotate seasonal recipes into your decor for a fresh touch.
They charm the eye and spark fresh, simple ideas for today.
Here’s a simple vintage recipe you can display on a card.
Ingredients
– 1 cup unsalted butter, softened
– 1/2 cup sugar
– 2 cups all-purpose flour
– 1/4 teaspoon salt
Steps
1. Preheat oven to 325°F (165°C).
2. Beat butter and sugar until light and fluffy.
3. Stir in flour and salt until a smooth dough forms.
4. Pat dough into a 1/4-inch sheet on a parchment-lined pan.
5. Cut into shapes with a cookie cutter; place on a baking sheet.
6. Bake 12-15 minutes, edges just golden.
7. Cool on a rack.
These shortbread cookies taste like a memory and look lovely on a display plate next to the recipe card.
14. Vintage Recipe Collections
Editor’s Choice
🛍️
MOLIGOU Cast Iron Cookbook Stand, Recipe Book Holder, Display Stand Hold…
Whimsical salt and pepper shakers are tiny joys for your table. They brighten meals and spark smiles, even when you’re in a hurry. Vintage sets with playful shapes and bright patterns add character without crowding the counter. Materials range from glossy porcelain to quirky ceramic, each finish giving a different vibe you can mix and match. A small wall rack can keep the set visible and tidy.
Place them where you cook. A bright corner shelf or a glass-front cabinet makes them easy to reach. Lighting matters—warm LEDs highlight the glazes and tiny faces on the shakers. If space is tight, group a few favorites in a shallow tray on the counter for daily use and a charming display.
– Display on a dedicated shelf so you can show off your shaker collection.
– Mix sizes and styles to create an eclectic look you can admire every day.
– Seasonal themes give you fresh variations for holidays and moods.
To keep them nice, wipe them after use and store loose parts so you won’t lose them. Choose easy-care finishes like ceramic or resin with smooth glazes that clean quickly. When you shop, pick sets that share colors or a common motif to keep the display cohesive. Ceramic shakers stay sturdy in busy kitchens. Resin pieces resist chips, but keep an eye on glaze wear.
16. Whimsical Salt and Pepper Shakers
Editor’s Choice
🛍️
Vintage Ceramic Salt and Pepper Shaker Set Condiments Cellar Stacking Bo…
You want a kitchen that feels warm and alive. Vintage-themed wall art can be the spark that makes it happen. Start by choosing prints that tell a small story: retro food ads, old utensils, or nostalgic scenes that match your vibe. Let the art speak in tones you love, not in flawless symmetry. That keeps the room friendly and real.
Lay out your gallery with intention. Stack pieces in playful layers or build a neat grid. Vary sizes to create rhythm. You can hang several small frames at different heights for a lively feel, or pick one big centerpiece and surround it.
Suggestions:
– Frame prints in mismatched vintage frames for an eclectic gallery vibe.
– Mix different art styles to show your personality—think photography, illustration, and typography.
– Don’t limit yourself to food art; vintage posters, botanical prints, or travel ads can complement your kitchen beautifully.
The right wall art adds personality and charm. It makes the kitchen feel inviting, like a tiny gallery you cook in. Checkered tiles, warm wood, and brass accents pair well with vintage art and pull the room together. Swap in new pieces as seasons change to keep things looking fresh.
17. Vintage Themed Wall Art
Editor’s Choice
🛍️
97 Decor Vintage Wall Art Prints – Vintage Pictures Wall Decor, Moody Ga…
You want a kitchen that feels warm and timeless without a full remodel. Rustic wood adds comfort and a touch of the outdoors. These ideas are easy to try and let your space grow with your taste.
– Reclaimed wood shelves add storage and vintage charm. Install them at eye level for quick access to spices and cups.
– Wooden bowls for fruit and herbs offer a natural display. Place them on a central island to catch light.
– Decorative wooden shutters soften windows and light. They pair well with metal hinges for a rustic vibe.
– Mix wooden elements with metal or ceramic for contrast. The metal cools the wood and the ceramics reflect light.
– Wall-hung cutting boards make a focal point. Hang several sizes as an art piece.
– Crates, baskets, and pull-out bins organize dry goods. Choose light stains to keep the space bright.
– Live-edge wood accents make natural art. A live-edge board on the wall adds texture.
– Wooden stools and chairs around a compact island invite meals. They bring warmth and a social nook.
– Wood countertops or butcher blocks offer a sturdy workspace. Treat them with mineral oil to protect from moisture.
Small care tips: seal with food-safe finishes, wipe spills quickly, and avoid excess moisture.
Rustic wooden accents bring warmth and charm to your vintage kitchen decor. A few simple touches can transform your cooking space into a cozy retreat where every meal feels special!
You want a kitchen that feels bright and personal. Colorful vintage pot holders do the job. They bring color into your cooking space and stay useful at the same time.
These tiny textiles carry more than heat protection. Their patterns and colors act like decor you can touch. Pick vibrant designs or playful motifs that match your personality. Colorful vintage pot holders can wake up a dull counter and invite you to cook more often.
– Use a mix of patterns for an eclectic, personal look.
– Hang them on hooks where you reach most, so they’re easy to grab.
– Display a few on a shelf or in a dish rack to add charm.
Quality matters. Look for cotton fabrics with a little padding inside. This combo handles heat and feels sturdy in your hand. Short, simple napkins or a single bright pot holder can stand out on a neutral backdrop. Pair colors with your dish towels, a backsplash, or a wooden countertop to create harmony.
Care is simple. Wash in warm water, air dry to maintain shape, and avoid heavy loads that can stretch loops. If you collect many styles, rotate them seasonally so your kitchen stays fresh without extra work.
With the right selection, color, and care, these tools become tiny, joyful accents that fit your kitchen style.
19. Colorful Vintage Pot Holders
Editor’s Choice
🛍️
Colorful Boho Florals Pot Holders Set of 2 Kitchen Decorative Heat Resis…
You want a kitchen that feels warm and organized. Vintage spice jars fit the bill. They add color. They bring a hint of history you can sense while you cook. You’ll see spices at a glance, and your shelves look curated, not crowded.
What to look for
– Look for glass or ceramic jars with unique designs. They catch the eye and stay in good shape.
– Check lids for a tight seal.
– Airtight lids help spices stay fresh longer.
– Mix shapes and sizes for visual interest.
– Choose jars with clear glass or light colors so you can read labels easily.
How to use them
– Label jars with vintage-style tags. Simple handwriting on kraft tags works well.
– Display on open shelves or a glass-front cabinet.
– Group by theme on a single tray to keep things cohesive.
Care and maintenance
– Wash jars with warm, soapy water.
– Dry thoroughly before refilling.
– Keep jars out of direct sun to protect color and flavor.
– Rotate spices so older jars stay fresh.
Where to find them
– Thrift stores and flea markets are good places to look.
– Estate sales and antique shops often have glass jars in good condition.
– Online marketplaces can help you find rare pieces.
20. Vintage Spice Jars
Editor’s Choice
🛍️
Glass Spice Jars Seasoning Containers Small Glass Jars with Lids Airtigh…
Transforming your kitchen with vintage decor can rekindle your love for cooking and create a space that feels like home.
By incorporating unique elements from the past, you not only enhance the aesthetics but also foster an inviting atmosphere that brings family and friends together. Consider trying out these ideas to create your own vintage kitchen haven, and let the stories evoked by these decor pieces inspire your culinary adventures!
Note: We aim to provide accurate product links, but some may occasionally expire or become unavailable. If this happens, please search directly on Amazon for the product or a suitable alternative.
This post contains Amazon affiliate links, meaning I may earn a small commission if you purchase through my links, at no extra cost to you.
Frequently Asked Questions
What Are Some Easy Ways to Incorporate Vintage Kitchen Decor into My Space?
Transforming your kitchen with vintage decor can be fun and simple! Start with retro color schemes like soft pastels, and consider displaying vintage cookware on open shelves. You can also add charming accessories that reflect your personality. Look for unique light fixtures and farmhouse style furniture to create that warm, inviting feel.
How Do I Choose the Right Vintage Accessories for My Kitchen?
Choosing the right vintage accessories is about finding pieces that resonate with you! Start by selecting a few items you truly love, such as whimsical salt and pepper shakers or nostalgic linens. Remember, less is more; adding accessories in small doses will keep your kitchen feeling cozy without being crowded.
Can Vintage Kitchen Decor Work in a Modern Home?
Absolutely! Vintage kitchen decor can beautifully complement modern aesthetics. Mixing antique furniture with sleek, modern appliances creates a unique contrast that adds character. Incorporate retro kitchen appliances and colorful vintage pot holders to maintain functionality while embracing a nostalgic vibe.
What Are the Benefits of Using Vintage Cookware in My Kitchen?
Using vintage cookware not only adds charm to your kitchen but also tells a story. These pieces often have character and can enhance your cooking experience. Plus, they are functional! Displaying them can create a warm, lived-in feel, inviting family and friends to gather and share meals in your cozy space.
How Can I Create a Vintage Herb Garden in My Kitchen?
Creating a vintage herb garden is easier than you think! Use mason jars or tin containers to hold your herbs, and place them on a sunny windowsill. This not only adds a splash of green to your decor but also gives your kitchen a fresh, inviting aroma. Plus, having fresh herbs on hand makes cooking even more enjoyable!
Related Topics
vintage kitchen decor
retro style
farmhouse charm
kitchen accessories
vintage cookware
rustic decor
nostalgic linens
creative storage
unique light fixtures
retro appliances
antique furniture
easy updates
Manage Consent
To provide the best experiences, we use technologies like cookies to store and/or access device information. Consenting to these technologies will allow us to process data such as browsing behavior or unique IDs on this site. Not consenting or withdrawing consent, may adversely affect certain features and functions.
Functional
Always active
The technical storage or access is strictly necessary for the legitimate purpose of enabling the use of a specific service explicitly requested by the subscriber or user, or for the sole purpose of carrying out the transmission of a communication over an electronic communications network.
Preferences
The technical storage or access is necessary for the legitimate purpose of storing preferences that are not requested by the subscriber or user.
Statistics
The technical storage or access that is used exclusively for statistical purposes.The technical storage or access that is used exclusively for anonymous statistical purposes. Without a subpoena, voluntary compliance on the part of your Internet Service Provider, or additional records from a third party, information stored or retrieved for this purpose alone cannot usually be used to identify you.
Marketing
The technical storage or access is required to create user profiles to send advertising, or to track the user on a website or across several websites for similar marketing purposes.


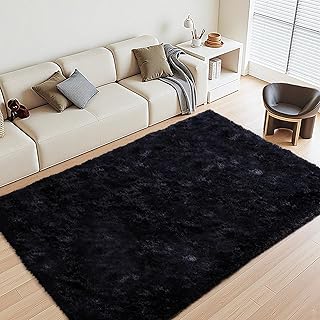


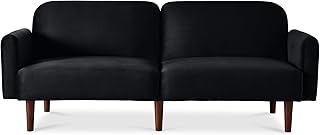


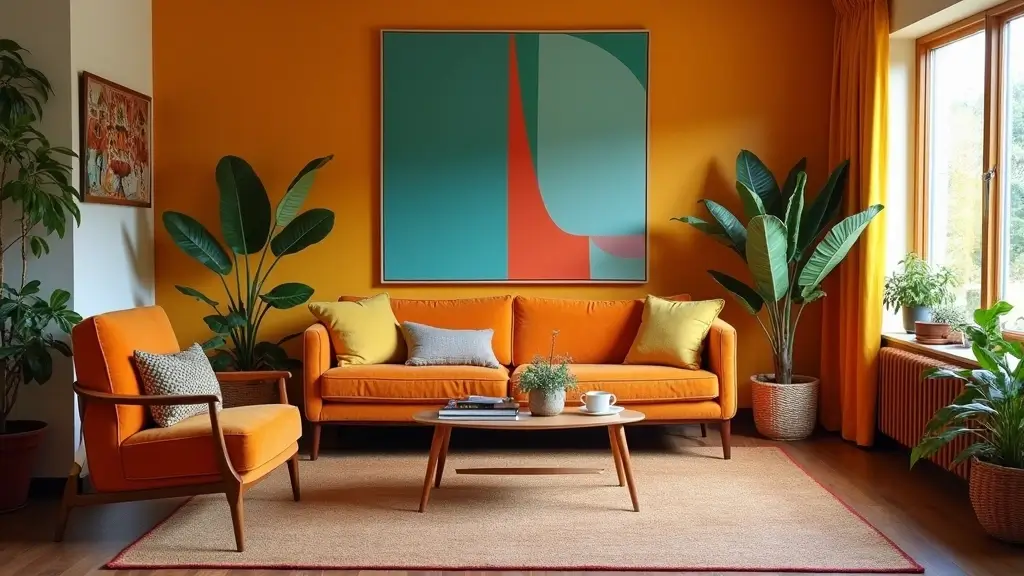


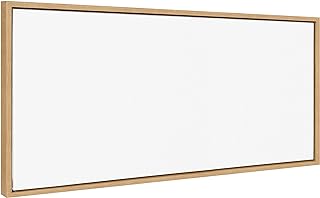


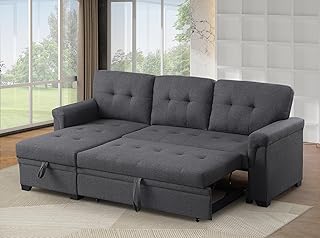


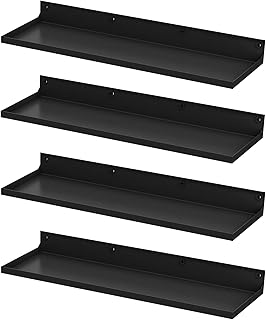


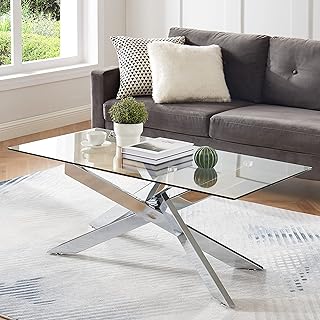


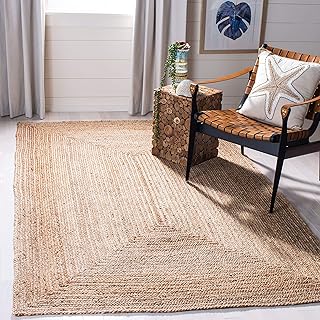


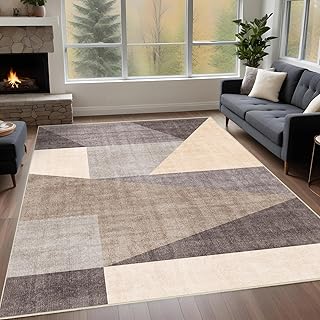


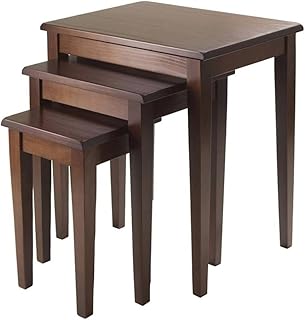


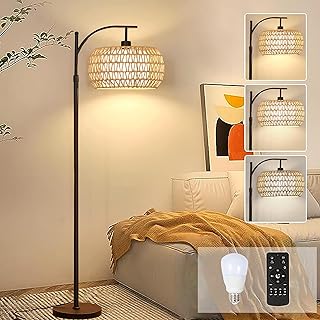


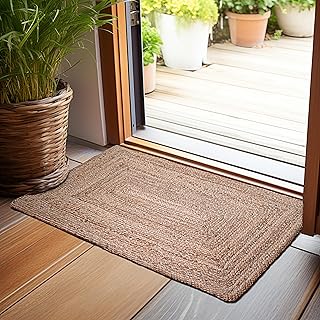


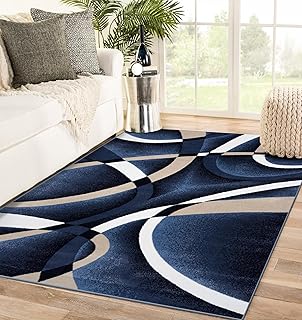


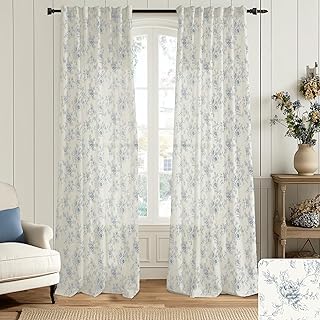


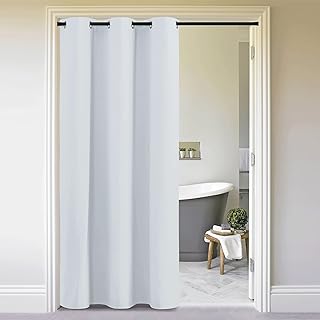


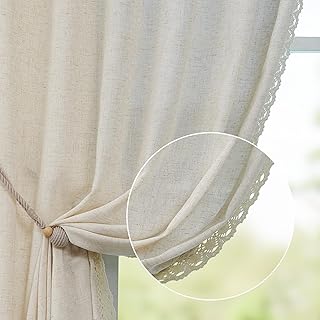


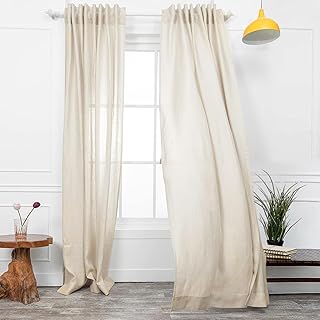


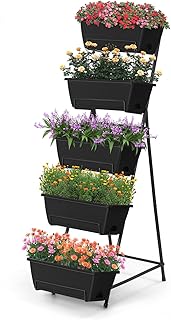


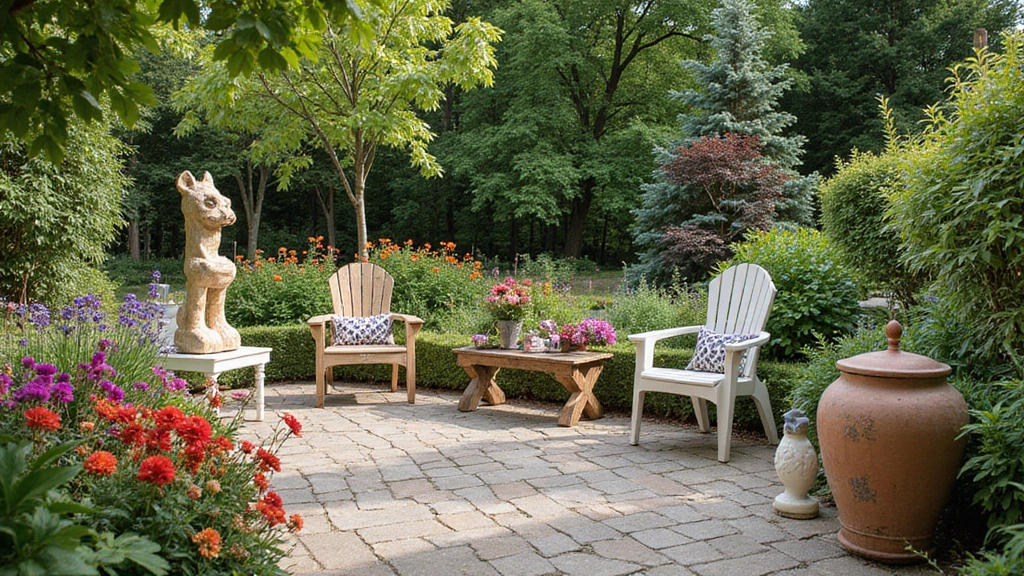


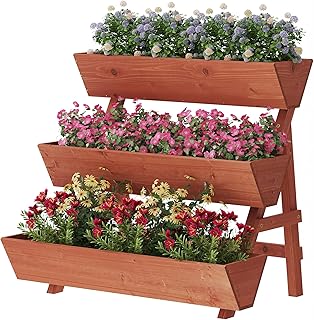


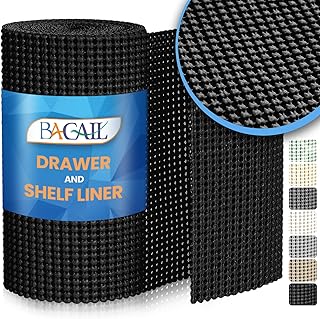


![4 Set [EXTRA LARGE] Hanging Wall Mount Storage Baskets with Adhesive Hoo...](https://m.media-amazon.com/images/I/812qykSTCXL._AC_UL320_.jpg)


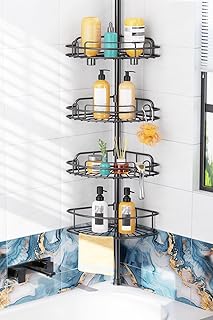
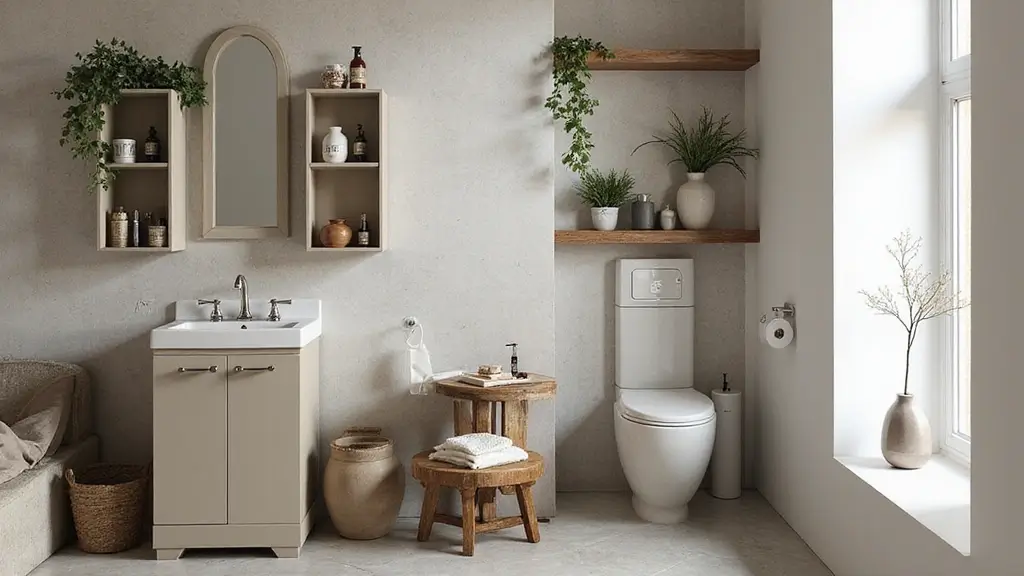


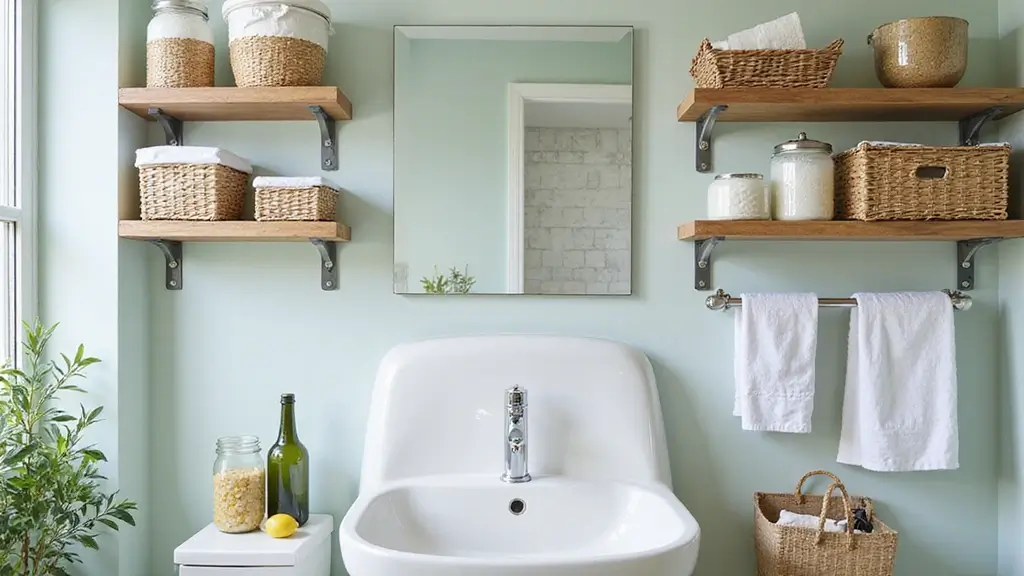


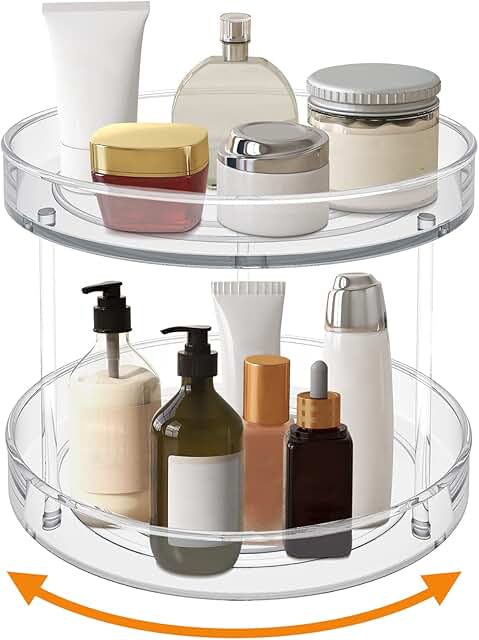


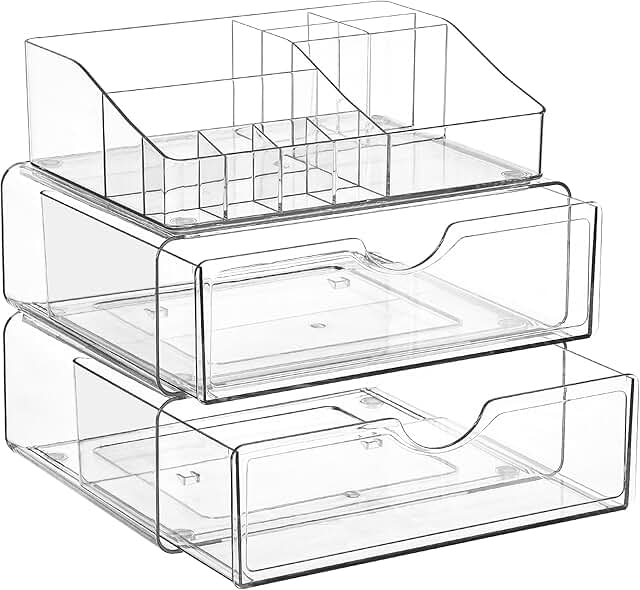

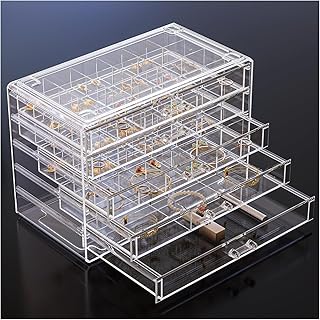


![MaraFansie [Extra Large] Wire Basket 2-Pack Hanging Wall Organizer Cabin...](https://m.media-amazon.com/images/I/712f0OXYDZL._AC_UL320_.jpg)


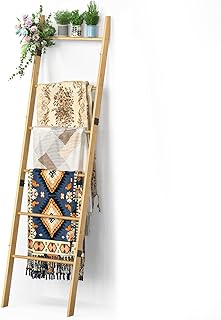


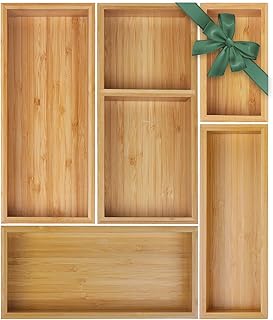


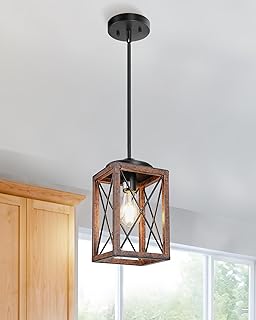
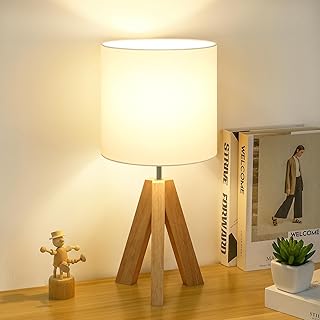


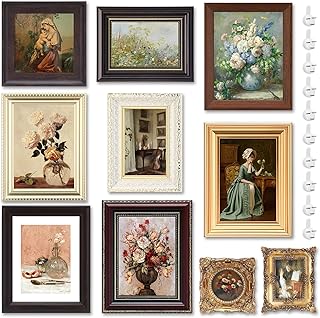


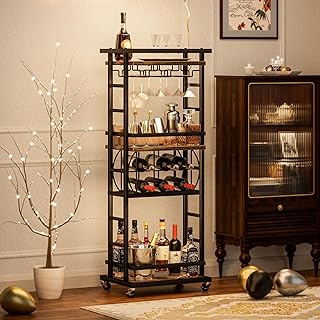


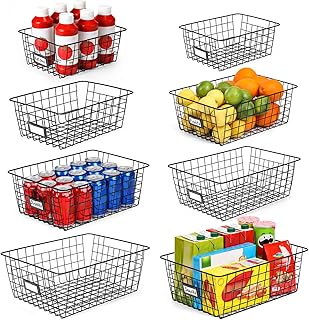
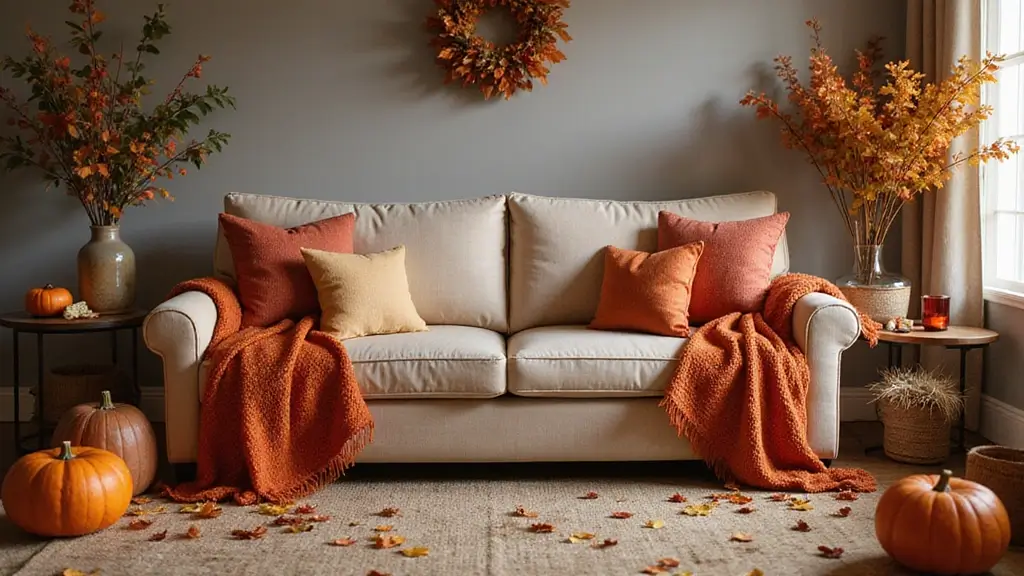


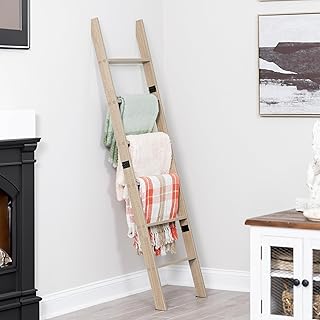


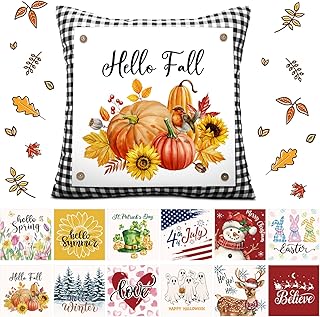


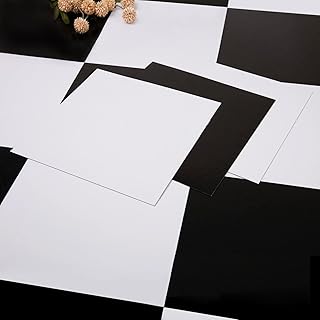

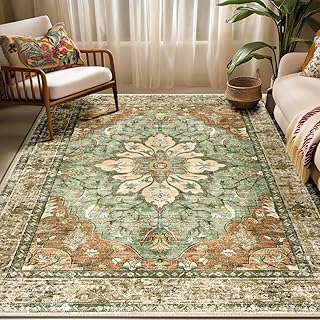


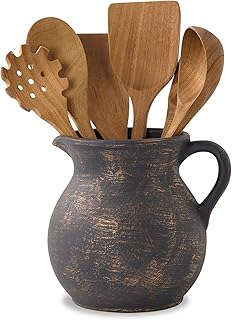

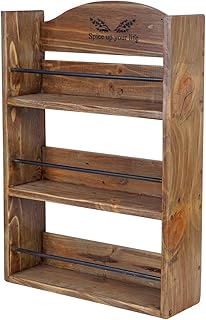


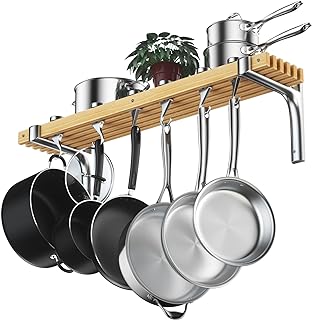


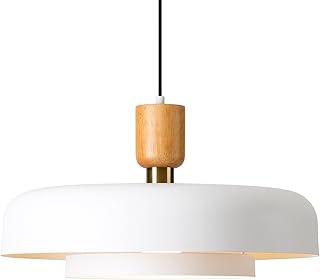


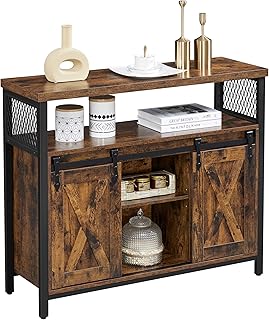


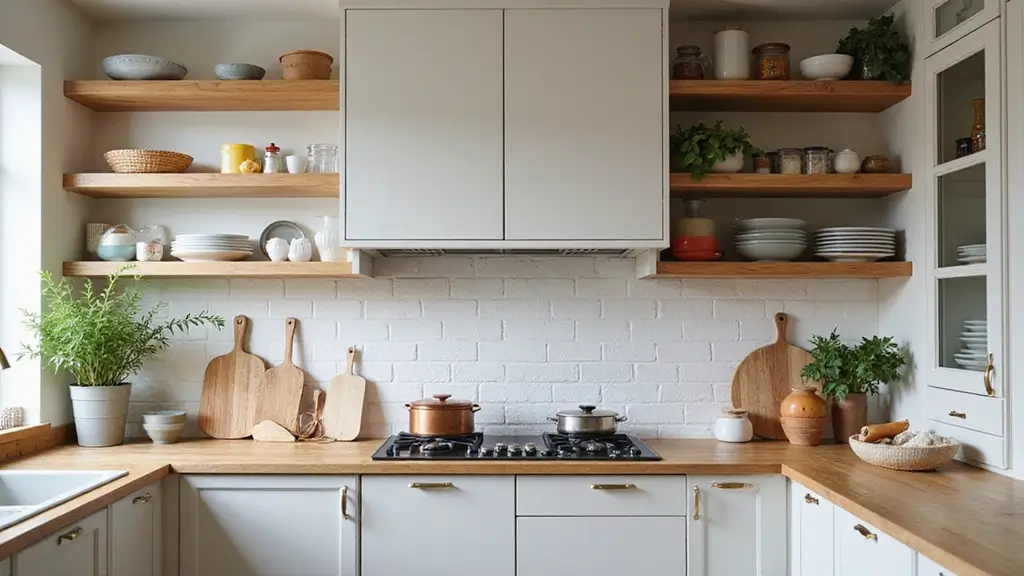

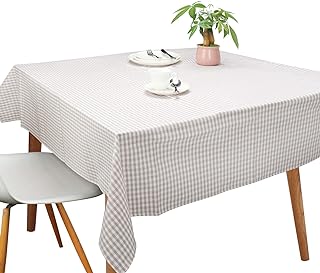


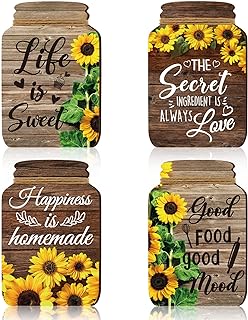


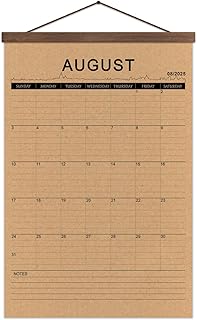


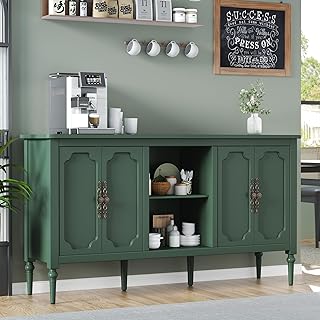


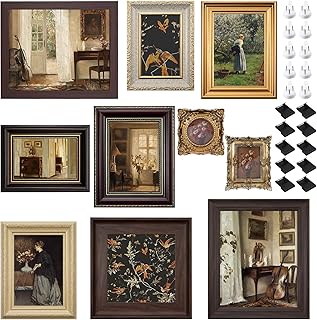


![Utopia Towels Blue Dish Towels [12 Pack - 15 x 25 Inches] 100% Ring Spun...](https://m.media-amazon.com/images/I/714RzjnJxbL._AC_UL320_.jpg)