This post grew out of a simple craving for magic in the garden. I want to show how vintage pieces can turn a plain yard into a fairy tale. Old iron gates, weathered pots, and soft lights can wake a space and tell a story. You don’t need a big budget to start.
If you love cottage gardens, thrift finds, and spaces that feel lived in, this one’s for you. If you care about quiet corners where you can breathe and linger, you’ll find ideas here. The whole vibe centers on warmth, texture, and small, doable shifts that add charm.
Inside this guide you’ll find eighteen vintage decor ideas that spark that fairy tale mood. Each idea comes with simple, actionable steps you can begin this weekend. Picture mossy urns, teacup planters, bird baths, and lanterns that glow softly after sunset. You’ll also get practical tips on mixing old treasures with new pieces and protecting delicate finishes.
Start with a small vignette in a shady corner or along a sunny path and build from there. Use a cohesive color story, like sage greens, dusty pinks, and warm terracotta, to pull scenes together. A simple bench under an arch invites a pause and makes a space feel lived in, not unused.
Vintage decor brings character, not perfect polish, and that’s part of the charm. Expect a little upkeep—cleaning, sealing, and perhaps a fresh coat of paint on wood—so the pieces last. I’ve included ideas that fit different budgets, skill levels, and garden sizes, with clear, realistic steps.
Ready to transform your outdoors? Start with one small idea this week, and watch the space bloom. By the end, your garden will feel like a page from a fairy tale, perfect for quiet mornings and playful evenings.
Contents
- 1. Upcycled Birdcages as Planters
- 2. Antique Garden Furniture
- 3. Whimsical Garden Signs
- 4. Vintage Wheelbarrows for Planters
- 5. Fairy Lights in Glass Jars
- 6. Rustic Garden Gates
- 7. Vintage Bird Feeders
- 8. Painted Terracotta Pots
- 9. Vintage Ladder Herb Garden
- 10. Vintage Mirrors as Garden Art
- 11. Charming Garden Arbors
- 12. Vintage Tea Sets for Display
- 13. Vintage Bicycle Garden Decor
- 14. Decorative Garden Stakes
- 15. Vintage Watering Cans
- 16. Stone Pathway with Vintage Touches
- 17. Vintage Fountain
- 18. Floral Trellis
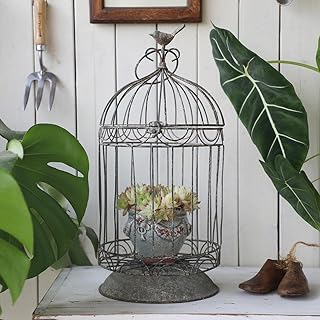
1. Upcycled Birdcages as Planters

Are you after whimsy and color without a big cost? Upcycled birdcages give you a timeless charm that brightens any garden space. They turn old metal cages into eye-catching planters that invite birds, bees, and you to linger a moment longer.
– Choose cages of different sizes and shapes to add height, depth, and a playful rhythm.
– Clean and prep every cage so soil and roots stay clean and plants stay healthy.
– Drill drainage holes in the bottom and layer rocks or broken pottery for better drainage.
– Pick compact plants or trailing vines that fit in shallow soil; herbs, violas, creepers, and mini succulents work well.
– Fill with light potting mix and tuck plants in gently; leave room for roots to spread.
– Paint for color or let a natural rust finish set the vintage vibe; both options suit cottage or shabby chic styles.
– Hang the cages from tree branches or set them on sturdy stands to create varying heights along a walkway or patio.
– Maintain and refresh the display season to season; swap in new blooms or greenery as needed.
A cluster of these cages acts as a focal point, drawing the eye along a path or at the end of a sunny border. With a little planning, you’ll have a charming, low-cost feature that feels like it came straight from a fairy tale. Your garden will smell of earth after rain and look friendlier to visitors.
1. Upcycled Birdcages as Planters
Editor’s Choice
Rustic Vintage Birdcage Planter Holder Farmhouse Distressed Decorative M…

Willowy Small Succulent Pot (1 Pack) – Succulent Pots with Drainage Tray…

FoxFarm Ocean Forest Potting Soil, 12qt – Light, Aerated Texture, Design…
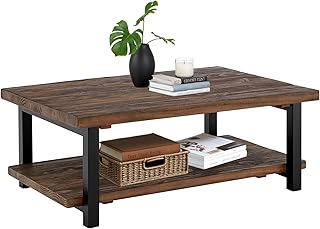
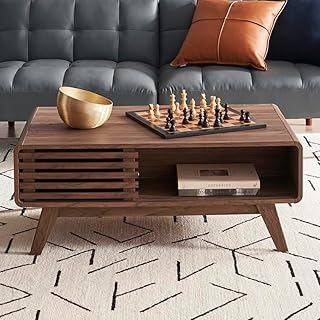
2. Antique Garden Furniture

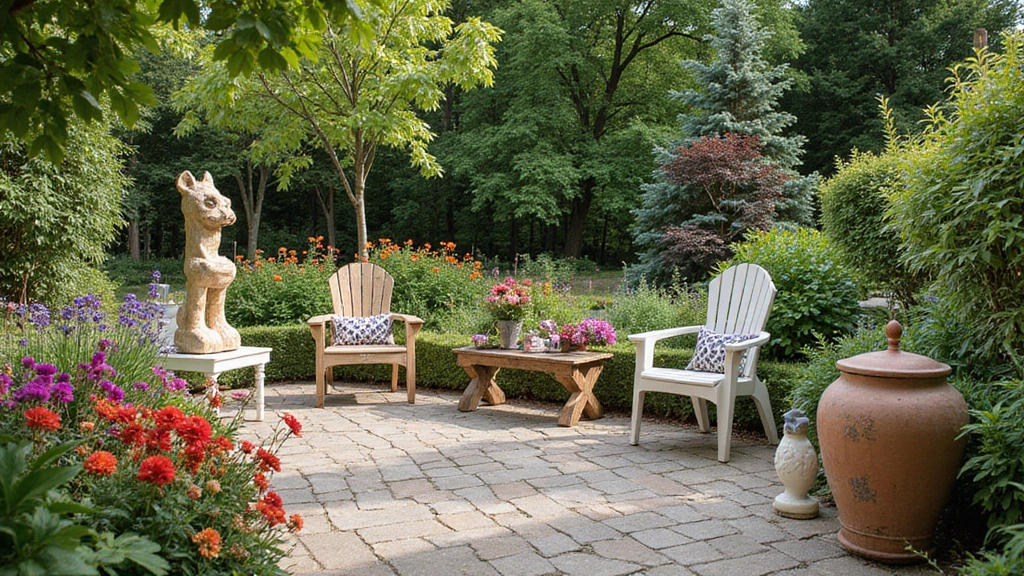
You want your outdoor space to feel timeless, not crowded with plastic chairs. Antique garden furniture can give you lasting charm. A wrought iron bench, a rustic wooden table, or a faded sun lounger—each piece tells a story. These pieces set a mood of quiet elegance you can feel. Picture yourself sipping tea on a weathered bench, while blooming flowers brush your sleeve.
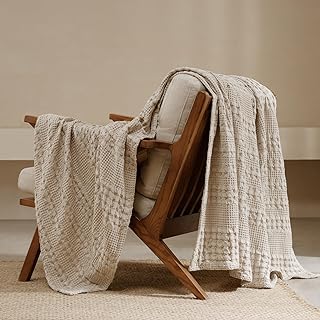
Old cushions look tired fast. Refresh them with vintage fabric that fits your color scheme. Steps are simple: measure, pick outdoor fabric, remove the old cover, cut new pieces, and staple them tight. Add weatherproof seal for durability. A small refresh goes a long way.
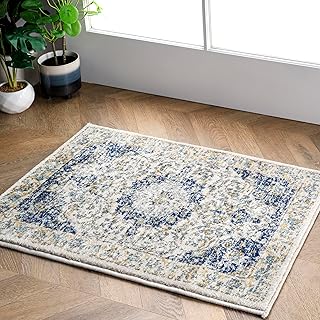
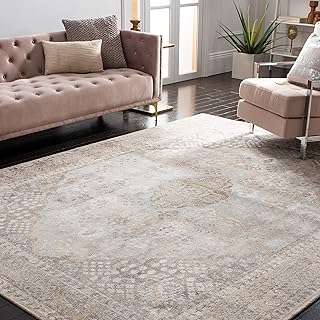
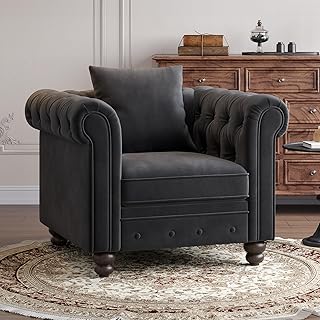
Shop for pieces where stories wait. Flea markets, estate sales, and thrift shops hide real treasures. Look for classic lines, sturdy joints, and weathered charm. Start with one focal piece and keep other furniture simple so your space feels calm. A simple outdoor rug ties the look together. That rug also cushions your steps.
Create cozy corners with soft lighting. String lights, lanterns, and solar lamps soften evenings. Place seating to face blooms or a garden view. Add warm throws and a few plants. Be honest about wear—patina adds depth, and a small repair can save a larger replacement. If you repaint metal, use outdoor-safe paint.
2. Antique Garden Furniture
Editor’s Choice

VINGLI 38.5″ Patio Park Garden Outdoor Metal Rose Bench,Cast Iron Cast A…

Waterproof Canvas Fabric by The Yard 58″ W 600D Upholstery Polyester Mat…

Solar Lantern Outdoor Indoor Use – Hanging Solar Lights with Realistic F…
3. Whimsical Garden Signs

You want a playful touch in your garden. Whimsical signs add personality and help guests find their way. You can find vintage signs in antique shops or make your own by repurposing old wooden boards. Create signs for different corners like “Rose Garden” or “Herb Haven” with stencils or freehand painting. To amp up the vintage vibe, choose signs with faded paint or distressed finishes. Weathered wood, chipped enamel, and a touch of rust feel authentic in a cottage garden. Place them at garden entrances or along paths to surprise visitors. They also guide you when you’re tidying beds or planning new plantings. Use a mix of materials—reclaimed wood, metal, enamel, or chalkboard panels—for variety. Quick steps: pick a style, prep the surface, apply paint or a stencil, seal, and mount. Add a weatherproof seal and a secure hanger so it lasts through rain and sun. Check stakes or screws periodically and replace rotten boards. Keep signs simple and legible for quick reading.
3. Whimsical Garden Signs
Editor’s Choice

Vintage Iron Garden Signs – Retro Style Decorations for Yard, Porch, and…

Gorilla Waterproof Caulk & Seal Silicone Sealant, 10oz Cartridge (Pack o…
KINGLAKE 20 Pcs Wood Chalkboard Plant Tag, Wooden Stakes Plant Labels Bl…
4. Vintage Wheelbarrows for Planters

Want a quick, charming update for your garden? A vintage wheelbarrow used as a planter adds whimsy without a lot of work. You can change its look with paint or patina, and it becomes a focal point that shifts with the seasons. That wheelbarrow fits many styles, from cottage to rustic. You can paint it bright or let a patina shine for a quiet, classic look.
– Choose your wheelbarrow. Pick a sturdy basin. Metal lasts longer; wood adds warmth.
– Prep and line. Clean the piece. If it has rust, decide to seal or let it age. Line the bottom with landscape fabric to keep soil in place and allow drainage.
– Fill with soil. Use a light, well-draining mix. Add a touch of compost for nutrition.
– Plant ideas that cascade. Pair flowering annuals with compact herbs for scent. Choose spillers like creeping thyme, ivy geraniums, or lobelia.
– Placement and care. Set it where it will be seen along a path or near seating. Water when the top inch of soil dries; mulch lightly in hot weather.
Transform your garden effortlessly! A vintage wheelbarrow as a planter can bring whimsy to any outdoor space while showcasing your unique style with a splash of color or charming patina.
4. Vintage Wheelbarrows for Planters
Editor’s Choice

BAYN Metal Wheelbarrow Flower Cart Planter, 2 Packs Plant Stands with Tr…

Weed Barrier Landscape Fabric, 3.2oz Premium Heavy-Duty Weed Blocker Fab…

Back to the Roots 100% Organic Indoor Potting Mix (6 Quart), Promotes He…
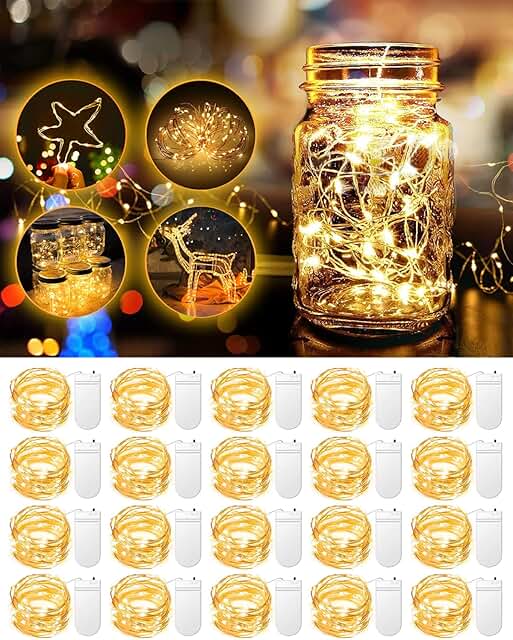
5. Fairy Lights in Glass Jars

You want a cozy, magical garden after dark. Fairy lights tucked in glass jars are easy to set up and affordable. A warm glow draws the eye to paths, tables, and trees. This simple idea makes your space feel like a tiny dream.
What you need
– Glass jars in various sizes (mason jars, pickle jars, or vintage-style containers)
– Battery-operated fairy lights (warm white preferred)
– Hooks, twine, or a small lantern hanger
– Scissors or ribbon for quick decoration
– Optional: jars with textured glass or an aged look
Where to place them
– Hang from low branches so the glow looks reachable
– Set on patio tables as a gentle centerpiece
– Line garden paths or steps for safe, pretty guidance
– Cluster several jars near seating to create a cozy reading nook
Tips for a cozy glow
– Pick warm white lights for a soft, inviting vibe
– Vary jar sizes and heights for depth and rhythm
– Use a timer or solar lights if you don’t want to swap batteries
– Let some jars have lids or metal lids for a rustic touch
– Keep jars clean so the light shines clear
Maintenance and safety
– Check batteries regularly and replace as needed
– Bring lights inside during heavy rain or strong winds
– Store extras with batteries removed when not in use
With a handful of jars, your garden becomes a dreamy escape as night falls.
5. Fairy Lights in Glass Jars
Editor’s Choice

Brightown 12 Pack LED Fairy Lights Battery Operated String Lights – 7ft …

Glass Regular Mouth Mason Jars, 16 oz Clear Glass Jars with Silver Metal…

Vanhench 805FT Natural Jute Twine String, Bulk Hemp Jute Rope Cord Twine…
6. Rustic Garden Gates

Your outdoor space deserves a gate that speaks vintage charm. A rustic garden gate creates the first welcome and sets the mood for the whole yard.
– Gate styles to consider A simple wooden gate or a wrought iron gate sets a timeless vintage tone that suits most garden styles.
– Climbing plants for a dreamy frame Let roses, ivy, or jasmine wind around the gate to soften lines and invite closer look.
– Color and finish options Paint the gate in soft pastels for a welcoming glow, or let weathered wood tell its own rustic tale.
– Framing with vintage pots Place vintage terracotta or ceramic pots on both sides to frame the gate with color and life.
– Hardware and decorative details Add a small latch, slim hinges, and quiet metal accents for authentic charm.
– Structural accents to guide growth Attach a trellis or espalier panels beside the gate to steer climbers and add depth.
– Lighting and ambiance Install solar lanterns or string lights along the gate to brighten evenings and show texture.
– Maintenance for longevity Clean regularly, seal wood every few years, and prune nearby vines to keep the look neat.
– Accessibility and safety Check the gate height and clearance, and use a secure latch so guests can enter safely.
6. Rustic Garden Gates
Editor’s Choice

Outdoor Garden Gate, Freestanding Wood Fence Partition, Carbonised Vinta…
Solar Lantern Outdoor Indoor Use – Hanging Solar Lights with Realistic F…

Creative Co-Op Cement Planter with Saucer, Distressed Terra-Cotta Finish…
7. Vintage Bird Feeders

Want a garden that feels alive without a big makeover? Vintage bird feeders can add whimsy and wildlife in one easy step. They bring color, charm, and a gentle bustle as birds come and go. With the right piece, you’ll hear tiny wings and feel a lighter glow in the yard.
Smaller touches like antique-style pieces make a big impact. They fit cozy corners, walkways, or a sunny patch near blooming plants. You don’t need a large budget or a fancy setup to start. A few well-placed feeders can transform your space and invite nature inside.
– Choose feeders made from wood or metal that show age; their weathered look adds character and a sense of story to your space.
– Hang the feeder from a sturdy branch or mount it on a pedestal near flowering shrubs, so it’s easy to watch from indoors, and angle it slightly to keep rain off.
– Fill with a mix of seeds—sunflower, nyjer, millet—plus some suet pellets in winter to attract different birds and invite them to linger.
– Keep it clean and check for rust or loose screws; a well cared for feeder stays safe and inviting.
– Create a feeding area with a small, shallow water dish nearby and a sunny spot that birds can see from across the yard, so visits happen more often.
If you want even more life, swap in colorful antique-style feeder cups, or rotate between hanging and pedestal styles to match seasons and plant beds. With a little care, these vintage pieces become the highlight of your garden.
7. Vintage Bird Feeders
Editor’s Choice
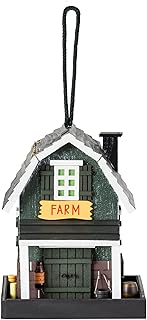
Alpine Corporation 9″ Tall Wooden Farm Store Hanging or Table Outdoor Bi…

Metal Roof Bird Feeder – Chew Proof for Outdoor Hanging Wild Bird Seeds….

Wagner’s 53002 Farmer’s Delight Wild Bird Food with Cherry Flavor, 10-Po…
8. Painted Terracotta Pots

You want a bright pop in your garden without a lot of money. Painted terracotta pots give you that burst of color in minutes. They also let your personality shine through. Acrylic paints work best for outdoor use. You can create bold blocks, pretty florals, or simple patterns that fit your space.
First, gather supplies. Get terracotta pots. Get acrylic outdoor paints. Get brushes in different sizes. Get painter’s tape. Get stencils if you like. Get a clear outdoor sealant. Get rags for cleanup.
Next, prep your pots. Clean them until they’re dust-free. Let them dry completely before you paint.
Choose a plan. A single pot can be a sun catcher with a bright solid color. Or you can make a mini scene with two or three tones. Use painter’s tape for clean lines, or freehand designs if you feel confident. Apply colors in thin coats and let each coat dry. A base coat helps colors pop and keeps the terra cotta from soaking up paint.
Protect your work. Seal the finished pots with a clear outdoor sealant. Apply two thin coats for lasting weather resistance. Re-seal if you notice wear or after a season.
Arrange them in groups. Mix tall, medium, and small pots for a playful display. Put them on a sunny step, along a fence, or by a doorway to greet guests. Cluster colors by hue for a cohesive look if you’d like. And remember, you can move them as your garden changes.
8. Painted Terracotta Pots
Editor’s Choice
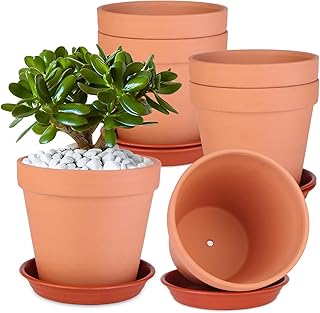
6 Pack 6 Inch Terracotta & Clay Pots with Saucer for Plants, Large Terra…
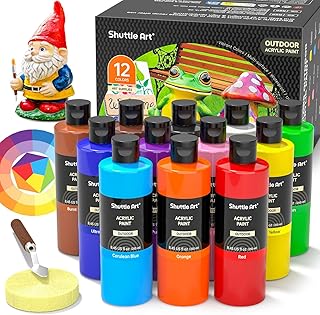
Shuttle Art Outdoor Acrylic Paint Set, 12 Colors Waterproof Paint, 8.45o…

GE All Purpose Silicone Caulk, Clear, 10 fl oz Cartridge, 1 Pack – 100% …
You might also like

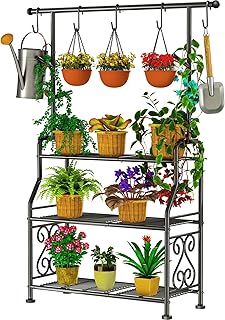
9. Vintage Ladder Herb Garden

You want fresh herbs within reach, but your space is tight. A vintage ladder offers a clever solution. It adds vertical interest and keeps herbs easy to grab as you cook.
Set it up the smart way
– Pick a sturdy wooden ladder with even rungs.
– Lean it against a wall or fence for balance and vertical appeal.
– If you can, secure the top with a wall bracket or hooks to stop wobble.
Hang small pots from the rungs with jute twine or S-hooks. Place larger pots on the bottom steps. Use pots in ceramic, terracotta, or metal. Choose colors that fit a faded, cottage look—sage white, pale blue, or warm terracotta.
Style tips
Keep the wood weathered or lightwashed for vintage charm. Add simple labels on each pot to stay organized. Chalkboard tags look friendly and practical. This setup helps you find dill, thyme, and parsley at a glance.
Practical care
Place the ladder where it gets the right sun for your herbs. Most herbs love sun, but check each plant. Make sure pots drain well; add a tray to catch water. Water regularly but let the soil dry a bit between drinks. Rotate pots so every herb gets light.
In a small space, this ladder garden becomes a fragrant, useful corner you’ll actually use.
9. Vintage Ladder Herb Garden
Editor’s Choice
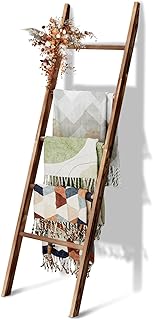
5-Tier Blanket Ladder Wooden, 5.3FT(63”) Blanket Quilt Towel Holder Rac…

Yishang 2.5 inch Terracotta Pots with Drainage Holes,Small Mini Clay Cer…
KINGLAKE 20 Pcs Wood Chalkboard Plant Tag, Wooden Stakes Plant Labels Bl…
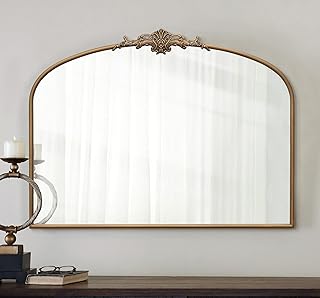
10. Vintage Mirrors as Garden Art

If your outdoor space feels small, vintage mirrors add depth and sparkle. They bounce light and give a garden a romantic, timeless feel. Use mirrors as art to create a focal point you can enjoy from many angles.
Place a mirror against a sunny wall to double brightness. Hang one from a sturdy branch for a playful, floating effect. Tuck a small mirror into a flower bed so it peeks through blooms.
Choose weatherproof backs or sturdy frames that resist rust. Refresh an old frame with outdoor-safe paint to match your style. Decorate frames with fresh flowers, moss, or small garden finds for a vintage touch.
Secure mirrors with reliable hardware to keep them steady in wind. To install, clean the glass, seal rough edges, and mount on a wall or with wire. Let the glass reflect colors and movement from the garden to feel alive.
Maintain easily: wipe with a soft cloth and check for cracks. For style, mix ornate frames with simple metal ones to balance the look. Place near seating so guests notice the reflection of the scene.
If you’re unsure, start with one small mirror and build from there. Always check weather and remove or cover mirrors in frost.
10. Vintage Mirrors as Garden Art
Editor’s Choice
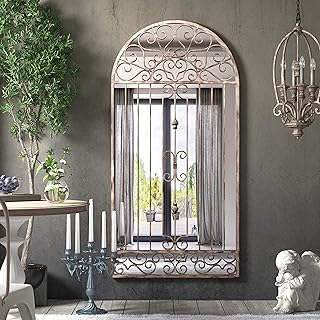
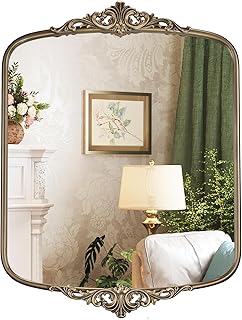
Outdoor Mirrors for Garden Wall Decor 49″x24″ Arched Metal Mirror Retro …

Magicfly Outdoor Acrylic Paint, Set of 30 Colors/Tubes (60 ml, 2 oz.) wi…
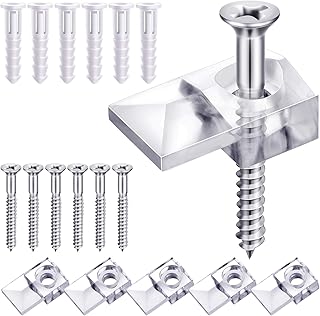
Blulu 20 Pack Mirror Holder Clips for 6 mm in (6/25) Glass Mirror Hangin…
11. Charming Garden Arbors

If you want a warm welcome at your garden gate, an arbor fits the bill.
Choose a vintage garden arbor built from weathered wood or wrought iron.
These materials age beautifully and add character to your outdoor space.
Train climbing plants to cover the arch for a leafy canopy.
Wisteria or climbing roses are sturdy choices that bloom year after year.
Let vines weave through the slats to create color and scent along your path.
Pair the arbor with a flower-lined path to boost romance and guide visitors.
The structure gives shade and a cozy corner for quiet moments.
Place it at a doorway, garden entrance, or beside a seating area.
Keep maintenance simple: trim vines and repaint as needed.
Add a solar light or lantern for a soft glow after dark.
Choose a size that fits your space, so it feels inviting.
A well-placed arbor also works as a focal point in photos and gatherings.
If you lack full sun, pick partial-shade plants and install a nearby trellis.
If privacy is a goal, place the arbor near a sunny corner and train vines to cover a trellis or lattice wall.
Keep a small tool tray nearby to ease pruning and tie knots.
Transform your garden into a fairy tale with a charming arbor! Let climbing plants create a leafy canopy, inviting you into a world of color and fragrance. Vintage garden decor isn’t just about style; it’s about crafting enchanting experiences outdoors!
11. Charming Garden Arbors
Editor’s Choice

Solid Fir Wooden Garden Arch Premium Outdoor Trellis for Climbing Plants…

Outvita 7FT Garden Arch Arbor, Heavy Duty Metal Arbour Archway, Decorati…
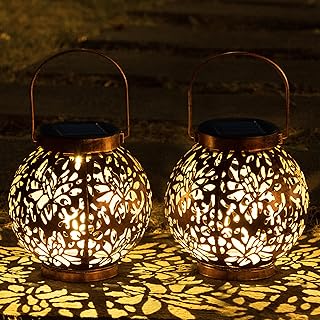
JOIEDOMI 2 Pack Outdoor Solar Hanging Lantern Lights, Waterproof Tableto…
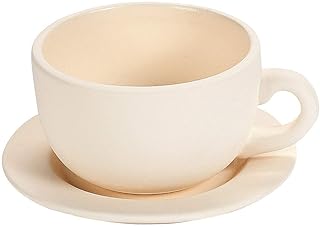
12. Vintage Tea Sets for Display

Want a simple way to turn your garden into a storybook space? A vintage tea set gives you a quiet, charming touch. These pieces feel old-world and fresh at the same time. Use them as decorative accents on tables or shelves to invite conversations and a smile. Choose sets with soft pastel shades for a gentle look. The right light makes the patterns pop at dusk.
– Tabletop vignette: Place a teapot and cups on a small table to create a focal point and a cozy welcome.
– Tea cup planters: Use cups as tiny planters for herbs and flowers.
– Eclectic display: Mix patterns and colors for an eye-catching, vintage look.
– Shelved display: Line a garden shelf with several sets to create a gallery vibe.
– Weather-smart care: Move fragile pieces indoors during frost and heavy rain to extend their life.
Add texture with soft pastels and delicate patterns. Pair tea sets with weathered wood, wicker, or stone to keep the look grounded. Check each piece for chips before you place it outside, and use a saucer under planters to catch drips. If you want a tea-party feel, keep a small teapot ready for spontaneous gatherings with friends. Consider swapping in a few seasonal pieces to refresh the look. Keep care simple: wash gently and dry thoroughly. Avoid strong cleaners that can fade patterns. Store them away from direct sun when not in use.
12. Vintage Tea Sets for Display
Editor’s Choice

Sweejar Porcelain Tea Sets, Vintage British Floral Relief Gold Rimmed Te…
Fun Express DIY Teacup Planter with Saucer – Makes 6 – Ceramic Crafts an…
GIOTORENT Plant Stand Indoor, 3-Tier Heavy Duty Metal Shelf for Patio & …
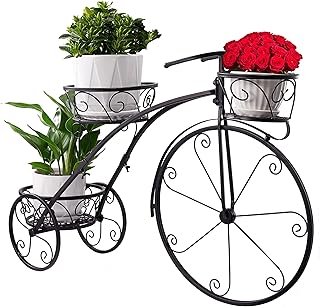
13. Vintage Bicycle Garden Decor

Looking for a simple way to add charm to your yard? A vintage bicycle tucked into the garden does it with ease. That old frame catches the eye and invites a closer look, a rusty bicycle planter vibe. The worn paint and a hint of rust tell a story, fitting cottage, country, and shabby chic styles. You’ll feel drawn to it as you stroll by.
Here’s how to use a vintage bicycle garden decor piece to transform spaces. It works as a focal point and a playful planter system all in one.
Practical setup tips
1) Choose a sturdy bike or a decorative frame that won’t tip in wind.
2) Clean the metal, remove sharp edges, and seal with a weather-friendly finish to keep rust looking intentional.
3) Fill the basket with bright blooms or soft greens for year-round color and scent, a nod to rusty bicycle planter aesthetics.
4) Hang small planters from handlebars or attach a vertical lattice so vines can climb.
5) Place the bike along a path or next to seating so visitors notice the charm as they pass.
Finish with styling ideas: let climbing roses or ivy weave through the spokes; pair florals with herbs in the basket; add a small chalk sign for a village feel.
Keep an eye on the weather and touch up the sealant each season. It’s affordable, easy to rearrange, and endlessly photogenic.
13. Vintage Bicycle Garden Decor
Editor’s Choice
Sorbus Tricycle Plant Stand – Flower Pot Cart Holder – Ideal for Home, G…

Titebond WeatherMaster Metal Roof Sealant 62611 Silver 9.5 fl oz.

OGIMA 4pcs Hanging Flower Pots, Metal Iron Wall Planter Indoor/Outdoor f…
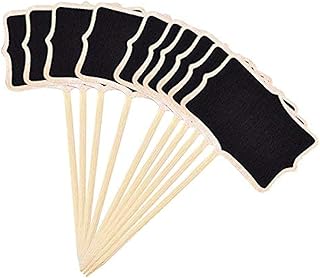
14. Decorative Garden Stakes

You want garden stakes that are useful and pretty. Vintage pieces can do both. They mark herbs and flowers while adding character.
What you need is simple: upcycled forks, spoons, or wooden signs. You can mix metal and wood for a true vintage look. Clean everything first, then patina or paint lightly to keep the antique feel. Add sturdy sticks to become the posts.
How to make them:
– Attach each utensil or sign to a straight wooden stake.
– Use a drill or a strong glue to fix it firmly.
– Bind with garden twine or a thin zip tie for extra hold.
– Seal with a clear outdoor sealer so rain won’t wash away the color.
– Place the stake near the plant base so you can see it easily.
Design ideas to inspire:
Choose a theme to guide your choices. Fairy or butterfly motifs work well with bright or muted colors. For a softer look, use chalky whites, greens, and pastel tones. If you prefer contrast, paint bright accents while keeping the metal patina visible. Space markers 8–12 inches apart in herb beds or flower borders.
Care tips and limits:
Check stakes after rain for looseness. Replace rusty pieces to avoid staining soil. Don’t crowd the plants; give each marker room to be read.
Start today with a small batch. Gather 4–6 utensils, 2–3 sticks, and a can of sealer. You’ll have ready-made charm in a weekend.
Turn your garden into a storybook with vintage garden stakes! Mix upcycled utensils and wooden signs for a charming touch that marks your favorite herbs and flowers beautifully.
14. Decorative Garden Stakes
Editor’s Choice

FEED GARDEN 6 Inch 50 Pack Hot-dip Galvanized Landscape Staples Plant Co…

Rust-Oleum 249859 Painter’s Touch 2X Ultra Cover Spray Paint, Semi-Gloss…

Mr. Pen – Wood Plant Labels with Marker, 100 Pcs, 6″ Wooden Plant Markers
You Might Also Like

15. Vintage Watering Cans

Need a simple way to give your garden a fairy-tale feel? Vintage watering cans are a quick, affordable option you can use today.
Most cans are made of galvanized metal or enamel in bright colors. The patina that comes with age adds character and charm. A faded blue, a sunny yellow, or a rustic red catches the eye among green leaves.
Why they work
These old cans bring nostalgia and a soft glow to outdoor spaces. They’re lightweight, easy to move, and never feel dated. The mix of metal, color, and wear creates texture you can see and almost feel.
Display ideas
How you use them is up to you. They are versatile and suit many spaces.
– Use them as planters filled with herbs or annuals.
– Hang them on hooks for a playful wall display.
– Stand them on a bench or shelf as a tiny sculpture.
– Group several cans with birdhouses, gnomes, or old boots for a cohesive vignette.
This simple decor works in any outdoor space—porches, patios, or a cottage yard. It pairs well with rustic, country, or shabby-chic styles. The cans also invite color and texture: a bright can against weathered wood reads as lively, while a silver-toned can feels modern and clean.
Care tips
Rinse out soil after a season, wipe clean, and touch up chips with a little paint if desired. If you plan to leave them outside, seal the metal to slow rust and protect the finish.
Start today
Place a few cans on a railing, platform, or gate to begin a charming vintage display. You’ll see charm swing into your yard as soon as you place them.
15. Vintage Watering Cans
Editor’s Choice

Galvanized Watering Can for Outdoor Indoor Plants, 1 Gallon Decorative C…

Vintage Grey Ceramic Ice Crack Flower Pot with Drainage Holes, Country R…

FEED GARDEN 2 Pack 8 Inch Hanging Plant Bracket Wall Hooks Decorative Pl…
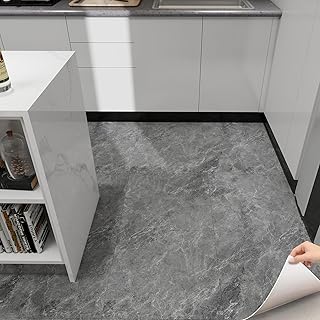
16. Stone Pathway with Vintage Touches

You want a garden path that feels inviting and full of character. A stone pathway with vintage touches can do that in no time. Start by planning the route. Make it wide enough for a comfortable step—about 2 to 3 feet. Trace the line with string or a garden hose, so you know where you’ll walk.
– Materials: choose large, flat stones or interlocking pavers. Set them on a level bed of sand or proper base so they don’t wobble. Leave even gaps, roughly 1 to 2 inches, to give a natural look and space for mulch or gravel between stones.
– Edges with vintage finds: line the path with old bricks, wooden crates, or broken pottery. Mix textures and sizes, placing pieces at irregular intervals for charm, not precision.
– Plant borders: grow a soft edge with creeping thyme, lavender, or sweet alyssum. These low plants hug the path, add color, and release a gentle scent when you brush by.
– Finishing and care: add a light mulch between stones to suppress weeds. Keep a small trowel and brush on hand for occasional weeding and cleaning.
With these steps, your stone pathway becomes a warm, welcoming feature that invites daily strolls and admiration.
16. Stone Pathway with Vintage Touches
Editor’s Choice

Emsco Group Flat Rock Rain Barrel and AC Unit Paver Patio Pad 24”x24” Na…

Fiskars 3-in-1 Garden Tool Set, Includes Trowel, Transplanter, and Culti…

Back to the Roots 25.7qt (1 Cubic ft) Organic Premium Mulch
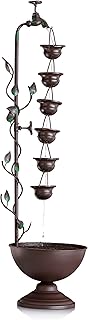
17. Vintage Fountain

Picture a quiet centerpiece that pulls you into your outdoor space. A vintage fountain does that by softening the air with sound and movement. Choose a small tabletop piece or a larger standing fountain to fit your area. The gentle splash and slow drift of water create a calm mood you can feel.
Look for fountains made of stone or aged metal with character. A patina of time—moss, rust, or weathered bronze—gives it charm. These textures help the fountain blend with plants rather than stand apart. Pair with neutral greens or soft blooms to let the fountain shine.
Place the fountain where you can hear it from a seating area. Surround it with plants to frame the water and soften the base. Add a small bench or a couple of chairs nearby so you can listen and watch birds.
Quick planning tips
– Size your space to fit a fountain without crowding paths.
– Choose a material that ages well in your climate.
– Plan seating and plants around it for easy enjoyment.
Maintenance helps it last. Use a simple pump if you want low effort. Keep the water clean and check for leaks monthly. In freezing areas, winterize or drain the fountain to prevent cracks.
A vintage fountain adds a serene focal point and invites wildlife to visit. It fits many garden styles and ages gracefully with your space.
17. Vintage Fountain
Editor’s Choice

Alpine Corporation WIN826 14” Vintage Water Pump Tabletop Fountain with …
Alpine Corporation MAZ254 Outdoor Floor Tiered Vintage Water Fountain w/…

Aquascape Maintenance Water Treatment for Fountains, 8-ounce / 250-ml | …
18. Floral Trellis

If your garden feels flat, a floral trellis can bring height, texture, and color.
Vertical structure draws the eye and frames seating.
Choose a vintage trellis made from wrought iron or reclaimed wood.
Metal lasts through weather, while wood adds warm charm.
Look for clean lines, an aged patina, and sturdy anchors.
Train climbing roses, clematis, or jasmine to grow up the frame.
Tie stems with soft garden twine and guide them along the lattice.
Prune gently to keep a tidy arch.
Place the trellis near a seating area to create a backdrop.
As vines fill in, you get shade, scent, and hint of privacy.
Practical tips for using a floral trellis
– Measure your space so the trellis fits.
– Pick a pattern and size that matches nearby structures.
– Choose plants suited to your climate and bloom time.
– Train, then prune regularly to keep it tidy.
If you spot rust on metal, sand it lightly and repaint with rust proof paint.
Powder coated iron needs less upkeep.
Match the wood with a clear seal to protect it from rain.
Ready to add a floral trellis?
Measure a style you love, plant climbs, and watch your garden bloom.
Your garden will feel magical.
A floral trellis isn’t just decor; it’s a vertical garden that brings life and charm to your outdoor space. Embrace vintage styles and let your climbing roses create a fairy tale ambiance!
18. Floral Trellis
Editor’s Choice

Trellis for Climbing Plants 86.6″ H x 29.5″ W Tall Garden Trellis Wrough…

Outvita 7 Ft Wooden Garden Arbor Arch, Fir Wood Arbour Trellis, Pergola …

PerkHomy Natural Jute Twine 600 Feet Long Twine String for Crafts Gift W…
Conclusion

Incorporating vintage garden decor into your outdoor space can truly create a fairy tale atmosphere, enticing you to spend more time outside. These 18 ideas give you plenty of inspiration to add personality and charm to your garden, making it an enchanting retreat.
So gather your favorite pieces, get creative, and transform your outdoor area into a magical haven that reflects your unique style and love for vintage treasures.
Note: We aim to provide accurate product links, but some may occasionally expire or become unavailable. If this happens, please search directly on Amazon for the product or a suitable alternative.
This post contains Amazon affiliate links, meaning I may earn a small commission if you purchase through my links, at no extra cost to you.
Frequently Asked Questions
What Are Some Creative Ideas for Incorporating Vintage Garden Decor?
Incorporating vintage garden decor can be a delightful way to add charm to your outdoor space. You can use upcycled birdcages as planters, vintage wheelbarrows for planting, or even antique garden furniture for seating. Each piece tells a story and gives your garden a unique personality!
Don’t forget whimsical garden signs and fairy lights in glass jars to enhance the magical feel of your garden.
How Can I Find Vintage Garden Decor on a Budget?
Finding vintage garden decor doesn’t have to break the bank! Check out local thrift stores, flea markets, or online marketplaces like Etsy and eBay for affordable treasures. You can also visit antique shops or even estate sales to discover unique pieces that fit your style and budget. Remember, sometimes a bit of creativity can turn an old item into a stunning focal point in your garden!
What Types of Vintage Decor Work Best for Small Gardens?
In small gardens, it’s best to focus on vertical elements like vintage ladders for herb gardens or floral trellises to add height and interest without taking up too much space. Vintage mirrors can also create an illusion of depth, making your garden feel larger. Additionally, consider using small vintage planters or decorative stakes to add character without overcrowding your space.
How Can I Create a Fairy Tale Atmosphere in My Garden?
To create a fairy tale atmosphere, focus on incorporating soft lighting like fairy lights and candles, as well as enchanting decor such as vintage tea sets or whimsical garden signs. Use elements like vintage fountains or charming arbors to create focal points. Layering textures with rustic furniture and colorful plants will also help evoke a magical ambiance that invites you to spend more time outdoors!
Are There Maintenance Tips for Vintage Garden Decor?
Absolutely! To keep your vintage garden decor in great shape, consider applying a protective sealant on metal items to prevent rust and regularly cleaning pieces to remove dirt and debris. For wooden items, a good coat of wood preservative can help maintain their charm. Additionally, store delicate items indoors during harsh weather to prolong their life. With a little care, your vintage treasures can remain beautiful for years to come!
Related Topics
vintage garden decor
outdoor inspiration
creative garden ideas
whimsical decor
budget friendly
easy DIY
antique furniture
rustic charm
magical gardens
upcycled decor
garden transformation
fairy tale gardens