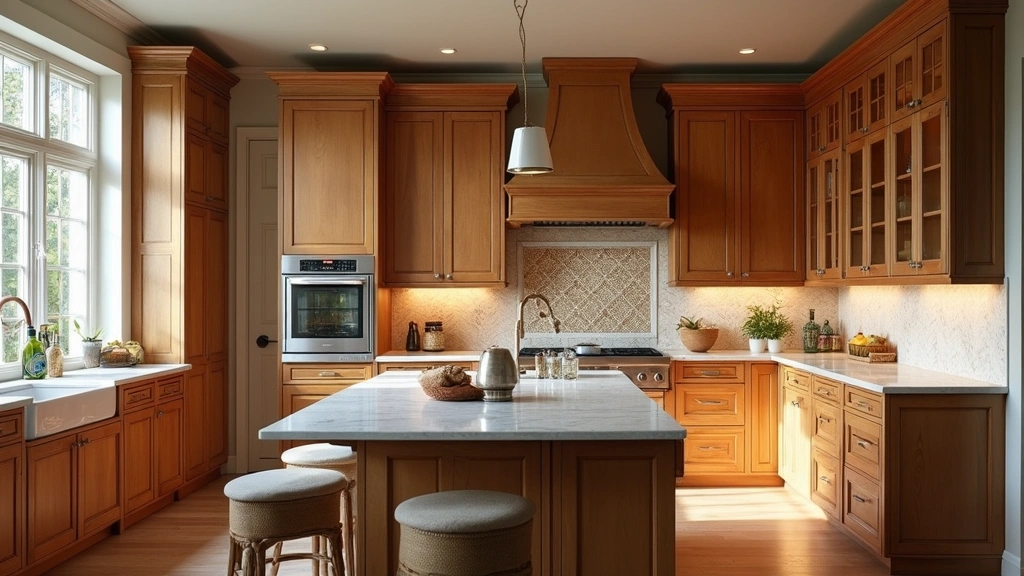
White kitchens wake up a home. They feel bright, calm, and clean. Here is why I put this post together: a white space can be warm if you mix texture and light. 30 stunning white modern kitchen designs you need to see to believe show that brightness can be lively, even cozy.
If you are remodeling, decorating a small space, or chasing a timeless, easy-to-live-with look, this is for you. If you value light, practical storage, and surfaces that wipe clean, you’ll find ideas that fit. You don’t have to choose a look that feels cold or sterile.
You will get 30 ideas that span glossy, matte, and textured white. You’ll see how people mix stone counters, wood accents, glass, and metal to keep the room warm. The post also includes tips on lighting, layout, and durable finishes like quartz, porcelain tile, and ceramic.
Use this as a catalog. Save photos you love. Note what fits your space and jot quick notes on finishes you want. Look for cues that match your budget and life. If you have kids or a busy kitchen, choose surfaces that wipe clean and smart storage that hides clutter.
Will white look cold? It can if you choose the wrong textures. Mix warm woods, brass or bronze hardware, and soft lighting to soften. Maintenance? Quartz counters and sealed porcelain wipe clean. You don’t need a big budget to start; begin with one countertop, one accent, one lighting idea.
Next steps: take a breath and pick one idea to try this week. Build a small mood board with photos and samples. Measure your space. Start with cabinet color, then plan lighting and storage. As you scroll, you’ll find something that fits your life and your space.
You want a kitchen that looks clean and calm. A white design can give you that. It feels bright, simple, and open. You get a space that seems larger and easier to breathe in.
White cabinets with a glossy finish bounce light around the room. A clean quartz countertop stays tough and wipes clean with little effort. Stainless steel appliances add a cool shine that stays in tune with the color theme. White walls keep the eye focused and give you a blank canvas.
Key Features:
– Glossy surfaces that reflect light, making the kitchen feel bigger.
– Open shelves mix quick access with a tidy look.
– White accessories and knobs blend in, so you can swap color accents without changing the core design.
This choice works well if you want a calm stage for your everyday meals. It also invites you to add small pops of color through decor, plants, or a few bold kitchen tools. To keep it practical, plan for good lighting and regular wipe-downs, since white shows dust and spills more quickly.
If you need more ideas, you can pair soft gray or pastel accents with the white base to soften the look.
Next steps: choose a white shade, a durable countertop, and lighting that flatters the space.
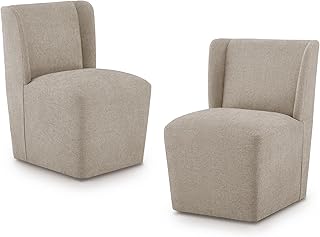
1. Sleek All-White Aesthetics
Editor’s Choice
🛍️
Anbuy White Buffet Cabinet with Lights 57.87” Sideboard with Storage Co…
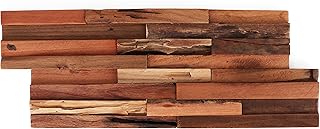
If you want a white kitchen that still feels warm, wood is your best friend. It adds comfort without stealing the clean look you love.
Here is why wood works in a white kitchen. It brings texture, depth, and a touch of nature. The contrast between light cabinets and warm wood draws the eye in. You notice how the room feels inviting, not sterile.
Next steps are practical. Choose a wood tone that matches your style. Lighter woods give a breezy glow. Darker woods create a rich, grounded feel. Think about the finish too—matte feels modern, while a soft satin shows off grain.
Key Features:
– Wooden countertops that stand out against white cabinetry.
– Open wooden shelves to display dishware, plants, or everyday favorites.
– Soft lighting that brings out the wood’s color and grain.
Add small touches to tie it together. Consider ceiling beams or wood trim to echo the warm tones. Balance is key—white keeps the space bright, wood adds life. If you work in steps, you can test one area first, like the island or a shelf, and expand from there.
Here is a quick tip: seal wood surfaces that touch water and food. This protects them and keeps them looking warm longer.
Next steps: start with one intentional wood feature, then expand as you love the look.
Is your kitchen asking for a bold, clean look? Industrial chic in a white kitchen makes that contrast pop. Exposed metal fixtures grab your eye. Edison bulbs glow warm and not too harsh.
Here is why this look works in white spaces. It leans on raw materials like steel, concrete, and brick, set against bright white cabinetry and counters. The result feels strong and practical at the same time.
Key features:
– Metal bar stools add an urban touch
– Exposed piping or ductwork paired with white cabinetry
– Open layouts that create a roomy, welcoming space
– Stainless steel surfaces and dark hardware for crisp contrast
– Small touches of brick or concrete to keep texture balanced
How to pull this off in your home:
– Start with a calm base: white cabinets and white counters
– Add metal finishes: faucet, lighting, and cabinet pulls
– Choose lighting wisely: install Edison bulbs in a simple, clean fixture
– Balance with warmth: add a wood island or warm-toned stools to soften metal
– Keep clutter low so the lines stay clear
Next steps. Measure your space, pick one bold metal feature, and plan lighting at eye level. This look stays sharp without feeling cold and adapts from a large kitchen island to a tight galley. You’ll get a space that reads clean, durable, and ready to cook in.
3. Industrial Chic
Editor’s Choice
🛍️
FDW Metal Bar Stools Set of 4 Counter Height Bar Stools 24 Inches Indust…
You want a kitchen that feels calm and easy to clean. A minimalist white design gives you that peace. Clean lines, quiet surfaces, and careful choices make cooking feel simple again. You choose a few standout pieces that do the work and look great. A striking island, sleek pendant lights, or a slim glass cabinet become the room’s focus.
Key Features:
– Hidden storage to hide clutter and keep the counter clear.
– Monochrome whites with different textures like matte cabinets, glossy countertops, and brushed metal accents.
– Functional decor that serves a purpose, not just for show.
A minimalist white kitchen shines when light plays on it. Light on white surfaces can make the room feel bigger. Choose warm textures too—wood, stone, or textured laminates soften the look without breaking it. Storage ideas matter: pull-out trays, shallow drawers for lids, toe-kick drawers, and invisible organizers keep every tool in its place.
Next steps: plan around your routines first. Decide what stays on the counter and what belongs in hidden storage. Pick a durable countertop, a calm faucet finish, and energy-saving lighting. With the right balance, cooking becomes a quiet, enjoyable ritual in a clean, modern room.
Your kitchen stays calm and ready to work.
4. Minimalist Elegance
Editor’s Choice
🛍️
2 Packs Pull out Cabinet Organizer, Expandable(12″-20″) Heavy Duty Slide…
Measure spaces and choose a style that fits your cabinets
5. Bright Accents
You want a white modern kitchen that feels lively, not cold. Bright accents are the easiest way to do it. They wake up the space and show off your personality.
Here is how to pull it off.
– Key Features: Bold bar stools or a colorful backsplash create contrast with white cabinets. Choose a hue you love and repeat it in small doses to keep the look balanced.
– Open shelves with colorful dishware and artwork add character. Let one or two items stand out against the clean white backdrop.
– Lighting as a feature: Bright pendant lights or a warm-toned fixture become a focal point. Test color and brightness at different times of day to see how it feels.
– Accessories that pop: Add towels, small appliances, or utensils in your chosen color. Keep most pieces in white to preserve the calm base.
Next steps: pick two or three accents and test them with your countertops and flooring. Hold swatches next to the cabinets, and observe light from a real window for a day. If it feels busy, scale back and let white lead.
This approach keeps white as the main stage while bringing life to the room. You gain warmth and energy without clutter.
5. Bright Accents
Editor’s Choice
🛍️
Flash Furniture Kai Commercial Grade 4 Pack 30″ High Backless Crystal Te…
White kitchens shine. They feel clean but can seem flat. Texture adds depth while keeping the bright look you want.
– Backsplash textures Textured tiles catch light and add depth. Pair a tile with a smooth white counter to create contrast. Seek tiles with a subtle pattern, like a raised hive or a soft wave.
– Cabinet finishes Matte white hides fingerprints. A hint of wood grain adds warmth. Doors with a light grain or linen look give soft texture you feel when you touch drawers.
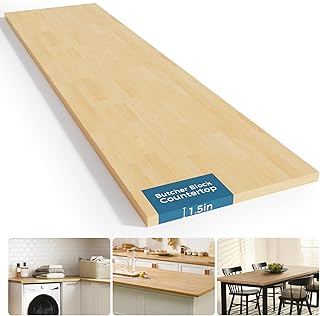
– Countertop variety Mix textures on counters. A honed stone or subtle quartz edge adds touch. Consider a thin wood butcher block for prep. This keeps meals practical and adds balance.
– Storage accents Woven baskets on open shelves add a natural, tactile look. They break the white blocks. Choose baskets in natural fibers like rattan or seagrass. Layer baskets of different sizes for depth.
– Lighting and hardware Light hits textures to stand out. Brushed metal or warm brass adds character. Under-cabinet lighting makes tile texture pop. Matte hardware also reads as texture when you touch it.
– Practical tips Start small. Choose one texture, then add more as you like. Keep balance so the room stays calm.
Your goal is a white kitchen that stays calm and easy to clean. Clutter breaks that calm fast in bright light. Smart storage helps you keep things tucked away without losing access. With the right setup, you wipe a surface and know where each tool sits.
Here is why white cabinets shine with smart storage: they hide clutter and make daily tasks feel smoother.
Key Features:
– Pull-out pantry sections for quick access to staples.
– Hidden drawers that blend into the cabinet doors.
– An island with built-in storage for pots, pans, and small appliances.
Smart storage does more than look good. It frees counter space, speeds chores, and keeps your most-used items within reach. In a white kitchen, hidden compartments create a clean line while you stay organized. Start with the places you touch most, the pantry, under-sink base cabinets, and the island. Use slim pull-out organizers and labeled bins so you always know where things belong.
Next steps:
1) Measure the spaces where doors swing and drawers slide.
2) Choose a style that fits your white cabinets, like matte or high-gloss white.
3) Add adjustable shelves, pull-out rails, and hidden dividers to your plan.
7. Smart Storage Solutions
Editor’s Choice
🛍️
2 Set, 2 Tier Clear Organizer with Dividers for Cabinet, Shlef, Counter …
Want a white kitchen that feels light, roomy, and easy to share? An open-concept layout blends your cooking space with the rest of the home. Sun pours in through windows, and voices drift as you work. You move from stove to island without turning a corner, and conversations stay natural. The challenge is to keep the layout open while preserving order and calm.
Here is why open layouts work. They boost flow and make daily life simpler. An island or breakfast bar acts as a gentle divider and a place to sit. You get a handy spot for drinks, quick meals, or a quick chat with a guest. Lighting stays soft and even, not blocked by walls. With the right balance, your white kitchen can feel airy yet cozy.
Key Features:
– Smooth flow from kitchen to living spaces.
– Plenty of room for entertaining without crowding.
– Clear zones for cooking and socializing.
To make it real, plan around three ideas. First, choose an island that fits as a centerpiece and a natural gathering spot. Second, keep sightlines clear by avoiding tall, full walls. Third, mix textures like matte white cabinets, a warm wood floor, and a cool quartz countertop to add warmth and depth.
Next steps: measure your space, lay out furniture with tape, and test seating spots. Then adjust until you love how it feels to cook and relax in the same area.
An open-concept layout is the heart of a white modern kitchen, where light, conversation, and creativity flow freely. Embrace the space and let your culinary adventures unfold naturally!
8. Open-Concept Layouts
Editor’s Choice
🛍️
HSH 72.4” Rolling Kitchen Island with Swivel Table, Storage Cabinet, Dra…
Here is why lighting matters in a white kitchen. It sets mood, guides your steps, and highlights clean lines. In a modern white space, statement fixtures can act as art you live with. You can pick a chandelier or large pendant that stands out without stealing the light.
Key Features:
– Bold designs that draw the eye upward
– Warm-toned bulbs to soften white’s sharp edge
– Dimmable options for bright cooking and cozy chats
Next steps:
– Choose a height and scale that matches your ceiling. A tall ceiling loves a chandelier; a low one shines with a wide pendant.
– Mix finishes for a touch of warmth. Try brushed brass or matte black against white.
– Layer light: add under-cabinet LEDs and a central fixture. It fills shadows and makes tasks easier.
Let’s break it down with a quick plan. Decide the fixture’s tone first. If you like modern chic, go with metal and simple shapes. If you want a cozy feel, pick warm glass and softer curves. Keep the rest of the room quiet so your statement piece can shine. With the right lighting, your white kitchen feels inviting, not cold.
And make controls easy. Dim the main lights, keep a simple switch close to the door, and you’re set.
In a white modern kitchen, lighting isn’t just a fixture; it’s the art that elevates your space. Choose bold designs to set the mood and let every meal be illuminated with style!
9. Statement Lighting
Editor’s Choice
🛍️
Black Chandelier, 6-Light Farmhouse Chandelier for Dining Room Lighting …
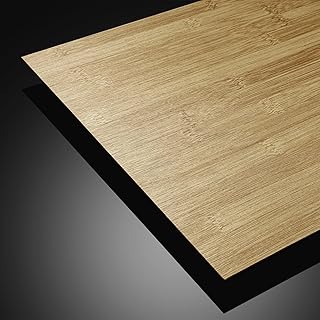
Here is how you keep a white kitchen bright and kind to the earth.
You want a clean look that lasts. You also want to cut waste and bills. Eco-friendly choices make both goals easy. You can mix light finishes with smart, simple swaps. Here is why this works.
Key Features:
– Bamboo cabinetry or recycled glass countertops.
– Countertops from recycled glass or durable quartz for lasting shine.
– Low-energy appliances that cut power use.
– Low-flow faucets to save water.
– Daylight-friendly layout with windows and skylights to cut the need for artificial light.
– Reflective white surfaces and smart placement to boost natural light.
These picks do more than look good. They help you save on daily costs and shrink your footprint. White stays crisp longer when you protect it with good planning.
Next steps for you:
– Pick bamboo boxes or glass tops to keep the space airy.
– Choose appliances with a small power draw and clear energy guides.
– Add windows, a skylight, or bright LEDs to lift daylight and cut glare.
If you plan well, you get a kitchen that shines white, stays fresh, and stays gentle on the planet. It is a practical path to a home you love.
You can start small by swapping one piece this year.
10. Eco-friendly Choices
Editor’s Choice
🛍️
RoyalHouse Bamboo Floor Cabinet with 2 Shutter Doors and 3 Open Shelves,…
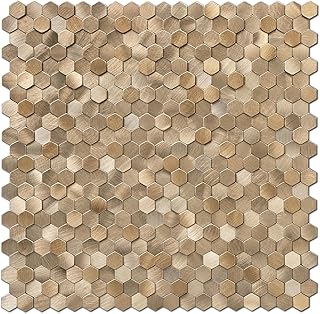
You want a backsplash that lifts a white kitchen without stealing the show. It should guard walls and stay easy to wipe. Here is why a backsplash matters.
Let’s break it down. You have three popular paths:
– Mosaic tiles add texture and sparkle, catching light from every angle.
– Glass panels brighten the room and reflect your cabinets.
– Marble slabs offer a clean line with a touch of luxury.
Key features:
– Textured or glossy finishes that play with light.
– Contrasting colors or patterns against white.
– Easy-to-clean surfaces that stay polished with little effort.
Next steps. Start with the vibe you want:
– Pick a finish: textured, matte, or glossy.
– Choose a color or pattern that contrasts with white or blends for a calm look.
– Check cleaning needs so it lasts.
Practical tips:
– Decide grout shade: blend with white or stand out for drama.
– Plan outlets and cuts before installation.
– In small kitchens, glass or high-gloss tiles can make the space feel larger.
Care tips:
– Wipe spills quickly and use mild cleaners.
– If you choose marble, reseal as needed to protect the surface.
Real-world ideas:
– Subtle mosaic for texture on a white backdrop.
– Bright glass panel to brighten morning light.
Next steps: measure, pick two options, and talk with a pro about layout and fit.
11. Gorgeous Backsplashes
Editor’s Choice
🛍️
Antique 2” x 2” Glass Squared Tile Glazed Red Grey Grid Mosaic Wall Ba…
If you want a white kitchen that feels polished but easy to live with, marble is a strong pick. It brings a soft glow and subtle drama to a clean, modern scheme.
Where marble shines in a white kitchen
– Countertops that gleam with life
– An island that becomes a central hub
– A backsplash that adds texture without crowding the view
Why it works: the natural veins in marble catch light, creating movement against pure white. You get character without clutter.
What to know before you go
Marble is porous. It can stain and it can etch from acidic foods. Plan for upkeep. A simple sealant helps, and you may need to refresh it every 1–2 years depending on use and the finish.
Practical care and use
– Wipe spills right away with a soft cloth
– Clean with a gentle, pH-neutral soap
– Use a cutting board and a hot pad for pans
– Choose a finish that fits your lifestyle: polished for bold shine, honed for a softer, matte look
Styling and pairing ideas
Pair marble with warm woods, glass, or brushed metal to balance bright white. Keep surrounding surfaces simple so the marble stays the star.
Here is why smart tech fits a white kitchen. It keeps the space calm and makes daily tasks simple. You get quick control, less mess, and fewer trips to the drawer.
– Key Features:
– Devices that blend with cabinetry without stealing the clean look.
– Easy controls that are quick to learn.
– Low power use that trims energy bills.
Smart devices act in real life moments. You can preheat your oven while you set the table. You can turn on lights or adjust the fan with a tap, a quick voice command, or a tap on your phone. A fridge can ping you when milk runs low or when a door is left ajar.
Next steps, practical and doable:
– Start with a touchless faucet. It keeps hands clean and shines with a white sink.
– Add a smart oven, or a smart controller that lets you heat food from your phone.
– Use smart lighting to set a cozy morning glow or bright task light.
– Pick a fridge with alerts so you know what you have and what you need.
Implementing these steps is doable in stages. Build your plan around one room and one device at a time. Remember, the goal is a cleaner look and faster, easier meals.
13. Smart Tech Integration
Editor’s Choice
🛍️
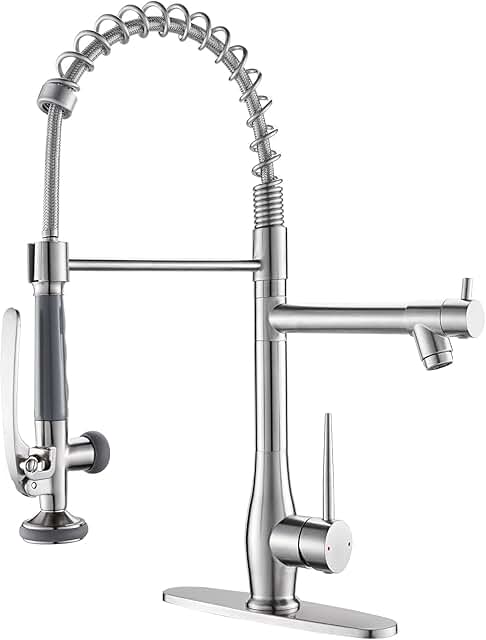
OWOFAN Touchless Kitchen Faucet with Pull Down Sprayer LED Light Single …
If your white kitchen feels cold when the lights are on, layered lighting can add warmth and depth. You gain sharp task light, a soft room glow, and accents that make features pop. Here’s why this setup fits a white space.
– Task lighting: Under-cabinet strips and island lamps illuminate counters with no shadows, making prep easy and safe.
– Ambient lighting: Recessed cans or slim ceiling fixtures spread a steady, overall glow for everyday use.
– Accent lighting: Pendants or hidden LEDs highlight a marble countertop, glass-front cabinets, or a neat coffee bar.
Next steps to make it real in your kitchen.
– Pick a color temperature that feels warm yet clear. Aim around 2700K to 3500K depending on the mood you want.
– Install dimmers for each layer so you can raise or lower light without fumbling with switches.
– Choose fixtures with clean lines. Metal finishes or simple glass shades work well in a white modern kitchen.
– Test the setup during cooking, cleaning, and entertaining. Adjust placement and brightness until the space feels inviting.
Key Features:
– Under-cabinet lighting for prep surfaces.
– Dimmable switches for easy mood control.
– Decorative fixtures that match the white kitchen style.
14. Layered Lighting
Editor’s Choice
🛍️
Nicor 18” LED Direct Wire Under Cabinet Light – Dimmable Undercounter LE…
If your white kitchen feels a touch too uniform, open shelves can bring it to life. They break up long runs of cabinets and give you a spot to show off what you love. You can grab what you need fast, and the shelves catch the light to keep the room inviting.
Here is why this setup works. Open shelves let you display favorite dishware, a small plant, or a well-read cookbook. They add character without making the space feel cramped. Mix with closed cabinets to hide the things you use less often. The result is a balanced look that stays easy to clean and organized.
Key Features:
– A place to showcase items you use every day while keeping them within reach.
– Flexible design that can shift with your decor and season.
– Adds depth to a simple, minimalist white kitchen.
To make open shelving work, start with the basics. Choose shelves in wood, metal, or glass that blend with your cabinets. Keep shelves around eye level to stay practical. Leave some space between shelves so they don’t look crowded. Group items by color or by use to keep things tidy.
What to display helps too. A stack of clean plates, a single pitcher, a small plant, and a few cookbooks can look intentional rather than cluttered. Dust regularly and wipe spills right away. Anchor the shelves to studs so they stay safe.
Next steps: plan your layout, pick your materials, and start with one or two shelves to test the look.
15. Open Shelves
Editor’s Choice
🛍️
PEKGRIL 4 Pack Metal Floating Shelves, 17×6 Inch Large Wall Mounted Shel…
You want a white modern kitchen that stays bright and calm while showing your style. Statement appliances can help you reach that balance. Pick bold colors, retro vibes, or shiny stainless steel to lift the room. These machines do more than cook and chill. They act as eye-catching focal points.
Key Features:
– Bold colors that pop against white
– Modern designs that fit the room
– Low energy use and easy controls
When you choose these appliances, you gain two wins. They show your taste and keep the space practical. You can mix a bright range with white cabinets, or place a chrome fridge next to a matte white dishwasher. Keep other surfaces simple so the appliance stands out without overwhelming.
Next steps: plan one standout piece first. Look for colors or finishes that repeat in small touches, like a faucet or bar stool. Make sure the layout still feels easy to use. Check energy use ratings, noise levels, and how easy the controls are to read. This approach lets you enjoy a clean, bright kitchen that still feels uniquely you.
Want a calmer look? pick one bold piece and keep the rest white. A warm brass handle helps.
16. Statement Appliances
Editor’s Choice
🛍️
Frigidaire EFR786 Retro Apartment Size Refrigerator with Top Freezer – 2…
You want a white kitchen that feels warm, not cold. Vintage charm gives that balance. Here is why it works: white surfaces stay clean, while old pieces add soul. You get a space that invites family time and easy cleaning.
Let’s break it down with simple steps you can use today.
– Antique hardware: Swap dull pulls for brass or copper knobs. They catch light and add a timeless touch.
– Reclaimed wood accents: Place reclaimed wood on the island or open shelves. The grain and scent bring warmth.
– Vintage light fixtures: Choose fixtures with warm bulbs. A soft glow against white makes the room feel cozy.
– Retro-style appliances: A fridge or range in retro white or pastel tones nods to the past without losing safety.
– Texture and decor: Add textiles, ceramics, and rugs in muted tones to soften edges.
Keep large surfaces white and let a few vintage pieces tell the story.
Here is why this approach works for most homes. It stays practical and easy to care for, while still looking fresh.
Next steps: plan a small test run. Start with one vintage piece, then add another after you see how it feels in your space.
Move slowly and enjoy the change today.
A white modern kitchen can feel warm and inviting! Add vintage charm with brass hardware and reclaimed wood to create a space that’s both clean and full of character.
If you want a white modern kitchen that feels warm, curved designs can help. Curves soften the hard lines of metal and glass. They guide how you move through the space. Imagine a rounded island. Imagine curved cabinetry. Imagine soft edges that stay true to white.
Key Benefits
– Flowing shapes soften sharp angles and bring calm to the room.
– Integrated seating lets family and guests gather without crowding the work zone.
– Soft colors and warm textures blend with a white palette for balance.
Next, practical steps to add curves.
Start with a gentle island radius.
The curved island should fit your room.
Leave space for stools on the outer curve.
Use curved cabinetry or a curved peninsula to avoid too many straight lines.
Choose the right finishes.
White quartz or marble tops stay bright.
Pair them with a matte wood or soft gray to add warmth.
Keep hardware minimal so the curves stay clean.
Lighting helps the shape shine.
Hang a small row of pendant lights along the curve.
That draws the eye and brightens prep zones.
Be mindful of space and cost.
Curved design costs more and needs precise planning.
You may lose some inner storage depth on the curve.
Work with a designer to map seating clearance and appliance placement.
Next steps.
Measure your space.
Sketch a curved island idea.
Talk to a kitchen pro about feasibility.
19. Curved Designs
Editor’s Choice
🛍️
HOSTACK Kitchen Island Cart with Storage, 47” Kitchen Storage Island on…
If you want a brighter, airier white kitchen, glass elements are a smart move. They reflect light and add a clean glow. Glass keeps the space open and lets you show off your favorite dishes.
– Glass-front cabinets that display dishware.
– Glass backsplash tiles for a sleek look that catches light.
– Glass pendant lights that hover above the island.
– Mirrored surfaces that bounce color and sun.
Here is why. Glass creates depth. It makes ceilings feel higher. It helps in a small kitchen. It also makes cleaning simple.
Next steps. How to implement:
– Choose tempered glass for safety in doors and panels.
– Use clear glass to show items, or frosted glass for less shine.
– For backsplashes, consider glass subway tiles or a large glass panel as a splash guard.
– Pick glass pendant lights with simple shapes to avoid clutter.
– Add a mirrored backsplash or wall near a window to amplify daylight.
Care tips. Wipe with a soft cloth and a mild cleaner. Avoid abrasive pads.
Limitations. Fingerprints show on glass, so keep a routine wipe.
Final note. With the right choices, glass elements boost brightness and keep a clean, open feel. You can mix frosted and clear glass to balance glow and privacy.
20. Glass Elements
Editor’s Choice
🛍️
Glass Display Cabinet with Lock, Metal Curio Cabinet with Tempered Glass…
Your white modern kitchen can feel calm and clean. The right hardware brings warmth and personality. It changes not just the look. It guides how you move through the space.
Here is why decorative hardware matters. It shines on your cabinets. It lets you show your style without changing doors. It also lets you mix different materials for texture. A bold finish brings contrast while keeping the sleek white base.
Key Features:
– Unique designs that reflect your taste.
– Mixed materials, like metal and ceramic.
– Finishes such as matte black or warm gold for a chic contrast.
With the right choices, hardware turns a practical task into a design moment. Now, let’s break it down.
– Start with a small set. Pick knobs or pulls in one finish.
– Add a second finish on accent pieces to create interest.
– Match scale to door and drawer size. Small drawers get small knobs. Tall doors get long pulls.
– Keep alignment clean. Measure center points and keep spacing even.
– Maintain lightly. Wipe with a damp cloth. Avoid harsh cleaners.
Next steps:
– Try a ceramic knob on a white shaker cabinet for a friendly touch.
– Use matte black pulls on upper cabinets and gold pulls on an island for depth.
– Budget a gradual update by swapping only the most used drawers first.
21. Decorative Hardware
Editor’s Choice
🛍️
20 X Mix Vintage Look Flower Ceramic Knobs Door Handle Cabinet Drawer Cu…
If you want a white kitchen that feels bold, try a dual-tone plan. White cabinets stay bright. Color lands on the island or lower cabinets. The contrast adds depth and keeps the look fresh.
This setup works in small kitchens too. A bold island acts as a single anchor, guiding the eye without making the space busy. You get a modern look with a touch of personality you can adjust over time. Test paint samples on a small panel first. That simple test helps.
Key Features:
– Bold color on the island or base cabinets creates a focal point.
– White uppers and walls keep the space airy.
– Balanced proportions prevent the design from feeling loud.
Here is why dual-tone designs work: they give you a fresh, easy way to update the look without a full remodel. You can swap color, hardware, or the countertop to refresh the scene.
Next steps to implement:
– Pick color for the island, like navy or emerald.
– Keep the rest white.
– Choose counters that tie both hues together.
– Add a backsplash that harmonizes tones.
– Use simple hardware in a neutral metal.
If you try this, you’ll feel a brighter room with a strong center of focus.
22. Dual Tone Designs
Editor’s Choice
🛍️
Sherwin Williams Colors collection Deck Complete Paint Colors
If you want a dining spot that fits a white modern kitchen, try a dining nook. It adds casual dining space without crowding the room. You get a friendly corner for family meals, quick breakfasts, and chats over coffee.
Here is why it works. A nook uses a small table and comfy seating to create a dedicated dining moment. It stays practical, but it also feels warm in a clean, light space.
Where to place it and how to style.
Key Features:
– Built-in benches save space.
– A small table with clean lines that match cabinetry.
– Soft textiles add comfort and warmth.
Color and light seal the mood. Keep major parts white or pale wood for calm. Add color with cushions, a rug, or art. A soft lamp finishes the look.
Next steps. Measure your corner. Pick a bench style that fits the wall and a table height that matches your chairs. Choose durable textiles and a washable cushion cover for daily use.
Practical layout tips. A dining nook lives on performance as well. Put it where natural light hits the table. Use a narrow bench to keep traffic clear. If space is tight, a fold-up chair or slim backless bench can work.
23. Chic Dining Nooks
Editor’s Choice
🛍️
IDEALHOUSE Folding Dining Table, Drop Leaf Table with 6 Wheels and 2-Lay…
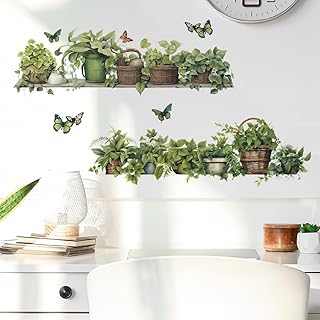
Want a brighter, more welcoming white kitchen? Indoor plants can do that with ease. They bring life, color, and a touch of nature. They also improve air quality, which you feel as soon as you step in to cook.
Here is why they work in a white space. Simple plants stay neat and fit the clean look. You can start with just three.
Key Features:
– Planters that match the kitchen’s style
– Herbs in pots for decoration and cooking
– Varying heights and colors for visual interest
Where to place them? On the windowsill for morning sun. A tall plant in a corner or beside the fridge anchors the room. Small pots on shelves or the counter add texture without clutter.
How to care without a lot of work? Water when the soil’s top inch dries. Use pots with drainage and good potting mix. Keep herbs near the prep area so you can trim and use them daily. Group plants in a sunny spot for you to notice.
The payoff is real. You gain a fresh scent, more color, and a calmer kitchen vibe. Ready to try? Start with three low-maintenance picks and set them up this weekend. Rotate plants with the seasons to keep the look alive.
24. Indoor Plants
Editor’s Choice
🛍️
SQOWL Ceramic Planter 8 Inch – Pot for Indoor Outdoor Plants Round Ceram…
You want a white, clean kitchen that still feels alive. Playful patterns can give that charm without crowding the space. Start small to keep the look calm, then grow as you fall in love with the idea. Patterns add texture, light, and a sense of play that fits a modern room.
Here is why patterns work in white kitchens. They create interest with contrast and rhythm. They guide your eye away from blank walls and keep the room from feeling flat. You can switch moods quickly by changing textiles or tiles. Patterns make a space feel personal without buying new cabinets.
How you apply them.
– Fun backsplash designs become a focal point at a glance.
– Textiles like towels, rugs, and seat covers bring warmth and softness.
– Layer two or three motifs using the same color family to keep harmony.
Keep the palette simple so the patterns can play together.
Key Features:
– Playful backsplash designs that catch the eye.
– Soft textiles and decor that add warmth.
– Layered patterns that create depth without clutter.
Tips to try now.
– Test scale with fabric swatches and tile samples in daylight.
– Choose two patterns plus one shared color to avoid a busy look.
– Swap textiles seasonally for a quick refresh.
Next steps: start with a small change, like a patterned tile border by the sink. View the room in natural light and adjust until the pattern feels inviting, not loud. You’ll keep the white kitchen feeling crisp while letting your style show.
Patterns add a playful touch to your white modern kitchen, turning a blank canvas into a lively masterpiece. Start small, and let your space tell a story that sparks joy!
25. Playful Patterns
Editor’s Choice
🛍️
LONGKING Peel and Stick Backsplash Tile Stickers, Colorful Talavera Mexi…
Here is why you want a light and airy kitchen. A white space makes small rooms feel bigger and airier. You see more sunlight, and your meals look cleaner and brighter.
Here is how to make it work:
– Focus on open spaces: keep the work zone clear. Move heavy cupboards to one side if possible or use slim storage.
– Large windows that flood the room with light. If you can, add a glass door to the patio. Use slim frames that still give the view.
– Light-colored surfaces: white cabinets, quartz or solid-surface countertops, glass tile backsplash. These reflect light.
– Sheer curtains or light blinds: drop the weight of heavy drapes but still offer privacy.
– Open layout: connect kitchen to dining or living areas. Fewer walls let light move.
– Textiles and accents: use pale gray, soft beige, or pale blue as calm anchors. Metallic handles or glass knobs catch sun.
– Practical care: white surfaces show dust. Wipe with a microfiber cloth weekly.
Key Features:
– Large windows that flood the space with sunlight.
– Light-colored textiles and surfaces that reflect brightness.
– Open layouts that promote a sense of freedom.
Next steps: map your space, pick one big window update, and start with a bright backsplash.
26. Light and Airy Designs
Editor’s Choice
🛍️
Chyhomenyc White Sheer Curtains 36 inch Length 2 Panels Set, Light Filte…
Here is why transitional styles work in a white modern kitchen. You want space that feels calm but not cold. The mix of old and new does that.
In a white kitchen, blend classic details with clean finishes. A vintage piece, like a wooden table, can sit with sleek modern stools. White walls bounce light and warm wood adds texture.
Key Features:
– Blending materials and finishes to keep balance.
– Pairing classic moldings with modern fixtures.
– Keeping a single color family to tie pieces together.
Transitional kitchens feel welcoming and timeless. They fit many tastes without screaming a style. Here is how to apply it in real life.
Let’s break it down with quick steps:
– Start with a white base: cabinets, counters, and backsplash in white or very light gray.
– Add one traditional touch: crown molding on cabinets, a pocket door, or a vintage lamp.
– Bring in a modern finish: chrome or matte black hardware, glass pulls, quartz surfaces.
– Use consistent tones: keep woods and metals in similar shades.
Next steps: test samples, stand back, and see if it reads as calm but lively. The result will be a kitchen that feels both familiar and fresh.
Take a weekend to test a few combos. See how easy it is to switch the mood.
Your white kitchen can feel bright and calm, but off-the-shelf cabinets often miss the mark. Custom cabinetry helps you shape the space around how you cook, eat, and clean. You choose the form, the shelves, and the finish. The result is a kitchen that feels built for you.
Here is why custom cabinets fit a white kitchen best:
– Tailored layouts that fit your cooking zones and cleanup needs.
– Unique finishes that give your white cabinetry its own glow.
– Built-in features that save space without crowding counters.
Next steps to get there:
– Start with the layout. Measure every work zone: prep, stove, sink, and recycling. Sketch where you want tall pantries or a corner pull-out.
– Pick materials and finishes. For white kitchens, two smart routes are solid wood doors in a painted finish or high-quality plywood with a glassy white coat. Matte, eggshell, or soft-semi gloss options change how the light plays in your room.
– Decide on storage gear. Think pull-out spice racks, deep rollout drawers, built-in trays, and corner carousels. These details keep every item in its place.
– Choose hardware and hinges. Touch should feel smooth. Soft-close drawers and simple pulls look clean in a white space.
– Set a budget and timeline. Custom cabinets cost more and take longer than stock pieces, but you gain a fit that lasts and grows with you.
Practical tips you can use now:
– Ask for adjustable shelves in every cabinet. You’ll adapt as your needs change.
– Include a hidden charging station or a slim pull-out for lids and utensils.
– Consider display doors for a few spots to show favorite dishes without breaking the clean look.
Common questions:
– How long does this take? From design to install, plan for several weeks to a few months.
– Do I need a special finish? A durable white paint or glaze works well in kitchens with high traffic.
– Can I mix white with other colors? Yes. A few warm wood tones or a bold accent can complement the white base.
Limitations to know:
– Custom cabinetry costs more than stock options.
– The plan requires careful measuring and clear communication with your cabinet maker.
With the right choices, custom cabinetry elevates your white kitchen beyond the ordinary. You gain fitted storage, a cohesive look, and a space that truly fits you.
28. Custom Cabinetry
Editor’s Choice
🛍️
Amazon Basics 5-Shelf Adjustable, Storage Shelving Unit, (200 Pound Load…
Color makes a white kitchen feel alive. You can add color without losing the calm you love. Colorful cookware gives you both style and function.
Pots, pans, and utensils become decor you cook with. They show your personality while staying practical. The result is a kitchen that feels friendly and organized. This balance keeps your space easy to use every day.
Practical ideas for color in a white kitchen
– Pick 2 or 3 colors. Keep the rest neutral so the space stays clean.
– Choose durable finishes. Enamel, ceramic, and stainless steel last well and wipe clean.
– Display on open shelves or a glass cabinet. Let the colors catch the eye.
– Mix shapes and sizes. Different pots create a rhythm on the counter or rack.
Care tip: wipe pieces after use. Dry them to stop spots. Also, space items evenly so you can reach every piece quickly.
Here is why this works. Color draws the eye to the heart of the room. It makes the white fade into a bright backdrop.
Next steps: decide your color plan, gather 6 to 9 pieces, and place them where you cook most.
29. Colorful Cookware
Editor’s Choice
🛍️
Hisencn Enameled Cast Iron Cookware Set – 7 Piece Set of Dutch Ovens, Sa…
You want a white kitchen that feels warm, not cold. Personal touches help you feel at home. In a clean space, little details carry meaning. You can update a white kitchen without losing its fresh look.
Here is why personalization works. It makes every meal feel familiar. It tells your story and invites people to linger. You can change the vibe with a few easy choices.
Key Features:
– Framed family photos or a small art display you can rotate.
– Meaningful decor pieces that spark stories at the table.
– Warm lighting and soft textures create a cozy glow.
Putting ideas into practice
– Start with one theme. Choose wood tones, soft textiles, and gentle color pops that stay calm with white.
– Build a memory wall. Use a grid of four to six frames where you can swap photos or art easily.
– Use safe, handmade items. A handmade ceramic bowl, a woven rug, or a fabric runner adds character.
– Keep surfaces clear. Let the white counters feel calm while you show off a few keepsakes.
Next steps:
– Rotate pieces every 6 to 8 weeks to keep the look fresh.
– Choose materials that add warmth: light wood, cotton, and metal accents.
– Watch for balance. A few pieces are better than a cluttered look.
You can start small and build.
30. Personalized Touches
Editor’s Choice
🛍️
Mixing and Serving Bowl – 9 inch Ceramic Stoneware, Handmade White, Micr…
A white modern kitchen is more than just a trend; it’s a canvas for creativity, functionality, and style.
From sleek minimalism to bold accents, the design possibilities are endless.
Embrace the features that resonate with your personal taste, and your kitchen will become a cherished space in your home.
Feel inspired to explore these designs and make them your own!
Note: We aim to provide accurate product links, but some may occasionally expire or become unavailable. If this happens, please search directly on Amazon for the product or a suitable alternative.
This post contains Amazon affiliate links, meaning I may earn a small commission if you purchase through my links, at no extra cost to you.
Frequently Asked Questions
What Are the Benefits of a White Modern Kitchen?
A white modern kitchen can transform your space into a bright, calm, and clean environment. It enhances the feeling of openness and can make your kitchen appear larger than it is. Additionally, white kitchens are versatile, allowing for a plethora of design options with textures, colors, and accents that can reflect your personal style.
How Can I Make My White Kitchen Feel Warmer?
To add warmth to a white modern kitchen, consider incorporating wood accents, such as wooden shelves or a rustic dining table. You can also mix in colorful decor, vibrant cookware, or indoor plants that bring a touch of nature inside. These elements create a cozy atmosphere without compromising the sleek, minimalist vibe you love.
What Are Some Popular Textures to Use in a White Kitchen?
Textures are key in a white kitchen to prevent it from feeling flat. You can use textured backsplashes, such as patterned tiles, or incorporate materials like marble and glass. Additionally, mixing in soft textiles, like cushions or curtains, can provide warmth and depth. Each texture will add dimension while maintaining that clean, modern look.
How Do I Choose the Right Lighting for My White Kitchen?
Lighting is crucial in a white modern kitchen to set the mood and highlight key features. Opt for statement lighting fixtures that serve as focal points or use layered lighting to create warmth. Pendant lights over an island or under-cabinet lighting can enhance clean lines and textures, ensuring your kitchen feels inviting and functional.
What Are Some Eco-Friendly Design Choices for a White Kitchen?
Creating an eco-friendly white modern kitchen can be achieved through sustainable materials, energy-efficient appliances, and smart tech integration. Choose recycled materials for countertops and cabinets, and opt for LED lighting to save energy. Incorporating indoor plants can also improve air quality while adding a fresh touch to your space.
Your kitchen cabinets are the anchor of the room. They frame your counters, your appliances, and even your meals. When they feel dated or dull, the whole space can look tired. I put this post together to cut through the noise and show you 25 modern cabinet ideas that fit real homes and real budgets.
Who is this for? If you own a home or rent and you want a fresh, practical kitchen, this is for you. If you care about clean lines, easy cleaning, and storage that actually works, you’ll find options that fit. This guide speaks to busy cooks, families, and anyone who wants a space that feels calm and modern.
Here is What you’ll get from these ideas. A clear path to choosing cabinet styles, finishes, and hardware that match your space. You’ll learn about common materials like wood veneer, solid wood, painted MDF, and laminates. You’ll see which finishes hide fingerprints, wear well, and stay bright after years of use. You’ll also get practical tips on measuring, budgeting, and moving from idea to installation.
Expect a mix of popular looks. Handleless slab doors for a sleek look. Framed or frameless cabinets for different feels. Two-tone schemes that balance warmth and polish. Glass fronts and open shelves to show off dishware. Matte, satin, and gloss finishes, and the right hardware to match your vibe. All of it explained with real world notes on where each style shines and where it can trip you up.
You won’t believe what number 5 is. It may surprise you with how simple it is and how it can fit many kitchens. It blends warmth with a modern edge without changing the rest of the room.
Next steps: use this guide to plan your update. Start by noting what you love and what you dislike about your current cabinets. Measure height and width, check the space around the sink and appliances, and think about lighting. Pick two or three finishes and a hardware style you can commit to. Then talk to a pro or visit showrooms to see these ideas in person.
Looking to make your kitchen feel bigger and brighter? Sleek high-gloss cabinets can do that. The glossy doors bounce light around the room, giving you an airy, open feel. You can pick bold colors like navy blue or deep green to show your style without overwhelming the space. A shiny finish also makes daily cleaning quick—a quick wipe with a microfiber cloth brings back the shine.
To keep the look balanced, pair high-gloss doors with matte countertops or a matte backsplash. The contrast adds depth and keeps glare in check. For hardware, choose clean metallic handles in nickel or black to keep the line modern. Good lighting helps too; under-cabinet LEDs can glow off the doors for a softer, welcoming effect.
Care tips at a glance:
– Wipe with a microfiber cloth regularly.
– Use mild soap and water; dry after cleaning.
– Avoid abrasive scrubbers that scratch the surface.
– Wipe spills quickly to prevent streaks.
Next steps: sample a few colors in your kitchen and check the glare in different lighting. Think about your budget and how the gloss may require occasional touch-ups. With careful color and finish, you’ll get a fresh, modern mood that lasts.
1. Sleek High-Gloss Cabinets
Editor’s Choice
🛍️
Rust-Oleum 372007 Transformations Basics Cabinet & Trim Paint, Quart, Pu…
Here is why minimalist floating cabinets work in small kitchens. They hang on the wall, not on the floor. This frees space and makes the room feel bigger.
They sit above the countertop. You reach dishes easily without bending. The area under them stays clear for a stool or a small cart.
Pair them with open shelves for a practical mix. You can display everyday dishware, glass jars, or herbs. The combo keeps storage hidden and air in the room.
Finish choices shape the mood. A natural wood finish adds warmth. A matte white or soft gray keeps the look calm and modern.
Here is how to plan and install.
– Plan the height: mount cabinets about 16 to 18 inches above the counter for easy reach.
– Decide depth: 12 inches works well for most kitchens.
– Find studs and use the right anchors so the unit stays secure.
– Choose materials: solid wood or plywood with a durable finish lasts longer.
– Pick a finish: match the cabinet color to doors or use a light wood tone for contrast.
Maintenance is quick. Wipe with a damp cloth. Avoid harsh cleaners that dull the finish.
Limitations: they hold lighter items more than heavy pots. If you cook with heavy pans, keep heavy storage nearby.
Next steps: measure your wall, sketch placements, and shop for wall-mounted options that fit your space.
2. Minimalist Floating Cabinets
Editor’s Choice
🛍️
Kate and Laurel Mezzeta Decorative Coastal 2-Door Wall Cabinet, 30 x 10 …
If you want more depth in your kitchen, two-tone cabinets do it with less work than a full remodel. They create contrast and make small rooms feel bigger.
– Balance your colors Put a light shade on the upper cabinets and a darker tone on the lowers.
– Smart color pairings Try warm wood with a cool gray or soft blue to keep things fresh and friendly in a busy kitchen.
– Texture contrasts Use matte on top and gloss below to catch light beautifully.
– Hardware and countertops Choose hardware that echoes one color and pick countertops that tie both tones.
– Practical layout In a small kitchen, let the lower cabinets wear the darker color to hide scuffs.
– Starting steps Start with a small area or a sample board to preview two tones in your space first.
– Maintenance note Light colors show dirt; seal and clean to stay bright.
– Lighting matters Lighting helps the color pop.
Take photos of samples in your space to see how the two tones look in different light today at home.
Two-tone cabinets offer bold style with flexibility. Plan carefully, test colors in your space, and you can enjoy a fresh look without a big mess at home.
Open shelves are a different way to store in your kitchen. You get easy reach and you can show off your best pieces. You need this look if you want a kitchen that feels bigger and lighter.
Here is why it helps. Your space looks brighter. Air moves around, and your dishware feels part of the room. You see your favorite mugs, plants, and cookbooks every day. That makes cooking more fun.
How to make it work:
– Balance. Use a mix of open shelves and closed cabinets.
– Pick a simple display. Group items by color or height.
– Mix textures. Wood shelves with metal brackets add warmth and edge.
– Add light. A small LED strip under shelves helps you see and creates mood.
Step-by-step setup:
– Start with one wall. Install shelves at eye level.
– Choose sturdy, kitchen-safe materials. Wood, painted MDF, or metal work well.
– Use baskets or jars for small items to cut clutter.
– Put items you use often within arm’s reach. Put rare pieces on a high shelf.
Things to know:
– Dust will collect on items. Wipe them regularly.
– It fits many styles, from cozy to industrial. It’s easy to refresh with new pieces.
Next steps: measure your space, pick a shelf kit, and try the look for a weekend.
Want a quick win? Start with a single shelf and a few must-have pieces.
4. Open Concept Cabinetry
Editor’s Choice
🛍️
PHPH Wood Floating Shelves for Wall, Wooden Wall Shelves for Bedroom, Se…
Here is why you might love a bold cabinet look. Oversized, statement cabinets grab attention and set the mood in your kitchen. They read as a big piece of furniture you use every day. Pick a strong color or a unique door shape, and the space feels alive. Try deep reds, royal blues, or a rich green. A high-gloss finish makes the color pop; a matte finish keeps it calm. Use one bold tone and keep the rest simple.
– Choose the right balance Keep walls and counters light. White or pale gray walls let the cabinets stand out without shouting. Add soft lighting under the cabinets to make the color glow.
– Pick a cabinet style that fits you Flat panels draw the eye to color. Shaker doors stay clean and easy to care for. If your room is small, go tall with cabinets that reach the ceiling to feel bigger.
– Add texture without clutter Subtle panel details or one printed panel on a door create interest. Glass inserts or metal trims can echo the bold look.
Next steps. Order small samples and test them on your wall. Look at the shade in daylight and at night. Plan calm surroundings so the cabinets stay the star.
Dare to go bold! A striking cabinet design can transform your kitchen into a vibrant masterpiece. Pair deep colors with light walls for a stunning balance that breathes life into your space.
5. The Bold Statement
Editor’s Choice
🛍️
Rust-Oleum 372007 Transformations Basics Cabinet & Trim Paint, Quart, Pu…
Are you aiming for a warm kitchen that still feels fresh and clean? Rustic modern cabinets give you that balance. They bring in natural texture without heavy old-world weight.
What makes them special
– They use real wood vibes, like reclaimed boards or rough-hewn panels. The look is inviting and tactile.
– The design stays simple and straight. Clean lines keep the space feeling open.
– Hardware matters. Pair the wood with sleek metal pulls in matte black or brushed nickel for a current touch.
How to pull it off in your kitchen
– Choose the wood tone you love. Lighter whites and soft grays with warm undertones read modern, while deeper woods read timeless.
– Mix textures carefully. Use wood doors with smooth, flat panels and keep frames slim. Let the grain do the talking.
– Balance with appliances. Stainless steel or black stainless appliances feel contemporary next to wood.
– Keep finishes practical. A clear matte seal protects the wood without hiding its character.
– Add light and contrast. White counters or light walls highlight the wood. Simple, bright lighting finishes the look.
Maintenance tips you can use
– Wipe spills quickly to avoid stains. A damp cloth works for daily care.
– Refinish every few years if you want to refresh color or tone. Simple touch-ups stay affordable.
– Check seams and edges. Tighten hardware as needed to keep the doors snug.
Common questions
– Will it feel dated? Not if you keep hardware slim and pair with modern appliances.
– Where should wood go? Use it on main cabinets and keep uppers lighter to maintain airiness.
Next steps
– Pick a wood sample, choose hardware, and map how you will mix textures for your space.
If you want a kitchen that feels bigger and brighter, glass-front cabinets may be the answer. They keep things tidy while letting your best pieces shine. You get function with style in one move.
Here is why they work: glass doors draw the eye upward, bounce light around the room, and create a focal point without heavy frames.
– Glass choices: Frosted glass hides fingerprints and clutter. Clear glass shows dishware and colors. A balanced mix gives privacy and style.
– Display plan: Group pieces by color or by set. Put a few bright pieces in the middle for focus. Rotate items with the seasons.
– Finishes: Pair glass fronts with dark wood, white, or matte finishes. The contrast adds depth and makes the space feel lighter.
– Lighting: Add LED strips inside or under the cabinets. Soft light makes glass sparkle and helps you see shelves clearly.
Maintenance tips: Keep glass clean with a microfiber cloth. Wipe fingerprints. Dust the shelves weekly.
Next steps:
1) Measure your space and choose the right height.
2) Start with one or two glass-front cabinets as a style anchor.
3) Plan a display grid that suits your dishes.
4) Add lighting to make the glass glow.
7. Glass-Front Cabinets
Editor’s Choice
🛍️
Govee White LED Strip Lights, Upgraded 16.4ft Dimmable LED Light Strip 6…
Here is why textured finishes on cabinets work for you. They add depth and a feel you can actually sense.
What textured finishes are
– Wood grain, beadboard, and embossed surfaces create visible patterns you can feel. The texture adds interest to flat doors.
Where they fit in your home
– They work in modern spaces and in traditional kitchens. The key is color and material. A dark matte grain reads contemporary. A light raised panel feels classic.
How to use texture well
– Pair texture with smooth countertops so the pattern stands out.
– Choose a calm backsplash to balance the surface.
– Use natural materials like stone or wood for harmony.
Practical steps you can take
– Step 1 pick one texture style you love.
– Step 2 pick a cabinet color that supports the texture.
– Step 3 test samples with your room lighting.
– Step 4 plan for care: wipe spills quickly and avoid harsh cleaners.
– Step 5 test samples under morning and evening light.
Care and costs
– textured finishes range from affordable laminates to real wood. Real wood needs more upkeep. Laminate options stay easier to care for.
Maintenance and upkeep
– Real wood needs a light seal to slow wear.
– Clean textured surfaces with a soft cloth and mild soap.
– Avoid strong cleaners that can dull the texture.
Next steps
– Decide where texture will be the focus and where to keep it quiet. Texture adds character without huge changes to your layout.
9. Textured Finishes
Editor’s Choice
🛍️
ALL-IN-ONE Paint, Durable cabinet and furniture paint. Built in primer a…
Here’s why you might feel cramped in a kitchen. Smart storage keeps your tools at hand and your counters clear. You gain a calmer space and faster meals. You feel in control when you see a tidy shelf right at hand.
– Pull-out shelves for pots and pans: They glide on tracks.
– Deep drawers for cookware: Put lids and pans flat. Use space dividers so lids sit in a row and pans stack neatly.
– Hidden compartments: A thin panel hides baking sheets or foil. You keep these items quiet and easy to reach.
– Spices on a pull-out rack keep them at eye level and easy to grab.
– Ceiling-height cabinets: Use tall units to store items you rarely use. It frees up lower shelves and makes the room feel taller.
– Corner storage: A lazy Susan or swing-out shelf makes corners usable. You reach farther with less effort and waste less space.
– Pull-out trash and recycling: A bin tucked away in a cabinet stops odors and keeps the look clean.
These ideas work in any kitchen, big or small.
Next steps: measure your space, pick two ideas, and test them in a single cabinet first. Start small, then add more as you like. This approach fits real kitchens and budgets.
Smart storage solutions create a kitchen where everything is at your fingertips. With a tidy shelf and pull-out drawers, you’ll find cooking is not just easier—it’s a joy to create in your modern kitchen space!
10. Smart Storage Solutions
Editor’s Choice
🛍️
PAKETA 4 Pack Expandable Pull Out Cabinet Organizer, 21” Deep Pull Out …
You want a kitchen that looks fresh and helps the planet. Eco-friendly cabinets can do both. They use bamboo, reclaimed wood, or fast-growing woods. They need fewer chemicals to grow and ship.
Also, finishes matter. Choose water-based finishes. They release fewer fumes. Look for low-VOC glues and adhesives. This keeps indoor air cleaner.
Here is why these choices shine: they cut down on waste and still bring style. Eco-friendly cabinets come in many looks. You can pick sleek flat panels, warm shaker doors, or saw-tooth grain that catches light.
– Materials to look for: bamboo, reclaimed wood, or FSC-certified plywood. These come from forests that are managed well.
– Finishes and adhesives: choose water-based or plant-based finishes and low-formaldehyde bindings.
– Certifications to trust: ask for third-party labels like GREENGUARD or CARB compliance.
Next steps. Check your space first. Measure, then compare two or three options. Get samples in natural light. See how the grain or color changes with sun. Budget wisely, because prices vary with material and finish.
Maintenance is simple: wipe with a damp cloth. Avoid harsh cleaners that dull the look. With care, green cabinets stay beautiful for years.
These choices can last a long time. They resist humidity better when built with a solid core.
11. Eco-Friendly Cabinet Options
Editor’s Choice
🛍️
RoyalHouse Bamboo Floor Cabinet with 2 Shutter Doors and 3 Open Shelves,…
You want a kitchen that fits your space and your life. Custom cabinet solutions make that possible. You pick the materials, colors, and layouts that work for you. This brings more storage and a look you love.
What a custom cabinet can include
– Integrated wine rack that keeps bottles within easy reach
– Hidden compartments for small appliances and cords
– Pull-out drawers that reach into deep corners
– Tall pantry with adjustable shelves for bulk items
– Glass-front doors for display and a lighter look
Think about how you move in the kitchen. The right features save steps and cut clutter. A few smart choices can make daily chores smoother and more enjoyable.
Here is how to start:
1) List your daily tasks and where storage feels tight.
2) Measure every inch and note awkward spots.
3) Pick durable materials and a finish you won’t tire of.
4) Plan the layout with a pro using CAD so it fits your space.
5) Add practical touches like a pull-out trash bin or a spice pull-out.
6) Confirm lead times, budget, and the installation date.
Reality check: custom cabinets cost more and take longer than off-the-shelf options. You may need a skilled installer. The payoff is a space that fits you exactly and keeps clutter away.
Trends to guide your choice
– Warm wood tones and sturdy laminates stay popular
– Flush, handle-free doors with soft-close hardware look clean
– Mixed metals on pulls and lighting add contrast
Choose a trend that matches your home and your life.
13. Custom Cabinet Solutions
Editor’s Choice
🛍️
Rev-A-Shelf Double Pullout Trash Can for Kitchen Cabinets 35 Qt Garbage …
You want a kitchen that feels warm and timeless, yet ready for daily use. Vintage-inspired cabinets can give you that mix.
What these cabinets bring
They show beadboard or decorative moldings with a modern finish. You get the charm of the past without losing today’s durability. The details add texture and character, while sturdy wood and coated surfaces stand up to daily cooking. You can choose colors that read soft and cozy or bold and confident. The result is a space that feels inviting but not fussy.
Here is why they work
Old-and-new blends create contrast that looks intentional. Classic trims paired with sleek hardware make the kitchen feel balanced. Modern finishes protect the look from wear, while smart storage keeps clutter away. The result is a cozy, stylish room that still keeps up with your busy life.
Let’s break it down
– Start with a classic frame, then add beadboard panels or decorative molding for texture.
– Pick a durable finish in white, cream, gray, or a muted blue or green for depth.
– Choose hardware that nods to the past but uses smooth, quiet hinges and soft-close drawers.
– Balance with clean countertops and modern appliances for a clear, friendly contrast.
Next steps
1) Decide on your cabinet profile first, then pick finishes that suit your kitchen lighting.
2) Test a small area with a beadboard insert to see how it feels in real life.
3) Pair the look with smart storage solutions and a simple backsplash.
4) Keep a few high-contrast pieces to maintain a fresh, current vibe.
14. Vintage-Inspired Cabinets
Editor’s Choice
🛍️
Weysat MDF Board and Batten Wall Panel Kit 94.5in x 47.2 in Premade Wain…
Craving a kitchen that feels both useful and fun? Chalkboard cabinets give you a built-in place to write menus, daily notes, or kid art. You get a playful touch without losing style.
Here is why it works: you gain a flexible space that grows with your family. A single chalkboard door can anchor a wall of classic cabinets. Or turn an entire cabinet into a writable panel for bigger tasks and ideas. Pair this with traditional wood or white cabinets to keep the look balanced and modern.
How to add chalkboard elements
– Choose your surface: paint a door with chalkboard paint, install a removable chalkboard panel, or use chalkboard vinyl wrap for quick updates.
– Prep and install: clean the surface, light sand, and apply primer. Then paint or apply the panel. Let it dry fully. Seal with a clear matte topcoat so it wipes clean.
– Write and erase: use regular chalk and a damp cloth. Avoid heavy marker ink near the board. Refresh the surface every so often to keep writing smooth.
Practical uses you’ll love
– Plan the week’s meals and jot the grocery list.
– Leave notes for family members or a quick chore chart.
– Let kids draw or practice letters during meal prep.
– Capture recipe ideas or notes from friends visiting your kitchen.
Care tips and limits
– Chalk marks can dust nearby surfaces. Keep a damp cloth handy.
– Seal the surface well to minimize ghosting.
– If writing becomes faint, a light repaint or a fresh topcoat helps.
Next steps
– Talk with a cabinet expert about chalkboard doors or panels. Pick a finish that fits your style and budget.
15. Chalkboard Cabinets
Editor’s Choice
🛍️
Rust-Oleum 206540 Chalkboard Brush-On Paint, 30 oz, Black
You want lights you can trust in every cabinet. Smart cabinet lighting adds ease to tasks and sets the mood you want.
– Inside and under-cabinet LEDs They brighten your prep area evenly and bring warmth to wood tones.
– Motion-sensor options Lights flip on when you open a door, saving steps and keeping hands free.
– Smartphone control An app lets you adjust brightness, pick a color, and schedule when the lights come on.
– Color and brightness choices Warm white feels cozy, while cooler tones help with detail work like chopping and reading labels.
– Safe wiring and clean looks Choose slim channels or battery options to hide cords and keep the line clean.
– Plan layout and power Decide where light is most useful and how you want to power it, then run a small, safe cable to a nearby outlet or switch.
– Durability and care Use diffusers to soften glare and wipe the panels with a damp cloth to remove dust.
Here are quick tips to get the most from your setup. Start with a small kit under one cabinet to test the look and feel. Then add zones as you cook and entertain, so the brightness fits your kitchen rhythm.
Keep the app handy and keep your plan flexible. Adjust as your space grows. This setup scales with your needs and keeps meals smooth too.
16. Smart Lighting Solutions
Editor’s Choice
🛍️
Gritin 10.2inch Under Cabinet Lighting Rechargeable -84 LED Super Bright…
Bold colors can give your kitchen a real lift. If you want your space to feel warm and lively, a bright cabinet color is your move. Here is why it pays off: color sets the mood, and it shows your taste without shouting.
– Pick a single bold color as the main look. Choose something you like every day. Think deep green, rich red, or midnight blue. A single color keeps things clear and modern.
– Balance with neutral walls. White, soft gray, or cream walls let the cabinets pop. This keeps the room calm even with a strong hue.
– Add accent in hardware and backsplash. Swap to colorful knobs or a contrasting tile strip. A small pop can tie the whole room together.
– Choose the right finish. Matte hides fingerprints; satin feels smooth; high gloss reflects light. Pick what fits your budget and how you use the kitchen.
– Test before you commit. Paint sample panels and put them in daylight. Move them around to see how they look with lighting and your countertops.
– Mind the space. Dark colors can make a small kitchen feel cozier, not cramped. Use lighter accents to keep air and flow.
Next steps: measure, pick a color, and talk with a pro about materials like wood, MDF, or thermofoil. Ready to update your space?
17. Bold Colors for Impact
Editor’s Choice
🛍️
Rust-Oleum 372007 Transformations Basics Cabinet & Trim Paint, Quart, Pu…
Is a tidy kitchen on your wish list? Integrated appliances can help you get it. They hide big machines behind cabinet doors, so your space reads as one uninterrupted line. This works especially well in small kitchens where every inch counts.
What integrated appliances do for you
Think refrigerators with a front panel that matches your cabinets, dishwashers hidden behind doors, and microwaves tucked into a tall cabinet or a drawer unit. The result is a calm, cohesive look you can love daily.
Here is why it matters:
– Fewer visual breaks keep counters clear for prep.
– Doors stay closed, making cleaning easier.
– A sense of more room, even in compact layouts.
How to plan it
– Start with your layout. Place the fridge, dishwasher, and microwave where they fit your work flow.
– Pick panel-ready models. Match the finish to your cabinetry for a seamless effect.
– Check ventilation and service access behind panels.
To fit your style, pick wood, laminate, or metal panels. Wood adds warmth; metal feels modern. Plan smart storage near the units, like a pull-out spice rack by the fridge or a slim tray above the dishwasher for tools.
Costs and limits
– This setup can cost more than standard options.
– Installation may take longer.
– If you plan to move soon, weigh the fit against the cost.
Next steps
Here is why planning now pays off. Let’s break it down into quick moves. Measure your space, compare panel fronts, and talk to a pro to fit your cabinets.
You want kitchen cabinets that feel fresh but not loud. Mixed materials can give you that balance. Wood brings warmth, metal adds edge, and glass lightens the space.
Here is why it works
The mix creates texture you can see and touch. It helps you show your style without shouting. When done right, the room feels cohesive.
How to pull it off
– Step 1: Choose a main material. Start with wood for the base or the island. Keep it simple so the look stays calm.
– Step 2: Add a metal touch. Try brushed steel, brass, or black metal handles. The metal anchors the space and wears well.
– Step 3: Bring in glass. Glass fronts can be full doors or a few panels on upper cabinets. They add shine and make the room feel bigger.
– Step 4: Tie it together. Use a shared tone for metal frames and glass edges. Let walls and counters repeat that tone with small shifts.
Practical ideas you can try
– Wood lowers with glass uppers create contrast and balance.
– A slim metal trim on selected cabinets adds polish.
Care and balance
Don’t mix too many textures at once. You want harmony, not chaos. Choose finishes that hold up in kitchens, like matte wood, satin metal, and clear glass.
Next steps
Test samples in your lighting. Start with one wall and build from there.
If you want a kitchen that grows with you, modular cabinets help. They come in small units you can mix. You control layout and look. This keeps your kitchen practical and easy to change.
What they are
Modular cabinet systems use separate boxes, doors, and drawers. You place them to fit your room. You can swap pieces in seconds. It feels like a tidy patchwork.
Benefits you will feel
You add storage where you need it. You can reconfigure when you remodel or move. It helps keep things organized and easy to reach. The result is a kitchen that works.
Practical ways to use them
In a small kitchen, add a tall pantry and trays. In a larger space, pair wall cabinets with an island. Use open shelves for quick access. Choose units that match your style and color.
Materials, finishes, and features
Look for wood, plywood, or durable laminates. Consider metal frames for a modern touch. Add soft-close doors and adjustable shelves. Pick finishes that hide fingerprints and stay clean.
Planning tips
Measure your space, sketch a plan, note must-haves. Start with base cabinets, add wall units. Think about lighting.
Reality check
Modular systems cost more upfront and need planning. They pay off with flexibility if you install them well.
Modular cabinet systems are like building blocks for your kitchen dreams! With flexible layouts, you can easily swap pieces and create a space that evolves just as you do. Embrace the change!
20. Modular Cabinet Systems
Editor’s Choice
🛍️
Crosley Furniture Tara 3-Piece Modern Farmhouse Sideboard Buffet Cabinet…
If you want more storage and better light in the kitchen, overhead cabinets with lighting are a smart move. You get extra space and a brighter work area at the same time.
Here is why this works. Cabinets keep things out of sight, but you still need good light to see what you’re doing. Lights tucked under or inside the cabinets wash the counters in even, steady glow. No more shadows when you chop or read a recipe.
Choose your light tone. Warm tones make a cozy feel. Bright whites look clean and modern. If you can, pick LEDs that let you adjust the brightness or color. This keeps the room flexible from day to night.
Next steps to set it up:
– Decide where the lights will live (inside the cabinet or under the lip).
– Pick slim fixtures that fit your cabinet depth.
– Use LEDs around 2700 to 4000 Kelvin for a comfortable glow.
– Add a dimmer so you can tone the light up for cooking or down for meals.
– Check wiring needs; a quick pro install keeps things safe.
The payoff is real. You’ll see better while you cook, find things faster, and enjoy a warmer mood in the kitchen. Start with a simple plan and grow from there. Next steps.
21. Overhead Cabinets with Lighting
Editor’s Choice
🛍️
DAYBETTER Under Cabinet Lights, 6 PCS Under Cabinet Lighting with Remote…
Is your kitchen busy at the edges where cabinets meet counters and walls? You can fix that. A calm, connected look comes from a few simple moves you can do this weekend.
– Match materials and colors Choose one material family for cabinets, counters, and the backsplash. If you pick light quartz for the counters, use a similar light shade in the wall tile or paint. If you love wood, pick a warm veneer for all fronts and a lighter stone for the work surface. This ties the space together without shouting. A shared texture helps too.
– Align lines and hardware Plan where lines appear. Keep the cabinet seams, the countertop edge, and the backsplash joints in a straight line. Use the same style handles or clean, handleless fronts across all drawers and doors. When lines line up, the eye travels smoothly across the room. If you must mix shapes, keep the rhythm steady.
– Choose a simple door style Pick a front that has clean, even panels. A consistent look helps different zones feel one room. A plain frame feels calm and easy to update later.
– Light the path Add under-cabinet lighting. It guides the eye and highlights the shared material story. Keep lighting warm to avoid harsh contrasts. A gentle glow makes the room feel larger.
– Practical example White shaker cabinets with pale gray quartz and a soft gray tile backsplash create a quiet, modern feel. Or warm wood cabinets with a light stone countertop and creamy walls read as one space. Both ideas stay cohesive with careful planning.
– Budget tips If exact matches are pricey, stick to the same color family and finish. Small changes still make a big difference. You can swap one surface now and others later.
Next steps: map your palette, pick a door style, line up edges, and light the run.
Corner spaces hide in the shadow of a kitchen. Minimalist corner cabinets fix that. They add storage without crowding the room.
Here is why this style works. Smart hardware, slim profiles, and quiet doors do the heavy lifting. You get easy reach, fast cleanup, and a calm, uncluttered look.
– Smart storage: Lazy Susan or pull-out shelves to reach items tucked in the back
– Open feel: Glass fronts to help the nook feel bigger
– Quiet use: Soft-close hinges and push-to-open options for a tidy, no-muss touch
Choose finishes that reflect light. White, ivory, light gray, or pale wood can make the corner feel airy. Skip bulky hardware. Go with clean, recessed handles or handleless doors for a truly minimalist vibe.
What to plan before you buy. Measure the corner angle and your cabinet depth. Match base units to your existing storage height. Pick a pull-out solution that fits your space, and add a slim pantry tower if you need extra depth.
Implementation ideas. Install one deep base corner cabinet with a pull-out tray for pans, and a wall cabinet with glass doors above to keep sight lines open. Add LED lighting above the corner to brighten the space.
Next steps. Take measurements, compare products, and sketch a quick layout tonight. Then choose a finish and hardware and take the plan to a local shop or DIY project.
23. Minimalistic Corner Cabinets
Editor’s Choice
🛍️
Set of 4, 10 Inch Non-Skid Lazy Susan Organizers – Turntable Rack for Ca…
If your kitchen feels cramped or stiff, you need cabinets that fit your life. You want space that bends to how you live, not the other way around. Modern cabinets can do more than store dishes. They adapt to your daily routine.
– Adjustable shelving. These shelves slide up or down so you can fit tall bottles, big pans, or a mixer with ease. No more stacking and guessing height.
– Pull-out workspaces. A small counter can slide out near the prep zone. It gives you room for chopping or rolling dough without moving to a different area.
– Hidden recycling bins. A bin tucked behind a door keeps clutter out of sight. It also makes it simple to separate waste and compost.
– Smart storage zones. Create easy spots for lids, trays, and small tools. Hooks, racks, and deep drawers help every item find a home.
– Soft-close drawers. They glide quietly. No slams, no pinch points.
Here is why this matters. You cook faster when the space matches your steps. You clean up faster when bins, bags, and tools are easy to reach. You also keep the kitchen looking tidy, even with daily life in full swing.
Next steps: audit your current setup, pick a cabinet line that offers modular options, and add one or two features you use every day. Work with a pro to fine-tune heights and clearances. Your kitchen will be ready for the way you live.
Your cabinets set the tone for your kitchen. The finishing touches complete your modern kitchen cabinet design and make the room feel alive.
– Hardware that stands out Choose a few unique handles, knobs, or decorative pulls. Brass or matte black finishes can change the vibe in an instant. Mix metals sparingly to keep things calm and cohesive. Simple lines stay timeless.
– Inside color spotlight Paint the cabinet interiors a light shade or a contrasting hue. A brighter inside helps you see items and makes shelves feel roomier. Choose a shade you won’t tire of.
– Personal touches Add items you love. A few family photos, a small piece of art, or a decorative dish on glass-front doors adds character without crowding. Pick items that tell your story.
– Lighting that frames the cabinets Install pendant lights over the island or a small chandelier nearby. Use warm bulbs around 2700K for comfort and keep the scale in balance with your cabinets. Measure space and energy use. This keeps things safe and easy to maintain.
– Keep it balanced Avoid too many bold finishes at once. If you choose a bright interior or dramatic hardware, keep the outside cabinets simpler. Then step back and review.
– Practical notes Test color swatches, check fit, and set a budget before you buy. Soft-close drawers and hinges add quiet function without extra fuss. Keep receipts and notes.
Next steps: pick two ideas you love, test them in your space, and then expand.
Your modern kitchen cabinet design isn’t complete without the finishing touches. Unique hardware and a splash of color inside can elevate your space from ordinary to extraordinary!
25. Finishing Touches
Editor’s Choice
🛍️
10PCS Zinc Alloy Black Twig Branch Decorative Cabinet Wardrobe Furniture…
Transforming your kitchen with modern cabinet designs can be both exciting and rewarding.
From bold colors to sleek finishes, the options are endless, allowing you to express your style while enhancing functionality.
As you consider these ideas, remember to stay true to your vision and enjoy the process of creating a space you’ll love for years to come.
Note: We aim to provide accurate product links, but some may occasionally expire or become unavailable. If this happens, please search directly on Amazon for the product or a suitable alternative.
This post contains Amazon affiliate links, meaning I may earn a small commission if you purchase through my links, at no extra cost to you.
Frequently Asked Questions
What Are Some Key Features of Modern Kitchen Cabinet Designs?
Modern kitchen cabinet designs offer a variety of features that elevate your space. Think sleek finishes, minimalist styles, and innovative storage solutions. These cabinets often use high-quality materials like wood, metal, and glass to enhance both aesthetics and functionality. Additionally, options like two-tone cabinets and open shelving can create visual interest while making your kitchen feel more open and inviting.
How Can I Choose the Right Color for My Kitchen Cabinets?
Choosing the right color for your kitchen cabinets can be a game-changer! Consider your overall kitchen theme and the mood you want to create. For a modern look, bold colors like navy blue or forest green can make a statement, while soft neutrals can create a calming atmosphere. Don’t forget about two-tone designs that balance bold and subtle shades, adding depth and character to your kitchen space.
What Are the Benefits of Minimalist Floating Cabinets?
Minimalist floating cabinets are perfect for small kitchens or modern spaces. They free up floor space, making your kitchen feel more open and airy. This design allows for easy access to your kitchen essentials while maintaining a clean, sleek look. Plus, they can be customized in various finishes and colors to match your decor, ensuring your kitchen remains stylish and functional!
Are Eco-Friendly Cabinet Options Worth Considering?
Absolutely! Eco-friendly cabinet options not only contribute to a healthier planet but also add a unique charm to your kitchen. Cabinets made from sustainable materials like bamboo or reclaimed wood can elevate your modern kitchen cabinet design while reducing your carbon footprint. Plus, these materials often require fewer chemicals, making them a safe choice for your home.
How Do Smart Storage Solutions Enhance Modern Kitchen Designs?
Smart storage solutions are essential in modern kitchen designs, especially for maximizing space and efficiency. These solutions include pull-out shelves, hidden compartments, and modular systems that adapt to your needs. By keeping your kitchen organized and clutter-free, you’ll not only improve functionality but also create a more visually appealing environment. A well-organized kitchen enhances your cooking experience and makes the space more enjoyable to use!
Here is why I made this post. I want you to turn a plain backyard into a space you actually enjoy. After long days, stepping outside should feel like a small vacation. But many ideas feel flashy or out of reach. So I pulled together 25 backyard landscaping designs that blend style with real life. They fit small and big spaces, and they focus on things you can do without draining your weekends.
Who it’s for? If you love an outdoor room you can use, if curb appeal matters but you want to keep things simple, this is for you. Homeowners who want a cozy, practical space will find what they need here. Busy families, weekend DIYers, and anyone who wants a yard that looks good in all seasons will get ideas that actually work in real life.
What you’ll get? 25 designs with clear notes on materials, scale, and upkeep. You’ll see styles from modern to rustic to natural. Each design includes tips for hardscaping—pavers, wood, stone—plus plant picks that thrive in your climate. You’ll find budget-friendly options and a straightforward plan to start implementing them this month.
Wait until you see #12 — it’s a clever mix of seating, soft lighting, and layered plants that makes a small yard feel bigger. It looks polished without feeling fussy, and it proves you don’t need a huge space to create a welcoming outdoor room.
How to use this guide? Start by walking your space. Notice where sun hits, where shade lives, and what you actually use on evenings and weekends. Then pick 2-3 ideas that fit your space and your style, and adapt them to your home. Think in small steps and build from there.
Next steps are simple: skim the designs, note your favorites, and plan a quick update you can tackle this weekend. You’ll gain confidence as you see how easy it can be to turn your backyard into a place you want to share with family and friends.
You want a backyard that feels calm and clean. A modern minimalist escape can give you that. It uses simple lines, a quiet color plan, and space to breathe.
Choose a monochrome palette—shades of gray, white, and black. Let natural textures carry the look: smooth concrete, warm wood, and cool stone. Keep furniture slim and purposeful so the space stays open.
– Use large potted plants for a clean silhouette.
– Add geometric shapes in pathways or garden beds.
– Choose a few bold furniture pieces instead of many small items.
Plan around a focal point like a fire pit, a water feature, or a bold planter. Lay out straight lines for paths and edge them cleanly. Limit your plant choices to two or three varieties with similar color and form.
Lighting should be soft and low; a few wall lights add safety without glare. Choose seating that invites time outside, such as a compact sofa or a pair of lounge chairs.
Keep maintenance simple. Minimalist yards need less work and show dust fast. Start small and build as you go.
With time, your simple yard grows into a quiet space you can enjoy year round.
1. The Modern Minimalist Escape
Editor’s Choice
🛍️
Set of 2 Large Tall Planter for Indoor or Outdoor 24″ Flower Pots Tapere…
If a warm, rustic yard is your goal, native plants can do the job. They grow well in your area and invite local birds, bees, and butterflies. This look feels friendly and easy to care for.
Here’s how to build it.
– Choose a mix of native wildflowers. Pick varieties that bloom in spring, summer, and fall. Plant them in clusters for bold color.
– Add wooden elements. Use cedar benches or a trellis. Wood adds warmth and long-lasting texture.
– Lay natural stone paths. Set small, rounded stones to create a gentle walk. Let moss grow in the gaps for a soft touch.
– Layer with texture. Add native grasses, low shrubs, and groundcovers. This gives color and depth through the seasons.
– Care basics. Mulch around plants to keep soil cool and moist. Water new plants slowly for the first few weeks.
– Wildlife and upkeep. Native plants attract pollinators and birds. Some natives spread, so prune to keep the look tidy and fit your space.
Next steps: choose a sunny bed, plan groupings, and map a path. Start small, watch what thrives, and adjust as seasons change. This approach stays true to your area and keeps care simple.
2. Rustic Charm with Native Plants
Editor’s Choice
🛍️
Northeast Wildflower Seeds – Extra Large 1 Ounce Packet – Over 7,500 Nat…
You want a yard that feels like a vacation, not a chore. A tropical look can give you color, shade, and a calm mood. Here is why it works and how you can make it real.
– Plant ideas: Banana trees give bold, big leaves. Hibiscus adds bright blooms most of the year. Add a palm or two to create a canopy. Use climbing vines on a wall for extra color.
– Water feature: A small pond or fountain adds a peaceful splash. Koi fish bring life and motion. Keep the basin shallow and easy to clean.
– Borders and fencing: Bamboo borders look natural and warm. Use it around a patch or as a screen against a neighbor.
– Seating and shade: Place a comfy set under a shade sail or a large umbrella. A shaded spot helps you stay outside longer.
Next steps: Check which areas in your yard get sun and which stay shaded. Pick a corner for the water feature. Choose three plants you love and map where they go. Start small and add as you go.
3. Tropical Paradise
Editor’s Choice
🛍️
Banana Tree Dwarf Cavendish (4 Pack) Live Banana Plant for Sale | Easy t…
You want a quiet corner where your day slows down. A Zen garden gives you that calm space without fuss. It relies on sand or gravel, a few rocks, and simple plants. The feel is clean, and the mood is peaceful.
Here is why this setup works. You see patterns in the sand that guide your breath. You hear the soft sound of gravel under your feet. You touch driftwood or stone and feel grounded. It’s a tiny retreat you can visit any time.
Let’s break it down into steps you can do this weekend.
– Pick a quiet spot in your yard away from loud areas.
– Lay a light weed barrier and spread a thin layer of gravel or fine sand.
– Rake the surface in simple lines. Straight lines feel calm; gentle curves invite you to linger.
– Place one or two large rocks or a piece of driftwood as a focal point.
– Add moss, small ferns, or a low bamboo variety for soft green touches. Keep plants sparse so they won’t crowd the space.
– Create a simple edge with low stones or timber edging. Add a stepping stone path if you want to approach the yard slowly.
– Add a small bench or a flat stone to sit and breathe.
Maintenance is light. Rake the sand weekly, wipe leaves away, and mist moss when it dries. This retreat stays quiet when you keep it simple.
4. Zen Garden Retreat
Editor’s Choice
🛍️
VEVOR Landscape Rake, 36″ Head Aluminum Lake Weed Rake with 75″ Long Han…
If you want a space that feels timeless and calm, an elegant English garden can give you that. It blends neat borders with gentle vines. You’ll see color through the year, a nice fragrance in the air, and a quiet spot to unwind.
Here is why it fits many yards. It looks tidy but still feels alive. It invites you to slow down and enjoy the scene.
– Seasonal blooms for year-round charm: Use a mix of plants that bloom at different times so color and scent shift with the season.
– Classic entry features: A wrought-iron gate or a trellis frames the entry and adds a timeless touch.
– Winding paths: Curved gravel or brick paths invite slow walks and new views.
– Cozy seating: A small bench or bistro set gives you a place to rest and watch the garden go by.
– Height and scent: Climbing roses or vines on arches lift the view and fill the air with fragrance.
– Soft borders: Lavender, thyme, and soft greens along edges calm the space and add a pleasant scent.
– Care and upkeep: Mulch, light pruning, and a simple watering plan keep it easy to manage.
Next steps: measure your area, sketch a rough layout, and pick a few key plants. Start with the entry feature and a short, curving path, then add seating to finish the scene.
5. Elegant English Garden
Editor’s Choice
🛍️
Amagabeli 2 Pack 71” x 21” Tall Garden Trellis for Climbing Plants Outdo…
Need a splash of color along your borders? Bougainvillea can be your best friend. It loves sun and heat, and its colorful bracts grab the eye. Along a fence or wall, it creates a color edge and privacy.
Here is how to use bougainvillea in borders.
– Create a living fence: plant a row along the edge. Train the vines on a trellis, wire, or mesh for a neat wall of color.
– Pair colors with greens: pick one or two tones that stand out against the leaves. Magenta and orange look great together, but pinks and purples work too.
– Train for space: run the branches along a wall to use vertical space. This keeps ground open for paths and planters.
Care and upkeep:
– Sun and soil: pick a sunny, well-drained spot. If soil is heavy, mix in compost.
– Watering and feeding: water deeply weekly in dry weather. Let the top inch dry. Feed in spring.
– Pruning: prune after bloom to shape and spur growth. Remove dead wood.
Style ideas:
– Border along a patio path.
– Arch on a trellis.
Next steps:
– In cold areas, bring pots indoors for winter or wrap roots.
– Expect growth and train vines early.
Your border will shine.
7. Colorful Bougainvillea Border
Editor’s Choice
🛍️
3 La Jolla Bougainvillea, Live Plants – Thriving in 2.5” Nursery Cubes –…
You want garden paths that guide guests, look good, and stay sturdy. You need a route that feels natural and is easy to walk. This guide gives simple steps, material ideas, and clear actions you can take now.
Material options that stand out
– Pebbles. Small, smooth, and a soft sound underfoot.
– Flagstone. Flat slabs with a timeless feel.
– Reclaimed wood. Warm color and rustic charm.
– Pavers or tiles. Clean lines that fit many yards.
Design ideas that wow
– Curve the path to follow the land. It invites a closer look.
– Mix textures. Pair gravel with larger stones for a modern touch.
– Edge with low plants. A green frame makes the path pop.
– Lead to a quiet spot. A hidden corner adds charm.
How to install in simple steps
– Plan the route with string and stakes.
– Dig a shallow trench and lay a sand base.
– Set the pieces and check level as you go.
– Fill joints with sand and add edging.
Care that keeps a path fresh
– Rake weeds and sweep debris often.
– Wash with water and a stiff brush.
– Refill joints as needed and reseal pavers.
Next steps: map your space, pick two materials, and sketch the curve. Your garden path can invite exploration and linger in memory.
8. Garden Pathways That Wow
Editor’s Choice
🛍️
Amazer Wooden Garden Pathway Pavers for Outside,8.5FT Roll Out Walkway W…
You want a backyard that feels calm and easy to use. A cozy pergola can give you that with just a simple frame. It adds shade, order, and a go-to spot for rest or chats.
Here is how to make it a retreat you actually use.
– Place it where the sun is strongest to shade your seating.
– Choose comfy seating with cushions and a small table.
– Add soft lighting like string lights or small solar lanterns.
– Grow climbing plants or hang lightweight fabric to soften the look.
– Use weather-friendly fabrics and a rug to define the space.
What makes this space inviting? Good lighting, natural elements, and a clean, simple layout. Pick materials that fit your yard. Cedar, treated pine, or a powder-coated frame all work well. Go with a style that feels like your home, not a mini room under glass.
Maintenance is part of the plan. Trim vines so light stays balanced. Check screws and posts a couple of times a year. Clean cushions and wipe down beams after rain.
Next steps? Measure your area, sketch a quick layout, and choose an easy care finish. Start with one corner of your yard and build outward. You’ll gain a shaded, social spot that’s ready for everyday moments.
10. Cozy Pergola Retreat
Editor’s Choice
🛍️
Brightever LED Outdoor String Lights 100FT Patio Lights with 52 Shatterp…
If you want a yard that uses less water and helps local life, you are in the right place. An eco-friendly yard saves money, slows flooding, and invites birds and butterflies. Here is why these choices work: native plants fit your soil, rain gardens catch runoff, and permeable paths let water sink in.
– Start with native plants that handle sun and drought. They need less water and fewer chemicals.
– Build a rain garden to soak excess rain and slow drainage.
– Use permeable paving like gravel, stepping stones, or porous concrete to prevent puddles.
– Install a drip system with a timer. It waters roots directly and wastes less water.
– Mulch flower beds and improve soil. Mulch keeps soil moist and feeds helpful worms.
– Put a rain barrel under a downspout. Use captured water on hot days.
– Pick drought-tolerant natives and grasses. They attract pollinators and stay lush with less care.
– Add wildlife spots: a small birdbath, native shrubs, and berry plants.
– Create a simple care plan. Trim, weed, and re-mulch when the season changes.
– Be honest about limits. Some spots need more care, but the long-term payoff is steady growth.
A green yard reduces waste, lowers bills, and helps bees and birds thrive outside your door.
Transform your outdoor space with an eco-friendly landscape! Native plants not only require less water but also provide a sanctuary for local wildlife. Embrace nature and watch your garden thrive!
11. Eco-Friendly Landscape
Editor’s Choice
🛍️
Survival Garden Seeds – New England Aster Seeds for Planting | Native Pu…
You want a quiet, magical spot in your yard. A secret garden gives you that safe, hidden feel. It draws you in and invites you to breathe slow. Here is why this idea fits any home. Let’s break it down into simple steps.
– Winding paths guide your eye with stepping stones or gravel and reveal small wonders.
– Privacy comes from tall hedges or grasses that create seclusion.
– Secluded seating gives you a cozy nook tucked behind vines.
– Soft lighting uses string lights, solar lanterns, or a candle in a safe holder.
– Whimsy adds a tiny statue, a bird bath, or a hidden gnome.
– Scent and sound keep the space alive with lavender, a gentle fountain, and rustling leaves.
Next steps to make it real:
– Choose a small corner to start.
– Map a 6 to 8 ft circle or oval.
– Pick two or three hardy perennials and a few evergreen accents.
– Build a simple border with treated wood, bricks, or low stone.
– Add drip irrigation or a simple mulch layer to cut weeds and save water.
– Keep maintenance simple: prune weekly and mulch yearly.
In time, your yard feels like a secret you can visit any day. It stays calm, yet invites exploration.
Next steps will help you move forward. Take it slow.
12. The Secret Garden
Editor’s Choice
🛍️
Brightown 108FT Solar String Lights Outdoor with Remote and 52 LED Shatt…
City life can feel crowded. A rooftop garden gives you a quiet escape just above the busy street. Here is why a rooftop oasis matters: it adds color, softens noise, and gives you a space to refresh.
Start with safety and ease. Planters should be light so the roof stays within its weight limit. Choose drought-tolerant plants to cut watering and upkeep. Add a seating area or a small dining spot so you can enjoy meals with a view.
– Lightweight planters: Use lighter containers like plastic or composite pots and mount them with rails when you can.
– Drought-tolerant plants: Pick succulents, grasses, and hardy perennials that survive dry spells.
– Seating and dining space: A compact bench, folding chairs, and a cafe table fit most rooftops.
Make the space last. Weatherproof furniture handles sun and rain, and washable cushions keep looks fresh. Add ambient lighting with solar lights or warm LEDs to extend evenings. Plan for wind and drainage too: choose planters with good drainage and secure bases so you won’t lose pots to gusts.
Next steps. Map where the sun lands throughout the day. Pick a simple color theme that follows your style. Check building rules and weight limits before you buy. Start small with a few planters and grow your green roof over time.
13. Urban Rooftop Oasis
Editor’s Choice
🛍️
Utopia Home – Plant Pots Indoor with Drainage – 7/6.6/6/5.3/4.8 Inches G…
You want a playful spot in your yard without a big project. A fairy garden fits that need. It adds whimsy to your backyard and stays easy to manage. It’s a place where imagination can grow, for kids and adults alike. You can start small and watch it sparkle through the seasons.
Step-by-step setup
– Choose a spot Pick a small, easy-to-see patch near a door or path. A little sun or shade helps the plants stay healthy.
– Plant picks Use moss, creeping thyme, tiny ferns, and a few small succulents. They stay compact and bright with little care.
– Add mini decor Place a tiny house, a tiny bridge, and small figurines. Keep colors soft so the scene feels magical.
– Make paths Line trails with smooth pebbles or fine sand. A winding route guides the eye and invites a closer look.
– Finish and care Layer soil and mulch. Water lightly and trim excess growth. Swap in seasonally fresh pieces to keep it lively.
Here is why this idea works. It fits any yard size, teaches kids gentle care, and adds daily delight. Next steps: start small, keep it simple, and update pieces as your interest grows.
You want a backyard that invites butterflies. It’s not just pretty. It helps local life. A well planned butterfly garden adds color from spring to fall and gives you joy.
Here is why it works. To start, design around three things: nectar, host plants, and places to warm up and rest.
– Nectar plants: Pick flowers that feed butterflies. Coneflowers, asters, butterfly bush, and zinnias work well. Plant several kinds to cover spring through fall.
– Host plants: Butterflies lay eggs on specific plants. Monarchs love milkweed. Swallowtails use parsley, dill, or fennel. Put these in sunny spots near your nectar beds.
– Sun and shelter: Butterflies love sun. Put the bed where it gets light most of the day. Add a shrub or tall grass to block wind and give a perch.
– Water and soil: Offer a shallow dish with stones so tiny feet have a safe place. Mulch the soil to hold moisture.
– Care and limits: Skip chemical sprays. Go organic. Deadhead spent blooms to keep color flowing and reduce pests.
Here is how to put it in place. Start small. Group plants in clusters. Use three height levels: ground covers, mid plants, and tall blooms. Space them so fluttering butterflies can move between flowers.
Next steps. Observe visitors. Tweak plant choices as seasons shift. With time you gain a lively corner that brings charm and tiny wings into your yard.
15. Butterfly Garden
Editor’s Choice
🛍️
Wildflower Seeds Hummingbird and Butterfly Mix 1 Ounce, No Filler, 24 Va…
Want a cozy, welcoming backyard? A charming cottage garden fills the space with color, scent, and soft curves. It uses an informal layout and grows with flowers and herbs. This style feels friendly and relaxing, not fussy. Here is how you can create it.
– Plant a mix of flowers and herbs in loose clusters rather than neat rows.
– Let vines climb a trellis or arch to add shade and a playful touch.
– Add a small bench, a birdbath, or a rustic wheel for a charming focal point.
– Create simple paths with brick or stepping stones that invite you to wander.
– Choose a soft color palette with pinks, purples, blues, and warm yellows.
– Surround beds with a light mulch and a low edging to keep edges tidy.
– Place herbs like thyme, oregano, and chives near beds for scent and practical use.
Here is why this works: the grouping and wild feel help plants care for themselves while still looking full.
Next steps: deadhead faded blooms, water deeply a few times a week, and let plants spread over the season. This style needs time, but it pays off with everyday joy.
With care, your yard becomes a warm, welcoming retreat that changes with the seasons.
16. Charming Cottage Garden
Editor’s Choice
🛍️
Garden Obelisk Trellis for Climbing Plants Outdoor 6 Ft Rose Bush Round …
Here is why you might want a water feature in your backyard. It adds calm sounds, soft movement, and a clear focal point you can enjoy every day.
– Modern fountain as a main feature. A clean, simple fountain catches the eye. It runs with little effort and gives a steady trickle.
– Small pond with plants. A tiny pond brings color and life. Add water lilies and grasses. Keep it shallow to stay safe.
– Stone accents. Use pavers, a rock border, or a dry creek to blend the feature with your yard. Neutral tones feel quiet.
Next steps: plan where it goes and how you’ll power it. Sun and wind matter. A solar pump is easy and keeps wiring simple.
Maintenance is part of the plan. Remove leaves, check the pump, and skim algae. A fall net helps keep debris out.
Choose by space and budget. For a small yard, pick a slim fountain or a tiny pond. For a bigger yard, a pond plus a stone feature works well.
Try trends: low-flow pumps, LED lights for night glow, and simple liner kits for ponds.
Be honest about limits. Water features need water, power, and care. Start with a simple plan, a few measurements, and a budget. Here are tips to begin.
A water feature isn’t just a pretty addition; it’s a serene escape. Embrace the soothing sounds and watch your backyard come alive with nature’s charm!
17. Contemporary Water Features
Editor’s Choice
🛍️
Solar Fountain Pump Kit with Separate Solar Panel, 1.8 W Upgraded Solar …
You want a cozy outdoor living room. Not just a yard, but a place you can truly relax. This corner of your backyard should feel like a second room.
Here is why good choices matter:
– Comfortable, weatherproof seating. Pick a sofa or chairs with sturdy frames that stand up to sun and rain. Add cushions built for outdoors with fade-resistant fabric and removable covers.
– Define the space with a rug. Place a durable outdoor rug under all seating. Choose a color that hides dirt and a texture you like under your feet. The rug makes the area feel intentional.
– Warm lighting for evenings. String lights and lanterns give a gentle glow. Use warm bulbs and a dimmer so you can shift from lively chat to quiet moments.
– Practical touches. Add a low table for drinks and snacks, plus side tables for phones and books. Pick weatherproof surfaces like teak, stone, or resin. A few outdoor pillows invite you to lean back.
– Shade and flow. Add a simple umbrella or pergola so noon sun won’t stop you. Arrange seating to face a garden view. Store cushions in a weatherproof box when rain is forecast.
Next steps: set a small budget and choose one focal feature to begin.
19. Dreamy Outdoor Living Room
Editor’s Choice
🛍️
WAROOM Patio Couch PE Wicker 3-Seat Outdoor Brown Rattan Sofa Deep Seati…
If you want a yard that is easy to care for and full of life, raised garden beds help you win. They boost soil health and keep your plants organized. Here is why raised beds work for you. Let’s break it down.
– Neat, sturdy look: A frame in wood, stone, or metal defines each bed. Soil sits above ground. It gives your yard a crisp feel.
– Sun and reach: Put beds where you get steady sun. Make them 3 to 4 feet wide. Reach the middle from the sides.
– Better soil mix: Fill with a blend of garden soil, compost, and a touch of sand or perlite. The mix drains well and feeds roots.
– Durable options: Reclaimed wood lasts if treated. Or choose stone for a classic, long life.
Next steps. Pin down sizes. Test sunlight. Pick a height that fits your back.
– Planning quick guide: For a beginner, start with a 4 by 8 foot bed. It is wide enough for many plants. It is not too heavy to build.
– Assembly quick tips: Cut boards. Screw them tight. Line the bottom with a thick weed barrier.
– Filling and planting: Layer soil and compost. Plant herbs, greens, and small tomatoes for a productive starter bed.
– Care tips: Mulch to keep weeds down. Water deeply, then let the soil dry a bit before the next watering. Refresh the topsoil each season.
Common questions. How high should a bed be. Most people choose 12 to 18 inches. Do I need a trellis. For vines, yes. What about pests. Use sturdy, rot resistant materials and gentle care.
Next steps: start small, build a plan, and watch your plants grow.
Elevate your gardening game! Raised garden beds not only boost soil health but also create a stunning visual impact in your large backyard landscaping designs. Dive in and watch your outdoor space come alive!
20. Raised Garden Beds
Editor’s Choice
🛍️
6×3×1ft Raised Garden Bed with Support Rods,Galvanized Raised Garden Bed…
You want a backyard that tells a story. A themed garden can do that. It gives your outdoor space a clear mood and a sense of place.
Here is how to build one.
– Pick a theme you love. Think Mediterranean oasis, Japanese zen garden, or English cottage style. Pick something you can stick with.
– Choose plants that fit. For a Mediterranean feel, use olive trees, lavender, and rosemary. For a Japanese vibe, add moss, bamboo, and ferns. For a cottage look, plant roses, foxglove, and boxwood hedges.
– Add decorative touches. Think sculptures, lanterns, distinctive pots, and a small seating area. A water feature or a stone statue can become a focal point.
– Unify with color. Pick a base tone and repeat it in planters, fabrics, and cushions. A cohesive palette makes the theme feel intentional.
– Create structure. Use clear paths like gravel or flagstone. Build a focal point with a fountain, a pergola, or a statue. Let the eye move naturally through the space.
– Plan for upkeep. Check your climate and water needs. Choose drought-tolerant plants if water is tight.
– Keep options open. Container plants let you adjust as the sun or seasons change.
This approach turns your yard into a small trip around the world, right at home.
Next steps: imagine two themes you want, then sketch a simple layout with paths, a focal point, and a few signature plants. Start with one bed and grow from there.
Transform your backyard into a storybook escape by choosing a theme you love. From a Mediterranean oasis to a Japanese zen garden, let your garden ideas bloom and create a place where memories are made!
21. Themed Gardens
Editor’s Choice
🛍️
JOIEDOMI 2 Pack Outdoor Solar Hanging Lantern Lights, Waterproof Tableto…
Want a yard that stays inviting after sunset? Good lighting does that. It adds safety, highlights your best features, and lets you enjoy the outdoors longer.
Here is why it helps:
– Path lights guide guests along walkways.
– Spotlights lift trees or sculptures into the evening.
– String lights create a warm, friendly glow.
Choose simple options.
– Start with low voltage or solar options. They save energy.
– Place lights at eye level for the view. Avoid glare that hurts eyes.
– Use warm white bulbs. They feel cozy and natural.
Where to place lights
– Along steps and paths for safe walking.
– Highlight features like a fountain or statue with soft beam.
– Behind seating areas to reduce shadows and add depth.
Practical tips
– Use timers or smart plugs so lights turn on at dusk and off later.
– Add dimmers to shift mood from bright task light to a gentle glow.
– Keep fixtures weatherproof and easy to maintain.
Limitations and tips
– A small yard can still feel bright with careful spacing.
– Start with a simple plan and add more lights later if you want.
Next steps
– Sketch your space, note lit spots, and pick a few fixtures to begin.
22. Landscape Lighting
Editor’s Choice
🛍️
8 Pack Solar Pathway Lights Outdoor, 12 Brighter LED Solar Lights Outdoo…
You want a yard that looks nice but needs little care. Low-maintenance planting makes that possible. It uses tough, water-wise plants and simple layouts. Here is how you can set it up now. Here is why this approach works.
– Choose drought-tolerant plants – Pick native perennials, hardy succulents, and ornamental grasses that thrive with less irrigation. Group them by sun and water needs so you can water a whole area at once.
– Mulch to cut weeds and save water – Apply 2 to 3 inches of mulch around beds and shrubs. Mulch slows evaporation, keeps roots cool, and makes weed pulling easier.
– Simplify your plant palette – Limit to a handful of species and repeat them in blocks. This keeps color cohesive and reduces time spent pruning and weeding.
– Add easy ground covers and smart paths – Use gravel, low-growing plants, or stepping stones to cut mowing and maintenance. Ground covers fill gaps, suppress weeds, and guide visitors through the yard.
– Set up water-smart systems – Install drip or soaker irrigation to deliver water at the roots. Water early in the day and let mulch stretch every drop.
– Schedule simple upkeep – Do a quick spring check, trim lightly, and refresh mulch as needed. Short, regular tasks beat a big mess later.
With these steps you get a tidy, lively outdoor space you can enjoy without constant work. It fits both small and large yards.
23. Low-Maintenance Landscaping
Editor’s Choice
🛍️
Created By Nature Drought Tolerant Wildflower Seed Mix, 15 Varieties, 67…
You want an outdoor kitchen that makes your yard feel alive. It should be easy to use, tough in weather, and fun for family and friends. Here is a practical plan you can follow for real results.
– Pick weatherproof appliances with protective covers. A stainless grill, a small fridge, and a sink that resists rain will keep you cooking without worry.
– Reserve plenty of prep space and a clear cook zone. Let you chop, mix, and plate with space to spare. Keep a smooth path from prep to grill.
– Create seating and a shaded area. Put stools at the counter and use a pergola, canopy, or awning so sun and rain don’t slow you down.
– Add good lighting and safe ventilation. Bright task lights help at dusk, and a hood or vent keeps smoke away from guests.
– Plan storage and easy cleanup. Weatherproof drawers and cabinets hide tools, and simple-to-clean countertops make wiping down quick.
Think about materials that last. Stone, concrete, and stainless metals stand up to heat and rain. Use a slip-resistant floor and a smart drainage plan. A few touches like a real sink corner and herb pots bring smells and life to the space.
Next steps. Measure your space, sketch a layout, and set a simple budget. If needed, ask a pro to review your plan.
24. Outdoor Kitchen Delight
Editor’s Choice
🛍️
Gas One – 14-inch Portable Barbecue Grill with 3-Point Locking Lid for H…
You want a backyard that looks good and uses less water. Eco-conscious hardscaping makes it possible. It slows rain runoff, reuses materials, and stays durable year after year. Here is why it helps and how you can start.
– Permeable patios: Choose porous pavers or open-grid gravel. Rain sinks in, not puddles on the surface.
– Reclaimed materials: Build with salvaged stone or bricks for walls and paths. They add texture and cut waste.
– Water-wise features: Add a shallow basin or rain catcher to collect rain. A simple trench or swale guides water to plant edges.
– Easy maintenance: Skip harsh sealants. Sweep, rinse, and let joints breathe.
– Quick starter plan: 12×12 foot patio with porous pavers, a brick-edged path, and a 55-gallon rain barrel. Surround with native ground cover for color and soil health.
Here are quick tips to pick the best options. Choose colors that match your home. Look for local recycled materials to save transport. Test a paver sample for foot feel on a sunny day. Keep edges clear and borders simple for easy upkeep.
Next steps: measure your space, pick a material, and visit a salvage yard or supplier for prices. You can make real progress in a weekend.
These 25 stunning landscaping designs illustrate how varied and beautiful backyard spaces can be.
Whether you’re looking for a peaceful retreat, a space to entertain, or a vibrant garden, there are endless possibilities to explore.
With a little creativity and inspiration, your outdoor space can transform into the oasis you’ve always wanted.
Note: We aim to provide accurate product links, but some may occasionally expire or become unavailable. If this happens, please search directly on Amazon for the product or a suitable alternative.
This post contains Amazon affiliate links, meaning I may earn a small commission if you purchase through my links, at no extra cost to you.
Frequently Asked Questions
What Are Some Key Elements to Consider When Designing Large Backyard Landscaping?
When tackling large backyard landscaping designs, consider elements like flow and functionality. Think about how spaces will be used—do you want areas for entertaining, relaxation, or gardening? Incorporate zones within your space, like dining areas, fire pits, or lush gardens to create a balanced design.
Additionally, pay attention to plant selection, choosing species that thrive in your climate and complement your overall aesthetic. Don’t forget to include pathways and lighting to enhance both beauty and accessibility!
How Can I Incorporate Eco-Friendly Practices into My Backyard Design?
Creating an eco-friendly backyard is a fantastic way to support the environment while enhancing your outdoor space! Start by selecting native plants that require less water and maintenance. Additionally, consider implementing rain gardens or permeable paving to manage water runoff effectively.
Using recycled materials for hardscaping and incorporating composting areas can also contribute to a sustainable landscape. Remember, every small change can make a significant impact!
What Types of Plants Are Best for Low-Maintenance Backyard Landscaping?
If you’re looking for low-maintenance landscaping options, opt for drought-resistant plants like succulents, ornamental grasses, and native perennials. These plants not only save water but also require less pruning and care.
Group plants with similar watering needs together to simplify maintenance even further. Incorporating mulch can help retain moisture and suppress weeds, making your backyard a breeze to manage while still looking stunning!
How Do I Create a Cozy Outdoor Living Space in My Backyard?
To create a cozy outdoor living space, focus on comfort and ambiance. Start by selecting comfortable seating options like plush outdoor sofas or lounge chairs, and don’t forget plenty of cushions! Incorporate a pergola or canopy for shade and define the space.
Enhance the atmosphere with string lights or lanterns for soft lighting, and consider adding a fire pit for warmth and gathering. Personal touches like outdoor rugs and decorative pillows can turn your backyard into a true retreat!
What Are Some Budget-Friendly Ideas for Transforming My Backyard?
Transforming your backyard on a budget is definitely achievable with some creative planning! Start by prioritizing DIY projects like building your own raised garden beds or creating a simple stone pathway. Use repurposed materials for furniture or decor, giving a unique flair without breaking the bank.
Also, consider planting seeds instead of purchasing established plants—this can save you money while adding a personal touch to your garden. Small changes can lead to a stunning transformation!
Are you craving a green paradise right in your backyard? This post is for anyone who wants to grow more food in less space, cut grocery bills, and enjoy fresh flavors all season. I pulled together 20 backyard vegetable garden hacks that cover water, soil, space, and pests, so you can turn a small patch into a thriving edible oasis.
Here is why I made this. I know how hard it is to start with a tiny yard, a busy life, and not much know-how. I want tips that work in real homes, not fancy demos. These hacks are simple, affordable, and doable on a weekend.
Who it’s for
If you’re a beginner, a busy parent, a renter with a balcony, or someone who loves clever space ideas, this is for you. If you care about fresh meals, saving money, and a smaller footprint, you’ll feel right at home here.
What you’ll get
You’ll get practical hacks that cover water use, soil health, space saving, and pest control. Each tip comes with a quick how-to and a setup you can try this week. The ideas help you save time, cut waste, and harvest more with less fuss.
For example, you can set up a rain barrel and run a simple drip line to beds. Mulch with shredded leaves to lock in moisture and keep weeds down. Build a low-cost raised bed or use cinder blocks to create a vertical garden. Install a trellis so cucumbers climb and free up ground. Start with fast growers like radishes, lettuce, and spinach to gain confidence. Make a tiny crop plan to rotate plants and keep soil healthy.
Next steps are easy. Pick one hack to start this weekend. Set a small goal, like installing a drip line or starting a batch of lettuce seeds. If you want, drop a note with your setup and I can help troubleshoot. Gardens grow with small, steady moves, and this guide is here to help you take the first ones.
If your yard is tight, you can grow a lot with vertical gardening. Putting plants up high saves ground space and lifts the burden off your knees. Here is why this setup works for small spaces. This guide shows a simple, sturdy way to start.
Vertical Gardening
Vertical gardening uses walls, trellises, shelves, and pots set off the ground. Tomatoes, cucumbers, and peas love this setup. Lifting plants lets air move around them and cuts some pests. You can make your own frame from wooden pallets or an old ladder. That saves money and adds a quirky look.
How to set it up
– Find a sunny wall or balcony with at least six hours of sun.
– Secure a frame that can hold wet soil and ripe fruit.
– Attach planters, pots, or baskets in a tiered layout.
– Water from the top or use a simple drip line to keep leaves dry.
– Choose crops that climb or spill, like tomatoes, cucumbers, beans, and lettuce.
– Plant flowers among greens to lure pollinators.
Tips:
– Make sure the frame is strong enough to hold ripening produce.
– Mix in flowers to attract bees and butterflies.
– Place taller plants toward the north side to avoid shading shorter ones.
Give this setup a try. You will see the plants climb in no time.
Elevate your gardening game! Vertical gardening not only saves space but also creates a stunning green backdrop. Transform your backyard vegetable gardens into a lush paradise with just a little creativity!
Wrestling with pests and patchy yields? Companion planting can help you rebalance your garden. You place certain crops near each other so they help one another. Some plants deter bugs. Others attract friendly insects. The result is a calmer bed and more steady harvest.
Here is why it works. A varied mix confuses pests and stops one bad year from wiping you out. It also keeps soil healthier. You can plant for flavor, not just cover.
Tips for choosing companions:
– Carrots and onions share space well. Onions deter pests that bother carrots.
– Lettuce and radishes grow fast together. Radish roots loosen the soil for lettuce.
– Beans and corn often grow in tandem. Beans fix nitrogen, feeding the corn, while the corn offers shade.
Next steps for a simple start:
– Sketch your bed. Mark where crops sit.
– Pair one crop with its friend in a small corner first.
– Observe two weeks. Note what bugs arrive and what looks healthier.
Let’s break it down: if you plant a mixed bed, pests hit one crop and miss others. Your overall harvest keeps rolling. With a little practice, you see fewer pests and healthier plants.
If your back aches from bending to weed or plant, raised beds help. They bring soil to a comfortable height. You can stand and work with less strain. Drainage improves and roots stay healthier. The soil warms sooner in spring, so you can start earlier. Weeds stay tamed, and the bed keeps your garden neat.
Here is why you should try them. They look tidy in the yard and make planting simple. Watering is easier, and soil stays looser.
Let’s break it down with simple steps:
– Materials: choose a frame from treated wood, bricks, concrete blocks, or recycled pieces. Cedar and redwood last longer. Add a border or mesh to keep pests out.
– Size and depth: aim for about 4×6 or 4×8 feet. 12 to 18 inches deep works for most vegetables.
– Soil mix: fill with topsoil, compost, and a bit of coco coir or peat for moisture and air.
– Setup tips: pick a sunny spot with good drainage. Place the bed on level ground. Mulch the edges to slow weeds.
Benefits:
– Less bending, easier on your back.
– Better drainage and soil health.
– A defined space that makes the yard feel organized.
Limitations: higher upfront cost and some heavy lifting. It takes time to build and fill.
Next steps: plan crops, label rows, and start with easy picks like lettuce and radish.
3. Raised Garden Beds
Editor’s Choice
🛍️
Land Guard Galvanized Raised Garden Bed Kit, Galvanized Planter Garden B…
Your backyard needs a boost, and you want less waste. Composting is a simple fix. It turns kitchen scraps and yard clippings into rich soil food that helps plants grow.
Turn kitchen scraps into garden soil gold! Composting feeds soil and cuts waste in one go. A well made pile or bin adds life to your beds and keeps nutrients where they belong.
Here is why it helps: it adds organic matter, improves water retention, and feeds microbes that plants rely on.
– Pick a spot that stays a little damp and away from the house.
– Use a simple pile or a sturdy bin.
– Layer greens and browns in roughly a two to one ratio.
– Turn the pile every week or two to add air.
– Keep it moist; it should feel like a wrung sponge.
– When it looks dark, crumbly, and smells earthy, it is ready.
– Mix it into garden beds or spread as mulch.
Tips:
– Do not add meat, dairy, or oily foods; they attract pests.
– Keep the pile moist, but not soggy.
– If it dries out, add water or green scraps.
– Consider a worm bin for nutrient rich vermicompost.
– Avoid weed seeds by composting only well-decomposed scraps.
Your garden grows.
4. DIY Composting
Editor’s Choice
🛍️
Utopia Kitchen Compost Bin for Kitchen Countertop, 1.3 Gallon Compost Bu…
Struggling with wasted water and dry spots in your veggie garden? A drip irrigation system puts water right at the roots. It feeds the roots slowly and keeps leaves dry, so plants grow steady. You save water and cut waste. Here is why it helps and how you can set one up this season.
What you need
– A main supply line or hose that runs along your beds
– Drip tape or tubing with emitters near plant bases
– Connectors and adapters to fit your hose
– A filter and a pressure regulator
– A timer to run automatically
– Clips to hold lines in place
How to set it up
1. Map your beds and mark each plant
2. Lay a main line along the beds without stepping on it
3. Attach drip lines to the main line and place emitters at each plant base
4. Add the filter, regulator, and a timer
5. Turn on the system, look for leaks, and adjust flow
6. Mulch around beds to cut evaporation
Be mindful at first. Some soils drink quickly, others soak slowly. Water in the morning to cut waste. Check lines monthly for clogs and leaks.
With this setup you waste less water and grow tastier veggies. Give it a try and watch your garden thrive.
Peace of mind.
5. Drip Irrigation Systems
Editor’s Choice
🛍️
Rain Bird DRIPKITBAG Drip Irrigation Repair and Expansion Kit
Your soil can get tired after a long season. Crop rotation helps keep it fed and strong. You switch the crops in a bed each year. This slows pests and reduces wear on the soil. Think of it as giving the soil a break while plants take what they need.
For example, if you plant nightshade veggies like tomatoes in Bed A this year, move legumes such as beans or peas into that bed next year. Different plants use different nutrients and resist pests in different ways. Rotation slows disease and keeps yields steady.
Unique Insight: A simple garden journal can make rotations easier. Jot down what you planted where and how it did. A quick map on paper or in a note app saves you from repeating the same bed with the same crops.
General Advice: Plan a 3- to 4-year rotation across beds. Pair rotation with simple companion planting to boost plant health, like basil near tomatoes or carrots with onions.
You want herbs that add flavor and function to your garden. Here is a simple way to get both. Herbs do more than taste good. They attract helpful insects and push back pests. Plant cilantro, basil, and parsley next to your veggies for color and a working bed. They fit in small spaces and can live in pots. If the weather turns cold, move them indoors and keep fresh leaves year round.
Here is why herbs help: they fill gaps, scent the air, and invite hoverflies that eat pests.
– Where to place them: around peppers and tomatoes, in a sunny yard corner, or on a balcony.
– In tiny yards, use shallow pots or window boxes.
– If you grow indoors, pick a bright spot and water regularly.
Tips:
– Regularly prune each herb to keep it bushy.
– Pair herbs with your vegetables. Basil with tomatoes, parsley with greens.
– Harvest leaves when you cook. Fresh or in oils or vinegars.
– Mint spreads. Grow it in a separate pot.
Next steps: choose a spot, pick a few herbs, and start a simple care routine. You’ll notice fresh flavor in every meal and fewer pests in your garden.
Enjoy the fresh herbs in meals and share them with friends. Your garden will feel calmer and more alive.
7. Planting Herbs
Editor’s Choice
🛍️
9 Herb Indoor Garden Kit – Unique Kitchen Gift for Women, Men, Mom, Frie…
You want a safe garden and you want results. Natural pest control can help you fight bugs without harsh sprays.
Here is why it works. Beneficial insects like ladybugs and lacewings eat common garden pests. To draw them in, plant blooms that give nectar and pollen. Good picks include daisies, yarrow, cosmos, and nasturtiums.
That’s a form of organic pest control that fits small yards. Try simple homemade sprays. A garlic or chili spray, or neem oil mix, can deter many pests. Mix a small amount with water, then spray the undersides of leaves in the cool early morning. Test on a leaf first. Reapply after rain or heavy dew.
Companion planting adds another layer. Some plants scare pests away or attract helpful insects. For example, nasturtiums lure aphids away from vegetables. Marigolds can help with soil pests, and basil or chives near tomatoes can offer extra protection.
Suggestions:
– Regularly inspect your plants for early signs of trouble.
– Keep the garden clean and compost healthy to support beneficial life.
– Use row covers or netting to physically shield your crops.
Next steps: pick one tactic to try this week and watch how your plants respond.
8. Natural Pest Control
Editor’s Choice
🛍️
Bonide Captain Jack’s Neem Oil, 32 oz Ready-to-Use Spray, Multi-Purpose …
Keep soil moist and curb weeds with mulch You want a garden that drinks less water and resists weeds. Mulch makes this easy. It acts like a soft blanket for your vegetables.
Materials to choose
– Straw, bark chips, or shredded leaves work well for mulch.
– Avoid fresh grass clippings in thick layers, as they can pack and stink.
How to apply
– Clear a small space around each plant.
– Spread a 2-3 inch layer of mulch.
– Keep a bit away from stems to prevent rot.
– Lightly press the mulch so it stays in place.
Benefits you’ll notice
– It helps soil stay moist, so you water less.
– It keeps soil temperature steady, protecting roots.
– It blocks sunlight, slowing weed growth.
– It slowly breaks down and feeds the soil.
Tips for best results
– Replenish mulch after heavy rain or during the season.
– Check the layer and add more if it thins.
– On slopes, add a touch more to slow erosion.
– For extra weed control, keep the mulch a bit thicker around bed edges.
Next steps
Choose a mulch you can get locally, apply this weekend, and watch your plants respond in a week.
9. Use of Mulch
Editor’s Choice
🛍️
GardenStraw, 3 cu ft (20 lbs) Pack of 1 – All-Natural Mulch for Gardens,…
You want fresh veggies most months. The trick is to fit crops to the season. Some plants love cool air. Others thrive in heat. When you plant by season, you keep a steady flow of harvest.
Plan this way
– Know frost dates and your growing zone. This helps you time starts and transplants.
– Try succession planting. Sow or set out a new batch every couple of weeks for staggered picks.
– Group crops by season. In early spring, choose leafy greens. As soil warms, move in tomatoes and peppers.
– Add simple season extenders. A lightweight row cover or a small cold frame can push back frost.
Here is how it grows in practice
– Early spring: lettuce, spinach, radish
– Late spring: peas, beans
– Summer: tomatoes, peppers, zucchini
– Fall: kale, broccoli, carrots
Common questions
– How often should I plant the same crop? Every 2–3 weeks works for many greens.
– Do I need special tools? Not much—just seeds, starts, and a protective cover.
Next steps: check your frost dates, pick 2–3 crops per season, and sketch a simple yard map to place them.
10. Seasonal Planting
Editor’s Choice
🛍️
Garden Netting, Jevrench Durable Ultra Fine Garden Netting, Garden Plant…
Here is why you need to test your soil. You want plants that grow strong. The base for success is soil. A soil test reveals three key facts: pH, nutrient levels, and texture. These facts guide what you plant and how you improve the soil.
Here is how to test it. Choose a testing method. Use a home kit or send a sample to a local lab. Take a representative soil sample from 6 to 8 spots in your garden bed. Mix the samples in a clean container. Send the mix for analysis or follow the kit directions. Read the results clearly. Look at pH, the levels of nitrogen, phosphorus, and potassium, and the texture result.
Vegetables respond to these numbers. For example, carrots grow best in sandy soil. Leafy greens thrive in a rich, loamy mix.
Next steps:
– If pH is off, adjust with lime to raise it or with sulfur to lower it.
– If nutrients are low, add organic fertilizers or compost based on the test results.
– Improve texture with well-rotted compost, aged manure, or mulch to help air and water flow.
Tips:
– Retest your soil annually or after a heavy crop season.
– Use the amendments the test suggests to feed the soil, not just the plants.
Great plants start with great soil! Testing your soil’s pH, nutrients, and texture is the secret ingredient to thriving backyard vegetable gardens. Dig deep, and let your garden flourish!
11. Soil Testing
Editor’s Choice
🛍️
Rapitest Soil Test Kit for Gardens, Vegetables, Flowers and Lawns. USA d…
Struggling to keep soil healthy while your beds rest? Cover crops can help. They work while you wait. Think of clover, rye, and vetch as soil keepers. They slow erosion, crowd out weeds, and feed the earth as they break down.
Here is how to use them:
– What to plant: Clover fixes nitrogen and invites helpful bugs; Rye provides a sturdy winter cover; Vetch adds nitrogen and a light, quick-growing ground cover.
– When to plant: In cool regions, sow in late summer or early fall. In warmer areas, plant in autumn or early spring before the heat arrives.
– How to sow: Broadcast seeds or drill them just under the surface. Rake lightly, press, and water if needed. Keep the seed bed moist until germination.
– How to finish: Let the cover crop grow until it forms a good mat. Then till it back into the soil a few weeks before you plant your main crops in spring.
Benefits:
– Improves soil structure and fertility.
– Attracts beneficial insects and reduces pests.
– Breaks up soil compaction and slows erosion.
Next steps: plan a small bed this season and select one mix to try. You’ll feel the soil loosen and see fewer weeds come spring.
12. Planting Cover Crops
Editor’s Choice
🛍️
No-Till Garden Farm and Garden Cover Crop Mix Seeds – 5 Lbs – Blend of G…
Staring out at your bed, you may forget what you planted where. Labels fix that. They save trips to guesswork and help when you try new varieties. Label with wooden stakes, stones, or scraps you have. The goal is simple: something you can read from a distance.
How to make labels last
Choose durable materials. Use waterproof markers or outdoor paint so the names stay clear after rain or watering. A thin coat of clear sealant helps wood stay legible longer. For a clean look, write in bold letters and keep the name short. Include the variety and a date if you want.
Where to place labels
Label rows or sections so you know what to expect at harvest time. Place labels at the end of each row or beside a new plant. If you plant in blocks, mark each block with the crop name. A quick garden map on paper or a chalkboard helps you remember what is where.
Tips to stay organized
– Create a simple plan that shows which plants live in each area.
– Update labels when you add new varieties or make changes.
– Use color codes or symbols to show plant families or harvest windows.
Next steps
Plant with confidence. Your garden will be easier to manage and more fun to grow.
A well-labeled garden is a happy garden! Keep track of your backyard vegetable gardens with simple, durable labels – your plants will thank you for it!
If your greens and herbs are new, strong sun can burn their leaves. Shade cloth filters light and cools the air around them. You still get enough sun to feed growth, but with less stress.
Where to use it
Set up a small frame over a bench, or drape the fabric over a row of pots. Keep the cloth at least a few inches above the leaves so air can move.
Choosing the right shade level
Shade cloth comes in different levels like 30, 40, or 50 percent shade. For most seedlings, start with 30 or 40 percent. If the plants look pale or stretch toward the sun, add a bit more shade.
How to install quickly
– Build a light frame from PVC pipes or use simple hoops.
– Drape the cloth loose and skip direct contact with leaves.
– Secure edges with clips, weights, or rocks.
– Leave a small gap for air and water to pass through.
Tips for best results
Water in the morning. Check often on hot days. If you remove it on a cool afternoon, your plants will thank you.
Benefits at a glance
– Reduces sunburn and wilting
– Eases heat stress during heatwaves
– Helps soil stay moist longer
– Supports steady growth of seedlings
14. Use of Shade Cloth
Editor’s Choice
🛍️
90% Shade Cloth for Garden -12 x 20 FT Durable Mesh Tarp with Grommets, …
You want big yields and great flavor. The way you pick fruit matters.
Here is why proper harvesting helps your garden stay healthy. It reduces damage and keeps plants growing.
– Cut, don’t pull: use a clean, sharp knife or scissors to remove the fruit. A clean cut helps the plant seal the wound faster.
– Harvest in cool moments: pick in the morning or evening when the air is cool. That keeps flavors bright and textures tender.
– Pick at the right size: many vegetables taste best when young. Zucchini, beans, and peppers are a good example. If you wait, they can turn fibrous or seedy.
– Check every day: daily harvests often encourage more production.
– Leave a small stem: this protects the fruit and looks nicer on the plant.
– Handle with care: soft bruises invite rot. Gently place veggies in a basket or crate.
– Experiment with stages: try picking some a bit early and some a bit later to learn your preferred taste.
With these habits, you’ll keep plants healthy and get tastier harvests. Next steps: watch for ripe cues, adjust how you pick, and enjoy the fresh garden produce.
If a plant looks stressed, skip that fruit and give it time.
Save seeds for next season and keep your best flavors growing. It cuts costs and keeps your garden true to taste. You learn which plants pass their good traits to the next crop and how long seeds stay viable.
– Pick healthy plants. Choose seeds from disease-free plants. Strong leaves and sturdy stems help seeds stay true.
– Let them finish. Allow a few plants to go to seed. Beans and tomatoes are easy for beginners.
– Collect with care. Harvest seeds when pods dry. Remove seeds, rinse gently, and dry.
– Dry well before storing. Spread seeds on a clean surface and air dry. Keep moisture away.
– Label every batch. Note the variety and harvest date on a small tag. Clear labels save time next season.
– Store in the right spot. Use jars or envelopes in a cool, dark, dry place.
– Guard against cross pollination. Separate related plants if you want true seeds.
– Check germination. Test a few seeds on a damp paper towel to see sprouts.
– Know the limits. Open-pollinated and heirloom seeds stay true longer; hybrids may not.
With a little practice, seed saving becomes fast. Start small and add more plants as you gain confidence.
16. Save Seeds
Editor’s Choice
🛍️
Bekith 4 Pack 15 FL OZ (450ml) Glass Food Storage Jar with Acacia Lids, …
Want a garden that helps itself? You can invite wildlife and watch the day come alive. A lively yard brings tastier veggies, fewer pests, and a morning chorus you can hear from the porch. You can build a space that welcomes birds, bees, and helpful critters.
Here is why this works. Plants feed wildlife, and wildlife feeds your garden. A steady flow of visitors keeps pests in check and helps pollination. You get better blooms and more color with less work.
– What to plant Choose native flowers and shrubs that fit your space. They attract bees, butterflies, and other helpful critters. Mix tall and low growing varieties for cover and a splash of color.
– Create shelter Leave fallen leaves in quiet corners, add a small brush pile, or install a birdhouse or a bee hotel. These little homes give birds and bees a safe place to rest and raise young.
– Provide water Set out a shallow bird bath or a tiny fountain. Moving water draws more wildlife and cools the garden on hot days.
– Care without chemicals Skip strong sprays in bloom time. If pests appear, try simple soap spray on a calm morning.
– Offer food year round Plant a mix of nectar-rich perennials and seed plants that feed wildlife through seasons.
– Keep it safe Avoid loud disruptions near feeding spots. A quiet path and gentle lighting invite night visitors too.
Next steps: start with one native plant, a water source, and a small bird shelter. See which visitors arrive and adjust as needed.
Benefits:
– A balanced garden helps plants stay healthier.
– You gain a natural soundtrack of birds and buzzing bees.
– You support local wildlife and keep biodiversity alive in your neighborhood.
17. Incorporate Wildlife
Editor’s Choice
🛍️
Northeast Wildflower Seeds – Extra Large 1 Ounce Packet – Over 7,500 Nat…
Turn tight spaces into a thriving vegetable spot with containers. If you have a small yard, a balcony, or a bright window, you can still grow your own food. Containers place vegetables where sun shines and soil stays fresh. Use pots, hanging baskets, or an old wheelbarrow as a planter.
Choose compact, dwarf varieties. They stay manageable in small pots and often give you harvests sooner. Start simple: two or three pots, a tote, and a hanging basket for greens.
How to set it up
– Pick pots with drainage holes so water flows out and roots stay healthy.
– Use fresh, lightweight potting soil. If you have compost, stir in a little.
– Fill pots fully so soil doesn’t settle. A thin layer of stones at the bottom helps drainage.
– Group pots by sun and water needs. This makes watering easier and keeps plants happier.
Care and maintenance
– Water regularly. Check the top inch and water when it feels dry.
– Feed every 2–3 weeks with a balanced fertilizer.
– Rotate plants every few weeks so they all get good light.
Next steps: sketch a quick layout, pick two crops, and test a couple of container styles.
18. Experiment with Container Gardening
Editor’s Choice
🛍️
yarlung 6 Pack Self Watering Planter with Water Level Indicator, 5 Inch …
Here is why you should trust old garden tricks. They fit small spaces, save work, and teach you what nature does well. You can mix a few simple ideas to see fast results.
– Square foot gardening. Build a 4 by 4 foot bed and mark a light grid. Each square foot holds a different crop. Plant fast growers like radish and lettuce in a few squares, and leave space for slower crops. Keep soil rich with compost and mulch. Water gently to protect roots. Tidy beds that are easy to manage.
– The Three Sisters method. Plant corn, beans, and squash together. The corn gives height, beans fix nitrogen, and squash blankets the soil. Start with a small corn mound, plant beans at the base, then spread squash around them.
– Traditional row gardening. Plant in long rows for easy care. Rotate crops yearly. Mulch to curb weeds and keep soil moist. A drip irrigation line saves water and makes weeding easier.
– Suggestions: Research local historical gardening practices for ideas. Consider joining a community garden to learn from seasoned gardeners.
19. Use Time-Tested Methods
Editor’s Choice
🛍️
Seeding Square – Patented Seed and Seedling Spacer Tool for Bigger Harve…
Your hard work has paid off in color and flavor. Take a moment to enjoy the harvest you grew right in your backyard. A small celebration keeps your garden feeling alive all year.
Host a simple garden party or cook a meal that features your freshest vegetables. Let the tomatoes pop red, basil send a bright scent, and peppers glow on the plate. Eating what you grew makes every bite special.
Consider keeping a visual diary of your garden journey. Photograph the first ripe fruit, the neat rows, and the tricky weeks. A simple scrapbook lets you see progress, learn from losses, and treasure the quiet beauty of grow spaces.
Tips:
– Organize a neighborhood potluck to share the bounty and swap ideas.
– Create quick recipe cards that use what you harvested to inspire others.
Next steps: plan your harvest menu, set a date for a small gathering, and add a page to your garden diary after each harvest. Celebrate every season with gratitude and good food.
Your celebration keeps you rooted in the garden and ready for the next planting season. You can repeat this yearly, keeping the joy alive in your garden.
Celebrate your backyard vegetable gardens! Every harvest is a moment to savor – host a garden party or cook a meal with your freshest picks, turning each bite into a memory.
20. Celebrate Your Harvest
Editor’s Choice
🛍️
Kate Aspen Tea Party Decorations, Colorful Pastel Plates And Napkins Gar…
Transforming your backyard vegetable garden into a green paradise doesn’t have to be overwhelming.
With these 20 hacks, you can cultivate a space that not only looks good but thrives year after year.
Embrace the joy of gardening and watch as your fresh produce flourishes, making your meals even more delightful!
Note: We aim to provide accurate product links, but some may occasionally expire or become unavailable. If this happens, please search directly on Amazon for the product or a suitable alternative.
This post contains Amazon affiliate links, meaning I may earn a small commission if you purchase through my links, at no extra cost to you.
Frequently Asked Questions
What is vertical gardening, and how can it benefit my backyard vegetable garden?
Vertical gardening is a fantastic way to maximize space in your backyard vegetable garden! By growing plants upwards, you save ground space and make gardening easier on your back and knees.
This method allows you to grow more food in less space, making it perfect for small yards. Plus, it can create a stunning visual display, transforming your garden into a vibrant green paradise!
How does companion planting work, and what are its advantages?
Companion planting is all about placing certain crops near each other so they can help one another thrive. For instance, some plants can deter pests while others improve growth rates.
This strategy not only boosts your yields but also promotes a healthier ecosystem in your backyard vegetable garden. It’s a natural way to combat pests and improve your homegrown vegetables without chemicals!
What are the benefits of using raised garden beds in my vegetable garden?
Raised garden beds are a game-changer for your backyard vegetable garden! They bring the soil to a comfortable height, reducing strain on your back while gardening.
Additionally, they improve drainage, allow for better soil control, and can even help with pest management. It’s a simple hack that can make your easy gardening experience much more enjoyable!
How can I implement a DIY composting system in my backyard garden?
Starting a DIY composting system in your backyard is easier than you might think! You can turn kitchen scraps and yard clippings into nutrient-rich compost that feeds your vegetable garden.
All you need is a compost bin or a designated area, and you can layer your materials. This eco-friendly approach reduces waste and provides your plants with the essential nutrients they crave, ultimately enhancing your homegrown vegetables!
What are some effective natural pest control methods for my vegetable garden?
If you’re looking to keep your backyard vegetable garden chemical-free, natural pest control methods are the way to go! You can use beneficial insects, like ladybugs, to manage pests naturally.
Herbs like basil or marigolds can also deter unwanted bugs. By embracing these methods, you create a healthier environment for your plants and enjoy delicious, homegrown vegetables without harmful chemicals!
I put this post together because I want you to feel confident growing veggies in your own yard. Back yard vegetable garden designs can feel overwhelming with pages of ideas and fancy terms. These 30 backyard vegetable garden designs are simple, beautiful, and something you can nail. They fit real spaces, from a tiny balcony to a wide yard, and they stay easy to manage.
If you’re new to growing edible plants, short on time, or just want a space that looks neat with little work, this is for you. If you care about fresh meals and the taste of sun warmed tomatoes, you’ll love these layouts. These ideas are friendly to kids and pets too, with clear paths and sturdy beds that keep your garden orderly.
Inside you’ll find 30 designs described in plain language. Each one shows how the beds sit, where to put paths, and how much sun and water they need. You’ll see options like raised beds, simple squares, vertical walls, and handy containers. Plus practical tips on spacing, mulch, irrigation, and avoiding the curse of crowded soil.
These designs work in different climates, yards, and budgets. They’re modular, so you can mix ideas and start small, then add as you grow more confident. Even a beginner can sketch a plan, pick a layout, and see a fast harvest corner take shape. That means you can have a thriving garden without a big renovation.
You’ll save time choosing a plan and avoid common mistakes. You’ll learn how to place beds to catch sun, set up a simple watering plan, and choose crops that pair well. The goal is to get tasty veggies on your table sooner, with a space you enjoy tending.
Here is why these ideas work: they balance beauty and practicality. Next steps are simple: pick a design that fits your space, map it on paper, and gather a few materials. Take it slow, keep notes, and adjust as you see what grows best. Read on to find your perfect starting point and start turning your yard into a real food garden.
You want a garden that is easy to manage and still fruitful. The Classic Raised Bed Garden helps you get both. Built with simple wooden frames, these beds keep soil contained and plants tidy. You stay organized and you can reach your veggies without bending too much.
Why this design works: Raised beds warm up faster in spring, letting you plant earlier. You control the soil mix, drainage, and bed height, which makes gardening easier for beginners and kids too. This setup also cuts down on soil compaction because you don’t walk on the soil every day.
How to set it up: Pick a sunny spot. Use untreated wood to avoid chemicals. Shape the beds as rectangles or squares. Line the bottom with cardboard to slow weed growth. Fill with rich, organic soil and add seed packets or transplants. Water and harvest become straightforward, thanks to the raised height.
Tips: Choose wood that’s safe for gardens. Keep the top edge at a comfortable height. Paint for a playful look or leave it natural. Plant a border of flowers around the beds to attract helpful pollinators.
Next steps: Start with one 4×6 bed and a few easy veggies like lettuce, radishes, and bush beans. Enjoy the neat lines, simple care, and steady harvest.
1. Classic Raised Bed Garden
Editor’s Choice
🛍️
Land Guard Galvanized Raised Garden Bed Kit, Galvanized Planter Garden B…
If your yard is small, a vertical garden can give you big harvests. Grow up, not out, and add life to a blank wall. A living wall saves space and adds color, scent, and texture to your backyard.
Ways to build a vertical garden
– Pallet wall: Grab a sturdy pallet and clean it well. Line the back with landscape fabric. Fill with a light soil mix and plant up the face. This creates a rugged, artistic backdrop for herbs and greens.
– Hanging pots: Use a wall rack and strong hooks. Hang fabric or plastic pots at varying heights. Pack in herbs or baby greens for quick bursts of flavor.
– Trellis or wire frame: Attach a trellis to a wall or fence. Train climbing plants like peas or beans to cover the frame. It looks lush and gives you tall, productive growth.
Best plants for a wall garden
– Climbing champions: Peas and beans grow fast and drape the structure with green vines.
– Fresh herbs: Mint and basil thrive in vertical setups and stay handy for cooking.
– Leafy greens: Lettuce, Swiss chard, and spinach work well in pocket planters or shallow pockets.
Smart watering and care
– Install a drip irrigation line or a soaker hose to keep soil evenly moist without mess. A simple timer helps you stick to a routine.
– Use a lightweight soil mix to keep weight down and make reshaping easier as plants grow.
– Place your wall where it gets several hours of sun. Check moisture in hot weather and trim back crowded growth to keep air moving.
Next steps: gather a pallet or two, pick a wall, and plan your first row of herbs. Your compact, up‑and‑covering garden is within reach.
Turn your walls into a harvest hub! Vertical gardens maximize space and add vibrant life to your backyard, transforming even the smallest areas into stunning vegetable oases. Grow up, not out!
Container gardening helps you grow fresh veggies even if you have little space. It fits on a patio, balcony, or a small backyard. You gain quick access to tasty picks and a little, colorful garden you can move.
Here is why this works and how to start strong:
– Choosing pots Pick containers at least 12 inches deep for root vegetables. Make sure each pot has a drainage hole. Use a tray to catch extra water. A sun-warmed pot smells earthy when you water it.
– Plants to grow Cherry tomatoes, peppers, and herbs do well in pots. Mix a few kinds in one container to save space and boost flavor. If you are new to this, choose compact varieties.
– Layout and color Group your containers in a sunny spot to form a tiny garden wall. Place tall plants at the back and shorter ones in front. Add a touch of color with flowering companions.
– Care basics Water in the morning when the soil is cool. Use good potting mix, not garden soil. Check soil moisture daily in hot weather and adjust. Move pots so they get enough sun.
Next steps: pick a sunny corner, gather a few pots, fill with mix, and plant. Start small and build from there.
3. Container Gardening Delight
Editor’s Choice
🛍️
Indoor Self Watering Planters with Drainage Holes and Saucers, 8, 7, 6.5…
Looking for a garden that stays healthy with less work and less waste? Permaculture design helps you build a small living system in your backyard. It works by listening to nature and letting it do much of the lifting.
A permaculture garden aims for a self-sustaining loop. Plants help each other, water is stored, and soil grows richer over time. You use companion planting to pair species that help each other, like tomatoes with basil. You plan with zones so tall plants shade smaller ones and guard the soil.
Key ideas to apply
– Zones near your home: zone 1 has high-use herbs and greens for quick access.
– Plant guilds: mix plants to support each other; include a root, a leafy top, and a vine.
– Water strategy: collect rain in barrels; mulch to slow evaporation and keep soil moist.
Practical steps
Build soil first: add compost, leaf mold, and a mulch layer. Mulch keeps heat down, holds moisture, and feeds soil life.
Start with a simple map of sun, water, and wind. Draft zones and guilds, then plant and watch. Adjust with the seasons. Observe results and note what works.
Benefits
Fewer pests, richer soil, and less water use. You also attract helpful insects and birds. You can start small this season.
4. Permaculture Design
Editor’s Choice
🛍️
Utopia Kitchen Compost Bin for Kitchen Countertop, 1.3 Gallon Compost Bu…
Start with one 4×6 bed; plant easy veggies like lettuce and radishes.
Vertical Garden Oasis
Pallets, wall racks, pots
$23.99
Use climbing plants like peas; install drip irrigation.
Container Gardening Delight
Containers (12 inches deep), potting mix
$19.99
Group containers in a sunny spot; mix different plants.
Herb Spiral Garden
Stones, rich soil, mulch
Check Price
Plant taller herbs at the back; use well-drained soil.
Permaculture Design
Compost, mulch, native plants
N/A
Create zones for different plants; collect rainwater.
Wildlife-Friendly Garden
Native plants, birdbath, mulch
$4.98
Include flowering perennials; create habitats for wildlife.
Straw Bale Garden
Straw bales, rich soil, compost
N/A
Water bales thoroughly before planting; use quick-growing crops.
5. Herb Spiral Garden
You want a small herb garden that’s handy and pretty. A herb spiral garden can deliver both. The spiral of stones curves up from the ground, so you get more growing space in a tight yard. It creates tiny microclimates, with hot sun on the top, cooler shade on the inner coils, and better drainage. That setup helps herbs with different needs grow close together without crowding.
Here’s why it works for beginners. This setup makes care easy for a busy gardener. You can rearrange herbs as your yard grows.
Design Tips: Start with larger stones at the bottom and add smaller ones as you go up. Build a spiral that is easy to reach from either side. Use rich, well-drained soil for healthy growth. Plant rosemary, thyme, oregano, and parsley for fragrance and flavor. The height makes harvesting simple and keeps leaves clean.
Next steps:
– Place the spiral where it gets sun most days; about six hours is plenty for most herbs.
– Water deeply but let the soil dry a little between drinks.
– Mulch lightly to hold moisture and curb weeds.
– Plant strategy: rosemary on the outer rims, thyme and oregano in the mid layers, parsley toward the inner, shadiest spots.
You want a yard that feeds you and still looks inviting. Edible landscaping helps you mix vegetables with beauty. It gives you a practical, easy way to enjoy fresh food all season. You set a plan that you can follow week by week.
Why it works for you
– Start with edible stars that blend with the look. Kale, Swiss chard, and sweet peppers add color and texture.
– Grow a few hardy herbs nearby. Basil, parsley, and thyme stay tasty and low maintenance.
– Add flowers that attract pollinators and hide crops. Marigolds, alyssum, and calendula give you color and scent while helping pests stay in check.
– Use raised beds or borders that match your home style. They keep soil loose, drain well, and stay tidy.
Layout and care basics
– Create simple paths with natural stones or wood chips. They make your yard easy to wander and clean.
– Place taller plants toward the back and smaller greens in front. This keeps access simple and makes beds feel full.
– Mulch after planting. A thin layer reduces weeds and preserves moisture.
– Plan for rotation. Swap greens with legumes or root crops each season to protect soil.
A quick plan you can try
– In a 6 by 8 foot corner bed, put kale at the back, Swiss chard mid, peppers at the sides, and a ring of marigolds around each bed.
Next steps: sketch your idea, pick a sunlit spot, and start small. Your space will feel inviting and alive.
Turn your backyard into a feast for the eyes and the palate! With edible landscaping, you can grow vibrant veggies that not only beautify your space but also nourish your body. It’s time to let your garden shine and feed you all season long!
6. Edible Landscaping
Editor’s Choice
🛍️
Land Guard 8×4×2 ft Galvanized Raised Garden Bed Kit, Galvanized Planter…
Here is why a pollinator garden helps your veggies. When bees and butterflies visit, your flowers share pollen. This helps fruit set and may raise your yields. It also makes your yard look alive.
– What to plant: Sunflowers, coneflowers, and lavender are great choices. Add zinnias, black-eyed Susans, and oregano or sage. Native perennials in your area suit you well. A mix of tall and short plants shelters pollinators.
– Layout ideas: Put a flower border around your vegetable beds. Or tuck flowers between rows of carrots, peppers, or beans. Vary colors and heights so the bed feels layered. Leave room for pollinators to move. Mulch helps keep soil cool and moist.
– Care tips: Water in the morning. Deadhead faded blooms to keep flowers coming. Avoid harsh chemicals that harm bees. Mulch lightly to nourish soil and reduce weeds.
– The payoff: More pollinators, steadier fruit set, and a richer garden look. You get constant movement, color, and scent each season.
– Quick tips: Plant tall blooms toward the back or along borders so short crops still get sun. Choose varieties that bloom at different times for a steady food source.
Next steps: Start small. Pick 3 to 5 flowering varieties. Plant them at the edge of beds today. Watch as colors bloom and bees arrive.
If you want to grow more in a small yard, square foot gardening can help. It keeps things simple and saves time. You get a tidy garden that’s easy to manage.
What square foot gardening is
The bed is split into tiny squares, each one foot by one foot. In each square you grow a different crop. This setup makes it easy to plant just what you need and to swap plants as the season changes.
Set up your grid
– Build a frame from affordable boards and lay it on the ground.
– Stretch string or use a light wire to mark every square.
– Use a mix of soil and compost in the bed. A well-drained blend helps roots grow fast.
Choosing crops for each square
Think about spacing and sun. Place small, fast growers in many squares—lettuce, spinach, radish, carrots, and herbs work well. Leave a few squares empty for flowering plants that attract good bugs. If you grow larger plants, give them a few squares or go vertical with supports.
Care and rotation
Rotate crops each season. This keeps soil healthy and reduces pests. Water evenly and mulch lightly to hold moisture. Label each square so you know what you planted where.
Kid-friendly ideas
Kids love the grid. It’s a game they can play with colors and labels. One square becomes a “fun salad,” another a “carrot corner.” It teaches planning and care in a friendly way.
Next steps: start with a 4-by-4 foot bed to test the system. You’ll see how neat, quick, and productive a small space can be.
With square foot gardening, you can maximize your harvest in just one square foot! It’s the perfect way to grow a variety of crops in a tidy, manageable space – ideal for any backyard vegetable garden design.
8. Square Foot Gardening
Editor’s Choice
🛍️
Seeding Square – Patented Seed and Seedling Spacer Tool for Bigger Harve…
Want a fruit and vegetable patch that boosts harvests and looks inviting? You can mix fruit and veg in one area to save space and add color.
Here is why a simple plan helps. Pick a sunny site. Sketch a map. Divide the patch into zones: strawberries, dwarf fruit trees, and your main vegetables.
Choose companion plants that help each other. For example, plant rhubarb near strawberries for a tasty pairing. Raspberries can share space with leafy greens if you space them well. Let tall crops stay on the north side so short plants get sun.
Create clear pathways to reach every bed. This keeps weeds down and makes picking easy. Use decorative edging like bricks or wood to mark zones and hold mulch in place.
Get the soil ready. Mix in compost. Add a thick mulch layer to conserve water. Install a drip irrigation line or soaker hoses for efficient watering.
Keep care simple. Water in the morning. Check for pests. Prune canes after fruiting. Harvest berries and veg as soon as they turn ripe.
With a fruit and vegetable patch, you gain flavor, color, and steady harvests. It’s easy to start and grows with your skills. Start small.
Raised beds with decorative borders turn a plain patch into a calm, tidy yard. You gain easy reach to the soil, clear lines, and a frame that makes colors pop.
Choose borders in stone, brick, or decorative wood. Stone feels cool to touch on hot days. Brick adds a warm glow at sunset. Wood borders smell earthy and stay sturdy for years. Borders define space and keep soil from creeping onto paths.
Design tips: Pick materials that match your house and fence. Think about a border that doubles as seating, built-in benches make weeding and chats easier. Leave a wide, clear path along the bed so you can move with a bucket and a trowel. Fill the beds with bright peppers, lettuce, tomatoes, and herbs. The greens and reds stand out against the dark soil and light border. Add a thin mulch cap to keep weeds down and give a neat finish.
Here is why this helps your garden: borders give you structure, cut maintenance, and a friendly look from the porch. This setup blends style with use and makes your yard feel like a small retreat for trying new veggies without a mess.
Next steps: plan your border color, pick one material, and sketch a quick layout.
11. Raised Bed with Decorative Borders
Editor’s Choice
🛍️
Land Guard Galvanized Raised Garden Bed Kit, Galvanized Planter Garden B…
Want a cherry tomato garden that adds color and stays easy for beginners? Start with a few bright varieties. Yellow, red, and purple cherry tomatoes look cheerful and grow in small spaces. They’re quick to fruit, so you see results fast.
Here is why this choice works for you. You get a pretty display and a fast harvest without a huge garden. You can grow them in beds, containers, or hanging baskets. They are forgiving if you are still learning the basics.
– Color choices Pick at least three colors. A mix of yellow, red, and purple creates a lively look from spring to fall.
– Support and space Use stakes or cages to keep plants upright. Add a trellis for a vertical touch that saves ground space. Tie new growth gently as it reaches the support.
– Sun and water Plant in a sunny spot. Water regularly so the soil stays evenly moist. Mulch helps keep moisture in and cuts down on weed work.
– Flavor and pest control Plant basil between tomatoes. It boosts aroma and may help ward off common pests.
– Layout ideas For a small bed, group colors in clusters or run a color row along a trellis. This makes care simple and harvests easy to reach.
Next steps for you: map your space, pick 3 color varieties, and set up supports this weekend. Then you can enjoy a colorful, easy tomato garden that delivers fresh fruit faster than you expect.
Natural stone paths can boost style and make your garden easier to use. You can walk right to the rows you need, grab herbs, or water without slipping on mud. Flat flagstones or tidy gravel give a simple, rustic vibe that pairs with lots of veggie beds.
Maintenance Tips: Set stones firmly with compacted sand or crushed stone. Check after heavy rain for moved stones and reset as needed. Edge the path with low-growing plants or thyme. A winding line feels natural and invites you to explore. Let herbs spill a little over the edge to soften the look.
Think about layout first. A curved path guides you through beds and reduces crowding. Use wide steps at busy spots to keep your feet safe. For wet areas, choose larger stones with a flat surface so you can dry your shoes before stepping into the bed.
Materials to consider:
– Flagstone or flat slate for a clean, sturdy feel
– Gravel with a weed barrier for quick setup
– Crushed stone for good drainage and a natural look
Next steps: plan, gather materials, and install in stages. With care, natural stone paths improve access and add long lasting charm to your backyard garden today too.
Want a bigger harvest even when nights turn cold? A greenhouse vegetable garden can help. It offers a warm, controlled space where you set the heat and humidity. You can grow tender veggies that need more time or frost protection. Start seeds early and push your harvest into the cooler months. Also plan for heat in winter and shade in summer. A simple thermometer helps you react quickly.
Design Ideas:
– Raised beds inside the greenhouse keep soil neat and make weeding easy.
– Shelves along the walls hold herbs and small plants, freeing floor space for bigger beds.
– Good ventilation with roof vents or small fans keeps air fresh and dampness down.
– A shade cloth helps on hot days so plants do not scorch.
– Drip irrigation gives even water with little waste.
With a greenhouse, you can harvest year-round. Here is why this helps beginners: you lower frost risk, protect seedlings, and learn on a small scale. Next steps: pick a sturdy frame that fits your yard, choose panels that suit your climate, and map crops by light and access. A little planning now pays off with steady, reliable yields.
15. Greenhouse Vegetable Garden
Editor’s Choice
🛍️
8×12 FT Greenhouse for Outdoors, Polycarbonate Greenhouse with Roof Vent…
If space is tight, you can still grow fruit. Train fruit trees to spread flat along a wall or fence. This espalier method saves space and makes a wall feel like a living book of leaves and fruit.
Choose dwarf fruit trees. Apples and pears fit well. Plums or figs work too if your climate supports them. Dwarf trees stay compact and still give you fresh harvests.
Design Tips:
– Install a sturdy trellis or frame. A metal cable system or a wooden lattice keeps branches from sagging.
– Train branches along vertical wires. Start with a main limb, then fan growth across the wall.
– Use soft ties to guide growth. Check yearly and adjust as the tree fills in.
– Give plenty of sun and good drainage. Aim for at least 6 hours of sun daily.
– Water deeply during dry spells. A slow soak is better than quick, light sprays.
– Prune lightly and regularly. In winter, trim to keep the fan shape and remove weak shoots.
Espalier takes a bit of care, but the payoff is clear: a neat wall of fruit you can reach from the yard or patio.
Common questions:
– Do I need a sunny wall? Yes, six hours of sun helps fruit form well.
– What if frost hits the tips? Protect new growth with light wrapping or plant away from cold pockets.
If you are new to this, start with one tree to test your wall. With steady care, you get a living piece of art that feeds you season after season.
16. Fruit Tree Espalier
Editor’s Choice
🛍️
American Plant Exchange Apple Tree ‘Semi Dwarf Pink Lady’ – Live Fruit-B…
Your raised bed can do more than hold soil. It can host a small team that helps each other. Companion planting in raised beds boosts yields and cuts pest problems. You can run a neat grid or mix plants for a lively look. Either way, you get a healthier, easier garden that beginners can handle.
– Layout options: Choose a grid for tidy rows or a mixed layout for a wilder, more natural feel. A clear plan makes care simple.
– Plant pairings: Marigolds planted among vegetables can deter many pests and brighten the bed. Place basil near tomatoes to help repel thrips and add flavor. Nasturtiums lure aphids away from greens.
– Height and space: Put tall plants at the back or center so short herbs and lettuce get light. Use trellises for vining beans or peas.
– Watering groups: Group plants that drink the same amount of water together. Mulch to keep soil even and chores simple.
– Maintenance tips: Rotate beds yearly to keep soils healthy. Keep pests out with early checks, removable mulch, and quick plant spacing adjustments.
With these steps, your companion raised beds become a smart, simple way to grow more and waste less. Start small and watch how it evolves.
17. Companion Raised Beds
Editor’s Choice
🛍️
Land Guard 8×4×2 ft Galvanized Raised Garden Bed Kit, Galvanized Planter…
Potato towers help you grow a big harvest in a small yard. You stack soil and straw inside a frame to make a tall, neat garden. The layers stay dark, so potatoes form underground and stay clean. With this setup you can lift more potatoes from a tiny space than you might expect.
What you need
– A frame or box that can stand tall, like a wire cage or sturdy wood
– Straw or mulch to layer between soil fills
– Rich garden soil or compost
– Seed potatoes or potato slips
– A watering can or hose for steady moisture
How it works
Build a tall frame and lay a base of soil. Add a layer of straw to keep the next potatoes shaded. Plant your slips near the top. As vines grow, you add more soil and straw. The potatoes grow in the dark, protected from light and heat. This setup uses vertical space and keeps your soil from spreading all over the ground.
Step-by-step
1) Place the frame where it will get sun most days. 2) Fill the bottom with soil, then add straw. 3) Plant seed potatoes near the top. 4) When vines reach two fists tall, add another soil-straw layer. 5) Repeat until you reach your preferred height and wait for the greens to mature.
Care and harvest
Water regularly and keep the bed evenly moist. Watch for good drainage so root rot stays away. Harvest when the tops fade and die back. Dismantle the tower and lift the potatoes out carefully. Store them in a cool, dark place.
Tips
– Build a strong frame so it won’t wobble with weight.
– Keep the upper layers dark to stop greening.
– Try rotating the tower to new soil spots each season.
If you want more space, you can build two towers side by side. This is a simple, practical way to add fresh potatoes to your meals.
18. Potato Tower Garden
Editor’s Choice
🛍️
Greenstalk Patented Large 5 Tier Vertical Garden Planter with Patented I…
Here is why a raised bed with built-in seating fits both your garden and your need for rest. It blends a sturdy growing space with a cozy spot to sit. You can enjoy your plants up close while you work or take a quick break.
Design tips
– Height matters. Sit comfortably without bending. Aim for about 16 to 18 inches of seat height and 28 to 36 inches of total bed height for a natural look.
– Materials should last. Use weather-resistant wood, fiber cement, metal, or high-quality composites. Seal wood to resist rain and sun.
– The wall becomes a bench. A flat top works as a seat and a shelf for pots, seed catalogs, or a cup of tea.
Comfort musts
– Add cushions made for outdoors. Pick fast-drying fabric. Keep cushions in a waterproof bag when not in use.
– Use screws and a smooth edge. No sharp corners. It keeps kids safe.
Practical setup
– Leave space to move. You should reach every bed without stepping on soil.
– Plan around irrigation. A drip line or soaker hose fits under the bench.
Next steps: pick a spot, measure, and sketch. Then choose materials and order cushions. With care, your garden becomes a place to tend and to linger.
– What is an easy herb wheel? It is a round bed split into wedge sections for herbs. Each slice holds a different plant. You can reach every leaf with a simple turn of your body.
– Why choose this circle garden? It uses a small space well. It keeps herbs neat and easy to pick. A simple center feature adds charm to your yard.
– Step by step to build it
1) Pick a size about 4 to 5 feet across. This is big enough to move around.
2) Add a border with stones or bricks. A clear edge keeps soil in place.
3) Fill with good soil and compost. Let roots breathe and grow.
4) Mark 6 to 8 equal wedges. You can draw them with chalk or string.
5) Plant taller herbs toward the back and shorter ones in front. This makes a neat, layered look.
6) Place a simple center feature, like a small pot, a birdbath, or a tiny fountain. It becomes a focal point you can admire.
– Herb plan ideas for each wedge Put kitchen staples in the wheel. Back row: rosemary and sage for tall growth. Middle rows: basil and oregano. Front row: thyme, chives, parsley, cilantro. This mix gives you easy access to flavors you use a lot.
– Care and harvest tips Water at the soil, not the leaves. Mulch to cut weeds and keep moisture. Prune every few weeks so plants stay full and tidy. Check for pests and pull them out by hand if needed.
– Common questions Can this fit in a small yard? Yes. A compact version works well near a sunny wall. Do I need irrigation? A drip line or soaker hose helps, but hand watering works too.
– Next steps Sketch your circle on paper, pick a sunny spot, gather stones, and lift the first shovel of soil. Plant and water the wheel this weekend. Fresh herbs will be ready sooner than you think.
20. Easy Herb Wheel
Editor’s Choice
🛍️
EasyFlex No-Dig Landscape Edging with Anchoring Spikes, 2.7 in Tall Deco…
You want a garden that keeps giving. A seasonal rotation plan helps you harvest more and keep soil healthy.
Here is why it works: cool weather crops shine in spring and fall. Warm weather crops fill the summer. Move plants between beds so the soil gets a rest and pests stay on the run.
Planning Tips: Use a simple chart to track what sits in each bed and when it will move. Group plants with similar needs so you can water and feed them together. This approach keeps chores clear and makes every bed useful all year.
Next steps:
– Map your beds on paper. Note sun, water needs, and paths.
– Pick cool-season crops for spring and fall, and warm-season crops for summer.
– Create a rotation plan. Decide which bed gets the next crop so you know what to plant each season.
– Start small. A 3-bed layout is perfect for beginners.
Example for a 3-bed setup:
– Bed 1: lettuce and peas in spring, tomatoes later.
– Bed 2: carrots in spring, beans in summer.
– Bed 3: greens in spring, peppers in summer.
Common questions:
– Do I need soil rest? Yes, give soil a break by rotating crops each season.
– How long before the same crop returns? Rotate to a different family if possible.
Try this in one bed this year and expand as you learn. Give it a try. It fits small yards.
Rotate your crops for a thriving garden! A seasonal rotation not only keeps your soil healthy but also maximizes your harvest. Remember, a little planning goes a long way in your backyard vegetable garden design!
21. Seasonal Rotation Garden
Editor’s Choice
🛍️
Garden Planner & Notebook: A 5-Year Garden Journal for Planning, Trackin…
Your yard hides in the shade, but you can still grow tasty vegetables. Start with crops that like dim light. With the right pick, you’ll enjoy greens all season.
– Spinach
– Lettuce
– Kale (baby leaves)
– Swiss chard
– Cilantro
– Parsley
– Chives
– Mint
These plants tolerate partial sun and stay flavorful. Look for spots where the light is dappled most of the day. A patch under a tree or along a fence can be productive, not gloomy.
Layout ideas:
– Use vertical supports. Trellises and lattices let greens climb and save ground for roots and herbs.
– Build a couple of raised beds near a warm wall. The warm surface helps a bit with light reflection.
– Create clear paths so you can reach every plant without stepping on soil.
Care tips:
– Water consistently. Shade slows growth, so keep soil evenly moist.
– Mulch well to lock in moisture and cut down on weeds.
– Harvest often. Early picking keeps leaves tender.
Common questions:
– Will it taste good in shade? Yes. Many greens stay crisp even with less sun.
– How much light do I need? Aim for a few hours of filtered sun daily.
Next steps:
– Test a shady corner for a half-day sun window.
– Choose 3 crops from the list.
– Set up a simple trellis and a small 4×4 bed.
22. Shade Vegetable Garden
Editor’s Choice
🛍️
Adorox 7.8ft Garden Arch Trellis for Climbing Plants, Metal Arch Frame, …
Your backyard fence sits at the edge of your yard and often goes unused. You can turn it into a living part of your garden.
Here is why this design works: it adds height without taking up yard space, and it brings you fresh air and scent as you work nearby.
Design Tips:
– Install sturdy supports along the fence top or posts so climbing plants can spread. Use wire, twine, or a small trellis.
– Let cucumbers or pole beans wander up and across the fence. Train them with gentle ties so they stay neat.
– Hang pots at eye level for easy harvest. Fill with herbs like basil, thyme, or mint for quick snips.
– Mix in flowering pots to add color and attract pollinators. This boosts blooms and brings life to the fence.
Next steps: map your fence, measure length, and choose plants that like your sun. Group pots in staggered rows to create depth. Water regularly, trim vines that creep too far, and switch in new herbs as seasons change.
This setup saves ground space, adds texture, and makes a plain fence a cozy, useful feature.
Start small with a short row of pots and a simple trellis. Over time you can add more pots and wire lines as you gain confidence.
It fits vertical gardening in small yards.
23. Decorated Fence Garden
Editor’s Choice
🛍️
5 Tier Vertical Raised Garden Bed Planter Box, Vertical Raised Bed with …
You want an easy, affordable way to grow vegetables. Straw bale gardening gives you a bed that’s ready to use. The bales drain well and keep roots warm when mornings are cool. Place them in a sunny spot, then soak them thoroughly. After a week of wetting and a light feeding, you can plant directly into the bale.
Growing Tips: Here is why straw bales work. Pick plants that thrive in straw beds. Squash, tomatoes, and peppers do well. Bales can also shape your garden as decorative borders or raised edges.
– Step 1: Set the bales on level ground in full sun. Stand them on the flat side with the cut ends up so you have a soft growing pocket.
– Step 2: Condition the bales. Water deeply each day and feed lightly for about 5 to 7 days.
– Step 3: Plant. Make a small hole in the bale, add a handful of soil, and tuck in a seedling or seeds. Gently pack the straw around the roots.
– Step 4: Care. Water in the morning. Check the top for dryness and keep the bale moist. Add mulch if you like to cut evaporation.
As the bales break down, they feed the soil beneath. You gain future soil, not just a harvest this season. It’s a smart option for beginners with a small yard.
Next steps: rotate crops in later seasons and try a second bale bed for herbs or greens.
24. Straw Bale Garden
Editor’s Choice
🛍️
GardenStraw, 3 cu ft (20 lbs) Pack of 1 – All-Natural Mulch for Gardens,…
If you want fresh greens fast and you only have a little space, microgreens are for you. These tiny plants still load the plate with flavor and nutrients. They work indoors or on a sunny balcony, so you can grow them almost anywhere.
Microgreens grow fast. Most varieties are ready to harvest in about 7 to 14 days after sprouting. They stay small but punchy in taste. Try radish, arugula, or basil microgreens for bold color and bright flavor.
What you grow
– Radish, arugula, and basil are popular starter choices.
– You can also experiment with broccoli, cilantro, or chives.
– Pick varieties that suit salads, sandwiches, or garnishes.
How to grow in four simple steps
– Use a shallow tray or container with a light layer of rich soil.
– Scatter seeds evenly and press them in gently; cover with a thin soil veil.
– Keep the soil damp and provide strong light. Put the tray on a sunny windowsill or under grow lights.
– Give your setup steady room temperature and 12 to 16 hours of light each day.
Harvest and use
– Clip greens with scissors when they reach 2 inches tall.
– Rinse lightly and dry before eating.
– Add to salads, sandwiches, wraps, or bowls for quick crunch and color.
– Store in the fridge for up to a week for maximum flavor.
Tips for success
– Start with clean trays and fresh seeds.
– Don’t let soil stay soggy; add water as needed.
– Label varieties so you can track what you planted and when it’s ready.
25. Microgreens Garden
Editor’s Choice
🛍️
Organic Seed Sprouting Jar Kit – 2 × 32 oz Wide-Mouth Mason Jars with St…
City life can make gardening feel tough. You want fresh veggies without a big yard. An urban farming patch lets you grow greens and small fruits right where you live. With sun, good soil, and smart planters, you can harvest tasty produce all season.
Layout Ideas:
– Use planters made from recycled items like old buckets, wooden crates, or fabric grow bags.
– Place containers where they catch the most sun; taller plants go in the back.
– Add a trellis or wire for climbing crops such as beans or cucumbers to save space.
– Create a small corner for a shared compost area with neighbors.
– Use simple watering tricks like self-watering pots or a drip line to save water.
What to plant:
– Start with easy greens—lettuce, spinach, and chard.
– Add quick roots like radishes and green onions.
– Include herbs for flavor and quick harvests.
– Try one tomato or pepper plant on a sunny balcony.
Next steps:
– Gather containers from around the home and test sun spots.
– Fill with light potting mix plus a bit of compost.
– Set a regular, morning watering habit and keep an eye on pests.
– Share harvests with neighbors or start a small swap club.
Want to tame rainwater and still grow your vegetables? A rain garden can help you do both.
A rain garden is a shallow bowl tucked into your yard. It catches runoff after a storm, lets water soak in, and filters soil as it drains. It cuts erosion, slows flooding, and gives birds, bees, and butterflies a small home.
Planning Tips:
– Pick a spot where water naturally runs or near a downspout so you catch the flow.
– Dig a shallow basin, 3–6 inches deep at the center, with a gentle rim.
– Use well draining soil. If your soil is heavy clay, mix in organic compost and a little sand so water moves through.
– Choose native, wet-tolerant plants that can also handle dry spells. Think iris, coneflowers, switchgrass, rushes, and goldenrod to feed pollinators.
– Mulch lightly to keep weeds down and to slow down water.
– Create a safe overflow path to a lawn bed or planted area so extra rain has a clear exit.
Next steps are simple. Sketch the shape, mark the edges, and set plants in small clusters. After a heavy rain, peek at the basin and pull out any debris. With a little care, your rain garden supports your vegetables and your local wildlife.
27. Rain Garden Design
Editor’s Choice
🛍️
Rain Bird GARDENKIT Drip Irrigation Raised Bed Garden Watering Kit
Growing a lot of veggies in a small yard is tough. A vegetable spiral garden can change that. It packs many plants into a tight space and still looks great.
How it works: You form a spiral bed with stones. The higher parts stay dry, which helps herbs and sun lovers. The lower pockets stay moist, perfect for leafy greens. The center catches sun and warms the soil a bit.
Design Tips: Build with sturdy stones that hold shape. Fill the bed with rich soil and compost. Mulch the surface to keep moisture even. The spiral acts as a natural centerpiece in your yard.
What to know before you start: Pick a sunny spot. Keep the spiral about 3 to 4 feet across so you can reach every plant.
Step-by-step setup:
– Place a circular outline with stones.
– Stack stones to form the spiral walls.
– Fill with a mix of topsoil and compost.
– Add mulch and give it a slow, even watering plan.
Planting ideas:
– Top and outer edges: thyme, oregano, basil.
– Middle and bottom pockets: lettuce, spinach, kale.
– Center: radish or cilantro.
Care tips:
– Water in the morning. Check soil moisture weekly.
– Harvest often to stay productive.
– Watch for pests and act early.
28. Vegetable Spiral Garden
Editor’s Choice
🛍️
Back to the Roots 100% Organic Potting Mix (Value 12 Quart) | Premium Bl…
You want a border that looks full of life and still gives you veggies. A mixed borders garden lets you plant vegetables among blossoms. You get color and fresh food in one view. The flowers lure pollinators, so tiny helpers zip from bloom to harvest with you.
Suggestions: Pick flowering plants that fit your vegetables. For example, try zinnias with tomatoes or marigolds with peppers. Make sure their light and water needs match. Space by height: tall blooms at the back, mid-size plants in the middle, and small edging flowers in front. This setup keeps the bed easy to care for and visually interesting.
How to set it up: Start with a sunny border that receives 6 to 8 hours of sun a day. Group plants that drink or dry out at similar rates. Use simple paths so you can reach veggies without stepping on the flowers. Add a thin mulch layer to keep weeds down and soil cool.
Care and tips: Water with drip lines for even moisture. Feed with a light, steady schedule rather than heavy feeds. Check soil often and pull any weeds quickly. Mulch helps protect roots and reduces watering needs.
What you gain: You enjoy a lively space that draws bees and butterflies while you pick tomatoes, peppers, and herbs. It’s practical, easy to manage, and kind to the garden bed’s rhythm—and you’ll see a steady harvest with a touch of beauty.
29. Mixed Borders Garden
Editor’s Choice
🛍️
Rain Bird DRIPKITBAG Drip Irrigation Repair and Expansion Kit
Want a garden that welcomes wildlife and helps your vegetables grow? A wildlife-friendly yard can do both. You get better pollination, fewer pests, and a calm, natural space to enjoy. You will see more color and hear more birds.
– Smart plant choices: Pick native species that fit your climate. Include flowering perennials and shrubs that bloom through spring, summer, and fall. A mix draws bees, butterflies, and birds. This makes your yard feel alive.
– Water and homes: A shallow birdbath, a small pond, or a dish invites visits. Refresh the water daily so it stays clean. Add a mud patch for frogs and toads. Mulch the soil to keep it cool and moist.
– Habitats in the yard: Create spaces that shelter wildlife. Dense shrubs give birds safe roosts. A nest box or two helps songbirds raise young.
– Garden layout: Three layers bring life. Canopy trees, mid-height shrubs, and groundcover plants keep the space lively. Leave some open ground for seeds and insect life. Let native grasses drift through borders.
– Care and safety: Use natural compost and avoid harsh chemicals. Let some pests stay if they do not harm your crops. You gain balance, not perfection. Your yard stays alive all year.
– First steps for beginners: Choose three easy native plants. Add a birdbath or shallow dish. Place rock seating near a planting bed to enjoy the scene.
Next steps: observe visitors, adjust plant choices, and enjoy a busy yard.
30. Wildlife-Friendly Garden
Editor’s Choice
🛍️
Survival Garden Seeds – New England Aster Seeds for Planting | Native Pu…
Transforming your backyard into a vegetable garden can be a rewarding experience, allowing you to grow fresh produce right at home.
With these 30 stunning designs, there’s something for everyone, whether you’re a seasoned gardener or just starting out.
Get inspired and start planning your perfect garden layout today—your future self will thank you for all the delicious meals to come!
Note: We aim to provide accurate product links, but some may occasionally expire or become unavailable. If this happens, please search directly on Amazon for the product or a suitable alternative.
This post contains Amazon affiliate links, meaning I may earn a small commission if you purchase through my links, at no extra cost to you.
Frequently Asked Questions
What are the easiest backyard vegetable garden designs for beginners?
If you’re just starting out, consider designs like the Classic Raised Bed Garden or Container Gardening Delight. These options are user-friendly and help you manage your plants easily while maximizing your harvest. Raised beds are particularly great for keeping soil contained and making it easier to access your veggies!
For those with limited space, container gardening allows you to grow fresh produce on patios or balconies, making it both practical and beautiful.
How can I make the most of a small backyard for vegetable gardening?
Don’t worry if your yard is on the smaller side! You can implement designs like the Vertical Garden Oasis or Vegetable Spiral Garden. These layouts allow you to grow upwards or pack more plants into a small area, ensuring you get a bountiful harvest without needing a large space.
Additionally, using square foot gardening techniques can help you maximize your gardening space efficiently!
What are some practical tips for maintaining a raised bed vegetable garden?
Maintaining a raised bed garden is straightforward! Ensure your beds are filled with high-quality soil and consider adding compost to enrich the nutrients. Water your plants regularly, especially during dry spells, and use mulch to help retain moisture.
Also, don’t forget about companion planting! This technique involves growing different crops together to enhance growth and deter pests, making your garden more productive.
Can I incorporate herbs into my backyard vegetable garden design?
Absolutely! Incorporating herbs is a fantastic way to enhance your backyard vegetable garden. You can create a dedicated Herb Spiral Garden or even plant herbs like basil and rosemary among your vegetables. These not only add flavor to your meals but also attract beneficial pollinators and deter pests, creating a healthier garden environment.
Plus, having fresh herbs on hand is a delightful perk for any home cook!
What should I consider when choosing a layout for my vegetable garden?
When selecting a layout for your backyard vegetable garden, consider factors like sunlight, space, and accessibility. Most vegetables thrive in full sun, so pick a spot that gets at least 6-8 hours of sunlight daily.
Think about using designs like the Sunken Vegetable Garden if you deal with wind or the Mixed Borders Garden if you want a blend of aesthetics and functionality. Plan for easy access to water and pathways to make your gardening experience enjoyable and efficient!
If your old faucet leaks, looks tired, or sprays water everywhere, you know the pain. I put this together because a great kitchen faucet can change how your space feels and works. In 2025, homeowners want things that look clean and perform without a fuss. You want something that makes daily chores easier and lasts through busy weeks. So I pulled together the latest kitchen faucets that look good, help you save water, and stand up to everyday use.
Who is this for? If you cook, host, or simply spend a lot of time at the sink, this is for you. If you care about small details that make tasks smoother, you will like these picks. Homeowners, renters, and designers alike can use these ideas to upgrade a kitchen, a bar area, or a laundry sink.
What you’ll get? Here are eight options to consider, with notes on finish, material, and how they feel in real life. You will see finishes like matte black, brushed nickel, and chrome. Plus materials such as stainless steel and brass. I also point out water flow, faucet height, and how easy the install is. There are tips to keep the finish nice and to check compatibility with a filtered water line.
You might be curious about the big one, number three. You may not believe how its tall arc and flexible spray make big pots easy to wash. It pairs a clean look with a smart reach that slides over your sink edge. You will thank its design the first time you rinse a pan full of pasta.
These picks also come with practical how-tos. When you shop, ask about size fit for your sink and clearance for a pot. Decide if a pull-down or pull-out spray works best for your space. Look for a smooth cartridge, sturdy valve, and a leak-free seal in the handle.
Ready to dive in? This post helps you compare models, plan a quick upgrade, and choose a faucet that keeps your kitchen easy to use. It covers styles, from classic to contemporary, and it explains finishes and installation basics. You’ll have a clear path to pick the right faucet within your budget and your space.
Are you trying to spice up a dull kitchen without a full remodel? Bold colors on a faucet can do that job. In 2025, color is a simple way to make your space feel warmer and more you. A bright faucet can become the centerpiece, while still fitting a practical, everyday kitchen. Here is why color helps and how to pick the right one for your space.
– Color family: Start with the mood you want. Warm tones like sunny yellow, coral, or a deep red feel friendly and lively. Cool tones like navy, teal, or midnight blue add a calm sense of drama. Test a swatch under your kitchen light at different times of day. See if you still like it when morning sun hits the faucet and again when lights are on.
– Plan color coordination: Think of the faucet as part of a larger color plan. Pair it with white cabinets for a cheerful look, or with gray counters for a modern vibe. If you choose a bold blue faucet, balance it with neutral surroundings so the color shines without shouting. A good rule is to keep one strong color and mix in quiet neutrals.
– Finish and material choices: Durable finishes stay bright longer. Matte finishes hide fingerprints better, but a gloss finish can feel crisp and clean. Look for powder-coated or ceramic coatings that resist chipping. For the functional parts, check that the finish can handle soap, water, and heat without fading.
– Test before you commit: Bring home small samples or use temporary decals to visualize the look. Place them on the sink edge or near the faucet area. Move them around the kitchen so you see how lighting changes the color. Ask a friend or family member for a quick second opinion.
– Care and maintenance: Some colors show water spots and fingerprints more than others. Dark blues and greens hide marks better than light yellows. Clean with mild soap and a soft cloth. Avoid abrasive pads or harsh cleaners that can dull the finish. Regular quick wipe-down keeps the shine.
– Make it a focal point safely: A bright faucet should feel intentional. Pair it with simple hardware and a clean backsplash. If you love color, let the faucet lead the look, not the other way around. This keeps your kitchen cohesive while still feeling energized.
Next steps: decide on a color family, see how it plays with your cabinets, then test a real sample. If you love what you see under both daylight and evening light, you’ve found your 2025 statement piece.
1. Bold Colors That Pop
Editor’s Choice
🛍️
Kitchen Faucet, Commercial Kitchen Sink Faucets with Pull Down Sprayer, …
You want a kitchen that looks calm and current. A sleek faucet helps you get there without clutter. In 2025, simple lines and quiet curves still rule. The right faucet can make your counters feel larger and your sink feel dressed up, without stealing the show.
Key elements of sleek kitchen faucets
– Simple shapes Choose faucets with clean lines and a slim silhouette. Geometric forms give a modern vibe without overpowering the space.
– Integrated function Look for features that stay out of sight when you don’t use them. A pull-down spray head should tuck away neatly and stay easy to reach.
– Metal finishes Finishes set the mood. Polished chrome adds shine for a bright, classic look. Matte black makes a bold statement. Brushed nickel blends with many color schemes and resists fingerprints.
– Height and reach The spout should clear your sink and reach over all bowls. A taller arc helps when you fill pots or wash large pans.
– Installation options Check if the faucet fits a single hole or multiple holes in your deck. Make sure there’s enough clearance under the sink for hoses and mounting hardware.
Here is why these choices matter. A sleek faucet changes how you move at the sink. It reduces fuss and keeps your countertop looking clean and calm. You get a space that feels thoughtful every time you cook.
Next steps to pick the right look
– Measure your sink and counter space. Note how much room you have for a tall spout and a wide spray head.
– Decide on a finish that matches your hardware. If your cabinet handles are warm toned, brushed nickel or warm brass can tie everything together.
– Check the pull-down mechanism. Make sure the spray head feels smooth and the magnet dock holds it in place.
– Compare hole options. If you have three holes, you can still use a single lever faucet with a deck plate. If you have one hole, look for a compact model with a clean, single-plate design.
Practical tips for a long lasting sleek look
– Clean regularly with a mild soap and soft cloth. Avoid harsh cleaners that could scratch the finish.
– Wipe down fingerprints after use. Matte finishes show less, but a quick wipe keeps them hidden.
– Check the hose for kinks. A bent hose can slow spray and make daily chores feel clumsy.
– Test water pressure and spray patterns every few months. A steady spray helps you save time and keep dishes clean.
If you want a kitchen that feels modern yet welcoming, start with a faucet that speaks softly through its design. The right choice blends form with function, helping you enjoy the space more every day.
Next steps for your project
– Sketch your layout and note the finishes you already own. This helps you choose a faucet that fits your room.
– Visit showrooms or browse online to compare shallow and deep sink styles. Look for real-life photos that show how the faucet looks with your counters.
– Plan a quick install day. Having the right tools and a friend to help speeds up the project.
With the right sleek faucet, your kitchen gains a clean, modern feel that lasts. You’ll notice the difference the moment you turn on the tap.
Simplicity is the ultimate sophistication. In 2025, let sleek kitchen faucets with clean lines and quiet curves elevate your space, creating a calm oasis without overwhelming your decor.
2. Sleek and Modern Designs
Editor’s Choice
🛍️
FORIOUS Kitchen Faucets with Pull Down Sprayer, Brushed Nickel, High Arc…
Feeling stuck with a kitchen faucet that looks dated but still feels clunky? Vintage charm might be the fix you need. In 2025, classic designs are back, but with better finishes and easy-to-use parts. You get the warm look you want and the dependable function you need.
Here is why this approach helps your kitchen. It adds character without making the space feel old. It pairs well with wood cabinets, stone counters, and creamy tiles. And it adapts to daily tasks, not just show. You can enjoy a faucet that looks timeless and works smoothly.
What to look for
– Bronze and Brass Finishes finish adds warmth and depth. The tones naturally soften light and hide minor splashes. They also patina nicely over time, giving your faucet a story.
– Curved Spouts feel classic and stay practical. The arc helps you reach pots, pans, and the sink corners. You’ll notice less splashing and more reach for big cleanups.
– Decorative Handles bring personality. Look for subtle engravings, unique knobs, or carved details that echo a vintage theme.
Practical tips for choosing and using a vintage-inspired faucet
– Match with your sink style. A farmhouse or apron-front sink often looks best with a curved spout and warm metal. If your sink is sleek, add small vintage touches rather than a full retro look.
– Check the valve type. Ceramic disc valves are reliable and quiet. They resist drips and wear. This keeps the charm without extra fuss.
– Think about maintenance. Bronze and brass finishes need a light touch of wax or polish sometimes. Clean with a soft cloth and mild soap. Avoid harsh cleaners that can dull the finish.
– Pick a finish that fits your room. If your cabinets are dark, brass can light up the space. If the room is bright, a deeper bronze can add richness without overpowering.
Style and space ideas you can actually use
– Pair a vintage faucet with a white or cream tile splash. The contrast makes the metal stand out in a friendly way.
– Use open shelving nearby to show off a set of copper or brass pots. It reinforces the old-time vibe.
– Add a brass sprayer or a small, decorative handle on the side for balance. It keeps the look cohesive and useful.
Limitations to consider
– The look can dominate a small kitchen. In tight spaces, scale the faucet to the sink size.
– Finishes may show wear differently. Bronze and brass patina over time. If you want a pristine shine forever, consider a modern finish that mimics antique tones.
Next steps
– Measure your sink area and check clearances before buying.
– Visit a showroom or browse online with filters for “bronze,” “brass,” and “vintage-inspired.”
– Read care guides and pick a model with reliable parts and easy replacement options.
3. Vintage-Inspired Charm
Editor’s Choice
🛍️
FORIOUS Vintage Kitchen Faucets with Pull Down Sprayer, Oil Rubbed Brown…
You want a kitchen that runs smooth and looks smart. A smart faucet can help you do that. It nows you by voice or by touch, and it can be watched from your phone.
Here is why smart faucets fit 2025 kitchens:
– Convenience: Speak a command or wave your hand. Water pours exactly as you want, without touching handles.
– Water savings: The faucet limits flow when you don’t need a full stream. That saves water and lowers waste.
– Control from your phone: Some models connect to Wi‑Fi. You set favorites, run scenes, and check for drips from anywhere.
What to consider when you pick a smart faucet
– Mounting and style: Look for a model that fits your sink. Options include single-hole and widespread deck-mount designs. Pick a finish that matches your taps and hardware.
– Power and connectivity: Most need a small power source. Some work with batteries, others plug in. They may require a Wi‑Fi link to use phone features.
– Smart home compatibility: Choose models that play well with your existing setup, like Google Home or Amazon Alexa. Find one that can run simple routines you already use in meals and cleanup.
– Flow and water feel: Check how much water comes out in a push or a timer. Typical kitchen faucets run around 1.5 to 2.2 gpm. Pick a model that offers a steady, comfortable stream for washing produce or filling pots.
– Finish and durability: Choose solid finishes that hide fingerprints and resist water spots. Stainless, matte black, or brushed bronze stay cleaner between cleans.
Getting started with your first smart faucet
– Measure the space under your sink so the valve will fit. If you’re unsure, ask a pro to check the plumbing.
– Decide which control you want most: voice, touchless, or a mix. Check what the app can do for you.
– Pick a finish that matches your faucet set and the style of the room. A cohesive look matters.
– Set up the app, connect to Wi‑Fi, and try a few presets. Create a simple scene for busy cooking moments.
Care, privacy, and limits
– Keep firmware up to date. Updates fix bugs and improve safety.
– Use strong passwords and limit apps to devices you trust.
– Remember smart faucets need power and a reliable network. If Wi‑Fi drops, some features won’t work.
Bottom line: a smart faucet adds easy control and a tidy feel to your kitchen. It isn’t a magic fix, but it helps you use water thoughtfully and makes everyday tasks a touch smoother.
If you want a kitchen that saves water without losing style, eco-friendly faucets fit the bill. They use recycled or responsibly chosen parts and help you cut waste every day.
– Recycled Content: Look for taps made from recycled metals or plastics. You’ll feel good knowing a part of the old world is now helping your home.
– Water-Saving Technology: Many green options use aerators that lower the flow but keep a strong, steady spray. You get clean dishes and a full sink without wasting water.
– Durability: Strong metals and solid ceramics often back these taps. They tend to last longer, which is kind to your wallet and the planet.
These faucets do more than cut water use. They fit a green-minded kitchen and still give you good looks and easy use.
Here is why you should consider them now. In 2025, more homes want low-impact choices that don’t skimp on function. You can do both with a faucet that’s built to last and kinder to the planet.
Let’s break it down with practical steps:
– Materials matter: Choose faucets with recycled content in the body or cartridge. Brass and stainless steel keep shine and strength longer.
– Flow and labels: Check the flow rate. A good target is 1.5 gallons per minute or less. The WaterSense label is a quick tell that the faucet meets lower flow standards.
– Finish and care: Pick a finish that hides fingerprints and is easy to wipe clean. Matte black, brushed nickel, and chrome finishings handle daily use well.
– Certifications: Look for NSF/ANSI and WaterSense marks. They show the faucet meets water safety and efficiency norms.
– Value over time: The upfront cost might be a bit higher, but you save on water bills and repairs. A well-made eco-friendly faucet pays you back.
Next steps for you at home:
– Compare two to three models that use recycled content and carry WaterSense. Read the label and the tiny print about flow rates.
– Check your sink setup. Make sure mounting holes and spacers fit the new faucet. It should be a simple swap for most homes.
– Plan installation. Shut off the water, remove the old faucet, install with plumber’s tape, and test for leaks. A basic DIY swap can work if you follow the steps.
– Maintain the aerator. Clean or replace it every 6 to 12 months. A clean aerator keeps the flow steady and saves more water.
– Pair with a green kitchen plan. Fix drips fast, run full loads, and choose low-flow appliances to keep your savings steady.
If you want a look that matters, pick a faucet that uses recycled content and a smart airflow. You’ll enjoy a kitchen that feels fresh, works well, and uses less water every day.
5. Eco-Friendly Materials
Editor’s Choice
🛍️
FORIOUS Kitchen Faucets with Pull Down Sprayer, Brushed Nickel, High Arc…
You want a kitchen that feels bold without feeling cold. The industrial look uses metal tones and clear mechanical lines. An industrial faucet with exposed pipes and thick handles can grab the room’s attention. Here is why it works in busy urban kitchens: the metal texture adds depth, while strong shapes anchor your counter area. The sound of water against metal can also give a satisfying feel as you work.
– Metallic finishes: copper, matte black, and brushed nickel give real depth to the space.
– Solid builds: look for a faucet that feels heavy in the hand and sits firm on the sink.
– Open spaces: industrial kitchens often use wide layouts and open shelves, so your faucet can be a focal point.
Here is why this style fits 2025 trends. It blends well with concrete counters, worn wood, and steel accents. It ages well with daily use and only needs simple care.
Next, how to pick and place your industrial faucet. Here is the guide in plain steps.
– Fit and flow: check the neck reach and the height of the spout so water lands inside the sink.
– Valve style: a single lever is quick to adjust; two handles offer a classic look but require a steady hand.
– Mounting: deck mounted faucets fit most sinks; wall mounted adds more of the factory feel.
How to put it into your kitchen right away. Try these practical steps.
– Start with a bold finish like matte black to ground the room, then add lighter metal touches elsewhere.
– Match the faucet finish with hardware, lights, and appliance trim for a cohesive look.
– If you have open shelves, keep the counter clear around the sink so the faucet stands out.
Styling tips to keep the space inviting. Pair metal with warmth.
– Add wood elements in the counter edge or nearby furniture to soften the metal.
– Use warm white lighting to highlight the faucet without making the room glare.
– Let natural textures, such as stone or brick, show a bit around the area.
Limitations to think about. A colder metal theme can feel stark if overused. Soften it with wood, soft towels, and a rug by the sink.
Next steps for you. Measure your sink and cabinet height, compare three brands, and read the spout reach specs before buying.
6. Industrial Aesthetic
Editor’s Choice
🛍️
FORIOUS Black Kitchen Faucet with Pull Down Sprayer, High Arc Single Han…
If you want more than one function at your sink, a combination faucet can be a smart upgrade. This type blends a traditional faucet with a built-in sprayer or a soap dispenser. The goal is simple: do more with less space.
– Versatility: You can switch between stream and spray without extra gadgets. It makes prep and cleanup quicker.
– Space-saving design: One faucet, fewer gadgets. Your counter looks cleaner and feels calmer.
– Easy installation: Most fit standard pipes. You don’t need major kitchen renos to get started.
Here is why this idea matters in 2025. A single fixture can handle many tasks so your workspace stays tidy. You get a clean look, less clutter, and fewer holes in the countertop to collect dust.
– Streamline tasks: Mix pasta water, rinse produce, and wash pots with one faucet.
– Better organization: An integrated soap dispenser reduces bottle clutter on the deck.
– Better cleaning flow: The pull-down or pull-out sprayer reaches corners and sinks deeply, helping wipe away stubborn bits.
What to look for when choosing a combination faucet. Pick options that fit how you cook and clean.
– Finish and material: Look for stainless steel, brass, chrome, or matte black. A solid brass core lasts longer and resists leaks.
– Spray modes: A smooth stream for washing and a strong spray for scrubbing. Some models offer a pause button to save water.
– Integrated soap dispenser: Handy for dish soap or hand soap. Check how easy it is to refill.
– Spout reach and height: A high arc helps you fill large pots. Make sure it has room under upper cabinets.
– Compatibility: Check your under-sink valves and mounting holes. Pick a model that fits standard plumbing.
Styles and setups you’ll see. The common choices fit different kitchens.
– Pull-down with hose comfort: The spray head pulls toward you and coils back easily.
– Pull-out options: A shorter hose that stays in place for small kitchens.
– With or without a side soap dispenser: Pick what fits your counter layout.
Practical tips to get it right. Measure before you buy. Check cabinet height to avoid clashes. Read the box for installation steps. Treat mineral buildup with a gentle cleaner and a soft cloth.
Limitations to keep in mind. A combo faucet can cost more than a basic model. It may take longer to service if the sprayer or dispenser leaks. Probe your needs and set a budget.
Next steps. Decide which functions you want most. Choose a finish you enjoy. Plan the layout and you’ll gain both form and function.
You want a kitchen that feels alive and true to you. 2025 brings faucets that look like art and still work every day. You can have a piece that catches the eye without slowing you down. This section shows how to use artistic faucets in real life.
– Bold Shapes: Choose sculptural forms that stand out. Look for tall curves, sharp angles, or unusual spouts. Check that the height and reach fit your sink and your height. A single, bold shape can become the room’s center.
– Mix Materials: Blend metal with wood, glass, or ceramic to create texture. A brass body with a wooden handle gives warmth. Glass accents can add a splash of color. Make sure the parts seal well and won’t wear quickly.
– Personalize: Pick a finish that matches your space. Matte black or brushed brass are common choices. You can echo tile colors or cabinet tones. The goal is to find a faucet that feels like yours, not a generic piece.
– Practical Picks: Not every art piece fits every kitchen. Look for a model that cleans easily and resists fingerprints. Choose finishes that are simple to wipe. Consider how hard it is to reach the aerator for regular cleaning.
Here is how to put artistic faucets into your plan. First, measure the area around your sink. Note the backsplash height and any tight spots. Then pick a style that fits your daily work. A taller spout helps with pots and tall glasses. A longer arc works for wide sinks.
Second, set a budget. Artistic pieces can cost more, but you can find mid range options with strong finishes. Read reviews about finish durability and leak resistance. A good warranty adds peace of mind.
Third, think about your sink setup. If you have a double sink, you may want two matching or complementary designs. If you have a prep sink, consider a second faucet with a different style for variety.
Maintenance matters. Clean with a soft cloth and mild soap. Avoid harsh cleaners that dull the finish. Check the aerator from time to time and replace worn parts early.
What about daily life? You get a faucet that acts like a work of art and stays simple to use. It should feel easy to turn on, reach, and rinse. It should keep its look after busy days and quick cleanups.
Next steps you can take today. – Measure your space and note any clearance issues. – Compare finishes that fit your color scheme. – Visit showrooms or browse online with care, and ask for swatches. – Check warranty terms and expected care needs. – Pick a model you can test with your sink before buying.
If you use these tips, you will choose an artistic faucet that elevates your kitchen without complicating your routine. You get both style and steadiness, day after day.
8. Artistic Statements
Editor’s Choice
🛍️
Antique High Arc Classical Single Handle Spring Kitchen Faucet with Pull…
Are you after a cleaner, more convenient kitchen? A touchless faucet can help. In 2025 the tech behind these faucets is more reliable and easier to use. You simply wave your hand or a pot to start the flow. No more sticky handles and splashes on the faucet.
Key benefits of touchless faucets
– Hygiene: You cut down on germs by not touching the spout. This is handy after handling raw meat or baking with busy hands.
– Convenience: When your hands are full or wet, a wave starts the water. It is fast and simple.
– Control: Many models let you adjust temperature and flow. Some have preset temps, others use a small lever for quick changes.
If you want a practical, stylish upgrade, a hands free faucet is a solid choice.
Here is how it can change your routine
– You rinse veggies while you hold a bowl in one hand. A quick wave starts the faucet, and you save time.
– You can fill a pot under the faucet without dripping water across the counter. The flow stops as soon as you pull away.
– Kids can wash hands easily. No more turning the handle with messy fingers.
How to pick the right touchless faucet
– Sensor type: Infrared and capacitive sensors are common. Look for a sensor that reacts quickly and stays off when you don’t move.
– Sensor range: A good model senses within a comfortable distance. Too close and it turns on by mistake; too far and you wait.
– Finish and style: Choose a finish that matches your sink and hardware. Stainless steel, brushed nickel, and matte black are popular. Pick a finish that hides fingerprints too.
– Mounting and fit: Check if the faucet mounts in a single hole or three. Confirm your sink has the right connections for hot and cold lines.
– Power option: Some faucets run on batteries. Others plug in. Make sure the power source is easy to access and replace.
– Water sense: Look for a low flow rate option for savings. Many models let you set eco-friendly defaults.
Tips for installation and care
– Read the installation guide before buying. A compatible setup saves time.
– Keep the sensor clean. Wipe with a soft cloth. Avoid harsh cleaners that can dull the sensor.
– Check batteries regularly. Replace when you notice a delayed response.
– Protect the sensor from steam and direct splashes. A little space around the spout helps.
What to expect in everyday use
– Most families notice easier cleanup and less cross contamination. The faucet feels responsive and easy to use.
– A few models offer clever features like a pause function to stop the water when you move away.
– If you live in a bright kitchen, choose a model with a sensor that isn’t tripped by sunlight.
Next steps
– Compare a few finishes and mounting styles. Look for a model that fits your sink size.
– Check reviews for sensor reliability and battery life. A small investment now pays off with long-term ease.
– Plan a quick installation day. A touchless faucet can refresh your entire kitchen routine.
If you want to upgrade your kitchen without a full redo, start with the faucet finish. In 2025, finishes go beyond shiny chrome. You can choose textures and colored coatings that give depth and character. The right finish can pull together cabinets, lighting, and counters, making the whole space feel busier with life.
Here are several strong options to consider:
– Matte Black finishes. They read clean and modern. They hide smudges and water spots well. This is a versatile choice that fits many styles, from industrial to farmhouse.
– Brushed Gold finishes. They bring a warm glow without looking too flashy. Brushed gold pairs nicely with light woods, white cabinets, and cool gray counters.
– Textured Finishes. Think ridges, hammered surfaces, or pebbled textures. These add visible depth and catch light in different ways. They help a plain space feel more curated.
– Colored Coatings. Deep greens, navy blues, copper tones and similar hues are coming into play. A color on the faucet can become a focal point or a quiet accent, depending on how you place it.
– Two-Tone or Dual Finishes. Use one finish on the body and a different finish on the handle or spout. This adds contrast and shows you planned the look.
Here is why these finishes can help your kitchen. They add texture and warmth. They make your faucet stand out without shouting. They also give you more ways to tie the faucet to your cabinets, backsplash, and flooring.
How to pick the right finish for your space:
– Match your style. If your kitchen leans modern, Matte Black or a cool gray can stay in step. If you love warm tones, Brushed Gold or copper shades work nicely.
– Check lighting and color. In bright rooms, a lighter finish can look crisp. In rooms with wood tones, a warm finish often feels cohesive.
– Think about wear and care. Matte finishes hide fingerprints better than shiny metals. Textured surfaces can resist showing minor wear, but they may need a bit more wipe-down to keep the texture looking true.
– Consider maintenance. Use a soft cloth and mild soap to clean. Avoid harsh abrasives and strong cleaners that can dull coatings.
Practical tips you can use today:
– If you have white or light cabinets, a darker finish like Matte Black creates a striking contrast. If your counters are warm stone, Brushed Gold or copper tones soften the look.
– For small kitchens, a bold finish on the faucet can act as a visual anchor. It gives the eye somewhere to focus and can make the room feel complete.
– Look for durability. High-quality coatings stand up to daily use and cleaning. Check the warranty and ask how the finish holds up with water and cleaners.
Common questions you might have:
– Will the finish wear down? Good coatings hold up with regular care. Look for names and warranties that cover finish wear.
– Can I mix finishes with my hardware? Yes. A careful mix can create depth, as long as you keep a common thread, like a metal family or a shared undertone.
Limitations to keep in mind:
– Some textures can show mineral buildup if you have very hard water. Wipe frequently and rinse well after cleaners.
– Very bold colors may go out of fashion faster than neutral tones. If you want staying power, balance color with classic shapes and clean lines.
Next steps for you:
– Measure your sink and determine whether your new faucet needs a deck mount or a wall-mount style.
– Pick a finish that complements your cabinets first, then test the look with a sample if possible.
– Check the finish warranty and care guidelines before buying.
– Budget for quality coatings. A good finish lasts longer and looks better over time.
With the right finish, your faucet becomes more than a tool. It becomes a design cue that pulls the room together. Explore matte, warm tones, textures, and color in 2025 to find the exact look you want for your kitchen.
10. Unique Finishes
Editor’s Choice
🛍️
FORIOUS Black Kitchen Faucet with Pull Down Sprayer, High Arc Single Han…
If your kitchen is all one open space, you need a faucet that fits the room, not one that sticks out. A versatile faucet helps the sink sit in the flow, from the island to the dining area. It should look right in the kitchen and also in adjacent rooms. It should feel easy to use while keeping your sightlines clear. Here is how to pick one that works.
– Heightened Reach: A pull-down or pull-out faucet reaches large pots and pans with less splash. You can rinse and fill without moving around the sink.
– Versatile Design: Choose a finish and style that match both the kitchen and the nearby rooms. A single, calm look ties the space together.
– Practical Features: Look for a spring-loaded spout or magnetic docking. They help you snap the head back into place fast and keep the area tidy.
A faucet that fits an open-concept layout gives the room a unified look and adds real value in daily use. Next, decide how it will live with the rest of your space.
Here is a simple guide to picking the right faucet for your open floor plan. First, pick a finish that repeats in lighting fixtures or cabinet pulls. If your rooms tilt warm, consider brass or bronze tones. If they lean cool, brushed nickel or stainless steel can blend nicely. In open layouts, a mid-tone finish can act as a quiet anchor without shouting for attention. Second, measure your sink and cabinet height. You want enough clearance to move big items without hitting the cabinet under the sink. Third, think about placement. If you have a long run of counters, a faucet with a flexible hose works well on the island and near the window.
To get the most from your choice, consider how it feels day to day. You will wash large pots after family meals and wipe down the counter around a hot stove. A good open-concept faucet keeps the workflow smooth and the look cohesive. And yes, it should be easy to install and simple to care for.
Next steps: visit showrooms or online galleries with a clear idea of your space. Bring home samples or make a quick mock-up with tape to see how a faucet will appear in real life. If you test a few options in your head, you will pick the one that truly belongs in your open kitchen.
11. Open-Concept Designs
Editor’s Choice
🛍️
FORIOUS Kitchen Faucets with Pull Down Sprayer, Brushed Nickel, High Arc…
Are you chasing clean water right from your faucet? A built-in filtration faucet can deliver just that in 2025. It puts filtered water at your fingertips without extra gadgets in your cabinets or on your counter.
Here is why this setup helps you daily:
– Convenience: You sip more water when it’s easy to grab.
– Space saving: One faucet replaces bulky filters and dispensers.
– Cost and waste: You cut bottle purchases and cut plastic for good.
How it works:
A built-in filter lives inside the faucet body. Water passes through the cartridge as you turn the handle. Some models add minerals to improve taste. The cartridge needs regular changes to stay clean. Check the product sheet for how often to swap it.
What to look for when you shop:
– Filtration type: Look for activated carbon or multi‑stage filters. They reduce chlorine, metals, and grit.
– Flow rate: A steady stream matters. Some filters slow the flow a bit after use.
– Compatibility: Check your sink size and the space under the counter. Some setups need extra clearance.
– Replacement parts: Pick brands with easy-to-find cartridges.
– Certifications: NSF/ANSI marks show safety and performance.
Materials and styles that fit today’s kitchens:
– Finishes: Brushed nickel, matte black, and stainless steel stay common. They blend with most sinks and appliances.
– Spouts: Gooseneck and pull-down options give room to fill pots and rinse produce.
– Connections: Most use standard hoses. Measure carefully if you have tight under-sink space.
Practical use and care:
– Installation: If you can swap a faucet, you can install a built-in filtration model. Read the manual, shut off the water, and test for leaks.
– Filter life: Expect 6 to 12 months of use per cartridge with regular use. Some models show a light when it’s time to change.
– Maintenance: Rinse the filter and check seals every few weeks. Replace worn O-rings as needed.
Limitations to keep in mind:
– Upfront cost can be higher than a basic faucet.
– You may notice a small dip in flow right after a filter change.
– Cartridges require regular replacements to keep taste and safety up to par.
Next steps:
– Decide what you want from your faucet. Clean taste, less plastic, or a sleeker look?
– Compare models that fit your sink and budget.
– Plan for a DIY install or hire a plumber if you’re unsure.
With a filtration faucet, you gain quick access to healthier water. It blends ease, style, and practical benefits in one smart package. Ready to explore options that fit your kitchen?
12. Water Filtration Systems
Editor’s Choice
🛍️
PUR Plus Vertical Faucet Mount Water Filtration System, Lead-Reducing Wa…
Are you hoping to find a faucet that fits how you cook and how your kitchen looks? Customizable faucets let you build a piece that matches your space and style. They come with interchangeable parts, swappable finishes, and adjustable settings. You can refresh the look without buying a whole new faucet. This keeps your kitchen practical and current as your tastes shift. Here is why it pays to consider customization.
Interchangeable Parts
– Swap out handles, spouts, and tips to change the look in minutes.
– Pick a quick-change design with clips or simple screws so you can update parts without tools or a full install.
– Make sure the parts you want are sold separately and easy to buy later.
With interchangeable parts, you can move from a sleek, modern vibe to a softer, warm tone without starting from scratch. You can also tailor the reach and height to fit your sink and prep space. It’s a simple way to keep your faucet feeling new as your cooking tasks change.
Personalized Finishes
– Choose metal tones that match your cabinet pulls, sink, and backsplash.
– Explore textures like brushed, satin, or hammered looks to add depth.
– Order swatches or visit a showroom to see how the finish looks in your lighting.
A good finish doesn’t just look nice. It resists fingerprints and water spots and hides wear from daily use. When you pick a finish, think about how it will age with your kitchen. A finish that blends now will still look right in a few years.
Adjustable Features
– Pick multiple spray modes for different tasks.
– Adjust reach and height to suit your tallest pot or your lowest faucet line.
– Look for a pause button or easy-to-use controls for one-hand operations.
– Choose eco-friendly aerator options that save water without sacrificing pressure.
Adjustable features make daily chores easier. You can switch from a wide spray for rinsing produce to a focused stream for washing a pan. The right reach keeps it comfortable and tidy, even in a crowded sink.
How to shop and use these faucets
– Step 1: Define what matters. Do you want quick swaps, a matching look, or a flexible spray?
– Step 2: Check your sink. Note hole counts and deck space. Make sure you can add or remove parts without crowding the area.
– Step 3: Read specs. Look for compatible parts, supported finishes, and what is covered by the warranty.
– Step 4: Budget wisely. Custom parts cost more, but they can save you a full replacement later.
– Step 5: Plan care. Clean with mild soap and a soft cloth. Avoid harsh cleaners that can dull finishes.
Next steps: pick a core faucet you like and build your plan around interchangeable parts, finishes, and adjustable features. With a little planning, your faucet can grow with your kitchen and your taste.
You want a faucet that gives you real space and real style. A high-arc design does both. In 2025, these spouts stay popular because they clear tall pots and big pans while keeping your kitchen looking sharp. They help with tasks and still catch the eye.
Here is why high-arc designs work for you:
– Accessibility: The tall arc makes it easier to fill wide pots and wash large dishes.
– Visual impact: The curved silhouette can become a standout feature that ties your sink to the rest of the room.
– Versatility: Many high-arc models pair with pull-down or pull-out sprays for extra reach.
If you want a faucet that boosts daily work and adds character, a high-arc design is a solid choice.
What to look for when choosing a high-arc faucet
– Clearance and reach: Aim for about 9 to 12 inches of neck height. A longer arc gives you more room, but make sure it fits your sink depth and cabinet space.
– Spray options: Decide between pull-down and pull-out. A pull-down spray is easy to reach if you stand at the front of the sink. A pull-out wand can be stored neatly when not in use.
– Finish and durability: Stainless steel, brushed nickel, and matte black finishes stay clean longer and hide fingerprints better. Pick a finish that matches your faucet handles and fixtures.
– Hole pattern and deck plate: Check if your sink needs a single-hole, three-hole, or a large deck plate. Some models include the plate so you can install without extra parts.
Practical tips you can use today
– Measure first: Before you shop, measure the sink opening and the cabinet clearance. Note how tall your tallest pot sits when upright.
– Test balance: If possible, test the spray head weight. A heavy head needs a smooth, sturdy hose so it won’t sag.
– Think maintenance: Look for easy-to-clean finishes and a wide-lip aerator that’s simple to remove for quick cleanups.
– Plan placement: Center the faucet over the sink but consider your workflow. A slightly off-center model can make room for a soap dispenser or a grab bar.
Common questions about high-arc faucets
– Will it fit my sink? Most 1-hole or 3-hole setups work, but check the mounting hardware and deck plate included.
– Will it splash? Use the spray to direct water toward the center of the sink and avoid overfilling the basin.
– Is installation hard? Many people do it themselves with basic tools. If you’re unsure, a pro can handle under-sink connections and leak checks.
Next steps
– Measure your sink and cabinet space.
– Pick a finish that matches your kitchen.
– Decide between pull-down or pull-out based on your spray needs.
– Read the installation guide and plan for a quick, clean setup.
14. High-Arc Designs
Editor’s Choice
🛍️
Lenta Touchless Kitchen Faucet with Touch Technology, Brushed Nickel Kit…
Waterfall spouts bring a soft, wide flow to your kitchen. In 2025 they stay popular for a calm look and a gentle sheet of water. You get a broad plume that pours smoothly, not a tall jet. This helps daily tasks feel easy and makes your sink area look bigger. Here is how to use them well.
– What a waterfall spout is
– It uses a wide, flat outlet to create a broad curtain of water.
– The stream spreads across a large area, cutting splashes.
– Why the style works
– The water falls in a natural sheet, which can make the room feel serene.
– The look acts as a focal point in a kitchen with bold lines.
– Design options you can pick
– Shapes range from simple curves to sculpted, art-like forms.
– Finishes include stainless steel, brushed nickel, chrome, and matte black.
– Practical uses you’ll notice
– The wide spout makes it easy to fill large pots without lifting high.
– Many models also offer a pull-down spray for rinsing and quick cleanups.
Next, plan for your space. A tall faucet needs room to splash, and a low one fits small sinks. Measure the sink depth and the clearance under the cabinet. Check the mounting style to match your setup.
– Choosing the right size
– Pick a height that fits your sink and any apron front.
– Make sure the reach covers the center of the basin.
– Materials and finishes
– If you have hot water and fingerprints, choose a finish that hides marks.
– Stainless steel lasts long and cleans easily. Matte finishes hide spots well.
– Care and maintenance
– Wipe with a soft cloth after use to keep the sheet clear.
– Check the aerator for mineral buildup and clean it every few months.
– Installation basics
– Most models fit standard plumbing and either single-hole or two-hole sinks.
– Have a helper hold the faucet as you tighten the mounting nut.
– Shopping tips
– Compare models that offer a wide spout plus a strong spray option.
– Read reviews about drips and ease of cleaning.
Ready to choose your waterfall spout? It adds a quiet touch of style while keeping tasks practical and easy to manage.
Waterfall spouts are more than just style; they create a tranquil flow that makes your kitchen tasks feel effortless. Transform your space in 2025 with a gentle cascade that adds both elegance and function!
15. Waterfall Spouts
Editor’s Choice
🛍️
FORIOUS Kitchen Faucets with Pull Down Sprayer, Brushed Nickel, High Arc…
Are you tired of too many knobs and extra fixtures crowding your sink? A dual function faucet could be the simple fix you want. In 2025, more cooks pick two-in-one designs that cut clutter and speed up daily chores. You get a faucet that can do two jobs without two different taps.
What a dual function faucet is
These faucets pair a regular stream with extra features right at the spout. Common options include a built‑in spray nozzle and a soap dispenser. Some models add a pull‑down or pull‑out sprayer for reach and control. The goal is to give you more tools in one compact unit.
Here is why you should consider one:
– Ease of Use: A quick switch between spray and stream should feel natural. You won’t fumble with several handles or knobs.
– Space Efficiency: One faucet covers two jobs, cutting down on extra fixtures and holes in the deck.
– Style Options: You can choose finishes that match your kitchen’s look, from warm brass to sleek stainless.
How you will use it in real life
Think about the daily tasks you do at the sink. A dual function faucet can make them faster and cleaner.
– Rinsing and washing produce: Use the sprayer to rinse dirt away while keeping scraps out of the sink.
– Soap on demand: A built‑in dispenser lets you soap up hands or dishes without reaching for a pump bottle.
– One‑handed cleaning: A pull‑down hose lets you aim water exactly where you need it, even when both hands are full.
Choosing the right model for your kitchen
Before you buy, check a few key points so the faucet fits your space and habits.
– Fit and reach: Look at the height of the spout and how far the spray head can reach. Make sure it clears your sink and works with your tallest dish.
– Mounting type: Deck‑mounted faucets sit on the counter; wall‑mounted ones go on the back wall. Deck models are most common for kitchens.
– Finish and durability: Pick a finish that resists fingerprints and water spots. Popular options include brushed nickel, chrome, and matte black.
– Flow and spray options: Some models have multiple spray patterns or adjustable flow. Ensure it gives you a steady, reliable stream.
– Soap dispenser capacity: If you use a lot of soap, choose a model with a dispenser that fits your bottle size and refill habit.
Maintenance and care
Keep it clean to avoid mineral buildup. Wipe the spout and spray head weekly. If you have hard water, soak the aerator occasionally to keep it flowing well. Check the hose for kinks and replace seals when you notice leaks.
Limitations to know
A dual function faucet is not a cure for every kitchen. Some sinks are too small for the extra hardware. A heavy unit may feel bulky on a very slim counter. Also, built‑in dispensers rely on a bottle that you must refill, so plan for that.
Next steps
Measure your sink area and check the deck thickness. Compare models by the features you use most—spray reach, soap capacity, and finish. Read user reviews for real‑world reliability. With the right choice, you get a clean look and faster cleanups every day.
16. Dual Functionality
Editor’s Choice
🛍️
Lenta Brushed Nickel Kitchen Faucet with Pull Down Sprayer, Modern Singl…
If you want a kitchen that feels warm and current, a farmhouse style faucet can be your best friend. It brings a cozy, lived-in vibe without giving up modern function. You get character with practical features you use every day.
Here is why farmhouse faucets work well in 2025. They often have wide mouths and tall spouts that make it easy to fill big pots. They pair well with rustic cabinets and open shelves. And they come in finishes that stay beautiful for years.
– Wide, High Spouts: A tall reach helps you fill stock pots without splashing. It also adds a touch of classic elegance to your sink area.
– Classic Finishes: Look for matte black, oil-rubbed bronze, or polished nickel. Each finish adds a warm feel and hides smudges better than shiny chrome.
– Unique Handles: Levers and cross knobs give you that true farmhouse look. They’re easy to grip, even with wet hands.
A farmhouse faucet isn’t just about looks. It brings real benefits to a busy kitchen. You’ll move through chores faster, you’ll see fewer splashes, and you’ll feel proud inviting guests into a space that feels crafted and welcoming.
Let’s break it down with practical steps you can use right away.
– Start with your sink height and cabinet space: A taller spout needs room above the sink. Check the clearance under the counter so the handle doesn’t hit the backsplash.
– Pick a finish that fits your kitchen: Matte finishes hide fingerprints. Bronze warms the room. Nickel brightens the area without feeling cold.
– Think about the handle style: Levers are simple to operate with hands full of soap. Cross handles look old-timey but still work great.
– Match the faucet to other hardware: Doornobs, cabinet pulls, and towel bars in the same finish pull the whole room together.
– Consider the water flow and aerator: A steady flow saves time and reduces splashes. An aerator helps water feel soft on your hands.
What about maintenance? Wipe the spout and handle with a soft cloth after use. Clean with a mild soap if needed. Dry it to reduce water spots. Avoid harsh cleaners that can dull finishes.
Common questions you might have. Can a farmhouse faucet work in a small kitchen? Yes. Choose a compact model with a shorter reach. Will it fit a modern sink? Yes, just pick a design with clean lines that still has the tall spout. Is installation hard? It’s doable for a DIYer with basic tools. If you’re unsure, call a pro for a quick install.
Next steps: measure your sink area, compare finishes, and pick a farmhouse faucet that fits your space. Then enjoy a kitchen that feels welcoming and timeless.
Farmhouse style faucets blend warmth and modern function, creating a kitchen that invites you in. With tall spouts and beautiful finishes, they truly make cooking feel like home in 2025!
17. Farmhouse Style
Editor’s Choice
🛍️
OWOFAN Kitchen Faucet with Pull Down Sprayer Brushed Nickel Stainless St…
You want a kitchen that feels calm and spa-like. In 2025, spa-inspired faucet designs can give you that quiet, soothing vibe without sacrificing function. These taps look simple, but they bring a retreat feel to your daily tasks like washing dishes and prepping meals.
Here is why spa-inspired faucets stand out in the kitchen:
– Gentle Water Flow: Choose a faucet that gives a smooth stream and soft spray. A quiet aerator keeps noise down and the water sounds feel natural, like a light rain.
– Natural Materials: Look for touches of bamboo, stone, or wood tones. These materials add a warm, organic feel that makes the sink area feel grounded.
– Built-in Filters: Some models have a small filtration system at the tap. You get cleaner drinking water right from the faucet, with less prep time.
Next, let’s break down how to make this style work in your space:
– Start with your sink and counter height. Pick a design with a low profile and rounded edges to keep the look calm and uncluttered.
– Check water flow and spray options. A steady, gentle flow is key to the spa feel. If you cook a lot, make sure you can switch to a wider spray for washing vegetables or rinsing pots.
– Choose a finish that fits your kitchen. Matte neutrals and earth tones blend with stone countertops or wooden accents for a cohesive look.
How to install and care for spa-inspired faucets:
– Installation: Most models fit standard sinks. If you’re unsure, ask for a quick in-store demo or hire a pro. A good fit means fewer leaks and smooth operation.
– Filtration maintenance: If your faucet has a filter, replace the cartridge as directed. That keeps taste clean without extra steps.
– Daily care: Wipe the faucet after use to prevent water spots. A soft cloth works best. Avoid harsh cleaners that dull the finish.
What you should know before buying:
– Price range and durability vary. Spa-inspired looks cost more when you add natural materials or built-in filters. Expect better long-term quality if you choose solid hardware.
– Compatibility matters. Make sure the faucet fits your sink holes and connects to your plumbing without adapters.
– Realistic expectations help. A calm faucet won’t solve every kitchen challenge, but it can reduce cluttered vibes and make cleaning feel easier.
Next steps for you:
– Compare 3 to 5 models that emphasize gentle water flow, natural materials, and built-in filters.
– Visit showrooms or online demos to see finishes in person.
– Pick one with a soft silhouette and a finish that matches your decor.
With a spa-inspired kitchen faucet, you create a calmer space where cooking and cleaning feel like a small ritual you look forward to each day.
18. Spa-Inspired Designs
Editor’s Choice
🛍️
WEWE Single Handle High Arc Brushed Nickel Pull Out Kitchen Faucet,Singl…
You want a kitchen that feels like a little gallery, yet stays easy to use. In 2025, faucets with artistic shapes do just that. They stand out without shouting. They bring a personal touch to your daily routines. You get function and flair in one small change.
– Sculptural Designs
Look for faucets that feel more like art than a standard fixture. Think tall, slim spouts, bold angles, or off‑beat silhouettes. A piece that catches the eye should still be easy to use. Check how the lever sits and how smooth the action is. You want a faucet that feels solid in your hand and looks stylish when you walk into the room. A sculpture that doubles as a faucet makes your kitchen feel intentional and warm.
– Play with Curves
Flowing lines add grace to a busy kitchen. Curved arms and gooseneck spouts soften the space. They draw the eye without clashing with other details. When you turn on the water, you should feel a small, satisfying release of motion. Curves also help with reach—some designs bring the spray closer to the sink, others sweep water farther across. If you cook a lot, curves can help you wash larger pots more easily.
– Contrasting Materials
Mix metal with glass or ceramic to create texture. A metal body paired with a glass spout or a ceramic handle can look dramatic but still practical. This creates visual interest as you move around the kitchen. Pay attention to finish choices too. Matte black, brushed nickel, or copper can change the mood of the room. The right mix catches light differently and hides fingerprints better in busy spaces.
Here is why artistic shapes work for your kitchen. They stay useful while becoming a natural focal point. People notice them, and you will feel proud of your design every time you cook or clean. These faucets invite conversation, yet they do not get in the way of everyday tasks.
Next steps
– Decide where the drama should live. Do you want a sculptural statement or a softer curve?
– Check clearance and height. Make sure the faucet clears the backsplash when you fill large pots.
– Choose a finish that fits your cabinets and hardware. Think about how it looks in daylight and at night.
– Compare care needs. Some shapes show water spots more than others. Pick one you can wipe down quickly.
Common questions you might have
– Will an artistic shape cost more than a plain faucet? It can, but you can find options at different price points.
– Are these hard to install? Most are standard deck-mount or wall-mount setups. If you are unsure, ask for a quick install check.
– How do I keep the look clean? Wipe with a soft cloth and mild soap. Avoid harsh cleaners on glass or ceramic parts.
With these ideas, you can choose a faucet that feels like art and works like a workhorse. Here is your path to a kitchen that reflects your taste and your everyday needs.
19. Artistic Shapes
Editor’s Choice
🛍️
FORIOUS Kitchen Faucets with Pull Down Sprayer, Brushed Nickel, High Arc…
You want a kitchen faucet that feels warm and timeless but still fits today. In 2025, designers blend vintage with modern in a way that works with real kitchens. The result is a faucet that looks classic and acts like new.
Here is how to pull off this look without breaking the room.
– Classic color palettes – Muted tones and aged finishes give a cozy, old world feel. They hide fingerprints and water spots better than shiny chrome. The result is a soft, welcoming glow in your sink area.
– Modern tech that fits the look – Choose touchless or pull-down features tucked into a vintage silhouette. The design stays familiar, while the valves and sprays stay practical. You get easy, clean use without losing charm.
– Timeless details – Porcelain handles, elegant spouts, and cross handles add character. These small touches connect past and present. They work with many kitchen styles, from country to city loft.
How to plan this in your space
– Start with your cabinet color and countertop. Pair warm woods or creamy stones with patina finishes. The aim is harmony, not a clash.
– Pick a finish that ages gracefully. Brass, copper, or bronze tones add depth. If you like a cooler mood, brushed nickel can still feel vintage with the right shape.
– Match the faucet to your sink. A good balance makes washing easy. If your sink is large, pick a longer reach. If it is small, choose a slimmer neck.
Practical tips you can use
– Keep the setup simple. One vintage-inspired faucet can anchor the room. Add one or two small accents in the same finish.
– Consider a pull-down spray that hides in a classic neck. You gain reach and control without breaking the look.
– Plan for daily care. A light wipe after use keeps the finish bright and the water flow smooth.
What to expect in real life
– The look ages well and stays inviting. Patina becomes part of the story.
– Daily use is easier with modern spray and touchless options.
– Your faucet asks less attention but gives more character to the space.
Next steps
– Tell me your sink size and cabinet color. I can suggest three fits that match your space.
– Ready to test ideas? Start with a small swap on the island or prep area to see the feel.
20. Vintage Meets Modern
Editor’s Choice
🛍️
FORIOUS Vintage Kitchen Faucets with Pull Down Sprayer, Oil Rubbed Brown…
You want a faucet that feels like it came from a place you love. 2025’s faucet lines pull from neighborhoods and the people who live there. They copy little details from local scenes, cafe culture, and street vibes. The result is a sink that tells a story, not a plain tool.
– Local influences: Look for shapes and finishes that nod to nearby architecture, coastlines, or countryside. A town square silhouette, a harbor curve, or a mountain ridge can show up in the faucet’s form.
– Colorful accents: Add warmth with colors you often see around you. A soft blue handle, warm brass rings, or earthy copper can tie the faucet to your kitchen’s mood.
– Personal touches: Pick details that remind you of a place you love. Maybe a handle that feels like a sea breeze or a knob that mirrors a favorite tile pattern. Your kitchen becomes a small map of memories.
Here is why this approach works. You get a focal point that is easy to pair with other design cues. You also gain a space that feels welcoming and unique to your home. Let’s break it down so you can choose with confidence.
– Know your space: If your kitchen leans coastal, favor light metals and soft hues. For an urban loft, consider darker finishes with clean lines. Match the faucet to the room’s overall energy.
– Finish and material: Pick materials that stand up to daily use. Stainless steel, brass, copper, or ceramic handles stay looking good with simple cleaning.
– Size and reach: Check the spout height and reach. A tall, long-spout makes pot filling easier. A compact design works well in tight counters.
– Coordinate with color: Let the faucet pick up a countertop or backsplash shade. Or use a neutral base and let the faucet be the place you add a pop of color.
– Story factors: Read product notes for hints about what place inspired the design. A clear cue helps you place the faucet in your home.
Next steps: practical tips you can use today.
– Start with a favorite place. Note its colors, textures, and light.
– Choose a finish that will wear well and stay clean.
– Pair the faucet with one bold accent and keep the rest simple.
– Check measurements and ensure the faucet fits your sink and cabinet space.
– Look for a design cue that you can see every day when you cook or wash up.
If you follow these steps, your faucet will feel like home while still serving as a smart, functional part of the kitchen.
Are you aiming for a kitchen that feels warm and refined without a full remodel? Brushed gold faucets are a smart pick in 2025. They add luxury in a quiet way, turning your sink into a soft centerpiece you’ll notice every day.
Here is why brushed gold works well in many kitchens:
– Subtle Shine: Brushed gold has a softer glow than shiny or polished metal. It catches light without glare, so your faucet looks inviting rather than flashy.
– Complementary Colors: Gold pairs nicely with white, charcoal, and deep jewel tones. It also plays well with natural stone and wood accents.
– Timeless Appeal: Gold finishes stay stylish longer when the lines of the faucet stay simple and the finish is well cared for.
What to look for when you shop
– Finish options: Choose brushed gold or satin gold for a nonreflective surface that hides fingerprints and water spots better than polished metal.
– Style harmony: Match the faucet shape to your cabinets and hardware. A sleek, modern lever pairs well with flat-front cabinets; a rounded, traditional silhouette goes with classic subway tile.
– Build quality: Look for solid brass construction, smooth operation, and easy-to-clean surfaces. A sturdy handle and a good seal reduce leaks and wobble over time.
Practical tips you can use tomorrow
– Start with one statement piece: If you’re unsure, pick a brushed gold faucet as a focal point and keep other finishes neutral.
– Pair with the right hardware: Gold pulls or handles on nearby cabinets can pull the look together. If you already have stainless steel, you can mix metals by adding a gold faucet and keeping other elements minimal.
– Care and upkeep: Wipe the faucet with a soft microfiber cloth after use to prevent water marks. Use mild soap and warm water for routine cleaning; avoid harsh chemicals that can dull the finish.
– Placement matters: A gold faucet works as a centerpiece when the sink sits under a window or near a bold backsplash. It also shines in kitchens with light wood tones or white marble.
Common questions you might have
– Will it show fingerprints? Brushed gold shows fewer marks than polished metal, but a quick wipe keeps it looking fresh.
– Can I mix gold with other metal finishes? Yes. Use gold on the faucet and keep other metals in smaller doses to avoid a busy look.
– Is brushed gold pricey? It can be more than matte chrome, but it often costs less than high-end polished gold. Look for good warranty and solid brass construction to protect your investment.
Next steps
– Test a sample: If you can, view a brushed gold faucet next to your cabinets in real light. This helps you judge the glow and how it blends.
– Plan the rest of the room: Decide if you want gold accents elsewhere, like lighting or hardware, to create a cohesive feel.
– Set a simple budget: Include faucet, installation, and any matching hardware so you don’t surprise yourself with extra costs.
In short, a brushed gold faucet can add warmth, style, and a touch of elegance to your kitchen—without overhauling your entire space.
Brushed gold faucets add a touch of elegance to your kitchen without overwhelming the space. Embrace the subtle shine and watch your sink become a daily centerpiece of warmth and beauty in 2025!
22. Luxurious Gold Accents
Editor’s Choice
🛍️
Havin Gold Kitchen Faucet with Pull Down Sprayer, High Arc Stainless Ste…
You want a kitchen faucet that does more than just pour water. A multi-functional faucet can cut clutter and save time. In 2025, many models add useful extras that fit your daily routine. You’ll get less mess on the counter and more space to work. It may seem small, but it changes how you prep, wash, and dry. Here is why these taps matter for busy kitchens.
– Built-in soap dispenser — No more squeezing bottles. A built-in dispenser keeps soap close to the sink. It reduces splash and speeds up handwashing after messy tasks like chicken handling or garlic mincing. It also helps you keep the counter clean and simple.
– Integrated cutting board — A board that sits over the sink gives you a safe space to chop. You can slide it out when you need extra room for mixing or slicing. When you’re done, snap it back in place and keep working without stepping away to a crowded counter.
– Integrated drying rack — Some faucets offer a compact rack that folds out. It catches towels or small dishes so you can dry as you go. The water drips back into the sink, not onto the counter. It makes post‑meal cleanup feel smoother.
– Space-saving design — All-in-one tools cut down clutter. You gain counter real estate for prep, plating, or a coffee station. The faucet stays a clean, single focal point in your kitchen.
Here is why you should pay attention to finishes and fittings. Think about stainless steel for a durable, easy-clean look. Brushed nickel and matte black finishes blend with most styles. Check the hose length and spray options. A sturdy pull-down or pull-out head helps you reach every corner of the sink. Choose smooth, easy-to-clean surfaces. Look for sealed joints so grime doesn’t hide in tiny gaps.
Next steps. Start with your space:
– Measure the sink opening and cabinet clearance to know what will fit.
– Check how high the faucet must be to clear any nearby windows or cabinets.
– Pick a finish that matches your current faucets and hardware.
– Read care tips so you can keep the finish looking new.
Then compare three to five models that offer at least two of the features above. Look for simple installation guides and a fair warranty. If you cook a lot, a faucet with these smart add-ons can lighten your routine without clashing with your kitchen style.
23. Multi-Functional Accessories
Editor’s Choice
🛍️
FORIOUS Kitchen Faucets with Soap Dispenser and Pull Down Sprayer, Brush…
You want a faucet that feels natural and calm. Natural stone finishes do that. They blend earthy tones with clean lines. You notice texture and depth in every edge. They stay interesting for years.
– Unique textures. Granite shows tiny specks, marble has elegant veins, and quartz looks smooth and even.
– Color variations. Stone comes in warm beiges, cool grays, rich browns, or deep blacks. You can pick a shade that fits your cabinets and counters.
– Eco-friendly options. Some stones are sourced with care and less waste. Look for suppliers who share notes about quarry practices.
Here is why this matters in daily life. A stone finish brings a calm feel to a busy kitchen. It pairs well with stainless steel, brass, or matte black fixtures. The surface stays cool to touch and often hides small water marks better than plain metal.
Choosing the right stone for your faucet
Start with tone. If your counters are warm wood, choose stone with warm undertones. If your counters are gray, pick a cooler shade.
Texture matters. Veining or a satin finish can hide water spots and fingerprints.
Think about care. Some stones seal easily and resist stains. Others need more upkeep and periodic re-sealing.
Check the fit. Heavy stone finishes require sturdy mounting and solid support in the sink area.
Care and maintenance
Clean with a soft cloth and mild soap.
Rinse and dry after every use.
Wipe spills quickly to avoid stains.
Re-seal as the maker recommends.
Avoid harsh cleaners that dull the surface.
Things to know before you buy
Stone can cost more than metal.
The price covers material, sealing, and installation.
Some stones show wear over time and may need touch-ups.
Weight and mounting are important to check before purchase.
Next steps. Look for samples and ask for care guides.
Compare prices and warranties.
Measure your faucet holes and space to ensure a good fit.
24. Natural Stone Finishes
Editor’s Choice
🛍️
Moen Mediterranean Bronze One-Handle High Arc Widespread Kitchen Faucet,…
You want a kitchen that feels calm, not crowded. Minimalist detailing helps you get that look. In 2025, this style stays popular because it breathes space into small rooms and lets your hardware do the talking without shouting. You can pick faucets that look clean, act simple, and still pull off real style.
Here is why minimalist detailing works for you:
– Clean Lines: Choose faucets with smooth curves and few extra decorations. The emphasis is on form, not fuss.
– Sophisticated Colors: Go with matte black, white, or metallic tones. These shades stay fresh and pair with many cabinet colors and backsplashes.
– Quality Materials: Look for solid brass bodies and reliable ceramic discs. A sturdy core makes a faucet feel dependable and last longer.
Minimalist detailing brings a quiet, refined feel to your kitchen. It helps your space stay open, even when you’ve got busy countertops.
Let’s break it down. What should you look for when shopping?
– Shape and lines: Favor simple silhouettes—one lever, or a clean two-handle design. Avoid busy knurling or heavy engraving.
– Finish matters: Matte finishes hide fingerprints and water spots better than bright polish. Match the finish to your sink, handles, and pulls.
– Build quality: A heavy, solid faucet signals lasting value. Check for brass construction and a smooth ceramic valve system.
– Space fit: Measure your sink area. Check the height and reach of the spout so it clears the basin and works with pots.
Next steps for putting minimalist detailing to work:
– Visualize with samples: Bring small finish swatches into your kitchen. See how light plays on metal during day and night.
– Test in person: Open and close a few models. Feel the motion; the lever should move cleanly with minimal effort.
– Plan maintenance: Choose easy-clean finishes. Use mild soap and a soft cloth to wipe away water marks.
– Think about the whole look: A minimalist faucet should connect with your faucet deck, sink, and cabinet lines. It should feel like a natural extension, not an afterthought.
Common questions you might have:
– Will a minimalist faucet look boring? Not if you pick a strong silhouette and a finish that matches your style. The point is harmony, not dullness.
– How much maintenance is required? Regular light cleaning keeps it shining. Avoid harsh chemicals that can dull finishes.
With these steps, you can select a minimalist faucet that brings calm to your kitchen. The result is a space that feels larger, cleaner, and more inviting—without losing function or personality.
25. Minimalist Detailing
Editor’s Choice
🛍️
Delta Essa Matte Black Kitchen Faucet with Pull Down Sprayer, Modern Sin…
Functional features are the first thing you notice in 2025 kitchen taps. They matter as much as the looks. A good faucet saves you time and effort every day. You want one that helps you wash, fill, and wipe away mess without a hitch. Here is how to pick.
– Pull-Down Spray: A spray head that pulls down and back into the spout makes rinsing veggies and cleaning pans easy. Check how far it reaches and how it sprays. A flexible hose helps you reach every corner of the sink.
– Temperature Control: You need steady, easy control of hot and cold. Look for smooth mixing with a simple turn or two. Avoid jumps in temperature that spill water or burn you.
– Ergonomic Design: Comfort matters. Choose a shape and grip that fit your hand. A lever that sits right in your palm reduces wrist strain. Try it for a moment so you know it feels right.
– Valve Quality: A durable valve keeps leaks away. Ceramic discs are a common choice for long life and reliable sealing. If the spray head is easy to detach and reattach, daily use stays simple.
– Maintenance and Care: Pick a faucet with easy-clean nozzles and a spray head that detaches without fuss. Look for parts you can replace without a big project. This helps your faucet stay useful longer.
– Materials and Finishes: Bodies in stainless steel or brass hold up well. Finishes like brushed nickel or matte black hide fingerprints and water spots. Choose a finish that matches your sink and sink hardware.
– Water Flow and Aerator: A good aerator cuts splashes and uses less water. Check the flow rate, usually around 1.5 to 2.2 gallons per minute. A steady flow makes filling a pot faster without making a mess.
– Spout Reach and Height: Make sure the arc clears the sink and gives room for tall pots. A little extra height helps, but too high can splash.
– Care and Installation Notes: Make sure the faucet fits your sink setup. Some taps work with single-hole sinks, others need three holes. Check supply lines and valve types before buying.
Next steps: visit a store and test hands-on feel. Bring a measuring tape to compare reach. Read the dealer’s care tips, and check the warranty. With the right functional features, your kitchen will work smoother and stay clean longer.
26. Functional Features
Editor’s Choice
🛍️
FORIOUS Kitchen Faucets with Pull Down Sprayer, Brushed Nickel, High Arc…
You want a kitchen faucet that stays solid for years. In 2025, durability is a must. You use your sink every day, washing, rinsing, and scraping off sticky foods. A weak faucet brings leaks, water waste, and a broken look. You deserve a fixture that keeps its charm while withstanding daily life. This section shows you how to pick a faucet that holds up.
Here is why durability matters. Faucets take a beating from spills, heat, and constant handling. A sturdy build means fewer repairs and less trouble. When you choose well, your kitchen stays stylish and easy to use for a long time.
Here is how to choose a durable faucet. Let’s break it down into three clear parts.
– High-Quality Materials: Look for a solid brass body with stainless steel or ceramic parts. These resist rust and stay tight after years of use.
– Finish Quality: Pick a finish that hides fingerprints and resists scratches. Brushed nickel, matte black, or chrome with a protective coating lasts longer.
– Valve and Seals: A ceramic disc valve or similar durable cartridge reduces wear and drips. Quality seals cut the chance of leaks down the road.
– Warranties and Service: A good warranty matters. A longer warranty on the body and finish shows the maker stands behind the product.
Next steps. When you shop, use these checks to guide you.
– Check the body material: Solid brass or stainless steel is a strong choice.
– Inspect the finish: Choose scratch-resistant finishes with a protective layer.
– Read the warranty: Look for longer coverage on both finish and parts.
– Think about upkeep: Choose models with easy access parts for future service.
How to keep durability strong in daily use. Simple habits pay off.
– Clean with mild soap and a soft cloth to avoid scratches.
– Dry the faucet after use to prevent water spots and mineral buildup.
– Avoid harsh cleaners and chlorine that can wear finishes.
– Do a quick leak check each month and tighten fittings if needed.
Common questions you might have. Do durable faucets cost more? Yes, usually a bit more, but the longer life saves money over time. Will a simple finish work in a busy kitchen? It can, as long as it’s a protected coating and you wipe it regularly.
Practical takeaway. Start by comparing the materials, finishes, and warranties. Pick a model that uses solid brass, a ceramic valve, and a long guarantee. Pair it with a simple care routine, and your faucet will stay reliable and good-looking for years.
Color can wake up a kitchen. A faucet with a splash of color makes the space feel fresh without shouting. You get personality without clutter. This is how color accents on faucets can help your look.
Here is why color matters. A small touch, like a colored handle or a colored base, pulls the eye. It links your cabinets, counters, and backsplashes. It can make dull rooms feel warm and inviting. And you can switch it up later if you want a new vibe.
– Accent handles: Look for faucets with handles or knobs in a color that stands out against neutral tones. A teal or emerald knob against white cabinets can feel lively, not loud.
– Base colors: Some faucets come with colored bases. They let you mix and match with counters, tile, or app plates. This is easy to update as your decor changes.
– Popular hues: Deep greens, soft blush, navy, and cobalt blue are popular options. They add character without overpowering the room.
Next, practical tips you can use right away. Pick one color family and keep the rest neutral. This helps the color look intentional. Choose finishes that hold color well, like brass or ceramic-coated bodies. Make sure the color you choose works with your sink, backsplash, and hardware.
– Match to decor: Tie the faucet color to a small detail somewhere else, like a teapot, a dish rack, or a tile accent. Small echoes create harmony.
– Test in light: Check how the color looks in morning and evening light. A shade you love in daylight can feel different at night.
– Think maintenance: Some colors show fingerprints or water spots more than others. Matte finishes hide marks better, but they need regular gentle cleaning.
What to avoid. Don’t pick color for color’s sake. It should enhance your space. If your cabinets are very busy, stick to a subtler shade. If your room already has strong textures, choose a calmer hue.
Here is how to implement this week. Start with one bold accent on a single faucet and see how it feels. If you love it, expand to a second point, like a soap dispenser in the same color family. You can swap out future pieces as you update your kitchen.
– Easy entry: Start with a colored handle or a small base color.
– Upgrade later: Consider a second colored accessory to echo the faucet.
Next steps. Browse options in your color family. Check measurements, especially handle clearance and spout depth. Read care guides to keep the color looking fresh. With the right choice, color accents can brighten your kitchen every day.
28. Colorful Accents
Editor’s Choice
🛍️
Kitchen Faucet, Commercial Kitchen Sink Faucets with Pull Down Sprayer, …
Are you trying to pick a faucet that fits your kitchen and your daily routine? In 2025 you can tailor a faucet to your space with smart options. You get a look that feels meant for you and parts that stay useful for years. Here is why this matters and how to do it.
– Interchangeable Parts choose faucets that let you swap spouts or handles easily. This is handy when your sink or decor changes. You can switch to a different look in minutes and keep the same base unit. It also makes cleaning simple, since you can swap to a smoother handle if your hands are wet.
– Color Choices finishes come in many tones. Think chrome, brushed nickel, matte black, or warm brass. Pick a shade that echoes your cabinet hardware and light fixtures. A thoughtful finish helps the whole room feel calm and cohesive.
– Personalized Styles find a line that fits your taste. A classic shape has soft curves and simple lines. A modern design uses clean edges and a tall arch. An artistic style can add a small sculpture feel to the sink area. The right look can make every kitchen moment feel more comfortable.
– Materials and Coatings the metal and finish change care and durability. Stainless steel hides water spots and fingerprints. Brass or copper brings warmth and a subtle glow that ages nicely. A ceramic cartridge lasts long and reduces leaks, even with heavy use.
Here is how to turn options into real benefits. If you cook a lot, a pull-down spray can reach pots and dishes without a struggle. If your sink sits near a bright window, a darker finish might hide splashes better than a shiny one. If you wash hands a lot, a smooth, easy-use handle saves time.
Next steps you can take now:
– Check product pages for interchangeable parts and color swatches.
– Learn how to care for each finish and read the warranty terms in plain language.
– Compare two or three finishes to see how they look with your sink, faucet, and cabinet hardware.
– Budget for the option you want and ask about any extra installation costs.
Be honest about limits. Not every faucet offers every color or every interchangeable part. Some changes require a pro install or extra plumbing work. Some finishes show wear sooner in hard water or high-traffic kitchens.
In the end, customization helps you get a faucet that fits space and use. You gain a kitchen that looks comfortable and works smoothly for everyday life.
29. Customization Options
Editor’s Choice
🛍️
WEWE Single Handle High Arc Brushed Nickel Pull Out Kitchen Faucet,Singl…
You want a kitchen that saves water and still looks great every day. Eco-conscious faucet designs help you do just that. They lower your water use, use materials with less impact, and keep your sink looking fresh.
Here is what to look for when you shop:
– Water-Saving Features: Choose faucets with aerators or flow restrictors. They cut water use without thinning the spray or making rinsing harder.
– Sustainable Materials: Look for brass, stainless steel, or ceramic parts that come from recycled content or are easy to recycle later. Hidden parts should stand up to rust and wear.
– Energy Efficiency: Pick designs that reduce heat loss and need less energy to perform. Some models heat less water or work well with low hot water pressure.
By focusing on eco-conscious designs, you get a kitchen that fits your values and still performs every day.
Practical steps to choose and use:
– Start with a Water Sense label. It signals real water savings without sacrificing strength.
– Compare flow rates. A good range is around 1.8 to 2.0 gallons per minute for kitchen sinks.
– Check durability. Favor sturdy finishes and smooth cartridge operation. A longer warranty often means solid build quality.
– Think about maintenance. Look for easy-to-clean aerators and cartridges you can replace without special tools.
– Consider your sink setup. Make sure the faucet fits your counter height and handles the basin depth you have.
How to put eco-conscious design into your kitchen now:
– Measure your current flow. If your old faucet uses more water, plan to swap for a model in the 1.8–2.0 gpm range.
– Pick a finish that lasts. Brushed nickel or stainless steel resist water spots and stay clean with a quick wipe.
– Choose sustainable sourcing. Ask for recycled content in metal parts and responsible packaging.
– Plan for the future. If you expect a change in water pressure, pick a faucet with a flexible cartridge or adjustable flow settings.
Practical tips you can use right away:
– Test aerator removal. If it comes off easily, you can clean or replace it without tools.
– Keep the aerator clean. A quick vinegar soak every few months keeps the spray steady.
– Prepare for upkeep. A simple cartridge swap can restore performance without a full replacement.
Limitations to keep in mind:
– Some homes have low water pressure that makes high-efficiency heads feel a bit weaker. Look for models with adjustable flow or built-in pressure-compensating features.
– Not all eco features are perfect for every sink. Check size, mounting options, and hot water reach before buying.
Next steps: go online or in store, flag models with clear water-saving specs, durable materials, and easy maintenance. Then pick one that fits your kitchen vibe and your wallet. Your sink will feel fresh, and your water bill will thank you.
30. Eco-Conscious Designs
Editor’s Choice
🛍️
FORIOUS Kitchen Faucets with Pull Down Sprayer, Brushed Nickel, High Arc…
Here is a simple truth. You want a kitchen tap that makes daily chores easier. In 2025, smart features in kitchen faucets do just that. They help you clean up faster, cook with less guesswork, and keep the look of your space fresh. You stay in control when your hands are dirty. The faucet responds with a tap, a pause, or a quick voice command.
Here is why this matters. A smart faucet can cut mess, save water, and help you stay organized. You get control even if your power flickers or your WiFi is slow. The right model fits your sink, your style, and your daily routine.
– Voice Activation: Talk to your faucet and it starts or stops the flow. You can ask for a splash of cold water while you scrub, or say “hot water” and it adjusts to the temp you set. It feels easy after you chop onions or mix batter.
– Temperature Control: Some models let you set precise temperatures for different tasks. Fill a pot with exactly the temp you need for safe cooking, or rinse veggies at a cooler setting. The control helps you avoid guesswork and keeps you from scalding yourself.
– Water Usage Tracking: Many smart faucets show how much water you use each day. Read the number on the faucet or in the app. That quick view helps you cut waste and save money over time.
– App Control and Alerts: A companion app can run water on a timer, set routines, or check filter status. It can ping you if a leak shows up or a part needs care. This makes upkeep more predictable.
Next steps to pick the right smart faucet for your kitchen. Start by checking two things: compatibility with your pipes and the finish you like. Common finishes are brushed nickel and stainless steel. Make sure the model fits your sink and matches your faucet height. Look for setup guides, but plan for a pro if you feel unsure. Remember, smart features need power and a WiFi link. If the network drops, you can still use the manual handle for basic use.
Maintenance tips to keep the tech happy. Wipe sensors gently with a damp cloth. Avoid abrasive cleaners that can scratch the finish. Keep the aerator clean so flow stays steady. If you notice lag or a drop in accuracy, check the battery or wiring at the base.
Common questions you may have.
– Do I need WiFi for a smart faucet? Not always. Some work offline with basic features, while others unlock full control when connected.
– Can I install it myself? It depends on your plumbing and tools. If you’re unsure, a professional can help ensure a tight seal and proper height.
By choosing a faucet with smart features you gain easier control, less mess, and more predictability in the kitchen. This is not a magic fix, but a practical upgrade you can enjoy daily. Ready for an easier kitchen? Use these checks as you shop to find the right fit for you.
In 2025, you can give your kitchen an edge with industrial chic faucets. They blend rugged metal with real use. You feel the weight in your hand. You hear a quiet click as you adjust the handle. Exposed piping and bold shapes define this style. It looks tough, but it also works.
Here is why they fit busy kitchens. They stand out next to wood and concrete. They create contrast without shouting.
Materials to consider:
– Iron for a strong, vintage feel.
– Copper for a warm glow that ages with you.
– Steel for a clean, modern look.
Functional design matters:
– Height should clear pots in your sink.
– Reach lets you sweep water across the basin.
– A swiveling spout helps with big tasks.
Finish options:
– Matte black hides fingerprints and water spots.
– Brushed nickel is versatile.
– Brass accents add warmth.
– Gunmetal adds a bold, dark touch.
Where to place it:
– A single-bowl sink shows off the faucet.
– An island sink benefits from a pull-down spray.
– A wall-mount setup works with open shelves and brick.
How to pair with other elements:
– Use wood with a rugged grain for contrast.
– Choose concrete countertops or floors to echo the metal.
– Keep cabinets simple to let the faucet shine.
Choosing and installing in a few steps:
– Measure your sink and the faucet height you need.
– Check hole size and under-sink clearance.
– Pick a model with a practical spray head and good water flow.
– Confirm it is lead-free and easy to clean.
– Have a helper hold the faucet while you secure it.
Care tips:
– Wipe after use to cut fingerprints.
– Dry the spout to prevent mineral spots.
– Inspect hoses yearly.
Next steps:
– Pick your preferred metal and finish.
– Compare models online or in a showroom.
– Install, test reach, and enjoy the new look.
32. Industrial Chic
Editor’s Choice
🛍️
GIMILI Kitchen Faucet with Pull Down Sprayer Single Handle High Pressure…
Wants a kitchen that feels fresh without gutting the whole space? Multi-color finishes can do that. They let you add personality with color instead of a total remodel. You get a look that pops, but you still keep the calm you want for everyday meals and messy cleanups.
What to explore
– Gradient designs: Faucets that shift from one color to another catch the eye. A gentle fade can look like a sunrise over the sink.
– Mixed materials: Some taps blend two or three colors in one design. Think a brass body with a blue accent ring. The result is creative and balanced.
– Playful options: You can pick different color choices to match the season or your mood. Swap in a new look when you refresh decor.
Adding multi-color finishes can wake up a kitchen. They create a small surprise that makes daily chores feel friendlier.
How to choose the right color
Start with your space. Look at your cabinets, countertops, and existing hardware. Pick colors that fit your base tones. If your room is light and airy, soft blues, greens, or warm creams work well. For a bold kitchen, choose a stronger shade that still lines up with metal finishes like stainless steel or copper.
Keep finish quality in mind. Some colors are powder coated or ceramic. They resist chipping better in busy spots. A color that scratches easily will show wear fast in a busy sink area.
Practical ideas you can use
– Test with swatches: Hold color samples near the faucet location. See how light and shadows change the shade.
– Pair with metals: A colored accent pairs well with stainless, brass, or matte black fixtures. Let one color be the star, the others stay quiet.
– Think about usage: If you cook a lot, pick colors that hide water spots or fingerprints. Lighter shades often show grime more than darker tones.
– Seasonal updates: Swap out small decor pieces to match the faucet color. A teal faucet can pair with a mint towel in spring or a navy placemat in fall.
Care and longevity
Wash with mild soap and a soft cloth. Avoid harsh cleaners that can fade color. Dry the faucet after use to cut down water marks. Regular wipe downs keep the finish looking new longer.
Common questions
– Will the color fade with time? Most colors hold up well, but use proper cleaners to protect the finish.
– Will it clash with my other fixtures? Start with one color and keep other elements neutral. A single color highlight is easier to balance.
– Is installation harder? Not usually. A colored finish is added to standard faucet bodies. A pro can fit it as part of a normal install.
Next steps: measure the sink area, pick a color family you love, and request sample finishes. See how each option feels in your space before you buy. A careful choice now keeps your kitchen looking good for years.
33. Multi-Color Finishes
Editor’s Choice
🛍️
Kitchen Faucet with Pull Down Sprayer, Brushed Nickel Stainless Steel Fa…
If you want a kitchen that feels calm and welcoming, consider nature-inspired faucets. They bring a hint of the outdoors into daily life. The result is a space that looks warm and lived in, even after a busy day.
Here is why these designs work
– Organic Shapes: Faucets with flowing curves imitate water in motion and bring a gentle rhythm to your sink area.
– Natural Materials: Look for touches of bamboo, stone, or wood that add texture and a softer feel to metal.
– Earthy Colors: Finishes in browns, greens, and warm whites blend with stone counters and wooden cabinets.
Next steps to use these ideas well
– Match your kitchen style: If you have wood cabinets, a brass or bronze finish can feel cohesive. If your counters are stone, drop-in stone look accents pair nicely.
– Check spout reach and height: Make sure the faucet can clear your largest pots and reach the center of the sink without splashing.
– Choose finishes that hide marks: Matte or brushed finishes tend to show fewer water spots and fingerprints.
– Consider the mounting style: Deck mounts work with most sinks, while wall mounts can free up counter space for large prep areas.
– Favor natural textures in the detail: A stone base or wooden handle can echo your backsplash or island.
– Plan for care: Natural materials need gentle cleaning and occasional treatment to stay vibrant.
What you can expect when you install nature-inspired faucets
– The look stays warm and inviting, even with daily use. You’ll notice a softer feel in the room, not a cold metal vibe.
– Textured surfaces invite touch and add subtle variety that other finishes can miss. The faucet becomes a small feature in your kitchen.
Potential limits to know
– Natural materials may cost more and require a bit more upkeep. They can also be less forgiving in very humid or very wet spaces.
– Some finishes may wear unevenly over time if you use strong cleaners. Stick to mild cleaners and a soft cloth.
In short, nature-inspired designs can give your kitchen a cozy, grounded look. They pair well with earthy tones and everyday routines. Start by picking one or two key elements—shape, material, or color—and build around them.
Next steps
– Define your budget and mark a couple of finishes you like.
– Visit showrooms or browse online to compare organic shapes and natural materials.
– Bring sample swatches home to see how the faucet looks with your counters and lighting.
34. Nature-Inspired Designs
Editor’s Choice
🛍️
Moen Adler Mediterranean Bronze One-Handle High Arc Modern Kitchen Fauce…
Facing a kitchen sink that never seems to fit all your tasks? An adjustable height faucet can be the fix you need. You raise the spout for tall pots and lower it for quick rinses. Water goes where you want it, with less splashing and less reaching.
Here is why this feature matters in 2025.
– Easy to adjust: You change height in seconds with a simple push or twist.
– Quick access for big jobs: Fill a stock pot or pasta pot without lifting it to the edge of the sink.
– Works with any routine: From kid-friendly cleanup to serious cooking, the height adapts to the task.
– Looks good from every angle: The faucet stays stylish at any height, helping your kitchen feel cohesive.
How to pick a height adjustable faucet that fits you.
– Check the height range: Look for the minimum and maximum height in inches. The broader the range, the more tasks you can handle without awkward maneuvers.
– Decide on a lever style: A single-handle model makes switching temps and heights fast. A two-handle style offers precise control but may take a moment longer to adjust.
– Choose a finish that endures: Stainless steel, brushed nickel, or matte black resist fingerprints and water spots. Pick a finish that matches your sink and hardware.
– Look at the reach and swan neck: A higher arch gives room for large pots, while a curved neck can save space around a cluttered sink area.
– Test the motion: The height should lift smoothly and stay in place once set. If it slips or snaps, it may not last.
Practical tips to get the most from your adjustable faucet.
– Measure your sink and cabinet space first. A tall spout helps, but it can hit cabinets if the room is tight.
– Consider your deck thickness. Most taps fit standard thickness, but some need extra parts.
– Pick a model with a sturdy hose. A flexible hose makes rinsing easy and keeps the spray strong.
– Install with care. If you’re handy, you can mount it yourself. If not, a quick call to a pro can save missteps.
Ways this feature appears in real life.
– You’re boiling vegetables. Raise the spout to avoid splashes and guide the water directly into the pot.
– You’re washing a large baking sheet. Lower the spout for better spray angle and control.
– You’re filling a wide pitcher. A taller height reduces the need to tilt, preventing spills.
Maintenance and care matter.
– Wipe the nozzle and hose after use to reduce mineral buildup.
– Clean the aerator every few months. A clear flow saves energy and keeps spray strong.
– Inspect the joints for stiffness. A tiny amount of silicone-safe lubricant can keep movement easy.
– Matte and brushed looks pair well with stainless sinks.
– Pull-down and spring designs are common and sturdy, with a calm, reliable feel.
Next steps to upgrade your kitchen.
– Start with measurements: height range, reach, and deck thickness.
– Compare a few models in finishes you like.
– Read user reviews about smooth operation and long life.
– Plan installation in a weekend and test it out with everyday tasks.
With the right adjustable height faucet, your kitchen becomes easier to use and nicer to look at. It changes how you wash, fill, and prep, turning small choices into big daily wins.
35. Adjustable Heights
Editor’s Choice
🛍️
Black Kitchen Faucets with Pull Down Sprayer,Waterfall Kitchen Sink Fauc…
You want a kitchen that stays fresh without chasing every trend. In 2025, timeless classics return as elegant faucet designs that keep their charm. They fit many styles, from cozy to sleek, and they won’t look dated soon.
Here is why they work:
– They offer a calm look with simple shapes that mix well with any cabinet.
– Finishes last. Chrome, brushed nickel, and polished brass resist wear when you care for them.
– They feel solid. Thick metal and tight joints show up in how they move and shut off.
What to look for
– Classic silhouettes: Clean lines, balanced curves, and easy-to-use handles. A gooseneck or straight spout with a simple lever looks at home anywhere.
– Enduring finishes: Pick finishes that hide fingerprints and stay bright. Chrome wipes clean; brushed brass adds warmth; satin nickel blends with many colors.
– Quality craftsmanship: Check for a sturdy base, smooth operation, and no wobble. Heavy metal parts and clean seams mean a long life.
How to pick for your kitchen
– Match to your sink and counters. If your backsplash is busy, choose a quiet shape.
– Choose mounting and handles. Deck-mounted faucets with one lever are quick to use. Two-handle options feel classic.
– Think about spray options. A pull-down head helps reach pots and corners.
– Plan for care. Select finishes you can care for with mild soap and water.
Care and upkeep
– Wipe with a soft cloth after use to keep shine.
– Use mild soap and water. Avoid harsh cleaners.
– Check parts occasionally. Replace worn cartridges or hoses before leaks show.
What to do next
– Measure your sink space to know what fits.
– Compare at least three timeless options in person or online.
Geometric designs are showing up in 2025 faucet styles. If your kitchen needs a crisp, modern touch, an angular faucet can shift the whole vibe. These pieces read as art while staying easy to use. Here is why they work.
– Sharp Angles
Faucets with straight lines and edgy corners create a confident look. A square or diamond spout catches the eye and mirrors metal countertops or tile edges. Look for a low arc to keep space over pots clear. A wider handle gap makes it easier to reach with wet hands.
– Bold Finishes
Matte black, brushed metal, or copper tones highlight the angles. A dark finish hides fingerprints and adds contrast with light cabinets. Brushed metal softens reflections so daily use feels calm. Check how the finish holds up in your kitchen light.
– Complementary Shapes
Balance is key. Pair a geometric faucet with square accents, soap dispensers, or a slate sink. Keep curves away from the main faucet line so the look stays clean. If your cabinets have soft curves, choose a tighter profile to avoid crowding.
Next, practical steps to make it work in your kitchen:
– Measure reach and height. Most standard sinks need a 7 to 9 inch reach from the faucet body to the sink edge. Check space for a comfortable swing without hitting the backsplash or the handle.
-Pick durable metal. Look for solid bodies and finishes that resist scratches. Read care tips for matte or brushed finishes. A quick wipe after cooking keeps the lines sharp.
– Plan the look with your cabinets. Light cabinets suit a dark matte finish. Dark wood can take bright brushed nickel.
– Mind maintenance. Geometric shapes hide grime in corners. Choose joints that are easy to clean and seals that resist leaks.
Here are ideas you can try this weekend:
– Swap in a square spout faucet and pair it with square soap dish and dish rack.
– Add a matching pull-out spray head in the same finish.
– Use a simple stainless sink to keep lines clear.
Quick answers to common questions:
– Will geometric faucets fit small kitchens? Yes, pick a compact model with short reach.
– Are they costly? Some are, but you can find midrange options that still look sharp.
– How do I clean them? Wipe often with a microfiber cloth; avoid harsh scrubbing.
Next steps, in four easy moves:
– Measure your sink area and note the space you have.
– Pick a finish that matches your hardware.
– Choose a model with a comfortable reach and good seals.
– Install and test, then tweak accessories for cohesion.
37. Geometric Designs
Editor’s Choice
🛍️
Delta Nicoli Matte Black Kitchen Faucet with Pull Down Sprayer, Bridge 3…
You want a kitchen faucet that adds warmth and personality. A plain metal look can feel safe but bland. Handcrafted finishes bring a real sense of life to your space.
Here is why handcrafted finishes matter:
– Artisanal quality: You’ll see tiny hammer marks, hand-brushed textures, and uneven edges that show a maker’s touch.
– Personal story: Finishes tell a small tale of craft, not just chrome and plastic.
– Unique designs: From rustic to sleek modern, these finishes give your sink area character.
How to spot a good handcrafted finish
– Look for real handiwork: Hammered surfaces, subtle irregularities, and deliberate texture matter.
– Check the patina plan: Some finishes are meant to age gracefully, others stay steady. Decide which path you prefer.
– Choose the metal wisely: Copper, brass, bronze, pewter, and aged nickel are common. Each looks different with your cabinets.
– Ask about protection: Some finishes are lacquered for life with clear protection; others rely on wax or a natural patina. Know what you’re buying.
– See how it pairs: The finish should harmonize with your sink, faucet handle, and surroundingHardware.
Practical ways to use handcrafted finishes in your kitchen
– Warm up a small space: A brushed brass faucet or copper accent can make a compact kitchen feel cozy.
– Pair with natural textures: Combine with wood cabinets, stone counters, or a butcher block island for a welcoming vibe.
– Decide on the coating: If you want long life, choose a protected finish. If you love aging, pick a finish that patinas over time.
– Think about maintenance: Use mild soap and a soft cloth. Avoid harsh cleaners that can wear the finish.
Care and maintenance made simple
– Wipe spills as soon as you can.
– Dry with a soft cloth to prevent water spots.
– Avoid abrasive pads and strong acids on copper or brass.
– Reapply polish or wax if the finish calls for it.
– Inspect yearly for wear, especially on high-use spots.
Pros and cons to consider
– Pros: Rich texture, a distinct look, and a sense of craft in your kitchen.
– Cons: They can cost more and may need a little extra care.
Three steps to add handcrafted finish to your kitchen
– Step 1: select a finish that matches your style and care habits.
– Step 2: compare at least two reputable makers to see real samples.
– Step 3: set up a simple care plan and keep a small polish kit nearby.
Common questions you might have
– Will it patina or change color over time? Many finishes are designed to age gracefully, while some stay fixed.
– Are handcrafted finishes durable? They can be durable, but they often require gentle cleaning and regular care.
– Do I need special tools to maintain them? A soft cloth and mild soap usually do the job.
With the right handcrafted finish, your faucet becomes a focal point that makes your kitchen feel warm, inviting, and truly yours.
38. Handcrafted Finishes
Editor’s Choice
🛍️
Havin Gold Kitchen Faucet with Pull Down Sprayer, High Arc Stainless Ste…
Want a kitchen that feels fresh and full of life? You can get that with a faucet that adds playfulness without making a mess of function. In 2025, fun and funky faucet designs are easier to find than you might think. They bring color, whimsy, and personality to your sink while still doing the work you need.
Whimsical shapes
Look for spouts and handles with a friendly look. Think arching gooseneck shapes, loops, or a touch of whimsy in the lever. A faucet that tilts or bends in a surprising way can become a conversation piece. But keep it practical: check the reach to your sink, and make sure the spout clears the basin when you fill a pot. A clever shape should feel natural as you wash dishes, not just look cute.
Bright hues
Color can punch up a plain kitchen. Choose finishes that are easy to wipe and resist stains. Enamel, ceramic coatings, or resin housings let you pick bold reds, teal, sunny yellows, or soft pastels. Pair a bright faucet with white or gray cabinets to let the color pop. If you worry about fading, pick a shade with a durable surface and a reputable finish. You want color that lasts as your kitchen sees daily use.
Personality & style
Your faucet should echo your overall look. A retro red faucet fits a diner-inspired kitchen. A matte black or brass accent can anchor a modern space with a pop of color elsewhere. Mix and match with your hardware, sink, and lighting to keep the room balanced. The goal is a cohesive vibe, not a cluttered one.
Here is why it works: fun designs make chores feel less dull and meals more welcoming. A colorful faucet can highlight your design choices and give guests something to notice.
Next steps
– Measure your sink and deck: number of holes, countertop thickness, clearance under the cabinet.
– Check compatibility: single-hole or widespread mounting, and the height of the spout.
– Pick a finish that cleans easily and matches your faucet’s color.
– Plan maintenance: a quick wipe keeps colors bright and spots away.
Common questions you might have
– Will colors fade? Look for durable coatings and read care tips from the maker.
– Are bold colors tougher to clean? Not if you choose a smooth finish and avoid harsh cleaners.
– Can you mix styles? Yes, but keep scale and balance in mind so the look stays put.
With these tips, you can choose a fun faucet that fits real life. It adds charm, saves space in your mind for more cooking, and keeps your kitchen feeling fresh.
You want a faucet that stays clean and lasts. In 2025, smart materials bring real help to kitchen taps. These designs use smart surfaces and tough coatings. They fight grime, handle heat, and stand up to daily use. No hype—just calmer cleaning and smoother cooking moments.
Here is why smart materials matter for your sink space:
– Self-Cleaning Features: Surfaces resist stains and splash marks. This means fewer scrapes with a sponge and less scrubbing after meals. Look for finishes that shed water and foods like fingerprints do not cling. Your counters stay brighter, and your faucet stays ready at a moment’s notice.
– Heat-Resistant Coatings: Hot water and hot pots can bounce around the basin. A good coating keeps the finish from warping, peeling, or fading. Check the heat rating on the spec sheet. You want a coating that can survive the kind of heat you actually use in a busy kitchen.
– Durable Construction: Smart materials shine when the core is solid. Brass or stainless steel cores with sturdy seals last longer than cheaper builds. Look for thick walls, durable cartridges, and corrosion resistance. A solid build feels reassuring and ages well in a family kitchen.
How to spot the right faucet in a store or online:
– Read care guides. See what the brand says about cleaning and maintenance. If a surface needs special cleaners, that’s a red flag.
– Check finish options. Matte black, brushed nickel, and polished chrome can all host smart coatings. Pick what hides smudges best for your space.
– Inspect the core parts. A ceramic disc valve, a solid brass body, and good gaskets mean fewer leaks and smoother operation.
– Review the warranty. A longer warranty often means the company stands behind its materials and build.
Putting smart materials to work in your kitchen:
– Start with a high-traffic area. If you cook often, a self-cleaning surface saves you more time.
– Pair with simple care. Wipe once a day with a dry cloth and a mild cleaner. That keeps the coating intact and your faucet looking new.
– Plan for the future. If you upgrade sinks, choose a model with compatible finishes and parts. It saves you effort later.
Next steps. Decide which feature matters most—easy cleaning, heat resistance, or tough build. Compare two or three models, and jot notes on how they feel when you turn the handle, how the finish looks after a week, and what the care guide asks of you. You’ll get a faucet that fits your daily rhythm without extra fuss.
You want a kitchen that feels calm and easy to live in. Scandinavian design fits that need in 2025. It favors clean lines, simple shapes, and honest materials. A Scandinavian-inspired faucet can blend into your space without shouting for attention.
Here is what to look for:
– Minimalist Aesthetic: Simple forms, gentle curves, and little ornament. The faucet should feel quiet and fit your cabinets and sink.
– Natural Materials: Wood or stone accents, and warm metal tones. These add a touch of nature that makes your kitchen feel welcoming.
– Functional Design: A smooth lever or handle, easy reach, and a spout that swivels where you need it. It should work well while still looking good.
– Care and Longevity: Durable finishes that resist fingerprints and water spots. If wood is used, it should be sealed to stand up to moisture.
Choosing these faucets brings a serene, practical kitchen that’s easy to maintain. You get form and function in one tidy package.
Here is how to pick the right faucet for your space:
– Measure the fit: Check how high the spout is and how far it reaches. You want room for large pots and soap bottles on the edge of the sink.
– Pick a finish: Matte nickel, brushed brass, or matte black are common. Match the finish to your cabinet hardware and faucet handles.
– Choose the spout style: A tall gooseneck is popular for its good clearance. A shorter curved spout can look sleeker in small kitchens.
– Test the handle: Make sure hot and cold move smoothly. A single lever should feel steady and easy to control.
– Decide on installation: Deck mount or wall mount depends on your sink and counter. Check the hole size and space behind the sink.
– Check water flow and aerator: Look for a smooth stream and easy flow control. An aerator reduces splash and wastes less water.
– Set a budget: You can find sturdy Scandinavian pieces in a range of prices. Don’t skip quality for price.
Practical tips you can use today:
– For wood accents, keep the handle dry after use. Wipe with a soft cloth and a light oil if the material allows.
– Clean metal finishes with a damp cloth. Avoid harsh chemicals that can dull the look over time.
– Dry the faucet after heavy use to prevent water spots and keep the finish bright.
– Plan for future maintenance. Replace cartridges or seals as needed so the faucet stays easy to use.
Next steps: check your sink size, review three finish options you like, and test lever action in a showroom or online. A Scandinavian-inspired faucet can make your kitchen feel calmer, more usable, and less cluttered.
41. Scandinavian Influence
Editor’s Choice
🛍️
Kitchen Faucet with Sprayer 2 Handle Kitchen Sink Faucets 8 Inch Centers…
You want a faucet that adds depth without shouting. In 2025, dual-tone finishes give you that extra pop. A two-color or two-material faucet can bring texture and a touch of surprise to your kitchen.
What dual-tone means
– You get two colors or two materials on one faucet. This creates contrast that catches the eye.
– It blends metal with ceramic, glass, or another finish for a richer feel.
– It works in both modern and traditional kitchens, so you can switch up your style later.
Three things to decide before you buy
– Contrast: Pick colors that stand out but still look like they belong in the room. Think dark brass with matte black, or brushed nickel with white ceramic accents.
– Material mix: Look for a faucet that pairs metal with another material. A metal body plus a ceramic valve cover adds texture and depth.
– Versatility: Choose a design that fits your cabinets and countertops. You want it to be a natural focal point, not a clash.
Practical looks you can try
– Farmhouse kitchen idea: A pewter body with a white ceramic handle. It nods to tradition but feels fresh.
– Contemporary kitchen idea: A matte black neck with a brushed brass body. The two tones highlight clean lines and a warm glow.
– Classic kitchen idea: A polished chrome base with a satin nickel lever. The mix reads as timeless, not loud.
How to pick and place it in your space
– Consider lighting: Bright light makes both tones pop. In a small kitchen, a lighter tone on the faucet helps bounce light around.
– Match with knobs and fixtures: If your sink area has dark accents, mirror them on the faucet. If your counters are light, keep the dual tone bold but balanced.
– Visual tests: Bring home a sample swatch or use a photo against your cabinets to see if the contrast feels right.
Care and long-term wear
– Clean with mild soap and water. Avoid harsh scrubbers that can dull finishes.
– Wipe dry after use to prevent water spots on lighter tones.
– Check seals periodically. A loose finish can ruin the look, even if the design feels right.
Common questions you might have
– Will it go out of style? Dual-tone looks stay flexible. Pick colors that echo other fixtures in your kitchen.
– Are they hard to clean? They need the same care as single-tone finishes. Gentle cleaning keeps both tones gleaming.
– Do they cost more? Yes, but the price often sits with the added texture and style rather than a big engineering leap.
Next steps
– Define your space: note cabinet color, countertop material, and lighting.
– Choose two finishes that stay harmonious with your room.
– Try mood boards or samples to confirm the contrast you want.
– Plan the install with a pro to ensure the hue balance remains intact.
42. Dual-Tone Finishes
Editor’s Choice
🛍️
FEELSO Kitchen Faucets, Upgraded Filter Water Kitchen Faucet with Pull D…
In 2025, you want a kitchen faucet that uses less water but still delivers a solid rinse. You deserve clean dishes and easy chores without a big water bill. Here is a honest guide to earth-friendly tech you can trust.
What to look for
– Water-saving features: Pick a faucet with a low-flow aerator. It reduces the water coming from the tap while keeping good pressure for scrubbing.
– End-of-life recycling: Choose models built to come apart. If parts can be separated, metals and plastics head to the right recycling stream.
– Green production marks: Some brands show they cut waste and use safer finishes. Look for these hints on the packaging or site.
– Durable materials: Solid brass bodies and quality seals resist wear. Long-lasting coatings keep the faucet looking new.
– Easy maintenance: Smooth surfaces and simple joints make cleaning quick. Fewer places for grime helps a lot in a busy kitchen.
Here is why these choices matter: you wash more with less water, and you waste less overall. You also reduce junk by choosing parts that can be recycled.
How to apply this in your kitchen
– Check the flow rate: Look for 1.5 to 2.2 gallons per minute. That range helps save water without making tasks take longer.
– Read the label: Look for mentions of recyclable parts or easy disassembly.
– Check the finish: Pick coatings that resist rust and smudges. A clean look lasts longer.
– Test the spray: A steady spray pattern helps you rinse greens or scrub pans without extra effort.
– Plan for future changes: If you swap to a new model later, you can recycle more parts and keep waste low.
Common questions
– Are eco-friendly faucets pricey? Some cost more upfront, but you save water and won’t replace parts as often.
– Do low-flow faucets feel weak? Some do at first. Try models with good aeration and longer warranties.
Next steps: Compare three models. Note the flow rate, whether parts can be recycled, and how easy it is to clean. Pick the faucet that fits your style and helps you use less water.
43. Eco-Friendly Technology
Editor’s Choice
🛍️
Black Kitchen Faucets with Pull Down Sprayer,Waterfall Kitchen Sink Fauc…
If you want a kitchen faucet that feels soft, not sharp, you’re in luck. In 2025, elegant curves are stealing the scene. A curved faucet makes your space feel calm and welcoming. It brings a gentle flow to any kitchen style.
Here is why curved designs stand out:
– Flowing shapes: Curvy spouts hug the sink with smooth lines. They mimic the sway of water and draw your eye in a friendly arc.
– Finishes that pop: Look for options like polished chrome, satin nickel, matte black, or warm brass. Each finish changes the mood of the room.
– Style compatibility: Curved faucets fit both old-fashioned kitchens and sleek, modern spaces. They’re a versatile choice that can grow with your room.
Let’s break it down. Here is how to pick a curved faucet that truly suits you:
– Measure and plan: Check your sink size and the hole spacing. A standard deck setup often uses about an 8-inch spread. Make sure the arc reaches the sink bowl nicely.
– Pick a finish and handle style: If fingerprints bug you, choose a finish that hides smudges. Decide between a single-handle for quick temp control or a two-handle model for precise mixing.
– Check reach and height: A taller, graceful arc works well if you have a big sink or a busy kitchen. Shorter curves fit compact spaces without crowding the counter.
– Think about water flow: Look for a good aerator. It creates a steady, gentle spray and uses less water.
– Plan for care: Some finishes show wear more than others. Matte textures hide little scratches; bright finishes show them more.
Next steps for practical use:
– Try before you buy: Imagine washing dishes in your sink with the curve sweeping toward the basin. If it feels awkward, keep looking.
– Match your cabinet hardware: A curved faucet should echo the style of your pulls, handles, and lighting.
– Consider light use vs. heavy use: In a busy kitchen, pick a finish that wears well and a spout that’s easy to clean.
– Check installation: Most curved faucets install on the counter with a single deck plate. Be sure your setup is compatible.
Practical setups you can try:
– Traditional kitchen: A gooseneck curve in oil-rubbed bronze adds warmth and grace.
– Modern kitchen: A slim, high-arc curve in satin nickel looks clean and bright.
– Small kitchen: A compact curved spout with a low-profile handle saves space and keeps counters open.
Care tips in one line: Wipe the faucet with a soft cloth after use to keep its shine.
FAQs you might ask:
– Do curved faucets use more water? Not if you choose a good aerator; flow stays efficient.
– Are curved faucets hard to install? Most models fit standard holes; read the instruction sheet and you’ll be fine.
With the right curved faucet, you add a touch of calm to your kitchen every day.
44. Elegant Curves
Editor’s Choice
🛍️
WEWE Single Handle High Arc Brushed Nickel Pull Out Kitchen Faucet,Singl…
You want a sink that works without a mess. Built-in accessories on 2025 kitchen faucets keep counters clear and chores simple. Features hidden in the faucet base, like a soap dispenser or a towel bar, cut clutter.
Trends show more homes pick built-in accessories to save space in small kitchens and open layouts. In compact kitchens, a built-in soap dispenser stops soap puddles and keeps sinks tidy. Family kitchens see kids dry hands faster with a towel bar at reach.
Here is why these built-in parts help every day.
– Space efficiency: Fewer gadgets on the counter.
– Quick tasks: Soap is ready when you wash; a towel bar is within reach.
– Clean look: Matching finishes and clean lines make the sink area feel tidy.
Choosing the right built-in accessory starts with how you cook and clean.
– Pick what you use most. If you wash hands a lot, a soap dispenser saves steps. If you wipe spills often, a nearby towel bar helps.
– Match materials and finishes. Stainless steel, brushed nickel, or matte black should fit your faucet and sink.
– Think about upkeep. A good dispenser is easy to refill and clean. Look for simple refills and drip guards.
Practical tips you can apply now.
– Measure your sink and cabinet depth before you shop. Make sure the built-in piece fits without touching walls.
– Check the mount. Built-in parts should feel solid when you tug gently.
– Try a quick refill and rinse. This helps prevent clogs and drips.
What to know before you buy.
– Not every faucet has every built-in accessory. You may need to choose one option.
– Price varies. Higher-end models last longer if you care for them.
– Some designs lean toward style over use. Pick a layout that fits your routine.
Next steps to get started.
– List must-have features. Start with a soap dispenser and a towel bar if you cook a lot.
– Compare models with the same finish. It keeps the look clean.
– Read quick setup guides. Look for easy installation and refilling steps.
With the right built-in accessory, your sink feels calmer and works smarter. The faucet and its extras fit your space, not the other way around.
45. Built-in Accessories
Editor’s Choice
🛍️
GAGALIFE Built in Sink Soap Dispenser or Lotion Dispenser for Kitchen Si…
Are you looking for a kitchen fix that adds character without a full remodel? Color blocking on faucets is a smart trend for 2025. A color-blocked faucet uses two or more colors on different parts. It draws the eye and still fits a real kitchen.
What color blocking means for your faucet
Color blocking is about contrast. It lets you pair a main color with one or two accent colors. The result can feel playful or chic, depending on your choices. It works best when the colors echo other elements in your room, like the cabinets, countertop, or backsplash.
Key considerations
– Bold color combos: Choose at least two colors for clear separation on the faucet’s parts.
– Contrast with surroundings: Pick colors that stand out against your cabinets, counters, or sink.
– Playful yet practical design: Look for parts that can carry a color without hiding function.
How to pick your palette
Start with a base color that shows up on the main faucet body. Add a secondary color for the lever, sprayer, or handle. For example, a stainless body with a blue lever can feel fresh in a white kitchen. A black matte body with brass accents adds depth in a warm space. Keep finishes consistent so cleaning is simple and spots are easy to spot.
Practical tips for implementation
– Two finishes, one look: Pair a durable metal finish with a contrasting color on the handle or spray head.
– Lighting matters: Test how the colors look in daylight and under kitchen bulbs. Color can look different when the lights are on.
– Maintenance matters: Dark colors hide water spots better. Light colors show them, but can brighten the space if kept clean.
– Realistic testing: Use photos or small swatches to imagine the faucet in your room before buying.
What to pair with different styles
In a modern kitchen, a two-tone faucet with a chrome body and matte black lever fits the clean line of the room. In a farmhouse or cottage kitchen, brass or copper accents on a white body can feel warm and welcoming. For small spaces, choose brighter accents to reflect light and make the area feel bigger.
Next steps
1) Decide on two colors and which parts get each color.
2) Check that the faucet style matches your sink and mount.
3) Look at cleaning needs and durability of the colors you pick.
4) Visualize the result with photos or swatches to confirm you love it.
Color blocking gives you a simple way to refresh a kitchen without extra work. With careful picks, your faucet becomes a real focal point that stays easy to live with every day.
In 2025, the way faucets are made is changing. You can get style and care for the planet at the same time. The new methods cut waste, shorten truck routes, and use smarter materials. You can pick a faucet that fits your kitchen and your values.
Here is why these changes matter and how you can spot them when you shop.
– Local materials: Look for parts from nearby mills and metal shops. Shorter distances mean fewer miles on heavy trucks. You may see notes like regional sourcing on the box or product page. You get parts that feel solid and reduce air and road pollution.
– Better factory habits: Brands are using less water, recycling scrap, and choosing cleaner energy. The result is less waste and fewer new resources used per faucet. You can enjoy a durable product that traveled a lighter path to your home.
– Open notes about sourcing: Get clear details about where parts come from and how they are made. A simple map, a short paragraph, or a side note can help you trust what you buy. When you know the story, you can choose with confidence.
– Third-party checks: Look for simple stamps or audits that verify materials and process steps. Certifications for recycled content or safe metals help you compare brands. It adds a level of care you can feel when you handle the box and user manual.
– Delivery and packaging: Favor brands that use less packaging or recycled cardboard. Some lines ship with minimal plastic and compact boxes. This saves space in your closet and cuts extra trips to the curb when you dispose of waste.
Next steps for you
– Check product pages for notes about where parts come from and how the faucet was made.
– Ask a seller for a quick supply map or a short explanation of the steps from factory to you.
– Compare two models by looking at the materials, finish, and the way they are built.
– Choose a brand that plans for spare parts and long life, so you can keep the faucet running for years.
Here are common questions
– Do these steps affect price? Sometimes yes, but many brands offer value by using nearby supplies and steady workflows.
– How can I tell if a faucet uses less energy? Look for labels that show energy-related features or simply choose models with metal components that last longer.
Bottom line: you deserve a faucet that looks good and travels a shorter, smarter path to your home.
You’re updating your kitchen and want a finish that feels premium but fits real life. In 2025, black faucets move from trend to staple. They add depth and calm lines to any room.
Here is why black finishes work well:
– Matte black: a subtle, modern base. It hides fingerprints and smudges. It softens bright light and keeps the look calm.
– Glossy black: bold shine that commands attention. It reflects light and makes a focal point. It shows water drops, so quick wipes matter.
– How to pair with your space. Matte black fits light cabinets and warm woods. Glossy black stands out with gray or white counters and stainless steel. Use warm metals for contrast so the scene doesn’t feel cold.
– Durability and care. Look for a coating like PVD. It helps resist scratches and corrosion. Clean with mild soap and water. Dry with a microfiber cloth after use to prevent water marks on glossy finishes.
– Practical tips for choosing. Check for solid seams and smooth operation. Make sure the faucet fits your sink size and deck space. Pick a finish that matches your other hardware.
Maintenance mindset
– Do a quick daily wipe with a soft cloth. It keeps the finish looking new.
– Plan a longer clean once a week with a gentle soap. Rinse well.
– Avoid harsh cleaners. They dull the finish over time.
Styles to match your layout
– For a modern look, try a matte black pull-down model with a long hose. It makes rinsing easy and keeps the surface clean.
– For a classic kitchen, a bridge faucet fits the vibe and stays graceful on counters.
– Check spray options and hose reach. That helps with big pots and deep sinks.
Next steps for you
– Decide how much shine you want. Matte for a calm look, glossy for drama.
– See samples in your kitchen light before buying. A small test helps you see aging and fingerprints.
– Pick a finish that harmonizes with your sink and appliances. That makes the whole room feel pulled together.
With careful choices, black finishes stay chic. They age well if you keep care simple. Your kitchen gains a refined, current feel that lasts.
48. Luxurious Black Finishes
Editor’s Choice
🛍️
FORIOUS Black Kitchen Faucet with Pull Down Sprayer, High Arc Single Han…
If you want a kitchen that looks clean and calm, the faucet is a key piece. A faucet that blends with your counter and sink can make the whole room feel bigger and easier to use. Here’s how to get that flush, built-in look that buyers and DIY-ers love in 2025.
Why this matters
A good blend makes every task feel smoother. When the faucet sits low and quiet against the counter, your sink area is easier to wipe down. You’ll notice less crowding around the edges and fewer places for gunk to hide. The result is a kitchen that looks polished and works well for daily chores.
How to achieve the look
Think about three things: the mount, the material, and the overall design. Each piece should work with the counter so the space reads as one.
– Flush-to-countertop designs
Look for faucets that mount directly to the counter and sit close to the surface. This gives a sleek, low-profile look. If you have a thick countertop, check the faucet’s deck height and spout reach to avoid splashing on the backsplash. A well-chosen flush-mount faucet feels almost invisible, yet it still works beautifully.
– Matching materials
The finish should echo your countertop and sink. If your counter is cool gray quartz, a satin nickel or brushed chrome finish often reads as a natural match. For dark stone, matte black or oil-rubbed bronze can disappear into the surface while still offering a touch of contrast. If you have a white or light stone, chrome or brushed brass can keep things bright without shouting.
– Design harmony
Keep lines simple and clean. Avoid ornate handles or extra curves that clash with a modern slab of stone. If your faucet has a pull-down spray, choose a hose that stores neatly and doesn’t poke out when you’re not using it. The goal is a cohesive look where the faucet supports, not competes with, your counter and sink.
Practical considerations you can act on
– Check hole count and deck thickness. Decide if you want a single-hole faucet with a deck plate or a multi-hole setup. This keeps the top looking tidy and avoids extra gaps.
– Measure sink and backsplash space. A tall spout might look nice, but it can crowd the window or cabinet area. Aim for a balanced silhouette.
– Think about maintenance. A smooth, single finish tends to wipe clean quickly and hides water spots better than busy textures.
– Plan for installation. If you’re replacing the faucet as part of a counter upgrade, a quick call to a plumber can prevent leaks and ensure the seal is tight.
Next steps
– Gather finish samples that match your counter color and texture.
– Confirm the hole configuration on your sink before buying.
– Read warranty terms for finish and moving parts.
– Set aside time to install or schedule a pro if needed.
By choosing flush-mount designs, materials that echo your counter, and a simple, harmonious look, you create a kitchen that feels calm and ready for any task. Your space earns a refined touch without extra clutter.
49. Seamless Integration
Editor’s Choice
🛍️
FORIOUS Kitchen Faucets with Pull Down Sprayer, Brushed Nickel, High Arc…
Your faucet should do more than turn on water. It should feel right in your hand and fit the room. In 2025, your style matters as much as how well a faucet works.
Here is why your choice matters. It shows your taste and keeps your kitchen feeling like home.
– Design Variety: Pick from vintage, modern, farmhouse, or industrial looks to match your cabinets and counters.
– Color Options: Choose finishes that speak to your design plan, such as brass for warmth or matte black for contrast.
– Unique Features: Look for helpers that make daily tasks easier, like a pull-down spray, quick-clean nozzle, or hands-free control.
Let your faucet be a small piece of art that also serves you well. When you start with a clear style goal, the rest falls into place.
Here is why you should shop with style in mind. Your kitchen becomes more inviting, and daily chores feel smoother.
Next steps to pick your perfect style:
– Match with the room: Compare the faucet finish to your cabinet hardware and sink. A common rule is to keep metals in the same family.
– Test the feel: Hold the handle, test the spray, and imagine you washing pots or filling a kettle. It should feel natural, not stiff.
– Check size and fit: Measure hole count, deck thickness, and the reach of the spout. Make sure it clears the sink and cabinet doors.
– Plan for upkeep: Choose finishes that resist fingerprints and are easy to clean.
– Set a budget: Decide what you will spend and compare warranties. A solid warranty helps if parts wear or leak.
By focusing on personal style expression, you turn a simple fixture into a daily friend. Your kitchen becomes warmer, more useful, and genuinely yours.
Here are extra tips to guide your choice:
– Materials and Finishes: Brass, bronze, nickel, and stainless each have a different feel and care needs.
– Style Pairing: Think of your sink, cabinets, and faucet shape as a set. A darker finish stands out on light cabinets; a lighter finish blends with dark ones.
– Shopping Smart: In the store, move the handle, check for smooth operation, and look for any leaks. Check the hose reach and the spout height.
– Maintenance Mindset: Clean with mild soap, dry after use, and wipe fingerprints to keep the finish looking its best.
With these steps, you can choose a faucet that fits your life and your home. It will feel like it was made for you from the start.
50. Personal Style Expression
Editor’s Choice
🛍️
FORIOUS Kitchen Faucets with Pull Down Sprayer, Brushed Nickel, High Arc…
As we step into 2025, the world of kitchen faucets offers endless possibilities for transforming your space. From vibrant colors to innovative designs, there’s something for every homeowner looking to elevate their kitchen.
Embrace these stunning trends and find the faucet that truly resonates with your style and needs. After all, your kitchen should reflect who you are!
Note: We aim to provide accurate product links, but some may occasionally expire or become unavailable. If this happens, please search directly on Amazon for the product or a suitable alternative.
This post contains Amazon affiliate links, meaning I may earn a small commission if you purchase through my links, at no extra cost to you.
Frequently Asked Questions
What are the key trends in kitchen faucets for 2025?
In 2025, expect to see a variety of exciting trends in kitchen faucets. You’ll find bold colors that add vibrancy, sleek modern designs that promote simplicity, and a resurgence of vintage-inspired charm. Smart faucets are also making waves, offering features like voice activation and touchless technology to enhance convenience. Plus, eco-friendly materials are becoming a staple, allowing you to save water without sacrificing style.
How can I choose a kitchen faucet that matches my decor style?
Choosing the right kitchen faucet to match your decor is all about understanding your style. If you love a modern aesthetic, go for sleek lines and minimalist designs. For a more rustic vibe, consider farmhouse or vintage styles. If you want a bold statement, try faucets with unique finishes or artistic shapes. Ultimately, select a faucet that speaks to your personal style while also providing the functionality you need.
Are smart kitchen faucets worth the investment?
Absolutely! Smart kitchen faucets are not just a trend; they offer real convenience and efficiency. Features like touchless activation and voice control can streamline your cooking and cleaning process, making daily tasks easier. Additionally, many smart faucets come with built-in water filtration systems, ensuring you have clean water at your fingertips. Investing in a smart faucet can enhance your kitchen experience and add a modern touch to your space.
What eco-friendly options are available for kitchen faucets in 2025?
In 2025, eco-friendly kitchen faucets are more accessible than ever! Look for models made from recycled materials or those that incorporate water-saving technologies. Many faucets now come with features that help reduce water flow without compromising performance, allowing you to maintain a stylish kitchen while being kind to the planet. Opting for eco-friendly faucets not only benefits the environment but can also lower your water bills!
How do I maintain my kitchen faucet to ensure longevity?
Maintaining your kitchen faucet is key to ensuring it lasts for years to come. Regularly check for leaks and tighten any loose fittings. Clean the faucet with a gentle cleanser to avoid scratches and remove mineral buildup from hard water. Also, consider replacing the aerator periodically to maintain optimal water flow. By taking these simple steps and being mindful of how you use your faucet, you can keep it looking great and functioning well for the long haul!
I put this together because a bright, welcoming kitchen can lift your whole home, but a full remodel can feel out of reach. This post shows you that a refreshed look is possible with small, smart upgrades. If you crave a kitchen that feels new without blowing your budget, you’re in the right place.
This post is for homeowners and renters who want style without stress. If you care about durability, easy updates, and a space that fits real life, this is for you. You’ll see ideas that are practical, affordable, and doable on weekends or weeknights.
Inside you will find 20 budget friendly kitchen remodel ideas you can use now. From paint and lighting to hardware and clever storage tricks, these ideas are designed to be affordable and simple. Each one comes with clear steps you can follow and a quick cost idea so you can plan with confidence.
Number five is a real surprise. It costs little but changes the mood of a room in minutes, and it doesn’t require fancy tools. You may see a bold note, a soft update, or a small swap that makes the whole kitchen feel new.
Here is how to use the guide. Pick a budget range and two or three ideas that fit your space. Test paint swatches on a wall, compare cabinet hardware, and map out a weekend plan. Look for sales, consider second hand pieces, and keep a simple list of what you need.
Ready to start? Save this post, share it with a friend, or comment which idea you want to try first. Read the full list to pick ideas that match your kitchen shape and your daily routine. Let’s make a small, smart update that shines.
If your kitchen looks tired and your budget is tight, painting the cabinets is a smart fix. It changes the whole room without tearing things apart. A clean, fresh look can lift your mood every day.
Here is why it works. It costs far less than new cabinets. It takes a weekend or two, not months. You decide the color and the finish. A solid paint job can last for years with good prep.
Next, choose colors that fit your space.
– Light colors brighten a dark kitchen. Soft whites, eggshells, and pale pastels bounce light around the room.
– Deep tones add drama. Navy, forest green, and charcoal make the room feel bold and chic.
If you want balance, pair cabinet color with warm or cool accents. Match the tile, countertop, and hardware to your chosen palette.
Finish choices. The finish affects how the space looks and how easy it is to clean. A semi-gloss gives a tiny shine and fights fingerprints. A satin finish hides small marks but stays smooth. For a modern, matte look, chalk paint is a popular budget option. It’s light on the wallet if you skip an expensive sealer.
Prep and process. A clean start saves you time and trouble. Remove doors and drawers, then label each piece so it rehangs the same way. Lightly sand surfaces to help paint grip. Wipe away dust with a damp cloth. Use a stain-blocking primer on wood with a lot of stain or old varnish. Apply two even coats of paint, letting each coat dry completely before the next one.
Next steps: take your time and stay organized.
Tools and materials you will need:
– Soap and warm water or a gentle cleaner
– Sandpaper or a sanding block
– Painter’s tape and drop cloths
– A roller kit and angled brushes
– Primer and cabinet paint
– Screwdriver and a small tray for brushes
Tips you can use:
– Tip: Chalk paint delivers a modern look at a lower cost if you already own brushes.
– Insight: A matte finish hides marks better in a busy kitchen.
– Trick: Remove doors and drawers first for clean edges and easier painting.
Common mistakes to avoid:
– Skipping cleaning and sanding before painting.
– Applying paint too thick in one coat.
– Forgetting to prime on stained or slick wood.
– Leaving hardware on while painting; it can cause smudges.
Maintenance and final touches:
– Wipe spills quickly to prevent staining.
– If edges wear, touch up with a small brush to keep the surface even.
– Consider new knobs or pulls to finish the refreshed look.
With careful prep and steady hands, you can revitalize your kitchen on a tight budget. The payoff is quick, and the space feels brighter and more you.
1. Paint Your Cabinets
Editor’s Choice
🛍️
FolkArt Home Décor Chalk Finish Acrylic Paint, 8oz, 8 ounce, Milk Jug
Open shelves can cut costs and brighten your kitchen. They free up wall space and make the room feel bigger. You’ll see what you use daily at a glance. It’s easy to change the look by swapping items.
Here is why this idea fits a budget remodel. Start small to test the vibe before you commit a lot of wall space.
– Materials that fit your budget Pick simple boards like pine or standard plywood. If you want warmth, a clear stain helps. Reclaimed wood adds character and saves money, but seal it so moisture won’t hurt it.
– Placement and mounting Plan how many shelves you need and where they should go. Find wall studs and use sturdy brackets. A single long shelf can work, but two or three shorter shelves balance the space and make loading easier.
– Depth and height Aim for 8 to 12 inches deep. Leave 12 to 18 inches between shelves. That space fits plates, cups, and tall glassware without crowding.
– Display ideas that work Group items by color or use. Put often used pieces on the lower shelves. Mix white dishes with clear glass for sparkle. Add a small plant or a decorative piece to bring life to the display.
– Maintenance and safety Put heavy items on the lower shelves or on extra supports. Check screws after a week or two and tighten if needed. Wipe the shelves with a damp cloth to keep dust away.
– Finishing touches Use a protective seal on wood to resist moisture. Choose a simple finish so the shelves fit many styles. If you want a quick update, swap a few color accents rather than a full overhaul.
Next steps and quick checks: Measure your space carefully. Sketch a simple layout before you cut. Gather boards, brackets, screws, and a level. Start with one wall to see how it feels. If you rent or want to avoid wall damage, use removable brackets and lighter boards.
Open shelving gives you cost control and a fresh, airy vibe. It helps your kitchen feel bigger and more inviting while keeping essentials within reach.
2. Install Open Shelving
Editor’s Choice
🛍️
Edge-glued Board by Walnut Hollow, Pine, 12″ x 16″ x 3/4″, (Pack of 1), …
If your kitchen looks tired but you don’t want a full reno, updating fixtures is a smart move. A few small changes can wake up the space. You’ll notice brighter light, cleaner lines, and a more practical layout. And you can finish it in a weekend.
What to swap and why
Start with cabinet knobs, drawer pulls, and the faucet. These parts show every time you reach to open a door or wash your hands. Fresh, simple pieces make the whole room feel newer.
– Mix it up Mismatched hardware adds a playful, eclectic vibe.
– Shop smart Look for vintage finds at flea markets or thrift stores for real character.
– Choose a finish Matte black or brass finishes bring a hint of luxury to basic cabinets.
– Keep the flow Pick finishes that echo your faucet or lighting for a smooth, unified look.
How to pick finishes that live well together
Two or three tones work best. Too many metals can feel busy. If your appliances are stainless, go with matte black, brass, or bronze for hardware. If your wood is warm, brass or oil-rubbed bronze can feel right at home. This helps the eye move through the space instead of fighting with it.
Practical steps to do the upgrade
– Measure first Check the hole spacing on your doors and drawers so you buy the right size knobs and pulls.
– Choose and pair Pick two finishes that match your style and keep the same shape family for a unified look.
– Prep the area Turn off the water if you are swapping the faucet. Lay cloth to catch screws and small parts.
– Install with care Take your time lining up screws and rows. Tighten evenly and wipe away fingerprints.
– Test and enjoy Open and close many times to ensure smooth operation and a clean finish.
Budget-friendly notes
Hardware updates usually cost far less than a full remodel. If you add a new faucet, plan for a little extra time for plumbing basics. Small upgrades can lift the mood of your kitchen without a big price tag.
Next steps
Grab a tape measure, pick two finishes you love, and hunt for a few pieces this weekend. You’ll be surprised how fast your kitchen feels new.
You want a kitchen splash that shines without draining your pockets. You can get a bold look with smart, affordable choices. Here is how to revamp your backsplash on a budget and still love the result.
– Option 1: Peel-and-stick tiles
Peel-and-stick tiles are easy to install. They come in many colors and patterns. Measure the area first, then cut with scissors where needed. Clean the wall smooth and dry before you start. Press the tile firmly for a strong hold. You’ll see instant color and texture right where you cook. This is a quick upgrade that fits tight schedules and tight budgets. Think copper tones, deep blues, or bright whites to brighten the room. The finish can mimic real tile without the cost. If you ever want a refresh, it’s simple to peel off and swap.
– Option 2: Metallic or colorful accents
Metallic or bold colors make your kitchen pop. Look for metal-look sheets or foil tiles you can attach with the same peel-and-stick method. The light will bounce off the surface and give the room a new feel. For small kitchens, a strip along the stove or around the island can define the space. If you choose color, pick a shade that ties into your cabinet or countertop. A little shimmer or a bright hue can create drama without a big price tag.
– Option 3: Subway tile on a budget
Subway tiles look clean and timeless. You can buy real ceramic tiles or use stick-on subway tiles for easier DIY. White, gray, or pale cream tiles reflect light and make the room feel larger. Lay them in a classic brick pattern for a simple look. Use a traditional grout color if you want a crisp finish. If you are short on time, go with a ready-made panel that snaps into place. Either way, you get the familiar, tidy backsplash that lasts.
– Option 4: Painted accent wall
A painted panel can feel like a true backsplash without tile costs. Tape off a border around the area you want to cover. Pick a color that complements your cabinets and countertop. For a fun twist, use chalkboard paint on a small section for notes or recipes. Or try a stucco or textured finish for depth. Paint is forgiving and easy to update later.
– Option 5: Mix, match, and texture
You can blend a few ideas. Pair a painted strip with a small tile accent to add depth. A glass mosaic insert near the sink can catch light and appear vibrant. Keep grout colors simple to avoid busy looks. This approach gives you a custom feel without a big budget.
Here is why these ideas work. They let you tailor the look to your space. They fit tight budgets and busy schedules. They are easy to update in the future if you want a new style.
Next steps:
– Measure the area and pick your favorite option.
– Gather tools and do a quick prep clean.
– Install the chosen backsplash and step back to admire your work.
4. Revamp Your Backsplash
Editor’s Choice
🛍️
Art3d Smoothing Tool Kit for Applying Peel and Stick Wallpaper, Vinyl Ba…
Is your kitchen begging for a fresh look, but your budget won’t bend? You can redo the counters without burning a hole in your wallet. The right surface can boost the room’s feel and stay easy on your cash. Here is how to get big impact with small spend.
– Laminate countertops
Laminate is a smart choice when you want color, pattern, and a smooth surface. It can imitate stone, marble, or wood without the high price. Look for thicker laminate and tight seams. Snap it on over your old top, or have a pro trim and edge it for a cleaner finish. The result? A clean, modern look that’s easy to wipe down.
– Butcher block countertops
Wood brings warmth and a friendly touch to a kitchen. Pair butcher block with white cabinets for a classic vibe. You can buy blocks ready to install or use a butcher-block sheet over your existing top. Sand lightly, seal well, and oil or wax every few months to keep the wood from drying out. It warms the room and invites you to prepare meals with a smile.
– Epoxy coatings on current counters
Glossy epoxy coats can give you that stone or concrete feeling without replacing the top. It’s a fast upgrade that adds a durable, wipe-clean surface. Prep is key: clean, sand, and remove old finishes. Apply the epoxy in thin layers, add color chips if you like, then seal with a clear top coat. The shine is striking, and repairs are simpler if you nick a corner.
– Painted or faux stone finishes
You can transform a plain surface by painting with a tough, alkyd or enamel paint. Finish with a durable topcoat to resist heat and moisture. Painted countertops work best on laminate or wood with good prep. You can mimic stone, concrete, or a solid color that fits your cabinet tone. It’s a fast, friendly option for a bold change.
Here is why these ideas fit a tight budget: you choose the material that matches your needs, you do most of the work yourself, and you avoid costly removals. Each method lets you refresh the kitchen’s look without a full remodel.
Next steps to make this come true:
– Pick one option that matches your daily use and style.
– Measure your existing counters and decide if you’ll cover the top or replace a small section.
– Gather the right supplies with clear instructions.
– Do a small test patch first to see how the finish holds up.
With a little planning, your counters can shine. You’ll notice the room feels bigger, cleaner, and more inviting. Your family will notice, too, every time you cook or prep a quick snack.
5. Transform Your Countertops
Editor’s Choice
🛍️
VEELIKE Grey Granite Kitchen Countertop Peel and Stick Waterproof Marble…
Choose light colors to brighten; use chalk paint for a modern look.
Install Open Shelving
$20-$100
Wood boards, brackets, screws
Start small; use reclaimed wood for character.
Update Fixtures
$10-$100
Knobs, pulls, faucet
Mix finishes for an eclectic vibe; shop thrift stores for unique finds.
Revamp Your Backsplash
$30-$150
Peel-and-stick tiles, paint
Consider metallic accents or painted panels for a bold look.
Transform Your Countertops
$50-$300
Laminate, butcher block, epoxy
Choose durable materials; consider DIY for cost savings.
Add a Kitchen Island
$50-$200
Table or dresser, countertop material
Use a mobile cart for flexibility; add storage underneath.
Incorporate Smart Storage Solutions
$10-$100
Shelves, hooks, bins
Utilize wall space; create zones for cooking and prep items.
6. Add a Kitchen Island
Are you trying to add more space in your kitchen without blowing your budget? A kitchen island can be the solution you want. It adds prep room, style, and a place to gather.
Here is why a DIY island works for real homes. You get extra counter space for chopping, mixing, and cooling. You also gain extra storage with shelves or drawers below the top. Best of all, you can tailor it to what you already own. No need to buy a store‑bought unit if your budget is tight.
Next steps to build a makeshift island that fits your space. Start with a solid base, like a sturdy table, a workbench, or a repurposed dresser. Make sure the legs are stable and the height is about 34 to 36 inches. A steady base keeps you safe when you work or lean in for a quick chop. Add a durable top that’s easy to clean. A butcher block or a sealed laminate works well. The top should overhang the base slightly for seating and easier prep.
– Mobility matters: use a scuffed cart or a small mobile island on wheels. You can move it for cleaning, parties, or to open up floor space when you cook alone.
– Storage on a budget: tuck in a few baskets, bins, or open shelves under the top. It keeps odds and ends handy without clutter.
– Surface that lasts: choose a finish that resists water and stains. A simple seal or clear coat keeps the wood or laminate looking fresh.
Here is a simple style plan you can follow. Pick a look that matches your kitchen to keep the whole room feeling connected. A natural wood top with a light painted base reads calm and classic. A bold color on the base makes the island stand out as a focal point. If you want a more industrial vibe, go with metal accents and a dark finish. If you love a cozy vibe, try soft neutrals and warm wood tones.
Next steps to make it work in your day to day. Measure your space before you buy or borrow items. Decide if you need wheels, extra storage, or a seating edge. Gather a few tools and materials you already have. Take your time and test the height by standing at the island and reaching across it. Fine tune the setup so you have room to move and room to set down hot pans.
A personalized island boosts how your kitchen feels. It makes cooking easier and adds everyday charm to your space.
If you feel your kitchen sits on top of clutter, you’re not alone. You want space that feels calm and items you can grab fast. Smart storage can deliver that without big changes or big costs. Here is a practical path you can take today.
– Let walls work for you. Use slim shelves or rails along empty wall spots. A high rail next to the stove holds pots and pans, while a small shelf above the fridge keeps rarely used tools in reach without crowding counters.
– Lines you can feel. Hooks and racks make lids, ladles, and oven mitts easy to grab. Install a row of hooks on the inside of a cabinet door or on a kitchen island. Items hang within arm reach and stay off the counter.
– Magnetic and metal helpers. A magnetic strip on the wall or the side of a cabinet holds knives and spice tins. It frees drawer space and keeps everyday items visible. If metal strips feel cold, add a warm wood trim to blend with your style.
– Inside the cabinet, smart organizers. Look for pull-out shelves, slim roll-out trays, and adjustable dividers. These keep cans, bottles, and snack bags organized. With one pull, you see what you need.
– Repurpose old furniture. A sturdy bookcase or a small buffet can become a pantry station. Use baskets for snacks and jars for grains. It adds character and extra storage without buying new furniture.
– Clear containers plus simple labels. Glass or clear plastic jars let you see contents at a glance. Keep pantry items together by category—grains, beans, snacks. Labels in chalk or tape make it easy to return items to place.
– Create zones for real use. Put cooking items near the range, prep gear beside the counter, and cleaning supplies under the sink or in a nearby cabinet. Zones cut down on trips and keep the flow natural.
Here is why these ideas work. They use the space you already have, not just more boxes and bins. They mix fast fixes with small upgrades, so you finish a project in a weekend.
Next steps
– Step 1: list what you use most and what slows you down.
– Step 2: pick two ideas that fit your space and budget.
– Step 3: install one new storage helper this week, then reassess.
– Step 4: label jars and zones to keep the system neat.
With a clear plan, your kitchen stays tidy, costs stay low, and you enjoy every step you take at the counter.
7. Incorporate Smart Storage Solutions
Editor’s Choice
🛍️
SONGMICS Cabinet Organizer Shelf, Set of 2 Kitchen Counter Shelves, Kitc…
If you want a fresh kitchen without a big renovation, wallpaper or wall decals can be a real game changer. This is a quick, low-cost way to add your own voice to the room. Peel-and-stick options make it simple to try a look and change it later.
Here is why this approach fits a budget kitchen remodel. It costs much less than a full paint job or new finishes. It is flexible, so you can test patterns and colors without feeling stuck. Best of all, you can remove it when you want a new vibe.
– Feature wall idea: put wallpaper on just one wall to create a focal point. A bold geometric or soft floral can set the mood for the whole room.
– Decal twist: try wall decals on cabinets or even on a fridge or oven panel for a playful touch.
– Change with the seasons: removable options let you switch styles the moment you tire of the look.
Choosing the right pattern is easy if you keep a few rules in mind. If your kitchen is bright and open, go with light, airy patterns. For a cozier space, look at warmer tones and smaller repeats. Think about how easy the design is to clean. Washable vinyl is a smart pick for kitchens. Consider color schemes that tie to your countertops and hardware. If you want a calm feel, pick soft florals or subtle textures. If you crave energy, bold geometrics or high-contrast colors can wake up the room.
Here is how to install and care for your wall decor. First, make sure the surface is clean, smooth, and dry. Second, measure and plan the layout. Third, cut wallpaper or decals with room for trimming. Fourth, peel away backing and press from the center outward to push out air bubbles. Fifth, run a smoothing tool along edges and seams. Sixth, wipe away any excess adhesive with a damp cloth before it dries. Finally, avoid placing wallpaper in direct heat near the stove or in very humid corners.
What to watch for before you commit. Peeling works best on smooth, flat walls. If your walls have texture, you may need a skim coat first. In kitchens with high steam, choose vinyl, washable options so cleaning stays easy. Remember, removal should be easy if you pick the right product, but take your time to plan and measure. With a little care, your kitchen can feel new without breaking the bank.
Next steps: decide where you want the feature wall, pick a pattern, and give removable wallpaper a try. You might discover a look you love enough to keep long after the price tag is forgotten.
Transform your kitchen without breaking the bank! A pop of wallpaper or clever wall decals can breathe life into your space without the hefty price tag of a full remodel.
8. Use Wallpaper or Wall Decals
Editor’s Choice
🛍️
Art3d Smoothing Tool Kit for Applying Peel and Stick Wallpaper, Vinyl Ba…
Your kitchen deserves better light. It makes hearts feel warmer and tasks feel easier. If you want a brighter cooking space without a big price tag, you are in the right spot. Here is why lighting matters: it helps you see when you chop, it sets the mood for meals, and it can make a small kitchen feel bigger. Let’s break it down into simple layers you can add this weekend.
– Three lighting layers. Plan for ambient, task, and accent light. Ambient fills the room with even brightness. Task lights focus on counters and islands. Accent lights add warmth and style.
– Ambient lighting options. Start with a ceiling fixture or recessed LED cans. Choose a clean, low profile look if you want a modern feel. Pick a color temperature around 2700 to 3000 Kelvin for a warm glow. This makes mornings calm and dinners cozy.
– Task lighting that helps you cook. Under-cabinet lights brighten the work surface. Add lights on the island or near the stove. Use LED strips or puck lights that sit close to the counter edge. Avoid glare by aiming lights downward.
– Accent lighting for style. Add a small wall sconce or a pendant that draws the eye. Highlight a glass cabinet, a brick wall, or a tile splash. A little glow behind the rim of a shelf can add depth.
– Fixtures that fit your style. Mix metal tones or choose a bold pendant for the island. For a retro vibe, use vintage style bulbs in a modern fixture. For a clean look, pick satin nickel or black finishes.
– Bulbs and controls. LED bulbs save energy and last long. Aim for 2700K to 3000K for warmth. Install a dimmer switch to adjust brightness for cooking and for cozy dinners. A smart bulb is handy but not required.
– Budget-friendly steps to start. Swap a couple of fixtures first. Add under-cabinet lights later if needed. Look for affordable LED kits that snap in place. Many options are plug-in and easy to install yourself.
– Practical tips for easy setup. Check your ceiling box and plan where wiring runs. Measure your island to choose pendant size. Leave room to upgrade later if you want more light.
– What to expect and limits. Good lighting changes the feel a lot, but it won’t fix a cramped layout or bad color choices. Pair lighting with cheerful wall colors and cabinets for best results.
Next steps. Sketch a simple plan on paper. Decide where each lighting layer will go. Buy a few key pieces to try first and test the look before adding more.
Good lighting can turn an ordinary kitchen into an extraordinary space! Layer your lights for a brighter, more inviting cooking haven—because every meal deserves a little magic!
9. Upgrade Your Lighting
Editor’s Choice
🛍️
Gritin 10.2inch Under Cabinet Lighting Rechargeable -84 LED Super Bright…
You want a cozy breakfast nook but fear your kitchen is too small. You can create a warm dining spot in a tight corner. It adds charm and makes mealtimes feel special without a major remodel.
Here is how to build a kitchen breakfast nook that works in a small space.
– Choose a compact table: Pick a round or square table about 24 to 30 inches wide. A small footprint keeps flow clear. If you can, use a pedestal base so legs don’t get in the way. A fold-down leaf or drop side helps when guests drop by.
– Two slim chairs or a bench: Two armless chairs fit under the table and feel light in a small room. A slim bench is even kinder to space and can slide under neatly. Look for low backs so you don’t crowd the room.
– Thrift for character: Check thrift shops or online marketplaces for stylish finds. A vintage wood table or painted chairs add personality. A quick refresh—sand, prime, and a fresh coat of paint—can make mismatched pieces look intentional.
– Pillows and color pops: Add cushions to boost comfort. Pick colors that echo your cabinets, rug, or tile. A bright pillow or two gives a friendly, welcoming vibe. A small rug under the nook softens the floor and anchors the setup.
– Personal touch: Hang a tiny piece of art or a chalkboard nearby. Write today’s specials, a family motto, or a playful note. It personalizes the space without big costs.
– Layer in the light: Choose warm light to invite people to sit. A small pendant or wall sconce keeps the area bright without glare. If wiring is tough, a plug-in pendant with a tidy cord works well.
– Smart storage: Add a narrow wall shelf for mugs or a couple of cookbooks. A small basket under the table can hold napkins, placemats, or kid-friendly toys. Hooks on the wall give you quick spots for bags or aprons.
– Plan and budget: Set a clear limit and shop with a list. You can assemble a great nook with thrift finds and simple upgrades. Expect a weekend to set it up, not a month.
This breakfast nook in your kitchen offers a warm hub for mornings and a cozy corner for chats. It makes daily meals feel special and invites the whole family to gather. It’s practical, affordable, and easy to customize as trends shift.
10. Create a Breakfast Nook
Editor’s Choice
🛍️
Unovivy 31.5″ Small Round Dining Table for 2-4, Space Saving Circle Kitc…
Here is why an area rug can transform your kitchen. It adds warmth and texture that make the space feel inviting. You’ll notice a softer step underfoot and a quieter room when you cook or dine.
Choose the right rug for busy kitchens
Pick a rug that is durable and easy to clean. Look for materials that handle spills and heavy foot traffic. Polypropylene, nylon, and cotton blends are good options. Flat weave and low pile rugs are easiest to dry and vacuum. A washable rug is a smart choice if you bake often or have kids.
Safety first with non-slip options
Next, check for a non-slip backing or add a rug pad. A pad keeps the rug from sliding and helps prevent slips. It also protects the floor from scratches. Keep the pad under the rug the moment you set it down. Simple safety steps keep you moving with confidence.
Where to place rugs in a kitchen
Place a rug in high-traffic zones like the sink area or in front of the fridge. A long runner works great along the kitchen’s main work aisle. Put a small mat by the stove or dishwasher for comfort when you’re standing. If you have a dining nook, a rug under the table can anchor the space.
Color, patterns and style tips
Use color to tie the room together. A bright rug can wake up neutral floors and cabinets. Textured or patterned rugs add character without loud décor changes. Stripes or simple geometric designs work in most kitchens. If your floor is busy, pick a rug with calmer tones. If your floor is plain, a bold rug can be the star.
Care and maintenance you can handle
Spot clean spills quickly with a mild soap and water. Vacuum regularly but avoid high heat or harsh brushes on delicate fibers. Lift the rug to shake out crumbs every now and then. Dry spills thoroughly to prevent mold.
Budget and security tips
Don’t overspend on a kitchen rug. Look for durable, washable options that fit your space. Check discount outlets or secondhand shops for good finds in clean condition. A well cared for rug lasts longer than it seems.
Things to watch out for
Rugs can trap crumbs and moisture if placed in the wrong spot. Don’t put a rug where water splashes are heavy or the rug won’t dry. In kitchens with lots of humidity, choose quick-drying fabrics.
Next steps
Measure your kitchen area before buying. Aim for a rug size that leaves a border around the edges. Read care labels to know cleaning steps. Add a thin, grippy rug pad for safety. With these tips, you can get a stylish, practical rug that fits your budget and taste.
You want a kitchen that looks fresh and costs less to run. Eco friendly choices help the planet and can save you money over time. Here is why green picks fit a budget remodel.
Here is why you should consider eco options in your kitchen:
– Bamboo flooring is durable, warm, and easy to clean.
– Recycled glass tiles create bright backsplashes that turn waste into art.
– Low-VOC paints keep indoor air cleaner for you and your family.
– Reclaimed wood cabinets or shelves add character and save resources.
– Upcycling old furniture is stylish and cuts your costs.
– Local sources help cut transport and carbon.
Next steps: plan with a simple checklist and a small budget.
Here is a practical plan to start today:
– Decide which areas to upgrade first, like the floor or the backsplash.
– Pick one eco material for each area, for example bamboo for the floor and glass tile for the wall.
– Check products for low-VOC labels and safe finishes.
– Look for local shops, salvage yards, and good online listings for deals.
– If you can, refinish cabinets or stain old wood instead of buying new.
Here are tips you can use right away:
– Mix new eco products with upcycled pieces for a fresh look.
– Compare prices and read reviews before buying.
– Small changes add up, like switching to LED lights and a water saving faucet.
Common questions:
– Are eco options pricey? Not always. Basic bamboo and reused materials can keep costs down.
– Do I need a pro to install them? Some tasks, like painting, can be DIY. Bigger jobs, like flooring, may need a pro.
Next steps:
– Start with one small eco upgrade this weekend.
– Gather a few sample boards, paint swatches, and price quotes.
– Create a simple plan and a rough budget.
Choosing eco-friendly options shows your style and care for the planet.
If you want your kitchen to feel brighter without blowing your budget, color can do the heavy lifting. Colorful dishware is small, but it changes how you see the room. It adds life, light, and a friendly vibe every day.
Here is why color dishware works
– It wakes up plain walls and neutral cabinets without any repaint. A pop of color is all you need.
– It creates a focal point you can enjoy every time you cook or set the table.
– It reflects light. White or light plates mixed with bright bowls can make the space feel bigger.
– It’s easy to change later. Swap a few pieces to refresh the look for a new season.
Practical ways to use colored dishware
– Start with a color story. Pick two or three hues you love and stick to them across bowls, plates, and cups. This keeps the display cohesive.
– Show it off. Put open shelves or a glass-front cabinet where the dishes can be seen. Let the colors become art.
– Mix styles on purpose. Pair solid, modern pieces with a few vintage finds. A bright mug beside a white plate can look intentional, not cluttered.
– Choose durable materials. Look for stoneware or porcelain with a strong glaze. They hold color well and can handle daily use.
– Use thrift finds smartly. Vintage plates or bowls add character at low cost. Inspect for chips, cracks, or fading glaze before you buy.
– Keep it practical. While the display looks good, you still need enough everyday dishes. Reserve a small set for daily meals and keep the rest in a cupboard.
Simple display tips you can try this weekend
– Arrange by color blocks on one shelf. A row of red, then blue, then white gives a clean, vibrant look.
– Create rhythm with patterns. Alternate patterns with solid colors to avoid busy chaos.
– Add glassware nearby. Clear glasses or bowls catch light and echo the colors on your plates.
Common questions, simple answers
– Will it clash with wall color? No. Neutral walls let the dishware shine.
– Can I use it every day? Yes. Pick durable pieces and mix in everyday plates so you still have enough for meals.
– How many pieces do I need? Start with a core set of 4–6 bowls, 4–6 plates, and 4 mugs. Add a few standout pieces over time.
Next steps
– Take stock of what you already own. Pick two favorite colors.
– Visit thrift shops or discount stores this weekend. Look for sturdy glaze and interesting patterns.
– Set up a small display on one shelf. Move pieces around until it feels balanced.
With these easy moves, colorful dishware becomes your best ally in a budget-friendly kitchen refresh.
13. Use Colorful Dishware
Editor’s Choice
🛍️
vancasso Bonita Dinnerware Sets 24 Pieces, Stoneware Dishes Set for 6, D…
You want a kitchen that feels warm without draining your wallet. Wall art is an easy, low-cost move that changes the whole room. It adds color, life, and a story to your mornings. You can pick art that fits your meals, your routine, and your taste. Here is why it works: it reflects you and makes the space feel finished.
Here is a simple plan to get started.
Choose a clear theme. Pick a small, reachable idea like bright fruit prints, cozy cooking quotes, or vintage kitchen scenes. Let that one idea guide what colors you pick and where you place things. If your cabinets are light, a bold print can wake them up. If they’re dark, softer tones keep the room calm.
Mix pieces you love. Don’t feel you must buy all at once. Start with one large focal piece, then add 1–2 smaller items. A single framed print and a couple of lightweight decals can do a lot. Look for variety in materials too—canvas prints, metal signs, and wood frames mix well.
Look for affordable sources. Check local shops for small prints from artists nearby. Explore thrift stores for frames that can be updated with fresh mats. Try online galleries that offer limited-edition prints. If you’re on a tight budget, consider removable wall decals or chalkboard panels you can change with the season.
Here are practical display options.
– Gallery wall with frames: Build a mini art wall over a sideboard or near the dining space. Use frames of different sizes but in a shared color to keep it cohesive. This creates a focal point without crowding the space.
– Removable wall decals: They’re easy to rearrange and don’t damage walls. Swap them out as you update decor or colors.
– Kitchen-themed signs: Wooden or metal signs add texture and a quick personality boost. Pair a sign with a small print for balance.
– Custom pieces: A commissioned sketch or photo print can feel personal without breaking the bank. Put it in a simple frame and place it at eye level.
Next, plan your layout. Lay out the arrangement on the floor first. Keep generous spacing between pieces. Aim for a balanced look that doesn’t overpower the counter space. Use painter’s tape to mark where each piece will hang.
Hanging tips and care.
– Use proper hardware for the wall type and weight of frames. Heavier items may need wall anchors.
– Create a grid or salon-style layout for a tidy, professional look. A grid works well on long walls; a salon style adds whimsy to a narrow space.
– Protect your art from sun and splashes. UV-protective glass helps, and place pieces away from direct sunlight.
– Dust regularly with a soft cloth. Avoid harsh cleaners that could harm prints.
Common questions you might have.
– How many pieces should I start with? Start with one large piece and two smaller ones. Add more as you grow your eye for the space.
– Do I need to frame everything? Framed pieces feel polished, but decals and signs can be just as effective.
– How do I avoid wall damage? Use damage-free hooks or removable strips. Plan a layout first, then hang with care.
With these steps, you can bring art into your kitchen on a budget. You’ll get a space that feels like you and stays easy to refresh. The right wall art makes the room feel finished, warm, and ready for your next meal or conversation.
14. Stylish Wall Art
Editor’s Choice
🛍️
Green Plant Wall Decals 3D Bonsai Tropical Plant Betterfly Wall Sticker …
You want a fresh look in your kitchen without spending a lot. Plants can do that in a simple, practical way. They add color, scent, and life to the room. You can also use some herbs while you cook. Here is why plants fit a budget kitchen.
Smart plant picks for your kitchen
– Basil and mint: Easy to grow near a sunny window. You can snip a few leaves for sauces and salads. Keep the soil moist but not soggy.
– Spider plant: A tough, forgiving plant. It handles partial light and helps brighten the space with its hanging leaves.
– Snake plant: A strong choice for busy days. It likes low light and needs little water. It keeps looking good with minimal care.
– Pothos: A trailing star for shelves or a rail. It fills empty corners and is hard to kill if you forget a watering day.
– Rosemary or thyme: Great for cooking, but they want brighter light. Put them on a sunny sill or near a bright window.
Where to place plants in your kitchen
– Window sill: A sunny spot for herbs and sun-loving greens.
– Small shelves: Add a slim shelf or two on a wall to hold several pots without taking up counter space.
– Counter edge: Place a few compact pots where you prep food so you can grab herbs quickly.
– Hanging planters: Use lightweight baskets or jars to free counter space and add vertical interest.
How to set up a neat plant display
– Use pots that match your kitchen style. A consistent color or material makes the display feel planned, not random.
– Vary heights. Put tall plants in back or on a higher shelf and shorter ones up front to create depth.
– Check drainage. Make sure each pot has a drainage hole or a tray to catch extra water.
– Create a weekly routine. Check moisture, prune dead leaves, and harvest herbs as needed.
Care basics you can count on
– Water small pots once the top inch of soil dries. Don’t wait until the soil is bone dry.
– Use good potting soil. It drains well and helps roots breathe.
– Light matters. Most kitchen plants prefer bright, indirect sun. If you lack windows, pick hardy options that tolerate lower light.
– Feed lightly. A small amount of fertilizer every month during growing season keeps herbs lush.
Budget-friendly ideas to get started
– Reuse jars, teacups, or tins as planters. Clean lines make the area look intentional.
– Start with cuttings. You can root herb stems in water and transplant them after they grow roots.
– Scout thrift shops for pots and shelves. You can find sturdy finds at low prices.
– Combine with decor. Pair plants with a backsplash color or a coordinating pot set to pull the room together.
Common pitfalls to avoid
– Overwatering. It is the most common mistake. Check soil moisture before you water.
– Too little light. Some plants stall in shade. Pick varieties that tolerate the space you have.
– Too big a plant on a busy counter. It can crowd work zones. Use narrow shelves or walls to keep space open.
Next steps to refresh your kitchen now
Choose two herbs you already use. Place them on a sunny sill. Add a small shelf for three more pots. Set a simple weekly check to water and trim. With a little care, your kitchen will feel brighter, smell nicer, and stay useful for cooking.
15. Refresh with Plants
Editor’s Choice
🛍️
PERFNIQUE Indoor Herb Garden, Herb Planter for Indoor/Outdoor, Farmhouse…
You want a simple way to enjoy coffee without a mess in your kitchen. A coffee corner can give you that. It creates a tidy spot, speeds up mornings, and adds a friendly touch to your home.
Here is why a coffee station helps you daily. You have everything you need in one place. You spend less time looking for cups or syrups. Your counter stays clear for other tasks. And you start each day with a small, cozy ritual.
Choose the best spot
– Put the station where you already stand to brew in the morning, near an outlet if you use an electric coffee maker.
– A sunny counter corner or a window ledge can make the ritual feel bright.
– If space is tight, consider a slim cart or a small shelf beside the fridge.
Stock the essentials
– Your coffee maker or French press is the anchor.
– Keep a set of mugs you love and a few spoons for mixing.
– Have syrups, cinnamon or cocoa, and a small jar of sugar within easy reach.
– Consider a grinder or a kettle if you use whole beans or tea for variety.
Organize with easy storage
– Use a tray to group items so everything sits neatly and moves as a unit.
– Add a mug rack or wall hooks to keep cups off the counter.
– A tiny shelf above the station holds syrups, cocoa, or a tiny plant for a personal touch.
Style it your way
– Pick materials that match your kitchen: wood and metal for a modern look, or ceramic and warm tones for a cozy feel.
– Choose a simple color palette so the space stays calm and easy to use.
– Add one small piece of art or a favorite photo to make it feel like you.
Keep it simple and practical
– Wipe spills quickly, and rotate the syrups so nothing goes to waste.
– Refill beans, grounds, and filters on a schedule that fits your mornings.
– If you share the kitchen, set a few quiet rules so the coffee corner stays clear.
Next steps. Decide on a spot today, grab a tray, and pull together your mugs and essentials. In one weekend you can turn a small corner into a real coffee station that makes every morning smile worthy. Your kitchen will feel calmer, and you will enjoy your daily ritual even more.
Start your day with a cozy coffee corner – where every cup is a moment of joy, and your kitchen stays mess-free. Because mornings deserve a little magic on a budget!
You want a sink that works better and looks fresh without blowing your budget. A good sink can speed up chores and brighten the kitchen mood.
Here is why a smart sink swap pays off.
– Choose your style: A farmhouse sink stands out with a wide front and a big basin. An undermount sink sits flush with the counter for a clean, modern feel. Pick what fits your cabinets and how you cook.
– Size and bowls: Decide on a single bowl or a double bowl. Deep bowls handle big pans and prevent splashes. If you cook often, a larger or deeper option helps a lot.
– Materials: Stainless steel lasts and cleans fast. Granite composite resists chips and stains. Porcelain looks classic but needs careful use. Think about the sound of water too.
– Budget tips: Watch for seasonal sales at local hardware stores. Check open-box deals or refurbished units with a warranty. Compare standard sizes to save on plumbing changes.
– Faucet pairing: Choose a faucet that matches the sink style. A pull-down sprayer makes cleaning easier. A brushed finish hides fingerprints and drips.
– Installation plan: You can swap a sink in a weekend with basic tools. If you see old pipes or odd gaps, call a pro. Have shutoff valves and plumber tape ready.
Next steps: measure your cabinet opening and the countertop cutout, then shop for models that fit. Bring home a sink with a durable finish and a deep basin for cooking nights and family dinners. Add sound-dampening pads and a good silicone seal to keep a tight, quiet fit.
Common questions you might have
– Will a new sink fit the cutout? Most kitchens use standard sizes, but you must measure the opening before you buy.
– Can I install it myself? If you can turn off water and lift a sink, you can try. Plan for extra hands if the sink is heavy.
– How long will it take? A typical swap takes a few hours to a weekend, depending on your plumbing.
– What about the faucet? A new sink pairs well with a matching faucet. If you keep your old faucet, check clearance and height so it still fits.
With these steps, you get a fresh look and better function without a full remodel.
Trending options for sinks give you long life and easy care. Stainless steel stays timeless and cleans easily. Granite composite offers a warm look and hides scratches. Pick a sink with built-in sound features or add a mat to quiet the wash noise.
17. Install a New Sink
Editor’s Choice
🛍️
KRAUS Standart Pro 30 -inch Undermount Single Bowl 16 Gauge Stainless St…
You want more kitchen storage without blowing your budget. Repurposing old furniture can do that. It adds a personal touch and keeps you from buying new.
Here is why this approach works. You reuse sturdy frames that are already built. A new top changes how the piece feels. You can tailor it to fit your space exactly.
Here is how to get it right in seven steps.
– Step 1: Inspect your space and plan. Measure width, depth, and the clearance you need for doors and drawers.
– Step 2: Pick pieces that fit. Dresser bases, sideboards, tables, and bookshelves can become kitchen helpers.
– Step 3: Decide the new job. Use a dresser as a kitchen island, a nightstand as a plant stand, or a bookshelf as open pantry storage.
– Step 4: Prep the furniture. Remove old hardware. Sand rough spots. Clean grime. Chalk paint is a good option for an easy, matte finish.
– Step 5: Add a solid top. Attach a butcher block, a wood slab, or a laminated panel to create a real counter feel.
– Step 6: Make it steady. Add brackets or legs, or mount wheels to keep it firm. Check it from all angles for wobble.
– Step 7: Finish with small style touches. Update knobs and pulls. Seal the surface with a clear coat. Place a tray, a plant, or baskets for quick storage.
Now try these ideas.
– Dresser turned island: remove the middle drawer front to create a true counter space, top with butcher block, and leave the sides open for storage.
– Nightstand plant stand: lower height makes a cozy spot for herbs or small plants near the sink.
– Bookcase pantry: a tall open shelf between walls holds canisters, jars, and dry foods.
– Bench seating with a small station: a bench for seating plus a slim shelf for spices makes a tiny work zone.
Tips to guide you.
– Chalk paint gives a friendly finish that is easy to apply.
– Mix vintage pieces with modern finishes to keep the kitchen warm.
– Measure twice before you cut or drill; plan the layout first.
What to watch out for.
– Heavy pieces near heat need careful placement and a sturdy top.
– Check weight limits and secure tall pieces so they won’t tip.
– If you feel unsure, ask a pro to help with mounts or top installs.
Next steps. Start with one piece you already own, test its fit, and go from there.
18. Repurpose Old Furniture
Editor’s Choice
🛍️
Rust-Oleum 206540 Chalkboard Brush-On Paint, 30 oz, Black
If your kitchen feels like it needs a personal touch but your budget is tight, DIY art can be your best friend. Art that you make yourself adds warmth and a story to the room without costing a lot. You get to choose colors, textures, and themes that speak to you.
Here is why DIY art fits a small budget and a busy life. It uses simple materials. It shows your taste with no big price tag. It also makes your space feel unique instead of cookie-cutter. Best of all, you can create and hang art in a weekend.
– Framed recipe gallery
Gather 3 to 5 favorite recipes or printouts. Use lightweight frames from a thrift shop or dollar store. Mount the pages on thin foam board so they sit cleanly inside the frames. Arrange the frames in a tidy grid on a kitchen wall. This creates a warm, personal wall that celebrates your cooking.
– Typography art on canvas
Pick a short cooking quote or your family motto. Print it in a bold, easy-to-read font. Tape the print to a plain canvas or a cheap pre-stretched canvas. Paint a simple background if you like. Tie the colors to your cabinets or countertops for a cohesive look.
– Chalkboard wall art
Paint a small panel with chalkboard paint or hang a tiny chalkboard. Use it for weekly menus, notes, or doodles. This is practical and playful. Your family can add ideas and share how a dish tasted.
– Herb and botanical art
Press small herb leaves or flowers between parchment and a heavy book. Once dry, mount the pieces in a shallow frame or on a wood panel. A few natural greens bring life to the kitchen, and they smell nice too.
– Upcycled kitchen panels
Repurpose old cutting boards or wooden scraps into wall art. Sand them smooth, then stencil a simple design or paint a color block. Seal with a clear spray to keep moisture at bay. The result is rugged, warm, and affordable.
What supplies make these ideas doable for beginners? Look for affordable frames, canvas packs, lightweight boards, chalkboard paint, and a few basic art tools. You can mix and match ideas to fit your space and style. If you prefer a quick start, try the framed recipe gallery first. It has a strong impact and is easy to update as you collect new favorites.
Next steps: pick one project that matches your mood this week. Gather the cheap frames or boards, art supplies, and a few favorite recipes. Set aside a couple of hours, and start creating. Your kitchen will feel new, and you will own the look you see every day.
DIY art isn’t just affordable; it’s a personal expression! Infuse your kitchen with warmth and uniqueness, because the best stories are those you create yourself.
Want a standout kitchen without tearing things apart? A feature wall can do the job. It adds drama and personality on one wall, not the whole room. It keeps costs low and effort simple. You get a strong focal point you can enjoy every day.
– Pick the right wall. Start with the wall you see first when you enter. This wall becomes the kitchen’s main stage. Keep the other walls calm so the space doesn’t feel crowded.
– Choose paint or wallpaper. A bold color gives instant impact. Pick a shade that fits your cabinets, counters, and hardware. If you love pattern, try a kitchen-friendly wallpaper with a washable finish. A small repeat or geometric works well in busy spaces.
– Get clean lines. Use painter’s tape to mark edges. Press the tape down to seal the edge. Apply thin coats and let them dry fully. Peel the tape while the edge is still just a bit tacky for a sharp line.
– Add a practical twist. Think magnetic walls or a chalkboard panel. A magnetic setup can hold notes, utensils, and magnets. A chalkboard wall gives you space for menus, grocery lists, and kid helpers. Both options add daily use without extra furniture.
– Boost storage with style. Mount a couple of floating shelves for spices, jars, or a small plant. Add hooks for aprons, mugs, or pots. This extra storage helps keep counters clear and the look tidy.
20. Make a Statement with a Feature Wall
Editor’s Choice
🛍️
HAOKHOME Peel and Stick Wallpaper Boho Green/White Eucalyptus Leaf Flora…
Renovating your kitchen on a budget is not only feasible but can also be incredibly rewarding.
These 20 ideas prove that with a little creativity and elbow grease, you can achieve amazing results without spending a fortune. Whether you opt for small changes or larger projects, remember that your kitchen should be a reflection of your personality and style.
So roll up your sleeves, let your creativity flow, and start transforming your kitchen today!
Note: We aim to provide accurate product links, but some may occasionally expire or become unavailable. If this happens, please search directly on Amazon for the product or a suitable alternative.
This post contains Amazon affiliate links, meaning I may earn a small commission if you purchase through my links, at no extra cost to you.
Frequently Asked Questions
What are some cost-effective ways to remodel my kitchen without spending a fortune?
You can transform your kitchen on a budget with several affordable ideas! Start by painting your cabinets for a fresh look, or consider installing open shelving to create an airy feel. Updating fixtures and revamping your backsplash are also great ways to make a big impact without a big price tag. Embrace creativity and think outside the box!
How can I make my small kitchen feel larger on a budget?
Making a small kitchen feel larger is all about smart design choices. Consider installing open shelving to free up wall space and create an illusion of openness. Light colors on walls and cabinets can also brighten the space. You might also want to incorporate smart storage solutions to declutter and maximize every inch!
What inexpensive materials can I use for kitchen countertops?
For a budget-friendly kitchen remodel, look into materials like laminate, butcher block, or even concrete. These options can achieve a stylish look without breaking the bank. Each material has its own charm, so pick one that suits your style while keeping costs down. Don’t forget to explore DIY options for even greater savings!
Are there any quick DIY projects to enhance my kitchen’s appeal?
Absolutely! Quick DIY projects can dramatically enhance your kitchen’s appeal. Consider creating a coffee corner or a cozy breakfast nook to make the space more inviting. You can also try DIY art projects or refreshing your kitchen with plants to add life and color without much effort or expense!
How do I choose budget-friendly decor for my kitchen remodel?
Choosing budget-friendly decor is all about creativity and resourcefulness. Start by selecting colorful dishware or stylish wall art that reflects your personality. Look for second-hand furniture that you can repurpose or give a fresh coat of paint. Remember, small touches can make a huge difference, so have fun mixing and matching!
I put this together because white cabinets give your kitchen a bright, clean feel, and the backsplash is where you add heart. It can stay calm and airy or grab attention with color and texture. I want to help you pick confidently instead of wandering the tile aisle in a daze.
If you’re in the middle of a kitchen update with white cabinets, or you want a quick, reversible change as a renter, this post is for you. If you care about style that lasts, easy cleaning, and a budget you can manage, you’ll find ideas that fit. This is for home cooks, DIY lovers, and anyone who wants their space to feel personal without a big mess.
Here you get 25 stunning backsplash ideas that work with white cabinets. You’ll see a mix of materials like glass, ceramic, stone, and metal, plus patterns from classic subway to bold mosaic. Each idea comes with the feeling it creates and where it shines in real life.
With white cabinets, you can swing toward soft neutrals or punch in color. A glossy tile adds light, a matte texture adds depth. Glass can make a small kitchen feel bigger, while stone brings a warm, tactile vibe. These contrasts help you tailor the room to your daily rhythm.
Start by saving two or three favorites. Then order samples and hold them under your kitchen lighting. Consider maintenance: glass cleans easy, natural stone needs sealing, white marble shows stains. If you rent, look for peel-and-stick options that let you test a new look without a full redo.
Take this guide as a map. Pick a mood board, choose one material family, decide a budget, and plan your installation around these. By the end you will see a short list of favorites and a clear path to bring your white cabinets to life. Let’s dive in and find the perfect backsplash for your space.
You want a backsplash that matches white cabinets and lasts year after year. Classic subway tiles fit that need. They give a clean, polished look and stay easy to clean. You can set them in simple rows or mix in patterns for a fresh vibe. A glossy finish helps reflect light and make the room feel bigger.
Here is why subway tiles work well with white cabinets. The slim, rectangular shapes draw the eye along the wall. That makes the kitchen feel more open. They come in white, black, and soft pastels to suit many moods. The timeless style never feels loud or out of place.
Let’s break down practical ways to use them in your kitchen.
– Pattern options:
Traditional straight lay keeps lines calm and orderly. Herringbone adds a playful twist without shouting. Stacked or vertical layouts bring a modern edge that still reads as clean and simple.
– Finish and color:
A glossy glaze bounces light across the wall, brightening a small kitchen. If you want contrast, black or deep gray tiles create a bold look. Soft pastels paired with white cabinets soften the space and soften reflections.
– Grout choices:
White grout blends in, making the wall look continuous. Dark or charcoal grout makes each tile edge pop and adds crisp lines. Light gray grout sits between the two, balancing care and look.
– Accent ideas:
Add a thin strip of a different tile near the stove for a surprise touch. A small mosaic panel at a corner or behind the sink can become a quiet focal point without overpowering the room.
– Care and durability:
Wipe tiles with mild soap and warm water to remove splashes quickly. Avoid harsh chemicals that dull the glaze. Seal or refresh grout if you notice stains or gaps after years of use.
– How to pick for your space:
Look at your kitchen size, how much natural light you have, and your budget. If the room is bright, keep the tile light to preserve airiness. If you have a lot of wood or metal fixtures, a darker grout can anchor the look.
Overall, classic subway tiles give you a dependable, stylish backdrop for white cabinets. They blend with many styles and stay simple to care for.
1. Classic Subway Tiles for Timeless Elegance
Editor’s Choice
🛍️
102-Piece Peel and Stick Wall Tile for Kitchen Backsplash, Bathroom, Fir…
You want a kitchen that feels personal but stays easy to clean. A bold mosaic backsplash can do that.
Mosaic tiles let you add color and pattern without repainting walls. They come in many shades and designs. You can pick blues and greens, or a multi color mix that tells your story. White cabinets set a clean stage, so the tiles don’t clash. The patterns, especially geometric ones, create movement. They act as a focal point that draws the eye across the room.
Here is why mosaics work well with white cabinets. They bring texture and a bit of shine. They break up the flat look without overpowering the space. You get depth while keeping a calm overall feel.
Next, practical ways to use mosaics in your kitchen
– Make the mosaic a statement piece above the stove or the kitchen island.
– Keep the grout color neutral so the tiles stay the main event.
– Choose glass mosaics for extra sparkle and light bounce.
– Opt for smaller tile sizes if you want busy patterns that line up neatly.
– Pick a color palette that matches your mood—cool blues for calm, warm earth tones for coziness.
– Consider mixing materials, like glass with ceramic, to add texture without a heavy look.
Tips to guide your selection
– If you want a bold effect, go with a high contrast mix of colors. The white cabinets will help the colors pop.
– For a softer touch, lean toward pale tones in a tight color family. It still feels lively next to white.
– Look for mosaics that are mesh-mounted. That makes installation easier and keeps lines straight.
– Check the tile sizes. Tiny tiles create more sparkle; larger ones read more like a single panel.
Maintenance and practicality
– Glass mosaics are usually easy to wipe clean. They resist fingerprints and smudges.
– Porcelain and ceramic mosaics hold up well in busy kitchens.
– Seal grout if you use cement-based grout. It helps prevent stains and makes cleaning smoother.
Next steps
– Browse color stories that match your countertops and hardware.
– Bring home samples and test how they look in your morning and evening light.
– Plan your layout before you buy. Decide if you want a full wall or a partial band.
Mosaic backsplashes suit cooks who want a room that speaks to their style. They offer color, texture, and a simple way to elevate white cabinets. With the right tile choice, you get a kitchen that feels bright, inviting, and uniquely yours.
You want a kitchen that feels warm yet clean. Natural stone can give you that with white cabinets. It adds texture without adding clutter.
Here is why stone works well. Marble offers a soft shine that lightens the room. Slate brings depth and a touch of rugged charm. Both feel natural and inviting.
The look is unique. Each slab has its own veining and markings. No two backsplashes are alike. The patterns catch light differently and add character. This makes your cooking space feel special and a bit luxurious.
Maintenance matters. Stone loves protection from stains. Sealing helps keep it safe from spills. Do the seal once and recheck it every year or two. Clean with a gentle soap and water, then dry. Avoid harsh acids that can dull the surface.
Key considerations
– Use larger stones for a bold look.
– Pair with wooden accents for warmth.
– Keep other elements minimal to highlight the stone.
Here are practical ideas to apply this look. Pick a slab with clear veining that matches your cabinet tone. Install with clean, straight joints to keep the surface feel calm. Choose light grout to let the stone stand out. If you have a wood island or trim, let the stone share the stage rather than compete with it. This creates a welcoming kitchen that still feels fresh and easy to live in.
Next steps to bring this to life. Decide between marble or slate based on the mood you want. Check the stone’s seal and plan a sealing date. Gather samples and compare how they look with your white cabinets and hardware. Then hire a pro for careful installation and a proper seal that lasts.
If you want trends without overdoing it, go with marble for a timeless glow or slate for a rustic charm. Matte finishes blur any marks and stay modern, while a polished seal can catch more light. Pair the backsplash with simple fixtures and soft lighting to keep the focus on the stone.
You want a splash that feels fresh with white cabinets. Glossy glass panels fit that brief. They shine, clean easily, and reflect light to make your kitchen feel bigger. Here is how to use them well.
– Why it works: The high gloss catches daylight and lamps. White cabinets stay crisp. You get a bright, calm backdrop that makes colors pop.
– Color and texture options: Clear glass stays ultra clean and bright. Frosted glass hides fingerprints but keeps the glow. You can also tint glass for a softer look. Subtle textures add depth without stealing the shine.
– Lighting adds drama: Backlighting behind glass creates a soft halo at night. It highlights metal accents and wall color. If you backlight, plan for a safe LED setup.
– Cleaning and care: Use a microfiber cloth and a gentle glass cleaner. Wipe from edge to edge to avoid streaks. Dry the surface after cleaning. Skip harsh scrubs or abrasive cleaners.
– Installation tips: Hire a professional for best results. Glass panels must sit flush with the wall and cabinets. Edges should be finished and sealed to prevent moisture. Ask about tempered glass for extra strength and safety.
– Pairing with fixtures: Stainless steel, brushed nickel, or chrome fixtures pair well with glass. These metals keep the look cohesive and bright.
– Pros and challenges: Pros are brightness, simple upkeep, and a modern feel. Challenges include fingerprints in bright light and a higher price than some options. Weigh these as you plan.
– Practical steps to get started:
1. Measure the wall area to cover.
2. Choose panel thickness and glass type.
3. Pick color or texture.
4. Gather quotes from pros and set a date for installation.
5. Prepare the wall and seal edges before mounting.
– Quick decision guide: If you want a night glow, choose backlit glass. If you prefer low upkeep, go with clear or frosted glass that hides marks better.
– Common questions: Can glass backsplashes crack? Tempered glass handles impacts better. Do you need grout? Most glass panels stay grout-free, but you may need small joints at edges. DIY installation is possible but tricky; a pro gives a cleaner finish.
Here is why you might love vintage tin tiles for a white kitchen. They add texture and a hint of old charm while keeping your cabinets clean and bright. A tin tile backsplash can turn a plain wall into a real focal point that still feels calm and simple.
Tin tiles come in patterns that catch light. They can stay metallic or be painted to fit your color story. Choose copper, pewter, bronze, or soft neutral that blends with your cabinets. Avoid colors that shout and lean toward calm hues to keep a vintage feel. The finish should let the texture shine without taking focus from white cabinets.
Where they shine best. Behind the sink or stove, a panel creates a bold backdrop that draws the eye. A narrower strip along the counter line adds texture without overwhelming the space. The reflective surface helps brighten a kitchen with white cupboards, especially when you pair it with warm wood or soft textiles.
Style pairing and balance Tin tiles work best when you pair them with the right accents. They fit rustic or farmhouse looks and suit industrial style. Keep the rest of the room simple so the tile does the talking. White cabinets act as a quiet stage, balancing the metal with wood tones, linen, or muted fabrics. Lighting with a warm glow brings out the depth of the tile.
Practical implementation Here is a simple way to start:
– Decide finish: leave natural metal or paint to match your palette.
– Pick a tile size and layout: measure your wall and plan for outlets and corners.
– Plan the work: set aside tools, gather spacers, and prepare a clean surface.
Care and durability Tin tiles offer charm but they can dent if hit hard. They may need a seal to slow tarnish in humid kitchens. They work best when installed over a smooth, clean surface and wiped with a soft cloth. If you paint them, recoat every few years to keep the color fresh.
Common questions Do you need a pro for cutting around outlets? You can DIY, but precision matters. Will tin tiles last? With proper seal and care, they hold up well in a busy kitchen. Are they hard to clean? A gentle wipe with mild soap keeps them looking good.
Next steps Measure the wall, browse patterns, and pull color swatches. If you feel unsure, hire a pro to cut and fit around outlets and corners. Start with a small panel first to test the look before committing to a full wall. Keep a sample strip on hand to compare with your cabinets as you decide.
Embrace the charm of vintage tin tiles! They not only add texture and personality to white cabinets but also create a stunning focal point that whispers elegance and simplicity.
5. Vintage Tin Tiles for a Unique Flair
Editor’s Choice
🛍️
RoomMates TIL4873FLT StickTiles Copper Tin Peel and Stick Tile Backsplash
If you crave an industrial edge with clean white cabinets, cement tiles can deliver. They bring bold patterns and a sturdy feel to a kitchen that gets daily use. A full backsplash or a narrow band of tile can anchor the room and add real character.
What makes cement tiles stand out
– Bold patterns and colors pop against white surfaces, making the backsplash the focal point.
– The material is durable and easy to wipe clean, ideal for busy kitchens.
– Geometric layouts turn simple walls into a work of art.
Design ideas you can actually use
– Try a geometric pattern in grayscale. This reads modern and stays calm with your white cabinets.
– A Moroccan-inspired motif in soft sand or blue tones adds warmth without overpowering the room.
– A simple grid or honeycomb pattern with dark grout creates crisp lines that define the space.
Practical steps to get it right
– Seal the tiles and grout after installation to guard against stains. A penetrating sealer helps keep the surface looking fresh.
– Pick a grout color that makes the tile pattern stand out. White grout makes the pattern bold; dark grout adds drama.
– Keep the rest of the decor minimal. Let the tile do the talking, and add small metal or wood accents for balance.
– Use a mild, pH-neutral cleaner for daily care. Avoid harsh chemicals that can dull the finish.
– Plan for maintenance. Reapply sealant per the product directions, especially in high-traffic kitchens.
Layout and installation tips
– Map the pattern around outlets and corners before you start. A pro can help cut edge pieces so the pattern stays clean.
– If you cannot seal the surface properly, consider selecting pre-sealed cement-look porcelain tiles. They mimic the look with less upkeep.
– Check the tile’s weight and support needs. Cement tiles are solid, but your backsplash should still be installed with proper support.
Common questions, quick answers
– Are cement tiles durable enough for a kitchen? Yes, with sealing and proper care.
– Do I need a pro to install them? A pro ensures straight lines and a smooth finish.
– Can I change the look later? Yes. You can swap to a different pattern or grout color to refresh the space.
Next steps
Here is why this option works for white cabinets. Cement tiles bring texture, create a strong focal point, and stand up to daily use. Let your pattern choices guide the mood of the room. Let’s break it down: pick a pattern, choose a grout color, and plan your sealant routine. Next steps include layout planning, selecting a pattern, and hiring a tile installer if you want the cleanest edge near outlets. Your kitchen can feel both sturdy and stylish with cement tiles.
6. Sleek Cement Tiles for an Industrial Feel
Editor’s Choice
🛍️
Miracle Sealants 511 Impregnator Advanced Penetrating Sealer for Counter…
You want a kitchen that feels personal and real. Handmade tiles can give your white cabinets a warm, human touch. They carry texture and color that show a maker’s hand. With the right choices, your backsplash becomes a story, not just a surface.
What makes handmade tiles stand out
These tiles show tiny quirks. A glaze may run a bit, or color may glow differently under light. That variation isn’t a flaw; it adds depth and charm. The result is a kitchen that looks crafted, not factory-made. You can feel the difference as you move through the room and catch little details in the pattern or tone. It is easy to notice the glow of a blue glaze, the drum of a speckled cream, or a bold stripe that runs like a seam in a painting.
Choosing handmade tiles for your space
– Find local makers who can tailor options to your room. Local artisans often offer a coast-to-coast range of colors and textures you can see in person.
– Mix and match to create a mosaic or keep one color for a calm, cohesive look. A single accent tile can become a focal point behind the stove.
– Check for fit and finish. Look at edge smoothness, glaze evenness, and how well the tile feels when you run your hand over it. Ask about color consistency and any expected tint shifts after firing.
– Think about maintenance. Some handmade tiles need gentler cleaning or special grout choices. Talk with the maker about care and recommended sealer if needed.
A practical approach to care and upkeep
Most handmade tiles take cleaning like any ceramic piece. Use a soft cloth and a mild soap solution. Avoid harsh cleaners that can dull glaze or crack a tile over time. Wipe spills quickly to prevent staining the grout. If you plan to seal, do it as directed by the maker or installer. Routine wipe-downs keep the surface looking bright and your grout line clean.
Design ideas you can try
– Create a focal strip behind the stove with a small mosaic of mixed patterns. Let the colors echo your cabinet tones.
– Use a solid color tile as a backing field and place a few patterned tiles at eye level for a playful accent.
– Install a long, narrow run of tiles as a backsplash border to frame your cabinets, then add a plain, easy-to-clean grout in between sections.
– Try different shapes—squares, bricks, or tiny hexes—to add texture without overwhelming white cabinets.
What to expect when you go handmade
Prices are often higher than mass-made tile. The upside is a one-of-a-kind look and a longer story behind each piece. Lead times may be longer, and installation might require a tile setter who understands variation. Plan for a little extra time and budget for occasional color shifts that come with handcrafting.
Next steps to get started
– Visit a local showroom or studio to see tiles in person. Request samples that you can view with your cabinet color and lighting.
– Bring photos of your kitchen and note where you want tiles to stand out.
– Talk about maintenance and sealing with the maker or installer. Confirm care instructions before you buy.
– Map a layout that keeps edges clean and lines straight, yet leaves space for natural tile variation.
Handmade tiles give your kitchen personality and warmth without losing the clean look of white cabinets. With careful choices, you’ll enjoy a backsplash that feels both crafted and timeless.
7. Artistic Handmade Tiles for a Personal Touch
Editor’s Choice
🛍️
COLOR Y TRADICIÓN 9 Mexican Tiles 4″ x 4″ Hand Painted Talavera F-30
8. Contemporary Patterned Tiles for a Bold Statement
You want a kitchen that stands out while your white cabinets stay calm and clean. Contemporary patterned tiles can give you that.
Patterned tiles come in many looks. Floral motifs soften a space. Geometric shapes bring a sharp, modern edge. Abstract patterns add energy that shifts with the light. With white cabinets, these designs become the star of your backsplash.
Here is why patterns work with white cabinets. They add character without stealing the show from your cabinets. They create a focal point you can build on. They also adapt to many moods, from playful to calm, depending on your color choice.
Tips for using patterned tiles
– Use the pattern as an accent, not the whole wall. A stripe, a panel, or a small square keeps balance.
– Pair the tiles with neutral surfaces. Think plain countertops and simple backsplashes nearby.
– Mix tile sizes for texture. A few larger tiles with smaller ones create visual interest.
– Choose a grout color that helps the pattern pop. A light grout blends, a dark grout defines.
Next, think about color and contrast. A tile with a touch of black or charcoal can echo metal fixtures. A soft blue or sage can cool a busy pattern. If your room feels small, pick lighter tiles and keep the surrounding surfaces simple. If rooms feel roomy, you can afford a stronger pattern or darker grout.
Materials and styles to know
– Porcelain and ceramic tiles are durable and easy to clean. They handle daily kitchen spills without fuss.
– Matte finishes hide smudges better than gloss. They give a quieter, more refined look.
– Gloss tiles sparkle in bright light and can feel lively. Use them sparingly if you want a calmer backdrop.
– Popular shapes include hex, subway, and small squares. Hex tiles create a honeycomb vibe. Subway patterns stay timeless. Other shapes add a playful twist.
– Pattern options include florals, geometric lines, and abstract swirls. Each sets a different mood for your space.
Practical steps to try
1) Pick one pattern you love and a color palette that fits white cabinets.
2) Mock it up with a few cutouts on the wall or a test board at home.
3) Plan how it will meet outlets and corners, and mark cuts with care.
4) Hire a pro for precise fit around edges and fixtures.
Care and upkeep
– Seal grout or choose a grout that cleans easily.
– Wipe with a mild cleaner on a regular basis.
– Avoid harsh scrubs that wear the pattern down.
If you want a bold statement with white cabinets, patterned tiles can be a smart, stylish choice. Start small, pick the right colors, and keep the rest simple. Your kitchen will feel fresh, inviting, and ready for quick meals or those weekend guests.
8. Contemporary Patterned Tiles for a Bold Stat…
Editor’s Choice
🛍️
COLOR Y TRADICIN 25 Mixed Color Mexican Talavera Tiles, 4×4 Square, 25 P…
You want a warm kitchen with white cabinets. Soft textures can help you get that cozy feel. They add depth without shouting for attention.
Here is why textures matter. They give the eye something to see and the hand something to feel. Light will bounce differently on a textured surface, so the room reads softer and more inviting.
Let’s break it down. Start with texture ideas that stay calm and light.
– Textured ceramic tiles with a gentle pattern in ivory or stone
– Soft-hued glass tiles in cream, pale gray, or blush
– Matte or linen-finish tiles that hide fingerprints and smudges
– Beadboard or a small brick pattern in narrow strips
– Natural stone slabs with a honed, non-glossy surface
Next steps: where to place textures for the best effect.
– Use the backsplash as the texture hero. Let it run the full width behind your counter.
– Try a texture strip, about 6 to 12 inches high, behind the stove or sink to add interest without overdoing it.
– Pair a textured tile with plain white field tiles to keep the look calm.
Practical design tips
– Choose light colors to boost brightness and keep the space airy
– Mix materials, not colors. Combine a textured tile with a smooth one for depth
– Add warm metallics like brass, copper, or gold through hardware or lighting to create a homey glow
– Plan the grout color carefully. A soft gray or bone tone often hides smudges while preserving the gentle look
– Keep cleaning in mind. Choose textures with grooves that are easy to wipe or seal
Here is what you can expect. The textures bring warmth and dimension to white cabinets. The play of light and shade makes meals feel cozier and family moments more inviting.
Common questions
– Will textured backsplashes be hard to clean? Answer: Choose textures with shallow grooves and seal the surface. Wipe with a damp cloth and mild soap
– Can texture go with light colors? Yes. Texture reads best with soft tones. White cabinets stay clean-looking when you keep colors light and grout pale
– How many textures should I use? Two textures are plenty. One main texture and one smooth surface keep the room calm
Two quick looks you can copy
– Look A: behind the stove, ivory textured ceramic with a soft gray grout, paired with white field tiles
– Look B: a strip of soft-hued glass, with a linen finish, above dark counters and brass hardware
Next steps
Head to the store with a short list. Order samples. See how they feel in your light.
You want white cabinets that still feel warm and inviting. A dual-toned backsplash can give your kitchen a fresh look without losing that cozy vibe. Two colors work together to catch the eye and add depth. One color can glow as the main tile, while the other serves as a subtle accent.
Here is why this move helps you today:
– It creates contrast that makes your cabinets stand out in a good way.
– It adds texture and interest, especially when you mix different finishes.
– It helps draw attention to the ceiling line and the upper shelves.
How to choose your two colors
– Start with your kitchen’s overall color plan. Pick shades that feel like they belong together.
– Pick one color as the star tile and the other as a supporting shade.
– Make grout work for you. A grout color that harmonizes both colors keeps the look clean.
Texture and finishes matter
– Pair matte tiles with glossy ones to gain depth without glare.
– A smooth tile with a slightly rough accent can surprise your eyes in different lighting.
– If you use glass or ceramic, keep the second color in a more opaque tile to balance shine.
Layout ideas you can try
– Use the darker color on the lower area of the backsplash for a grounded feel.
– Install the lighter color higher up or in a vertical pattern to draw the eye upward.
– Mix a narrow strip of the accent color at the top or bottom for a clean edge.
Practical pairings to consider
– Charcoal charcoal-gray tile with white cabinets creates a timeless contrast.
– Navy or inky blue tiles paired with white surfaces brings a calm, modern look.
– Soft taupe or warm gray as the base, with a crisp white or pale blue accent, keeps things light.
Tips for a smart, lasting result
– Order sample tiles and compare them in your kitchen lighting before buying.
– Check how the colors respond to natural daylight and under your stove light.
– Plan enough grout lines and choose a grout color that ties the two shades together.
Common questions you might have
– Will this look busy? If you keep one color as the main tile and the other as a small accent, you stay balanced.
– How do I keep it upkeep friendly? Choose tiles and grout that wipe clean easily and avoid very busy patterns.
– Can I remove it later? Yes, it’s easier to replace a small accent strip than the whole backsplash.
Next steps
– Collect color samples that match your cabinets and countertops.
– Draft a small mockup with the two colors in different areas of your kitchen.
– Visit a tile shop with your palette and ask for finish and grout options that fit your plan.
With these ideas you can craft a two-tone backsplash that fits white cabinets perfectly. It brings in character, texture, and a clear sense of style—without overwhelming the room.
10. Dual-Toned Backsplashes for a Modern Twist
Editor’s Choice
🛍️
3×6 White Glossy Ceramic Subway Tile Wall Backsplash Made in USA (Full B…
If your white cabinets feel a bit cool, consider a natural wood backsplash to warm the space. Wood brings texture and a soft, inviting feel to any kitchen. You can choose reclaimed boards for a rustic look or smooth panels for a clean, contemporary vibe. Make sure the wood is sealed for kitchen use so it holds up to steam and splashes.
Here is why wood works well with white cabinets:
– It softens the brightness and adds depth.
– The grain adds subtle pattern without shouting for attention.
– It ages gracefully and can be refreshed with a new coat of finish.
How to pick the right wood
– Light woods like maple, birch, or ash keep the room feeling airy.
– Dark woods bring drama but can make a small kitchen feel cozier.
– If you love both effects, try a light backsplash with small dark accents around the edges.
Moisture and finish matter
– Choose a finish rated for kitchens or moisture resistance.
– A clear varnish or polyurethane protects the surface from splashes and heat.
– Water-based seals can cut odor and cure faster after installation.
– For heavy cooking, opt for a thicker seal and a stain that hides fingerprints.
Practical styling ideas
– For a bright, open feel, keep most of the wood light in tone.
– Tie in metal accents like faucet, lighting, or cabinet pulls for an urban edge.
– Use dark fixtures or decor to create a striking contrast against the white and wood.
Installation and care tips
– Hire a pro if you’re unsure about measuring and sealing. A precise fit matters.
– If you DIY, cut precise gaps around outlets and corners to avoid gaps that trap moisture.
– Clean with a mild soap solution and a soft cloth. Avoid harsh cleaners that dull the finish.
– Inspect the surface a few times a year. Look for warping or softened spots near the sink.
Common questions you might have
– Will wood back splashes warp in humidity? Use a proper kitchen-grade seal and vented space to keep moisture away.
– How long does it last? With good seal and care, it can look great for many years.
– Is it hard to maintain? A quick wipe and re-seal every few years is usually enough.
Next steps for your project
– Gather a few sample boards and place them next to your cabinets to see the color in your light.
– Check moisture ratings and pick a finish that fits your cooking style.
– Decide if you want all wood or a mixed look with tile at the stove.
Natural wood adds a warm, welcoming touch that many kitchens crave. With the right wood, finish, and care, your white cabinets will feel cozy and stylish for years to come.
If you want white cabinets to feel bright and calm, a minimalist backsplash can do the job. It gives you a clean stage where your cabinets take center stage. You get a kitchen that looks uncluttered and easy to live in.
What makes minimalist backsplashes work with white cabinets
Minimal design uses simple shapes and soft colors. It keeps lines clear and patterns very subtle. The goal is to reduce noise and let the space breathe. A smooth porcelain or matte tile finishes this look with a quiet, steady feel. You’ll notice fewer seams and fewer distractions.
Key choices to keep the look cohesive
– Stick to a narrow color palette. Think whites, off-whites, light grays. A tight range keeps everything in harmony.
– Use large tiles. Bigger tiles mean fewer grout lines, which makes the wall look seamless.
– Pick a flat or matte finish. It reflects less glare and stays calm under kitchen lights.
– Choose sleek fixtures. Go with clean metal or satin finishes that fit the simple vibe.
Practical steps for installation
– Measure the space behind the sink and stove. Know your width, height, and tile size before you buy.
– Pick tile size that suits the room. 12×24 or 24×24 formats often look neat with white cabinets.
– Decide on grout color. A light gray or white grout hides dirt better and keeps the wall looking smooth.
– Plan edge trims. Use a simple bullnose or a slim trim to finish the top edge for a clean border.
– Prep the wall. Make sure the surface is flat and dry before you lay tiles. A good base keeps gaps small and lines straight.
Realistic looks you can try this month
– A solid, soft gray porcelain run behind the cook area. It reads quiet and modern while staying warm with your lighting.
– A matte white or very light cream tile laid in a simple offset or vertical stack. It adds texture without busy patterns.
– A light, glass subway tile with a matte glaze. It catches a touch of light and remains understated.
What you gain with a minimalist backsplash
You get a kitchen that feels larger and easier to clean. The clean lines reduce clutter in your eyes and your cabinet doors. Maintenance is simpler because there are fewer grout lines to scrub. With white cabinets, the look stays bright and timeless.
Common questions, quick answers
– Will a minimalist backsplash feel cold? It can feel cool, but good lighting and a touch of warm wood or brass accents keep it welcoming.
– How do I pick a grout color? Match the grout to your tile tone. A light gray grout hides smudges and still looks neat.
– Can I add texture without losing the look? Yes. A matte finish or a subtle grain in the tile gives depth while staying calm.
Next steps
Here is why this approach fits white cabinets. It brings light, reduces clutter, and makes every day cooking feel easier. Let’s break it down: choose a color family, pick large-format tiles, and decide on a clean edge trim. Then you can plan a quick, tidy install that you can finish over a weekend.
12. Minimalistic Designs for a Clean Look
Editor’s Choice
🛍️
MS International La Paloma Encaustic 8 in. x 8 in. Glazed Porcelain Wall…
Colored grout is a small change that makes a big impact with white cabinets. It adds a touch of personality without overhauling your whole kitchen. The right shade in the joints can wake up plain subway tiles or hex patterns and pull your entire look together. Think of it as a tiny accent that sits right between your tiles and cabinets.
Here is why colored grout works well with white cabinets. It creates a clear line that guides the eye and defines the tile pattern. Darker grouts hide kitchen messes a bit better. Light pastels or bold hues add fresh energy and a hint of playfulness. The result is a fresh, custom feel that stays easy to live with.
Color choices that pair well with white cabinets
– Choose a shade that contrasts with the tile color. For classic subway tiles, cobalt blue or charcoal can look striking. For a softer vibe, mint or blush pastel tones work nicely.
– Use color to highlight the tile pattern. A tight white grout around inverted tiles can make the shape pop, while a colored grout frames each tile more clearly.
– Consider the lighting in your kitchen. A color that looks bright in daylight may feel different under warm bulbs. Test swatches in the actual space.
Practical tips for testing and applying
– Start with samples. Put small squares of tile and grout on a board or a hidden wall area. Check under the kitchen light and near your sink to see how it behaves with water splashes.
– Plan the amount of color. A bold line along a row or a single border band gives a playful touch. Using color in every joint can feel busy, so keep it restrained.
– Pick the right grout type. Cement grout with a seal can work well, but epoxy grout resists stains better in busy kitchens. If you choose cement grout, seal it after the grout cures.
Maintenance and care
– Seal colored grout after it cures. A seal helps keep spills from staining the color. Reapply as the product directions suggest.
– Clean with gentle, pH-neutral cleaners. Avoid acids or harsh scrubs that can wear down the color in time.
– Expect some wear on light colors. If you notice fading or staining, you can regrout or refresh the color on a small section first.
Real life looks to try
– A bright cobalt line along a classic subway tile creates a modern twist without losing the timeless feel.
– A soft pastel edge on hex tiles gives a gentle retro vibe that still fits contemporary white cabinets.
– A dark charcoal grout on white tiles can make the whole backsplash look sharper and easier to maintain.
Next steps: sketch your plan, grab tile and grout samples, and test them in your kitchen. With the right shade and care, colored grout becomes a simple, stylish upgrade.
A splash of color in your grout can turn ordinary tiles into a stunning design statement! With white cabinets, it’s the perfect way to add personality and charm to your kitchen without a full makeover.
13. Colored Grout for a Fun Twist
Editor’s Choice
🛍️
Red Devil 042260 Pre-Mixed Tile Grout – Professional Quality, Excellent …
Want depth in a white kitchen without crowding the space? Textured 3D panels as a backsplash bring real depth and tactile interest. They catch light in different ways, so the wall reads differently as you move. The result is a standout feature that stays calm next to your white cabinets.
Materials you can choose from:
– Ceramic panels for easy cleaning and a smooth finish.
– Metal panels for a crisp, modern vibe.
– Bamboo or other sustainable options for warmth and eco style.
Some designs imitate stone or glass, while others show bold textures and patterns. Pick what fits your room vibe and your cleanup routine.
Where to place them for the best effect:
– Behind the stove or the sink, where texture can be a focal point.
– On a long run to create a strong wall statement.
– In a small kitchen, use texture to add character without overwhelming the space.
How to use textured panels well:
– Keep other decor simple so the texture can shine.
– Choose neutral or soft colors to keep balance with white cabinets.
– Add soft ambient lighting to highlight the depth in the panels.
– Think about thickness and grout lines to avoid busy seams.
– Make sure the area behind the stove is heat and moisture friendly.
Maintenance and practical care:
– Wipe with a soft cloth and mild soap; most panels resist stains easily.
– Check heat resistance where the panel sits behind the stove.
– Seal edges if needed to prevent moisture from seeping into gaps.
Installation and planning tips:
– Measure the space carefully and decide on panel size and layout.
– Decide if you will mount panels with adhesive or use a frame system.
– Use a waterproof sealant around edges to keep moisture out.
– Consider hiring a pro for precise cuts and a clean finish, especially around outlets and corners.
What to expect in real life:
– Texture adds depth, not bulk. Your kitchen looks layered yet simple.
– Costs are higher than flat backsplashes, but the visual payoff can be big.
– Seams will show; plan a layout that minimizes their visibility.
Next steps you can take today:
– Gather samples in your room’s lighting to see how they shift with time.
– Compare ceramic, metal, and bamboo options side by side.
– Sketch a quick layout for behind the stove and the sink, noting where lighting can play on the texture.
A textured 3D panel isn’t just a backsplash; it’s a conversation starter! Elevate your kitchen with depth and interest while keeping it serene next to your white cabinets. Let light play its magic!
14. Textured 3D Panels for Depth
Editor’s Choice
🛍️
100 Pieces Peel and Stick Backsplash for Kitchen, 3″ x 6″ PVC Subway Til…
Here is why iridescent tiles work with white cabinets. They catch light and shift color as you move. That small change turns a plain backsplash into a focal point without crowding the room.
What you get with iridescent tiles
– A subtle glow A soft glow in daylight and brighter hints under lamps. You feel the room wake up as you walk in.
– Color play The tiles reveal a quick spectrum from cool blues to warm pinks as the angle shifts. It stays calm, not loud.
– Easy pairing White cabinets stay clean and bright while the tiles add a touch of sparkle. It looks intentional, not busy.
Where to put them for the best effect
– Use a narrow band behind the sink or stove as an accent strip. This creates a spark where you use the most heat and water.
– Create a small panel about 18 by 36 inches. A contained patch keeps the glaze from taking over.
– Try a backsplash around an island or breakfast bar for a quick punch of shine. It makes the center of the kitchen feel special.
Practical tips to get it right
– Keep the tile design simple Choose a clean grid or a quiet, small pattern. Let the shimmer speak.
– Pair with metallic touches Think brushed nickel, chrome, or warm brass. Metals frame the glow well.
– Choose grout carefully Light gray or white grout keeps lines tidy and hides small smudges.
– Use the right lighting Under-cabinet LEDs show the colors best and light up work zones.
– Pick materials that fit daily life Glass or mother-of-pearl tiles wipe clean easily and resist stains.
– Plan for professional help A pro can lay sheets evenly and trim around outlets for a neat finish.
Common questions you might have
– Do these tiles really change color with light Yes. The shift is gentle and pretty, not flashy.
– Are they hard to care for Not at all. A soft cloth and mild cleaner do the job.
– Will they fit any kitchen style They work with modern and classic looks if you keep the rest calm.
Next steps to plan your glam touch
– Get a sample set Compare how they look in day and night light.
– Decide where the accent will live Map the size of the panel before you buy.
– Talk with a tile pro About laying sheets and sealing edges for a clean finish.
Are you chasing a modern vibe for your white cabinets? Geometric patterns can give your kitchen a sharp, fresh look without overwhelming the space. They bring order, structure, and a dash of personality.
Here is why geometric tiles work well with white cabinets
– They create a clear, modern edge. Clean lines and bold angles stand out against white backgrounds.
– You can go bold or stay subtle. Shapes alone can do the talking or you can mix colors to suit your style.
– The tile pattern defines the room. A geometric backsplash becomes a featured element that sets the mood.
Popular geometric tile shapes
– Hexagon tiles: A honeycomb effect that adds texture without shouting.
– Chevron or herringbone: Classic zig lines that feel timeless and chic.
– Square grids with a twist: Slightly offset squares add visual interest.
– Lattice and lattice-inspired mosaics: Delicate lines that read as soft geometry.
– Mixed shapes: Combining diamonds, triangles, and hexagons for a dynamic look.
Here is how to use color and contrast to your advantage
– Dark grout makes the pattern pop. It creates crisp outlines that highlight each shape.
– A bold tile color against white cabinets works too. Think charcoal, navy, or deep green.
– Light gray or warm tones give a softer, more casual vibe.
– Keep the countertop and hardware simple to let the pattern breathe.
Layout ideas to fit your space
– Full-height backsplash with one bold tile pattern for a strong statement.
– A band of pattern above the counter with plain tiles below for balance.
– A diagonal or staircase layout to add movement in small kitchens.
– A gradual approach: start with a small inset panel, then expand if you love the look.
Next steps to bring this to life
1) Pick 1–2 shapes you actually like. Decide if you want high contrast or a more subtle look.
2) Measure the backsplash area and choose tile size that matches your space. Larger tiles feel calmer; small mosaics feel lively.
3) Get color and grout samples. See how real light changes the pattern.
4) Prepare the wall, lay out a mock grid, and plan the edge finishes near outlets and corners.
Practical tips for smooth installation
– Use a quality primer if the wall is uneven. A flat base helps the pattern read clearly.
– Align patterns with cabinet lines. Stay consistent to avoid jagged edges at corners.
– Seal the tile and grout after installation to keep colors bright longer.
– Clean with a mild soap solution; avoid harsh cleaners that dull the finish.
Maintenance and care
– Wipe spills quickly to stop staining on light grout.
– Re-seal grout as recommended by the tile maker to keep the contrast sharp.
– If a tile chip happens, replace only the affected piece to avoid a full redo.
Common questions you might have
– Will a bold geometric backsplash clash with white cabinets? Not if you scale the pattern and pick a calm grout. Pair big shapes with simple counters for balance.
– What grout color is best? Dark grout creates the strongest line; light grout softens the pattern.
– How do I choose between patterns? Start with one focal tile, then test two options in a portable sample. See how they look in your kitchen’s light.
If you want a modern edge that still stays timeless, geometric patterns are a smart move with white cabinets. They offer structure, style, and a touch of personality you can refine over time.
You want a backsplash that makes white cabinets stand out without crowding the room. Bold black accents can do this well. Black adds depth and a sense of confidence. It helps the white look brighter. Here is why this works: you get a strong anchor that draws the eye. The contrast feels clean and modern. It also gives you a canvas to play with textures and shapes.
Finish ideas
– Mix matte and glossy black tiles to create a layered look. This combo catches light and adds depth.
– Add a touch of texture. A stone look, ceramic with a tiny grain, or a pebble surface makes the backsplash feel tactile.
– Keep grout dark. Black grout ties pieces together and hides small smudges.
– Use a thin metal trim in black to frame the edge and keep lines clean.
– Consider a black glass tile for a reflective surface.
– A matte finish with a tiny mica sparkle can hide soap scum.
Pattern and layout options
– Subway tiles in a straightforward grid offer a timeless base.
– A herringbone or chevron pattern brings movement while staying bold.
– A stacked bond or basketweave gives a strong modern edge.
– Small tiles with a large pattern create a focal stripe without overwhelming the room.
– Use a large format tile in black to give a bold, uninterrupted look.
Balance and lighting tips
– Let the rest of the kitchen stay light to avoid a heavy feel.
– Add brighter countertops or pale walls to bounce light around.
– Install under-cabinet lights to spotlight the backsplash.
– If you like metal, add black fixtures like faucets, handles, or shelves to tie the look together.
– Paint the ceiling a light shade to keep the space airy.
Practical steps to implement
– Start with a small sample board to see how black looks with white and steel.
– Pick two finishes at most to keep things calm.
– Plan your layout on paper or with a tile app before buying.
– Order some extra tiles for repairs later.
– If you are hiring help, ask for tile that is easy to trim and fit in corners.
Common questions
– Will a black backsplash be hard to keep clean? Choose good grout and wipe spills quickly.
– Do I need black countertops? No. Light stone or white counters work well with a black backsplash.
– How long does the install take? It depends on the size. A small kitchen can be done in a weekend.
– Can I mix black with white marble? It works if the marble has light veins that keep the look fresh.
Next steps. Take time to plan, test, and then install. Your white cabinets will pop with bold black accents.
17. Bold Black Accents for Dramatic Contrast
Editor’s Choice
🛍️
Black Glass Subway Tile 4 x 12 Inch for Kitchen Backsplash Bathroom Show…
You want a kitchen that looks upscale but stays easy to live with. A marble backsplash with white cabinets can give you that timeless, cafe-inspired vibe. The veining in natural marble catches the light and adds a touch of drama without shouting. When you walk into the room, you feel washed in calm luxury.
Here is why marble works well with white cabinets. Marble is a classic material that never goes out of style. It reflects soft light and keeps the space feeling bright. A honed finish gives a smooth, matte look that hides tiny stains better than a shiny surface. The right marble makes cooking feel like a small indulgence.
Let’s break down your options and how they fit your kitchen.
– Marble types: Calacatta for bold, pronounced veining; Carrara for gentler lines; Statuary for a dramatic look. Choose based on how much contrast you want against white cabinets.
– Finish styles: Honed marble offers a subtle, everyday glow. Polished marble shines more and shows veins clearly. For busy kitchens, honed is often easier to love long term.
– Vein patterns: Subtle swirls create a quiet backdrop. Heavy veining adds personality and becomes a focal point.
Practical tips you can use now
– Go with honed marble for a forgiving, low-maintenance vibe. It hides fingerprints and minor spills better than a glossy surface.
– Seal the marble before install and re-seal as recommended. A good seal keeps stains at bay and makes cleanup simpler.
– Pair with stainless steel or matte black finishes. This combo feels modern without clashing with the marble’s warmth.
– Add warm lighting above the backsplash. Soft amber or warm white light enhances the marble’s natural color and depth.
– Think about layout: full-height behind the stove can create a striking, cohesive wall. A shorter strip behind the sink or countertop edge can echo the lines of your cabinets nicely.
What to expect in daily use
– Marble is durable but not stain-proof. Clean spills quickly, especially acids like lemon or tomato.
– Wipe with a soft cloth and mild soap. Avoid harsh scrubs that scratch the surface.
– Plan for periodic maintenance. A reseal every couple of years helps keep the look fresh.
Next steps you can take
– Decide on the marble family and finish you prefer. This guides your color and lighting choices.
– Sketch a simple layout: where the backsplash ends and any stone cuts happen near outlets or the range.
– Talk with a pro about edge detail and installation. A clean edge and proper mastic help marble stay beautiful longer.
With the right marble and careful care, your white cabinets can glow with quiet luxury. You’ll gain a kitchen that feels elegant every day, ready for both casual meals and special occasions.
You want a kitchen that feels lively but stays clean next to white cabinets. A splash of color on the backsplash can do it. Colorful tiles catch the eye and set a warm mood for family meals and quick breakfasts.
Why color matters
– A bold tile draws the eye and frames your white cabinets.
– It reflects light and makes the room feel bigger.
– It sets a tone you can build on with decor.
– It hides small smudges better than plain white.
Color families that work with white cabinets
– Sunny yellows add warmth and cheer. Pair them with white and light wood for a bright, welcoming look.
– Soft blues create a calm, coastal feel. Add a hint of brass or copper for a subtle glow.
– Fresh greens give a garden-like glow. Think sage or mint against white for a fresh finish.
– Bright pinks or oranges punch up energy. Use them as a narrow band or a small panel to avoid overload.
Keep your palette simple. Pick one main color and one or two accents. This keeps the kitchen from looking crowded.
Tile shapes and finishes
– Hexagon tiles look modern without shouting too loud.
– Triangle or diamond shapes add a playful touch.
– Subway tiles with a tinted glaze feel timeless and easy to pair.
– Glass or ceramic finishes sparkle in daylight and under task lights.
– A touch of iridescent glass can add depth without stealing the show. Start with a small section if you are unsure.
Finish choices affect how the color reads. Glossy tiles brighten a small space. Matte tiles give a softer, cozier feel. Use glossy for the back wall or splash to catch light. Use matte where you want a calm backdrop.
Design tips to pair colors
– Decide on a dominant color and use it most of the time.
– Pick a contrasting shade for accents like a thin row or a small panel.
20. Unique Recycled Material Backsplashes for Sustainability
You want a kitchen that looks great and helps the planet. A backsplash made from recycled materials can do both. It adds character and a story to your space. White cabinets shine with these options.
Here is why they work:
– Recycled glass tiles catch the light. They add color and sparkle. They wipe clean easily.
– Reclaimed wood brings warmth. It ages well when sealed properly.
– Terrazzo made from recycled chips shows a speckled pattern. It hides small marks and wears nicely.
– Recycled metal mosaics give a modern, reflective finish. They pair well with white.
– Recycled brick tile adds texture and a rustic touch. It cleans up with a quick wipe.
Other good options:
– Recycled ceramic or porcelain tiles with chips. They come in many colors and stay durable.
– Cork tiles give a soft, warm feel. Seal well to stand up to kitchen moisture.
– Bottle cap mosaics offer bold color and a playful vibe. They work best as a small accent wall.
Design ideas to try:
– Choose one hero material and add a slim second material for an accent line.
– Install glass behind the sink with a thin metal border for a crisp edge.
– Use terrazzo as a bold wall behind the stove to draw the eye.
– Mix in cork or brick in a band for texture without overwhelming white cabinets.
Sourcing and safety tips:
– Look for local shops that carry eco-friendly options.
– Ask for proof that the material is recycled or reclaimed.
– Check how tough the surface is and how you clean it.
– Confirm any sealing needs for wood or cork areas.
Care and upkeep:
– Clean with mild soap and warm water. Dry with a soft cloth.
– Seal wood or cork as recommended by the maker.
– Avoid strong cleaners that dull color or finish.
– Wipe up spills quickly to prevent stains.
Limits to plan for:
– Prices vary by material and pattern; expect some premium options.
– Availability can be limited for rare recycled choices.
– Some designs need a pro for precise seams or curved walls.
Next steps:
– Set a budget and pick a hero material.
– Gather samples and compare with your white cabinets.
– Talk with a kitchen installer about layout and sealing.
With a recycled material backsplash, you add style and a friendly footprint. Your kitchen becomes warmer and more thoughtful.
20. Unique Recycled Material Backsplashes for S…
Editor’s Choice
🛍️
1 LB 5x20mm Glass Strips Mosaic Tiles for Home Decoration, Mini Recycled…
Are you craving a fresh look for your kitchen but want to skip a messy tile job? Peel-and-stick tiles offer a budget-friendly, weekend-friendly update that works great with white cabinets. They give you room to experiment with color, texture, and pattern without tearing out walls.
– Why this idea fits white cabinets
White cabinets make any color pop. Peel-and-stick tiles create a clean, modern backdrop that lets bold grout lines, soft neutrals, or vintage patterns shine. It’s easy to switch from a subtle brick look to a bright geometric design if you crave a quick change.
– What you’ll find in peel-and-stick options
These tiles come in many textures and styles. You can mimic subway, mosaic, stone, or ceramic finishes. They’re usually made from vinyl or a similar flexible material with a strong adhesive. Some look glossy and new; others have a matte, natural feel. Pick patterns that can blend into other areas like a dining nook or breakfast bar for a cohesive look.
– How to install in a few simple steps
1) Clean the wall thoroughly. Wipe away grease and dust until the surface is dry and smooth.
2) Measure the area. Mark a straight starting line to keep everything aligned.
3) Cut with care. Use scissors or a utility knife for precise sections, especially around outlets and corners.
4) Peel and place. Start at the center or from a corner, then press the tile firmly into place.
5) Press again. Run a roller or a firm flat object over the tile to push out air bubbles.
6) Finish edges. If you have gaps, trim carefully and use edge trim or a compatible caulk to seal the seam.
– Tips for lasting results
Choose a higher-quality tile. Cheaper options peel sooner, especially in busy kitchens. Make sure the wall is clean and dry before sticking. Apply in a calm, dry window to avoid humidity. If you’re unsure, test a small patch first. For busy splash zones, look for water-resistant varieties and check heat resistance specs.
– Look for a durable adhesive and a water-resistant finish.
– Consider a cohesive pattern that can extend to other walls or nearby spaces.
– Edge details help: decide if you want corners trimmed with a matching trim strip.
– Who should try peel-and-stick tiles
This is ideal for renters or anyone who wants a reversible update. It’s perfect for a quick change after a big kitchen reface, or when you’re testing a color or pattern before committing to real tile.
– Common questions you might have
Can I put peel-and-stick behind the sink or stove? Check the product specs. Some are fine behind a sink, others are not recommended near direct heat or splatter. Do they peel off easily? Yes, but more so with low-quality materials. Prep well and you’ll get a solid update that lasts.
– Next steps
Walk through your space, note wall prep needs, and choose a tile style that echoes the look you want with your white cabinets. Then plan a weekend install and enjoy a fresh new kitchen without the mess.
Transform your kitchen effortlessly! With peel-and-stick tiles, you can experiment with color and pattern, giving your white cabinets the stunning backdrop they deserve – no messy renovations needed!
21. Peel-and-Stick Tiles for Easy Updates
Editor’s Choice
🛍️
Achim Home Furnishings FTVMA40220 Nexus 12-Inch Vinyl Tile, Marble Class…
Why stainless steel backsplashes work with white cabinets
You want a kitchen that feels clean and useful. Stainless steel reflects light, making a white kitchen look brighter. It stands up to heat and splashes, so you won’t worry during busy mornings. It stays easy to wipe clean.
Installation styles
Backsplashes in stainless steel come as sheets or as tiles. Sheets give a smooth, uninterrupted wall. Tiles create a grid pattern that is simple to install and replace if needed. Both fit a modern white kitchen and keep the room feeling open.
Finish choices to shape the look
Brushed steel hides fingerprints and small scratches. Polished steel reads bright and adds a bold shine. Textured finishes add depth and cut glare. Textured options like satin or micro-brushed give a softer feel and hide dust.
How to pair with white cabinets
Keep lines clean and even. Let the steel act as a hero piece against the white. Match with simple hardware and calm lighting. A bright under-cabinet light helps the steel pop without washing out the room.
Care tips that keep the shine
Use a soft cloth and a cleaner made for stainless steel. Rinse, then dry to avoid water marks. Avoid harsh abrasives that scratch the surface. Wipe up spills quickly to maintain the glow. A microfiber cloth works best for a streak-free finish.
Practical setup notes
Measure the width and height of the area. Decide between sheets for a seamless wall or tiles for easy replacement. Plan seams around outlets and corners. Consider hiring a pro for a precise fit, or study a DIY guide if you take the job on.
Common concerns
Polished steel shows fingerprints more than brushed finishes. You can choose brushed if you want a low-maintenance look. It handles heat well and cleans fast, but plan for occasional touch-ups.
Next steps
Start with sample finishes in your kitchen light. Compare sheet versus tile options. Sketch a plan for outlets and trim. Then pick a finish and book a simple install.
22. Stainless Steel for a Modern Industrial Feel
Editor’s Choice
🛍️
Stainless Steel Backsplash for Stove 24″x30″ Stove Backsplash Protector …
Do you want a kitchen that invites notes, ideas, and small art? Chalkboard paint on a backsplash can give you that. It pairs well with white cabinets by adding a writable surface without losing brightness. You get a place to plan meals, leave reminders, and let family members express themselves.
Here is why it works for white cabinets:
– It creates a clear, usable writing space right where you cook.
– It adds a touch of playfulness without clutter if you keep the area small.
– It becomes a warm, inviting contrast against the clean lines of white.
Let’s break it down with practical steps you can use this weekend.
– Choose a small, practical patch – Aim for about 18 to 24 inches wide and 12 to 18 inches high. Place it where you cook or prep, not where you wash dishes, to reduce splash and wear.
– Prep the wall – Clean the surface well to remove grease. Lightly rough up a glossy spot so the paint grabs. A smooth base helps you write and wipe with ease.
– Apply the chalkboard paint – Use two to three thin coats. Let each coat dry fully before the next. Thick coats smear and wear faster.
– Season the surface – After the last coat dries, rub the area with white chalk, then wipe it clean. This primes the surface so chalk writes smoothly from the first use.
– Keep the look practical – Start with a single patch. You can expand later if you love it, but a small area stays neat and easy to manage.
Smart tips to keep it tidy
– Use normal chalk for clean writing and easy erasing. Colored chalk can brighten the space but keep a small palette handy.
– Write in short notes, recipes, or lists. Long blocks of text feel messy on a small backsplash.
– Wipe with a damp cloth regularly. Avoid harsh cleaners that can dull the finish.
Maintenance and what to expect
– Chalkboard surfaces can wear where you touch most. They can be affected by heat and water near the sink. If you notice chalk showing through, re-season the area with chalk and wipe clean.
– Keep the section modest. A big, full-wall chalkboard may steal attention from your white cabinets.
Alternatives if you want less upkeep
– Chalkboard vinyl strips you can apply and remove easily.
– Chalkboard tiles that give a defined grid.
– A glass panel painted with a chalk-friendly marker that you wipe clean.
Next steps
– Measure your chosen patch.
– Pick a chalkboard paint color or finish.
– Plan a simple layout for recipes, notes, and doodles.
23. Chalkboard Paint for a Fun, Interactive Space
Editor’s Choice
🛍️
Rust-Oleum 206540 Chalkboard Brush-On Paint, 30 oz, Black
You want a kitchen that looks fresh and feels bigger. A high-gloss backsplash on white cabinets can do that fast. It adds shine and a clean, modern vibe you can see and feel.
Here is why high-gloss backsplashes work well with white cabinets.
– The reflective surface bounces light around the room. This makes the space feel brighter.
– The white base stays crisp and clean with less effort. Smudges show, but a quick wipe helps every time.
– The glossy finish adds a polished, contemporary touch without heavy design work.
– Cleaning is simple. Wipe with a soft cloth and mild soap if needed.
How to choose color and tone for your gloss tile
– Clear glass keeps the focus on the cabinets. It creates a seamless, almost seamless look.
– Tinted glass adds a hint of color without overpowering the white. Think pale blue, soft gray, or seafoam green.
– Solid colors in a high-gloss glaze can punch up the room. Consider navy, emerald, or charcoal as accents.
– If you want a busy pattern, pick a color that echoes your cabinet doors to keep balance.
Shapes and patterns that pair with white cabinets
– Hexagon tiles offer a modern twist without shouting for attention.
– Large squares keep things simple and bold.
– A brick or stacked pattern adds texture while still staying clean.
– A subway tile in a glossy finish always feels timeless with white cabinetry.
Lighting that makes the gloss pop
– Under-cabinet LEDs brighten the work areas and highlight the tile’s shine.
– Strip lighting along the top edge helps the backsplash glow softly in the evening.
– White or cool-toned bulbs show the true color of the glaze rather than yellowing it.
Care and maintenance you can rely on
– Clean regularly to keep the shine. A damp cloth works in most cases.
– Avoid abrasive pads that scratch the surface.
– Use mild soap or a gentle cleaner for stubborn spots. Rinse and dry to prevent streaks.
– Wipe in the same direction when cleaning us to avoid smudges.
Next steps to get this look in your kitchen
– Gather samples of clear glass and a few bold gloss colors.
– Check tile shapes you like: hexagon, square, or brick.
– Plan under-cabinet lighting before you install.
– Measure the backsplash area and budget for a gloss finish.
– Talk with a pro about grout color and sealing options.
With the right high-gloss backsplash, your white cabinets will look bright, modern, and ready for daily life.
24. High-Gloss Finishes for a Contemporary Look
Editor’s Choice
🛍️
Glass Subway Tile 3 x 6 Inch White for Kitchen Backsplash Bathroom Wall …
You want a kitchen that fits your style without losing the clean look of white cabinets. A customizable backsplash can give you that personal touch. It lets you pick a design that speaks for you while keeping the room bright and easy to live in.
What customizable backsplashes can be
– Hand painted tiles with simple shapes or a small motif. They feel like art you can live with.
– Custom tile mosaics that form a tiny scene or a repeating pattern you love.
– Tile murals sized to fit behind the sink or stove for a bold moment.
– Glass or metal sheets cut to fit, adding shine or a touch of industrial style.
– Textured ceramic or stone tiles that catch the light in a new way.
Here is why it helps your white cabinets
– It creates a focal point you notice every day.
– It lets you express your taste without changing the whole kitchen.
– It stays easy to clean if you choose durable materials and proper finishes.
Let’s break it down into steps you can act on
– Define your vibe Decide if you want calm, bold, vintage, or modern. Write down a few keywords like warm, graphic, or classic.
– Pick the material For kitchens, consider ceramic or porcelain for value and ease. Glass adds shine. Natural stone gives texture but needs sealing. Metal brings a sleek edge.
– Choose color and pattern With white cabinets, you can go high-contrast with deep blue or black. Or stay soft with warm creams and grays. Pattern ideas include herringbone, subway tile, or a tiny geometric.
– Work with a pro An artist or tile designer can craft a one‑of‑a‑kind piece. You can also buy customizable tile sets that feel custom but cost less.
– Plan the installation Measure the area, pick grout color, and decide on a tile layout. Talk about a sealing plan if you use stone or porous tiles.
– Set a budget and timeline Custom pieces take time. Ask for a written estimate and a clear schedule.
Practical ideas you can use now
– Start with a small accent area, like a strip behind the stove. It gives you a test run without a big commitment.
– Try a simple hand painted tile border for a personal touch that isn’t loud.
– Mix two materials, such as a glass panel with ceramic tiles around the edges. It adds depth without overpowering white cabinets.
Care and limits to know
– Stone and some glass need sealing and mild cleaners. Harsh cleaners can wear color and shine.
– Custom work may cost more and take longer. If you plan to move soon, think about a reversible option like a removable panel.
Common questions
– What material best fits white cabinets? Ceramic or porcelain is reliable. Glass adds light. Stone gives texture but needs care.
– How do I keep it clean? Wipe with a soft cloth and a gentle cleaner. Rinse and dry to prevent streaks.
Next steps
– Gather a few ideas from magazines or online shops.
– Visit tile shops to see finishes in person.
– Get quotes and lead times from artists or designers.
– Start a simple board of your top color and pattern options to share with a pro.
With the right customizable backsplash, your white cabinets stay bright while your space shows your true style.
25. Customizable Backsplashes for a Unique Look
Editor’s Choice
🛍️
DYARI Set of 9 Decorative Ceramic Tiles – Hand Painted Indoor & Outdoor …
With these 25 stunning kitchen backsplash ideas, you’re equipped to create a space that reflects your style while beautifully complementing your white cabinets.
Whether you prefer timeless elegance, bold colors, or a unique personal touch, there’s an option for every taste.
Now it’s your turn to get inspired and start designing a kitchen that will leave everyone speechless!
Note: We aim to provide accurate product links, but some may occasionally expire or become unavailable. If this happens, please search directly on Amazon for the product or a suitable alternative.
This post contains Amazon affiliate links, meaning I may earn a small commission if you purchase through my links, at no extra cost to you.
Frequently Asked Questions
What Are Some Popular Kitchen Backsplash Ideas for White Cabinets?
If you’re looking to enhance your white cabinets, there are plenty of stylish options! Consider classic subway tiles for a timeless look or bold mosaic designs for a pop of color. If you prefer a more rustic feel, elegant natural stone or unique vintage tin tiles can add charm. There’s truly something for everyone!
How Do I Choose the Right Backsplash Material for My Kitchen?
Choosing the right backsplash material largely depends on your style and maintenance preferences. For a sleek and modern design, glossy glass panels or high-gloss finishes work beautifully. If you want something more cozy, consider natural wood elements or soft subtle textures. Don’t forget to think about how much cleaning you’ll be doing, as some materials are easier to maintain than others!
Can I Use Peel-and-Stick Backsplashes with White Cabinets?
Absolutely! Peel-and-stick tiles are a fantastic option for updating your kitchen without the mess of a traditional tile job. They come in various designs, from modern to vintage, and can easily complement your white cabinets. Plus, they’re budget-friendly and perfect for DIY enthusiasts looking for a quick transformation!
What Colors Work Best for Grout with White Cabinets?
When it comes to grout, the color can make a big difference in the overall look. For a classic feel, stick with white or light gray. If you want a fun twist, consider using colored grout to highlight your tiles and add personality. Just make sure it complements the backsplash design and enhances the clean look of your white cabinets!
How Can I Incorporate Sustainability into My Kitchen Backsplash Design?
Sustainability is a fantastic consideration when designing your kitchen! Look for backsplashes made from recycled materials or eco-friendly options like natural stone. These materials not only add character to your space but also reflect your commitment to the environment, all while beautifully complementing your white cabinets.
Spring cleaning season has me craving a system that actually sticks. When I open a cabinet and see mismatched lids, foil packets, and gadgets piled high, I waste time and patience. So I made this post to help you cut that waste and feel more in control in the kitchen. You deserve a setup that makes cooking and cleaning smoother, not a daily struggle with clutter. This guide packs 25 kitchen cabinet organization hacks that are practical, affordable, and easy to start today.
Who is this for. If you cook at home, live in a small space, or juggle busy days, this one is for you. If you love a kitchen that stays neat while you rush through lunches, dinners, and quick prep, you will find ideas you can actually use. These hacks speak to home cooks, busy parents, students, and anyone with limited cabinet space.
What you’ll get. Here are 25 kitchen cabinet organization hacks that cover space planning, containers, and labeling. They are practical, cheap, and flexible enough to fit most kitchens. You will discover ideas like using a lazy Susan for deep corners. A shelf riser adds a second layer. Clear bins keep items visible. Labeled bins help you grab what you need.
Each hack comes with a simple path you can follow. Start with a quick audit of what you actually use. Measure the depth and height of each cabinet. Decide on a container style, from clear plastic to glass jars. This plan keeps items easy to see and easy to grab.
Here is the plan to get results. Here is why it works: it cuts the time you spend looking for lids and spices. Let’s break it down into bite sized tasks. Pick one cabinet, empty it, group like items, then add one simple tool.
Next steps: try one or two hacks this week and notice how your kitchen feels. This introduction invites you to test, tweak, and build a system that lasts. If you want more, keep reading and choose ideas that fit your space and routine.
You want your pantry fast to use and easy on the eyes. Clear containers let you see what you have at a glance. You stop guessing and you stop wasted trips to the store.
– Pick a mix of sizes: small jars for spices and baking powder; larger canisters for flour, sugar, and rice.
– Glass shows what is inside and feels clean.
– BPA-free plastic is lighter and less likely to break.
– Metal tins work for cereals or pasta.
– Seal matters. Look for airtight lids that snap or screw on. This keeps moisture out and keeps flavors strong.
– Label simply. Use white labels or a colorful sticker set. Write the food name and the date you opened it if you want.
– Group like items. Put all flours on one shelf, all sugars on another, and keep all beans or grains together. This makes restocking easy.
– Place the containers where you reach most often. Put the items you use every day at eye level. That way you can grab them without bending or rummaging.
Here is why the setup helps. It makes your cabinet calm and clean. You can stack the containers neatly without lids knocking into each other. The sight of clear jars creates a pleasant rhythm that tells your brain you are organized.
Small changes add up. If your cabinet is deep, add a shallow shelf or a pull out bin for heavy items.
Put a simple rotation plan in place. When you open a new bag, transfer the contents to a container and write the date on the label. Use a first in, first out rule so nothing sits too long. This keeps flavors fresh and reduces waste.
Maintenance is easy. Wipe the rims after each use. Check lids for wear every month. If you notice moisture, wipe the inside and replace the lid seals.
Next steps
– Measure your cabinet space first. Then pick containers that fit with a little space to spare.
– Start with the top two shelves for frequently used items. Move slower things to the back.
– Make one change this week. A small step adds up quickly over time.
– Consider color or style. A few bright labels or glass jars that match your kitchen can make the space feel calmer.
1. Use Clear Containers for Dry Goods
Editor’s Choice
🛍️
32oz Glass Food Storage Jars with Airtight Clamp Lids,Set of 4 Airtight …
Do you struggle to see what you have in a deep cabinet? Pull-out shelves change that. They sit on sturdy rails and slide out toward you. You can see every pot, pan, and lid at a glance. No more unstacking or climbing into the cabinet to grab something. Your heaviest cookware becomes easy to reach, and your cupboard stops feeling like a black hole.
Smart ways to use them in your kitchen
Use pull-out shelves for bulky items that are hard to reach. Heavy pots and large skillets mount on the shelves so you can pull them out and lift them without tipping. Lids and bakeware fit well on a separate tier. Tall appliances, like mixers or slow cookers, can ride on a wide shelf that pulls out smoothly. Keep fruit and snacks in the lower shelves for quick access. A clean, organized stack looks and works better.
Choosing the right pull-out shelves
Pick shelves made to handle your load. Look for steel or solid wood frames with smooth, quiet slides. If moisture is a concern in your kitchen, choose materials with a protective coating to resist warping. Check the weight rating and match it to your most used items. Soft-close options reduce clanging and help protect your cookware. Consider the depth of your cabinet and whether you want adjustable shelves for future changes.
Installation in a few steps
1) Measure your cabinet opening, depth, and width to pick the right size.
2) Choose rails that fit your cabinet sides and screw them in with a drill.
3) Attach the shelves to the rails. Ensure they glide smoothly before loading.
4) Test with a few heavy items to confirm the weight feels steady.
5) Load evenly and keep the heaviest items toward the front for balance.
Strong, sturdy rails make a big difference. If you’re unsure about tools or cabinet type, ask a pro to help you avoid problems later.
Tips to keep pots quiet and neat
– Use dividers or small racks on each shelf to stop clanging.
– Place the heaviest items on the lower shelf for easy lifting.
– Keep lids in a dedicated tray or organizer so they don’t topple.
– Label the front edge so you know where everything lives, even in a hurry.
– Leave a little space behind items for air and easier pulling.
Limitations and next steps
Pull-out shelves cost more than plain shelves and require some planning. They work best in wide, deep cabinets. Very tall or oddly shaped spaces may need a custom fit. If you have a tight budget or a tricky layout, start with one cabinet first and see how it changes your routine.
Next steps
Check your cabinet dimensions and look for pull-out options that match your needs. Start with a single, heavy cabinet and test the system for a week. Adjust the setup as you learn what you reach for most. Soon your kitchen will feel calmer, and cooking will be a lot easier.
2. Install Pull-Out Shelves
Editor’s Choice
🛍️
Pull out Cabinet Organizer,Heavy Duty Smooth Sliding Under Cabinet Shelv…
Label simply, group like items, keep frequently used at eye level
Install Pull-Out Shelves
Steel or solid wood frames
$24.99 – $49.99
Choose adjustable shelves, use dividers for organization
Utilize Vertical Space with Tiered Shelving
Metal wire racks, clear acrylic risers, wooden steps
$19.54 – $40.99
Group similar items, keep heaviest on bottom tier
Magnetic Spice Racks
Magnetic strips, small metal spice jars
$18.99 – $19.99
Arrange by color or spice family, paint lids to match decor
Drawer Organizers for Utensils
Plastic, bamboo, or metal organizers
$13.99 – $23.98
Create zones by job, use labels for easy identification
Lazy Susans for Easy Access
Plastic or metal turntables
$19.99 – $28.82
Group items by use, keep lids visible for easy access
Hang Pots and Pans
Wall rails, ceiling racks, hooks
$36.93 – $116.00
Choose a style that fits your kitchen, organize by size and function
3. Utilize Vertical Space with Tiered Shelving
Make the extra space in your cabinets count
Your kitchen cabinets hide a lot of space. Tall items sit idle there. Tiered shelving uses vertical space inside your cabinet. It adds levels you can actually see and reach.
– What to use
Choose tiered shelves that fit your cabinet. Options include metal wire racks, clear acrylic risers, or simple wooden steps. Metal holds heavy cans well. Acrylic wipes clean easily. Wood adds a warm feel. Mix and match if some shelves need more height.
– Where to place them
Set the tiers on the shelf you already have. If your cabinet is deep, pick flatter tiers so you can reach items without digging.
– How to set them up
Start by emptying the cabinet. Wipe the inside and dry it. Put the first tier toward the front so you can grab items. Add a second tier above it. If there’s room for a third, place it higher still. Adjustable options help you tailor the height to what you store.
– Sorting tips
Group similar items as you reload. Put spices on a small tier, baking sheets on a wider one, and cans on a taller one. Front-facing labels help you pick what you need fast. Keep the items you use most in the easiest reach.
– Loading rules
Heaviest things go on the bottom tier. Tall jars or cans sit on the back of a higher level. Short items stay on the lower front for quick grabs. This setup cuts clutter and frees counter space.
– Maintenance habits
Every few weeks, pull the items out and check. Wipe up spills, peek at expiration dates, and move daily staples to the front. A quick reset keeps things tidy longer.
– Practical examples
A three-tier rack can hold spices on top, baking sheets in the middle, and canned goods on the bottom. A smaller, two-tier setup works well in a shallow cabinet near prep space.
– Quick fixes
If you cannot install shelves inside, use a freestanding tiered organizer on the shelf or a slim pull-out unit. Both give you more control without remodeling.
– Next steps
Spend 15 minutes this week sorting a cabinet. Pull everything out, decide what you use often, and reload with a smart mix of tiers. You’ll cook faster and see a calmer shelf.
3. Utilize Vertical Space with Tiered Shelving
Editor’s Choice
🛍️
BestOffice | 4-Tier Wire Storage Shelves | 36x14x54 | Black | with Adjus…
Spice clutter makes cooking slow and messy. A magnetic spice rack fixes that. It saves space, keeps spices in reach, and gives your kitchen a clean, modern look. Here is why it works and how to set it up.
– Choose a spot. Put the strips on the side of a cabinet, the fridge, or a pantry door.
– Use strips that are strong enough for metal jars.
– Pick small metal spice jars with tight lids.
– Fill the jars with your spices and snap on the lids.
– Clean the surface first, then attach the strips and press firmly for 30 seconds.
– Put the jars on the strips and arrange them by color, by spice family, or by how often you use them.
Decor and color tips:
– Paint the lids to match your decor.
– Use color labels so you can spot spices fast.
What you need:
– Magnetic strips for mounting.
– Small metal spice jars with tight lids.
– Clear labels or tape for quick reads.
– A clean cloth for prep and cleaning.
– Optional: paint or color tape to blend with your kitchen.
Next steps:
– Measure the space and decide how many jars you want.
– Mount the strips on a clean, dry surface and press to fix.
– Fill, label, and place the jars.
Care and limits:
– This works best on metal surfaces like metal-framed cabinet sides or the fridge.
– If the door is light or the jars are heavy, use a stronger strip or add a second strip.
– Check the strips every few months and wipe away splashes.
Common questions:
– Will jars fall off? Use strong strips and proper lids.
– Can you color code by spice family? Yes, that helps you grab what you need.
4. Magnetic Spice Racks
Editor’s Choice
🛍️
Metal 4 Pack Magnetic Spice Storage Rack Organizer for Refrigerator and …
Your utensil drawer can feel like a tumble of spoons, tongs, and spatulas. You dig in and grab a ladle, only to knock over a whisk. The mess slows you down and adds stress to weeknight cooking. The fix is simple: use drawer organizers that separate tools by size and job. You’ll find what you need in seconds, not minutes.
Here is why this works. Clear gaps mean air flow, even in a small drawer. With the right setup, every tool has a home. You cut clutter, reduce slips, and protect sharp knives from bumps. A tidy drawer also makes cleanups easier because you know where to drop each item.
Next, let’s break it down into practical steps you can use today.
– Measure your drawers. Note the depth and width. This tells you what kinds of organizers fit without sticking out.
– Pick a mix of organizers. Use shallow dividers for cutlery and deeper trays for spatulas and tliers. Consider stacking trays for tall drawers.
– Choose materials that fit your kitchen. Plastic is affordable and easy to wipe. Bamboo looks warm and resists stains. Metal or acrylic can feel sleek and sturdy.
– Create zones by job. Have a zone for forks and knives, a zone for spoons and salad forks, and a zone for larger tools like ladles and whisks.
– Add labels if you like structure. A small, simple label helps when guests or kids help with the chores.
Here are quick setup tips you can apply now. Start with a basic set and add sections later. Place the longest items in the back or on the sides so they don’t crowd the smaller tools. For very deep drawers, stack two shallow trays on a pedestal or riser to gain extra height and space. If you share your kitchen with others, color-coding can make life smoother.
What about questions you might have? How many compartments should you use? As many as you need to keep items from touching. Do you need to label? Not always, but labels help with quick restocking. Should you mix materials? Yes, if you like the look, but keep it simple to avoid slippage and wobble.
Limitations are real. A very deep drawer may need a taller riser. A shallow drawer can feel crowded with too many sections. If you run into that, swap in fewer dividers and leave room to breathe. You can always add more later.
Next steps are easy. Sketch your drawer on paper, choose a couple of organizers, and test them in place. If something doesn’t fit, swap it out for a smaller tray or an adjustable divider. In a few minutes, your utensil drawer will work like a well oiled tool chest—calm, clean, and ready for your next recipe.
5. Drawer Organizers for Utensils
Editor’s Choice
🛍️
SpaceAid Bamboo Drawer Dividers with Inserts and Labels, Kitchen Adjusta…
Ever pull out a bottle from the back of a cabinet and wish you could reach it without a scavenger hunt? A Lazy Susan can fix that. These round, spinning trays bring items to the front so you don’t waste time digging.
Where to use them
– In the pantry, a Lazy Susan keeps oils, snacks, and cans in reach.
– Under the sink, it holds cleaners, brushes, and sponges so you can grab what you need fast.
– In corner cabinets, the rotating base turns a dead space into a useful shelf.
Two big ideas to get started
– Choose the right size. A 12-inch tray fits most spice racks. A 16-inch turntable works well for bottles and bigger items. If you have tight space, a compact 9–10 inch model can still help.
– Pick the right material. Metal and heavy-duty plastic spin smoothly and stay clean. Clear acrylic lets you see every item at a glance. Pick something sturdy with a smooth bearing so it won’t wobble or stick.
How to set it up quickly
– Measure your cabinet depth and height. You want room to turn without hitting the door.
– Group items by use. Put frequently used oils and spices on the top layer. Put less used things on the bottom.
– Place a non-slip mat under the tray. It stops items from sliding when you spin it.
– Label the sections. Simple tags or color codes help you spot herbs, condiments, and snacks at a glance.
– Keep lids and caps visible. Stand tall bottles with their tops facing outward so you can grab the cap without tipping anything.
Daily use that sticks
– Spin to scan. A quick turn shows you what you have and what you don’t.
– Put back where you found it. Always return items to the same spot to keep the system tidy.
– Refill in small bursts. When you finish a bottle, swap it to the front and replace with a full one in the back.
Tips for best results
– Use multiple turntables for different groups: one for herbs, one for sauces, one for snacks.
– Clear bins inside the tray help keep tiny items from rolling away.
– Clean the tray every few weeks with a damp cloth to keep it looking new.
Here is why this works. It cuts clutter and saves you time. It makes you notice items you would otherwise miss. Next steps? Pick a space, choose a size, and start organizing with a Lazy Susan today.
6. Lazy Susans for Easy Access
Editor’s Choice
🛍️
Set of 4, 10 Inch Non-Skid Lazy Susan Organizers – Turntable Rack for Ca…
If your pots take over the counter and your cabinets are stuffed, you’re not alone. You want storage that’s easy to reach, not a mess to fight with. Hanging pots and pans can solve both problems. It frees space, speeds up meal prep, and adds a touch of charm to your kitchen.
Here is why this works. A pot rack turns your cookware into a decorative feature you live with every day. It keeps heavy pots off the shelves and shows off your favorite finishes. You can pick a style that matches your kitchen, from rustic iron to sleek stainless. The result is tidy storage and a stylish focal point.
– Choose a style that fits your space. Wall rails look clean in modern kitchens. Ceiling racks give a bold, roomy feel. Freestanding racks work well in small or oddly shaped rooms. Materials vary from black iron to brushed steel to warm wood tones. Pick what looks right with your stove, island, and cabinets.
– Place it where it helps most. Hang the rack above your kitchen island or right over the stove if you have space. You want a height that lets you grab pots without climbing or reaching. Make sure you leave room for the lids and any vent hoods or lighting above.
– Set up for quick access. Use S-hooks to hold lids, pans, and lids separately. Put your most-used pots within easy reach—fry pans and stock pots near the front. Keep the heaviest pieces on the bottom hooks so you don’t lift too high.
– Organize by size and function. Start with the big pots on plates or the bottom rung. Stack smaller ones on higher hooks where they won’t bang. Group like pieces together so you know where each pot lives. A tidy line makes grabbing what you need fast.
– Keep finishes and lids in check. Use the same metal tone for all hooks to avoid a mixed look. If you have copper pots, you can blend them with stainless or matte black hooks for a cohesive scene. Use a few labeled hooks for lids to keep them upright and accessible.
– Mind the weight and durability. Secure mounting hardware into studs or joists. Use appropriate anchors if you must mount on drywall. Check occasionally for loose screws and wear. If a rack wobbles, stop and resecure.
Next steps. Measure your space, pick a style, and plan the wall or ceiling path. Install the rack with care, then organize by size and daily use. Watch how much cabinet space you gain and how fast you cook with everything at hand.
7. Hang Pots and Pans
Editor’s Choice
🛍️
Cooks Standard Wall Mounted Wooden Pot Rack, 36 by 8-Inch
If your cabinets feel crowded, you need a simple fix. You want more space without losing counter area. Over-the-door storage can give you that boost.
What over-the-door storage is
It hangs on the outside of a pantry or cabinet door. A sturdy rack adds extra shelves without stealing inside space. It’s quick to install and easy to adjust as your needs change.
What it holds
– Small jars and spice bottles in clear containers.
– Cutting boards, lids, and measuring spoons.
– Snack packs, tea bags, or packets of instant mix.
– Light cleaning supplies or wipes in small bins.
– Hair ties, foil and plastic wrap rolls, or other tiny kitchen odds and ends.
Here is why this setup works: it frees up drawer and shelf space while keeping everyday items close at hand. Next, let’s pick the right rack for your door.
Choosing the right rack
– Check the door size and thickness before you buy.
– Pick metal for strength or sturdy plastic for light use.
– Look for racks with secure hooks or a simple over-the-door track.
– Choose bins or baskets that fit snugly inside the rack.
– If you want a clean look, pick a finish that matches your cabinet hardware.
Let’s break down the installation steps so you can start today.
How to install it
– Measure your door to know the exact fit.
– Clean the door so hooks grip well and items don’t slip.
– Hang the rack over the top edge. Make sure it sits flat and sturdy.
– Place containers that fit tight and won’t slide when the door moves.
– Load light items first, then heavier items toward the bottom of each bin.
– Test the door. It should close fully without rubbing.
Next steps are about making the setup work in real life.
Smart setup tips
– Use uniform, stackable bins for a neat look.
– Label bins so you can grab what you need in a flash.
– Put frequently used items at eye level on the rack.
– Rotate seasonal or rarely used items to lighter bins to avoid strain.
Limitations to know
Over-the-door racks add weight to the door. If the door starts to rub, switch to lighter items or thinner hooks. They aren’t for large, heavy tools or bulky pots. Keep the load balanced to avoid door strain over time.
Maintenance and upkeep
Wipe the rack and bins every few weeks. Check hooks for looseness and tighten if needed. Reorganize every season so you still reach what you need fast.
With these steps, you gain more space, better access, and a kitchen that feels calmer every day.
8. Use Over-the-Door Storage
Editor’s Choice
🛍️
Over The Door Pantry Organizer,9-Tier Over The Door Organizer with Adjus…
Tired of a big, visible trash can getting in the way while you cook? You’re not alone. A pull-out trash can tucked inside a cabinet can make your kitchen feel calmer and cleaner. Here’s how to choose, install, and get the most from this smart setup.
What it is
A pull-out trash bin sits inside a cabinet. A sliding rail lets you pull it out when you need to toss something. When you’re done, push it back. It stays out of sight and out of the way.
How to pick the right one
– Measure first. Check the cabinet’s width, depth, and door clearance. You want a bin that can slide in and out smoothly without blocking shelves or hinges.
– Decide on one or two bins. If you recycle, a two-bin pull-out helps you separate waste and recyclables without extra bags.
– Pick a lid that fits your habits. A soft-close lid keeps smells in and makes quiet, controlled closes.
– Choose materials you can clean easily. Plastic bins are simple and affordable; stainless steel looks sleek and handles busy kitchens.
– Think about liners. A built-in liner or a bag with a steady fit makes bag changes quick and tidy.
Why this helps your kitchen
– It hides waste from sight, so your counters look neat.
– It reduces spills. The bin sits lower and upright, so bags stay put and don’t tip when you reach for ingredients.
– It frees counter space. You keep prep areas clear, which helps your flow during busy cooking moments.
– It can curb smells when you close the lid right away.
Installation in simple steps
– Check fit and plan placement. Mark the location inside the cabinet where the rails will go.
– Remove any old bins or organizers. Clean the area so new parts sit cleanly.
– Attach the rails to the cabinet walls. Use the provided screws and measures from the kit.
– Hang the bin on the rails. Slide it in and out to test.
– Test the whole action. Open, pull, push back, and close. Make sure nothing binds and the lid shuts quietly.
Tips for best results
– Use sturdy bags that fit your bin. It prevents leaks and keeps the inside tidy.
– If you have a small compost or compostable waste, keep a compact bin inside the same cabinet or next to it so you don’t mix odors.
– Label or color-code recycling and trash if you share the kitchen with others. A quick note helps everyone sort waste faster.
Common questions
– Will it fit my crowded cabinet? Most kits come in several widths, and some fit behind standard cabinet doors.
– Can I install this myself? Yes. A basic drill, screwdriver, and ruler are enough for many kits.
Next steps
Measure your cabinet, pick a pull-out trash system that fits, and plan a weekend install. In a short time you’ll cook with less clutter and more ease.
Out of sight, out of mind! A pull-out trash can not only tidies up your kitchen but also keeps your cooking space serene and organized. Discover the magic of hidden storage!
9. Pull-Out Trash Cans
Editor’s Choice
🛍️
Rev-A-Shelf Double Pullout Trash Can for Kitchen Cabinets 35 Qt Garbage …
Do you reach into a jammed drawer and pull out a handful of tools instead of what you need? You are not alone. A tidy drawer makes cooking smoother and faster. The fix is simple: drawer dividers designed for kitchen tools.
Here is why these dividers matter. They carve the space into neat zones. Each tool has a home. Whisks go with whisks, peelers with peelers, and small gadgets sit in their own spot. No more hunting for a corkscrew in a sea of spoons. A calm, orderly drawer keeps you focused on the task and the taste of your next meal.
Choose the right style for your drawer
– Adjustable dividers: These stretch or slide to fit your drawer. They let you create tall sections for long tools and shallow bays for small gadgets. It is easy to reconfigure when your collection changes.
– Expandable or flexible dividers: Perfect for drawers with curves or odd shapes. They can bend to follow the drawer edges and keep items from sliding around.
– Narrow inserts and mini trays: Great for tiny tools like pliers, scoops, and bottle openers. These give each item a little home and stop them from tipping over.
– Non-slip liners inside: A soft mat helps tools stay put as you open and close the drawer. It also protects blades and ends from banging.
DIY on a budget
You can save money by making your own divider system. Use small boxes or trays you already have. A cereal box cut to fit the drawer makes a quick divider wall. Plastic lids or old gift boxes can become tidy compartments. Line the bottom with shelf liner to keep items from moving and to protect edges. It is fast, flexible, and gentle on your wallet.
How to set up your drawer dividers in 4 steps
– Measure: Note the length and height of the drawer before you buy or cut any dividers.
– Plan zones: Decide where long tools go and where small gadgets fit. Sketch a simple layout if helpful.
– Install: Place the dividers and adjust so there is little movement. Make sure you can remove items without knocking others over.
– Test and tweak: Put your most-used tools in their spots. If something feels crowded, thin a zone or add a new divider.
Practical tips you can use now
– Keep the most-used tools at the front for easy reach.
– Color-code by family: all whisk-type tools in one section, all peelers in another.
– Clean every few weeks. Pull out the dividers, wipe the drawer, and put items back neatly.
– Consider a second drawer for similar items if you own a lot of gadgets.
Common questions
– Do I need dividers in every drawer? Not always. Start with the most crowded drawer and go from there.
– What material works best? Plastic and silicone are light and easy to clean. Wood adds a warm look but needs care.
– Can I remove a divider if space changes? Yes. Adjustable models make it simple to reconfigure.
Next steps
Pick one drawer that hides the most chaos. Measure it, choose a divider style, and set up a tidy, user-friendly zone. You will notice the difference every time you cook.
10. Drawer Dividers for Kitchen Tools
Editor’s Choice
🛍️
Vtopmart 12 Pack Drawer Dividers for Clothes, 4″ High 10.2″-16.6″ Adjust…
If your kitchen cabinets feel crowded and items slide around, baskets can be your secret fix. They turn chaos into order without turning your space into a box store. With baskets, grouping like items becomes simple, quick, and kind to your daily routine.
Here is why baskets work. They pull items together by type, so you always know where to look. They make grabbing snacks, baking supplies, or kitchen linens easy with one pull of the handle. Baskets can be moved from shelf to shelf as your needs change. They also add a warm, cozy touch to your cabinets, especially when you pick textures that match your decor. Woven baskets bring a rustic vibe, while fabric baskets feel soft and modern. You can switch colors or materials over time without ripping out existing shelves. The payoff is real: less rummaging, less mess, and faster meal prep.
Choosing the right baskets matters. Start with a few sizes so you can fit any cabinet height and depth. Use at least one shallow option for snacks or spice jars and one deeper option for baking supplies or dish towels. Materials matter too: wicker or rattan work great in sunlit kitchens, fabric baskets stay tidy and quiet, and sturdy plastic or metal baskets handle heavier items. Match the look to your kitchen style, but don’t sacrifice function. Label each basket so you know what lives inside at a glance. Simple labels on the front work wonders, especially when you’re sharing the space with others.
Placing baskets in your cabinets is easy. Put the most-used groups at eye level, so you don’t have to bend or reach. Stack baskets if you have tall shelves, but keep the top one light for safety. Use baskets on pull-out shelves or on adjustable racks so you can slide them out with one hand. If you have awkward corner spaces, choose wedge-shaped or smaller baskets that can fit snugly. Let the baskets act as a quick-scanning map of your pantry: grab a basket and you’re done.
What to store in baskets, exactly. Put snacks together in one, baking supplies in another, and clean kitchen linens in a third. Cooking sprays, tea bags, and packets of yeast all like to live in dedicated baskets. Spices that tend to spill can stay neat in a shallow basket with a non-slip liner. For kids’ snacks, choose a bright fabric basket; it makes healthy choices feel like a game.
Here are practical steps to get started.
– Measure each cabinet to know how big your baskets can be.
– Pick 2–4 baskets of different sizes that fit your space.
– Gather items you often reach for and group them by category.
– Label every basket with a simple tag or chalk label.
– Place them on the shelf where you use them most and adjust as needed.
Care and upkeep help baskets stay useful. Wipe wicker with a damp cloth, wash fabric baskets as the label allows, and check labels every few months. Rotate items with the season to keep things fresh and easy to find.
Next steps: take a quick inventory of your cabinet space today. Choose one area to start, add two baskets, and see how much faster you locate what you need. You’ll feel the difference right away.
11. Use Baskets for Easy Grouping
Editor’s Choice
🛍️
Cute Woven Storage Basket with Handle, Baskets for Gifts Empty, Gift Bas…
Running out of shelf space in a busy kitchen? The inside of cabinet doors is an empty highway you can use. A few simple additions let you stash spices, cups, and towels without crowding your countertops. You’ll reach for items faster and keep the heart of your kitchen calm and tidy.
What fits on cabinet doors
– Spices in a slim rack that sits inside the door. Group them by meal or frequency for quick grabs.
– Measuring cups and spoons in a small pocket or on a magnetic strip.
– Pot holders and oven mitts within easy reach of the stove.
– Tiny tools like a bottle opener, timer, or a small whisk.
– Dish towels or cloths on a tiny rack to dry hands or wipe spills.
Strong, simple shelves and strips work best when items are light. If you keep things heavy, you risk warping the door or pulling it loose. Always test weight before loading up the space.
Choosing the right organizers
– Look for slim, lightweight racks that hinge or slide neatly on the door.
– Magnetic strips work great for metal utensils and metal lids from jars.
– Fabric or plastic pockets offer soft storage for small items without scratching surfaces.
– If you rent or want a temporary fix, choose removable adhesive strips rather than screws.
Strong magnets should never touch spice jars with metal lids. Keep spice jars separate or use magnetic strips only for metal tools.
How to install
– Measure the door height and the available space near the hinge.
– Decide on screws for durability or on strong adhesive for a damage-free setup.
– Mark drilling holes or stick the adhesive strips where you want the racks.
– Attach the rack or strip, then let the adhesive set if you use it.
– Place items and test. Open and close the door slowly to ensure nothing binds.
Keep tools simple. You want clean lines and easy access, not a jumble when you close the door.
Smart layout ideas
– Put a narrow spice rack toward the top of the door, near the hinge for steadiness.
– Mount a magnetic strip along the bottom edge for spoons, small metal lids, or bottle openers.
– A tiny pocket can hold a timer, a mini scissor, or a list of daily steps.
– Near the stove, store potholders on a small hook so you reach them in a flash.
These placements help you cook faster and keep the counter clean.
Maintenance and safety
– Check the weight every month. If you see a loose screw or weak strip, adjust.
– Wipe dust from racks and magnets. Clean jars and lids before reloading.
– If the door sticks, pause and remove the organizer. Use a lighter option next time.
FAQ quick tips
– Are magnets bad for spices? Not if jars stay away from metal lids, and if you keep lids closed tightly.
– Do magnets hold a lot of weight? Stick to light metal utensils and small tools. For heavier items, use a door shelf with a sturdy mount.
By using door space well, you free up shelf real estate and make your kitchen feel calmer. Simple, smart picks and careful placement turn a crowded cabinet into a well organized work station.
Unlock the hidden potential of your kitchen! Utilizing cabinet door space not only clears clutter but also makes your essentials easy to grab. A tidy kitchen is a happy kitchen!
12. Utilize Cabinet Door Space
Editor’s Choice
🛍️
Spectrum Diversified 3-Tier Spice Rack Shelf Organizer for Kitchen Count…
If you live in a small kitchen, you know every inch matters. Stackable containers can solve a big part of that puzzle. They let you use vertical space and keep cabinets clean. Here is why they work so well and how to pick the right ones.
What to look for
– Airtight lids matter. They keep snacks fresh and prevent leaks. Pick lids that snap on firmly and seal well.
– Clear materials help you see what’s inside fast. Glass lasts long and cleans easy, but sturdy plastic is lighter to lift.
– Shape matters. Square or rectangular containers fit shelves and door bins better than round ones. They pack tightly without wasting space.
– A mix of sizes is smart. Small jars for spices, medium containers for grains, large ones for flour or baking sheets. Keep a few slim options for odd gaps.
– Uniform tops help with stacking. If possible, choose containers that stack at the same height for stability.
How to set them up
– Group by what you store. Put breakfast items in one zone, snacks in another, and baking supplies in a third.
– Put the ones you use most often at the front. Put the rest toward the back or on higher shelves.
– Stack like with like. Place heavier, sturdier containers on the bottom. Light, small ones go on top.
– Use risers or small bins inside a cabinet. They create a second shelf for quick picks and clean sightlines.
– Align containers so the labels face out. A quick glance tells you what’s inside without rifling through.
Smart labeling and rotation
– Label each jar with name and date opened. A simple tape label or a chalk marker works well.
– Rotate oldest items to the front. This helps you use what you have before it goes stale.
– Keep a small notepad near the area. Jot ideas for meals you’ll make with what you have.
Practical examples to try
– Pantry staples: oats, flour, rice, and pasta in uniform 1–2 liter jars. Stack two medium jars on a shelf above a large one.
– Snacks: pretzels, crackers, and nuts in 500 ml to 1 liter containers. Line them up in a row for easy grabbing.
– Baking supplies: chocolate chips, sugar, and baking powder in labeled, airtight canisters. Group them by use.
Limitations to know
– Some containers take up more upfront space when you group lids. Choose a system you can move and clean easily.
– Cleaning jars and lids can take time. Wash while you switch out items so shelves stay fresh.
Next steps
– Measure your cabinet depth and height. Note the space you want for stacked items.
– Pick 3–5 sizes that cover your most-used foods.
– Set up a small test zone this weekend. Watch what you reach for most and adjust.
With a simple plan, stackable containers turn a crowded cabinet into a calm, usable space. You’ll see more room, easier meal prep, and less waste. Start small, and build as you go.
13. Stackable Containers for Maximum Space
Editor’s Choice
🛍️
Sterilite 4-Pack Gasket Box, Weather-Resistant Storage Bins with Latchin…
If your kitchen shelves feel chaotic, color can be your best helper. Color coding makes items easy to find and easy to put away. It also adds a friendly, tidy look you can enjoy every day.
Here is why color coding works. Your eyes spot colors faster than shapes or names. A quick glance tells you exactly where to go. It reduces mixups, saving time when you cook or clean. It also makes kids and guests more likely to help because the system is simple and clear.
Let’s break it down into a plan you can start today.
– Pick a simple color set
Choose three or four colors you like. A calm trio or a bold quartet works. Keep it consistent.
– Decide color roles
Assign each color to a set of items or a zone. For example:
– Green for food prep gear (cutting boards, measuring cups, mixing bowls)
– Blue for towels and cloths (dish towels, hand towels)
– Yellow for spices and dry goods (spice jars, canisters, pasta)
– Red for lids, caps, and frequently used containers
You can mix and match to fit your space, but keep the rules the same everywhere.
– Gather the supplies
Get color-coded bins, baskets, and labels in your chosen colors. Clear bins with colored lids work well. Chalkboard or plastic labels in matching colors stay readable. Use color tape to mark shelves or drawers if you don’t want to buy new bins.
– Label and set up
Put colored labels on the inside of drawers, on baskets, and on shelf edges. A simple font size is enough to read quickly. Group items by color and by function as you place them. For example, green bins near the prep counter, yellow canisters on the pantry shelf, blue towels by the sink.
– Start with a small zone
Pick one area to begin. Set up green items at the prep station. Once that zone stays neat, apply color rules to another area.
– Keep it practical
Don’t overdo colors. If a color is hard to find or shows wear, replace it. Keep the system light so it’s easy to maintain.
– Maintain with a quick weekly check
Each week, skim the zones. Return items to their color home. Replenish labels if they fade. A quick check keeps the system working.
What you’ll gain
– Faster shopping and cooking because you can locate items in a flash.
– Less clutter as items slide back to their color home.
– A kitchen that looks organized and feels calmer.
If you’re unsure, start small. A single color on spice jars or towels can already make a big difference. Over time, you can expand the palette and the zones to fit your routine.
14. Color-Coding Your Kitchen Supplies
Editor’s Choice
🛍️
Storex Small Cubby Bins – Plastic Storage Containers for Classroom, 12.2…
Are you drowning in a sea of loose pantry items and mismatched lids? Old glass jars can stop the chaos. They keep dry goods tidy, cut down mess, and look good on the shelf. Let’s turn those jars into a simple, solid system you can use today.
– Here is why this works
– Start by gathering jars you already have. Look for clean glass with lids in good shape. Save jam jars, pickle jars, and any other clear containers. The more sizes you have, the easier it is to fit your spaces.
– Next steps: clean and prep
– Rinse every jar well. Soak off stubborn labels with warm water and a little soap. Scrub until the glass shines. Dry them completely before use. This prevents moisture from making your dry goods moldy.
– Decide what to store in each jar
– Use wide-mouth jars for bulk items like oats, rice, flour, or beans. Tall jars work great for pasta or grated cheese. Small jars are perfect for spices, seeds, and nuts. Group jars by category so you can grab what you need in a flash.
– Label and date for real organization
– Put a simple label on each jar. You can write the name and the date with a marker or use small sticky labels. Clear labeling helps you know what’s inside without opening the lid. Date items that go bad, like nuts or opened sauces, so you rotate them quickly.
– Style and keep it simple
– For a rustic feel, leave some jars bare. If you want color, spray the lids or add a fabric lid cover. Keep lids tight but easy to twist. A neat row of jars with matching lids makes the shelf calm and easy to scan.
– Put jars to work in the kitchen
– Use jars for dry staples on the pantry shelf. Store pasta, oats, beans, and granola in clear jars so you can see what you have. Move frequently used items to eye level. Put a small shelf or a lazy susan under the cabinet to spin through your jars.
– Safe, practical tips you can use now
– Do not store raw meat or perishable foods in glass jars. Use jars for sauces or dressings that stay in the fridge. Keep a few jars near the stove for quick utensils or spices. Rotate items so the oldest get used first.
– Quick setup plan
– Start with one shelf. Pick five jars to test: two wide-mouth, two tall, one small. Label, fill, and place them. Step back and see how it changes your space. If it helps, repeat on other shelves.
Ready for a neat upgrade? Repurposing old glass jars gives you a cleaner kitchen, less waste, and a design you can see and feel every day. Start small, stay consistent, and watch your cabinet space expand.
Tired of drawers that stick or slam shut? A small upgrade can fix that and make your kitchen feel calmer. Drawer slides are the rails that let a drawer glide. Put in good slides and you’ll notice the difference every time you reach for a spoon or a pan.
Here is why this upgrade pays off. Smooth slides mean fewer wrenches of effort. You’ll open a drawer with one easy pull. You won’t hear jarring thumps or feel the whole cabinet shake as you push it closed. If you want a touch of quiet luxury, soft-close slides are worth it. They slow the drawer at the end so it settles softly instead of banging shut.
Different types to know
– Full-extension slides: You can pull the drawer all the way out. That means you see the back of the drawer and grab items you might have missed before.
– Side-mount versus undermount: Side-mount slides run along the sides of the drawer; undermount slides are tucked beneath the drawer for a cleaner look. Choose what fits your cabinet style.
– Soft-close options: These bring the drawer to a gentle stop. They’re popular in kitchens where kids help with chores and in cabinets that get daily use.
– Weight and depth: Pick slides that can handle the stuff you keep in the drawer and match the drawer’s depth. Too long and the drawer won’t close; too short and you lose reach.
How to pick and measure
– Measure the drawer length. Your slide should be as long as the drawer’s depth, not longer.
– Check the drawer height and the side thickness where you’ll mount the slides.
– Decide on the mounting style that matches your cabinet. If you’re not sure, choose a common side-mount package with a soft-close option.
– Think about usage. If you slam drawers a lot or store heavy tools, go with sturdy slides and a higher weight rating.
Installation at a glance
– Remove the drawer from the cabinet. This makes it easier to work.
– Take out old slides and clean the mounting corners.
– Align the new slides with the drawer sides and cabinet walls. Use the screws that come with the kit.
– Don’t over-tighten the screws. A snug fit works best.
– If you can’t swap the whole set, you can often add soft-close units to existing slides. It’s a practical middle-ground.
Care and quick fixes
– Keep the tracks clean. Wipe away dust and crumbs so the glide stays smooth.
– If it Ever feels sticky, a light spray of silicone on the tracks can help. Wipe away any excess.
– Check screws every few months. Loose hardware makes drawers wobble again.
Common questions you might have
– Do soft-close slides slow closing too much? No. They slow the finish so you hear a quiet settle instead of a slam.
– Are undermount slides stronger? They’re sturdy for heavy use, but your choice should fit your drawer size and cabinet style.
– Is installation hard for a beginner? Many kits are designed for DIY. With basic tools and patience, you can do it.
Next steps
– Measure your drawers, pick a matching full-extension, soft-close set, and follow the basic install steps. A small upgrade can restore flow to your kitchen and make daily tasks feel smoother.
16. Invest in Drawer Slides
Editor’s Choice
🛍️
LONTAN Soft Close Drawer Slides 22 Inch Side Mount Heavy Duty Cabinet Dr…
Open shelves are more than decor. They are a smart way to store and show what you love. They free up cabinet space and add life to your kitchen. If you want easier access and a personal touch, these shelves are for you.
Here is how to make open shelves work for you.
– Choose the best spots. Put shelves where you cook most or where you eat. A wall near the stove or a spot beside the dining table is ideal.
– Pick the right shelves. Wood shelves with a warm tone blend with many kitchens. Metal shelves give a clean, modern feel. Depth of 12 to 18 inches keeps items from tipping. Check the weight load before filling them.
– Decide what to display. Pick a small set of items you reach often. A couple of cookbooks, a few bowls, glass jars for dried goods, and a tiny herb pot work well. Keep daily use items on the lowest shelf.
– Create tidy groupings. Line items up with straight edges. Pair tall pieces with shorter ones. Group by color for a calm look.
– Add simple storage helpers. Baskets and jars hide small pieces like spoons and tags. They make the shelf look neat while still showing your favorites.
– Bring in life with plants. A small herb plant or a pothos adds color and a lightweight scent. It makes the space feel fresh.
– Light it up. Add a small under shelf light or a bright lamp nearby. Good light makes each piece pop and helps you see ingredients.
– Keep it practical. Place mugs you use every day within easy reach. Put recipe cards or cookbooks you pull from often at a handy height.
– Clean as you go. Wipe shelves once a week. A quick dust keeps the display clean and inviting.
– Match the style. Mix textures like ceramic, glass, and wood. Keep finishes similar so the display looks polished.
– Try current trends in a real way. Floating shelves save space in tight kitchens. A slim metal frame adds an urban edge. Rounded wood pieces feel cozy.
Next steps. Measure your wall and set a simple goal. Start with two shelves and a few items. Pick one plant, a small book stand, and a few jars. Install them and adjust until you love the look.
If you feel cramped at the counter, a kitchen cart can be your best helper. It gives you a sturdy work surface and extra shelves you can move where you need them. You can slide it out for a quick prep session or tuck it away when you are done.
– Why a kitchen cart helps A cart boosts prep space and daily storage. It keeps pots, pans, and utensils within arm’s reach. You can roll it to the stove or sink without lifting heavy items. It also adds a touch of style that fits your kitchen vibe.
– What to look for when buying Measure your space first. A cart should be tall enough to stand at a comfortable height while you chop. Look for three or more tiers so you have room for lids, spices, and towels. Pick wheels that lock so the cart stays put during use. Materials matter. Stainless steel is easy to wipe; wood and bamboo add warmth; metal frames stay sturdy.
– Ways to use it every day Put your go‑to tools on the top shelf: cutting board, knife block, measuring cups. Store pots, pans, and lids on the middle and bottom shelves. Add a wire rack or baskets for small items like jars, sponges, and cloths. If you like to host, turn the cart into a mini bar or drink station. A few bottles, glasses, and a shaker can live there.
– Smart setup ideas Group items by task. Top for prep, middle for cookware, bottom for bulk storage. Use bins for small bits like spices or tea bags. Keep a towel hook on the side so you have a ready cloth when you wipe a spill. Choose a cart with a tidy look that matches your kitchen style, from rustic to modern.
– Placement and care tips Put the cart near the prep zone or dining area so you save steps. Keep it away from heat, steam, and open flames. When not in use, push it against a wall to stay out of the way. Wipe the surface after cooking and dry the shelves to prevent moisture damage. Tighten wheels and screws every few months to keep it smooth.
– Next steps Decide on a size that fits your space. Pick a style that matches your cabinets or fixtures. Measure, choose wisely, and you will gain a flexible station that makes cooking and cleaning easier.
A kitchen cart is more than just a piece of furniture; it’s your sous-chef! Boost your kitchen cabinet organization and create a stylish prep station that rolls wherever you need it. Cooking just got a whole lot easier!
18. Incorporate a Kitchen Cart
Editor’s Choice
🛍️
Finnhomy 3-Tier Rolling Kitchen Cart With 18″ D x 30″ W Oak Wood Tableto…
If you waste time hunting for measuring cups and spoons, this fix can speed up cooking. When you can reach what you need in a blink, you cook with less hassle. You also keep your counters tidy and your tools easy to see.
Here is why this approach works. Hanging tools creates a simple system. It keeps metal and plastic pieces from piling in a drawer. It also adds a small touch of style to your kitchen.
What you gain
– Quick access during meals and batch cooking
– A clean, organized wall or cabinet door
– A chance to add color that matches your decor
Pick the right setup
– Magnetic strip: best for metal cups and spoons. It holds items flat so you can scan what you need fast.
– Hook rack: small, sturdy hooks work well for plastic pieces or light metal items.
– Slim rail or pegboard: lets you slide items along and swap them as your needs change.
Where to put them
– Under cabinets for easy reach while prepping.
– Inside a cabinet door for a hidden, neat look.
– On a spare wall area if you have space.
How to install
– Choose a height you can see easily. Eye level is a good target.
– Clean the surface so the mount sticks well.
– Mark the spots for screws or magnets. If you use a strip, make sure the spot has a metal back or you add a small backing plate.
– Attach the strip or rack with the included screws. Use a level to keep it straight.
– Hang cups by their rims or handles. Clip spoons onto hooks.
Set it up so it helps your routine
– Group by type: all cups together, then spoons.
– Sort by size, from small to large.
– Color code if you like. A splash of color can speed picks.
– Put the most used sizes at the front.
Care and upkeep
– Wipe pieces dry after washing to prevent rust.
– Check screws and magnets every few months. Tighten if needed.
– Refresh the layout when you add new tools.
Common questions
– Will magnets hurt plastic cups? Not usually. They stay put on a proper strip.
– Can I use this on a fridge door? Yes, for light items and a strong strip.
Next steps
– Measure your space today.
– Pick a plan: strip, rack, or pegboard.
– Gather parts and install this weekend.
Why dig through drawers for measuring tools? Hang them up for quick access and a dash of style! Streamline your kitchen cabinet organization and make cooking a breeze!
19. Hang Measuring Cups and Spoons
Editor’s Choice
🛍️
Magnetic Knife Strips(15 Inch X Set Of 2) Magnetic Knife Storage Strip, …
Feeling cramped in your kitchen? A simple tension rod can change that. It works fast, costs little, and travels with you if you move spaces. Here is why this tool fits real life: it is adjustable, friendly to walls, and easy to reset. You get clean lines, less clutter, and items that stay where you expect them. Now, let’s get practical.
– Under the sink or in a small cabinet: install a tension rod across the opening. Hang spray bottles by their handles. Clip cleaning towels on the rod too. This keeps liquids upright and within reach when you need them most.
– Inside a cabinet: place the rod between two sides to hold towels or rags. Drape dishcloths in a row so they dry and stay tidy. It cuts down on loose fabrics slipping around every time you open the door.
– Vertical pot lid storage: stand lids up against the rod. They won’t rub or scratch each other. It makes grabbing the right lid quick and quiet during dinner prep.
– Narrow pantry spots or cabinet doors: mount a rod across a thin space and add clip-on bins or small hanging organizers. Store packet sauces, seasoning mixes, or tea bags where you can see them at a glance.
– Cups, mugs, and mugs with handles: hang these on a second rod if you have a tall cabinet. It frees shelf space for bowls and plates while keeping cups easy to grab.
Here is why this setup shines in real kitchens: it creates instant vertical storage. You gain room for bulkier items you already own. It’s gentle on surfaces—many rods come with soft caps to avoid mark marks. It’s flexible too; you can move it when you rearrange or clean.
Next, how to install quickly. Measure the space first. Add a little extra to the rod so it fits snugly but still twists. Place the rod, then twist clockwise until it holds tight. If you use it in a damp area, choose a rod with rust-resistant finish, like stainless steel or coated metal.
Tips to get the most from tension rods: keep a lightweight load for best grip. Use non-slip liners on the rod ends if the space is slick. Check the rod every week or so to verify it stays firm.
Common questions you might have: Will the rod leave marks? It can leave a tiny imprint if the surface is soft. Add felt pads on the ends to protect surfaces. Can I lift items easily? Yes, keep weight light or medium. Heavy jars are better kept on shelves.
Next steps: pick a few tight spots in your kitchen. Decide which items to corral first. Measure, install, and enjoy the extra space in minutes.
20. Use Tension Rods for Kitchen Supplies
Editor’s Choice
🛍️
Black Shower Curtain Rod 31 to 80 Inch,1 Inch Diameter Adjustable Spring…
Struggling to find what you need in a crowded kitchen? Labels save time and cut chaos. You will spend less time hunting and more time cooking. When you can spot content at a glance, you waste less food and stay organized.
Here is why labels work. They guide everyone in your home. A clear label on a jar shows what lives inside at a glance. Now, let’s break it down into easy steps.
– What to label first: Start with jars and containers you use every day, like oats, flour, rice, pasta, and coffee, so you can grab them fast.
– Label styles: A label maker gives crisp, durable results, while handwritten tags add charm.
– Color code: Use three colors to group items by type, such as red for spices, blue for grains, and green for snacks, so your eyes scan fast.
– Placement matters: Put labels on the front of jars or on the lid where you look first, and keep them at eye level for quick reach.
– Durability matters: Choose waterproof vinyl labels for glass and laminated paper labels for wood or plastic to withstand kitchens’ damp air.
– Maintenance: Wipe labels clean and replace fading ones during your monthly tidy to keep the system fresh.
– Labeling on curved jars: If a jar curves, use wrap-around labels or two short labels so the name stays readable.
– Kitchen zones: Color code by zone like pantry, fridge, and cabinet and keep labels consistent across the room.
– Spice rack care: Label spice jars with both name and best-by date to avoid old stock.
– Quick audit plan: Do a 15-minute scan weekly to check labels, rearrange items, and prevent crowding.
Next steps to put this into action:
1. Gather containers you use most and note what sits inside each.
2. Choose a labeling method and make or print the labels.
3. Apply labels and test for a week, then adjust.
Common questions come up. Will labels peel off? Use a clean, dry surface and a strong adhesive. Do curved jars cause problems? Wrap labels around the curve or apply several short labels so the name remains readable.
With labels in place, your kitchen runs smoother, looks tidier, and you waste less food.
21. Organize with Labels
Editor’s Choice
🛍️
Nelko Label Maker Machine with Tape, P21 Bluetooth Label Printer, Wirele…
Struggling to keep tools off the counters? A pegboard can fix that fast. It gives you a wall or cabinet space where your tools live, ready to grab.
Why a pegboard works for kitchen tools
– You hang items instead of leaving them flat.
– You can move hooks and shelves as your cooking habits shift.
– It looks tidy and makes prep feel smoother.
Where to place a kitchen pegboard
Mount it on a free wall near your prep zone, or inside a cabinet door for a hidden setup. Choose a spot that saves steps and keeps knives, spatulas, and spoons within easy reach. Pick a pegboard that’s sturdy enough for your needs, and use proper anchors if you attach it to drywall.
How to set it up
– Measure the space and decide on a size.
– Gather pegboard hooks, small bins, and a tiny shelf.
– Plan your layout by task: group spatulas and tongs together, then place whisks and ladles nearby.
– Install the board with screws or anchors so it stays still as you pull tools off and on.
– Hang items in a logical order. For example, keep everyday tools at the front and lighter items near the top.
Want to adjust after a week? Move pieces until the flow feels right for you.
Smart layout ideas
– Front and center: daily tools like spatulas, wooden spoons, and kitchen tongs.
– Mid level: whisks, ladles, pastry brushes, and small measuring cups.
– Right side or top: can opener, scissors, peeler, and micro tools.
– Use small bins for things that tend to clutter, like zipper bags clips or recipe cards kept in a slim pocket.
Materials, styles, and how to pick
– Wood pegboards bring a warm look. They soak up moisture less than metal and feel sturdy.
– Metal or powder-coated boards resist humidity and wipe clean easily.
– Choose a neutral color to blend with your cabinets, or a bold shade to make tools easy to spot.
– Pick durable hooks and baskets meant for kitchen use. They should click on and off without snagging.
Maintenance and limits
Pegboards are low maintenance. Wipe them with a damp cloth to remove dust and spills. If you use heavy pots or large pans, a pegboard alone may not hold them. In that case, pair the board with a small shelf or wall rack for big items.
Next steps
Plan a quick layout today. Install the board, hang your most used tools first, and test the flow. Keep adjusting until you reach a setup that feels fast and calm every time you cook.
22. Use a Pegboard for Tools
Editor’s Choice
🛍️
Keepo Pegboard Combination Kit, Pegboards and Accessories Modular Hangin…
You want a clean kitchen fast. The right plan makes that possible. A dedicated cleaning supply station keeps every tool in one place. It helps you clean up after meals without hunting for items.
Here is why a station works. It saves time, reduces mess, and makes cleaning less of a chore. Even small spaces can fit a useful setup. You get a calm, clear spot for every job.
1. Pick the spot
Choose a cabinet near your prep area or a closet. Under the sink is common, but a small rolling cart can live on the floor too. The goal is easy access. You should reach what you need without leaving the room.
2. Gather the right supplies
Start with basics. An all‑purpose spray, a glass cleaner, a degreaser, sponges, microfiber cloths, rubber gloves, trash bags, and paper towels stay busy. If you mop, add a mop head or microfiber pad. You do not need every cleaner in the store.
3. Use labeled bins
Put similar items together in small bins or baskets. One bin for bottles, one for brushes and rags, one for spare sponges and gloves. Labels help you find what you need fast. When you put things back, you know the home.
4. Create a cleaning caddy
A portable tote keeps your go‑to items in one place. Put a spray bottle, a roll of towels, and a few rags inside. Take it to the sink, the stove, or the table as needed. It makes quick cleans simple.
5. Safety and access
Keep stronger cleaners out of kids’ reach. Use a simple latch if needed. Read labels for how to use products safely. Always keep lids on tight and store in a cool spot away from heat.
6. Keep the area tidy
Wipe the station down once a week. Refill supplies before they run out. Toss old sponges and rotate stock. A neat station invites you to clean up sooner.
Next steps
Decide where your station will live. Grab a couple of baskets, labels, and maybe a small rolling cart. Set up the bins, label them, and start using the station this week. You will notice the change right away.
23. Create a Cleaning Supply Station
Editor’s Choice
🛍️
Casabella Plastic Multipurpose Cleaning Storage Caddy with Handle, 1.85 …
If your baking sheets keep slipping to the back of the cabinet, you are not alone. The risk is clutter that makes a simple bake day slow. Vertical storage cuts the guesswork in half. You’ll reach for the sheet you need in seconds, not minutes.
Here is why this works. Stacking sheets creates tall piles that are hard to lift. A vertical setup keeps each sheet visible and easy to grab. It also frees up horizontal space for pans, lids, or racks. The result is a cleaner, calmer cabinet and fewer scraps of time wasted.
What you need
– A file organizer, magazine file, or adjustable dividers
– A shallow bin or a low, wide rack if your cabinet is tall
– Non-slip pads or a simple cloth liner to keep sheets from sliding
– A quick labeling method so you know what you have
How to set it up
– Clear the shelf. Take out all baking sheets and sort them by size.
– Choose a vertical solution. A metal file organizer, plastic dividers, or a set of magazine holders works well.
– Place the organizer inside the cabinet. Make sure it sits flat and won’t tip when you slide in a sheet.
– Stand sheets on edge. Slide each sheet into a slot or between dividers. Keep the most used sizes toward the front.
– Add a liner if you like. A thin cloth or silicone liner helps sheets stay in place while you open and close the door.
– Label the front or edge. Simple notes like “baking sheets 12×16” help you grab the right one fast.
Tips for best results
– Group by size. Keeping similar sizes together makes scanning quick.
– Leave a little air. Don’t cram sheets tight; you want a easy pull.
– Keep a spare space. A small slot for a cooling rack can free up other spots.
Common questions you might have
– Will this bend the sheets? Not if you stand them on edge and don’t push too hard.
– Will it fit in a shallow cabinet? Use a low rack or a slim file organizer to fit the space.
– Is it hard to switch back to horizontal? No. You can still store lids or trays on the shelf above.
Next steps. Measure your cabinet height and depth. Pick a vertical organizer that fits. Then set up and enjoy a cleaner, faster kitchen routine.
24. Store Baking Sheets Vertically
Editor’s Choice
🛍️
Hanging File Organizer, Letter-Size File Holder with 5 Folders, Modern M…
If your kitchen feels jammed with stuff you rarely use, you’re not alone. Seasonal rotation helps you keep only what you need, when you need it. It cuts clutter and makes room for what you truly use.
Here is why rotation works. It stops waste. It helps you find items fast. It keeps your space feeling calm and easy to cook in.
– Step 1 — Take stock Start with a quick sweep of your cabinets, drawers, and the pantry. Pull out items that you seldom touch. Set aside anything you forgot you owned or that sits past its date. You want a clear picture of what stays and what goes away for now.
– Step 2 — Decide a rotation cadence Pick a simple rhythm. A three-month cycle fits most kitchens. If your space is smaller, try a six-week cycle. The goal is regular checkups, not a long, boring project.
– Step 3 — Separate and store by season Put seasonal items out of sight when they aren’t needed. Holiday dishware can live higher on a shelf. Baking tools that you only use in fall and winter should sit with other off-season gear. Keep everyday items where you cook most often.
– Step 4 — Use clear, labeled storage Clear bins or baskets make it easy to see what’s inside. Label each bin with the season or month. A simple tag helps you know when to rotate again.
– Step 5 — Create a rotation plan for fast access Put items you use a lot where you reach most in the kitchen. Move rarely used gear to back shelves. Involve a quick reordering system so you never lose track of what’s on hand.
– Step 6 — Set reminders Add a calendar reminder every few months. A quick audit takes only a few minutes. Seeing a date trashs or rehomes items keeps the habit alive.
– Step 7 — Make it part of cooking prep During meal prep, check what you’ll need in the next few weeks. If you’ll not use something soon, swap it out. This keeps today’s tasks smooth and future months simple.
Practical examples to try. Store summer grilling gear in a back corner during winter. Move winter mugs and cozy cups near the coffee maker in cold months. Take out holiday-specific bakeware once the season ends and tuck it away until it returns.
What you gain is clear space and less stress. You’ll spend less time digging, less money on duplicates, and more time on what you love—cooking and sharing meals. If you hit a snag, adjust the cadence or where things sit. The system should serve you, not the other way around.
Next steps: pick a start date, pull out one category, and begin your first rotation. Simple steps now pay off with a calmer, brighter kitchen later.
25. Seasonal Rotation of Kitchen Items
Editor’s Choice
🛍️
Vtopmart 6 Pack Clear Stackable Storage Bins with Lids, Large Plastic Co…
With these 25 kitchen cabinet organization hacks, you’re well on your way to creating a beautifully organized cooking space.
Implementing these ideas not only improves functionality but elevates your kitchen’s overall look. Enjoy the ease of cooking in a space that feels delightful and welcoming, and don’t forget to share your own organization tips with friends and family!
Note: We aim to provide accurate product links, but some may occasionally expire or become unavailable. If this happens, please search directly on Amazon for the product or a suitable alternative.
This post contains Amazon affiliate links, meaning I may earn a small commission if you purchase through my links, at no extra cost to you.
Frequently Asked Questions
What Are Some Simple Tips for Kitchen Cabinet Organization?
Starting with simple tips can make a world of difference in your kitchen cabinet organization! Consider using clear containers for dry goods to easily see what you have on hand. Implementing drawer dividers can help keep utensils in check, while tiered shelving maximizes vertical space. Each of these hacks can enhance functionality and reduce clutter!
How Can I Optimize My Kitchen Space If It’s Small?
If you’re working with a small kitchen, optimizing your space is key! Try using stackable containers to make the most of vertical space and consider over-the-door storage for added organization without cluttering your counters. Another great idea is to use a kitchen cart that can be moved as needed, providing both additional storage and workspace.
What Is the Best Way to Organize Spices in My Kitchen?
To keep your spices organized and easily accessible, a magnetic spice rack might be your best bet! It saves space and gives your kitchen a chic look. Alternatively, consider using a Lazy Susan in a cabinet to spin and find spices without the hassle of digging through clutter. Labeling your spices can also make finding them a breeze!
How Do I Keep My Kitchen Cabinets Clutter-Free?
Keeping your kitchen cabinets clutter-free is all about regular decluttering! Make it a habit to remove items you rarely use, and consider a seasonal rotation for kitchen items. Using baskets for grouping similar items can also help maintain order, while labels can guide everyone in the household to return items to their rightful spots. A little maintenance goes a long way!
Are There Any Creative Ways to Use Vertical Space in My Kitchen Cabinets?
Absolutely! Vertical space is often underutilized in kitchens. You can install pull-out shelves to make deep cabinets more accessible, or use tension rods to create extra space for utensils and kitchen supplies. Additionally, consider hanging pots and pans to free up cabinet space while adding a stylish touch to your kitchen decor!
Big backyards can feel like a blank canvas. This post is here to help you turn that space into something you love to use. I created it because a few smart choices can turn an empty lawn into a warm, welcoming area. A large yard should invite you to cook, play, relax, and host friends without a fuss. You’ll find ideas that fit real life, not just a show yard.
If you own a large yard and care about curb appeal, family time, and easy upkeep, this one is for you. You want ideas that scale with the space, stay comfy in every season, and don’t break the budget. This guide is for homeowners who want bold, practical changes they can actually pull off.
Here are 20 large backyard design ideas that cover many styles and budgets. Each idea includes tips on where to place a seating area, how to lay paths, and what lights to use. You’ll see how to blend stone, wood, water, and plants to make the yard feel alive. You can mix and match to fit your home, your climate, and your taste.
Start by breaking the space into zones. A sunny dining spot, a shady lounge, a play area for kids or pets, and a garden closer to the house. Use different textures—gravel underfoot, smooth pavers for paths, warm wood for fences and screens. Add a focal point like a fountain, a fire pit, or a striking planting bed so the eye has a place to rest. String lights come alive at dusk, and the air carries the scent of herbs from a nearby pot or planter.
Think about maintenance and cost. Choose durable materials that handle your weather. Plan with a simple color palette and repeat it in planters, cushions, and lighting so the yard feels one piece. Start small if you must and add features in stages. A single feature now can guide your later choices.
Ready to get inspired? Next steps are simple. Measure your space, note where the sun hits, and mark any utilities or slopes. Pick one anchor feature to start, like a fire pit, a sheltered seating area, or a bold planting bed, and build around it. With these ideas in hand, your big yard will feel warm, practical, and a little bit enviable.
Want a yard that looks orderly and calm, but still feels inviting? A Modern Minimalist Oasis can give you that balance. It centers on clean lines, open spaces, and a simple, easy-to-care-for vibe. You get more time to enjoy your outdoors and less time spent maintaining it.
This style is all about fewer things and better quality. Think a spacious concrete patio, low-profile outdoor furniture, and plenty of room to breathe. You’ll mix in some rocks for texture and a few plants that don’t demand a lot of work, like succulents and ornamental grasses. The goal is a space that feels tidy, bright, and usable most days.
Key features:
– Use wood and stone to add warmth and texture.
– Neutral color tones with pops of green from plants.
– A fire pit or outdoor fireplace for cool evenings.
– Smart lighting that creates mood without adding clutter.
Here is why this design works for real life. It reduces clutter with a few well-chosen pieces. It makes rooms outdoors that you can walk through easily. It also ages well, so your yard stays fresh year after year.
Next steps to build your minimalist oasis
– Define zones clearly. Put the patio where you can seat guests, leave a wide path for movement, and set a small lounging corner away from grills.
– Choose durable materials. Polished concrete stays clean and flat. Pick outdoor furniture with simple shapes and weather-safe fabrics.
– Pick plants that thrill with little work. Succulents, ornamental grasses, and a few drought-tolerant perennials do the job.
– Plan lighting in layers. Use path lights for safety, accent lights for trees or rocks, and a warm glow from a fire feature after dark.
– Keep color quiet. Stick to neutral walls or paving and let greens and natural textures stand out.
Practical tips you can apply now
– Start with a single focal point, like a slim fire pit area, and build around it.
– Add texture with joints of wood, stone, and metal—no busy patterns.
– Rinse the space with air by leaving wide openings and keeping plant growth controlled.
– Maintain it simply: weed weekly, wipe furniture, and sweep the patio as needed.
What to expect and what to adjust
– You’ll gain a calm, versatile yard that suits gatherings and solo afternoons.
– If you want more color, add a single accent plant or a bright outdoor rug in moderation.
– If the space feels chilly, soften with warm-toned lighting and a plush seating area.
Next steps
– Sketch your layout on paper. Mark the patio, the fire feature, and plant beds.
– Source one or two key pieces that set the tone.
– Start with a small corner and expand as you like. Your Modern Minimalist Oasis will grow with you.
1. Modern Minimalist Oasis
Editor’s Choice
🛍️
36 Inch Fire Pit with 2 Grills, Wood Burning Fire Pits for Outside with …
If you crave a yard that feels like a cozy cottage, this design can give you that warm, inviting charm. It’s all about color, scent, and gentle curves that invite you to slow down and enjoy. You’ll mix a pocket of perennials with bright annuals so your garden looks good most of the year. A rustic wooden fence or trellis with climbing vines adds a playful touch that says “home sweet home.”
A cottage garden works for any yard size. It creates a soft, layered look with flowers at different heights and textures. You get color bursts, fragrance, and a sense of whimsy. Best of all, you can start small and grow the garden as you learn what you love to plant and how much care you want to give it.
Design elements to consider:
– Raised beds for vegetables and herbs.
– Pathways made of stone or gravel that gently wind through blooms.
– A serene seating nook tucked among fragrant flowers.
– A few bird-friendly touches, like birdhouses or a butterfly garden.
Here is how to bring it to life.
1) Pick a focal point. Decide where you want to sit or where a small arch or bench will stand. Let this spot draw the eye and give you a sense of arrival.
2) Create gentle curves. Let paths curve slowly rather than meet in hard corners. Curved lines feel calmer and suit the cottage vibe.
3) Plant in layers. Put tall blooms in the back, mid-height varieties in the middle, and low ground covers near the path. Mix perennials and annuals so color appears from spring to fall.
4) Choose a color story. Limit to two or three main colors, then add accents with foliage and a few white flowers for contrast. This keeps the scene cohesive and easy to care for.
5) Add structure. A weathered fence, a trellis, or a small gate adds charm and a place for climbing roses or vines. Wood tones should echo your deck or house trim.
6) Include practical spaces. Raised beds help you grow herbs or veggies without bending too much. Put herb boxes near the kitchen for quick seasoning.
7) Invite wildlife. Plant nectar-rich species to attract butterflies. Place a campanula or lavender near the seating area for scent on warm days.
Maintenance notes that help you stay on track.
– Water deeply once or twice a week, more often in heat waves. Mulch to hold moisture and reduce weeds.
– Deadhead spent blooms to keep color coming. Cut back vigorous perennials after every bloom cycle.
– Refresh annuals as needed. Swap in new varieties to extend color while keeping costs down.
Common questions you might have.
– How do I keep color through a long season? Choose a mix of early, mid, and late-blooming plants and use containers for quick fills.
– What if I have shade? You can still charm a cottage garden with shade-tolerant blooms and leafy ground covers.
– Can I do this on a tight budget? Start with a few raised beds, a bench, and a couple of cheap potted plants. Expand as you go.
Next steps to get started quickly.
– Sketch a simple layout with a curved path and a seating nook.
– Pick two main color tones and one accent color.
– Gather a few evergreen-looking plants for year-round structure.
– Plant a butterfly-friendly mix in sunny spots and keep a small watering can handy.
With steady care, your cozy cottage garden grows into a welcoming retreat right in your backyard.
2. Cozy Cottage Garden
Editor’s Choice
🛍️
Land Guard Galvanized Raised Garden Bed Kit, Galvanized Planter Garden B…
If you want a yard that feels big and alive, this section is for you. A wide lawn gives you room for family games, casual picnics, and a night under the stars. It also offers shade so you stay cool while you play. You can mix comfort with fun without crowding the space.
What to include in an expansive lawn
– Large open space for sports, frisbee, or a simple picnic
– A fire pit area with safe seating for evening talks
– Soft string lights that glow after dark
– A kid-friendly play zone or an outdoor game corner
Here is why this setup helps you. It keeps the yard flexible. It makes room for both rest and action. Now let’s break down how to make it work in your yard.
Practical steps to build this space
– Plan the zones on paper first. Sketch where the grass stays open and where you place shade and seating. Keep paths clear so you can move freely from one area to another.
– Pick a grass type that fits your climate, foot traffic, and sun. In many yards, a hardy mix of fescue or Bermuda works well. If your soil is poor, think about overseeding or laying sod in the busy spots.
– Add shade where it matters most. A pergola or a large umbrella can cool the sun. Plant a couple of trees if you want a long-term solution that grows with your space.
– Create a fire pit area with safe, comfy seating. Put the pit on level ground, away from low-hanging branches, and give it a clear path to the house.
– Light the space with string lights or solar lamps. Run cords neatly along edges and keep lighting low to the ground so it’s gentle on the eyes.
– Reserve a corner for play or games. A small swing, a chalkboard wall, or a portable bocce set fits nicely beside the main lawn.
– Plan for upkeep. Mow regularly, rake gently, and water in the early morning to keep the grass healthy. Mulch the borders to cut down weeds and fade.
Next, think about budget and timeline. Start with one goal, like a shade feature or a dedicated play zone, then add the rest as you go. This keeps projects small and doable.
With these steps, your yard becomes a stage for daily joy. Picture a sunny afternoon, the sound of the mower, the scent of fresh cut grass, and the soft glow of lights at dusk. You don’t need perfect turf to enjoy great times outside. You only need a plan and a space that fits your family.
3. Expansive Lawn for Activities
Editor’s Choice
🛍️
Devoko Outdoor Fire Pit, 32 Inch Firepit Table Metal Outdoor Fireplaces …
If you want a vacation vibe in your own yard, a tropical retreat can give you that escape every day. Imagine tall palms swaying, bright flowers, and a peaceful pond with koi. Add a hammock, a cozy seating area, and a few tiki torches for a true island feel. This look helps you slow down and feel far from the daily rush.
Key elements
– A mix of tropical plants and flowers. Choose palms, hibiscus, bird of paradise, and heliconia for layers of green and color.
– A deck or patio designed for lounging. Make a small outdoor living room with seating that fits your space.
– Water features like a pond or a gentle fountain. The sound of water makes the space feel calm and alive.
– Colorful outdoor furniture and lighting. Bold cushions, a woven rug, and warm lanterns or string lights finish the scene.
Put together, these pieces create a space you can use from morning coffee to evening chats. You get shade where you need it, a cool place to sit, and pockets of color that lift your mood. It’s about simple comfort and easy care, not a huge project.
How to build it, step by step
– Start with a focal point. This could be a stand of palm trees, a pond, or a lush planting bed. Build the rest around it.
– Plan the lounge area first. Pick a deck or a flat patio that fits your seating and keeps feet dry in rain.
– Pick plants for sun and shade. Use pots for flexible spots and to protect tender roots in cold starts.
– Choose materials that hold up to heat. Teak, cedar, or durable composite decking live well outside. Use weatherproof cushions.
– Add a water touch. A small pond or koi feature adds life and sound without taking over the space.
– Light the night softly. Use warm lights, lanterns, and solar options so you can enjoy the space after dark.
Practical tips you can use now
– Create micro zones. A sunning spot, a shaded seating corner, and a small walking path make the yard feel bigger.
– Use textures. Layer rough stone with smooth pots and soft fabrics to add depth.
– Keep care simple. Choose drought-tolerant tropical plants in the ground and in pots to cut upkeep.
– Think about seasonal uses. Container plants help you move color around as seasons change.
– Check bugs and moisture. Water in the morning to cut disease and set irrigation on a schedule.
Maintenance and care
– Water wisely. Use drip lines or soaker hoses to target roots and reduce waste.
– Refresh color seasonally. Swap a few cushions or pots to keep the look fresh.
– Trim and tidy weekly. Remove spent blooms and prune dead leaves to keep plants healthy.
– Protect from cold. Bring delicate pots inside or wrap them when frost is possible.
Frequently asked questions
– Will this work in small yards? Yes. Focus on a compact deck, vertical plantings, and a shallow pond.
– Can I use faux or low-maintenance plants? You can. Mix real and synthetic greens for texture, but keep the water feature real for sound.
– How do I keep mosquitoes away? Remove standing water, add fast-draining soil, and use fans around seating.
Next steps
– Measure your space and pick a focal point.
– Choose a color palette and a few key plants.
– Start with a simple deck or seating area and build from there.
4. Vibrant Tropical Retreat
Editor’s Choice
🛍️
PNAEUT Double Hammocks with Stand for Outside, Portable Space Saving Hea…
You want a backyard that feels warm and inviting. A rustic farmhouse vibe can make that happen. It pairs weathered wood with simple, honest decor. The result is a space that looks good and tells a story. You’ll feel drawn outside, not rushed back indoors.
Here is why this style works for backyards. It brings nature close with soft textures. It uses practical pieces you can live with daily. It also ages beautifully with time. Clean lines meet cozy touches. The whole area feels like a comforting, country retreat.
Design elements to incorporate:
– Wooden benches or a swing made from reclaimed wood. Sit back and listen to the birds.
– Flower beds bursting with wildflowers and tall grasses. They soften edges and attract pollinators.
– A garden shed or potting area that doubles as decor. A simple roof, mixed wood, and a little window box can pull the look together.
– Farm-inspired accessories like vintage watering cans, rustic signs, and old milk jugs. They add character without clutter.
– A simple gravel or flagstone path. It guides your steps and keeps dirt outside the yard.
– A small seating nook with a metal or wooden table. Add a lantern or string lights for quiet evenings.
– A border fence or trellis that frames beds. It gives the space a finished, cottage-like feel.
This approach creates a space that looks good and feels real. It gives you places to sit, work, and enjoy the outdoors. It also lets you add stories with each piece you choose.
Next steps to bring it to life
– Start with a cohesive palette. Think weathered wood, cream, sage green, and charcoal. Keep colors muted so plants stand out.
– Source reclaimed wood and metal. Look for old gates, crates, or window shutters to repurpose.
– Build a small seating area first. A bench and a chair set on a gravel patch sets the mood quickly.
– Plant a wildflower border. Choose species like coreopsis, yarrow, and coneflowers for easy care.
– Add simple decor pieces. A vintage watering can by the shed, a rustic sign, and a few ceramic pots finish the look.
Practical tips for success
– Use durable, low-maintenance plants near paths. They can handle sun and foot traffic.
– Keep furniture proportions in check. A big bench can dominate a small yard.
– Maintain the wood. A yearly coat of outdoor sealant or wax helps weathered pieces last.
What to watch for and limits
– Weathered wood needs care. Check for rot and treat it rather than replacing whole pieces.
– A farmhouse vibe grows with details. Too many small decorations feel busy. Pick a few strong pieces.
– Budget-friendly options work best when you balance new buys with repurposed items.
Next steps
– Sketch a simple layout. Place the bench, shed, and path to form an inviting flow.
– Gather a handful of key pieces first. Then add finishing touches over time.
With these steps, your rustic farmhouse backyard becomes a warm, welcoming spot your neighbors notice and you love.
5. Rustic Farmhouse Vibe
Editor’s Choice
🛍️
Reclaimed Solid Wood Bench-43.3″ Farmhouse Entryway Bench with Storage S…
If your yard feels busy, you need a calm corner. A Zen garden gives you that quiet space you can visit any time. It’s simple on purpose. You will slow your breathing and clear your mind as you sit or walk.
Here is how to plan a small, soothing zone in your yard. Pick a spot that stays mostly out of the wind and away from loud street sounds. Keep the area open and clean. Use natural colors like gray, tan, and green. A Zen garden works with minimal care, so start small and grow slowly.
Elements to include:
– Stones and clean gravel arranged for gentle, raked patterns. The act of raking becomes a meditative routine.
– A water touch, such as a tiny pond, a shallow stream, or a fountain that adds soft sound.
– A strip of bamboo or a simple bench for quiet sitting and reflection.
– Green plants that stay tidy and calm the space without shouting for attention.
This setup creates a mindful space you can use after work or first thing in the morning. It invites you to slow down, listen to the water, and focus on the moment.
How to build it in practical steps:
– Choose a quiet patch where you can hear a breeze or water if you add a feature. Keep the view uncluttered.
– Level the ground and lay down a base of smooth sand or fine gravel. It should feel clean under your feet.
– Lay a curved stone path that guides your steps. Let it feel natural, not forced.
– Place a small water feature and test the sound. If the water is too loud, adjust the size or position.
– Add the stones, then spread the gravel. Rake lines daily or weekly to form simple patterns.
– Put in a low bench or a short stool. Add a few slender plants or moss to soften edges.
Practical tips to keep it peaceful
– Keep color simple: greens, creams, and browns work best.
– Trim plants regularly so shapes stay neat and calm.
– Clean the area often. A tidy space feels more relaxing.
– Use soft, natural materials for seating and borders.
– Build your path with smooth edges so your steps feel sure and easy.
A Zen garden can be tiny and still feel deep. It is a place for breath, focus, and a gentle pause. Real value comes from daily touch—raking a line, watching a ripple, or simply sitting and listening.
Next steps
– Sketch a quick layout on paper, mark where sand, stones, and water could go.
– Gather a few items first: a small tray of sand, a couple of stones, a bench, and a compact fountain.
– Start with one corner, then add a path and a few plants over time.
In a busy world, a Zen garden can be your personal getaway. Embrace simplicity, choose calming colors, and watch your stress melt away in your tranquil backyard oasis.
6. Tranquil Zen Garden
Editor’s Choice
🛍️
Tabletop Fountain 4 Level Small Waterfall Fountain Indoor Relaxing Water…
Tropical plants, water features, colorful furniture
$300 – $800
Palms, hibiscus, teak
Start with a focal point, plan lounge area
Rustic Farmhouse Vibe
Weathered wood, wildflowers, cozy seating
$150 – $400
Reclaimed wood, gravel, vintage decor
Source reclaimed materials, keep colors muted
Tranquil Zen Garden
Stones, water feature, bamboo
$100 – $300
Gravel, plants, wood
Keep color simple, use soft materials
Wildlife-Friendly Spaces
Native plants, birdhouses, water sources
$50 – $200
Native plants, wood, stone
Add shelters, avoid pesticides
7. Luxurious Resort Inspired
You want a backyard that feels like a five star retreat. You deserve spaces that invite you to relax, entertain, and unwind. Start with a clear goal: a cool pool, comfy lounges, a place to cook and dine, and shade for sunny days. Think simple first, then layer in richer touches.
Key elements to consider
– Infinity pool that looks like it melts into the view. The trick is a clean edge and a calm water line that makes your yard feel bigger.
– Outdoor kitchen with a grill, sink, and a bar counter. Add a mini fridge if you cook a lot outside. A layout that keeps cooking and serving easy will save you steps and time.
– A cabana or shaded seating area. This gives you shelter from sun and rain and a private spot for conversations.
– Durable materials and finishes. Use long-lasting stone, porcelain or stamped concrete for the deck. Pick colors that match your home and the plants you use.
– Palm trees and tropical plants. They give height, texture, and that vacation vibe with minimal care if you choose the right species.
– ambient lighting for evenings. Layer warm-white path lights, pool lighting, and soft string or lantern vibes near seating zones.
Here is why these elements work. They create distinct zones you can use all year. They also help your eye travel through the space, making it feel larger than it is. And they give you predictable spots for seating, dining, and lounging.
Layout and flow
– Plan zones before you buy. Put the pool where you can hear it on hot days, the kitchen near dining areas, and the cabana a short stroll away from seating.
– Build sight lines. A straight view from the back door to the pool makes the space feel open and inviting.
– Use surface changes to mark zones. A different deck material or a low step can signal “dining” and “lounging.”
Materials and style
– Choose a light, natural palette. Light stone, warm wood, and neutral textiles keep things calm and elegant.
– Pick slip-resistant surfaces near water. Safety comes first, even in a luxury setup.
– Use durable, low-maintenance plants. Palm varieties and tropical shrubs thrive with minimal fuss if you place them in sun or shade correctly.
Practical steps to start
– 1) Set a realistic budget and a phased plan. You can begin with the pool and kitchen, then add the cabana and lights later.
– 2) Check local rules and permits. A simple pool addition often needs approvals.
– 3) Choose core materials first. Pick a deck and pool finish that survive the weather and look good for years.
– 4) Map lighting and irrigation. Low-voltage lighting creates mood; smart irrigation lowers water use.
– 5) Plan maintenance. A simple routine keeps your resort vibe fresh without heavy work.
Next steps are simple. Sketch the zones you want. List the features you can afford now. Then map a two-part timeline: pull in the pool and kitchen this season, add shade and lights next year.
With the right design, your backyard becomes a personal retreat. A space that breathes calm, hosts easy gatherings, and feels like a getaway—without ever leaving home.
7. Luxurious Resort Inspired
Editor’s Choice
🛍️
Inflatable Pool for Kids and Adults, 120″ X 72″ X 22″ Oversized Thickene…
If you want a yard that feels free, colorful, and welcoming, a bohemian dreamscape fits. You get texture, warmth, and space to express yourself. It’s not about perfect lines. It’s about a lived-in charm you can enjoy every day.
Here is why this style works for first-time landscapers and seasoned planners alike. It blends big color with soft textures. It invites people to sit, share, and stay a little longer. And it can grow with you as your tastes change.
– Colorful seating and textiles Start with one comfy spot. Add cushions in different shades and a bold outdoor rug. Choose fabrics that stand up to sun and rain. The goal is a cozy, inviting circle you can gather around.
– Hanging plants and macramé accents Let greenery drape down from decks or pergolas. Use macramé hangers to add movement and whimsy. This makes the air feel fresher and the space look more layered.
– Fire features as a focal point A small fire pit or outdoor fireplace draws people in. It provides warmth on cool evenings and gives your space a real center to anchor conversations.
– Mix of plants for color and texture Combine leafy greens, flowering plants, and a few tall grasses. Add containers in different sizes and materials to create depth. You’ll see a lively mix that changes with the seasons.
Let’s break it down into action steps you can use this weekend.
– Step 1: Define zones. Put a seating area near the house for easy access. Add a small, low-maintenance path to a fire pit or sitting spot.
– Step 2: Pick weather-friendly furniture. Look for rust-proof metal, treated wood, and synthetic weaves that resist sun and rain. Keep cushions in a washable cover.
– Step 3: Add textiles and lighting. String lights or lanterns create a soft glow. Layer rugs, throws, and pillows for warmth and color.
– Step 4: Build plant interest. Use a mix of pots and a few raised beds. Plant herbs near the seating for scent. Use taller plants at the back for privacy and drama.
What about upkeep? Start simple. Water smartly. Trim regularly. Swap out a few planters each season to refresh the look without a big spend.
Common questions you might have: Can this style work in a small yard? Yes. Focus on one or two bold colors and a single focal piece. Do I need to hire a pro? Not necessarily. Start with one area, measure what you can maintain, then expand.
Next steps: sketch your layout, choose two colors, and pick a focal piece like a fire pit or a hanging planter. Then gather a few textiles and plants that fit your climate. Your Bohemian dreamscape is ready to grow with you.
8. Bohemian Dreamscape
Editor’s Choice
🛍️
36 Inch Fire Pit with 2 Grills, Wood Burning Fire Pits for Outside with …
You want a backyard that looks good and feeds you too. An edible yard plan can do both. It blends beauty with usefulness, so you get color and fresh bites from your own space.
What to include
– Raised beds for easy access to vegetables and herbs.
– Fruit trees placed where they offer shade and a splash of color.
– Simple paths that let you reach every patch without stepping on soil.
– Trellises, markers, and little accents that show off what you grow.
This setup helps you work smarter and harvest sooner. You’ll feel more connected to the seasons and your kitchen.
How to set it up
– Start with sun and soil. Track how many hours of sun each area gets. Test the soil to know what to add.
– Pick a layout. A neat grid of raised beds works well, or a curved, flowing pattern if you prefer soft lines.
– Build raised beds. Cedar, treated pine, or recycled materials are common choices. A good size is 4 by 8 feet or 3 by 6 feet so you can reach the center from all sides.
– Fill beds with a mix of topsoil, compost, and a little peat or coconut coir. This blend holds moisture and feeds plants.
– Add fruit trees with space to grow. Plant them where they won’t shade veggie beds too much.
– Plant herbs near the kitchen. Think basil, thyme, and rosemary for quick, tasty picks.
– Lay down paths. Use stepping stones, gravel, or mulch so you can walk without trampling beds.
– Install a simple irrigation plan. A small drip line or soaker hose saves water and keeps leaves dry to cut disease.
– Label what you plant. Garden markers help you remember what goes where and make after-harvest care easier.
Care and smart habits
– Mulch after planting. A 2–3 inch layer keeps moisture and blocks weeds.
– Feed with compost each season. It feeds soil life and reduces waste.
– Rotate crops. Change beds so pests and disease don’t stick around.
– Think pollinators. Add flowering herbs and small native plants to attract bees and butterflies.
Questions readers often ask
– Do I need full sun for most edibles? Many crops love sun, but some greens tolerate partial shade. Pick a sunny corner for tomatoes and peppers, and reserve shade-friendly crops for cooler spots.
– How much space is enough? Even a couple of raised beds can yield plenty. Start small and grow as you learn what you like to eat.
– How do I keep pests away? Build a light fence, use netting for fruit, and choose pest-resistant varieties when possible.
This approach keeps your yard useful year round. It teaches you where food comes from and cuts down trips to the store. Best of all, you taste the rewards right at home.
Transform your large backyard landscaping designs into a feast for the eyes and the palate. An edible landscape is where beauty meets bounty—grow fresh herbs and fruit while delighting your senses!
9. Edible Landscape Design
Editor’s Choice
🛍️
Land Guard Galvanized Raised Garden Bed Kit, Galvanized Planter Garden B…
You want a backyard that feels calm and inviting. A water feature can deliver that mood in a clear, easy way. It also gives your yard a bright focal point you and your guests will love.
Here is why water features work in any yard. The sound of moving water soothes the senses. Water adds light and sparkle as the sun hits the surface. They also invite wildlife, like birds and frogs, to visit. You can make this part of your outdoor space with a style that fits your home.
– Koi pond adds color and life. It creates a quiet spot you can enjoy from a bench or a patio. Build it with a safe edge and a simple filter so it stays clear. Deep enough for the fish and plants, it still works in a small yard.
– Waterfalls that feed a pool bring a soft rush of water and a cooler feel on hot days. Start with a small spillway and a basin that hides the pump. Place rocks around the edge to blend the feature with the rest of your yard.
– Fountains that double as art become a sculpture you can watch as water moves through them. Choose a form and finish that match your home style, from sleek metal to rough stone. Add a soft light for late-evening glow.
– Plants around the water frame the feature and soften its edges. Pick moisture-loving plants that stay tidy with trimming. Think ferns, grasses, or water-loving perennials that stay lush without a lot of fuss.
Maintenance and safety tips you can use now. Start with a simple plan that fits your schedule. Check the water level once a week and remove fallen leaves. Use a basic filter or skimmer to cut down on debris. If you want a longer life for your feature, schedule a yearly check with a local pro.
How to start your build. Sketch the space and set a clear focus for the feature you choose. Measure gate and doorway widths in case you need help bringing materials home. Decide on a budget and pick materials that fit your style, such as natural stone, concrete, or fiberglass fireproof features. Think about lighting for ambiance and safety at night.
Next steps. Pick one idea to begin with and plan a small, doable project. Gather a few essential supplies, like a pump, liner, and basic plants. Then install the feature in stages, so you can learn and adjust. Your backyard will gain a calm, inviting vibe you can enjoy all year.
You want a backyard that both kids and grownups enjoy. A space you can use every day for play, games, and quick rest. This design builds three easy zones: a kid zone, a game zone, and a cozy seating spot. It keeps the eye moving and the feet busy.
Here is why this setup works. It keeps fun in reach for little ones, but also gives adults a place to relax without missing the smiles. It’s simple to add on later, too.
Zone ideas for your yard
– Kid zone with a sandbox and small playhouse. A sandbox around 6×6 feet is plenty for many kids. A sturdy playhouse invites hours of do-it-yourself adventures.
– Outdoor games area. Put in a cornhole set, a giant Jenga game, and a few bean bags or rings. Leave space for a quick toss or a friendly match.
– Supervision-friendly seating. Choose a shaded bench or a couple of comfortable chairs. Position them where you can see the kids play from the patio or porch.
– Open grass run space. Keep a clear grassy patch for running, tag, or a quick game of catch. Avoid clutter to prevent trips.
Next, plan how you will put these zones together. Start with a simple layout that makes paths safe and easy to follow.
Practical setup tips
– Map your space first. Measure the area and mark zones with string or chalk.
– Pick safe, durable ground surfaces. Use grass for a soft feel, or add rubber mulch under the play area for extra cushion. Artificial turf is low maintenance if you prefer a always-ready look.
– Anchor heavy items. A swingset and a slide need sturdy anchors. If you use a playset, follow the manufacturer’s instructions for footing.
– Create shade and comfort. Add a shade sail, a gazebo, or an umbrella over the seating area. A cool corner makes supervision easier on hot days.
– Use calm color accents. Soft blues, greens, or sunny yellows can lift the mood without overpowering the yard.
– Build in safe boundaries. A low fence or gate keeps toys inside and little ones close when you want them nearby.
Materials and maintenance to consider
– Choose cedar or treated wood for play structures. They stand up to weather and still look friendly.
– Consider durable seating. Plastic-coated metal or resin wicker lasts longer in sun and rain.
– Use weather-friendly storage. A small deck box or shed keeps toys tidy and ready.
– Mulch or rubber under play zones. This reduces slips and protects little knees.
– Keep maintenance realistic. Schedule a quick weekly sweep, weed escapees, and check screws or bolts before big play sessions.
Here is how to keep it simple and inviting year round. Keep the zones distinct but close enough to share energy. You’ll get more playtime, less clutter, and plenty of room for memories to grow.
Next steps
– Pick one feature to add this season, like a sandbox or a couple of chairs with a shade option.
– Sketch a rough layout on paper or with a simple app.
– Gather two or three key items first, then expand as you use the space.
This setup makes your yard feel alive every day. It invites laughter, games, and easy moments of calm for the grownups who supervise. Your family will thank you for the thoughtful, practical design that keeps everyone connected.
11. Playful Family Spaces
Editor’s Choice
🛍️
Best Choice Products Kid’s Large Octagonal Wooden Outdoor Sandbox with C…
You want a backyard that shows your style without becoming a chore. An outdoor art gallery can give you that balance. It keeps the space personal. With the right pieces, your yard invites neighbors to pause.
Ideas for your gallery:
– Using reclaimed materials to build art pieces. Old wood, metal, and stone can become wall panels, sculptures, or a simple mural.
– Large planters filled with bold flowers or tall grasses. They act as clear focal points and guide the eye.
– Garden paths lined with artistic stones or tiles. These add texture and color underfoot.
– Interactive art that invites touch or play. Think a wind chime wall, a sun dial, or a mosaic panel.
This setup lets you show your creative side and keeps the yard friendly for all who visit.
Next steps:
– Pick a spot. Look for a wall, fence edge, or patio corner near seating.
– Choose a simple theme. A rustic, modern, nature-inspired, or playful vibe works well.
– Mix heights and textures. Pair a tall piece with low planters and a flat mural to create rhythm.
– Go with weather-friendly materials. Metal, ceramic, stone, and treated wood hold up outdoors.
– Add soft lighting. Warm lights make sculptures glow after dark.
Common questions:
– Will it feel busy? Start with three to five pieces. Add more only if the space breathes.
– How do I keep art safe outside? Mount items securely and choose weatherproof finishes.
– How often should I refresh it? Rotate pieces seasonally. Swap planters to give the space a new feel.
– How much does this cost? Begin with affordable pieces. You can upgrade as your budget allows.
Be honest about limits. A crowded wall can steal attention from your yard’s natural feel. A small, well-planned gallery often works best. Start with a single focal piece and a couple of planters. Grow your collection as you enjoy the space.
You want to dine outside and your yard should help you enjoy meals with family and friends. This section shows you a simple, doable plan for an outdoor dining zone that feels welcoming all season.
Here is why a dedicated dining space works. It makes meals easier to share. It keeps the mess out of the indoor rooms. It creates a place where conversations flow and memories grow.
– Start with a clear setup
Choose a flat, accessible patch near a door or patio. A level area makes seating comfortable and keeps chairs from wobbling. Put the table in the center of the spot so guests can talk from all sides. A long table works for big gatherings; a round table invites close, easy chats.
– Pick the right table and chairs
Select a table that fits your space and needs. If you host often, a sturdy table with room for serving platters is great. Pair it with weatherproof chairs. Add cushions or weatherproof pads for comfort. Keep the seating comfortable but easy to move.
– Add a practical outdoor kitchen or grill
A built-in grill or a compact outdoor kitchen boosts cooking ease. Think a small prep counter, a sink if you have space, and a storage cart for tools. You don’t need every gadget at once. Start with the essentials and build up later.
– Create mood with lighting
Soft lighting makes nights feel special. String lights overhead set a warm tone. Add lanterns or solar path lights along the edge of the dining area. Keep lights low enough to avoid glare but bright enough to see faces clearly.
– Use greenery and fresh scents
Plant greenery around the dining zone for privacy and charm. Potted herbs near the prep area smell great and stay handy for cooking. Fresh flowers as centerpieces bring color without clutter.
– Choose durable materials
Look for weatherproof options. Teak, powder-coated metal, and stone hold up well. Avoid fragile pieces that need constant care. Simple, sturdy pieces stay nicer longer.
– Plan for weather and comfort
Include a shade option if you’re sunny most days. A retractable canopy or large umbrellas work well. Have a plan for rain, like a nearby covered spot or outdoor-safe covers for cushions.
– Keep maintenance simple
Wipe tables after meals and store cushions in a dry spot when not in use. Use covers to protect furniture during off seasons. A quick rinse a few times a month keeps the area fresh.
Next steps
– Sketch a quick layout on paper.
– List three must-have items for your space.
– Start with a small setup and grow it as you enjoy the area.
Common questions solved
– Do I need a full outdoor kitchen? No. A single grill and a prep counter can handle most weeknight meals.
– What about warmth? Burners or a small fire pit adds coziness without taking over the space.
– How much should I invest first? Start with durable basics and add one feature at a time.
With this plan, your outdoor dining area becomes a handy, inviting place. You’ll cook, eat, and relax outside more often.
You want a calm corner in your yard where you can unwind. A real outdoor living space makes that easy. It becomes a place to read, talk with a friend, or sip tea after a long day.
Plan your lounge for comfort and function
Start with a spot near your home that stays cool and shaded most of the day. A pleasant view helps, too. Then pick a seating setup that fits your space.
– Choose two small sofas or one sofa with two lounge chairs. Add a low table for drinks and snacks.
– Use weatherproof cushions and easy-clean covers. Pick soft colors that hide dirt.
– Add throws for chilly nights. Keep a couple in reach.
– Include a low coffee table and side tables for books and cups.
– Lay down an outdoor rug to anchor the area. It makes the space feel welcoming.
– Install lighting that works after dark. Warm string lights and small lanterns set the mood.
– Bring in planters with herbs or grasses. Greenery lightens hard edges.
– If you can, add a portable fire pit or small heater. It extends use on cool evenings.
– A storage bench helps you tuck cushions away when they’re not in use.
Next, keep maintenance simple. Choose durable fabrics and sturdy frames. A quick wipe keeps surfaces neat.
Here is why these choices help. Comfort invites you to stay longer. Shade prevents you from getting overheated. A rug and tables make the space look like a real room. Warm lighting helps you relax after sunset.
Why this setup fits a backyard lounge
A well-planned lounge gives you a year‑round spot. It blends with garden beds, stone paths, and plants. It stays flexible for family meals, late chats, or a quiet solo moment.
Next steps
– Measure the space and sketch a simple layout. See how many pieces fit.
– Choose sturdy materials. Teak, aluminum, and resin wicker work well outside.
– Pick a color plan that matches your yard. Light tones feel bigger; earthy tones blend with greenery.
– Install a simple lighting plan. A few solar path lights and string lights do the job.
– Add small touches you love. A blanket, a real plant, a cooler for drinks.
– Schedule a quick seasonal check. Clean cushions, store them, and refresh accents as needed.
With these steps, your yard becomes a cozy retreat you can use all season.
14. Scenic Outdoor Lounge
Editor’s Choice
🛍️
Arden Outdoor Dining Chair Cushion, 20 in x 20 in, Weather-Proof, Rain-P…
You want a backyard that feels calm and easy to move through. A good path does more than look nice. It guides your steps and protects your grass from wear. Think of a route that invites you to slow down, breathe, and enjoy the yard.
Materials set the mood. Pick options that fit your climate and budget.
– Natural stone for a rustic or timeless look.
– Weathered wood for a warm, organic feel.
– Gravel or pea stone for a casual, airier path.
– Brick or smooth concrete for a clean, modern touch.
Each choice changes how the path wears, sounds underfoot, and how it sheds water after a rain.
Design ideas to try. Simple choices can make a big difference.
– Curves that lead you to quiet corners or a cozy bench. Soft bends feel natural and encourage exploration.
– Stone or brick sections with narrow strips of grass in between. The green breaks up hard surfaces and keeps the path from feeling too stark.
– Decorative edging that defines the path and holds mulch or soil in place. It makes the route look intentional.
– Lighting along the edges so you can stroll at dusk without stumbling. Solar or low-voltage options work well and save energy.
Here is why these paths work. They create flow in your yard and add a sense of adventure. A winding route makes you linger at a blooming bed. A straight crossover helps a quick evening walk stay practical. The right mix of materials and lines makes the space feel larger than it is.
Practical steps you can take this weekend. Build a path you can actually use.
– Start with a simple route map. Draw it on paper and mark potential turn-offs to seating or a water feature.
– Check drainage before you lay anything. A slight slope keeps water from pooling on the path.
– Decide on width. A single person path can be 2.5 to 3 feet wide; a two-person or higher-traffic path can be 4 feet or wider.
– Prep the base with a compact layer of crushed stone or compacted gravel. Add a border and level as you go.
– Lay the surface in easy-to-handle sections. Place each piece snugly and avoid gaps that trip you up.
– Add lighting and soft ground cover near the edges. This keeps the path inviting after dark and helps it blend with the garden.
Maintenance ideas to keep it fresh. Sweep away leaves, rake any loose gravel, and re-level edges after heavy rains. Tidy edges with a garden spade, and tighten loose stones or pavers as needed. A well-kept path stays safe and appealing year after year.
Next steps. Start with a small section to test your favorite materials and look. Then expand the route, add edges or lighting, and tune the curve to your taste. You’ll gain a charming, practical feature that makes your whole yard feel more welcoming.
15. Nature-Inspired Pathways
Editor’s Choice
🛍️
Emsco Group Flat Rock Rain Barrel and AC Unit Paver Patio Pad 24”x24” Na…
If you want a yard that stays lively through the year, a seasonal flower garden is a smart move. You pick flowers that bloom at different times, so color moves with the calendar. Small seasonal touches can keep the feel fresh all year long.
Here is why this plan works: Spring bulbs wake the yard after winter. Summer flowers fill beds with bright spots. Autumn blooms add warm tones before the frost. Winter greens give shape when many plants sleep.
How to plan your seasonal garden
– Start with a simple map of your yard. Note sun, shade, and how water runs.
– Pick a color idea you love. Go soft and calm or bright and bold.
– Choose plants that fit your climate and soil. Aim for eight to twelve varieties total.
– Group plants by bloom time. This creates a steady rhythm you can see.
Want a backyard that truly helps local wildlife? You can create a calm space where birds sing, bees buzz, and critters find a safe corner. This approach blends simple planting with small shelters and thoughtful water spots. The result is a friendly spot for nature that you can enjoy too.
Why it matters
A wildlife-friendly yard supports pollinators, controls pests, and brings life to your outdoor space. You’ll see more birds at dawn, fluttering wings around flowers, and the soft sound of water in a bowl or pond. Best of all, you don’t have to give up your lawn to get results. You just add the right touch in the right places.
What to include
– Native plants that match your sun and soil. They feed local birds and butterflies with less work for you.
– Birdhouses or feeders placed at different heights and in varied spots. This reduces crowding and invites a wider mix of species.
– Pollinator gardens filled with flowers that bloom in waves. Plants that feed bees and butterflies keep activity high through the season.
– Water sources that are safe and easy to use. A shallow dish, a small pond, or a bubbling tiered fountain can attract birds and slow down heat on hot days.
– Small shelters like brush piles, log piles, rock stacks, or a few fallen branches. These give shelter to hedgehogs, lizards, and other critters.
– A pesticide plan that favors natural helpers. Keep chemicals off the yard so insects, birds, and frogs can thrive.
– Quiet corners for critters. A tucked-away spot with mulch and leaves feels like a home to shy animals.
Practical setup ideas
Here is how you start. First pick native plants that fit your sun, water, and soil. Second place water bowls where you can see birds without inviting trouble from pets. Third build a simple brush pile near a plant bed. Fourth set up feeders or houses away from heavy foot traffic.
Care and reality check
Keep the space tidy but not perfect. Remove fallen leaves slowly to keep habitats intact. Replace food sources as seasons change. Watch what visits you and learn which plants attract which visitors. Do not expect a flood of life overnight. A steady rhythm brings a steady stream of guests.
Next steps
Try one new plant this month. Add a small water dish next season. Build a simple shelter and watch for signs of wildlife activity. Over time, your yard becomes a friendly hub for critters and a joy to watch.
Create a wildlife-friendly oasis in your large backyard! By adding native plants and simple shelters, you’ll invite nature’s beauty right to your doorstep while supporting vital pollinators and enjoying the serene symphony of local wildlife.
17. Wildlife-Friendly Spaces
Editor’s Choice
🛍️
Survival Garden Seeds – New England Aster Seeds for Planting | Native Pu…
You want a yard that looks good and uses fewer resources. You also want to help the planet. A thoughtful, sustainable approach can do both. It lowers bills, cuts waste, and keeps your outdoor space lively. Here is how you can start right away.
– Rain gardens – A rain garden catches runoff in a shallow bowl. It slows water that would rush to the street. Pick a sunny, well-drained spot. Fill it with soil that drains well and plant varieties that like moist roots, then mulch to hold in moisture. It acts like a sponge and feeds nearby beds. Next steps: mark the area, choose sturdy native plants, and plan for seasonal water needs.
– Xeriscaping – This means using less water. Don’t flood every corner with lawn. Group plants by how much water they need. Add mulch to keep roots cool and soil steady. A drip system waters roots only, cutting waste. The look can be calm and clean with rocks, grasses, and low shrubs. Next steps: pick water-smart plants and design simple, even borders.
– Composting – Turn kitchen scraps and leaves into rich soil food. Start with a simple bin and place it away from the house. Let it breathe; turn it every week or two. In a few months you’ll have dark, crumbly compost to mix into beds or pots. It cuts trash and feeds your garden. Next steps: set up a bin, add everyday scraps, and harvest when ready.
– Native plants – Local plants fit your climate best. They drink less water and resist typical pests. They invite bees, butterflies, and birds to your yard. Start with a few easy options and let them spread. You’ll see less maintenance and more life. Next steps: choose a couple of favorites and plant them in sunny and shady spots.
– Reuse and recycled materials – Use old bricks for borders or salvaged wood for benches. Recycled gravel makes neat paths. This saves money and gives character. It also keeps waste out of landfills. Next steps: scout for leftovers and plan small, practical features.
– Soil and sun checks – Test soil each year and add compost to feed beds. If drainage is slow, mix in a little sand. Observe sun paths through the seasons. A bright corner loves fast growers; a shady patch suits ferns and hostas. Next steps: test, amend, and map sunny vs. shaded areas.
– Starting tips – It takes time, but progress adds up. The first year may need a bit more water as plants settle. Begin small and grow with patience. Next steps: pick one project now, then add another when you’re ready.
18. Sustainable Landscaping
Editor’s Choice
🛍️
32 Outdoor Native Plants for Full Sun & Wet Ground – Includes Brown-Eyed…
Want a backyard that works for you, not the other way around? Smart tech can cut chores, save water, and boost your outdoor fun.
Here is why you should consider tech in your landscape. It makes care simple. It helps you enjoy more time outside. It can also keep your yard looking good after a busy day.
Smart irrigation that actually adapts
– Use a weather-based sprinkler controller. It reads rain forecasts and soil moisture so you water only when plants need it.
– Add a rain sensor to pause watering when it rains. This keeps you from wasting water.
– Tie irrigation to your garden’s plant types. Shrubs, lawns, and beds get the right amount without guesswork.
– Check a water-use report from your controller. You’ll see how much you saved and where extra care helps.
Lighting that sets a mood, not a maze
– Install low-voltage lights along paths and borders. They guide your steps and highlight plants.
– Create zones with dimmable LEDs. You can switch from bright to cozy with a tap.
– Add motion sensors for safety. Lights come on when someone walks by.
– Use timers to keep energy use steady. Set them to match your routines, not the clock.
Outdoor speakers for easy entertainment
– Pick weatherproof speakers that stay loud without distortion. They handle sun and rain.
– Place them by seating areas for clear sound. You can hear podcasts, playlists, or quiet nature sounds.
– Control music from your phone. You don’t need to haul a kitchen speaker outside.
Control in one simple touch
– Use a single app or hub to manage lights, water, and sound. It saves you from juggling devices.
– Set simple schedules. Lights at sunset, irrigation after midnight, music for meals outside.
– Check alarms and alerts on your phone. You’ll know if a valve or speaker needs attention.
Practical tips to start now
– Start small with one project. A weather-based irrigation controller is a solid first step.
– Plan around power and water ideas. Some devices run on solar power or low voltage.
– Think about safety. Keep cords tidy and out of walkways.
– Budget in stages. You can upgrade as you see the benefits.
What you gain is real. You spend less time watering by hand. Your yard looks cared for with less effort. You enjoy outdoor moments more, no matter the season. Ready to begin? Pick one feature and test how it changes your evenings outside. The rest will follow.
Transform your outdoor space with smart technology! It not only saves water but also lets you enjoy your large backyard landscaping designs without the hassle. Why work harder when tech can make it easier?
You want a big backyard that does more than look nice. You want places to rest, eat, and grow herbs all in one yard. The plan should feel easy to use and natural to move through. You can get this with careful zones and simple choices.
Here is why multi-functional spaces work. They cut down trips across the yard. They give you more use from every square foot. They keep guests comfy and kids busy. They stay useful all year.
Here is how to set up your yard for several jobs:
– Zone 1 – Relax and unwind. A small seating area with a couple of weatherproof chairs and a couch helps you feel at ease. Add shade with a pergola or a big umbrella. A little water trickle or soft lights makes the air feel calm.
– Zone 2 – Dining and social time. A sturdy table and chairs fit for meals and chats. Place a grill or a compact outdoor kitchen nearby. A counter for serving and a prep area helps a lot. Use furniture that can be moved if you need more room.
– Zone 3 – Planting and growth. Raised beds hold vegetables, herbs, and flowers. A bench or stool lets you sit and plan your next harvest. Keep a tool bench and a rain barrel close by for easy care.
– Zone 4 – Play, move, and paths. A flat, safe surface works for kids and pets. A winding path connects zones without creating rough edges. Stepping stones or compact pavers keep it neat.
– Create soft boundaries. A trellis, a row of hedges, or a low planter wall separates zones but still keeps sight lines open. This makes each area feel distinct yet connected.
– Pick flexible furniture. Storeable tables, light chairs, and movable planters let you adjust the layout in minutes. The yard stays fresh without a big cost.
– Plan the route. A clear main path runs through the yard as you walk from one zone to another. Sight lines guide your eye and make the space feel larger.
– Add features that pull double duty. A fire pit with seating around it links comfort with warmth. An outdoor kitchen offers prep space as well. Good lighting stretches evenings longer.
Next steps:
1) Measure the yard and sketch zones on paper. Note sun hours and where shade falls.
2) Choose a color mood and keep it simple. Use natural stone, wood, or metal that mix well.
3) Set a budget and start with one zone you will use the most.
4) Store cushions and tools in a weatherproof box. Keep surfaces clean and safe.
Try a simple layout this weekend. Move pieces as you go until it feels right for you and your family.
20. Multi-Functional Spaces
Editor’s Choice
🛍️
Weatherproof Patio Chair, Poly Lumber Outdoor Patio Chairs with Ergonomi…
No matter which design you choose, each of these large backyard landscaping ideas has something unique to offer. From serene spaces to vibrant outdoor escapes, your backyard can be transformed into an extension of your home and an invaluable part of your life.
Consider what fits your style and lifestyle best, and get ready to create an outdoor retreat that truly reflects who you are. Your neighbors will definitely take notice of your stunning landscapes!
Note: We aim to provide accurate product links, but some may occasionally expire or become unavailable. If this happens, please search directly on Amazon for the product or a suitable alternative.
This post contains Amazon affiliate links, meaning I may earn a small commission if you purchase through my links, at no extra cost to you.
Frequently Asked Questions
What Are Some Key Elements to Consider in Large Backyard Landscaping Designs?
When it comes to large backyard landscaping designs, a few key elements can make all the difference! Start by assessing the layout and natural features of your yard. Consider incorporating zoning for different activities—like a cozy seating area, a vibrant garden, or a fun play zone for the kids. Don’t forget about plants and flowers that suit your climate, as well as features like pathways and water elements that enhance the overall aesthetic.
How Can I Make My Backyard More Inviting for Gatherings?
To create a backyard that’s perfect for gatherings, focus on multi-functional spaces. Incorporate comfortable seating, an outdoor dining area, and maybe even a fire pit for cozy evenings. Using lighting can also set a warm, inviting mood. Think about adding a few personal touches, such as decorative elements or a theme that resonates with your style, making it a space where friends and family will love to gather.
What Types of Plants Are Best for a Vibrant Tropical Retreat?
For a vibrant tropical retreat, choose plants that evoke that lush, vacation vibe! Look for tall palms, colorful hibiscus, and fragrant jasmine. Incorporating greenery like ferns and ornamental grasses can also add texture. Don’t forget to include a water feature to enhance the tranquil atmosphere! Remember to consider your local climate and soil type to ensure these plants thrive.
How Do I Start Planning My Backyard Landscape Design?
Starting your backyard landscape design can be exciting! Begin by determining your goals and needs. Do you want a space for entertaining, a garden, or a play area? Once that’s clear, sketch a rough layout of your yard, considering existing features and sunlight patterns. Research different garden ideas that inspire you, and create a vision board to help visualize your dreams. Don’t hesitate to seek advice from landscaping professionals if needed!
What Are the Benefits of Sustainable Landscaping in My Backyard?
Sustainable landscaping offers numerous benefits for both you and the environment! By using native plants and eco-friendly practices, you can create a beautiful yard that requires less water and maintenance. This approach helps preserve local wildlife and reduces your carbon footprint. Plus, with features like edible gardens and compost areas, you can enjoy fresh produce while minimizing waste. It’s a win-win for your backyard and the planet!
Related Topics
large backyard landscaping
garden ideas
outdoor spaces
modern minimalist
rustic farmhouse
tropical retreat
sustainable landscaping
family-friendly design
edible gardens
zen garden
seasonal flowers
artistic outdoor
Manage Consent
To provide the best experiences, we use technologies like cookies to store and/or access device information. Consenting to these technologies will allow us to process data such as browsing behavior or unique IDs on this site. Not consenting or withdrawing consent, may adversely affect certain features and functions.
Functional
Always active
The technical storage or access is strictly necessary for the legitimate purpose of enabling the use of a specific service explicitly requested by the subscriber or user, or for the sole purpose of carrying out the transmission of a communication over an electronic communications network.
Preferences
The technical storage or access is necessary for the legitimate purpose of storing preferences that are not requested by the subscriber or user.
Statistics
The technical storage or access that is used exclusively for statistical purposes.The technical storage or access that is used exclusively for anonymous statistical purposes. Without a subpoena, voluntary compliance on the part of your Internet Service Provider, or additional records from a third party, information stored or retrieved for this purpose alone cannot usually be used to identify you.
Marketing
The technical storage or access is required to create user profiles to send advertising, or to track the user on a website or across several websites for similar marketing purposes.


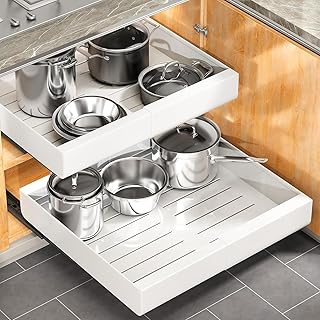


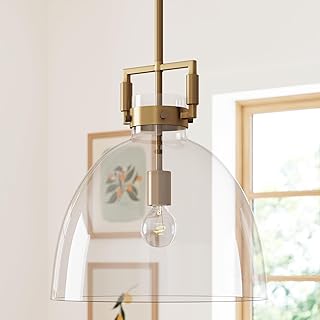


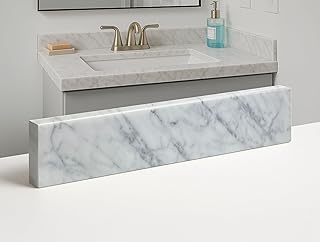


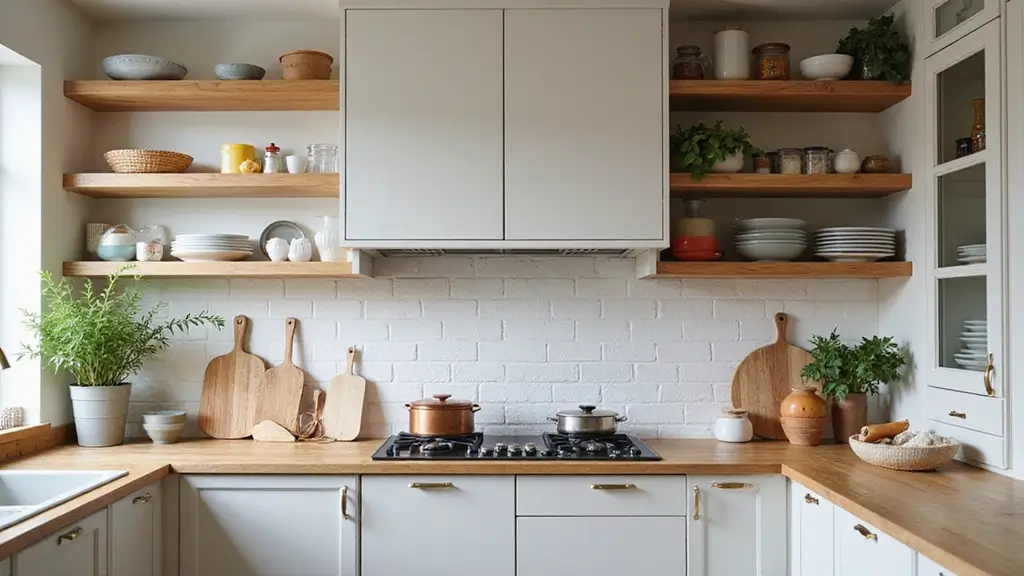


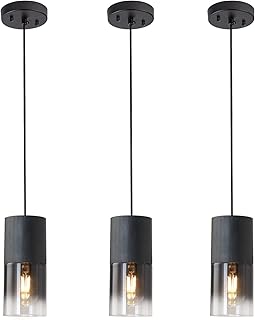

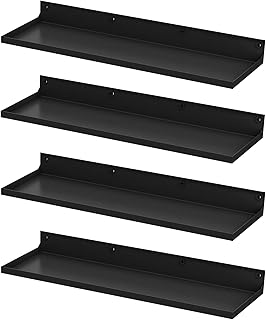


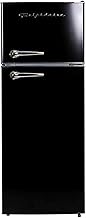

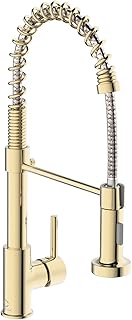


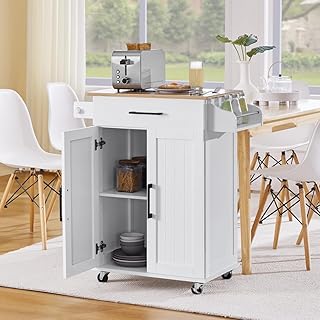


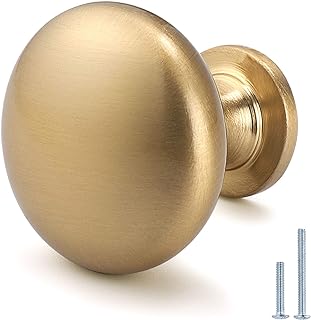

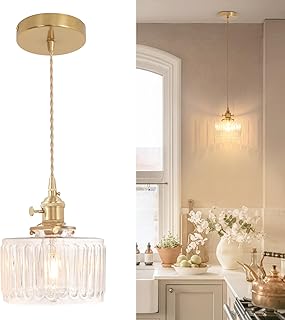

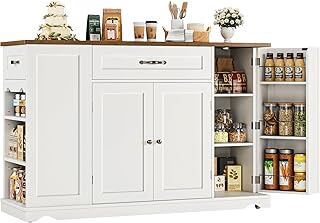


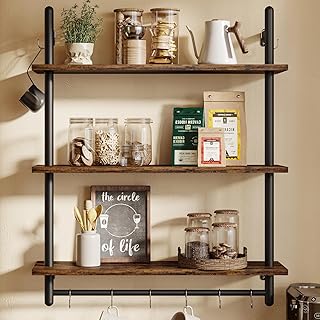


![Glass Food Storage Containers with Lids, [18 Piece] Glass Meal Prep Cont...](https://m.media-amazon.com/images/I/61wEFV5mGVL._AC_UL320_.jpg)


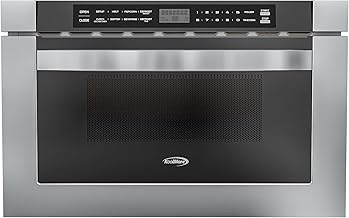


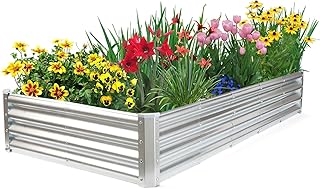


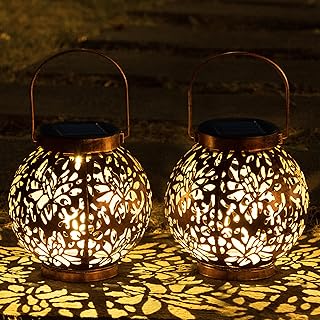


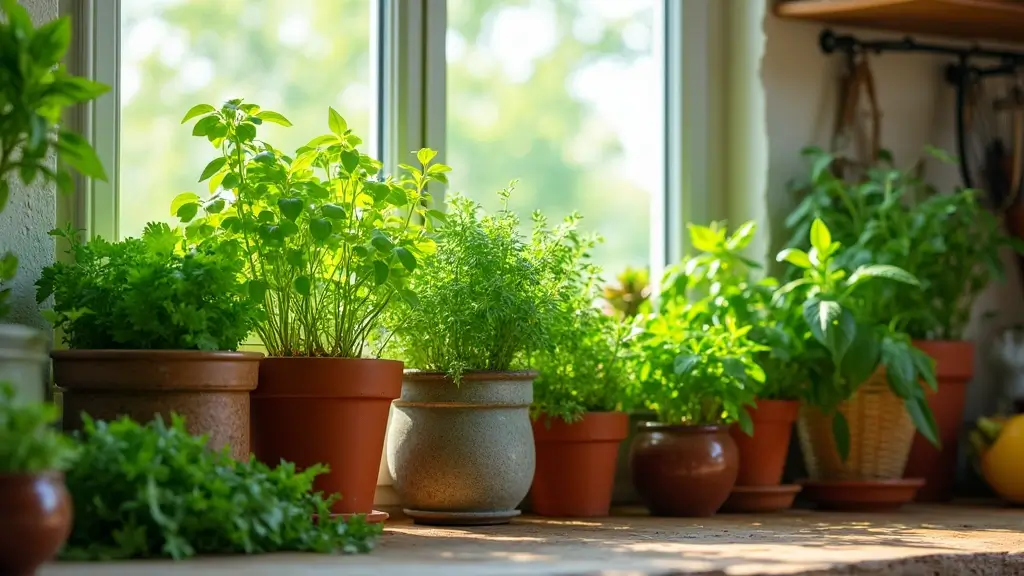


![Landscape Edging 33FT,Garden Edging Borders [Extra Tall 4IN High] Flexib...](https://m.media-amazon.com/images/I/616o5JwXoYL._AC_UL320_.jpg)