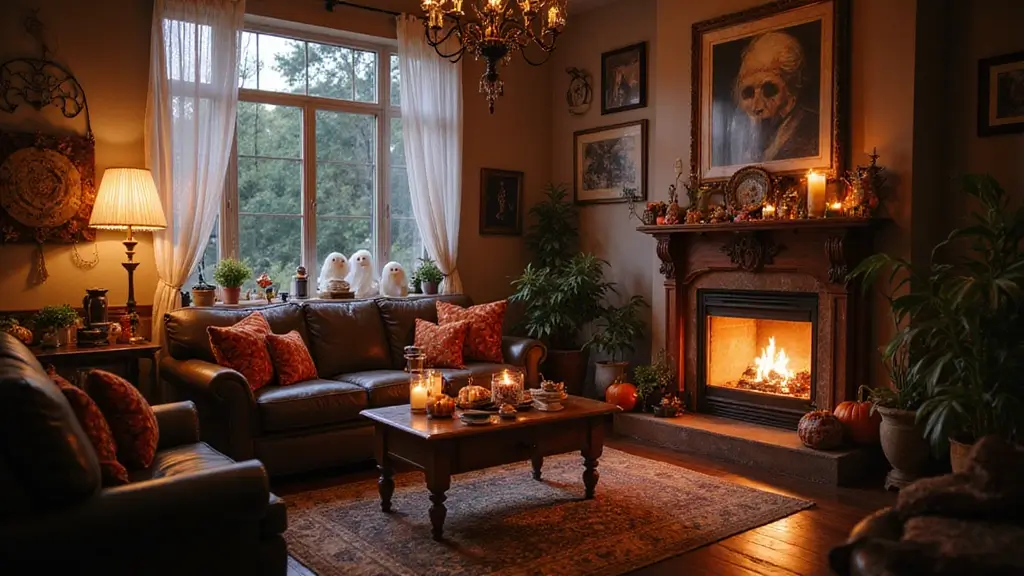
I put this together because I want to help you add rustic charm to your home without it feeling stuffy. Vintage decor has a way of making a room warm and lived in. This post covers 22 ideas that blend old pieces with simple, practical tweaks. And you won’t believe #11.
If you love cozy spaces, textures you can touch, and a home that tells stories, this one is for you. Whether you rent or own, small or large, you can pull off vintage charm with smart choices. You care about style that feels real, not fussy. You want ideas that you can actually do this weekend.
Here you’ll get practical ideas you can try over a weekend. Each idea uses common items like old wooden crates, metal accents, and soft linens. I’ll show you how to mix woods, metals, and fabrics so they feel balanced. You’ll find tips on sourcing affordable pieces and protecting surfaces.
These ideas cover styles such as farmhouse, industrial, and shabby chic. You’ll learn where to place art, how to light a room with warm bulbs, and how to pick a color plan. Simple steps help you start now: pick a focal item, pull in two old pieces, add a light modern touch.
Real life means rooms have constraints and budgets. Some vintage pieces will need refinishing, and some spaces need lighter furniture. The goal is to give you clear, doable options that still feel fresh.
Keep reading to discover all 22 ideas and how to use them. You can begin with one small swap this week and see how it changes the room. This guide aims to be practical, friendly, and easy to act on.
Contents
- 1. Antique Trunks as Coffee Tables
- 2. Vintage Frames as Wall Art
- 3. Rustic Ladder as a Decor Piece
- 4. Vintage Typewriters as Centerpieces
- 5. Mason Jars for Storage and Decor
- 6. Repurposed Wooden Pallets
- 7. Vintage Rugs for Warmth
- 8. Farmhouse-Style Dining Tables
- 9. Vintage Mirrors for Illusion and Light
- 10. Old Books for Character
- 11. Vintage Suitcases for Storage
- 12. Antique Clocks for Timeless Charm
- 13. Wrought Iron Accents for Elegance
- 14. Vintage Kitchenware Display
- 15. Shabby Chic Furniture
- 16. Vintage Silverware Displays
- 17. Farm Fresh Produce Displays
- 18. Vintage Lighting Fixtures
- 19. Vintage Wall Clocks
- 20. Painted Furniture for a Pop of Color
- 21. Vintage Garden Decor
- 22. Vintage Fabric for Warmth and Texture
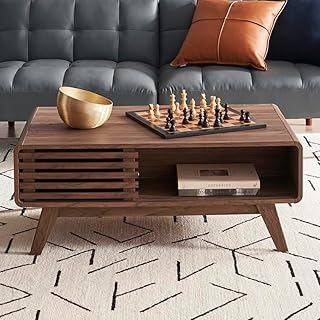
1. Antique Trunks as Coffee Tables

Craving a coffee table that adds character and space for your things? An antique trunk fits. It brings rustic charm to your living room and hides blankets, remotes, or magazines inside. The lid stays flat enough for a lamp or a tray. Best of all, it tells a story with every scratch and nail head.
– Character-rich details Look for trunks with carved panels or bold metal hardware. These details make the piece a real focal point.
– Solid condition Check the lid for sturdiness and the inside for smells or dampness. A dry, clean trunk lasts longer.
– Right size and height Consider size and height. It should sit close to your sofa for easy reach.
– Smart sourcing You can find trunks in thrift shops, flea markets, or online marketplaces. Take a friend if you’re unsure about age or value.
Pair it with a simple, modern sofa to balance the look. A light table runner or a stack of colorful books on top adds warmth. A small tray keeps drinks steady and easy to grab.
Care is simple. Wipe with a damp cloth. Polish wood or seal bare surfaces to guard against spills. Check the legs and hinges every few months.
Antique trunks show that beauty can be practical. They invite cozy moments and a touch of history into any room.
1. Antique Trunks as Coffee Tables
Editor’s Choice

Signature Design by Ashley Kettleby Vintage Wood Storage Trunk or Coffee…

Round Decorative Tray Wood Bathroom Counter Organizer Farmhouse Kitchen …
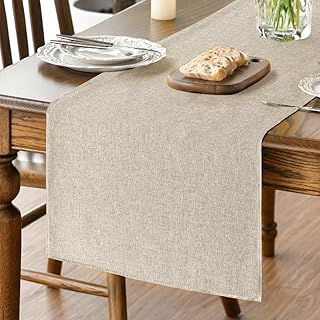
Artoid Mode Light Brown Table Runner, Seasonal Fall Washable Kitchen Din…
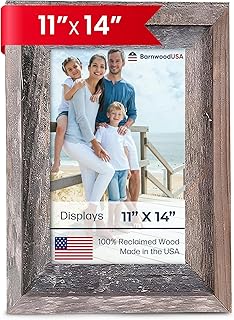
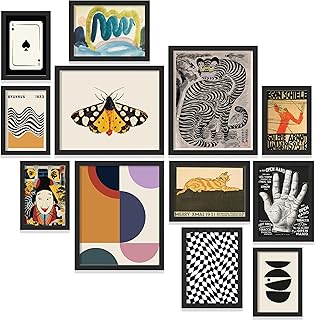
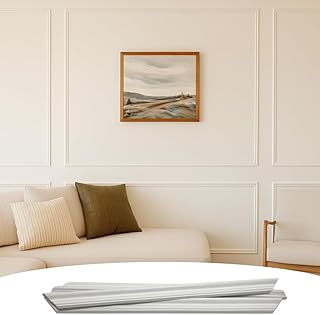
2. Vintage Frames as Wall Art

If you want warm walls without strict matching, try a collection of vintage frames. Mismatched frames carry character. They tell a story with every corner and curve. A wall of variety feels inviting and alive.
Arrange them in a gallery style. You get a look that is both curated and free. Play with layout in a hallway or above a sideboard for quick impact.
– Mix colors, materials, and shapes for a lively, varied display.
– Start with an anchor piece and build around it to keep balance.
– Use removable hangers or washi tape to swap art without nails.
– Put a few smaller frames on a shelf to soften the wall and add texture.
– Plan the layout on the floor first, aiming for about 2 inches of space between frames.
– Tie the set together with a common detail, like a shared mat color or metal finish.
– Include personal pieces—old photos, prints, or small artworks—to make the wall feel lived-in.
– Light helps: add a soft wall light or track lighting to highlight the frame collection.
This approach adds vintage charm, makes memories ready to view, and keeps your decor flexible as your collection grows.
2. Vintage Frames as Wall Art
Editor’s Choice
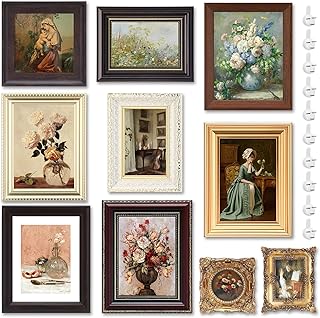
Qunclay 10 Pcs Vintage Picture Frames for Wall or Tabletop Display Ornat…

Large Hooks for Hanging Heavy-Duty 44Ib(Max) 10 Packs, Wall Hangers With…

Plug in Wall Sconces Set of Two: Wall Lights with On/Off Switch – Steple…
3. Rustic Ladder as a Decor Piece

You want a decor piece that adds height and warmth without crowding your space. A rustic ladder fits the bill. It leans against a wall and doubles as a display for blankets, magazines, or plants.
Why a rustic ladder works
It sits quietly, yet it changes the room. You can swap items with the season, and the different rungs give you multiple spots to style.
Styles to fit your space
Pick a look that matches your home, and you’ll keep the ladder from feeling out of place.
– Weathered wood finish for a cozy farmhouse feel
– Painted versions in soft tones for a bright, modern room
– Stain to show grain and add warmth
How to style
Then use the ladder to tell a small story.
– Drape blankets for texture
– Place magazines and a plant on two rungs
– Wrap fairy lights or a garland for glow
– Add hooks to hang hats, scarves, or keys
Placement tips
Lean it on a sturdy wall with a gentle angle. Don’t overload the top rung. If you want extra security, use a wall anchor or bracket.
Seasonal flair
Switch in pine sprigs, a small basket, or a pumpkin in fall.
Where to find or make one
Find it at flea markets, thrift shops, or make one from reclaimed wood.
– Flea markets and thrift shops
– Garage sales
– DIY with reclaimed wood
A rustic ladder adds height, texture, and charm without clutter.
3. Rustic Ladder as a Decor Piece
Editor’s Choice

FUIN 57in Wood Blanket Ladder Living Room Decorative Wall Leaning Farmho…

Brightown 12 Pack LED Fairy Lights Battery Operated String Lights – 7ft …

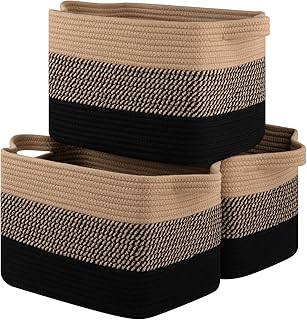
Deco 79 Seagrass Handmade Decorative and Functional Storage Basket Large…
4. Vintage Typewriters as Centerpieces

Want a focal point that adds warmth without shouting for attention? A vintage typewriter fits. Place it on a side table or a bookshelf. It becomes a true centerpiece. You can layer texture by letting a small bouquet rest on the carriage or use it as a stand for a tiny sculpture. A typewriter is more than a pretty object. It hints at old stories and a love of words. You can even tuck a few sheets of paper inside so guests can type a quick note or a quote.
Finding and choosing
– Look for typewriters at estate sales or antique shops.
– Pick a color that matches your space, like classic black, brass, wood, or a bold hue.
– Embrace minor flaws; they add character and tell a story.
This little piece can warm a corner and spark curiosity, making your space feel personal and lived-in.
Place it where guests can walk by and notice it. A soft lamp nearby makes the typewriter glow. If you want more color, swap in a bright ribbon or a small bouquet seasonally.
Care and placement tips
– Clean the keys gently and wipe dust from the surface.
– Keep the area around it tidy so the piece stands out.
– If you want to modernize it slightly, place a small vase nearby with fresh flowers.
This charming addition can warm any nook and spark real interest. Give it a try this weekend.
4. Vintage Typewriters as Centerpieces
Editor’s Choice
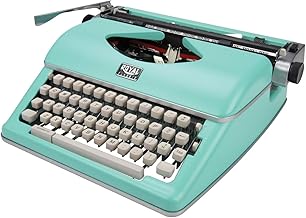
Royal 79101t Classic Manual Typewriter (mint Green)

Mapoxy Glass Bud Vases Set of 4,Small Flower Vases for Wedding Centerpie…

Small Table Lamp for Bedroom – Bedside Lamps for Nightstand, Minimalist …
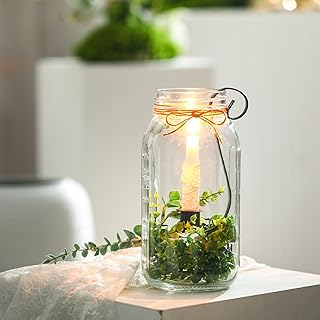
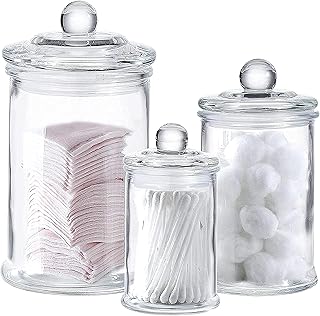
5. Mason Jars for Storage and Decor

Want a quick, affordable way to add rustic charm and keep things tidy? Mason jars fit the bill. These glass staples from old kitchens bring a warm, vintage vibe without a big price tag. You can use them for storage, decor, or both, and they work in almost any room.
– Kitchen storage: Use jars for oats, pasta, sugar, and herbs. Label with chalk tags to see contents at a glance.
– Centerpiece and decor: Fill with fresh flowers or fairy lights to create a soft glow on a dining table.
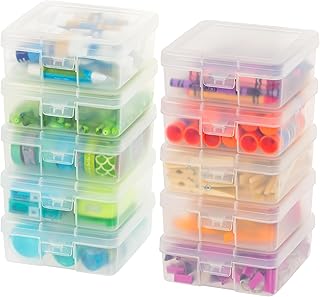
– Craft and hobby organization: Store buttons, beads, thread, and small tools by color or size.
– Display techniques: Group jars of different sizes on shelves or a tiered tray for visual interest.
– Customization: Paint lids, wrap twine, or attach tags to make jars feel like your own.
– Care and durability: Wash gently by hand and dry fully to keep the glass clear and the lid rust-free.
Mason jars are easy to mix with wood, metal, or wicker. They’re sturdy, recyclable, and stay relevant as styles shift. Start with a few jars on a kitchen shelf, then expand as you see what you actually use.
5. Mason Jars for Storage and Decor
Editor’s Choice

Mason Jars Canning Jars, 24 Pack Jelly Jars With Regular Lids, Ideal for…
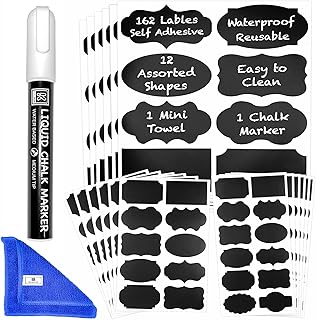
Chalkboard Labels for Jars 162pcs – Waterproof Reusable Chalk Sticker La…
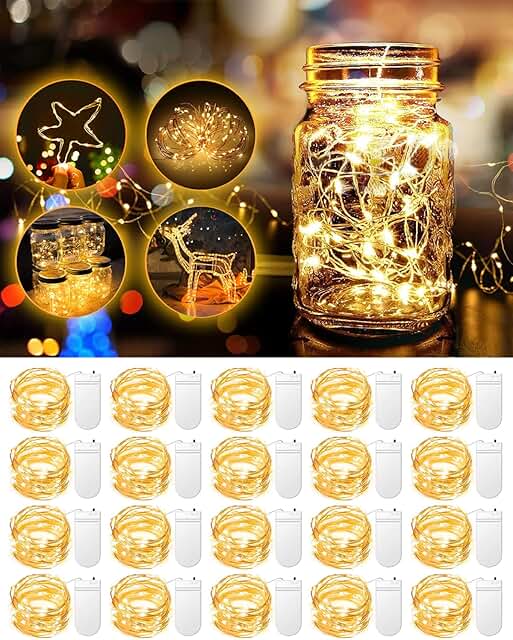
20 Pack Fairy Lights Battery Operated, 3.3ft 20 LED Mini String Lights T…
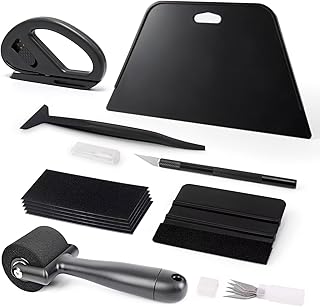
6. Repurposed Wooden Pallets

Repurposed Wooden Pallets
Are you after rustic charm that won’t break the bank? Repurposed wooden pallets can give you that warmth and character while keeping waste out of the landfill.
You can turn pallets into coffee tables, bed frames, shelves, or wall art. A Pallet wall makes a strong, textured backdrop in a living room. Or lay one pallet panel flat as a garden planter. Each pallet carries its own grain pattern, knots, and color shifts — no two are the same.
– Ensure pallets are clean and safe for indoor use.
– Sand rough edges for a smooth finish.
– Paint or stain them to match your decor.
Safety matters. Look for nails and loose boards, and remove them. Choose pallets with the HT stamp (heat-treated) to avoid chemical treatments. Wear gloves and goggles when you work. If you plan a wall panel, mount it to studs and secure with screws.
For a quick project, lean a pallet panel against a wall as a statement piece, then add cushions, lighting, or plants to soften it. For outdoor or covered patios, seal the wood with a clear, non-toxic finish to resist weather.
This material is versatile and affordable. It brings texture, depth, and a touch of country style to any room.
With a little creativity, repurposed wooden pallets can turn your home into a rustic haven. Embrace the charm of unique textures and eco-friendly style that tells a story all its own!
6. Repurposed Wooden Pallets
Editor’s Choice

Greaton, Unassembled Heavy-Duty Wooden Pallet Kit – 20x20x5 Inches, Indu…

Tried & True Original Wood Finish, 8 oz. – Linseed Oil & Beeswax Blend, …

Safety Work Gloves for Men PU Coated 12 Pairs Bulk Pack,Hi-Vis Yellow Se…
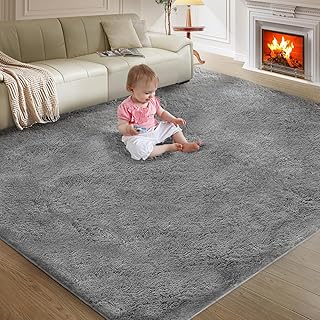
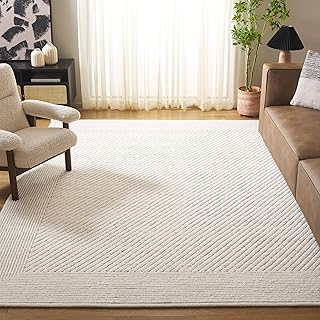
7. Vintage Rugs for Warmth

Want a quick hug for your room? A vintage rug can do that. It adds warmth underfoot and a touch of old-world charm that fits rustic decor perfectly.
Think Persian or kilim styles. They bring color, texture, and a story you can see in the patterns. A well-chosen rug links furniture, walls, and floors into one cohesive look.
Place it where you gather. Put it in the living room under a coffee table, or let it lead a hallway while inviting the eye to travel. Layering tricks work too. Put a smaller rug atop a larger one for a cozy, bohemian vibe that adds depth.
– Size matters: Choose a rug that fits your space and furniture proportions. It should feel balanced, not crowded.
– Color and pattern: Pick hues and motifs that echo your walls and wood tones. This helps the room feel intentional.
– Material and care: Wool rugs are durable and soft. Vacuum regularly and treat spills promptly.
– Placement: In living rooms, aim for the front legs of larger furniture to sit on the rug. In hallways, a runner creates rhythm.
– Maintenance: Rotate seasonally and protect from harsh sun to prevent fading.
Vintage rugs remind you of the past while giving your space instant warmth. They’re a practical, stylish choice for anyone loving rustic decor.
7. Vintage Rugs for Warmth
Editor’s Choice
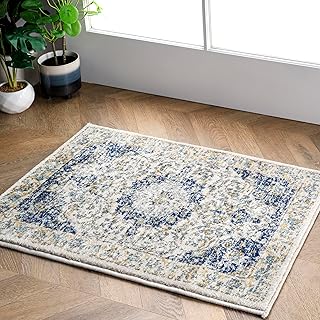
nuLOOM Paisley Vintage Persian Area Rug, 2′ x 3′, Verona Blue

Malamote Boho Vintage Colorful Runner Rug – Farmhouse Traditional Medall…
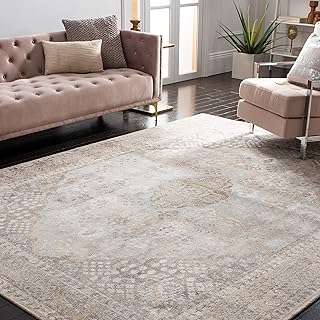
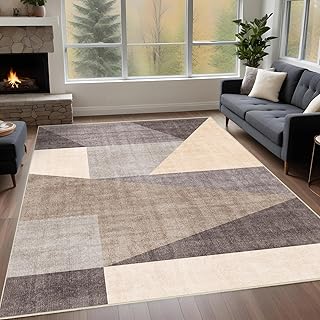
SAFAVIEH Area Rug 8×10 – Restoration Vintage Collection – Large – Beige …
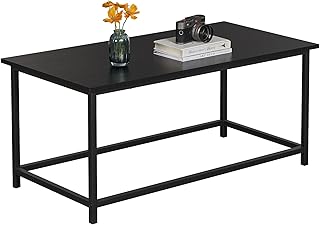
8. Farmhouse-Style Dining Tables

You want a focal point that feels warm and lived in. A farmhouse-style dining table can be that anchor. Made mostly from reclaimed wood, it carries character and texture into your dining space. The sturdy design adds a rustic vibe that makes meals feel special. It also adapts to different dining moments, from casual mornings to big holiday feasts.
– Character from reclaimed wood shows in visible grain and natural imperfections.
– Size and space matter; choose a length that fits your room and keeps at least three feet of clearance around every side.
– Mix seating for character; pair sturdy chairs with a bench for a casual, communal feel and easy seating when guests arrive.
– Finish with protection that preserves grain; matte or oil finishes highlight the wood and make daily wear easy to manage, so your table lasts.
– Style with rustic accents; add wooden bowls, greenery, or seasonal decor to complete the look and invite touch.
With this approach, your farmhouse dining table becomes more than furniture. It invites family and friends to gather, share meals, and tell stories. Keep the care simple—wipe spills promptly and dust lightly. A little oil or wax now and then helps the surface stay smooth and welcoming for years to come.
8. Farmhouse-Style Dining Tables
Editor’s Choice

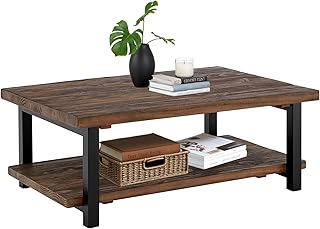
Jofran Reclamation 42″ Rustic Reclaimed Solid Wood Round Dining Table

Minwax 222224444 Polycrylic Protective Wood Finish, Clear Matte, ½ Pint

Wooden Decorative Natural Wood Fruit Bowl, Irregular Creative Rustic Han…
9. Vintage Mirrors for Illusion and Light

Want more light and space without a big renovation? Vintage mirrors help. They bounce daylight, add depth, and bring old-world charm to any room.
– Make a statement with a large mirror: Hang a sizable vintage piece in a hall or above a mantel to draw the eye.
– Group smaller mirrors: Create a playful wall by clustering several petite frames in coordinating finishes.
– Boost light behind lamps: Place a mirror behind a table lamp or lamp base to double the glow.
– Find treasure at flea markets: Look for unique frames, worn edges, and stories that add character.
– Care for beauty: Clean glass gently, polish frames, and resist harsh chemicals that can hurt the finish.
– Match the frame to your theme: Ornate gold suits traditional rooms; simple black or brushed metal works well with modern decor.
– Place for impact: Position mirrors to brighten dim corners or to extend sightlines from a window.
– Secure heavy pieces: Wall anchors and proper mounting keep big mirrors safe in busy rooms.
– Ask these quick questions: Will it reflect clutter? If yes, hide the mess; if not, place it where it brightens.
With these tweaks, vintage mirrors become more than decor—they add space, light, and personality to your home. Try different shapes—from oval to rectangle—and let your space guide your next mirror.
9. Vintage Mirrors for Illusion and Light
Editor’s Choice
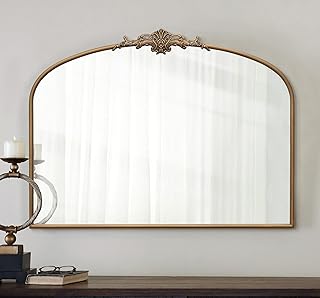
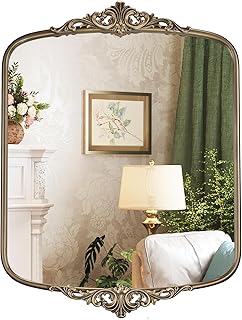
Vintage Arched Anthropologie Mirror: 40″x30″ Large Gold Antique Wall Mou…

4 Pcs Vintage Gold Mirror Set Including Oval Antique Decorative Gold Shi…

Furniture Anchors (10 Packs) Anti Tip Furniture Anchors for Baby Proofin…
You might also like


10. Old Books for Character

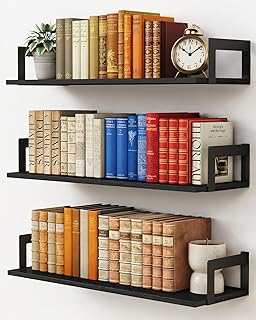
You want warmth in your home without making it feel crowded. Old books can do that job. Their weathered covers and yellowed pages carry a quiet story your space can tell.
Old books bring texture, color, and a calm vibe. They invite the eye to linger and the mind to wander. You’ll notice a softer glow when light hits a leather spine or dusty page edges.
How to use them simply:
– Place books on shelves, coffee tables, or mantels as part of a display.
– Use stacked books as a base for lamps, vases, or small sculptures.
– Pick titles or colors that fit your scheme to add small pops of tone.
Tips for balance and style:
– Mix old books with modern pieces to create contrast.
– Build themed stacks, like travel guides or cookbooks, for a room-specific look.
– Let books lift other decor items to add height and variation.
Care and practicality:
– Keep a small basket or tray for a tidy display.
– Dust regularly and store in dry spots to protect bindings.
– Rotate titles seasonally to refresh the room.
With thoughtful placement, old books become more than decoration. They spark nostalgia and make your home feel lived-in and loved.
10. Old Books for Character
Editor’s Choice

Decorative Vintage Book Shaped Trinket Storage Box- Green
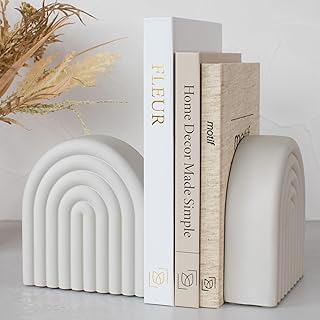
Decorative Concrete Bookends for Heavy Books – Stylish Set of 2, Ideal f…

11.5 Inches Candle Holder Tray Home Decor, Round Wood Tray for Coffee Ta…
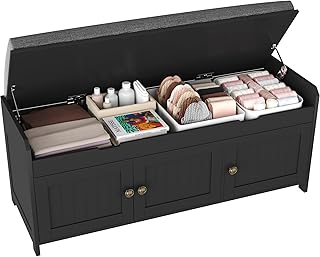
11. Vintage Suitcases for Storage

If clutter drags your space down, try vintage suitcases for storage that also adds charm. Old cases give you hidden storage and a warm, lived-in feel. Choose suitcases with character—bold patterns, bright colors, or rich leather. You can stack them into a tower or tuck a slim set under a bed for quick, out-of-sight storage.
Turn one suitcase into a small side table by placing a lamp on top. This adds light, surface space, and travel-inspired style to any room. Choose sturdy lids for a stable top; add a glass tray if you want a flat, washable surface.
Use it in the living room, bedroom, or entry to keep a few essentials within reach.
– Mix different sizes and styles for an eclectic look.
– Use them to store seasonal items or keepsakes.
– Line the interiors with fabric to add color and protect contents.
How to pick and use them well
Look for cases with sturdy hinges and solid bottoms. Check for missing clasps or saggy lids. If they’re leather, condition them so they last. Put felt pads on the bottom to protect floors and keep surfaces from scratching.
Practical setup ideas
Display a few stacked next to a chair, or tuck a set under a bed to free dresser space. Pair them with a woven basket, a plant, or a rug to blend textures.
Vintage suitcases offer useful storage and a cozy, inviting vibe in any room. These pieces age gracefully with daily use, adding character over time.
11. Vintage Suitcases for Storage
Editor’s Choice

Luggage Set Suitcase Carry On Luggage PC Hardshell Luggage TSA Lock Spin…

Scotch Felt Pads 162 PCS Beige, Felt Furniture Pads for Protecting Hardw…
12. Antique Clocks for Timeless Charm

Antique clocks bring a quiet, timeless glow to any room. They carry stories from the past and invite a moment to pause. A mantel or a wall becomes a stage for their charm.
– Match your decor style — Pick clocks that fit your space, whether rustic, industrial, or modern.
– Make sure they work — If a clock runs, it shows time clearly; if not, let its face and case tell a story.
– Group for eclectic display — Mix small desk clocks with a larger wall piece for contrast and character.
– Display with intention — A single bold clock on a clean wall makes a strong statement; a small cluster on a shelf adds texture.
– Choose varied sizes — Pair a large, eye-catching piece with smaller accents for depth.
– Care and maintenance — Dust regularly, keep away from direct sun, and wind mechanical clocks as needed.
– Find them where you love — Check antique shops, flea markets, or trusted online sellers for good finds.
They work well in many styles, from cozy cottages to sleek lofts. When you pick well, antique clocks ground a room with history. They show that beauty can be simple and slow. With a little care, their charm stays strong for years. Be patient when hunting; good clocks show up in time.
12. Antique Clocks for Timeless Charm
Editor’s Choice

Wall Clock, Vintage Wall Clocks Battery Operated Quartz Silent Non-Ticki…

Peakeep Retro 4.5 inches Battery Operated Twin Bell Loud Alarm Clock (Bl…

mooas Flip Desk Clock (Black), Retro Vintage Design Auto Flip Desk/Table…
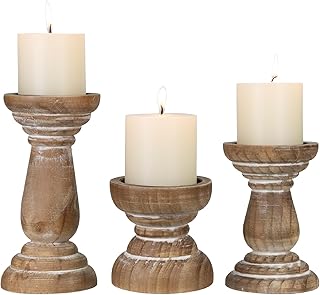
13. Wrought Iron Accents for Elegance

Want a touch of vintage elegance? Wrought iron accents bring a calm, lasting charm to any room. They feel sturdy and timeless, and they work with many color schemes. You gain pieces that look great and stand up to daily life.
Here are practical ways to bring iron into your space.
– Mix iron with wood: Pair dark iron with warm wood like oak or pine. The contrast keeps the room inviting and avoids a cold metal vibe.
– Candle holders and soft lighting: Place iron candle holders on your dining table or mantel to cast a warm glow and create gentle shadows.
– Wall sconces for ambience: Install wrought iron wall sconces in living rooms or hallways to add depth and soft light.
– Use iron in unexpected rooms: Try towel hooks or a small iron rack in the bathroom for a chic surprise.
– Choose unique designs: Look for pieces with scrolls, geometric shapes, or clean lines. They add character that fits your vintage or farmhouse vibe.
– Finish and care: Pick finishes like matte black, aged bronze, or antique pewter. Wipe with a soft cloth and keep iron dry to slow rust.
This timeless material adds sophistication and warmth to your home. Start with one piece and build your look over time.
13. Wrought Iron Accents for Elegance
Editor’s Choice

Iron Taper Candle Holder Set of 3 – Decorative Tall Candle Stand, Candle…

Metal Wall Candle Sconce Holder Set of 2 Wall Mount Candle Holders Moder…

Railroad Spike Cast Iron Hooks (10 Pack) Handmade Blacksmith, Wall Mount…
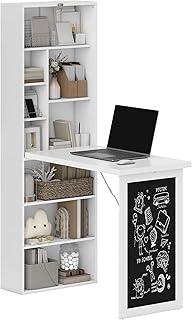
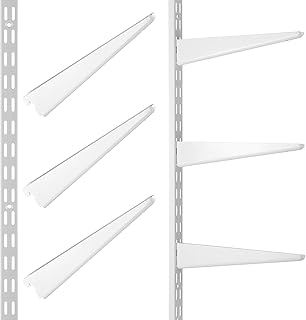
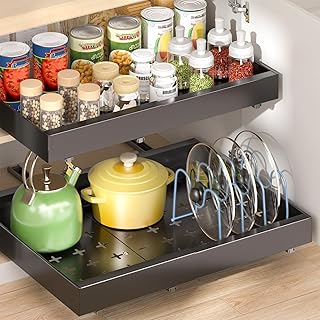
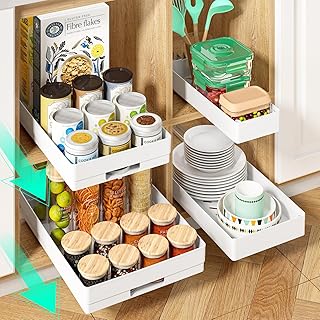
14. Vintage Kitchenware Display

You want a kitchen that feels warm and inviting. Displaying vintage kitchenware does that and stays practical. The right pieces bring color, texture, and a touch of nostalgia.
– Open shelves work best to show off color and pattern.
– A vintage cart adds extra storage and a small, mobile display surface.
– Shop thrift stores and flea markets for enamelware, colorful ceramic dishes, and retro utensils.
– Mix colors and patterns across pieces, and vary sizes for visual movement.
– Make sure every item can still function; a cracked bowl or dull enamel won’t do.
– Group similar pieces in small displays and use risers to add height.
– Keep everyday items handy and rotate pieces so you see something new.
– Light it well with warm bulbs or under-shelf lighting to make colors pop.
Care and safety matter. Dust shelves regularly and wipe pieces with a soft cloth. Check that shelves are sturdy and items are stored in a way that won’t topple. Rotate displays so spaces stay fresh. Keep a small rotation list so you remember what to swap.
With the right setup, vintage kitchenware creates a warm vibe that nods to cooking traditions. Start small—one shelf or cart—and grow as you find pieces you love, then share updates with friends.
14. Vintage Kitchenware Display
Editor’s Choice

Tribesigns 5-Tier Bookshelf, Vintage Industrial Style Bookcase 72 H x 12…
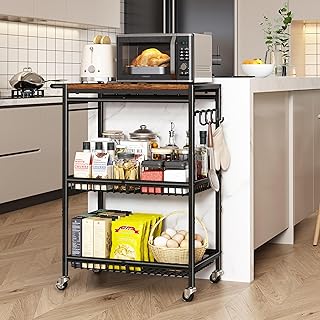
Microwave Kitchen Cart with Push Handle, 3 Tier Rolling Cart with 2 Lock…
ONEMORE Plates and Bowls Set – Microwavable, Oven & Dishwasher Safe Porc…
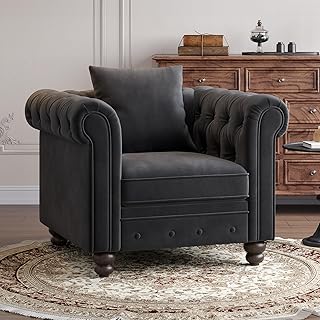
15. Shabby Chic Furniture

You want warmth and character in your home without buying brand-new furniture. Shabby chic furniture gives you that mix of elegance and worn charm. Its distressed finishes and pastel colors catch the eye. A vintage dresser, a delicate side table, or a comfy upholstered chair can become a room’s focal point. Pair these pieces with clean, modern items to keep the look fresh. Each piece should tell a story, from a family heirloom to something you repurposed with paint.
– Look for furniture at estate sales or flea markets for unique finds.
– Try easy DIY projects like repainting, distressing, or reupholstering seats.
– Create a cozy vignette with mismatched chairs and a rustic table, layered with textiles.
If you want lasting charm, pick two coordinating pastel tones and repeat them across pieces. Balance bold finishes with simple walls and light textures. This style fits small rooms and busy spaces, and it feels welcoming. Start with one statement piece, then add more as your space and mood change.
Choose pieces with solid frames and easy-clean fabrics. Choose matte or satin finishes, not shiny. Seal painted surfaces with wax. Dust and wipe with a damp cloth to keep colors soft. Now build your collection slowly.
15. Shabby Chic Furniture
Editor’s Choice

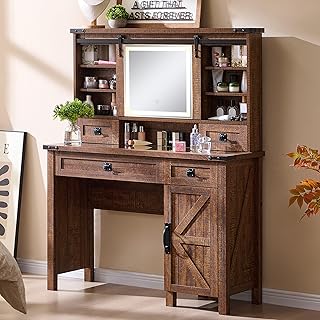
T4TREAM Farmhouse 6 Drawers Dresser for Bedroom, 54″ Wide Wood Rustic Ch…

MELLCOM Floral Accent Chair, High Back Upholstered Armchair with Solid L…

VASAGLE Side Table, Small End Table, Tall Nightstand for Living Room, Be…
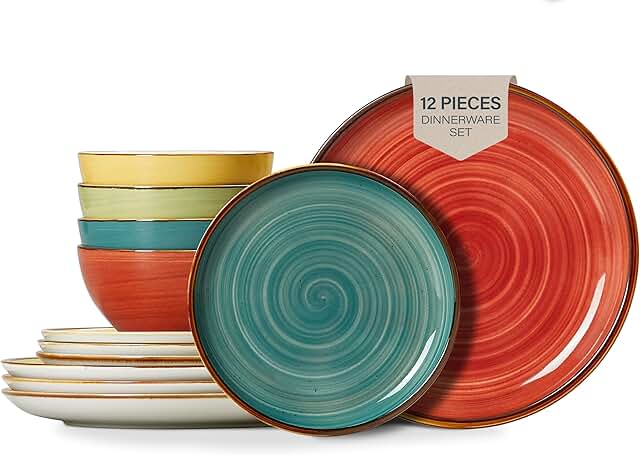
16. Vintage Silverware Displays

You want a rustic touch without spending much. Vintage silverware can do that and more, adding texture and a story to your dining area.
Display options:
– Arrange pieces on a table or in a glass jar for a casual, eye-catching look.
– Use a wooden box for a grounded, rustic display.
– Hang them on the wall in a row or inside a shadow box for a bold statement.
Each piece has its charm. Look for patterns or engravings that catch the light. These engravings speak to the past. The patina tells time and adds warmth. Mix different shapes or metal tones to keep the display lively.
Practical tips:
– Keep tarnish away with a soft wipe after use.
– Dust regularly and store pieces in a dry place.
– Choose trays, boxes, or jars that protect both utensils and surfaces.
Start small. Pick 5 to 7 pieces you love. Try pairing a fancy spoon with a simple fork for contrast. Create a simple centerpiece or wall gallery in one color.
Pair your display with natural textures like wood, linen, or clay. A simple color palette helps the silverware shine. You can rotate pieces with the seasons so the look stays fresh. Let natural light highlight the metal.
Vintage silverware isn’t just for dining – it’s a story waiting to be told! Elevate your rustic home decor by showcasing pieces that add texture and charm to your space.
16. Vintage Silverware Displays
Editor’s Choice
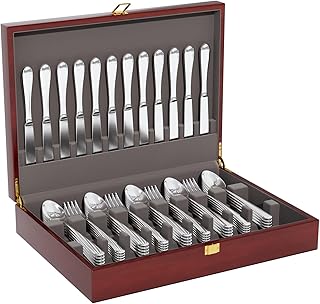
Mahogany Wood Silverware Storage Box,Silverware Chest without Silverware…

4 Pcs Silverware Utensil Holder Mason Jar with Wooden Utensil Organizer …

Yangbaga Rustic Wooden Serving Trays with Handle – Set of 7 Rectangular …
You Might Also Like

17. Farm Fresh Produce Displays

Want a warm kitchen that feels fresh and real? Farm fresh produce displays bring rustic charm at little cost. You can start by picking vessels.
How to arrange your farm-fresh display
– Use vintage bowls, enamelware, wooden bowls, or wire baskets.
– Pick produce that adds color and texture.
– Choose seasonal items for a fresh feel.
– Group items in odd numbers for balance.
– Vary heights with stacked bowls or crates.
Place these displays on the counter, kitchen island, or open shelves. Open shelves and wooden crates add a market vibe and draw the eye. A bowl of lemons anchors the look. Mix colors and shapes to keep it lively.
Herbs in vintage pots add scent and life. Wash produce and wipe bowls; rotate fruit as it ripens. Don’t pile too much; give space for air to circulate. This setup is decorative and practical; you can grab a snack. Seasonal flair helps—swap in seasonal colors. It stays sustainable and affordable while adding real farmhouse charm.
17. Farm Fresh Produce Displays
Editor’s Choice

Red Barn Candle Company Wooden Dough Bowl – 12″ Round – Wood Decor Bowls…

Red Co. Set of 2 Enamelware Metal Large Classic 4 quart Round Salad Serv…

Wire Baskets for Organizing Household 4 Pack Pantry Baskets For Storage …
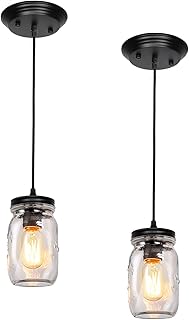
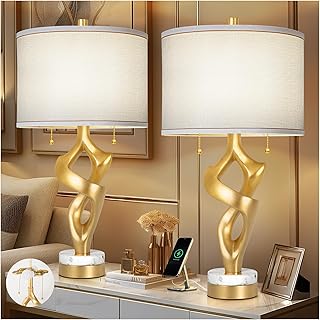
18. Vintage Lighting Fixtures

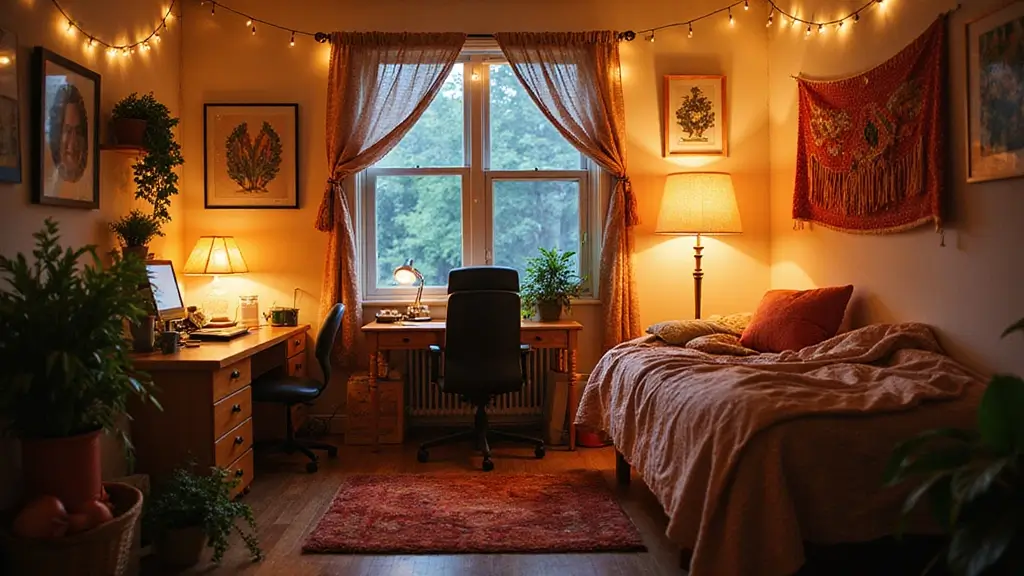
Lighting shapes how you feel in a room. Vintage lighting fixtures add warmth and character to a rustic home. They work as both light and decor, guiding the mood you want.
– Match the fixture to your space: Choose pieces that echo your home’s architecture. A grand chandelier fits a formal dining room; a simple pendant works over a small kitchen island. If the ceiling is low, pick flush-mounts or compact pendants to keep the room open.
– Mix styles for personality: Don’t chase one look. Pair an industrial pendant with a wooden sconce to create contrast. A glass lantern beside brick adds warmth and depth to the scene.
– Mind the scale: Size matters. A heavy fixture can overwhelm a tiny space. In a wide hall, go tall with a multi-light lantern to balance the room.
– Light sources and bulbs: Use warm bulbs (2700K–3000K) for a soft glow. Edison-style filaments add authentic vintage charm. If you prefer LEDs, choose dimmable retro bulbs for flexibility.
– Placement and layering: Plan light layers for depth. Hang dining lights about 28–34 inches above the table surface. Add wall sconces to soften shadows and tie the room together.
– Care and updates: Dust fixtures regularly and wipe glass clean. Check cords and switches for safety. Swap old bulbs for energy-saving options that keep the vintage look.
With these steps, your rooms glow with vintage charm and a cozy, inviting air. You’ll enjoy a rustic vibe that fits everyday life.
Vintage lighting fixtures do more than illuminate; they create a warm, inviting atmosphere that speaks to your home’s rustic charm. Choose pieces that resonate with your space, and let your decor shine!
18. Vintage Lighting Fixtures
Editor’s Choice

DAYBETTER 4 Pack Vintage LED Edison Bulbs, E26 Led Bulb 60W Equivalent, …

Industrial Pendant Light INNOCCY Edison Hanging Cage Pendant Lights E26 …

Vintage Wall Sconce Wall Lamp with Amber Striped Glass Shade Hanging Wal…
19. Vintage Wall Clocks

You want a clock that adds charm, not clutter. Vintage wall clocks bring texture, color, and a little history to your walls.
Choosing the right vintage wall clock
Think about style first. Do you love ornate faces or clean, simple lines? Pick a material that fits your space—wood for warmth, brass for a hint of shine, or steel for a modern touch.
– Style: Choose ornate, rustic, or minimalist to suit your decor.
– Materials: Wood, metal, or porcelain create different vibes.
– Color and finish: Warm woods, black metal, or brass accents.
– Size and readability: Large clocks suit big walls; ensure the dial is easy to read.
Placement ideas
Use these spots to maximize impact.
– Above a mantel to anchor the room.
– In the kitchen or dining area for a practical focal point.
– Hang at eye level for easy viewing.
– Pair with art to form a balanced gallery wall.
– Mix clocks of different sizes for a curated, eclectic look.
Care and maintenance
Mount sturdy hardware to support weight.
Dust regularly and steer clear of direct sun to prevent fading.
Change the battery when you notice a drift in time.
Take your time choosing the clock and let it feel like a natural part of your home. It will glow with life every day.
19. Vintage Wall Clocks
Editor’s Choice

Aero Snail Dia 9-inch Retro Style Vintage Wood Indoor Wall Clock with Sw…

Bekith Wall Clock 12 Inch Silent Non-Ticking Retro Wall Clocks Battery O…

Stylish Minimalist Pendulum Black Wall Clock 8 Inch Modern Decorative Ti…
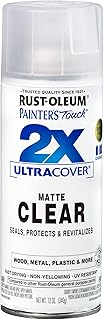
20. Painted Furniture for a Pop of Color

You want color without losing the warm, rustic charm. Painted vintage furniture can brighten a room and keep that handmade feel.
Chalk paint is a simple, forgiving option. It gives a soft matte finish that looks timeless and real.
– Color choice: Choose a color that fits your space and plays well with neutrals, so it blends instead of shouting.
– Prep and clean: Prep the piece with a quick wash and light sanding, and test the color on a hidden area first.
– Layer thinly: Apply thin coats and let each layer dry fully; multiple light coats beat thick, uneven paint every time.
– Distress tastefully: Distress the edges lightly, using fine sandpaper to reveal a hint of wood without looking rough.
– Seal for protection: Seal with wax for a soft, antique feel or with a clear topcoat for better durability.
– Detail with care: Add stencils or decals for small, clean details that lift the piece without overpowering its vintage mood.
– Balance the look: Pair bold colors with quiet surroundings, like a bright dresser with neutral walls, to keep the room calm.
This approach blends old and new pieces with style.
Start small with a nightstand or stool, then grow your color palette piece by piece.
20. Painted Furniture for a Pop of Color
Editor’s Choice

FolkArt Home Décor Chalk Finish Acrylic Paint, 8oz, 8 ounce, Milk Jug

3M Sandpaper, 220 Grit, 5 Sheets, 9 in x 11 in, Sands Paint, Wood & Meta…

Howard Products Beeswax Wood Polish & Conditioner, Feed-N-Wax for Wood F…
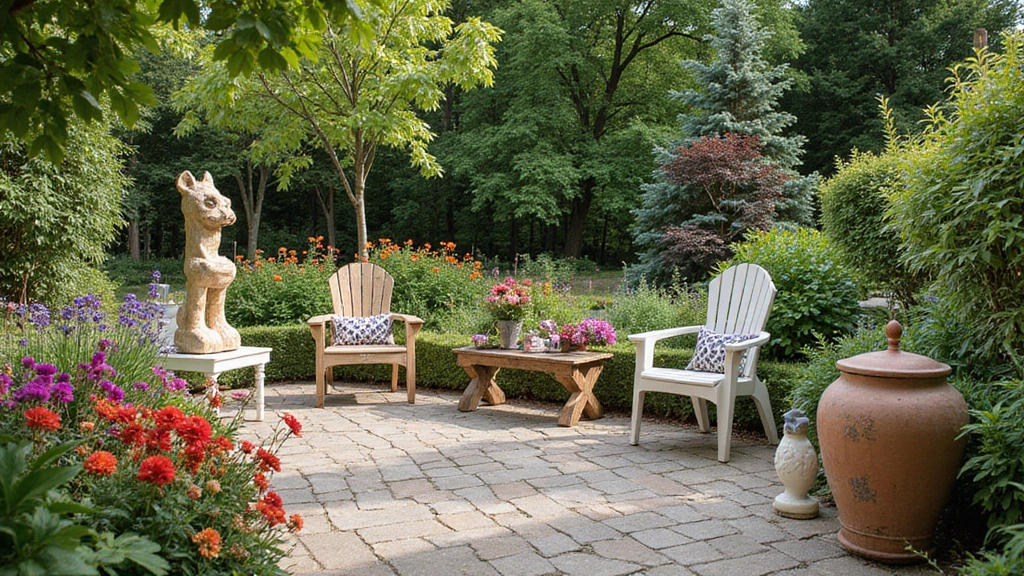
21. Vintage Garden Decor

Want a garden that feels warm and lived-in without a big budget? Vintage decor adds rustic charm with simple, easy steps. You can pair old pieces with fresh plants to create a soothing outdoor space.
Key vintage pieces to start
– Aged garden statues tucked in a shady corner to guide the eye and tell a story.
– Weathered watering cans filled with soil and flowers for a pop of color and function.
– Reclaimed wooden planters that bring warmth and texture to paths and borders.
– Hanging vintage bird feeders that invite feathered visitors and add motion.
A vintage bicycle can become a playful planter, its wheels framing a bed of blooms. Old wooden crates turn into sturdy garden beds or quirky plant stands. These items add character while offering real use in the space.
Keep these tips in mind
– Make sure any outdoor decor is weather-resistant or treated to last through rain and sun.
– Pair rustic pieces with vibrant flowers to make colors sing.
– Vary heights by placing items on stools, walls, or stands for visual interest.
Maintenance is simple—wipe dust, check for rust, and refresh paint or seal wood every season. Use materials like galvanized metal, ceramic jugs, and stone to mix textures and keep the scene lively.
This approach creates a cozy retreat you’ll love spending time in, whether you’re sipping tea or hosting friends.
Transform your garden into a cozy retreat with vintage treasures! A simple watering can or an aged statue can weave stories and warmth throughout your outdoor space.
21. Vintage Garden Decor
Editor’s Choice

Roman Giftware Inc., Garden Collection, Gnome Riding Turtle Statue, 11.5…

2 Gallon Watering Can, Outdoor Watering Can for Plants, Garden Water Can…

Small Wooden Planter Box – Rustic 2-Pack Wood Window Planter Box Set for…
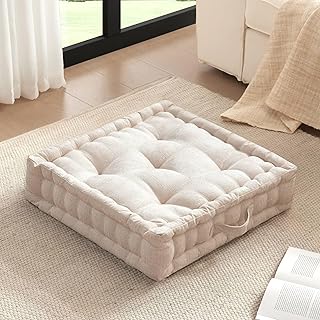
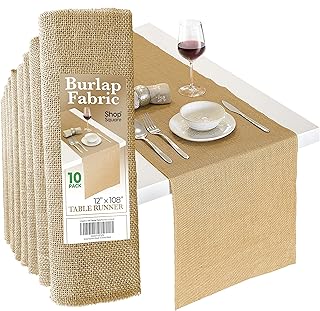
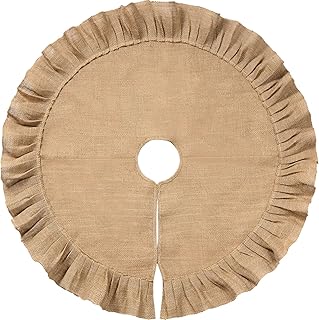
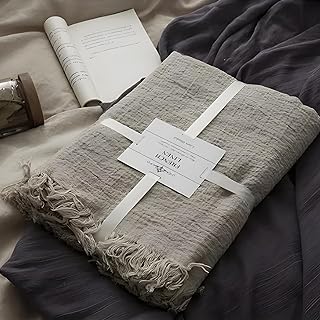
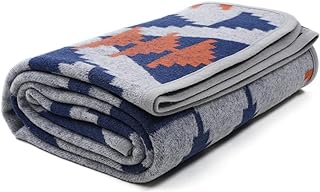
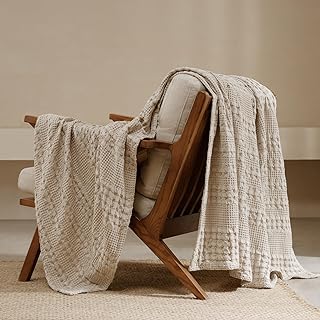
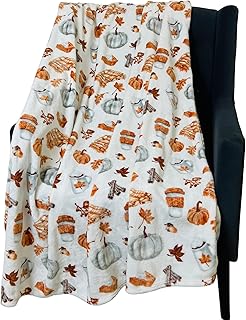
22. Vintage Fabric for Warmth and Texture

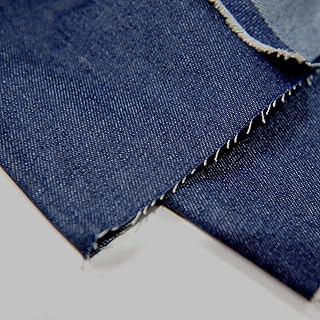
You want warmth and texture in your space without a big, expensive makeover. Vintage fabric can give you that cozy, lived-in feel with real character.
Quilts, throws, and even curtains bring color and comfort. A well-chosen piece can define a corner or soften a plain sofa. You’ll notice the tiny stitches, faded spots, and stories in the fabric—that texture makes a room feel inviting.
– Look for fabrics with history: family heirlooms or gems from local thrift shops.
– Mix patterns for depth: pair florals with stripes or checks with paisleys. Keep a common color in the mix to hold the look together.
– Simple upgrades, big impact: sew cushion covers from vintage fabric or fold a quilt to make a table runner.
– Layer for warmth: drape a quilt over a chair, hang a textured curtain, and toss a throw on the sofa. The layers catch light and create cozy corners.
– Care and longevity: wash cold, air dry or line dry, and avoid harsh detergents. Test a small patch first to keep colors from bleeding.
If you are unsure, start small. Pick one bold vintage piece as a statement and keep other textiles neutral. You can swap fabrics with the seasons for a fresh feel.
Vintage fabric lets you personalize your decor without losing function. It invites warmth, story, and a touch of rustic charm to everyday life.
22. Vintage Fabric for Warmth and Texture
Editor’s Choice

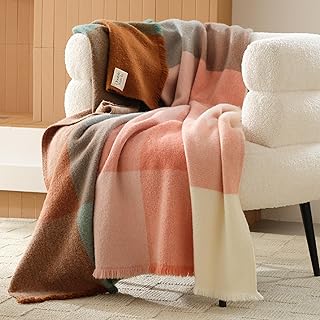
Greenland Home Antique Chic Quilted Patchwork Throw, 50″ x 60″ , Multicolor

BOURINA Beige Throw Blanket 50×60 Inches Throw Textured Solid Soft Sofa …

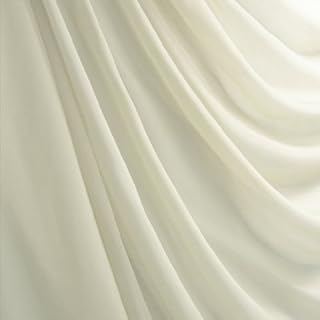
Topfinel Mustard Yellow Vintage Curtains & Drapes 84 Inches Long, Gromme…
Conclusion

Bringing vintage and rustic home decor into your living space can truly transform its vibe. With endless options, from antique furniture to charming accents, it’s all about finding pieces that speak to you.
Each idea shared brings its own story, creating a home filled with warmth and character. So why not begin your vintage decor journey today? Your home deserves a touch of nostalgia and charm that reflects who you are!
Note: We aim to provide accurate product links, but some may occasionally expire or become unavailable. If this happens, please search directly on Amazon for the product or a suitable alternative.
This post contains Amazon affiliate links, meaning I may earn a small commission if you purchase through my links, at no extra cost to you.
Frequently Asked Questions
What are some easy ways to incorporate vintage and rustic home decor into my living space?
Incorporating vintage and rustic home decor can be a fun and creative process! Start by mixing in a few key pieces like antique trunks as coffee tables or vintage frames as wall art. These items not only add character but also create a warm, inviting atmosphere. You can also explore using mason jars for storage and decor, or even a rustic ladder as a stylish display for blankets or plants. The key is to choose pieces that resonate with you and blend seamlessly into your home.
How can I maintain a cohesive look while using mismatched vintage decor?
Using mismatched vintage decor can actually enhance your space’s charm! To maintain a cohesive look, focus on a unifying color palette or theme. For instance, if you choose vintage frames for wall art, select frames in similar tones or finishes. You can also create a focal point, like a farmhouse-style dining table, that anchors the room, allowing other eclectic pieces to shine without feeling chaotic. Remember, the beauty of vintage decor lies in its uniqueness, so embrace the imperfections!
Where can I find affordable vintage and rustic decor items?
Finding affordable vintage and rustic decor items can be an exciting treasure hunt! Check out local thrift stores, flea markets, and garage sales for unique finds. Online platforms like eBay and Etsy also offer a wide range of vintage items at various price points. Additionally, consider repurposing items like wooden pallets or old furniture, which can be easily transformed into charming decor. Don’t forget to explore community groups or social media marketplaces for great deals!
What are some vintage decor ideas that can easily be DIY projects?
DIY projects can be a fantastic way to add vintage charm to your home! Consider making vintage fabric throw pillows or re-staining an old piece of furniture for a fresh look. You could also create a vintage-inspired gallery wall using mismatched frames filled with family photos or artwork. Another fun project is to turn old books into decorative bookends or centerpieces. These DIY ideas not only personalize your space but also bring a sense of accomplishment!
How do I choose the right vintage lighting fixtures for my home?
Choosing the right vintage lighting fixtures can truly elevate your decor! Consider the style and size of the room when selecting fixtures; for example, a large vintage chandelier can make a statement in a dining room, while a quaint vintage lamp works well on a side table. Look for fixtures with unique materials or designs that resonate with your personal style, and make sure they complement other elements in the room. Don’t forget to check the functionality and ensure that they fit your lighting needs while adding that desired rustic charm!
Related Topics
vintage decor
rustic charm
home styling
DIY vintage
affordable decor
farmhouse style
repurposed furniture
decor tips
warm interiors
character pieces
easy updates
vintage accents