This season has me craving simple, cozy Christmas vibes that don’t drain my wallet. That’s why I made this guide—to show you can decorate with small, smart ideas instead of big purchases. There are 20 DIY home Christmas decor ideas that won’t break the bank, and yes, you’ll love the fifth idea. You can finish many of these in a weekend or even in an afternoon. It’s a mix of easy crafts and simple swaps you can do right now.
If you love a warm, lived-in feel and you want a touch of whimsy without the price tag, this is for you. If you’re short on time or money, you’ll still find ideas that fit your schedule and your space. If you decorate with kids or in a small apartment, you’ll see options that work and look great in photos.
What you’ll get is a practical mix of ideas, steps, and tips that actually work. Each idea uses easy-to-find materials like jars, pinecones, ribbon, twine, fabric scraps, and thrift-store finds. I’ve kept the instructions simple so you can start right away.
These ideas lean natural and warm, with soft lights, wood tones, and simple shapes. They fit on a mantel, a coffee table, or a kitchen shelf, and they shine in real life and in photos. You’ll learn quick tricks to reuse what you already have and cut waste.
Trend-wise, look for natural textures, warm whites, and a touch of metallics. That mix lets you blend easy thrift-store finds with your favorite old ornaments for a refreshed, cozy look. If you’re pressed for time, some ideas take under 15 minutes to complete, while other projects can be spread over a weekend.
What you’ll get is not just a list. It’s a practical plan you can actually follow. So grab a mug, pick one idea, and start small. As you try them, you’ll see your home feel warmer and more personal. And yes, stick around to see the standout idea five—you’ll fall for it.
Contents
- 1. Rustic Mason Jar Centerpieces
- 2. Festive Paper Snowflakes
- 3. DIY Christmas Tree Ornaments
- 4. Pinecone Garlands
- 5. Upcycled Sweater Stockings
- 6. Simple Twine-Wrapped Vases
- 7. Repurposed Holiday Signs
- 8. Handmade Advent Calendar
- 9. DIY Garland with Christmas Cards
- 10. Cinnamon Stick Bundles
- 11. Colorful Christmas Wreaths
- 12. Glass Jar Luminaries
- 13. Holiday Table Runner
- 14. Bottle Brush Trees
- 15. Painted Pinecones
- 16. DIY Christmas Village
- 17. String Light Jars
- 18. Felt Christmas Trees
- 19. Holiday Scented Sachets
- 20. Festive Holiday Pillows
1. Rustic Mason Jar Centerpieces

Rustic Mason Jar Centerpieces
You want a cozy Christmas table that won’t cost a fortune. This DIY idea uses simple jars and natural elements for big impact.
Fill each jar with pine needles, red berries, and a light spray of glitter. A candle on top adds warm glow. Wrap the jar with burlap or twine for a rustic touch. These centerpieces work on the dining table, on window sills, or as small accents around the room.
What you’ll need:
– Mason jars
– Burlap or twine
– Pine needles, cranberries, or small ornaments
– A candle or LED tea light
– Optional greenery or cinnamon sticks
How to make:
– Wash and dry the jars.
– Layer pine needles, berries, or ornaments inside each jar.
– Wrap burlap around the outside and tie with twine.
– Place a candle or LED light on top.
Tips to customize:
– Use jars of different heights for variety.
– Add a sprig of greenery between layers for a fresh look.
– Swap red berries for dried orange slices or cloves for a festive scent.
Want more sparkle? Add pine cones or metallic beads. Line a tray with several jars for a bigger centerpiece display.
Care and storage: After the season, remove any candle holders, wipe the glass, and store jars in a dry place.
1. Rustic Mason Jar Centerpieces
Editor’s Choice

Glass Regular Mouth Mason Jars, 16 oz Clear Glass Jars with Silver Metal…
Burlap Ribbon 3 Inch Wide – Burlap Roll Fabric Ribbon, 10 Yard Burlap Ri…

Homemory 24Pcs Flickering Flameless Candle Battery Operated, 200+Hours F…
2. Festive Paper Snowflakes

Want a cozy Christmas look without breaking the bank? Paper snowflakes bring a winter vibe to any room. They’re cheap, easy to make, and add texture you can see and feel.
What you need
– One square sheet of plain white paper that folds cleanly.
– A pair of scissors to shape the edges.
– A thin thread or fishing line for hanging.
– Optional: iridescent glitter or a light spray sealant.
How to make them
– Fold a square sheet into quarters to form a four-point base.
– Cut shapes along the edges, then unfold to reveal a snowflake.
– Punch holes or trim edges so you can connect flakes with thread.
– String the flakes and hang them from the ceiling, in windows, or the tree.
Paint them with iridescent glitter for a soft, sparkling finish.
Display ideas
– Group different sizes to create a frosty cascade that catches light.
– Hang at varying heights to add dimension and movement.
– Cluster a few near a doorway for a cozy welcome.
Tips for variety
– Use different sizes to add depth.
– Mix white with pale blue or silver sheets.
– Glitter only on the edges for a subtle glow.
2. Festive Paper Snowflakes
Editor’s Choice

Fiskars All Purpose Scissors, High Performance Cutting, Stainless Steel …

Prang (Formerly SunWorks) Construction Paper, White, 9″ x 12″, 100 Sheets

HTVRONT Holographic Fine White Glitter – 50 g/1.76 oz Glitter for Resin,…
3. DIY Christmas Tree Ornaments

You want a tree that feels like you, yet stays friendly to your budget. Handmade ornaments bring charm and real memories. They’re easy to make with family or friends.
Create wooden slice ornaments. Gather wood slices, twine, and acrylic paint. Sand the edges so they’re smooth. Paint simple designs or write a short message. Add a year or name to make it a keepsake. Seal with a clear spray or varnish to protect the art. Thread twine for hanging. Let dry fully before you hang them on the tree.
Try felt ornaments for soft texture. Cut shapes from felt, such as stars, trees, or hearts. Use fabric glue or simple stitches to assemble. Add a tiny bead, button, or appliqué for detail. Attach a loop of string for hanging. These are lightweight and safe for real trees.
Reuse old holiday cards. Cut cards into circles or shapes you love. Write a short note on the back or add a tiny photo. Punch a hole and string with ribbon or baker’s twine. They turn into bright accents on your tree or stand alone as mini ornaments.
Add simple photo ornaments. Print small portraits or favorite moments. Mount under a clear plastic dome or inside a lightweight frame made for ornaments. Hang with a ribbon. This makes memories part of your holiday decor.
Quick tips: mix natural wood with metallic accents for a modern look. Keep a cohesive color palette so the tree feels intentional. Store extra supplies for next year.
3. DIY Christmas Tree Ornaments
Editor’s Choice

Sukh 20PCS Christmas Natural Wood Slices – Unfinished Wood Slices 2.7-3….

Caliart Acrylic Paint Set, 52 Colors (2oz/Bottle) with 4 Brushes, Art Cr…

Thin Felt Fabric Sheets, Assorted Colors Stiff Felt Sheets for Crafts DI…
4. Pinecone Garlands

You want a warm, natural touch for Christmas that won’t break the bank. Pinecone garlands give you that cozy, rustic vibe with little effort.
What you’ll need
– Pinecones collected from your yard or a nearby park
– Twine or ribbon
– Optional paint, a light matte spray, or a pinch of glitter
– Hot glue or a simple needle and thread
– Scissors
How to make it
1) Clean the cones and let them dry. They should feel dry and sturdy before you work with them.
2) Choose your method. Thread the pinecones onto the twine, or glue them in a neat row along the twine.
3) Space them evenly. If you want color, spray or paint in light coats and let each layer dry. A touch of glitter adds sparkle if you like.
4) Hang or drape your garland. Mantels, stair banisters, and dining tables all become warmer with this natural strip of charm.
Tips for best results
– Use a mix of sizes for a organic, forest-like look.
– Seal with a light spray to help colors stay put and dust off easier.
– Keep the palette simple: wood tones, greens, and reds read festive without shouting.
– Store flat in a box when the season ends so it’s ready to reuse.
This simple project brings the outdoors inside and adds instant holiday warmth to any room.
4. Pinecone Garlands
Editor’s Choice

JOHOUSE 3.5-5Inch Natural Pine Cones Crafts, Natural Pinecone Ornaments …

Vanhench 805FT Natural Jute Twine String, Bulk Hemp Jute Rope Cord Twine…
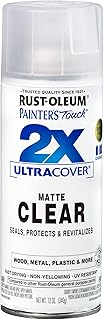
Rust-Oleum 334022 Painter’s Touch 2X Ultra Cover Spray Paint, 12 oz, Mat…
5. Upcycled Sweater Stockings

Looking for cozy, budget-friendly Christmas decor? Upcycled sweater stockings give you warm style without spending much. They feel handmade and eco-friendly, and each one carries a little holiday memory.
To make these festive stockings:
– Gather old sweaters you no longer wear and choose colors that blend with your decor.
– Cut the legs off the sweater to shape a stocking, leaving extra fabric for a neat toe and heel.
– Sew the raw edges with a zigzag stitch or a basic seam to stop fraying.
– Turn the stocking right side out so the seams hide inside and look tidy.
– Add a cuff from rib knit or a scrap of fabric; fold the edge for a finished, snug top.
– Personalize with buttons, embroidery, fabric paint, or a simple monogram to give each stocking its own charm.
– Attach a hanging loop with a small fabric tab or ribbon; sew it on firmly.
– Optional: line the stocking with a thin scrap to add strength and warmth.
Hang these stockings by the fireplace, on a wall, or along a stair rail for a gentle, rustic glow. For care, hand wash gently and air dry to keep colors bright and textures soft.
5. Upcycled Sweater Stockings
Editor’s Choice

Coquimbo Sewing Kit Gifts for Mom Grandma Women Men Adults Kids Teen Beg…

Shuttle Art Fabric Paint, 18 Colors Permanent Soft Fabric Paint in Bottl…
Fiskars All Purpose Scissors, High Performance Cutting, Stainless Steel …
6. Simple Twine-Wrapped Vases

Want a simple, affordable way to add texture to your Christmas decor? Twine-wrapped vases do the trick. They look handcrafted, but they’re easy and fast to make. Use them as a centerpiece or tucked on a shelf for a warm, holiday glow.
How to create twine-wrapped vases
– Gather glass vases, natural twine, a hot glue gun, and scissors.
– Clean the vases with soap and water, then dry them completely so the twine sticks well.
– Start at the base with a small dab of hot glue, press the first loop of twine, and hold until it sticks.
– Wrap upward in a steady line. You can go straight around or try a diagonal spiral for more texture.
– When you reach the top, secure the end with glue and trim any loose ends.
– Fill the vases with seasonal elements like red berries, pine branches, or faux ornaments to match your theme.
– Place them on a table as a centerpiece or on a mantel for a subtle, festive touch.
– For different looks, switch twine colors or use twine with a hint of metallic. White twine reads modern, while jute adds rustic charm.
– Safety note: let the glue cool before moving the vase, and handle glass gently.
Transform everyday vases into festive treasures! With just twine and a dash of creativity, you can create DIY home Christmas decor on a budget that adds warmth to your holiday gatherings.
6. Simple Twine-Wrapped Vases
Editor’s Choice

PerkHomy Natural Jute Twine 600 Feet Long Twine String for Crafts Gift W…

4 Pack Glass Cylinder Vases 4,6,8,10 Inch Tall Clear Flower Vase Hurrica…

Hot Glue Gun Kit with 30 Glue Sticks(130mm x 7mm), Fast Preheating Hot M…
7. Repurposed Holiday Signs

Want a warm, personal touch that doesn’t cost a lot? Repurposed holiday signs fit the bill. They add character, tell a story, and can be made in an afternoon.
What you’ll need
– Old wood scraps or leftover plywood, sandpaper, and a gentle saw if you trim boards
– Festive paint colors or chalk paint in white, red, green, or black
– Paint brushes, a small stencil or tape for lettering, and a pencil
– A clear sealant or outdoor varnish if you plan to place signs outside
– Jute twine, ribbon, or small sawtooth hangers for mounting
How to make them
1) Pick a piece of wood and rough-sand the edges so it feels smooth to the touch.
2) Choose a background color and paint a solid base.
3) Sketch or stencil a holiday phrase like “Merry & Bright,” “Joy,” or “Let It Snow.”
4) Apply the letters with a steady hand, or use a simple stencil for clean lines.
5) Lightly distress the edges with sandpaper for a rustic, lived-in look if you like.
6) Seal the surface with a clear coat to protect the art.
7) Attach a hanger or stake so you can display it on the wall, door, or front yard.
Placement ideas
– Hang signs on mantel shelves, entryways, or near the tree.
– Use smaller signs on front doors or porch railings to greet guests.
– For outdoors, choose weatherproof paint and a weather-resistant sealant so your sign lasts through winter storms.
These repurposed signs are quick to complete, inexpensive, and they bring a charming, handmade feel to your Christmas decor.
7. Repurposed Holiday Signs
Editor’s Choice

Klever Kits 4 DIY Wooden Race Cars-Build & Paint Your Own Wood Craft Kit…

FolkArt Home Decor Ultra Matte Chalk Finish Acrylic Craft Paint Set Form…

YEAJON 2 Inch Letter Stencils Symbol Numbers Craft Stencils, 42 Pcs Reus…
8. Handmade Advent Calendar

Looking for a warm, budget-friendly way to count down to Christmas? A handmade advent calendar adds charm and daily anticipation to your home. It’s a simple project that fits any space and invites you to get everyone involved.
What you’ll need
– Small containers or envelopes that come in different sizes
– Cloth pouches, jars, or tiny gift boxes
– Numbered tags or a printable sheet to mark the days
– Treats, tiny toys, or simple activity ideas for each day
– Ribbon, twine, or a sturdy string to create a display
– Decorative items like stickers, paint, washi tape, or markers
Steps to build
– Gather your containers and decide on a 1–24 (or 1–25) layout
– Number each container clearly with a pen or stickers
– Fill each pocket with a small treat or a fun activity
– Decorate the containers so they feel connected as a set
– Hang them on a wall, string them across a mantel, or place them on a table
Display ideas
– Create a wall calendar using clothespins and a ribbon
– Drape a string across the mantel and clip each day in a row
– Arrange the pouches on a decorative tray for a festive centerpiece
Tips for success
– Pick a simple color theme so the display looks cohesive
– Reuse containers from year to year to save money
– Mix edible treats with non-food activities to keep things balanced
– Plan a few days ahead to avoid last-minute scrambling
This project brings a personal touch to your holiday decor and builds anticipation for December days.
8. Handmade Advent Calendar
Editor’s Choice
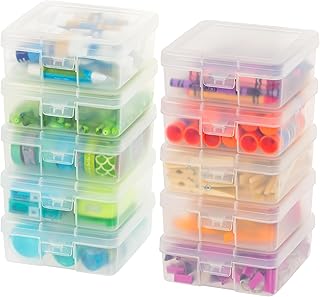
IRIS USA Pencil Case Plastic Pouch Box Storage Organizer for Beads, Pens…

yueton 50PCS 1-25 Wooden Numbers Ornaments, Unfinished Number Wood Piece…
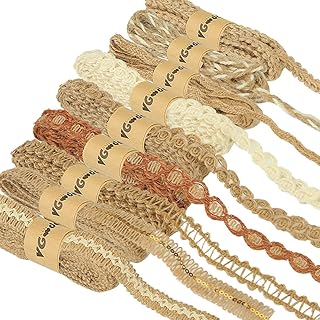
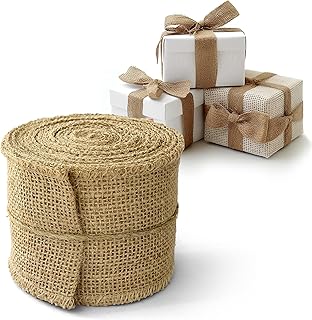
VGOODALL 9 Rolls Jute Ribbons Lace Craft Ribbon 18 Meters for Crafts Wra…
You might also like


9. DIY Garland with Christmas Cards

You want a festive look that won’t break the bank. This garland uses cards you already have and adds a personal touch to your space. You’ll see color, tiny pictures, and memories peeking through as you hang it.
The cards come in many sizes. Mix big and small shapes for texture. You can add tiny photos or gift tags for extra charm.
What you need
– Old Christmas cards
– Twine, string, or ribbon
– Scissors
– Optional: a hole punch or glue dots
Steps
1) Gather several cards from past years and pick colors that fit your decor.
2) Cut each card into a simple shape, like a star, tree, or circle. Keep sizes similar for neat spacing.
3) Punch a hole near the top of each shape, or make a small slit to thread through.
4) Thread the shapes onto the twine, leaving space between them so the garland feels airy.
5) Hang the garland on a mantle, around a doorway, or along a wall. Adjust the length to fit your space.
6) Enjoy the memory-filled display and switch in new cards each season.
Tips
– Pair white cards with red or green for a classic look.
– Add a year tag to memories you want to remember.
– If you worry about wear, laminate the shapes or coat with clear adhesive.
This simple project turns keepsakes into decor you can enjoy all season.
Transform your old Christmas cards into a stunning DIY garland! Not only does it add a personal touch to your home, but it’s a budget-friendly way to showcase cherished memories this festive season.
9. DIY Garland with Christmas Cards
Editor’s Choice
Vanhench 805FT Natural Jute Twine String, Bulk Hemp Jute Rope Cord Twine…
Fiskars All Purpose Scissors, High Performance Cutting, Stainless Steel …

Single Hole Punch 1/4” Paper Hole Puncher for Crafts, One Hole Puncher w…
10. Cinnamon Stick Bundles

You want a simple, budget-friendly way to add scent and charm to your Christmas home. Cinnamon stick bundles do that and look natural on any surface. They bring a warm spice aroma that makes rooms feel cozy. They’re quick to make and easy to reuse year after year.
What you’ll need
– Cinnamon sticks (12–18 per bundle for a fuller look)
– Lightweight twine
– Optional: dried orange slices, pine sprigs, or a small bell for extra color
Steps
– Gather cinnamon sticks and twine.
– Bundle sticks into a neat clump and tie tightly.
– Trim uneven ends for a tidy edge.
– Hang on the tree or place in decorative bowls.
Why this works
The cinnamon scent fills the air as soon as you set the bundle out. The aroma lingers longer with gentle air movement, giving your home a steady holiday feel.
Tips to boost the look
– Choose sticks of similar length for a clean line.
– Tie with a double knot to hold up well.
– Add a citrus slice or pine cone for contrast.
– Use natural twine for a fuller, rustic finish.
Placement ideas
– Drape several on a mini garland along a mantle.
– Set a trio in a glass bowl by the entry.
– Hang lightweight bundles on the tree as ornaments.
– Place on a coffee table or shelf to keep fragrance nearby.
These bundles are affordable, practical, and easy to refresh when you want a quick scent lift. Simply re-tie, swap a few sticks, or move them to a new spot to renew the mood.
10. Cinnamon Stick Bundles
Editor’s Choice

Spicy World Cinnamon Sticks 14 Oz Bag ~100 Sticks – Strong Aroma, Perfec…
PerkHomy Natural Jute Twine 600 Feet Long Twine String for Crafts Gift W…

11. Colorful Christmas Wreaths

Colorful wreaths on your door set the mood for the whole home. You don’t need to spend a lot to get a big splash of color. Start with a simple base. Use a wire frame, sturdy cardboard, or an old wreath you already have. Choose greenery that stays fresh for days. Gather inexpensive materials: ribbons, ornaments, pine sprigs, berries, and a few bows. Keep your color plan simple or bold—your choice.
Steps:
– Build a base: bend the wire frame or cut a circle of cardboard.
– Attach greenery to the base with hot glue or floral wire.
– Layer texture: tuck in real or faux greens, pinecones, berries, and small ornaments.
– Don’t overload—space the items so each piece shines.
– Add color: wrap ribbons around the frame, add a bold bow at the bottom, or scatter bright ornaments.
– Finish: seal the greens with a clear spray for weather protection.
– Hang with a sturdy hook and check for balance.
Tips:
– Match your door color, or go high-contrast with red and gold.
– Use lightweight accents for easy hanging.
– Reuse bits from last year to save money.
With a few cheap supplies, you get a warm look.
11. Colorful Christmas Wreaths
Editor’s Choice
Hot Glue Gun Kit with 30 Glue Sticks(130mm x 7mm), Fast Preheating Hot M…
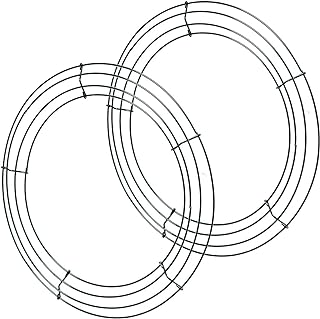
KBHOME 2 Pieces 14 inch Metal Wire Wreath Form Frame Dark Green Ring for…

Mod Podge Spray Acrylic Sealer that is Specifically Formulated to Seal C…
12. Glass Jar Luminaries

Want a warm, festive glow without breaking the bank? Glass jar luminaries are your answer. They’re simple to make, easy to customize, and great for indoors or porch lighting. You’ll get soft light that feels cozy and personal without spending hours on decor.
What you’ll need
– Empty glass jars (mason jars or any clear jar work)
– Paint, markers, or festive fabric and glue
– LED tea lights (battery-powered) or small candles if you’re careful
– Optional accents: ribbon, twine, burlap, pine sprigs, cinnamon sticks, tiny glitter
How to make them
1. Clean jars and let them dry.
2. Create designs with paint or wrap the jar with fabric. Keep patterns simple and bold.
3. Add illumination by placing an LED tea light inside. If you use a real candle, keep fabric away and never leave it unattended.
4. Finish with a ribbon, twine, or a touch of glitter for extra sparkle.
5. Arrange on a porch step, windowsill, table, or mantel. Group different sizes for a layered glow.
Tips for best results
– Mix several jar sizes to add depth.
– Choose warm-white LEDs for a cozy feel.
– Set luminaries on a tray or tray liner to protect surfaces.
– If using fabric, avoid placing it too close to the light source.
These jar luminaries cast a soft, inviting glow. They fit many decor styles and are easy to store after the holidays. You can keep them simple or add brighter colors for a playful look. Best of all, they’re safe and kid-friendly when you use LEDs.
12. Glass Jar Luminaries
Editor’s Choice

KOABY 12 Pack LED Tea Lights, Flickering Warm White Lights, Battery Oper…

12oz Glass Jars With Lids Regular Mouth 20 Pack -Mason Jars 12 oz For Cr…

Apple Barrel Essentials Acrylic Paint Set, 12, 24 Fl Oz (Pack of 1)
13. Holiday Table Runner

Holiday Table Runner on a Budget
You want a table that feels festive without spending a lot. A handmade table runner does the job. It brings color, texture, and a personal touch to Christmas meals and family gatherings.
– Choose your material: soft cotton, sturdy burlap, or even durable gift-wrap paper.
– Measure the space: run a line along the table, add a little overhang on each end, and keep the width comfortable for your place settings.
– Cut to size: use a straight edge for clean lines. Decide if you’ll sew a simple hem or skip the stitch with glue or double-sided tape.
– Decorate: add a border, ribbon trim, pom-poms, or stamped patterns for a unique look.
If you go paper, try bold colors, metallic pens, or festive tape. If you go fabric, keep a single color for easy matching, or layer two tones for depth.
Setting the table is easy: center the runner, leave space for placemats, and drape neatly. Clean fabric runners air dry and iron on low if needed.
Quick ideas to try:
– Plaid burlap for a rustic vibe
– White linen with red stitching
– Kraft paper with gold accents
This simple project gives your holiday table charm and a warm invitation for guests to linger.
Create a festive table runner with just a few materials and your personal touch! It’s a budget-friendly way to elevate your holiday meals and make family gatherings feel extra special.
13. Holiday Table Runner
Editor’s Choice

40″ x15 Feet Gardening Burlap Roll – Multipurpose Natural Burlap Fabric,…

Fabric Glue Permanent, 60 ML Washable Clear Clothing Glue, Super Fabric …

PerkHomy Brown Kraft Paper Roll 17.5″ x 1,200″ (100′) for Gift Wrapping …
14. Bottle Brush Trees

You want a festive look without breaking the bank. DIY bottle brush trees add whimsy and color with almost no mess. These bottle brush Christmas trees fit any shelf, mantel, or table and are easy to move as your decor shifts.
What you’ll need
– Bottle brush trees you can grab cheap at craft stores.
– Yarn or felt for DIY bases you can customize.
– Paint, glitter, and tiny ornaments for decorating options.
– Glue, scissors, and a small tray to anchor them securely.
– Optional: a touch of floral wire to help stand.
How to make them
1. Gather your bottle brushes, paint, and decorations.
2. Paint the branches in your chosen color.
3. Add glitter or tiny ornaments for extra charm.
4. Let every tree dry completely before you place them.
Decorating ideas
– Snowy tips: brush white paint on the ends.
– Metallic sparkle: add gold or silver glitter.
– Tiny add-ons: glue mini bells or beads.
– Themed palettes: match reds and greens or blush tones.
Placement and care
– Group them on a mantel, coffee table, or windowsill.
– Mix sizes to create a village feel.
– Store them flat in a box when not in use.
14. Bottle Brush Trees
Editor’s Choice

9Pcs Mini Christmas Trees Christmas Decor Artificial Christmas Decoratio…

Acrylic Paint Set, 24 Colors (2 oz/Bottle) with 12 Art Brushes, Art Supp…

LEOBRO Glitter, Fine Glitter for Resin, Set of 32 Colors, for Nail Body …
15. Painted Pinecones

Want a splash of color without spending a lot? Painted pinecones brighten your space and suit many styles. Natural shapes with bold hues bring holiday charm. It’s a quick weekend project.
What you’ll need
– Pinecones gathered outside
– Acrylic paints in your chosen colors
– Small brushes or sponges
– Clear sealant spray (optional)
– A tray for drying
How to do it
– Gather pinecones and lay them on a protective surface.
– Paint in light coats, either on the tips or the entire cone.
– Let each layer dry before the next.
– Add metallic accents, a soft ombré, or a sprinkle of glitter if you like.
– Finish with a clear sealant once dry to keep colors bright.
Ways to use painted pinecones
– Place them in a decorative bowl for a quick table accent.
– Thread ribbon to make tree ornaments.
– Mix with garlands or place-settings for cohesive detail.
Tips and ideas
– Choose colors that match your theme—reds and golds or blues and greens.
– Try two-tone or gradient effects for depth.
– Dry in a well-ventilated area to avoid smudges.
Why it works
– It’s inexpensive, easy, and fully customizable. You control the look and vibe.
15. Painted Pinecones
Editor’s Choice
Acrylic Paint Set, 24 Colors (2 oz/Bottle) with 12 Art Brushes, Art Supp…
Mod Podge Spray Acrylic Sealer that is Specifically Formulated to Seal C…

Mr. Pen- Artist Paint Brushes for Acrylic Painting, 10 pcs, Ergonomic Wo…
You Might Also Like


16. DIY Christmas Village

Want a warm, nostalgic Christmas village you can make without breaking the bank? You can build one from recycled materials and a little imagination. A simple village feels cozy on a mantel or table, especially when you glow with tiny lights.
This guide helps you turn cardboard, paper, and empty jars into tiny houses. No fancy kits are needed.
What you’ll need
– Find cardboard boxes, sturdy paper, or clean jars for your houses.
– Gather paint, glue, scissors, and a touch of glitter for snow.
– Use battery-powered fairy lights for a soft, twinkling glow.
– Optional: tiny trees, sticker windows, cotton for snow, and small figurines for scene.
Steps to build
1. Cut and shape the houses from boxes or thick paper.
2. Glue pieces together and let them dry, making each home solid.
3. Paint colors you like, add windows with white or contrasting color, and sprinkle glitter or faux snow.
4. Add doors, roofs, trees, and little details to bring character.
5. Drape the lights behind or around the village and test the glow before you place it.
Display tips
– Keep the village low, so the lights reach every corner.
– Place it on a mantel, shelf, or coffee table for best effect.
– Add a border of faux snow or evergreen garlands for depth.
This simple project brings nostalgia and warmth, and you can tweak colors or figures each year to keep it fresh. Enjoy the soft glow on quiet evenings.
16. DIY Christmas Village
Editor’s Choice

Brightown 12 Pack LED Fairy Lights Battery Operated String Lights – 7ft …
Apple Barrel Essentials Acrylic Paint Set, 12, 24 Fl Oz (Pack of 1)
Hot Glue Gun Kit with 30 Glue Sticks(130mm x 7mm), Fast Preheating Hot M…
17. String Light Jars

Want a cozy, budget-friendly glow for your home this Christmas? String light jars give you warm light and easy charm with almost no effort.
These jar lanterns are simple to make and fit any room. You can keep a classic clear look or try a splash of color for a playful vibe.
What you’ll need
– Glass jars (mason jars work great)
– LED string lights (battery-powered or plug-in)
– Optional: twine, ribbon, pine cones, or greenery
– A small tray or safe surface to set them on
How to make them
– Step 1: Wash the jars and dry them well.
– Step 2: Gently coil the lights inside the jar so the bulbs show but the string sits neatly.
– Step 3: Leave the end of the string outside the jar, or place the battery pack where you can reach it easily.
– Step 4: Decorate the outside with twine, ribbon, or a light touch of paint if you like.
Place and enjoy
These jars glow softly on tabletops, mantels, or shelves. Hanging them in a window creates a pretty glow you can see from outside. Grouping jars of different heights adds depth and warmth to any room.
Tips for best results
– Use warm white LEDs for a gentle, inviting feel.
– If you’ll use them outdoors, pick weatherproof lights and place on a sheltered porch.
– Mix a few jars with greens or pine needles for a festive touch.
17. String Light Jars
Editor’s Choice
Glass Regular Mouth Mason Jars, 16 oz Clear Glass Jars with Silver Metal…

Outdoor String LED Patio Lights – 100Ft 30M Outside Waterproof Light wit…
Vanhench 805FT Natural Jute Twine String, Bulk Hemp Jute Rope Cord Twine…
18. Felt Christmas Trees

Are you after cheerful, budget-friendly decor that’s simple to make? Felt Christmas trees fit the bill. They’re colorful and light. They’re easy to move from room to room. You can set them on a table. You can hang them on a wall. You can tuck them into gift ideas for a personal touch.
What you’ll need
– Felt sheets in several colors
– Scissors and fabric glue or a hot glue gun
– Thin ribbon or string for hanging
– Small beads, sequins, or stitched details (optional)
– A flat base such as cardboard or a tiny wooden slice (optional)
How to make them
1) Cut tree shapes from your felt in three or four sizes.
2) Layer the smaller trees on top of larger ones to build a mini forest.
3) Decorate as you like with beads or stitches.
4) Attach a small loop of ribbon at the top for hanging or simply prop the stack on a tray.
Ways to use
Use them as tabletop decor, as tiny ornaments on a garland, or as cute gift tags. You can even glue a tree to a card for a festive note.
Tips
Choose bold colors for a playful look or soft tones for a calm scene. Store flat in a box after the season. They’re easy for kids to help with too.
18. Felt Christmas Trees
Editor’s Choice
Thin Felt Fabric Sheets, Assorted Colors Stiff Felt Sheets for Crafts DI…
Hot Glue Gun Kit with 30 Glue Sticks(130mm x 7mm), Fast Preheating Hot M…

John Bead Sequins and Beads Kit APX 81g Mix 10 Types, Purple Palette
19. Holiday Scented Sachets

Want a warm, festive scent around your home without spending a lot? DIY holiday scented sachets let you add charming aromas with everyday kitchen staples. They work in closets, drawers, or on shelves, and you can swap in different spices to match the season.
What you’ll need
– Small cloth bags (cotton or muslin)
– Dried cinnamon sticks, whole cloves, orange peels, and star anise
– Optional extras: dried lavender, rosemary, lemon zest
– Twine or ribbon to tie the bags shut
– A small scoop or spoon
How to make them
– Pick a scent blend you love and mix it in a bowl.
– Fill each bag with a pinch of the blend until it’s comfortable to the touch.
– Tie the top securely with twine and trim the ends.
– Place sachets in closets, drawers, or on shelves where you want a gentle fragrance.
Tips for stronger scent
– Use a few sachets in one area for a noticeable boost.
– Refresh the scent by adding a pinch of the blend to a bag every week or two.
– Store extras in a cool, dry spot so they’re ready to deploy when the mood strikes.
These sachets are a budget-friendly way to bring a soft, natural fragrance into your home. They’re simple to customize, safe for most spaces, and you can rework the mix each year to keep the scent fresh and seasonal.
19. Holiday Scented Sachets
Editor’s Choice
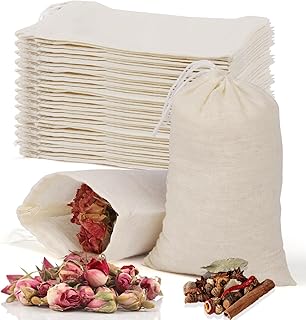
60 Pcs Empty Spice Bags for Cooking Soup, 3×4 In Natural Muslin Drawstri…

Selefina Spices: Mulling Spice Mix – Fresh Ingredients and Full of Flavo…
Vanhench 805FT Natural Jute Twine String, Bulk Hemp Jute Rope Cord Twine…
20. Festive Holiday Pillows

You want a cozy holiday vibe without spending a lot. DIY festive pillows give that look fast and with a personal touch. They brighten your living room with color, texture, and a sense of home.
– Pick your base: Use plain pillows or sturdy fabric in colors that match your space. If your couch already shows red, white, or green, you’re on the right track.
– Choose a design: Go for simple shapes like snowflakes, trees, stars, or cheerful letters. Lightly sketch the design on the fabric first to guide your work.
– Apply the decor: Paint with fabric paints, use stencils, or sew on a felt shape. If you paint, use a thin brush and let it dry.
– Keep it simple: Limit your palette to two colors so the look stays calm. That helps your room feel tied together.
– Make it washable: Sew removable pillow covers, not extra stuffing. Add an envelope closure or a hidden zipper for easy cleaning.
– Set the look: Place pillows in pairs on the sofa and chairs. Mix textures like knit, velvet, and cotton for depth and coziness.
– Care tips: Spot clean small marks or machine wash gentle if removable. Store seasonal covers with your decor.
With a little effort, you’ll have a warm, welcoming holiday room.
Transform your living space with DIY festive pillows! A splash of color and personal touch can create a cozy holiday vibe without breaking the bank. Let your creativity shine this Christmas!
20. Festive Holiday Pillows
Editor’s Choice
Shuttle Art Fabric Paint, 18 Colors Permanent Soft Fabric Paint in Bottl…

Juvale Canvas Covers for Throw Pillows – 17 x 17 in, Cream, Pack of 4, C…
Coquimbo Sewing Kit Gifts for Mom Grandma Women Men Adults Kids Teen Beg…
Conclusion

Decorating for the holidays doesn’t have to be expensive or time-consuming! With these 20 DIY home Christmas decor ideas, you can create a warm and inviting atmosphere that reflects your style and creativity. Embrace the spirit of the season by crafting decorations that tell your holiday story and bring joy to your home.
Don’t hesitate to try out these projects and personalize them to your liking. Happy decorating!
Note: We aim to provide accurate product links, but some may occasionally expire or become unavailable. If this happens, please search directly on Amazon for the product or a suitable alternative.
This post contains Amazon affiliate links, meaning I may earn a small commission if you purchase through my links, at no extra cost to you.
Frequently Asked Questions
What are some easy DIY home Christmas decor ideas that won’t break the bank?
Looking for budget-friendly options? You can create charming decorations like rustic mason jar centerpieces, festive paper snowflakes, or even upcycled sweater stockings. These ideas are simple and use materials you might already have at home, allowing you to celebrate the holidays stylishly without overspending!
How can I make my DIY Christmas decorations more personal?
Adding a personal touch is easy! Consider making handmade ornaments with family or friends, or create a DIY Christmas village from recycled materials. These projects not only reflect your style but also create lasting memories, making your home feel even more special this holiday season.
What materials do I need for budget-friendly holiday decorations?
You’ll be surprised how many everyday items can be transformed into beautiful decor! Gather pinecones, twine, paper, and even old clothing for upcycling. Many of the DIY projects listed in the article use natural elements or common craft supplies, making them both affordable and accessible for everyone.
How long do these DIY Christmas projects typically take to complete?
Most of the projects in the article are designed to be quick and easy, often taking less than a couple of hours. For example, paper snowflakes can be made in 30 minutes, while a handmade advent calendar might take an hour or so. This means you can enjoy the fun of decorating without a significant time commitment!
Can I involve my kids in making DIY holiday decorations?
Absolutely! Many of the DIY home Christmas decor ideas are perfect for kids. Projects like making paper snowflakes or painting pinecones can be a fun family activity. Not only will it keep them engaged, but it also allows for precious moments of creativity and bonding during the holiday season!
Related Topics
DIY home christmas decor
budget-friendly decor
holiday decorations
easy crafts
rustic style
upcycled decor
cozy christmas
simple projects
festive DIY
crafting on a budget
beginner friendly
seasonal decor
Leave a Reply to Nam Lang Cancel reply