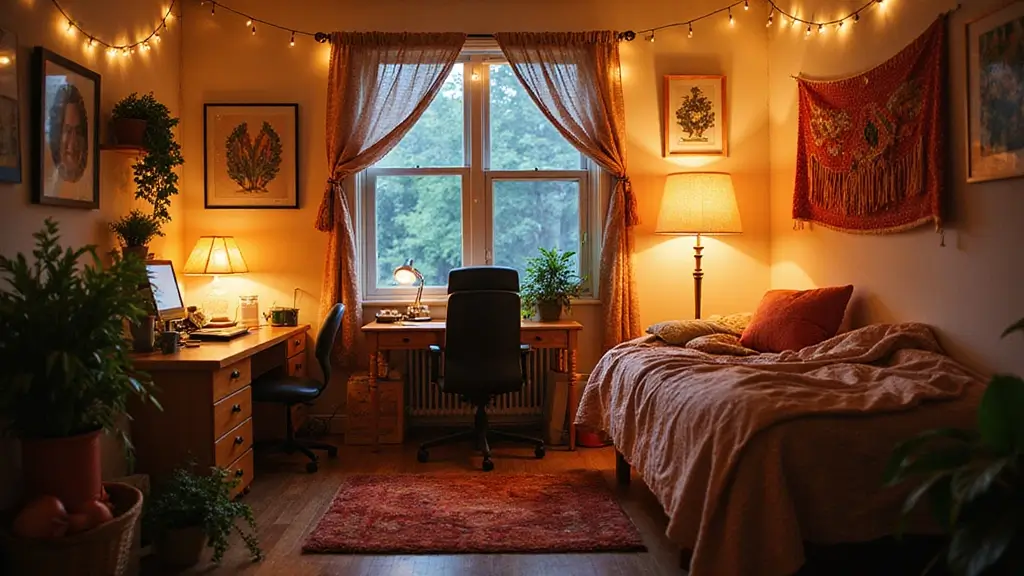
I put this together because teens deserve a space that grows with them. A room that feels lived-in and lively can lift mood and spark creativity. You deserve something affordable you can redo when your taste shifts. In this post, I share practical DIY room decor ideas that are simple, budget-friendly, and doable in a weekend.
This is for you if you’re a teen who wants a room that shows your taste—music, art, gaming, and study vibes. If you rent or share a room, you know spaces can feel small. You care about color, texture, and tiny upgrades you can do yourself. These ideas are made to be doable for beginners and friendly on a tight budget.
You’ll get 25 DIY ideas that cover walls, lighting, fabric, storage, and personal touches. Many ideas can be finished in a weekend. I explain what you need, how to do it, and the feeling each project creates. And yes, #13 really stands out with a wow factor you can copy.
We focus on easy tools and common materials you can grab at a craft store or around the house: tape, paint, fabric scraps, string lights, washi tape. You’ll learn how to pick a theme and tailor it to a small room. The goal is a space that looks put together and still feels like you. I include practical tips on measuring, planning, and keeping the project tidy.
Not every idea fits every room. Some projects may require permission for dorm walls or shared spaces. Be honest about limits and safety. If a project isn’t your vibe, you can tweak it to a lighter version.
Start with one idea this weekend and see how it shifts your mood. Take a photo of your before and after, tweak colors, and note what worked. This post is about getting started, staying flexible, and building a space that grows with you. If you want more inspiration, come back for new ideas and tips.
Contents
- 1. Gallery Wall of Memories
- 2. DIY Dream Catcher
- 3. Upcycled Mason Jar Lanterns
- 4. Personalized String Art
- 5. Fabric Wall Hangings
- 6. Painted Flower Pots
- 7. DIY Tapestry
- 8. Repurposed Furniture
- 9. Wall-Mounted Bookshelf
- 10. Upcycled Denim Projects
- 11. Cozy Reading Nook
- 12. DIY Cork Board Wall
- 13. Neon Light Sign
- 14. Custom Pillow Covers
- 15. DIY Bulletin Board
- 16. Fun Floor Cushions
- 17. Woven Wall Basket
- 18. Stylish Storage Jars
- 19. Painted Window Frames
- 20. DIY Scented Candles
- 21. Colorful Wall Decals
- 22. DIY Mood Board
- 23. Personalized Doormat
- 24. Bohemian Macramé Hangings
- 25. DIY Photo Clip String
1. Gallery Wall of Memories

You want a room that feels like you, not like everyone else.
A gallery wall of memories can do that fast and give your room instant personality.
– Gather photos, postcards, and small art you love.
– Use a mix of frame styles for an eclectic vibe.
– Hang lightweight pieces with washi tape or small clips.
Decide on a color theme or keep the frames bold for contrast.
Lay the pieces on the floor to test the layout before touching the wall.
Mix sizes and shapes to keep the wall lively.
If some frames are empty, paint them bright colors for a pop.
Drape fairy lights around the edges to add a cozy glow.
When you’re ready to hang, start at eye level and work outward.
Secure lightweight items and avoid heavy frames without anchors.
Use a simple grid or a free form drift to match your space.
Take a photo of your layout to remember the plan.
Rotate quick picks every few months to keep the wall fresh.
Add one bold, eye-catching piece like a poster to anchor the wall.
If you share the room, let each person pick one piece to reflect them.
1. Gallery Wall of Memories
Editor’s Choice

LUCKYLIFE Picture Frames Collage Wall Decor 10-Pack, Gallery Wall Frame …

Washi Tape Set 30 Rolls, Decorative Tape, Colored Tape, Scrapbook Tape, …
20 Pack Fairy Lights Battery Operated, 3.3ft 20 LED Mini String Lights T…
2. DIY Dream Catcher

Want a teen room decor piece that fits your space and vibe? A DIY dream catcher does more than look cool. It adds calm and a splash of color to your room.
Materials
– Hoop: wooden or metal, about 6–10 inches in diameter
– String, yarn, or embroidery floss in colors you love
– Feathers and beads for a personal touch
– Scissors and a glue option for extra hold
– A hanging cord or ribbon to finish
Steps
1) Wrap the hoop with string until the ring looks neat and even.
2) Make anchor points around the ring, then weave a simple web toward the center.
3) Add a few short hanging cords with beads for color and texture.
4) Tie on feathers at the ends of the cords; add a tiny bead or charm if you like.
5) Attach a hanging cord at the top and place the dream catcher where you’ll see it each day.
Why It’s Great
– Fully customizable: pick colors that match your wall, bedspread, or lamp.
– Easy to adjust: swap colors or add new charms whenever you want a fresh vibe.
– Visual focal point: hang it above your bed or desk to draw the eye.
– Calming touch: soft movement and natural textures create a cozy mood.
Try a few quick tweaks: glow-in-the-dark beads for late-night vibes, metallic thread for glow, or smaller versions as mini accents.
A DIY dream catcher is more than just decor; it’s a piece of art that brings peace and color to your space. Transform your room and let your creativity soar!
2. DIY Dream Catcher
Editor’s Choice

Worown 6 Pack 10 Inch Wooden Bamboo Floral Hoops Wreath Rings for Making…

LIHAO 12 Skeins Mini Yarn for Knitting Crochet Craft – 100% Acrylic

Hair Feathers in Rainbow Tie Dye Bright Colors, 20 Long Feathers with be…
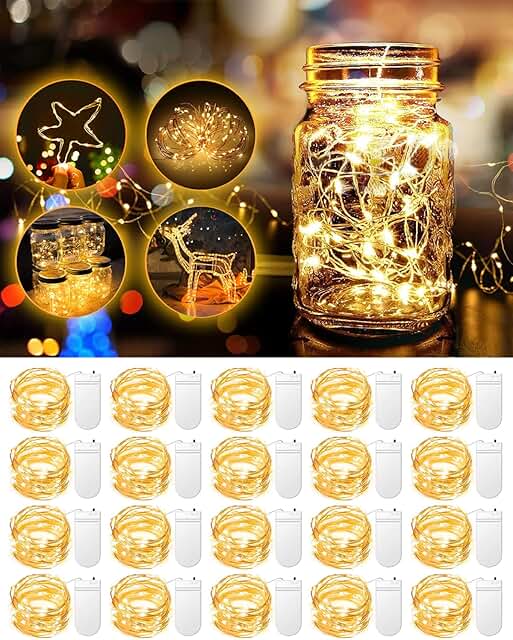
3. Upcycled Mason Jar Lanterns

You want room lighting that feels cozy and affordable. Upcycled mason jar lanterns give you both. They’re easy to make and you can change them with your mood. With a few jars, some lights, and your favorite colors, you’ll style any spot in your room.
– Supplies you’ll need: clean mason jars (any size), battery-operated fairy lights or small LED candles, acrylic or chalk paints, brushes or foam sponges, twine or ribbon, and optional touches like washi tape or decals.
How to make them in simple steps:
– Step 1: Prep the jars. Wash them well and dry completely so the paint sticks.
– Step 2: Paint with care. Use your chosen colors or designs. Let each coat dry before adding more.
– Step 3: Add the glow. Coil string lights inside the jar or place a small LED candle at the bottom for a steady shine.
– Step 4: Go rustic or sleek. Wrap twine around the neck or body of the jar for texture, or keep it clean with a single color.
– Step 5: Personalize. Add decals, bold markers, or a splash of glitter to make each lantern unique.
Where to place them for the most impact:
– Line a row on your desk for late-night study with soft focus light.
– Hang them from a string near your bed for gentle bedside glow.
– Scatter a few on shelves or a window sill to create a warm room vibe.
Tips to keep them practical:
– Use long-lasting LED lights to save batteries.
– Clean the jars occasionally so the paint stays bright.
– Change colors or add seasonal decorations to refresh the look quickly.
3. Upcycled Mason Jar Lanterns
Editor’s Choice

Glass Regular Mouth Mason Jars, 16 oz Clear Glass Jars with Silver Metal…

Brightown 12 Pack LED Fairy Lights Battery Operated String Lights – 7ft …

Acrylic Paint Set, 24 Colors (2 oz/Bottle) with 12 Art Brushes, Art Supp…
4. Personalized String Art

You want a personal touch for your room that’s easy on the budget. Personalized string art fits teens’ spaces because it’s creative and calming to make. Pick a word or shape that truly means something to you. It could be your name, a favorite phrase, or a simple heart.
What you’ll need
– A wooden board, about 12×12 inches (or larger for a bolder look)
– Small nails and a hammer
– Colorful yarn or string (try 2–3 colors for a cool gradient)
– A pencil and a ruler for layout
How to build it
1) Lightly trace your shape on the board with a pencil, so you have a clear guide.
2) Hammer nails along the outline, about 1 cm apart, keeping them steady and evenly spaced.
3) Tie a starting piece of yarn to a nail, then wrap around neighboring nails to outline the shape.
4) Switch colors or layer yarn to create a gradient or a solid look, depending on your style.
5) When the wrap is tight, finish with a small knot and trim the ends. Hang using a simple string or a picture hanger.
Tips to level up
– Keep nails at the same height so your lines stay straight.
– Practice on a scrap board first to test spacing.
– Leave some negative space for a modern feel.
– Seal the board with a clear spray if you want it to last longer.
Placement ideas
Hang above your bed, beside your desk, or in a cozy reading nook. It’s a statement piece that still feels handmade and personal.
Create your own masterpiece with personalized string art—it’s not just decor, it’s a reflection of you! A few nails, some colorful yarn, and a meaningful word can transform your space into a sanctuary of self-expression.
4. Personalized String Art
Editor’s Choice

Balsa Wood Sheet, 5 Pack Plywood Sheets, Basswood Sheets 12X12X1/16 Inch…
LIHAO 12 Skeins Mini Yarn for Knitting Crochet Craft – 100% Acrylic

Picture Hanging Kit, cSeao 415 Pieces Hardware Nail Assortment Kit & 8oz…
5. Fabric Wall Hangings

Want to make your room feel warmer with little effort? Fabric wall hangings do that fast. They add texture and a soft, cozy vibe.
Choose fabrics that match your color palette. Cotton, linen, or soft blends work well. Think about texture too—flat, fuzzy, or drapey materials catch the light differently.
Two easy DIY options get you started.
– Cut fabric into strips about 6 to 8 inches long.
– Tie the strips onto a wooden dowel to create a fringe.
– Space the pieces evenly and trim for a neat edge.
– For a woven look, thread thin strips onto a small loom or cardboard frame.
– Weave over and under to form a simple pattern.
– Secure the ends and hang from a dowel.
Best hang spots include above the bed, at your desk, or in a reading nook.
Switch with the seasons to keep your room lively. Stock fabric scraps so you can swap pieces in a few minutes. A small change makes a big difference.
Care for these textiles by giving dust a gentle shake. If needed, spot clean with a damp cloth and air dry.
Fabric wall hangings are affordable, quick to update, and totally you. Mix textures and colors to create a space that feels like your own.
5. Fabric Wall Hangings
Editor’s Choice

HOPELF 25PCS Wooden Dowel Rods – 1/4 x 12 Inch Bamboo Sticks – for Craft…

150Pcs 4″ x 4″ (10cm x 10cm) Cotton Craft Fabric Bundle Squares,Squares …

Juexica 7 Pcs Weaving Loom Kit Small Weaving Loom for Beginners Wooden D…
6. Painted Flower Pots

Want to brighten your room fast? Painted flower pots add color and character without costing a lot.
Terracotta pots work great for DIY plant pots. They’re cheap, sturdy, and easy to customize with simple designs.
Materials
– Terracotta pots
– Acrylic paints or paint markers
– Mod Podge or decoupage paper (optional)
– Clear sealant (spray or brush-on)
– Paint brushes, sponges, scissors
– Paper towels and water for cleanup
Steps
1) Clean the pots with warm, soapy water and dry them completely.
2) Start with a base color if you want a solid look. Let it dry.
3) Add your design. Try stripes, polka dots, or a tiny scene using bold or pastel colors.
4) Use markers for fine details or add decoupage pieces for a collage effect. Press gently so the edges stay flat.
5) Seal the finished pots with a clear spray or brush-on sealer. Let them cure in a well-ventilated area.
6) Fill with real plants, herbs, or faux greens. Set them on a shelf, windowsill, or desk for an instant upgrade.
Tips
– If you use real plants, choose pots with drainage or place liners inside to avoid leaks.
– Protect your work surface with newspaper or old cloth.
– Match pot colors to your room’s vibe—soft pastels for calm, bright hues for punch.
6. Painted Flower Pots
Editor’s Choice

4 Inch Terracotta Pot with Saucer – 6 Pack Small Clay Plant Pots with Dr…
Acrylic Paint Set, 24 Colors (2 oz/Bottle) with 12 Art Brushes, Art Supp…

Mod Podge Spray Acrylic Sealer that is Specifically Formulated to Seal C…
7. DIY Tapestry

– Stuck with plain walls?
– A DIY tapestry creates a strong focal point with little work.
– Choose a large piece of fabric, burlap, or an old bedsheet.
– Pick a color that fits your room.
– Add a design with fabric paint, tie-dye, or stencils.
– Finish the edges so the fabric won’t fray.
– Hang it on a wall with a wooden dowel and string.
– Or clip it to the wall for an easy, swap-friendly look.
– Tapestries are cheap, light, and they can muffle room noise a bit.
– They’re easy to swap when you want a new vibe for the season.
– Boho, vintage, and modern styles all work with tapestries.
– Try earthy tones for a calm space, bold jewel tones for a pop, or a simple black-and-white for a modern feel.
– Care tips: dust gently, hand wash if needed, and let it air dry.
– Pair your tapestry with string lights or a few plants to make a cozy corner.
– Ready-made or DIY, tapestries blend texture with color and can change your room fast.
– For a bigger impact, go oversized or add a fringe.
– Layer two textiles for depth if you want more texture.
– Give it a quick shake before hanging to smooth out creases and set the look.
7. DIY Tapestry
Editor’s Choice

Shuttle Art Fabric Paint, 18 Colors Permanent Soft Fabric Paint in Bottl…

50Pcs Wooden Dowel Rods 1/4 x 12 Inch Wood Sticks for Crafts, Precut Woo…

JMEXSUSS 100 LED Connectable Globe String Lights Indoor Bedroom, 33ft Wa…
8. Repurposed Furniture

Want a room that feels fresh without spending a lot? Repurposed furniture makes it possible. It gives your space character and cuts waste at the same time.
– Turn a tired nightstand into your art station. Sand lightly, repaint in a bright color, and install new knobs. A small change with big impact.
– Transform an old desk into a chic vanity. Add a mirror, a slim tray for brushes, and new pulls. Clean lines and soft tones look grown-up and tidy.
– Give a dresser a glow-up. Sand, choose a bold shade, and seal it. Try a simple decoupage pattern on the top for a personal touch.
– Add wheels to a bookshelf for a mobile storage unit. Casters let you roll it to a corner for crafts or to vacuum around the bed.
– Build a mini wall library from donated shelves. Paint them the same color, hang neatly, and brace them for plants, books, and keepsakes.
Why it helps It saves money and reduces waste. You’ll see a fresh look fast and feel proud of your handmade vibe.
Pro tips Start with one piece and plan colors before you begin. Prep clean surfaces, use primer when needed, and seal with a clear topcoat. Choose easy-to-clean finishes for teen use.
8. Repurposed Furniture
Editor’s Choice

Rust-Oleum Linen White Chalked All-in-One Ultra Matte Paint | One Coat C…

Romeda 18 Piece Drawer Hardware – Black 30mm Cabinet Knobs & Pulls for D…

1.5 Inch Furniture Caster Wheels, Plastic Casters Set of 4, Plate Swivel…
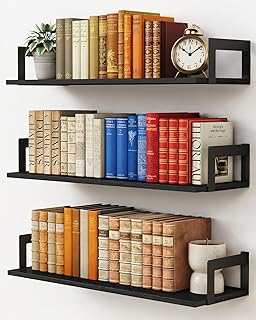
9. Wall-Mounted Bookshelf

Want more floor space and a cool focal point in your room? A wall-mounted bookshelf does both. You can build a slim shelf with wood and brackets, or repurpose crates for a laid-back vibe. You get room to display books, plants, and small keepsakes.
Here’s how to get it done.
1) Choose a style you love, like a slim wood shelf with metal brackets or stacked crates for a cozy vibe.
2) Gather supplies that you will use: sturdy wood boards or crates, brackets or floating hardware, screws, wall anchors, and paint or stain.
3) Decide the height and length you want, then lightly mark the wall so everything lines up.
4) Find wall studs with a stud finder or by tapping for solid spots, so the shelf stays sturdy.
5) Drill pilot holes, screw the brackets into the studs, and double-check that each one is level.
6) Lay the board on the brackets and secure it, or bolt crates firmly to the brackets.
7) Paint or stain to match your theme, then place books, small plants, photos, and keepsakes.
Why It’s Useful: This setup saves floor space and keeps your favorite items within easy reach. It also makes swapping in seasonal decor quick and simple.
Safety note: don’t overload the shelf, and anchor into studs to stay safe.
Elevate your teen room decor with a wall-mounted bookshelf! It’s the perfect blend of style and functionality, giving you more floor space and a personalized touch for your favorite books and treasures.
9. Wall-Mounted Bookshelf
Editor’s Choice
24 Inch Floating Shelves for Wall Set of 3, Wall Mounted Bookshelf, 8 In…

Franklin Sensors ProSensor M210 Stud Finder with 13-Sensors, Wood & Meta…
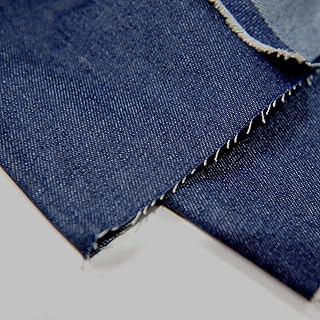
10. Upcycled Denim Projects

Want a fresh teen room without spending much? Upcycled denim is perfect. It’s budget-friendly, eco-friendly, and adds a personal touch to your space. Use your old jeans to make decor you’ll actually use.
– Denim Pillow Covers
Turn old jeans into soft pillow covers. Wash them first so they shrink evenly. Cut a square about 18 by 18 inches from a jean leg. Sew a back panel to create an easy envelope closure. Insert a pillow form and stitch the final seam. Mix shades or add patches for a bold, one-of-a-kind look.
– Denim Rug or Mat
Slice denim into long strips. Braiding or weaving makes a sturdy, chunky texture. Whipstitch the strips into a rug or mat. Back the piece with a sturdy fabric so it lies flat. Place it by your desk for color and character.
– Denim Pocket Organizer
Save pockets from jeans that still look good. Cut pockets clean and prepare a backing board. Sew pockets in place to create a desk or wall organizer. Label sections with clear tags so you find things fast. Mount the organizer with lightweight nails or strong adhesive.
– Denim Tote Bag
Cut two denim panels for the bag body. Sew the panels together along the sides. Attach sturdy handles from long jean strips or belt pieces. Line the bag with lightweight fabric for extra strength. Add a small inner pocket or patch for a personal touch.
10. Upcycled Denim Projects
Editor’s Choice

Brother XM2701 Sewing Machine, Lightweight, Full Featured, 27 Stitches, …

Fabric Scissors Professional, 8″ Heavy Duty Sewing Scissor for Fabric Cu…
Denim 9 OZ.Indigo Washed of Deep Col 100% Cotton Fabric 62′ ‘ Wide by Th…
You might also like

11. Cozy Reading Nook

If you want a calm spot to read in your room, build a cozy reading nook. It should feel simple, inviting, and easy to use.
– Pick a comfy seat: a soft chair or a large floor cushion works. Sit for a bit to test comfort. Place it in a quiet corner with good light.
– Add a small side table: enough space for your book, a drink, and a timer if you use your phone for reminders.
– Layer in warmth: drape a throw blanket over the chair. String fairy lights or use a warm lamp to create a soft glow.
– Bring in storage: a small bookshelf, crate, or wall shelf for your favorite reads. Keep a few go-to books within arm’s reach.
– Personalize the wall: hang a tapestry, poster, or artwork that matches your vibe. Choose colors and patterns you love.
Why it matters: a reading nook is your own quiet retreat after a busy day. It invites you to unwind, focus, and drift into stories.
Practical tip: keep a bookmark stash and a notebook for quick notes about books you want to revisit. If space changes, you can move the nook to another spot in your room.
11. Cozy Reading Nook
Editor’s Choice
Intelligent Design Azza Large Cushion/Pouf, 24″ W x 24″ L x 5″ H, Square…

HOOBRO End Table, Small Side Table, Nightstand with 2-Layer Storage Shel…
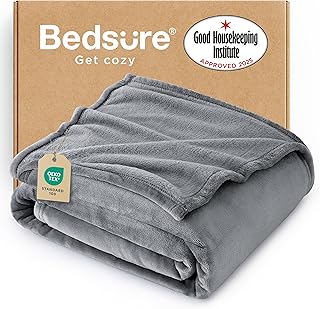
Bedsure GentleSoft Fleece Throw Blanket for Couch Grey – Lightweight Plu…
12. DIY Cork Board Wall

You want a space that holds ideas, reminders, and art without feeling crowded. A DIY cork board wall helps you see what matters and keeps your room tidy. It’s easy to change as your style shifts. And it looks cool in photos too.
– Pick the spot: Choose a section of wall that’s easy to reach and visible. A central place makes it perfect for daily notes and art.
– Plan the layout: Decide how big the cork board wall will be. Lay out the tiles on the floor first to get a feel for the look.
– Gather supplies: You’ll need cork tiles, strong adhesive strips or mounting pins, a level, a ruler, and options for borders like paint or washi tape.
– Install the cork tiles: Clean the wall first. Press each tile firmly into place with steady hands. Use a level to keep rows straight.
– decorate the borders: Add color with a paint edge or wrap the edges with washi tape. This frame makes the cork wall feel finished.
– Fill with what matters: Use push pins to hold photos, notes, and artwork. Group items by color or theme to make it easy to spot.
– Keep it fresh: Create a rotating display. Swap items every week or two so the wall shows your current mood.
– Pro tips: Use color-coded pins for different subjects, like school reminders, quotes, or doodles. Add a small tray for tiny keepsakes.
With a cork board wall, you gain a practical, stylish hub for ideas. It’s simple to update, easy to customize, and a real mood booster for your room.
12. DIY Cork Board Wall
Editor’s Choice

Quartet Cork Tiles, Bulletin Board Cork Panels 12″ x 12″ x 3/16″, Natura…

Scotch Extreme Mounting Strips, Double-Sided Heavy Duty Tape, 8 Strips, …
Washi Tape Set 30 Rolls, Decorative Tape, Colored Tape, Scrapbook Tape, …
13. Neon Light Sign

You want a bold look in your room without a big price tag. A neon light sign can give you a bright glow and real personality. You can buy ready-made signs or make your own with LED neon flex tubes.
Choose a word or symbol that fits your vibe, like “Dream” or a fun shape. The font matters because you want it to read clearly from across the room. Size helps too—a big sign above your bed draws attention, while a smaller piece near your desk adds character without clutter.
Placement and power A sign works best when it’s easy to see. Hang it above your bed or on a blank wall near your desk. Use lightweight brackets or strong command strips to keep it steady. Go with USB power or a slim wall plug so cords stay tidy. Some signs offer battery power, but they’re rarer and shorter-lived.
Quick setup checklist
– Measure the space you want to fill.
– Pick a neon design that matches your style.
– Mount with brackets or adhesive strips.
– Plug in and test brightness.
For safety and care, keep the sign away from water and heat sources. Wipe it with a soft cloth if dust gathers on the tube. A neon sign is durable and low maintenance, so it stays cool and easy to live with.
13. Neon Light Sign
Editor’s Choice

Feit Electric 360° Chasing Neon Flex Rope Light, 5ft LED Tube Light, Dim…

Custom Neon Sign, Custom LED Neon Sign Customizable for Wedding Bar Salo…

Command 15 lb & 10 lb Large and Medium Picture Hanging Strips 28 Assorte…
14. Custom Pillow Covers

Want a room update that costs little? Custom pillow covers can change the vibe fast.
You can make them with plain pillowcases and simple craft supplies.
What you’ll need
– Choose plain cotton pillow covers in colors you like.
– Gather fabric paints and markers for bright, lasting colors.
– Grab stencils or masking tape for clean lines.
– Get a tie-dye kit or fabric dye for bold patterns.
– Slip a sheet of cardboard inside each cover to keep colors from bleeding.
Design ideas
– Add your initials or name in a bold font.
– Write a favorite quote in simple letters.
– Draw small doodles like stars or leaves.
– Create patterns with stripes or chevrons.
Step-by-step
– Start with clean, dry pillow covers.
– Place cardboard inside to prevent color bleed.
– Lightly plan your design with pencil or stencil.
– Apply paint in thin layers, letting each dry.
– Heat-set the design per the paint’s instructions.
– Let it cure, then wash gently.
Care tips
– Let the design dry completely before use.
– Hand-wash or use a gentle cycle.
– Iron on low heat from the back if needed.
– Rotate covers to keep colors fresh.
14. Custom Pillow Covers
Editor’s Choice

Encasa XO Throw Pillow Covers 18×18 in Set of 2 Natural | No Inserts | C…
Shuttle Art Fabric Paint, 18 Colors Permanent Soft Fabric Paint in Bottl…

Tulip One-Step 5 Color Tie-Dye Kits Ultimate, 1.5oz
15. DIY Bulletin Board

Want a simple way to keep notes, schedules, and art in one place? A DIY bulletin board fits the bill. It mixes function with your style and stays within reach from your desk.
– Pick a corkboard or a fabric-covered board.
– Each type has its perks.
– Cork is easy for paper, but pins can leave tiny marks.
– If you want a clean, polished look, wrap a corkboard in bold fabric.
First, measure your space and pick a size.
Cut fabric with a little extra for edges.
Lay the fabric on the board, pull tight, and staple the edges in back.
Or remove old cork and wrap your board with the fabric, then trim the edges.
Mount the board on a wall with sturdy screws.
What to use?
Choosing pins and clips is your chance to add color.
Keep a few colors for tasks, art, and reminders.
Add washi tape or small clips to hold loose papers.
Hang it above your desk or in a reading nook for easy access.
Why it’s useful: It helps you track tasks, show off ideas, and change things up as your interests shift.
– Use different pin colors to separate tasks, art, and reminders.
– Label sections with sticky notes for quick scans.
– Rotate content weekly to keep it fresh.
– Keep it within arm’s reach so you can update it without getting up.
15. DIY Bulletin Board
Editor’s Choice

U Brands Cork Bulletin Board, 18″ x 24″ Inches, Light Birch Wood Frame (…

Bulletin Board Fabric 48 ” x 107 ” Class Fabric for Classroom Bulletin…

12 Colors 150 Pcs Push Pins, Standard Thumb Tacks Steel Point and Plasti…
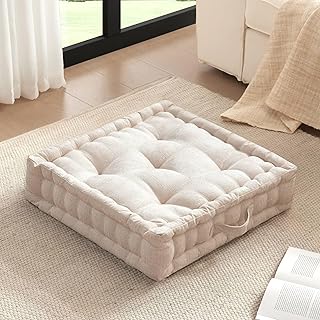
16. Fun Floor Cushions

Want a comfy, flexible hangout spot without spending a lot? Floor cushions are your best move. They’re soft, easy to move, and they add color to your room.
Style ideas
– Choose shapes you love, like stars, hearts, or circles.
– Mix bold colors with softer tones for balance.
– Add a contrasting trim or piping to give a pop.
Materials
– Gather cotton, canvas, or soft fleece in colors you want.
– Pick filling such as polyester fiberfill or inexpensive old pillows.
– Get thread, a needle, and scissors for quick sewing.
– Consider a zipper or Velcro for a removable cover.
– Have a ruler or measuring tape to size your cushions.
– Optional: a sewing machine to speed things up.
DIY steps
1) Cut two fabric pieces in your chosen shape and size.
2) Sew the edges, leaving a small opening for stuffing.
3) Turn the cushion right side out.
4) Stuff with filling until it feels plump.
5) Sew the opening closed, or add a zipper for easy removal.
6) Slip a removable cover over the cushion for easy washing.
Smart layouts
– Place cushions around a low coffee table to create a cozy hangout.
– Use cushions of different sizes to add depth and interest.
– Store extra cushions in a basket or under the bed to keep the floor tidy.
Care tips
– Remove and wash removable covers every few weeks.
– Spot clean spills and check seams for wear.
You now have a soft, flexible lounge that can adapt as your room changes. This setup makes movie nights, chats with friends, and quiet reading feel extra comfy.
16. Fun Floor Cushions
Editor’s Choice

HIGOGOGO Washable Floor Pillow Cushion for Adults, Meditation Cushion Pi…
Brother XM2701 Sewing Machine, Lightweight, Full Featured, 27 Stitches, …

AK TRADING CO. 27 inch Premium Cotton Upholstery Batting Made in USA (1 …
17. Woven Wall Basket

You want walls that pop without a huge project. Woven wall baskets add depth and texture that grab attention right away. They work as art, storage, or a little of both, so your space feels intentional.
– Gather 4–6 baskets in different sizes to create variety.
– Choose natural materials like wicker, rattan, or cotton rope for texture that catches light.
– Paint or stain a few of them in two or three colors that match your room’s palette.
– Plan a layout on the floor first. Try a vertical line, a loose cluster, or a diagonal flow.
– Hang with sturdy hardware. Use nails, screws, or anchors, and space them evenly.
Place the baskets where you’ll use them most. A row above a desk can hold crafts; a corner can hold magazines or loose items. Dust regularly with a soft cloth to keep colors bright.
Why It’s Eye-Catching: The mix of textures and subtle color pops keeps walls from feeling flat. It’s a fresh, stylish take that’s easy to change as your style shifts.
Add a touch of charm to your teen room with woven wall baskets! They’re not just decor; they’re a stylish way to organize and create warmth in your space.
17. Woven Wall Basket
Editor’s Choice

Hanging Woven Wall Basket Set – 7 Unique Handcrafted Seagrass Baskets fo…

KURUI 510Pcs Wall Hanging Kit with Anchors and Screws, Picture Hanging K…
Acrylic Paint Set, 24 Colors (2 oz/Bottle) with 12 Art Brushes, Art Supp…
18. Stylish Storage Jars

Your space feels crowded. Storage jars can fix the clutter without dull vibes.
These jars bring function and style. They fit on a desk, shelf, or dresser.
Turn ordinary jars into chic organizers. Paint them a color you like, or wrap the neck with twine for a rustic touch. Label with tags or write on the glass with a marker. Clear jars let you see what you stored at a glance.
What you need
– Get clear glass jars with lids.
– Choose acrylic paint, tape, or twine.
– Gather labels or a chalk marker.
– Keep a small tray or storage shelf.
How to transform
1. Pick jars that match the items you plan to store.
2. Paint the outside in a single color, or apply a thin coat for color hints.
3. Wrap the neck with twine or add a strip of washi tape for texture.
4. Add labels.
5. Place jars where you use them most. Keep similar items together.
Where to use
– Use on your desk for pens, brushes, and clips.
– Use on a shelf for makeup brushes and cotton rounds.
– Use in a dresser drawer as tiny pull-out organizers.
Why it works
It tidies up while still looking fresh. You’ll grab what you need faster and feel proud of your display.
If you want extra flair, try frosted paint, metallic lids, or color-coding by room. These jars stay practical and stylish.
18. Stylish Storage Jars
Editor’s Choice

Anchor Hocking Heritage Hill 1 Gallon Glass Jar with Lid, Set of 2
Acrylic Paint Set, 24 Colors (2 oz/Bottle) with 12 Art Brushes, Art Supp…

Liquid Chalk Markers for Blackboards – Bold Color Dry Erase Marker – Cha…
You Might Also Like


19. Painted Window Frames

Want a fast, easy refresh for your room? Painted window frames add color and texture without buying new furniture. Use frames you already have or grab cheap ones at thrift shops. Start by cleaning them well and lightly sanding the edges. If you can, remove the glass; if not, tape it off so paint stays on the wood. Pick a bold color or a soft pastel to match your room’s vibe. Prime dark or rough frames, then apply two thin coats of paint for a solid finish. Let each coat dry completely to avoid smudges. For a vintage feel, use a matte finish; for a pop of brightness, choose gloss. Create a collage by clipping photos or artwork inside the frame with small clips or tape. You can also fill the frame with fabric swatches, pressed flowers, or small mirrors. Hang the frames in a row on a wall, or prop them on a shelf for a casual display. Weave a string of fairy lights around the frames or place a tiny battery pack behind them so the glow is visible at night. Why It’s Unique: It’s a striking focal point that shows your creativity and keeps old materials out of the trash.
19. Painted Window Frames
Editor’s Choice
Acrylic Paint Set, 24 Colors (2 oz/Bottle) with 12 Art Brushes, Art Supp…

3M Scotch 2090 Blue Painters Tape: 1 in. x 60 yds. (Blue)
20. DIY Scented Candles

Want a quick, affordable way to upgrade your teen room? DIY scented candles fit the bill. They add scent, light, and a bit of you to your space.
Materials you’ll need
– You’ll need wax, wicks, jars, a double boiler or microwave-safe container, a thermometer, and your favorite fragrance oils.
– Optional color chips or dried petals give your candle color and texture.
– A wick centerer or a dab of hot glue helps keep the wick perfectly centered.
Steps
– Melt the wax in a double boiler until it flows smoothly.
– Cool it slightly, then stir in fragrance oil according to the bottle’s directions.
– Add color if you want a tint.
– Pour the wax into jars, keeping the wick centered.
– Let the candles cool completely, then trim the wick to about ¼ inch.
Tips for best results
– Work in a well-ventilated area.
– Use heat-safe jars and a stable surface.
– Make a small test candle first to check strength and scent throw.
– Label jars with scent and date so you remember what you made.
This tiny project pays off with a cozy glow and a room that smells like you.
20. DIY Scented Candles
Editor’s Choice

SAEUYVB Candle Making Kit with Wax Melter, Candle Making Kit for Adults …

3.38FL.OZ Coconut & Vanilla Fragrance Oils for Aromatherapy, Essential O…

Weck Jar 974 – 1.5L Glass Jars with Large Storage Capacity – Preserving …
21. Colorful Wall Decals

You want a fast room refresh without a big project. Colorful wall decals make that easy. They are removable and affordable.
Why they work
Decals are peel-and-stick. They come off cleanly when you want a change. This helps if you live in a rental or like to try new styles.
Where to use them
– On smooth walls to frame a bed or desk.
– On a dresser to add color.
– On a mirror for a playful outline.
How to apply
– Plan a simple layout on paper first.
– Clean the surface so decals cling well.
– Peel the backing and place the decal from the top down.
– Press each edge with a card to smooth out air bubbles.
– Step back and adjust if needed.
Creative ideas
– Build an accent wall with a repeating pattern.
– Surround a poster or photo grid with shapes.
– Outline a shelf edge for a splash of color.
Care and removal
– When you want a change, warm the decal with a hair dryer on low for a few seconds.
– Peel slowly from one corner.
– If any sticky residue remains, wipe with a damp cloth.
Tips
– Choose a color family that matches your room.
– Start with a few large decals, then add smaller pieces.
– Avoid rough or textured walls for best cling.
21. Colorful Wall Decals
Editor’s Choice

Colorful Polka Dot Wall Decals Watercolor Dots Wall Sticker for Kids Bab…
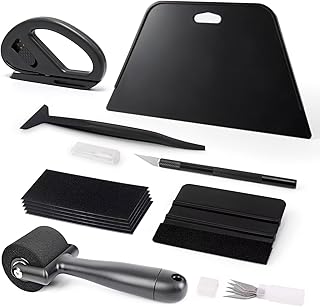
EHDIS Wallpaper Smoothing Tool Kit with Sponge Seam Roller, Vinyl Squeeg…

Heat Gun for Crafting, Mini Dual Temp Hot Air Gun Tool for Epoxy Resin, …
22. DIY Mood Board

You want a room that feels like you. A mood board helps you map your vibe in one place. It fits teen room decor and makes ideas easy to see and change. You’ll stay motivated when your goals line up on the board. Here’s how to build yours.
1) Gather supplies. Use a large board—cork, foam, or a sturdy poster. Collect magazines, photos, color swatches, and fabric scraps. Have scissors, glue, tape, and pins handy.
2) Collect inspiration. Flip through magazines. Clip images, textures, and colors that speak to you. Save digital pics if you prefer.
3) Pick a palette. Choose 2-3 main colors. Add one neutral or accent color. Write the palette on a sticky note.
4) Arrange and refine. Lay items on the board first. Move pieces until the layout feels balanced. Group items by color or theme.
5) Use and refresh. Hang the board where you’ll see it every day. Let it guide shopping and DIY projects. Update it as your style grows.
Why It’s Valuable: It keeps you focused. It slows impulse buys. It shows your progress as the board fills. It becomes a personal piece of art that reflects your style.
22. DIY Mood Board
Editor’s Choice
U Brands Cork Bulletin Board, 18″ x 24″ Inches, Light Birch Wood Frame (…

Color Swatch: Cute, Bold & Easy Test Chart Coloring Logbook

Scissors Set of 4, Premium Stainless Steel Razor Blades, Ergonomic Semi-…
23. Personalized Doormat

Are you looking for a warm, personal touch for your room? A personalized doormat can do it fast. It welcomes you and your guests and shows your style without saying a word. It’s easy, affordable, and a blast to make with friends.
What you’ll need
– Plain coir doormat
– Fabric paint or outdoor acrylics (2–3 colors)
– Stencils or masking tape
– Paint brushes and a small sponge
– Paper plates for mixing
– Clear outdoor sealer or spray
– Pencil or chalk for sketching
– Gloves (optional)
Steps to make it
1) Clean the mat. Wipe away dust so paint sticks. 2) Decide on a design. Your name, a short phrase, or a simple symbol. 3) Lightly sketch lines with pencil. 4) Tape or place stencils. 5) Paint in layers. Let each layer dry before adding more. 6) Remove tape and tidy edges. 7) Seal the mat with outdoor sealer. Let it dry fully. 8) Cure for 24–48 hours before use.
Ideas to try
– “Welcome [your name]” in bold letters
– Initials inside a simple shape
– A tiny icon like a sun, heart, or star
Placement and care
Put it by your door or near your reading nook. It adds a cozy vibe and is easy to clean with a damp cloth. Re-seal once a year or after heavy weather.
Why it helps
It’s practical and personal. It sparks a smile and shows off your style every day.
23. Personalized Doormat
Editor’s Choice

MAINEVENT Plain Coir Doormat Bulk 30×17 Inch, 2 Pack Door Mat Coir Outdo…
Shuttle Art Fabric Paint, 18 Colors Permanent Soft Fabric Paint in Bottl…
Rust-Oleum 249859 Painter’s Touch 2X Ultra Cover Spray Paint, Semi-Gloss…
24. Bohemian Macramé Hangings

Your teen room could use a cozy touch that doesn’t cost a lot. Bohemian macramé hangings fit the bill. They add texture and warmth, and you can make them yourself.
Macramé lets you create art you can touch. You can make plant hangers, wall art, or even a curtain. When finished, hang it near a window or above your bed for an instant focal point. Pair with a few indoor plants to complete a lush look.
What makes it trendy: Textured knots give a cozy feel. It fits modern, boho, or vintage styles, so your piece can grow with your space.
Materials you’ll need:
– Choose cotton cord or jute about 3-6 mm thick.
– Pick a wooden dowel or metal ring for the top.
– Have scissors, a ruler, and tape handy.
– Add beads or wood accents for extra flair.
How to make a simple wall hanging:
1) Cut cords to equal lengths for a balanced start.
2) Attach cords to the dowel with lark’s head knots.
3) Build a pattern using square knots to create texture.
4) Add beads or extra cords if you like.
5) Finish with a neat knot and trim the tails.
Where to place and care:
– Hang near a sunny window or above your bed for best impact.
– Leave space between pieces so your wall breathes.
– Dust with a soft cloth every few weeks.
Optional twists:
– Try colors or natural tones to match your room.
– Make a longer piece to use as a curtain or plant hammock.
24. Bohemian Macramé Hangings
Editor’s Choice

NOANTA Natural Macrame Cord 3mm x 109Yards, Beige Macrame Rope, Cotton C…

Wooden Dowel Rods Wood Dowels, 10PCS 1/2 x 12 Round Wooden Sticks for Cr…

Beadthoven 100pcs Large Hole European Beads Watercolor Colorful Resin Ro…
25. DIY Photo Clip String

Looking to add a personal touch to your room without spending a lot of money? A photo clip string does the job. It shows your memories in a simple, flexible display that you can change in minutes.
– Materials: a length of twine or thin rope (6–8 feet works well), mini clips or clothespins, printed photos, scissors, and tape or command strips to hang. Optional: fairy lights, washi tape, or a wooden dowel for a cleaner look.
– Steps:
1) Cut your twine to the right length for your wall or desk area.
2) String clips along the line, spacing them every 4–6 inches.
3) Clip your favorite photos, starting with a small grid and adding more as you collect new memories.
4) Hang the string at a comfy height using tape or command strips.
5) Change photos whenever you want to refresh the vibe.
– Why This Works: It adds a warm, casual feel to your room. Photos stay visible, but you can swap them fast. It’s a living display of your story, not a fixed poster.
– Tips: Match the twine color to your wall, or use clear clips for a subtle look. Try a zigzag layout or group a few strings for a bigger photo wall.
Give it a try this week.
25. DIY Photo Clip String
Editor’s Choice

Vanhench 805FT Natural Jute Twine String, Bulk Hemp Jute Rope Cord Twine…

DECORA Sturdy 1 Inch Mini Wooden Craft Clothespins 100pcs

Command 20 lb XL Heavyweight Picture Hanging Strips 16 Pairs (32 Command…
Conclusion

Transforming your room into a personal paradise is entirely possible with these DIY decor ideas! Each project caters to different styles and creativity levels, making it easy to find something that resonates with you.
Whether you’re looking to revamp your space on a budget or just want to express your individuality, these ideas are sure to inspire. Dive into these projects, have fun, and enjoy creating a space that truly feels like home!
Note: We aim to provide accurate product links, but some may occasionally expire or become unavailable. If this happens, please search directly on Amazon for the product or a suitable alternative.
This post contains Amazon affiliate links, meaning I may earn a small commission if you purchase through my links, at no extra cost to you.
Frequently Asked Questions
What Are Some Budget-Friendly DIY Room Decor Ideas for Teens?
Absolutely! There are plenty of budget-friendly DIY room decor ideas for teens that can transform your space without breaking the bank. For example, consider creating a gallery wall of memories with photos and postcards, or upcycling mason jars into cozy lanterns. These projects not only add personality to your room but also allow you to express your creativity without spending a fortune!
How Can I Personalize My Teen Room Decor on a Budget?
Personalizing your room decor is a fantastic way to make your space feel uniquely yours! You can create personalized string art featuring a word or shape that means something to you or design custom pillow covers using plain pillowcases and fabric paint. These DIY projects are not only affordable but also a fun way to showcase your individual style!
Are There DIY Room Decor Projects Suitable for All Skill Levels?
Definitely! The beauty of DIY room decor for teens is that there are projects suitable for every skill level. From simple ideas like colorful wall decals that are peel-and-stick, to more involved projects like a DIY tapestry, there’s something for everyone. Whether you’re a beginner or a seasoned crafter, you can find projects that match your comfort level and help you transform your space!
What Materials Do I Need for DIY Room Decor Projects?
The materials you’ll need for DIY room decor can vary depending on the project, but many ideas are quite simple and inexpensive! For example, for a DIY dream catcher, you’ll need a hoop, string, and embellishments like feathers or beads. For painted flower pots, gather terracotta pots and acrylic paint. Most importantly, use your creativity and look around your home for items you can repurpose!
How Can DIY Decor Help Create a Comfortable and Creative Teen Space?
DIY decor can significantly enhance your teen room by reflecting your personality and providing comfort! Projects like a cozy reading nook or fun floor cushions not only add style but also create inviting spaces for relaxation and creativity. A room that feels lived-in and lively can truly lift your mood and inspire you, making it the perfect environment for your teenage years!
Related Topics
DIY room decor
teen room ideas
budget-friendly decor
personalized decor
eco-friendly projects
easy DIY
upcycled decor
colorful accents
creative wall art
cozy spaces
teenage style
home transformation
Leave a Reply to Alex Tooth Cancel reply