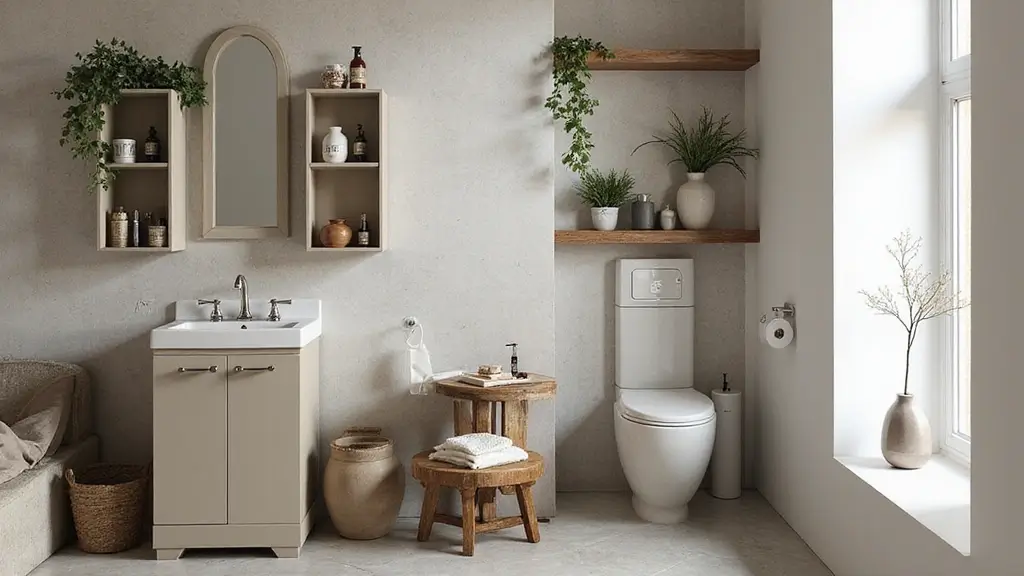
I put this together because a clean, calm bathroom counter can start your day on the right foot. If you live in a small space or share a bathroom with others, clutter on the counter can slow you down. Why I made this post is simple: I want to share twenty practical bathroom countertop organization hacks you can try this week, without breaking the bank.
Who it’s for includes anyone who wants a neat space but hates complicated setups. From tiny apartments to busy family bathrooms, this guide is for you. This set of ideas stays practical and realistic, not a big, fancy overhaul.
What you’ll get is real help you can use today. You’ll learn how to carve out zones on the counter, pick the right trays, and keep everyday items within reach. Plus, number 5 will surprise you.
We cover materials and styles that fit most baths, like clear acrylic organizers, bamboo trays, and soft silicone mats. These tricks blend function with style, so your counter looks neat and still holds the products you use every day.
Each idea comes with simple steps you can try in minutes. You’ll see how to group items, label containers, and keep the system going with a quick daily reset.
Not every hack fits every space, and that’s okay. Try one or two at a time, test what works, and tweak as needed. Your bathroom can feel bigger, calmer, and more organized when you take these small actions.
Contents
- 1. Tiered Storage Trays
- 2. Floating Shelves
- 3. Clear Acrylic Organizers
- 4. Repurposed Containers
- 5. Magnetic Strips
- 6. Drawer Dividers
- 7. Decorative Trays
- 8. Wall-Mounted Baskets
- 9. Hooks for Towels and Accessories
- 10. Glass Canisters
- 11. Use a Lazy Susan
- 12. Sink-side Caddies
- 13. Use Baskets Under the Sink
- 14. Multi-Purpose Furniture
- 15. Color-Coded Bins
- 16. Use a Towel Ladder
- 17. Hidden Containers
- 18. Use S Hooks
- 19. Bathroom Caddy for Travel
- 20. Natural Elements
1. Tiered Storage Trays

Is your bathroom counter crowded with bottles, brushes, and tubes? A busy surface wastes time and adds stress. Tiered storage trays help you reclaim space and speed up routines. They use vertical space so you can see and reach what you need.
These trays stack items in clear levels, so you see what you own at a glance. You can group things by routine, which makes morning skincare, makeup, and hair tools easier to grab. When items sit on different shelves, clutter stays off the counter and out of sight until you need them.
Styles that fit different bathrooms
A rustic wood tiered tray brings warm farmhouse charm. A sleek metal or clear acrylic tray looks clean and modern. Match your counter by color or choose a contrasting finish to add a playful accent.
– Group your products by type or daily use to speed up routines.
– Label each tier with a simple name or icon so you know exactly where to reach.
– Pick colors that complement your bathroom decor to keep the scene calm.
– Choose moisture-resistant materials if your counter is near a sink.
– Make sure the tray base is stable and level to prevent spills.
Practical setup ideas
Place the tier near the mirror or sink for quick access during your routine. If you have a small counter, keep the top tier for the most-used items. Put less-used products on the lower levels to stay organized without crowding your view. Experiment with height so the top shelf is easy to reach while you stand straight.
Maintenance keeps it looking new. Wipe the trays regularly with a mild cleaner to remove soap scum. Dry after cleaning to avoid water marks. Check the weight limit and avoid overloading one shelf.
What’s trending and worth trying
Modern trends favor compact, stackable designs that save space. Look for trays in bamboo, matte black metal, or clear acrylic to create a light, airy feel. These materials stand up to moisture and wipe clean easily, so you stay organized with less hassle.
Ready to test this approach? Here’s a quick setup plan.
– Step 1: Measure your counter space to know what size tray fits without crowding the sink.
– Step 2: Pick a tray material and finish that resists moisture and fits your decor.
– Step 3: Arrange items by routine and place the most-used items on the top level.
– Step 4: Label each tier and test stability, then adjust as needed.
With a few small changes, you gain a cleaner counter and a smoother start to your day.
1. Tiered Storage Trays
Editor’s Choice
VAEHOLD 2 Tier Lazy Susan Turntable Spice Rack Organizer for Kitchen Cab…

CATIFLIN 1200 Blank Removable Freezer Labels, Waterproof & Oil Resistant…

Madesmart 2-Tier Plastic Mini Multipurpose Organizer with Divided Slide-…
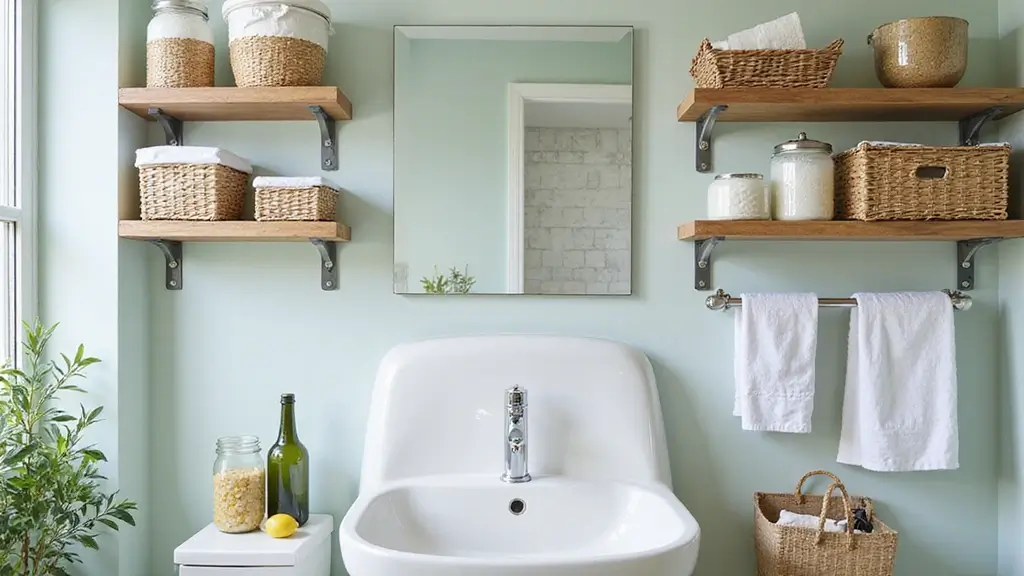
2. Floating Shelves

If your bathroom counter always looks crowded, you’re not alone. You want space for the basics and a place that feels calm. Floating shelves above the counter give you both. They add usable storage and become a small showcase for decor. Wood shelves bring warmth. Glass shelves give a light, modern look. Pick what fits your space and mood.
Think about moisture when you choose. Wood with a durable finish handles splashes better. Glass is slick and easy to wipe. If you share the room with kids or guests, go with sturdy brackets and a solid mounting plan. The goal is clean lines, less clutter, and a shelf that lasts.
How to pick the right floating shelves
– Material matters: warm wood, clear glass, or metal for an urban vibe.
– Depth and length: match the shelf to the counter area and what you plan to store.
– Weight capacity: heavier items need stronger hardware and solid studs.
– Finish and edge: smooth edges protect against bumps and water splashes.
– Color or texture: choose a tone that blends with your vanity or creates a bold contrast.
Installation basics you can do this weekend
– Find wall studs: shelves stay solid when anchored into studs.
– Gather proper hardware: choose mounting brackets or a dedicated floating-shelf system rated for bathroom use.
– Level the shelf: a quick look with a level saves you from tilting items later.
– Drill pilot holes: start small to keep the wall intact.
– Attach brackets or the mounting rail: tighten evenly so the shelf sits flat.
– Place and secure the shelf: check again for level, then fasten all screws.
– Add a little sealant if needed: a thin line at the edges helps keep moisture away.
Practical ways to use floating shelves
– Use attractive baskets: they hide daily clutter like cosmetics, razors, and cotton rounds.
– Display items on purpose: place a couple of white candles, a small plant, or a few favorite books.
– Group by use: keep daily items together so you can grab them fast.
– Balance the look: lighter items on one end, a heavier decor piece on the other to keep the shelf stable.
Maintenance and safety tips
– Wipe spills quickly with a soft cloth; moisture is your enemy over time.
– Check the mounts every few months and tighten if needed.
– Keep heavy items toward the center to reduce sway.
Common questions you might have
– Will wood warp in a humid bathroom? Choose a sealed or painted finish and dry the shelf occasionally.
– Do glass shelves crack? Use tempered glass and avoid banging objects on the edge.
– How high should they be? Put them where you reach easily—near the sink but not in the way of every daily motion.
Floating shelves can turn storage into a design element. They’re simple to install, easy to style, and surprisingly durable when built for bathroom use. Start with one set, and you’ll see the space open up in seconds.
Floating shelves are the secret ingredient to a clutter-free bathroom countertop! They not only add storage but also showcase your style—choose wood for warmth or glass for a sleek look.
2. Floating Shelves
Editor’s Choice

BAYKA Floating Shelves for Wall, Wall Mounted Rustic Wood Shelves for Ba…

Cute Woven Storage Basket with Handle, Baskets for Gifts Empty, Gift Bas…

8″ x 36″ Rectangle Floating Glass Shelf – Shelf Only – Tempered – 3/8″ T…
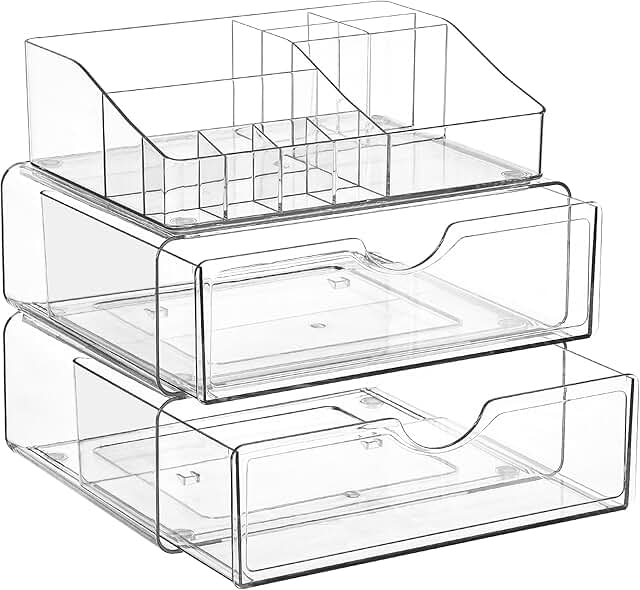
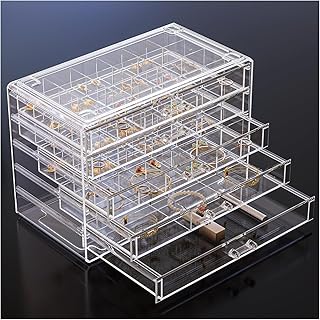
3. Clear Acrylic Organizers

If your bathroom counter feels crowded, clear acrylic organizers can fix it. They keep items in sight and within reach. They give the space a clean, upscale look. Their transparency helps you see what you have at a glance.
Key benefits
– Easy to clean and maintain.
– Clear visibility helps you spot when you’re running low.
– Small items stay visible and don’t get buried in clutter.
Practical setup tips
– Measure your space first. Note width, depth, and height. Then pick a few organizers that fit without crowding.
– Group items by use. Put skin care in one tray, makeup in another, and cotton swabs in a shallow bowl.
– Mix tall and shallow pieces. Tall trays suit serums and bottles. Shallow organizers work well for cotton pads and tools.
– Leave a little space between pieces. Air flow keeps everything looking tidy and easy to wipe down.
– Think in layers. Put the items you reach daily at the front, behind them place backups or less-used products.
– Use labels on the outside if helpful. A small note can remind you what goes where, without clutter.
Storage ideas that actually work
– Cotton swabs, cotton rounds, and floss picks in slim, shallow trays.
– Serums and small bottles in a nested set of cubed organizers.
– Q-tips and bandages in a tiny, clear dish for quick access.
– Lip glosses and small makeup items in a shallow, long tray to keep them from rolling away.
– Jewelry or hair ties in a tiny sectioned box to stop tangling.
Placement and care
– Place the organizers near the sink or mirror for easy grab-and-go use.
– Keep them away from direct water splashes to protect the surface and the items.
– Clean weekly with mild soap and water. Wipe dry to avoid streaks.
– For fingerprint smudges, use a microfiber cloth. A quick wipe keeps the glassy look.
Common questions
– Are they durable? They hold up well when you handle them gently. Avoid dropping them on hard tiles.
– Do they fit every style? Yes. Clear acrylic blends with wood, metal, and ceramic accents.
– Will they feel flimsy? They’re sturdy, but pick the right thickness for your load. If you stack a lot of heavy bottles, choose a sturdier set.
Limitations to know
– They show every smudge. Regular wiping helps keep them pristine.
– They can trap water on the edge if you place them too close to the sink. Keep a small gap to let moisture escape.
Trends and style tips
– Pair with natural wood or soft metals for a balanced look.
– Choose sets with varied depths to create visual interest without clutter.
– Keep the color palette simple. Clear pieces let your products stand out.
Take a few minutes to plan your layout. Then you can enjoy a calmer, more organized counter every day.
3. Clear Acrylic Organizers
Editor’s Choice
Vtopmart 3 Tier Clear Makeup Organizer with Drawer, Cosmetic Storage for…

4 Pack Acrylic Qtip Holder Dispenser for Cotton Swabs, Balls, Pads, Flos…
ProCase Acrylic Earrings Holder Organizer Box, Large Clear Earring Jewel…
4. Repurposed Containers

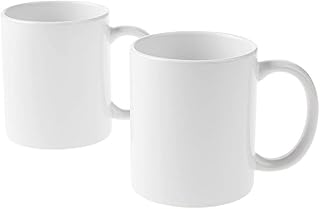
Struggling with a crowded bathroom counter? Repurposed containers can fix that fast. Using jars, tins, or old mugs gives you affordable storage with a personal touch. It’s a simple swap that clears clutter and adds character to your space.
What to gather
Think about what you already own. Glass jars, metal tins, and ceramic mugs are all good options. They should be clean, dry, and easy to reach. Your goal is quick access for everyday items without creating a mess. Keep a small tray or shallow dish handy to group similar containers together. This makes the whole setup feel intentional, not random.
Creative ideas you can try
– Paint jars in colors that match your bathroom theme. A fresh coat can tie the room together.
– Use vintage tins for a rustic or retro vibe. They look great on a simple metal or wooden tray.
– Decorate containers with ribbons or twine for a charming finish. A small label or chalkboard sticker helps you spot what’s inside at a glance.
– Mix shapes and heights. Tall jars work great for brushes or toothpaste, while short jars hold cotton rounds or q-tips.
– Put a few containers in front of a mirror or under a wall-mounted cabinet. You’ll free up counter space and keep essentials close.
Practical setup steps
1) Empty and clean everything. Let items dry completely before you reuse them.
2) Decide roles for each container. For example, toothbrushes in a tall jar, cotton balls in a shallow dish, makeup brushes in a wide mug.
3) Pick a color or finish that fits your style. If you choose paint, use a water-based product that’s easy to clean.
4) Add liners or soft padding inside jars if you plan to store items with rough edges. This protects brushes and keeps things quiet.
5) Group your containers on a small tray or organizer. Place it near the sink for easy access and quick cleanup.
6) Label lids or edges with a chalk label. It helps you identify contents fast and swap items as needed.
Durability and hygiene tips
Glass and ceramic are easy to wipe down, but they can break. If you share the drawer with lively kids, keep heavier items in sturdy mugs rather than tall glass jars. Avoid porous materials that soak up moisture or odors. Clean weekly, and dry everything well after washing. If steam is a problem, choose containers with lids or use spill-proof designs.
Limitations to keep in mind
Repurposed containers work best for light, everyday items. They may not hold large toiletries or heavy tools. If space is very damp, some finishes can wear faster. In those cases, switch to sealed containers or choose materials designed for bathrooms.
The payoff
You gain a tidy, personalized counter in minutes. It costs little and lets your style shine. Plus, you’ve got a simple DIY project that you can tweak anytime. Repurposed containers turn everyday items into smart storage—and they look great doing it.
Repurpose what you already own! Transforming jars and mugs into bathroom countertop organization solutions not only clears the clutter but adds a personal touch to your space. It’s amazing what a little creativity can do!
4. Repurposed Containers
Editor’s Choice

Anchor Hocking Heritage Hill 1 Gallon Glass Jar with Lid, Set of 2
Cricut Ceramic Mug Blank, White – 12 oz/340 ml (2 ct)
Luwint Tin Storage Box with Handle Small Metal Fun Box Retro Sturdy Tin …
5. Magnetic Strips

Struggling with a cluttered bathroom counter? A magnetic strip might be the quick fix you’ve been looking for. It uses vertical space so the countertop stays clean and calm. You can mount it where you need it most and reach for items without digging through drawers.
What you gain from this small upgrade
– Save counter space by going vertical. A slim strip on a cabinet door or wall keeps daily tools out of the way but in sight.
– Prevent loss of tiny items. No more fishing for tweezers or small scissors under a stack of makeup.
– Easy to customize with different lengths and mounting options. You can pick a strip that fits your space and style.
– Simple installation that doesn’t require a pro. Use screws for durability or strong adhesive for quick setup.
This approach gives you instant access to what you use every day while preserving surface area for taller bottles and brushes.
Where to put it and what to mount
– Place it inside a cabinet door for a hidden, neat look. It hides the hardware and keeps items out of sight until you need them.
– Mount it on the wall near your vanity. That way you can grab what you need before you sit down, without bending over a sink.
– Choose a location away from water splashes. A dry, steady spot helps keep magnets strong and items in place.
Choose the right strip for your load. If you store heavier tools, pick a high-strength option with wider spacing between magnets. For light items like tweezers, nail clippers, and small makeup tools, a mid-range strip will work fine.
What to store on the strip
– Tweezers, small scissors, and nail clippers. Keep them clean and dry so they stay sharp and rust-free.
– Hair pins, bobby pins, and small brushes. These stay visible and easy to grab when you’re in a rush.
– Lip balms and metal-tinish tubes. If a product has metal accents, a magnet helps it stay put rather than roll away.
– Spare metal tools from your kit. Anything small and metal that tends to disappear can live here.
Keep items light enough for the magnets to hold firmly. Rotate tools as your mornings change so you always know where to find them.
Care, safety, and a few practical tips
– Clean the strip and the mounting surface before sticking or screwing it on. A clean base makes the hold last longer.
– If humidity is high, opt for stainless steel magnets and a coated strip to resist rust. Hardware that wears well in a bath concludes a longer life.
– Don’t crowd the strip. Leave room for each item to sit flat. Crowding can cause items to tilt and fall.
– Check the fit every few weeks. If a magnet loosens, reattach with a stronger mount or move to a new spot.
Limitations? Magnets work best for metal items. Very light or non-metal items won’t cling reliably. If you have fragile glass containers, keep them away from the strip to prevent accidents.
With a well-placed magnetic strip, your bathroom quickly feels more orderly. It blends clean design with practical use, turning chaos into easy, everyday access.
5. Magnetic Strips
Editor’s Choice

Magnetic Tool Holder Storage Organizer: 7-Piece Garage Wall Mount Rack O…

DIYMAG Magnetic Hooks, 30lbs+ Magnet Hook 2025 Cruise Cabin Ship Essenti…

Remerry 2 Pack Back to School Magnetic Pencil Holder, Non-slip Acrylic M…
6. Drawer Dividers

Is your bathroom drawer a grab bag of face creams, brushes, and cotton swabs? It can feel like a mini storm each morning. Drawer dividers give you calm by creating neat pockets in each drawer. You’ll reach for what you need without digging through a pile.
– Measure first. Know your drawer’s width, depth, and height before you buy. No guesswork. If you buy too tall, you’ll block closing. If you buy too wide, you’ll waste space.
– Sort by use. Create zones for skincare, haircare, and tools. A small zone for cotton pads, another for razors, another for brushes. The goal is quick access, not empty space.
– Pick adjustable options. Look for modular or expandable dividers that can slide into place as your collection grows. Clear dividers are handy because you can see items at a glance.
– Choose the right material. Clear acrylic blends with almost any style. Bamboo adds warmth to a wooden vanity. Plastic is budget-friendly. Metal is sturdy for heavy tools.
– Add a liner. A thin mat or shelf liner keeps items from sliding. It also protects the drawer bottom from spills and marks.
Pro tips
– Use adjustable dividers to create different heights. Short ones for small jars, tall ones for combs and brushes.
– Leave tiny pockets for tiny items. A few small inserts hold bands, clips, and spare contacts.
– Consider labeling, but keep it simple. A tiny sticker or a faint outline works.
Maintenance matters
– Wipe the dividers weekly. Rotate items every month or two so things don’t get stuck in one pocket.
How this looks in real life
– In a 12-inch wide drawer, place two long dividers to create three zones: skincare, tools, and cotton goods.
– In a shallow 8-inch drawer, use several short dividers to hold cotton swabs, razors, and tiny bottles.
Common questions
– Do I need dividers in every drawer? Not always. Use them in the drawers that get crowded first.
– Can I DIY this? Sure. If you’re handy, build simple wooden or foam inserts that snap into place.
Limitations to note
– Very deep drawers may require extra-tall or multiple rows of dividers.
– Heavy items can press on dividers; make sure they’re secured.
With the right dividers, your bathroom routine feels smoother. You’ll save time and keep surfaces clear, too.
6. Drawer Dividers
Editor’s Choice

Lifewit 5 Pack Drawer Dividers 4″ High, 11-17″ Adjustable Dresser Drawer…

Vtopmart 25 PCS Clear Plastic Drawer Organizers Set, 4-Size Versatile Ba…

SpaceAid Bamboo Drawer Dividers with Inserts and Labels, Kitchen Adjusta…
7. Decorative Trays

Is your bathroom counter crowded with bottles and tubes? A decorative tray can turn clutter into calm, usable space. It keeps the items you reach most in reach, without making the surface feel crowded.
Trays do more than hold things. They group perfumes, lotions, and daily tools into tidy, easy-to-find setups. They also add a touch of style, so your counter looks pulled together, not chaotic.
Choose trays that match your style and space. Start with a simple plan before you shop.
– Size and space: Measure your counter from edge to edge and pick a tray that fits with room to spare. Don’t crowd the sink or the edges of the counter.
– Materials and vibes: Wood adds warmth, metal brings a modern shine, and ceramic offers color. Pick what fits your bathroom’s mood.
– Texture and contrast: Mix finishes and hues to keep the look lively. Pair a smooth ceramic with a rough wood edge for depth.
– Shape matters: Rectangular trays work well along the back line, oval trays soften the space, and round trays make a small plant feel at home.
– Care and durability: Choose trays that wipe clean easily and won’t warp near moisture. Check seams and rims for real durability with daily use.
Now, let’s talk about arranging on the tray. A good setup feels intentional and easy to repeat.
– Create small groupings: Place a perfume bottle, a lotion, and a tiny jar together in one corner so each item has its own space while acting as one scene.
– Vary heights: Put a taller bottle behind a shorter item to add vertical interest and keep the layout from looking flat.
– Add a focal point: A small plant or a scented candle draws the eye and softens the look of hard plastics.
– Keep essentials visible: Put items you use daily in front for quick grabs, and tuck back less-used products toward the back.
Placement tips help the tray work with your daily routine. Put it where you naturally reach for things each morning.
– Placement: Center the tray on the counter or tuck it in a corner where it visually ties the space together.
– Maintenance: Wipe the tray weekly with a damp cloth and dry it thoroughly; rotate products seasonally to keep things fresh.
Why this approach helps: decorative trays reduce clutter instantly and create a calm, cohesive look. They let you see what you have at a glance and keep your favorite items ready to use. With the right tray, your bathroom can feel organized, stylish, and easier to navigate every day.
7. Decorative Trays
Editor’s Choice

11.5 Inches Candle Holder Tray Home Decor, Round Wood Tray for Coffee Ta…

10 x 5 Ceramic Bathroom Tray for Countertop, Decorative Vanity Tray for …

Hipiwe Industrial Style Metal Iron Tray Galvanized Serving Tray for Coff…
8. Wall-Mounted Baskets

You want more storage without crowding the counter. Wall-mounted baskets give you space where you need it most. They hang on the wall, so you can grab what you need without a cluttered sink in sight. They keep towels, brushes, and bottles within reach and off the surface.
Choose baskets that stand up to humidity. Woven options like rattan or bamboo feel warm and natural, while metal baskets with a powder-coated finish look clean and modern. Each style fits a different vibe, from rustic to industrial. Pick a look that matches your faucet, mirrors, and vanity.
What to store and where
– Towels and washcloths you reach every day. Fold them neatly so a dry towel is easy to grab.
– Everyday toiletries, like soap, lotion, toothpaste, and sunscreen, placed in small matching baskets.
– Hair tools, brushes, and combs so they don’t sit loose on the counter.
– Extra toilet paper or a few compact books for a quick read in a powder room.
– Cotton swabs, cotton balls, and tiny bottles in a shallow tray basket.
How to install
– Pick a spot above eye level on the wall near your sink or shower.
– Measure spacing between baskets, usually 12 to 18 inches.
– Mark holes.
– Drill and insert anchors if you’re not hitting a stud.
– Use sturdy screws that hold the weight you plan to put inside the baskets.
– Mount baskets securely.
– Adjust for level.
– If needed, add a dab of clear sealant where the frame meets the wall to keep moisture out.
Styling and maintenance tips
– Vary the heights to add visual interest.
– Label baskets for quick grabbing. A small card or tape helps when contents change.
– Color code for a cohesive vibe. Use one color for towels, another for toiletries, a third for grooming tools.
– Line the bottom with a thin liner to catch drips. It keeps spills from soaking the wood or metal.
– Choose rounded edges and smooth surfaces to prevent snagging.
Practical benefits
– You gain counter space instantly. The sink stays clean and ready for use.
– It’s flexible. Move baskets if you rearrange the room.
– It’s affordable. Start with a pair and add more later.
Ready to try it? Pick a couple of baskets you love and plan their spots. In a week, you’ll notice a calmer, easier-to-use bathroom. The counter mess will fade away.
8. Wall-Mounted Baskets
Editor’s Choice

3 Tier Wall Mounted Woven Hanging Basket, Over the Door Hanging Basket w…
![MaraFansie [Extra Large] Wire Basket 2-Pack Hanging Wall Organizer Cabin...](https://m.media-amazon.com/images/I/712f0OXYDZL._AC_UL320_.jpg)
MaraFansie [Extra Large] Wire Basket 2-Pack Hanging Wall Organizer Cabin…

Basket Labels Clip On for Pantry Organization and Storage Baskets Bin La…
You might also like


9. Hooks for Towels and Accessories

Your bathroom counter gets crowded fast. Towels, brushes, lotions, and gadgets pile up. Hooks can end the clutter. They lift items off the counter and put them where you can reach them quickly. Here’s a simple plan to pick hooks that fit your space and draw the room together.
– Material matters Choose hooks that resist moisture and corrosion because bathrooms stay damp; stainless steel lasts for years, brass adds warmth and shine, and ceramic can blend with your tiles for a cohesive look.
– Where to install Place hooks on the side of the vanity or on an adjacent wall so towels dry faster and daily items stay in reach; if space is tight, install a slim wall rack instead.
– Spacing and height Space hooks about 6 to 12 inches apart, and mount them at a height that every family member can reach without bending or standing on tiptoes; this makes grabbing items simple.
– Use multi-hook racks A rack with two, three, or four hooks keeps a hand towel, a washcloth, a loofah, and a robe in one neat cluster, reducing trips to find the right item.
– Weight and installation Don’t hang heavy towels on small hooks; test the load first, secure into studs or use strong wall anchors, and predrill to keep screws straight and reduce splinters.
– Style coordination Match the hook finish to your faucet, cabinet handles, or lighting so the space feels cohesive; a coordinated hardware set makes a small bath look larger.
– Practical tricks Use a hook behind the door for travel bottles or a spare towel when guests visit; it creates a handy extra station you might not notice at first.
– Care and maintenance Wipe metal hooks with a soft cloth to stop water spots, dry around the screws after showers, and tighten loose screws every few months to keep them secure.
– Trending ideas Matte black, brushed brass, and natural wood accents give modern or rustic vibes; if you’re on a budget, look for mixed-material sets that still feel premium.
With the right hooks, you reclaim counter space and keep daily items within reach. Start with one good spot, then grow your setup as needed. Your sink area will feel calmer and cleaner in no time.
9. Hooks for Towels and Accessories
Editor’s Choice

8 Pcs Stainless Steel Hooks for Hanging, Heavy Duty Hook, Wall Hooks Key…

Coat Hook Rack Wall Mounted – Sagmoc Towel Hook Rail with 6 Round Hooks/…

Towel Hooks Bathroom Coat Robe Hook Stainless Steel Heavy Duty Door Hang…
10. Glass Canisters

If your bathroom counter feels crowded, glass canisters can fix it. They turn small items into a tidy display and make daily routines quicker.
Why glass canisters work
Clear glass lets you see what’s inside at a glance. You won’t waste time hunting for cotton balls or bath salts. The simple look adds a clean, modern touch to any style, from beachy to spa-like. When you fill them right, they stay dust-free and easy to lift. They work on a bathroom shelf, vanity, or inside a cabinet.
Key Benefits
– See-through design helps you grab what you need fast.
– Glass keeps items clean and protected from dust.
– A range of sizes fits different items, from tiny swabs to large bath salts.
– The bright, simple style pairs with many decor ideas, from chrome to matte black.
What to store and how to arrange
Use small jars for cotton balls, cotton swabs, and facial rounds. Put bath salts and bubble bars in mid-sized canisters to show off colors. Large jars fit cotton balls, hair ties, or bath salts sacks. Place like items together so your routine feels natural: vanity items near the sink, extra supplies in a cabinet, and weekly-use items in the middle.
Choosing the right canisters
Look for glass with solid lids that seal well. Airtight lids protect moisture-loving items and keep powders fresh. You’ll find options with cork, metal, or silicone seals—pick one that’s easy to open with wet hands. Consider sets that come in three to five sizes so you can group items by use. If you want a pop of color, choose lids in soft pastels or metallic finishes.
Practical setup ideas
– Use a small tray or a shallow basket under the jars to catch spills and make cleaning easier.
– Label the lids or use a tiny tag so you know what’s inside without lifting every jar.
– Group items by task: skincare, bath, and hair care. This saves steps and keeps your counter calm.
– Mix heights by stacking a few jars on a shallow riser so you see every item at a glance.
Care and durability
Wash glass canisters with warm, soapy water. Rinse well and air-dry completely before refilling. Put them where they won’t be knocked over by daily use. If you drop one, replace it quickly—glass can break, and safety comes first.
Common questions
– Do these canisters keep items dust-free? Yes, when lids seal well.
– How do I clean them without leaving water spots? Use a soft cloth and mild soap, then dry with a lint-free towel.
– Are glass canisters good for humid bathrooms? They are, as long as lids seal and items aren’t moisture-heavy.
Quick start guide
1) Empty a few items you want to organize.
2) Measure shelf space to choose three to five canisters.
3) Pick clear glass with airtight lids in a consistent style.
4) Put items in groups, label if you like, and place on a tray.
Try glass canisters today and watch your bathroom turn into a calm, easy-to-use space.
10. Glass Canisters
Editor’s Choice
Anchor Hocking Heritage Hill 1 Gallon Glass Jar with Lid, Set of 2

Nelko Label Maker Machine with Tape, P21 Bluetooth Label Printer, Wirele…

Silicone Bathroom Tray,Shatterproof Silicone Tray for Bathroom Counter,S…
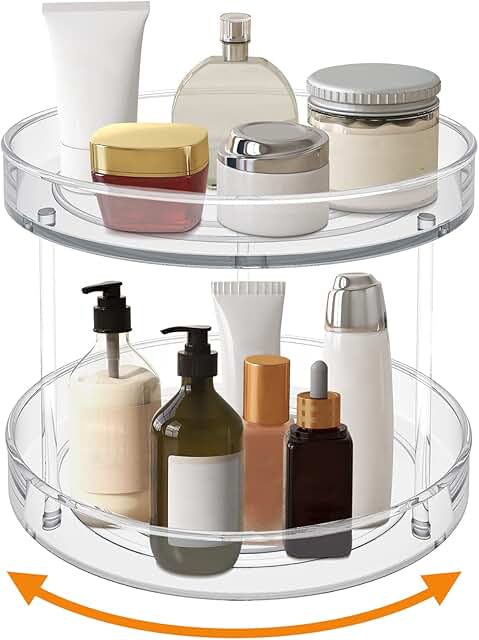
11. Use a Lazy Susan

Your bathroom counter is crowded, and you waste time hunting for creams and brushes. A rotating tray can fix that. Put a Lazy Susan on the counter and spin it to find what you need in seconds. It fits narrow spaces and can hold many items, from skincare bottles to hair products, makeup, and cotton pads. The smooth turn lets you reach items without moving everything.
Benefits:
– Efficiency – spin to grab what you need fast.
– Space-saving design makes small bathrooms feel bigger.
– Style options let you match metal, glass, or wood to your décor.
This simple tool can turn a cluttered counter into a calm, easy-to-use surface.
How to set it up:
– Choose the right size. Measure the counter and pick a unit that leaves room to open drawers or cabinets.
– Pick a material that fits your style. Metal and glass look sleek; bamboo brings warmth; acrylic blends in.
– Group items by use. Put daily items at the front. Keep multiples together in small organizers on top.
– Add non-slip padding. A soft mat keeps the tray from sliding and protects the counter.
– Keep it clean. Wipe with a damp cloth weekly to prevent water marks and soap buildup.
Tips for real life:
– Use a mini tray on top of the Lazy Susan for tiny items like q-tips, clips, and bands.
– Put tall bottles toward the back so they don’t block rotation.
– Label clear containers so you know where each item lives.
– Check labels often. Move older products to the front so you use them before they expire.
– Spin once a day as part of your routine to stay ahead of clutter.
Common questions:
– Will it fit on a small counter? Yes. Measure carefully and choose a compact model.
– Can I use it for lots of items? Yes. Group similar products together so you can grab a group in one spin.
– Is it hard to clean? Not if you wipe it weekly and avoid getting water under the turntable.
– Can it handle wet spots from splash? A quick wipe after use keeps it looking good and prevents slipping.
Why this works now:
– It matches current trends toward simple, tidy spaces.
– It’s easy. You can set it up in minutes.
– It scales. Add more organizers or swap it as your stash changes.
This approach saves space, speeds up routines, and keeps the counter looking neat with little effort.
11. Use a Lazy Susan
Editor’s Choice

Rotating Makeup Organizer, DIY 8 Adjustable Layers Spinning Skincare Org…
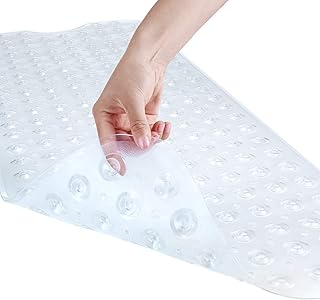
YINENN Bath and Shower Safety Mats 40×16 inch, Non Slip with Suction Cup…

Vtopmart 6 Pack Clear Stackable Storage Bins with Lids, Large Plastic Co…
12. Sink-side Caddies

Sink-side Caddies
If your counter feels crowded, you’re not alone. Water, toothpaste, and brushes stack up fast. A sink-side caddy puts the essentials right next to your faucet. You grab what you need, then keep the rest tidy.
What a sink-side caddy does for you:
– Holds daily items in one spot: toothbrush, toothpaste, soap, sponge.
– Cuts mess by keeping things upright and controlled.
– Speeds up cleanup when the caddy is within arm’s reach.
What to look for when choosing:
– Compartments that separate items so brushes don’t touch toothpaste.
– Water- and stain-resistant materials. Plastic, stainless steel, ceramic, or sealed wood all work.
– A slim profile that fits beside the sink without crowding the faucet.
– A non-slip base to stay put on wet counters.
Materials and styles that fit many looks:
– Plastic or resin: affordable, easy to wipe, and comes in colors that match your decor.
– Stainless steel: clean, durable, and naturally moisture resistant.
– Bamboo or wood blends: warm style; sealants help, but avoid standing water.
– Glass or clear acrylic: makes a small area feel open and neat.
How to set it up in your bathroom:
– Place it on the side you use most when you stand at the sink.
– Leave room for a soap dispenser or sponge beside the caddy.
– Only keep items you reach for daily. Change weekly to avoid clutter.
Care and maintenance:
– Wipe with a damp cloth after splashes.
– Dry the bottom to prevent mildew.
– Check for loose parts and tighten or replace when needed.
Common questions:
– Do I need a lid? Open designs dry faster and stay easy to reach.
– Can I mount one? Some caddies clip to the sink or fit on the lip for extra stability.
– Will it clash with my style? Pick a finish that matches your faucet or cabinet hardware.
Bottom line: a sink-side caddy makes daily routines smoother. It adds order, reduces mess, and keeps the counter clean. Start with a simple design and upgrade as your space grows.
12. Sink-side Caddies
Editor’s Choice

OXO Good Grips Stronghold Suction Sinkware Organizer – Gray, One Size

Cisily Sink Caddy Sponge Holder for Kitchen, 304 Stainless Steel Rustpro…

Instant Dry Sink Caddy Diatomite Fast Drying Stone Tray for Kitchen Counter
13. Use Baskets Under the Sink

Turn under-sink chaos into easy access
Your bathroom sink area tends to get crowded fast. It often feels dark, damp, and hard to reach. With the right baskets, you can turn that space into a neat, quick-access zone. You’ll spend less time digging for stuff and more time using it.
Choose baskets that handle moisture
– Pick moisture-resistant containers, like sturdy plastic or resin bins, that fit the cabinet’s depth.
– Avoid wicker that can get mildewy; if you love a natural look, add liners or tuck wicker into a covered spot.
– Look for smooth interiors you can wipe clean in seconds.
You want baskets that stay neat after spills. They should be easy to wipe and move. When you can reach for what you need without wading through a pile, your mornings go smoother.
Balance size, shape, and space
– Measure the cabinet height, width, and door clearance before buying.
– Use a mix of tall, medium, and short baskets to fill every inch cleanly.
– If you have a higher shelf, add a second level with a slim pull-out bin or stackable pieces.
A smart mix lets you use vertical space. It prevents large bottles from tipping and keeps towels dry and off the floor.
Organize items by use and habit
– Create zones: cleaning supplies, spare toiletries, and towels each get their own basket.
– Put the items you reach most in the front for quick grabs.
– Use small baskets inside larger ones for tiny items like sponges or cotton swabs.
Grouping by use cuts search time. It also helps you see when a bucket is running low and needs a refill.
Label for quick finding
– Label each basket so you never have to guess where stuff is.
– Use waterproof labels or simple tape with clear words.
– Color-code by category if you like a strong visual cue.
Labels keep your system simple. They make maintenance after a spill or cleaning easy.
Make the setup easy to maintain
– Do a quick wipe-down once a week to keep moisture from building up.
– Reassess every month and move items you don’t use often to the back basket.
– Don’t overfill; leave space so you can grab items without a mess.
A little habit goes a long way. A clean basket system stays nice longer and helps you stay on track.
Practical ideas you can use today
– Place a small bin for rags and cleaning cloths near the front.
– Use a tall basket for extra towels if the space is deep.
– Add a shallow tray on top of a basket to catch drips from bottles.
With these simple steps, your under-sink area becomes a calm, efficient part of your bathroom. You’ll save time, cut clutter, and keep cleaning supplies ready for whenever you need them.
13. Use Baskets Under the Sink
Editor’s Choice

Sterilite 4-Pack Gasket Box, Weather-Resistant Storage Bins with Latchin…
Nelko Label Maker Machine with Tape, P21 Bluetooth Label Printer, Wirele…

Sterilite 10-Pack Medium Stacking Basket, Open Top Plastic Storage Organ…
14. Multi-Purpose Furniture

If your bathroom feels crowded, a smart furniture piece can change everything. Multi-purpose furniture gives you seating and storage in one compact item. A storage ottoman or a stool with a hidden compartment makes a small room feel bigger and more usable. You’ll sit comfortably and still have a place to tuck towels, toiletries, or washcloths out of sight.
What to look for
– Size that fits your space. Measure before you shop. You want something that leaves room to move and doors to open.
– Hidden storage with enough depth. A good storage compartment should hold bulky towels or several bottles without feeling tight.
– Moisture resistance. Pick materials that handle bathroom humidity. Think sealed wood, water-repellent fabric, or sturdy resin/plastic finishes.
– Style that matches your decor. Choose colors and textures that blend with tile, vanity, and cabinets. A smooth, clean look often works best in small baths.
– Comfort and safety. A well-padded seat that isn’t too high helps you sit easily. Look for a lid that closes softly to avoid slams.
How to choose and use
– Start with a real test. Put the piece in the spot you’ll use most—near the sink, at the end of the tub, or by the towel rack. Check that you can stand, sit, and reach stored items without bending awkwardly.
– Check the lid or top. A hinged or lift-top lid is handy. Soft-close actions feel nicer and prevent fingers from getting pinched.
– Think about how you’ll load it. If you store heavy towels, pick a sturdy base and avoid flimsy legs. A wider footprint can feel steadier.
– Pick a dual purpose piece. A stool can double as a small side table for a tray of daily items. An ottoman can hold a basket inside for quick access to everyday supplies.
– Consider materials. Wood with a water seal lasts long. Bamboo stays light and is easy to wipe. Fabric should be moisture-resistant or vinyl-backed.
Placement ideas
– Place beside the vanity for quick towel grab-and-go.
– Use at the end of the tub to keep a seating option while you dry off.
– Tuck near the toilet for extra seating without blocking flow.
– Put a low shelf inside the storage area for smaller items so they stay organized.
Maintenance and tips
– Wipe surfaces weekly with a mild cleaner. Dry any damp spots to prevent mold.
– Check the hinges or lid mechanism every few months. Tighten screws if needed.
– Rotate stored items to keep the most used things easy to reach.
Quick-start plan
1) Measure your target space.
2) Choose one multi-purpose piece with hidden storage that matches your decor.
3) Test it in place and confirm it doesn’t block doors or drawers.
4) Stock the inside with towels and toiletries, keeping like items together.
5) Enjoy a chair-ready surface and tidier shelves without losing square footage.
With the right piece, your bathroom gains function, style, and calm.
14. Multi-Purpose Furniture
Editor’s Choice

Sweetcrispy 43in Foldable Storage Ottoman – Large Storage Chest & Padded…

IBosins Corner Shower Stool with Storage Shelf Shower Foot Rest for Shav…
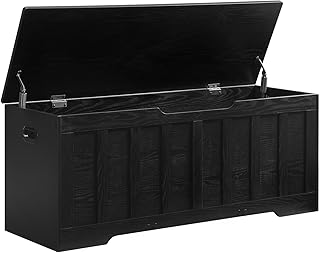
47.2″ Storage Chest Extra Large,Storage Trunk with 2 Safety Hinges,Woode…
15. Color-Coded Bins

Are you tired of a crowded bathroom counter that hides your daily essentials? Color-coded bins offer a simple fix. They turn chaos into order and give kids an easy map for where things belong. The result is a counter that looks tidy, and a routine that actually sticks.
How color-coded bins work for your space
Color codes create quick, visible organization. Different colors tell you where items live at a glance. You can assign colors to family members or to types of products. When everyone knows the colors, items go back where they belong. The whole bathroom feels calmer because you’re not hunting for what you need.
Set up in 6 practical steps
1) Pick your colors and groups. Use 3 to 5 colors. For example, blue for dad’s razors, pink for kids’ hair ties, green for daily meds and toothpaste. Keep the system simple so kids can read it.
2) Choose sturdy, clear bins. Clear plastic shows content at a quick glance, while solid colors help hide messes. Get bins with low sides so small items don’t get lost.
3) Create zones near the sink. Put a bin for daily items in easy reach. Add a spare bin for weekly or seasonal items that don’t need daily access.
4) Label with big, easy-to-read text or icons. Use strong labels that survive splash water. Add simple pictures if your kids can’t read yet.
5) Make a color rule and practice it. Tell everyone, “If it’s blue, it goes in blue bin.” Do a quick run-through together the first week so everyone understands.
6) Maintain with a 5-minute weekly reset. Check for stray bottles, old makeup, or empty containers. Put back items, toss trash, and wipe down the bins.
Tips to fit any bathroom
– If space is tight, hang slim organizers on the door or mount bins on the wall. This keeps the countertop clear and still within reach for kids.
– For shared bathrooms, assign a color to each person and one color for shared items. It reduces confusion at busy times.
– Use a mix of materials. Fabric bins soften the room, while sturdy plastic bins handle damp surfaces.
– Keep labels visible but not overwhelming. A simple icon plus name is enough.
What to expect and common questions
You’ll notice faster morning routines and less mess. Kids learn responsibility without a big lesson. If colors feel overwhelming, start with 2–3 colors and add more later. Some bathrooms are small; try wall-mount options or a slim set of bins on a shelf.
Final thought
Color-coded bins are a practical, friendly path to better countertop organization. They blend style with function and turn a cluttered space into a daily helper you can actually keep up with.
Color-coded bins can turn your chaotic bathroom countertop into a sanctuary! With a splash of color, everyone knows where their essentials belong, making tidy routines a breeze.
15. Color-Coded Bins
Editor’s Choice

Nicunom 6 Pack Small Cubby Bins Storage Bins with Lids, 5 Qt Plastic Sto…

Brother P-Touch, PTD210, Easy-to-Use Label Maker Bundle (4 Label Tapes I…

Fixwal Hanging Floating Shelves, 4 Sets of Wall Mounted Shelves for Wall…
You Might Also Like
16. Use a Towel Ladder

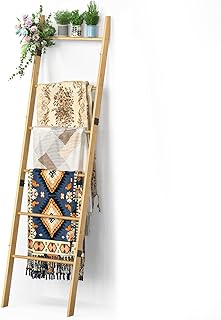
You want a clean bathroom counter where towels are easy to reach. A towel ladder offers a simple fix. It stands against the wall and lets towels hang freely. You get space back on the counter, and your bathroom feels more open.
– Frees up surface area on sinks and counters.
– Adds texture and style, from cozy boho to sleek modern.
– Makes seasonal towels easy to switch without crowding a rack.
A towel ladder blends function with style. It can make small baths feel larger and calmer.
Choosing the right ladder
Materials matter. Wood brings warmth. Metal adds a cool, contemporary vibe. Bamboo gives a natural, eco-friendly look. Pick a finish that matches fixtures in your bathroom. Think about height and spacing: you want towels to hang without rubbing each other.
– For compact bathrooms, a shorter ladder close to the wall works best.
– For larger spaces, a taller ladder gives you more towels and options.
– Wider rungs help thick bath sheets stay in place.
Where and how to place it
Lean the ladder against a dry wall or tile, near the shower or sink. Make sure it has room to breathe. If you’re worried about slipping, add soft felt pads between the ladder legs and the floor or wall. You can prop it near a towel bar to corral extra pieces. Place the ladder where you can reach it with a simple twist or stretch, not when you’re wet.
Daily use and care
Hang towels after use so they dry quickly. Stash light hand towels on the upper rungs and heavier bath towels on the lower ones. If you like seasonal decor, swap in towels with color changes to match the season. Wipe the ladder occasionally to remove shampoo, soap, and dust.
Tips and limits
A towel ladder works best for cotton or microfiber towels. It may not handle heavy, bulky bath robes on every rung. If your space is tight, lean carefully and avoid blocking doorways. Regularly check the ladder’s lean angle and wall contact.
Start with a simple, one-rung ladder and test fit. Move to a taller option as your towels grow.
16. Use a Towel Ladder
Editor’s Choice

HOOBRO Blanket Ladder for Living Room and Bedroom, 5-Tier Wall Leaning T…
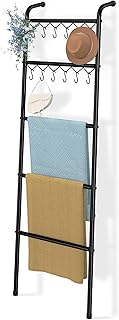
Simple Trending Blanket Ladder,5 Tier Metal Towel Rack with 12 Hooks, 79…
BAMBANG 6-Tier Blanket Ladder for Living Room, Blanket Quilt Ladder Rack…
17. Hidden Containers

Is your bathroom counter crowded with razors, brushes, and bottles? Hidden containers can change that. They tuck items away while keeping them easy to reach. Here’s how to choose and use them for a cleaner look and a smoother morning.
– Match your color scheme Choose boxes that blend with your tile, towels, and vanity so they disappear into the background. This keeps the surface calm and makes the room feel larger.
– Size and shape matter Measure the space on your counter or shelf before you buy. Pick long, slim boxes for razors or curling tools, and squat, wide jars for daily tools you reach for often.
– Easy access is a must Make sure lids open smoothly and containers stay put when you grab items. Avoid boxes with stiff hinges or hard lids that slow you down in the morning rush.
– Material choices Acrylic looks clean and modern, glass adds elegance, bamboo brings warmth, and fabric hides the messy stuff. Think about moisture and cleaning—some materials wipe clean, others need gentler care.
– Hidden yet handy placement Put boxes on a high shelf for rarely used tools, and keep a smaller tray within reach on the counter for daily items. This creates a tiered setup that feels organized and simple to maintain.
– Labeling helps quick finding Use small labels or simple icons on the front so you know what sits where. Labels stay neat and make resets fast, even on busy mornings.
– Personalize the look Add a pop of color with a patterned lid, or swap lids with the seasons. Personal touches make the space feel like yours and inspire you to keep it tidy.
– Care and maintenance Wipe boxes regularly to stop soap film and water spots from building up. Dry them after showers, and check for warping or loose pieces so everything stays sturdy.
These tips elevate hidden containers from mere storage to a real upgrade for bathroom countertop organization. You’ll notice less clutter, easier mornings, and a calmer space that still holds all your daily essentials within reach. By choosing the right materials, sizes, and placements, you can keep your décor cohesive while enjoying practical beauty in everyday use.
17. Hidden Containers
Editor’s Choice

Clear Stackable Plastic Storage Bins with Magnetic Lid, Dustproof Book &…
Anchor Hocking Heritage Hill 1 Gallon Glass Jar with Lid, Set of 2
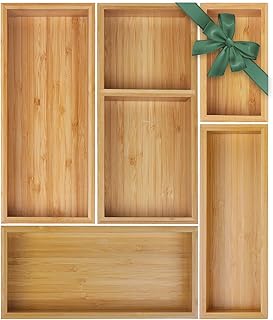
Bamboo Drawer Organizer Set, 5 PCS Multi-Use Individual Wood Storage Org…
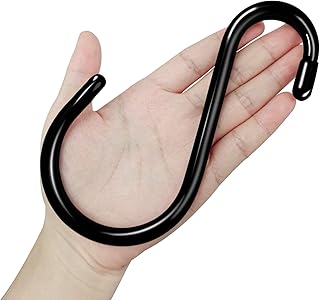
18. Use S Hooks

Your bathroom counter gets crowded fast. Hair tools, bottles, and brushes spill over the edge. You want easy access, but you also want a clean, open surface. S hooks offer a simple fix you can set up in minutes.
What they are and why they work
S hooks are small, curved metal or plastic hooks. You slide them onto a rod, rack, or towel bar and hang items from them. They keep things off the counter and in easy reach. The result is a room that feels bigger and more intentional.
Where to put S hooks
– On a towel bar near the sink for brushes, combs, or a small cosmetic bag.
– On a shower rack or a metal rail to hold a hairdryer with its cord neatly looped.
– On a slim over-the-sink rack to hold daily-use items like cotton rounds or facial masks.
What to hang with S hooks
– Hairdryers, curling irons, and straighteners (use a dedicated hook if the cord is long).
– Brushes, combs, and razors for quick grabs.
– Small travel bottles, face wash, or lotion tubes you reach every day.
– A lightweight mirror or accessory bag that you want within arm’s reach.
Choosing the right S hooks
– Pick hooks that can hold more weight than your heaviest tool. A few sturdy hooks beat many flimsy ones.
– Choose a finish that fits your style. Matte black, brushed nickel, or brass hooks blend with most decors.
– Pick the right size. Bulky items need larger hooks; tiny items do fine on standard hooks.
– Look for smooth edges. Sharp edges can scratch powder bottles or cords.
Placement and use tips
– Start near the mirror so you grab what you need without bending down.
– Group items by use. Put drying tools together, then day-to-day items in another spot.
– Manage cords. Let cords hang down instead of piling them on the counter. This cuts clutter and lowers the chance of pulling items off the shelf.
– Test weight after you install. If a hook wobbles, move it to a sturdier spot or use a stronger hook.
Common mistakes to avoid
– Overloading a single bar. Spread weight across several hooks or bars.
– Using cheap hooks on damp metal. They can rust or slip over time.
– Blocking essential outlets or reducing air circulation around a dryer. Keep safety in mind.
Quick setup plan
1) Pick a bar or rack you already have. 2) Buy 6–8 sturdy S hooks that fit your items. 3) Hang hooks in a high-traffic area near the sink. 4) Move items around after a week if something feels awkward.
With a few hooks, your bathroom stays tidy and efficient. It’s a small change that makes a big difference in how easy your mornings feel.
18. Use S Hooks
Editor’s Choice
12 Pack S Hooks Heavy Duty Vinyl Coated Large S Hooks 6 inch Non Slip 7m…

Ohuhu Over Sink Dish Drying Rack, Silicone Wrapped 17.6″ W x 15.4″ L Lar…

XHF 5/8” Adhesive Cord Clips White 60pcs, Cable Management Staples for U…
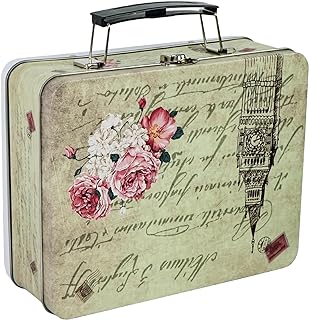
19. Bathroom Caddy for Travel

Traveling or hosting guests can turn your bathroom into a clutter zone fast. A portable bathroom caddy helps you stay organized, pack faster, and keep your items safe in transit. With the right caddy, you have a neat kit you can grab on the go or leave as a stylish decor piece at home.
Why a travel caddy makes sense
A dedicated caddy keeps all your essentials in one place. It shields liquid bottles from spills and makes unpacking a breeze. It also doubles as a handy travel kit you can move from a hotel room to a guest bathroom without hunting for items. Look for a design that looks good in your space and travels well.
What to look for when buying a travel caddy
– Size and compartments: Pick a caddy that fits your daily routine, with a roomy main pocket and several smaller pockets for small items. A good mix helps you group items by type—face care, hair care, and meds—so you can grab what you need in seconds.
– Waterproof materials: Choose hard plastic, coated fabric, or silicone that wipes clean and resists leaks. Durable shells protect contents during bumps and jostles in transit.
– Leak protection: A lined interior or a removable, washable liner helps catch spills and makes cleanup quick. Look for a seal or tight zipper to cut down on drips.
– Portability: Look for sturdy handles, a comfortable strap, or a small carabiner so you can clip it to a bag or hang it in a shower area. Easy carrying cuts the hassle of moving a full kit.
– Style and care: Choose a color and finish that matches your home or hotel vibe. Pick fabrics or shells you can wipe down fast after a trip.
How to pack and use your travel caddy
– Start by gathering a daily set of items you actually use every trip, not the whole bath stock.
– Transfer liquids into travel bottles and label them; keep them in a clear bag if you fly.
– Place heavier bottles at the bottom and lighter items on top to prevent spills and breakage.
– Close the caddy securely and slide it into your suitcase, tote, or overnight bag for easy access.
– In a hotel or guest bathroom, set the caddy near the sink so you can reach toiletries without digging through a suitcase.
Maintenance and care tips
– Wipe the liner after each trip and let it air dry completely before the next use.
– Clean the outer shell with a damp cloth to remove soap residue or water stains.
– Store the caddy in a dry spot to prevent mold and funny smells from lingering.
Common questions about travel bathroom caddies
– Is it TSA friendly? Yes, if you keep liquids in small travel bottles and place them in a clear bag as required.
– What if I don’t travel with liquids? You can still use the same caddy for dry items like combs, brushes, makeup, and mini medicines.
Realistic limits and honest tips
A travel caddy won’t replace a full vanity, but it makes trips smoother. If you stay in extreme climates or have many users, opt for a larger model with more compartments. You can also carry two slim caddies—one for daily essentials and one for backup items.
By choosing the right travel bathroom caddy and keeping it ready, you turn packing into a simple, fast task. Your essentials stay organized, your hotel routine stays calm, and your bathroom stays tidy—every trip, every guest visit.
19. Bathroom Caddy for Travel
Editor’s Choice

Tiawudi Portable Shower Caddy, Caddy Organizer with Handle, Plastic Show…

20 Pack Travel Bottles Set for Toiletries TSA Approved, Leak Proof Trave…

HOTOR Travel Toiletry Bag for Women & Men, Waterproof Makeup Bag with Ha…
20. Natural Elements

Feeling clutter on the bathroom counter? You want better order and a calmer look without losing style. Natural elements can deliver both. They bring texture, warmth, and a simple, organized feel to your daily routine.
Wood, stone, and plants work together to shape a calm, practical space. Wood adds warmth and a sturdy feel that stands up to daily use. Stone gives a cool, earthy touch that grounds the room. Plants bring life and a touch of humidity balance, which helps many bathroom items last longer. Put together, these elements create a spa-like mood you can see and sense every day.
Ideas to Try:
– Add small potted plants that thrive in humidity. Choose pothos, spider plants, or ferns that handle steamy air. Put them where they get gentle morning light and clear of splashes. They stay fresh with a quick weekly check for trimming brown tips.
– Use natural wood for trays and organizers. Look for teak, bamboo, or maple that can stand damp air. Seal the wood to resist water spots and mold. Wipe the surfaces with a damp cloth and dry them after each big shower.
– Integrate stones or pebbles in decorative containers. Pebbles add an earthy vibe and can keep small items in place. Try a clear jar or bowl with stones under cotton rounds or makeup pads. Rinse stones every now and then to remove soap residue.
– Mix textures with wicker baskets or ceramic vessels. Open-weave baskets hide clutter while staying easy to reach. Put daily items in ceramic jars for a simple, clean look. Match the colors to your tile or countertop for cohesion.
– Create a small stone or wood tray for soap, brushes, or daily essentials. A steady tray catches drips and keeps items from rolling around. It also makes your minimal routine feel organized and intentional.
Practical care helps these ideas last. Place plants where they won’t sit in standing water. Use a plant saucer or coaster to protect wood from spills. Keep wood trays sealed and wipe them weekly to stop water stains. Clean pebble containers with warm water and a soft brush to remove soap film. Rotate items on the trays seasonally to keep the display fresh and useful.
Putting natural elements in your bathroom isn’t a luxury—it’s an easy way to boost organization and mood. With wood, stone, and plants, you gain usable storage and a unique style. The result is a calmer space that still does the work you need every day.
Natural elements like wood, stone, and plants can turn your bathroom countertop into a serene oasis, bringing warmth and organization to your daily routine. Embrace nature and watch your clutter vanish!
20. Natural Elements
Editor’s Choice

Costa Farms Golden Pothos Live Plant, Easy Care Indoor House Plant in Gr…

Bamboo Vanity Bathroom Tray for Counter, Bamboo Tray for Bathroom, Toile…

Pebbles Polished Gravel, Natural Polished Mixed Color Stones, Small Deco…
Conclusion

Transforming your bathroom countertop doesn’t need to be overwhelming. By implementing these 20 bathroom countertop organization hacks, you can create a space that’s not only functional but also beautiful. Remember, the key is to find solutions that fit your style and needs, allowing you to enjoy a clutter-free oasis.
Which hack are you excited to try first? Share your favorites and let’s keep the conversation going!
Note: We aim to provide accurate product links, but some may occasionally expire or become unavailable. If this happens, please search directly on Amazon for the product or a suitable alternative.
This post contains Amazon affiliate links, meaning I may earn a small commission if you purchase through my links, at no extra cost to you.
Frequently Asked Questions
What Are Some Easy Storage Solutions for Bathroom Countertop Organization?
If your bathroom counter feels cluttered, don’t worry! There are plenty of easy storage solutions to help you declutter. Consider using tiered storage trays to maximize vertical space or clear acrylic organizers to keep essentials visible and accessible. You could also use repurposed containers like jars and tins for a personal touch. These hacks not only tidy up your space but also add a stylish flair!
How Can I Use Floating Shelves for Better Bathroom Countertop Organization?
Floating shelves are a fantastic way to enhance your bathroom countertop organization! They provide extra storage without taking up counter space. Simply install them above your sink or toilet to keep items like toiletries or decor items within reach but off the counter. This creates a clean, calm look while allowing you to display your favorite bathroom items beautifully!
What Are Some Creative Ways to Declutter My Bathroom Counter?
Decluttering your bathroom counter can be both fun and creative! Try using decorative trays to corral smaller items, or wall-mounted baskets for easy access to essentials without crowding your surfaces. You can also implement hooks for towels and accessories to lift items off the counter, creating an open and organized feel. These hacks make decluttering a breeze while adding style to your space!
How Do I Choose the Right Storage Solutions for My Bathroom?
Choosing the right storage solutions for your bathroom depends on the space you have and your specific needs. Start by assessing what items you use daily and what can be stored away. For frequently used products, consider sink-side caddies or lazy Susans for easy access. For hidden storage, hidden containers work wonders! Don’t forget to mix aesthetics with functionality to maintain a beautiful yet organized space.
Can I Use Natural Elements in My Bathroom for Both Style and Organization?
Absolutely! Incorporating natural elements into your bathroom not only enhances the aesthetic but also contributes to organization. Think about using wooden trays or wicker baskets to store items. These elements bring warmth and texture to your space while keeping everything tidy. Plus, they can make your morning routine feel more serene and enjoyable!
Related Topics
bathroom decor
countertop organization
storage solutions
small space hacks
clever storage
minimalist design
easy organization
decorative trays
repurposed containers
declutter tips
DIY bathroom
functional decor
Leave a Reply to Towfiquir Rahman Cancel reply