Spring cleaning season has me craving a system that actually sticks. When I open a cabinet and see mismatched lids, foil packets, and gadgets piled high, I waste time and patience. So I made this post to help you cut that waste and feel more in control in the kitchen. You deserve a setup that makes cooking and cleaning smoother, not a daily struggle with clutter. This guide packs 25 kitchen cabinet organization hacks that are practical, affordable, and easy to start today.
Who is this for. If you cook at home, live in a small space, or juggle busy days, this one is for you. If you love a kitchen that stays neat while you rush through lunches, dinners, and quick prep, you will find ideas you can actually use. These hacks speak to home cooks, busy parents, students, and anyone with limited cabinet space.
What you’ll get. Here are 25 kitchen cabinet organization hacks that cover space planning, containers, and labeling. They are practical, cheap, and flexible enough to fit most kitchens. You will discover ideas like using a lazy Susan for deep corners. A shelf riser adds a second layer. Clear bins keep items visible. Labeled bins help you grab what you need.
Each hack comes with a simple path you can follow. Start with a quick audit of what you actually use. Measure the depth and height of each cabinet. Decide on a container style, from clear plastic to glass jars. This plan keeps items easy to see and easy to grab.
Here is the plan to get results. Here is why it works: it cuts the time you spend looking for lids and spices. Let’s break it down into bite sized tasks. Pick one cabinet, empty it, group like items, then add one simple tool.
Next steps: try one or two hacks this week and notice how your kitchen feels. This introduction invites you to test, tweak, and build a system that lasts. If you want more, keep reading and choose ideas that fit your space and routine.
Contents
- 1. Use Clear Containers for Dry Goods
- 2. Install Pull-Out Shelves
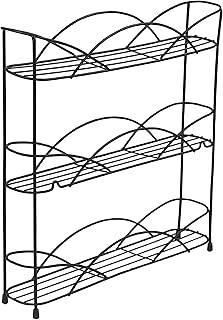
- 3. Utilize Vertical Space with Tiered Shelving
- 4. Magnetic Spice Racks
- 5. Drawer Organizers for Utensils
- 6. Lazy Susans for Easy Access
- 7. Hang Pots and Pans
- 8. Use Over-the-Door Storage
- 9. Pull-Out Trash Cans
- 10. Drawer Dividers for Kitchen Tools
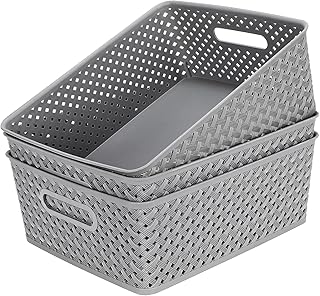
- 11. Use Baskets for Easy Grouping
- 12. Utilize Cabinet Door Space
- 13. Stackable Containers for Maximum Space
- 14. Color-Coding Your Kitchen Supplies
- 15. Repurpose Old Jars for Storage
- 16. Invest in Drawer Slides
- 17. Use Kitchen Shelves for Display
- 18. Incorporate a Kitchen Cart
- 19. Hang Measuring Cups and Spoons
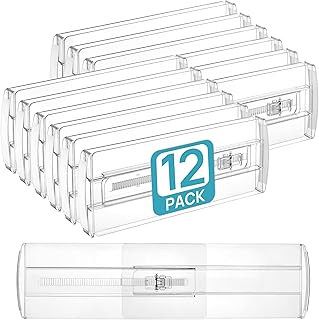
- 20. Use Tension Rods for Kitchen Supplies
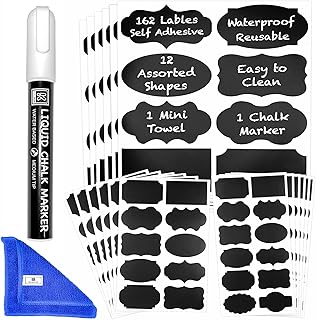
- 21. Organize with Labels
- 22. Use a Pegboard for Tools
- 23. Create a Cleaning Supply Station
- 24. Store Baking Sheets Vertically
- 25. Seasonal Rotation of Kitchen Items
1. Use Clear Containers for Dry Goods

You want your pantry fast to use and easy on the eyes. Clear containers let you see what you have at a glance. You stop guessing and you stop wasted trips to the store.
– Pick a mix of sizes: small jars for spices and baking powder; larger canisters for flour, sugar, and rice.
– Glass shows what is inside and feels clean.
– BPA-free plastic is lighter and less likely to break.
– Metal tins work for cereals or pasta.
– Seal matters. Look for airtight lids that snap or screw on. This keeps moisture out and keeps flavors strong.
– Label simply. Use white labels or a colorful sticker set. Write the food name and the date you opened it if you want.
– Group like items. Put all flours on one shelf, all sugars on another, and keep all beans or grains together. This makes restocking easy.
– Place the containers where you reach most often. Put the items you use every day at eye level. That way you can grab them without bending or rummaging.
Here is why the setup helps. It makes your cabinet calm and clean. You can stack the containers neatly without lids knocking into each other. The sight of clear jars creates a pleasant rhythm that tells your brain you are organized.
Small changes add up. If your cabinet is deep, add a shallow shelf or a pull out bin for heavy items.
Put a simple rotation plan in place. When you open a new bag, transfer the contents to a container and write the date on the label. Use a first in, first out rule so nothing sits too long. This keeps flavors fresh and reduces waste.
Maintenance is easy. Wipe the rims after each use. Check lids for wear every month. If you notice moisture, wipe the inside and replace the lid seals.
Next steps
– Measure your cabinet space first. Then pick containers that fit with a little space to spare.
– Start with the top two shelves for frequently used items. Move slower things to the back.
– Make one change this week. A small step adds up quickly over time.
– Consider color or style. A few bright labels or glass jars that match your kitchen can make the space feel calmer.
1. Use Clear Containers for Dry Goods
Editor’s Choice

32oz Glass Food Storage Jars with Airtight Clamp Lids,Set of 4 Airtight …

40 Piece Food Storage Containers with Lids(20 Containers & 20 Lids), BPA…

Avery Multi-Use Removable Labels, 1″ x 3″, White, Non-Printable, 72 Blan…
2. Install Pull-Out Shelves

What pull-out shelves do for deep cabinets
Do you struggle to see what you have in a deep cabinet? Pull-out shelves change that. They sit on sturdy rails and slide out toward you. You can see every pot, pan, and lid at a glance. No more unstacking or climbing into the cabinet to grab something. Your heaviest cookware becomes easy to reach, and your cupboard stops feeling like a black hole.
Smart ways to use them in your kitchen
Use pull-out shelves for bulky items that are hard to reach. Heavy pots and large skillets mount on the shelves so you can pull them out and lift them without tipping. Lids and bakeware fit well on a separate tier. Tall appliances, like mixers or slow cookers, can ride on a wide shelf that pulls out smoothly. Keep fruit and snacks in the lower shelves for quick access. A clean, organized stack looks and works better.
Choosing the right pull-out shelves
Pick shelves made to handle your load. Look for steel or solid wood frames with smooth, quiet slides. If moisture is a concern in your kitchen, choose materials with a protective coating to resist warping. Check the weight rating and match it to your most used items. Soft-close options reduce clanging and help protect your cookware. Consider the depth of your cabinet and whether you want adjustable shelves for future changes.
Installation in a few steps
1) Measure your cabinet opening, depth, and width to pick the right size.
2) Choose rails that fit your cabinet sides and screw them in with a drill.
3) Attach the shelves to the rails. Ensure they glide smoothly before loading.
4) Test with a few heavy items to confirm the weight feels steady.
5) Load evenly and keep the heaviest items toward the front for balance.
Strong, sturdy rails make a big difference. If you’re unsure about tools or cabinet type, ask a pro to help you avoid problems later.
Tips to keep pots quiet and neat
– Use dividers or small racks on each shelf to stop clanging.
– Place the heaviest items on the lower shelf for easy lifting.
– Keep lids in a dedicated tray or organizer so they don’t topple.
– Label the front edge so you know where everything lives, even in a hurry.
– Leave a little space behind items for air and easier pulling.
Limitations and next steps
Pull-out shelves cost more than plain shelves and require some planning. They work best in wide, deep cabinets. Very tall or oddly shaped spaces may need a custom fit. If you have a tight budget or a tricky layout, start with one cabinet first and see how it changes your routine.
Next steps
Check your cabinet dimensions and look for pull-out options that match your needs. Start with a single, heavy cabinet and test the system for a week. Adjust the setup as you learn what you reach for most. Soon your kitchen will feel calmer, and cooking will be a lot easier.
2. Install Pull-Out Shelves
Editor’s Choice

Pull out Cabinet Organizer,Heavy Duty Smooth Sliding Under Cabinet Shelv…

SONGMICS Cabinet Organizer Shelf, Set of 2 Kitchen Counter Shelves, Kitc…

Nelko Label Maker Machine with Tape, P21 Bluetooth Label Printer, Wirele…
3. Utilize Vertical Space with Tiered Shelving

Make the extra space in your cabinets count
Your kitchen cabinets hide a lot of space. Tall items sit idle there. Tiered shelving uses vertical space inside your cabinet. It adds levels you can actually see and reach.
– What to use
Choose tiered shelves that fit your cabinet. Options include metal wire racks, clear acrylic risers, or simple wooden steps. Metal holds heavy cans well. Acrylic wipes clean easily. Wood adds a warm feel. Mix and match if some shelves need more height.
– Where to place them
Set the tiers on the shelf you already have. If your cabinet is deep, pick flatter tiers so you can reach items without digging.
– How to set them up
Start by emptying the cabinet. Wipe the inside and dry it. Put the first tier toward the front so you can grab items. Add a second tier above it. If there’s room for a third, place it higher still. Adjustable options help you tailor the height to what you store.
– Sorting tips
Group similar items as you reload. Put spices on a small tier, baking sheets on a wider one, and cans on a taller one. Front-facing labels help you pick what you need fast. Keep the items you use most in the easiest reach.
– Loading rules
Heaviest things go on the bottom tier. Tall jars or cans sit on the back of a higher level. Short items stay on the lower front for quick grabs. This setup cuts clutter and frees counter space.
– Maintenance habits
Every few weeks, pull the items out and check. Wipe up spills, peek at expiration dates, and move daily staples to the front. A quick reset keeps things tidy longer.
– Practical examples
A three-tier rack can hold spices on top, baking sheets in the middle, and canned goods on the bottom. A smaller, two-tier setup works well in a shallow cabinet near prep space.
– Quick fixes
If you cannot install shelves inside, use a freestanding tiered organizer on the shelf or a slim pull-out unit. Both give you more control without remodeling.
– Next steps
Spend 15 minutes this week sorting a cabinet. Pull everything out, decide what you use often, and reload with a smart mix of tiers. You’ll cook faster and see a calmer shelf.
3. Utilize Vertical Space with Tiered Shelving
Editor’s Choice

BestOffice | 4-Tier Wire Storage Shelves | 36x14x54 | Black | with Adjus…

Aheroi Large Acrylic Risers, 8 Pcs 2 Set(7”L~8”L~9”L) Acrylic Display Se…

Bamboo Spice Rack Organizer for Cabinet 3 Tier Countertop Step Spice She…
4. Magnetic Spice Racks

Spice clutter makes cooking slow and messy. A magnetic spice rack fixes that. It saves space, keeps spices in reach, and gives your kitchen a clean, modern look. Here is why it works and how to set it up.
– Choose a spot. Put the strips on the side of a cabinet, the fridge, or a pantry door.
– Use strips that are strong enough for metal jars.
– Pick small metal spice jars with tight lids.
– Fill the jars with your spices and snap on the lids.
– Clean the surface first, then attach the strips and press firmly for 30 seconds.
– Put the jars on the strips and arrange them by color, by spice family, or by how often you use them.
Decor and color tips:
– Paint the lids to match your decor.
– Use color labels so you can spot spices fast.
What you need:
– Magnetic strips for mounting.
– Small metal spice jars with tight lids.
– Clear labels or tape for quick reads.
– A clean cloth for prep and cleaning.
– Optional: paint or color tape to blend with your kitchen.
Next steps:
– Measure the space and decide how many jars you want.
– Mount the strips on a clean, dry surface and press to fix.
– Fill, label, and place the jars.
Care and limits:
– This works best on metal surfaces like metal-framed cabinet sides or the fridge.
– If the door is light or the jars are heavy, use a stronger strip or add a second strip.
– Check the strips every few months and wipe away splashes.
Common questions:
– Will jars fall off? Use strong strips and proper lids.
– Can you color code by spice family? Yes, that helps you grab what you need.
4. Magnetic Spice Racks
Editor’s Choice

Metal 4 Pack Magnetic Spice Storage Rack Organizer for Refrigerator and …
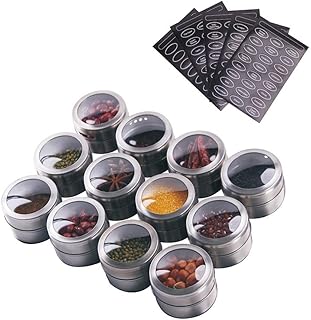
12 Powerful Magnetic Spice Tins- Stainless Steel Spice Storage Container…

500 Pieces Clear Labels Label Protector Clear Stickers Wafer Seals Water…
5. Drawer Organizers for Utensils

Your utensil drawer can feel like a tumble of spoons, tongs, and spatulas. You dig in and grab a ladle, only to knock over a whisk. The mess slows you down and adds stress to weeknight cooking. The fix is simple: use drawer organizers that separate tools by size and job. You’ll find what you need in seconds, not minutes.
Here is why this works. Clear gaps mean air flow, even in a small drawer. With the right setup, every tool has a home. You cut clutter, reduce slips, and protect sharp knives from bumps. A tidy drawer also makes cleanups easier because you know where to drop each item.
Next, let’s break it down into practical steps you can use today.
– Measure your drawers. Note the depth and width. This tells you what kinds of organizers fit without sticking out.
– Pick a mix of organizers. Use shallow dividers for cutlery and deeper trays for spatulas and tliers. Consider stacking trays for tall drawers.
– Choose materials that fit your kitchen. Plastic is affordable and easy to wipe. Bamboo looks warm and resists stains. Metal or acrylic can feel sleek and sturdy.
– Create zones by job. Have a zone for forks and knives, a zone for spoons and salad forks, and a zone for larger tools like ladles and whisks.
– Add labels if you like structure. A small, simple label helps when guests or kids help with the chores.
Here are quick setup tips you can apply now. Start with a basic set and add sections later. Place the longest items in the back or on the sides so they don’t crowd the smaller tools. For very deep drawers, stack two shallow trays on a pedestal or riser to gain extra height and space. If you share your kitchen with others, color-coding can make life smoother.
What about questions you might have? How many compartments should you use? As many as you need to keep items from touching. Do you need to label? Not always, but labels help with quick restocking. Should you mix materials? Yes, if you like the look, but keep it simple to avoid slippage and wobble.
Limitations are real. A very deep drawer may need a taller riser. A shallow drawer can feel crowded with too many sections. If you run into that, swap in fewer dividers and leave room to breathe. You can always add more later.
Next steps are easy. Sketch your drawer on paper, choose a couple of organizers, and test them in place. If something doesn’t fit, swap it out for a smaller tray or an adjustable divider. In a few minutes, your utensil drawer will work like a well oiled tool chest—calm, clean, and ready for your next recipe.
5. Drawer Organizers for Utensils
Editor’s Choice

SpaceAid Bamboo Drawer Dividers with Inserts and Labels, Kitchen Adjusta…

Silverware Organizer Kitchen Drawer Organizer Utensil Organizer Bamboo S…

8 PACK Clear Stackable Drawer Organizer Bins, Plastic Organizer Bins for…
6. Lazy Susans for Easy Access

Ever pull out a bottle from the back of a cabinet and wish you could reach it without a scavenger hunt? A Lazy Susan can fix that. These round, spinning trays bring items to the front so you don’t waste time digging.
Where to use them
– In the pantry, a Lazy Susan keeps oils, snacks, and cans in reach.
– Under the sink, it holds cleaners, brushes, and sponges so you can grab what you need fast.
– In corner cabinets, the rotating base turns a dead space into a useful shelf.
Two big ideas to get started
– Choose the right size. A 12-inch tray fits most spice racks. A 16-inch turntable works well for bottles and bigger items. If you have tight space, a compact 9–10 inch model can still help.
– Pick the right material. Metal and heavy-duty plastic spin smoothly and stay clean. Clear acrylic lets you see every item at a glance. Pick something sturdy with a smooth bearing so it won’t wobble or stick.
How to set it up quickly
– Measure your cabinet depth and height. You want room to turn without hitting the door.
– Group items by use. Put frequently used oils and spices on the top layer. Put less used things on the bottom.
– Place a non-slip mat under the tray. It stops items from sliding when you spin it.
– Label the sections. Simple tags or color codes help you spot herbs, condiments, and snacks at a glance.
– Keep lids and caps visible. Stand tall bottles with their tops facing outward so you can grab the cap without tipping anything.
Daily use that sticks
– Spin to scan. A quick turn shows you what you have and what you don’t.
– Put back where you found it. Always return items to the same spot to keep the system tidy.
– Refill in small bursts. When you finish a bottle, swap it to the front and replace with a full one in the back.
Tips for best results
– Use multiple turntables for different groups: one for herbs, one for sauces, one for snacks.
– Clear bins inside the tray help keep tiny items from rolling away.
– Clean the tray every few weeks with a damp cloth to keep it looking new.
Here is why this works. It cuts clutter and saves you time. It makes you notice items you would otherwise miss. Next steps? Pick a space, choose a size, and start organizing with a Lazy Susan today.
6. Lazy Susans for Easy Access
Editor’s Choice

Set of 4, 10 Inch Non-Skid Lazy Susan Organizers – Turntable Rack for Ca…
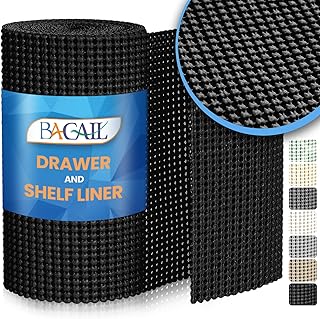
BAGAIL Drawer and Shelf Liner, 12 in X 10 Ft Non-Adhesive Shelf Liners f…

Vtopmart 6 Pack Clear Stackable Storage Bins with Lids, Large Plastic Co…
7. Hang Pots and Pans

If your pots take over the counter and your cabinets are stuffed, you’re not alone. You want storage that’s easy to reach, not a mess to fight with. Hanging pots and pans can solve both problems. It frees space, speeds up meal prep, and adds a touch of charm to your kitchen.
Here is why this works. A pot rack turns your cookware into a decorative feature you live with every day. It keeps heavy pots off the shelves and shows off your favorite finishes. You can pick a style that matches your kitchen, from rustic iron to sleek stainless. The result is tidy storage and a stylish focal point.
– Choose a style that fits your space. Wall rails look clean in modern kitchens. Ceiling racks give a bold, roomy feel. Freestanding racks work well in small or oddly shaped rooms. Materials vary from black iron to brushed steel to warm wood tones. Pick what looks right with your stove, island, and cabinets.
– Place it where it helps most. Hang the rack above your kitchen island or right over the stove if you have space. You want a height that lets you grab pots without climbing or reaching. Make sure you leave room for the lids and any vent hoods or lighting above.
– Set up for quick access. Use S-hooks to hold lids, pans, and lids separately. Put your most-used pots within easy reach—fry pans and stock pots near the front. Keep the heaviest pieces on the bottom hooks so you don’t lift too high.
– Organize by size and function. Start with the big pots on plates or the bottom rung. Stack smaller ones on higher hooks where they won’t bang. Group like pieces together so you know where each pot lives. A tidy line makes grabbing what you need fast.
– Keep finishes and lids in check. Use the same metal tone for all hooks to avoid a mixed look. If you have copper pots, you can blend them with stainless or matte black hooks for a cohesive scene. Use a few labeled hooks for lids to keep them upright and accessible.
– Mind the weight and durability. Secure mounting hardware into studs or joists. Use appropriate anchors if you must mount on drywall. Check occasionally for loose screws and wear. If a rack wobbles, stop and resecure.
Next steps. Measure your space, pick a style, and plan the wall or ceiling path. Install the rack with care, then organize by size and daily use. Watch how much cabinet space you gain and how fast you cook with everything at hand.
7. Hang Pots and Pans
Editor’s Choice
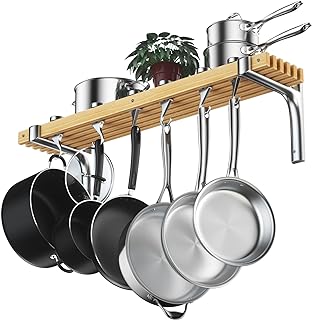
Cooks Standard Wall Mounted Wooden Pot Rack, 36 by 8-Inch

Cooks Standard NC-00269 Standard, Single Bar, 36-Inch Ceiling Mounted Wo…

Lodge 6-Tier, Kitchen and Pantry Cast Iron Cookware Storage Organizing T…
8. Use Over-the-Door Storage

If your cabinets feel crowded, you need a simple fix. You want more space without losing counter area. Over-the-door storage can give you that boost.
What over-the-door storage is
It hangs on the outside of a pantry or cabinet door. A sturdy rack adds extra shelves without stealing inside space. It’s quick to install and easy to adjust as your needs change.
What it holds
– Small jars and spice bottles in clear containers.
– Cutting boards, lids, and measuring spoons.
– Snack packs, tea bags, or packets of instant mix.
– Light cleaning supplies or wipes in small bins.
– Hair ties, foil and plastic wrap rolls, or other tiny kitchen odds and ends.
Here is why this setup works: it frees up drawer and shelf space while keeping everyday items close at hand. Next, let’s pick the right rack for your door.
Choosing the right rack
– Check the door size and thickness before you buy.
– Pick metal for strength or sturdy plastic for light use.
– Look for racks with secure hooks or a simple over-the-door track.
– Choose bins or baskets that fit snugly inside the rack.
– If you want a clean look, pick a finish that matches your cabinet hardware.
Let’s break down the installation steps so you can start today.
How to install it
– Measure your door to know the exact fit.
– Clean the door so hooks grip well and items don’t slip.
– Hang the rack over the top edge. Make sure it sits flat and sturdy.
– Place containers that fit tight and won’t slide when the door moves.
– Load light items first, then heavier items toward the bottom of each bin.
– Test the door. It should close fully without rubbing.
Next steps are about making the setup work in real life.
Smart setup tips
– Use uniform, stackable bins for a neat look.
– Label bins so you can grab what you need in a flash.
– Put frequently used items at eye level on the rack.
– Rotate seasonal or rarely used items to lighter bins to avoid strain.
Limitations to know
Over-the-door racks add weight to the door. If the door starts to rub, switch to lighter items or thinner hooks. They aren’t for large, heavy tools or bulky pots. Keep the load balanced to avoid door strain over time.
Maintenance and upkeep
Wipe the rack and bins every few weeks. Check hooks for looseness and tighten if needed. Reorganize every season so you still reach what you need fast.
With these steps, you gain more space, better access, and a kitchen that feels calmer every day.
8. Use Over-the-Door Storage
Editor’s Choice

Over The Door Pantry Organizer,9-Tier Over The Door Organizer with Adjus…

Sterilite 4-Pack Ultra Latching Box, Storage Bins with Lids, Clear Plast…

Brother P-Touch PT-N20 Personal Desktop Label Maker, Portable, Handheld …
9. Pull-Out Trash Cans

Tired of a big, visible trash can getting in the way while you cook? You’re not alone. A pull-out trash can tucked inside a cabinet can make your kitchen feel calmer and cleaner. Here’s how to choose, install, and get the most from this smart setup.
What it is
A pull-out trash bin sits inside a cabinet. A sliding rail lets you pull it out when you need to toss something. When you’re done, push it back. It stays out of sight and out of the way.
How to pick the right one
– Measure first. Check the cabinet’s width, depth, and door clearance. You want a bin that can slide in and out smoothly without blocking shelves or hinges.
– Decide on one or two bins. If you recycle, a two-bin pull-out helps you separate waste and recyclables without extra bags.
– Pick a lid that fits your habits. A soft-close lid keeps smells in and makes quiet, controlled closes.
– Choose materials you can clean easily. Plastic bins are simple and affordable; stainless steel looks sleek and handles busy kitchens.
– Think about liners. A built-in liner or a bag with a steady fit makes bag changes quick and tidy.
Why this helps your kitchen
– It hides waste from sight, so your counters look neat.
– It reduces spills. The bin sits lower and upright, so bags stay put and don’t tip when you reach for ingredients.
– It frees counter space. You keep prep areas clear, which helps your flow during busy cooking moments.
– It can curb smells when you close the lid right away.
Installation in simple steps
– Check fit and plan placement. Mark the location inside the cabinet where the rails will go.
– Remove any old bins or organizers. Clean the area so new parts sit cleanly.
– Attach the rails to the cabinet walls. Use the provided screws and measures from the kit.
– Hang the bin on the rails. Slide it in and out to test.
– Test the whole action. Open, pull, push back, and close. Make sure nothing binds and the lid shuts quietly.
Tips for best results
– Use sturdy bags that fit your bin. It prevents leaks and keeps the inside tidy.
– If you have a small compost or compostable waste, keep a compact bin inside the same cabinet or next to it so you don’t mix odors.
– Label or color-code recycling and trash if you share the kitchen with others. A quick note helps everyone sort waste faster.
Common questions
– Will it fit my crowded cabinet? Most kits come in several widths, and some fit behind standard cabinet doors.
– Can I install this myself? Yes. A basic drill, screwdriver, and ruler are enough for many kits.
Next steps
Measure your cabinet, pick a pull-out trash system that fits, and plan a weekend install. In a short time you’ll cook with less clutter and more ease.
Out of sight, out of mind! A pull-out trash can not only tidies up your kitchen but also keeps your cooking space serene and organized. Discover the magic of hidden storage!
9. Pull-Out Trash Cans
Editor’s Choice

Rev-A-Shelf Double Pullout Trash Can for Kitchen Cabinets 35 Qt Garbage …
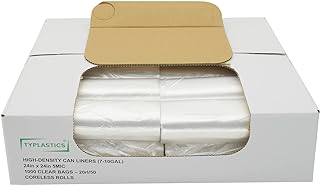
TYPLASTICS Trash Can Liner – Wholesale 1000 Count Garbage Bags on Perfor…

10. Drawer Dividers for Kitchen Tools

Do you reach into a jammed drawer and pull out a handful of tools instead of what you need? You are not alone. A tidy drawer makes cooking smoother and faster. The fix is simple: drawer dividers designed for kitchen tools.
Here is why these dividers matter. They carve the space into neat zones. Each tool has a home. Whisks go with whisks, peelers with peelers, and small gadgets sit in their own spot. No more hunting for a corkscrew in a sea of spoons. A calm, orderly drawer keeps you focused on the task and the taste of your next meal.
Choose the right style for your drawer
– Adjustable dividers: These stretch or slide to fit your drawer. They let you create tall sections for long tools and shallow bays for small gadgets. It is easy to reconfigure when your collection changes.
– Expandable or flexible dividers: Perfect for drawers with curves or odd shapes. They can bend to follow the drawer edges and keep items from sliding around.
– Narrow inserts and mini trays: Great for tiny tools like pliers, scoops, and bottle openers. These give each item a little home and stop them from tipping over.
– Non-slip liners inside: A soft mat helps tools stay put as you open and close the drawer. It also protects blades and ends from banging.
DIY on a budget
You can save money by making your own divider system. Use small boxes or trays you already have. A cereal box cut to fit the drawer makes a quick divider wall. Plastic lids or old gift boxes can become tidy compartments. Line the bottom with shelf liner to keep items from moving and to protect edges. It is fast, flexible, and gentle on your wallet.
How to set up your drawer dividers in 4 steps
– Measure: Note the length and height of the drawer before you buy or cut any dividers.
– Plan zones: Decide where long tools go and where small gadgets fit. Sketch a simple layout if helpful.
– Install: Place the dividers and adjust so there is little movement. Make sure you can remove items without knocking others over.
– Test and tweak: Put your most-used tools in their spots. If something feels crowded, thin a zone or add a new divider.
Practical tips you can use now
– Keep the most-used tools at the front for easy reach.
– Color-code by family: all whisk-type tools in one section, all peelers in another.
– Clean every few weeks. Pull out the dividers, wipe the drawer, and put items back neatly.
– Consider a second drawer for similar items if you own a lot of gadgets.
Common questions
– Do I need dividers in every drawer? Not always. Start with the most crowded drawer and go from there.
– What material works best? Plastic and silicone are light and easy to clean. Wood adds a warm look but needs care.
– Can I remove a divider if space changes? Yes. Adjustable models make it simple to reconfigure.
Next steps
Pick one drawer that hides the most chaos. Measure it, choose a divider style, and set up a tidy, user-friendly zone. You will notice the difference every time you cook.
10. Drawer Dividers for Kitchen Tools
Editor’s Choice
Vtopmart 12 Pack Drawer Dividers for Clothes, 4″ High 10.2″-16.6″ Adjust…

Pipishell Bamboo Silverware Organizer, Expandable Cutlery Tray, Utensil …

GORILLA GRIP powerGRIP Drawer Shelf and Cabinet Liner, Thick Strong Hold…
You might also like


11. Use Baskets for Easy Grouping

If your kitchen cabinets feel crowded and items slide around, baskets can be your secret fix. They turn chaos into order without turning your space into a box store. With baskets, grouping like items becomes simple, quick, and kind to your daily routine.
Here is why baskets work. They pull items together by type, so you always know where to look. They make grabbing snacks, baking supplies, or kitchen linens easy with one pull of the handle. Baskets can be moved from shelf to shelf as your needs change. They also add a warm, cozy touch to your cabinets, especially when you pick textures that match your decor. Woven baskets bring a rustic vibe, while fabric baskets feel soft and modern. You can switch colors or materials over time without ripping out existing shelves. The payoff is real: less rummaging, less mess, and faster meal prep.
Choosing the right baskets matters. Start with a few sizes so you can fit any cabinet height and depth. Use at least one shallow option for snacks or spice jars and one deeper option for baking supplies or dish towels. Materials matter too: wicker or rattan work great in sunlit kitchens, fabric baskets stay tidy and quiet, and sturdy plastic or metal baskets handle heavier items. Match the look to your kitchen style, but don’t sacrifice function. Label each basket so you know what lives inside at a glance. Simple labels on the front work wonders, especially when you’re sharing the space with others.
Placing baskets in your cabinets is easy. Put the most-used groups at eye level, so you don’t have to bend or reach. Stack baskets if you have tall shelves, but keep the top one light for safety. Use baskets on pull-out shelves or on adjustable racks so you can slide them out with one hand. If you have awkward corner spaces, choose wedge-shaped or smaller baskets that can fit snugly. Let the baskets act as a quick-scanning map of your pantry: grab a basket and you’re done.
What to store in baskets, exactly. Put snacks together in one, baking supplies in another, and clean kitchen linens in a third. Cooking sprays, tea bags, and packets of yeast all like to live in dedicated baskets. Spices that tend to spill can stay neat in a shallow basket with a non-slip liner. For kids’ snacks, choose a bright fabric basket; it makes healthy choices feel like a game.
Here are practical steps to get started.
– Measure each cabinet to know how big your baskets can be.
– Pick 2–4 baskets of different sizes that fit your space.
– Gather items you often reach for and group them by category.
– Label every basket with a simple tag or chalk label.
– Place them on the shelf where you use them most and adjust as needed.
Care and upkeep help baskets stay useful. Wipe wicker with a damp cloth, wash fabric baskets as the label allows, and check labels every few months. Rotate items with the season to keep things fresh and easy to find.
Next steps: take a quick inventory of your cabinet space today. Choose one area to start, add two baskets, and see how much faster you locate what you need. You’ll feel the difference right away.
11. Use Baskets for Easy Grouping
Editor’s Choice

Cute Woven Storage Basket with Handle, Baskets for Gifts Empty, Gift Bas…

Amazon Basics Collapsible Fabric Storage Cubes Organizer with Handles, S…
MaxGear Organization and Storage 3 Packs, Plastic Bins Organizer Bins, W…
12. Utilize Cabinet Door Space

Running out of shelf space in a busy kitchen? The inside of cabinet doors is an empty highway you can use. A few simple additions let you stash spices, cups, and towels without crowding your countertops. You’ll reach for items faster and keep the heart of your kitchen calm and tidy.
What fits on cabinet doors
– Spices in a slim rack that sits inside the door. Group them by meal or frequency for quick grabs.
– Measuring cups and spoons in a small pocket or on a magnetic strip.
– Pot holders and oven mitts within easy reach of the stove.
– Tiny tools like a bottle opener, timer, or a small whisk.
– Dish towels or cloths on a tiny rack to dry hands or wipe spills.
Strong, simple shelves and strips work best when items are light. If you keep things heavy, you risk warping the door or pulling it loose. Always test weight before loading up the space.
Choosing the right organizers
– Look for slim, lightweight racks that hinge or slide neatly on the door.
– Magnetic strips work great for metal utensils and metal lids from jars.
– Fabric or plastic pockets offer soft storage for small items without scratching surfaces.
– If you rent or want a temporary fix, choose removable adhesive strips rather than screws.
Strong magnets should never touch spice jars with metal lids. Keep spice jars separate or use magnetic strips only for metal tools.
How to install
– Measure the door height and the available space near the hinge.
– Decide on screws for durability or on strong adhesive for a damage-free setup.
– Mark drilling holes or stick the adhesive strips where you want the racks.
– Attach the rack or strip, then let the adhesive set if you use it.
– Place items and test. Open and close the door slowly to ensure nothing binds.
Keep tools simple. You want clean lines and easy access, not a jumble when you close the door.
Smart layout ideas
– Put a narrow spice rack toward the top of the door, near the hinge for steadiness.
– Mount a magnetic strip along the bottom edge for spoons, small metal lids, or bottle openers.
– A tiny pocket can hold a timer, a mini scissor, or a list of daily steps.
– Near the stove, store potholders on a small hook so you reach them in a flash.
These placements help you cook faster and keep the counter clean.
Maintenance and safety
– Check the weight every month. If you see a loose screw or weak strip, adjust.
– Wipe dust from racks and magnets. Clean jars and lids before reloading.
– If the door sticks, pause and remove the organizer. Use a lighter option next time.
FAQ quick tips
– Are magnets bad for spices? Not if jars stay away from metal lids, and if you keep lids closed tightly.
– Do magnets hold a lot of weight? Stick to light metal utensils and small tools. For heavier items, use a door shelf with a sturdy mount.
By using door space well, you free up shelf real estate and make your kitchen feel calmer. Simple, smart picks and careful placement turn a crowded cabinet into a well organized work station.
Unlock the hidden potential of your kitchen! Utilizing cabinet door space not only clears clutter but also makes your essentials easy to grab. A tidy kitchen is a happy kitchen!
12. Utilize Cabinet Door Space
Editor’s Choice
Spectrum Diversified 3-Tier Spice Rack Shelf Organizer for Kitchen Count…

Magnetic Knife Strips(15 Inch X Set Of 2) Magnetic Knife Storage Strip, …

Co-link Linen/Cotton Fabric Wall Door Cloth Hanging Storage Pockets Book…
13. Stackable Containers for Maximum Space

If you live in a small kitchen, you know every inch matters. Stackable containers can solve a big part of that puzzle. They let you use vertical space and keep cabinets clean. Here is why they work so well and how to pick the right ones.
What to look for
– Airtight lids matter. They keep snacks fresh and prevent leaks. Pick lids that snap on firmly and seal well.
– Clear materials help you see what’s inside fast. Glass lasts long and cleans easy, but sturdy plastic is lighter to lift.
– Shape matters. Square or rectangular containers fit shelves and door bins better than round ones. They pack tightly without wasting space.
– A mix of sizes is smart. Small jars for spices, medium containers for grains, large ones for flour or baking sheets. Keep a few slim options for odd gaps.
– Uniform tops help with stacking. If possible, choose containers that stack at the same height for stability.
How to set them up
– Group by what you store. Put breakfast items in one zone, snacks in another, and baking supplies in a third.
– Put the ones you use most often at the front. Put the rest toward the back or on higher shelves.
– Stack like with like. Place heavier, sturdier containers on the bottom. Light, small ones go on top.
– Use risers or small bins inside a cabinet. They create a second shelf for quick picks and clean sightlines.
– Align containers so the labels face out. A quick glance tells you what’s inside without rifling through.
Smart labeling and rotation
– Label each jar with name and date opened. A simple tape label or a chalk marker works well.
– Rotate oldest items to the front. This helps you use what you have before it goes stale.
– Keep a small notepad near the area. Jot ideas for meals you’ll make with what you have.
Practical examples to try
– Pantry staples: oats, flour, rice, and pasta in uniform 1–2 liter jars. Stack two medium jars on a shelf above a large one.
– Snacks: pretzels, crackers, and nuts in 500 ml to 1 liter containers. Line them up in a row for easy grabbing.
– Baking supplies: chocolate chips, sugar, and baking powder in labeled, airtight canisters. Group them by use.
Limitations to know
– Some containers take up more upfront space when you group lids. Choose a system you can move and clean easily.
– Cleaning jars and lids can take time. Wash while you switch out items so shelves stay fresh.
Next steps
– Measure your cabinet depth and height. Note the space you want for stacked items.
– Pick 3–5 sizes that cover your most-used foods.
– Set up a small test zone this weekend. Watch what you reach for most and adjust.
With a simple plan, stackable containers turn a crowded cabinet into a calm, usable space. You’ll see more room, easier meal prep, and less waste. Start small, and build as you go.
13. Stackable Containers for Maximum Space
Editor’s Choice

Sterilite 4-Pack Gasket Box, Weather-Resistant Storage Bins with Latchin…

500 Removable Blank Food Labels, Water/Oil/Tear Resistant with Perforati…

SONGMICS Cabinet Organizer Shelf, Set of 4 Kitchen Counter Shelves, Kitc…
14. Color-Coding Your Kitchen Supplies

If your kitchen shelves feel chaotic, color can be your best helper. Color coding makes items easy to find and easy to put away. It also adds a friendly, tidy look you can enjoy every day.
Here is why color coding works. Your eyes spot colors faster than shapes or names. A quick glance tells you exactly where to go. It reduces mixups, saving time when you cook or clean. It also makes kids and guests more likely to help because the system is simple and clear.
Let’s break it down into a plan you can start today.
– Pick a simple color set
Choose three or four colors you like. A calm trio or a bold quartet works. Keep it consistent.
– Decide color roles
Assign each color to a set of items or a zone. For example:
– Green for food prep gear (cutting boards, measuring cups, mixing bowls)
– Blue for towels and cloths (dish towels, hand towels)
– Yellow for spices and dry goods (spice jars, canisters, pasta)
– Red for lids, caps, and frequently used containers
You can mix and match to fit your space, but keep the rules the same everywhere.
– Gather the supplies
Get color-coded bins, baskets, and labels in your chosen colors. Clear bins with colored lids work well. Chalkboard or plastic labels in matching colors stay readable. Use color tape to mark shelves or drawers if you don’t want to buy new bins.
– Label and set up
Put colored labels on the inside of drawers, on baskets, and on shelf edges. A simple font size is enough to read quickly. Group items by color and by function as you place them. For example, green bins near the prep counter, yellow canisters on the pantry shelf, blue towels by the sink.
– Start with a small zone
Pick one area to begin. Set up green items at the prep station. Once that zone stays neat, apply color rules to another area.
– Keep it practical
Don’t overdo colors. If a color is hard to find or shows wear, replace it. Keep the system light so it’s easy to maintain.
– Maintain with a quick weekly check
Each week, skim the zones. Return items to their color home. Replenish labels if they fade. A quick check keeps the system working.
What you’ll gain
– Faster shopping and cooking because you can locate items in a flash.
– Less clutter as items slide back to their color home.
– A kitchen that looks organized and feels calmer.
If you’re unsure, start small. A single color on spice jars or towels can already make a big difference. Over time, you can expand the palette and the zones to fit your routine.
14. Color-Coding Your Kitchen Supplies
Editor’s Choice

Storex Small Cubby Bins – Plastic Storage Containers for Classroom, 12.2…
Chalkboard Labels for Jars 162pcs – Waterproof Reusable Chalk Sticker La…

8PCS Colored Masking Tape – Painters Tape, Rainbow Colors Rolls, Kids Ar…
15. Repurpose Old Jars for Storage

Are you drowning in a sea of loose pantry items and mismatched lids? Old glass jars can stop the chaos. They keep dry goods tidy, cut down mess, and look good on the shelf. Let’s turn those jars into a simple, solid system you can use today.
– Here is why this works
– Start by gathering jars you already have. Look for clean glass with lids in good shape. Save jam jars, pickle jars, and any other clear containers. The more sizes you have, the easier it is to fit your spaces.
– Next steps: clean and prep
– Rinse every jar well. Soak off stubborn labels with warm water and a little soap. Scrub until the glass shines. Dry them completely before use. This prevents moisture from making your dry goods moldy.
– Decide what to store in each jar
– Use wide-mouth jars for bulk items like oats, rice, flour, or beans. Tall jars work great for pasta or grated cheese. Small jars are perfect for spices, seeds, and nuts. Group jars by category so you can grab what you need in a flash.
– Label and date for real organization
– Put a simple label on each jar. You can write the name and the date with a marker or use small sticky labels. Clear labeling helps you know what’s inside without opening the lid. Date items that go bad, like nuts or opened sauces, so you rotate them quickly.
– Style and keep it simple
– For a rustic feel, leave some jars bare. If you want color, spray the lids or add a fabric lid cover. Keep lids tight but easy to twist. A neat row of jars with matching lids makes the shelf calm and easy to scan.
– Put jars to work in the kitchen
– Use jars for dry staples on the pantry shelf. Store pasta, oats, beans, and granola in clear jars so you can see what you have. Move frequently used items to eye level. Put a small shelf or a lazy susan under the cabinet to spin through your jars.
– Safe, practical tips you can use now
– Do not store raw meat or perishable foods in glass jars. Use jars for sauces or dressings that stay in the fridge. Keep a few jars near the stove for quick utensils or spices. Rotate items so the oldest get used first.
– Quick setup plan
– Start with one shelf. Pick five jars to test: two wide-mouth, two tall, one small. Label, fill, and place them. Step back and see how it changes your space. If it helps, repeat on other shelves.
Ready for a neat upgrade? Repurposing old glass jars gives you a cleaner kitchen, less waste, and a design you can see and feel every day. Start small, stay consistent, and watch your cabinet space expand.
15. Repurpose Old Jars for Storage
Editor’s Choice

Mason Jars Canning Jars, 24 Pack Jelly Jars With Regular Lids, Ideal for…
Nelko Label Maker Machine with Tape, P21 Bluetooth Label Printer, Wirele…
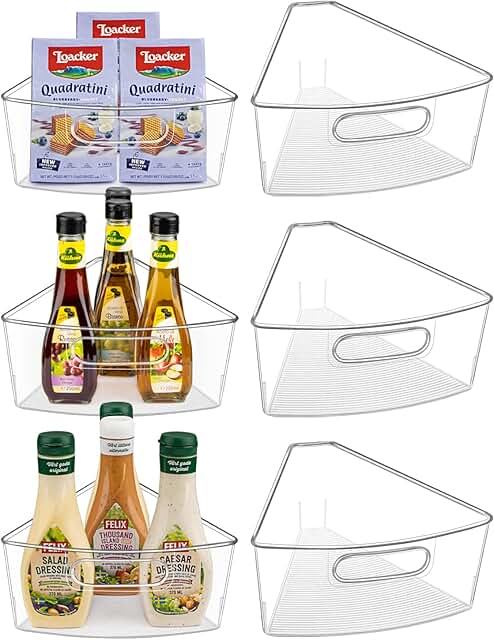
Lazy Susan Cabinet Organizer Bins for 26″/ 28″/ 32″ Diameter Corner Orga…
16. Invest in Drawer Slides

Tired of drawers that stick or slam shut? A small upgrade can fix that and make your kitchen feel calmer. Drawer slides are the rails that let a drawer glide. Put in good slides and you’ll notice the difference every time you reach for a spoon or a pan.
Here is why this upgrade pays off. Smooth slides mean fewer wrenches of effort. You’ll open a drawer with one easy pull. You won’t hear jarring thumps or feel the whole cabinet shake as you push it closed. If you want a touch of quiet luxury, soft-close slides are worth it. They slow the drawer at the end so it settles softly instead of banging shut.
Different types to know
– Full-extension slides: You can pull the drawer all the way out. That means you see the back of the drawer and grab items you might have missed before.
– Side-mount versus undermount: Side-mount slides run along the sides of the drawer; undermount slides are tucked beneath the drawer for a cleaner look. Choose what fits your cabinet style.
– Soft-close options: These bring the drawer to a gentle stop. They’re popular in kitchens where kids help with chores and in cabinets that get daily use.
– Weight and depth: Pick slides that can handle the stuff you keep in the drawer and match the drawer’s depth. Too long and the drawer won’t close; too short and you lose reach.
How to pick and measure
– Measure the drawer length. Your slide should be as long as the drawer’s depth, not longer.
– Check the drawer height and the side thickness where you’ll mount the slides.
– Decide on the mounting style that matches your cabinet. If you’re not sure, choose a common side-mount package with a soft-close option.
– Think about usage. If you slam drawers a lot or store heavy tools, go with sturdy slides and a higher weight rating.
Installation at a glance
– Remove the drawer from the cabinet. This makes it easier to work.
– Take out old slides and clean the mounting corners.
– Align the new slides with the drawer sides and cabinet walls. Use the screws that come with the kit.
– Don’t over-tighten the screws. A snug fit works best.
– If you can’t swap the whole set, you can often add soft-close units to existing slides. It’s a practical middle-ground.
Care and quick fixes
– Keep the tracks clean. Wipe away dust and crumbs so the glide stays smooth.
– If it Ever feels sticky, a light spray of silicone on the tracks can help. Wipe away any excess.
– Check screws every few months. Loose hardware makes drawers wobble again.
Common questions you might have
– Do soft-close slides slow closing too much? No. They slow the finish so you hear a quiet settle instead of a slam.
– Are undermount slides stronger? They’re sturdy for heavy use, but your choice should fit your drawer size and cabinet style.
– Is installation hard for a beginner? Many kits are designed for DIY. With basic tools and patience, you can do it.
Next steps
– Measure your drawers, pick a matching full-extension, soft-close set, and follow the basic install steps. A small upgrade can restore flow to your kitchen and make daily tasks feel smoother.
16. Invest in Drawer Slides
Editor’s Choice

LONTAN Soft Close Drawer Slides 22 Inch Side Mount Heavy Duty Cabinet Dr…

Liberty D68814C-W-TX 14-Inch Bottom Mount Drawer Slide

6 Pairs of 21 Inch Undermount Soft Close Drawer Slides Full Extension Co…
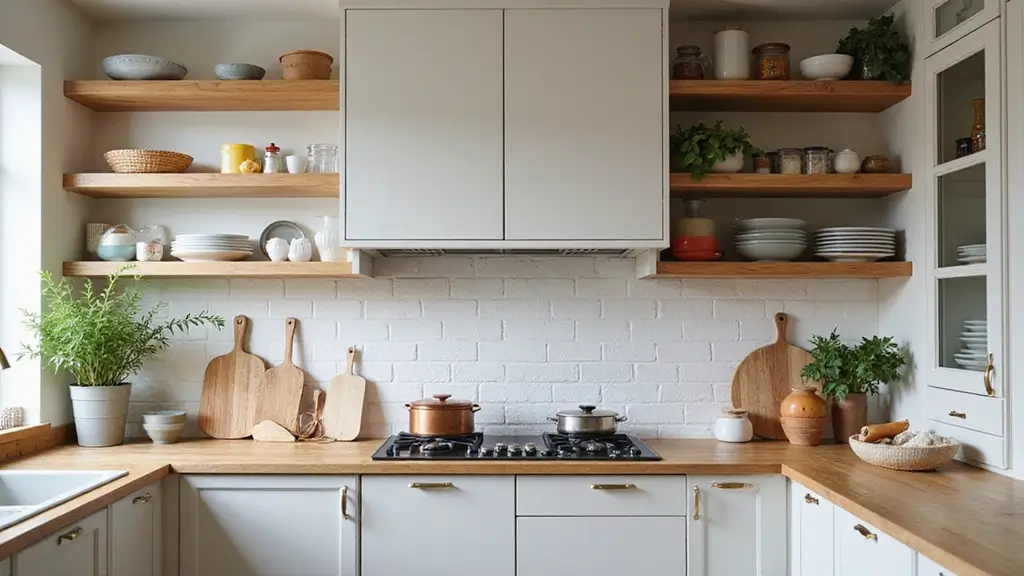
17. Use Kitchen Shelves for Display

Open shelves are more than decor. They are a smart way to store and show what you love. They free up cabinet space and add life to your kitchen. If you want easier access and a personal touch, these shelves are for you.
Here is how to make open shelves work for you.
– Choose the best spots. Put shelves where you cook most or where you eat. A wall near the stove or a spot beside the dining table is ideal.
– Pick the right shelves. Wood shelves with a warm tone blend with many kitchens. Metal shelves give a clean, modern feel. Depth of 12 to 18 inches keeps items from tipping. Check the weight load before filling them.
– Decide what to display. Pick a small set of items you reach often. A couple of cookbooks, a few bowls, glass jars for dried goods, and a tiny herb pot work well. Keep daily use items on the lowest shelf.
– Create tidy groupings. Line items up with straight edges. Pair tall pieces with shorter ones. Group by color for a calm look.
– Add simple storage helpers. Baskets and jars hide small pieces like spoons and tags. They make the shelf look neat while still showing your favorites.
– Bring in life with plants. A small herb plant or a pothos adds color and a lightweight scent. It makes the space feel fresh.
– Light it up. Add a small under shelf light or a bright lamp nearby. Good light makes each piece pop and helps you see ingredients.
– Keep it practical. Place mugs you use every day within easy reach. Put recipe cards or cookbooks you pull from often at a handy height.
– Clean as you go. Wipe shelves once a week. A quick dust keeps the display clean and inviting.
– Match the style. Mix textures like ceramic, glass, and wood. Keep finishes similar so the display looks polished.
– Try current trends in a real way. Floating shelves save space in tight kitchens. A slim metal frame adds an urban edge. Rounded wood pieces feel cozy.
Next steps. Measure your wall and set a simple goal. Start with two shelves and a few items. Pick one plant, a small book stand, and a few jars. Install them and adjust until you love the look.
17. Use Kitchen Shelves for Display
Editor’s Choice

QEEIG Bathroom Shelves Over Toilet – Wall Mounted Floating Shelves Toile…

Anchor Hocking Heritage Hill 1 Gallon Glass Jar with Lid, Set of 2

KIBAGA Beautiful Herb Garden Planter Indoor Set of 3 – Perfect for Any K…
18. Incorporate a Kitchen Cart

If you feel cramped at the counter, a kitchen cart can be your best helper. It gives you a sturdy work surface and extra shelves you can move where you need them. You can slide it out for a quick prep session or tuck it away when you are done.
– Why a kitchen cart helps A cart boosts prep space and daily storage. It keeps pots, pans, and utensils within arm’s reach. You can roll it to the stove or sink without lifting heavy items. It also adds a touch of style that fits your kitchen vibe.
– What to look for when buying Measure your space first. A cart should be tall enough to stand at a comfortable height while you chop. Look for three or more tiers so you have room for lids, spices, and towels. Pick wheels that lock so the cart stays put during use. Materials matter. Stainless steel is easy to wipe; wood and bamboo add warmth; metal frames stay sturdy.
– Ways to use it every day Put your go‑to tools on the top shelf: cutting board, knife block, measuring cups. Store pots, pans, and lids on the middle and bottom shelves. Add a wire rack or baskets for small items like jars, sponges, and cloths. If you like to host, turn the cart into a mini bar or drink station. A few bottles, glasses, and a shaker can live there.
– Smart setup ideas Group items by task. Top for prep, middle for cookware, bottom for bulk storage. Use bins for small bits like spices or tea bags. Keep a towel hook on the side so you have a ready cloth when you wipe a spill. Choose a cart with a tidy look that matches your kitchen style, from rustic to modern.
– Placement and care tips Put the cart near the prep zone or dining area so you save steps. Keep it away from heat, steam, and open flames. When not in use, push it against a wall to stay out of the way. Wipe the surface after cooking and dry the shelves to prevent moisture damage. Tighten wheels and screws every few months to keep it smooth.
– Next steps Decide on a size that fits your space. Pick a style that matches your cabinets or fixtures. Measure, choose wisely, and you will gain a flexible station that makes cooking and cleaning easier.
A kitchen cart is more than just a piece of furniture; it’s your sous-chef! Boost your kitchen cabinet organization and create a stylish prep station that rolls wherever you need it. Cooking just got a whole lot easier!
18. Incorporate a Kitchen Cart
Editor’s Choice

Finnhomy 3-Tier Rolling Kitchen Cart With 18″ D x 30″ W Oak Wood Tableto…

Vtopmart Clear Plastic Storage Bins, 6 PCS Pantry Organizer Bins with Ha…
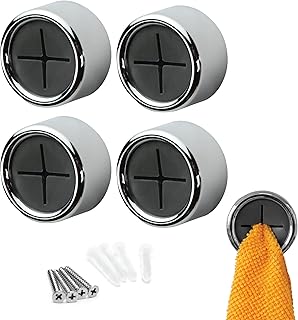
S&T INC. Round Adhesive Push Towel Hooks for Kitchen, Hand and Dish Towe…
You Might Also Like
19. Hang Measuring Cups and Spoons

If you waste time hunting for measuring cups and spoons, this fix can speed up cooking. When you can reach what you need in a blink, you cook with less hassle. You also keep your counters tidy and your tools easy to see.
Here is why this approach works. Hanging tools creates a simple system. It keeps metal and plastic pieces from piling in a drawer. It also adds a small touch of style to your kitchen.
What you gain
– Quick access during meals and batch cooking
– A clean, organized wall or cabinet door
– A chance to add color that matches your decor
Pick the right setup
– Magnetic strip: best for metal cups and spoons. It holds items flat so you can scan what you need fast.
– Hook rack: small, sturdy hooks work well for plastic pieces or light metal items.
– Slim rail or pegboard: lets you slide items along and swap them as your needs change.
Where to put them
– Under cabinets for easy reach while prepping.
– Inside a cabinet door for a hidden, neat look.
– On a spare wall area if you have space.
How to install
– Choose a height you can see easily. Eye level is a good target.
– Clean the surface so the mount sticks well.
– Mark the spots for screws or magnets. If you use a strip, make sure the spot has a metal back or you add a small backing plate.
– Attach the strip or rack with the included screws. Use a level to keep it straight.
– Hang cups by their rims or handles. Clip spoons onto hooks.
Set it up so it helps your routine
– Group by type: all cups together, then spoons.
– Sort by size, from small to large.
– Color code if you like. A splash of color can speed picks.
– Put the most used sizes at the front.
Care and upkeep
– Wipe pieces dry after washing to prevent rust.
– Check screws and magnets every few months. Tighten if needed.
– Refresh the layout when you add new tools.
Common questions
– Will magnets hurt plastic cups? Not usually. They stay put on a proper strip.
– Can I use this on a fridge door? Yes, for light items and a strong strip.
Next steps
– Measure your space today.
– Pick a plan: strip, rack, or pegboard.
– Gather parts and install this weekend.
Why dig through drawers for measuring tools? Hang them up for quick access and a dash of style! Streamline your kitchen cabinet organization and make cooking a breeze!
19. Hang Measuring Cups and Spoons
Editor’s Choice
Magnetic Knife Strips(15 Inch X Set Of 2) Magnetic Knife Storage Strip, …
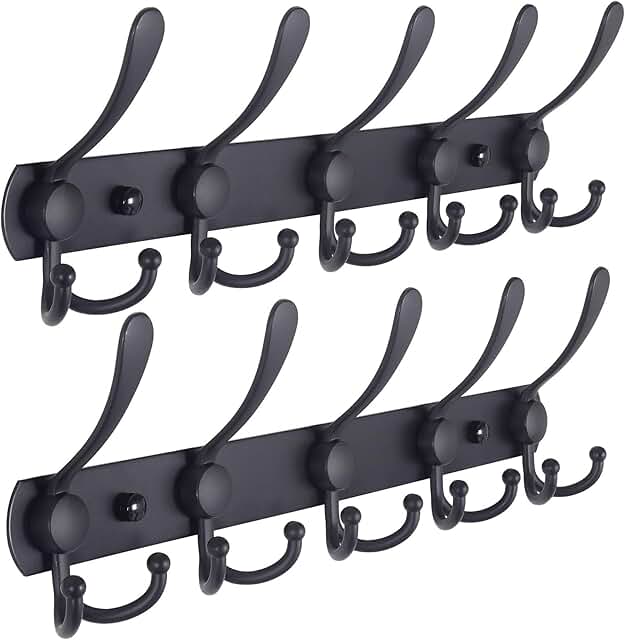
Dseap Coat Rack Wall Mounted – 5 Tri Hooks, Heavy Duty, Stainless Steel,…

INCLY 278PCS Pegboard Accessories Organizer Kit, Peg Board Hooks Assortm…
20. Use Tension Rods for Kitchen Supplies

Feeling cramped in your kitchen? A simple tension rod can change that. It works fast, costs little, and travels with you if you move spaces. Here is why this tool fits real life: it is adjustable, friendly to walls, and easy to reset. You get clean lines, less clutter, and items that stay where you expect them. Now, let’s get practical.
– Under the sink or in a small cabinet: install a tension rod across the opening. Hang spray bottles by their handles. Clip cleaning towels on the rod too. This keeps liquids upright and within reach when you need them most.
– Inside a cabinet: place the rod between two sides to hold towels or rags. Drape dishcloths in a row so they dry and stay tidy. It cuts down on loose fabrics slipping around every time you open the door.
– Vertical pot lid storage: stand lids up against the rod. They won’t rub or scratch each other. It makes grabbing the right lid quick and quiet during dinner prep.
– Narrow pantry spots or cabinet doors: mount a rod across a thin space and add clip-on bins or small hanging organizers. Store packet sauces, seasoning mixes, or tea bags where you can see them at a glance.
– Cups, mugs, and mugs with handles: hang these on a second rod if you have a tall cabinet. It frees shelf space for bowls and plates while keeping cups easy to grab.
Here is why this setup shines in real kitchens: it creates instant vertical storage. You gain room for bulkier items you already own. It’s gentle on surfaces—many rods come with soft caps to avoid mark marks. It’s flexible too; you can move it when you rearrange or clean.
Next, how to install quickly. Measure the space first. Add a little extra to the rod so it fits snugly but still twists. Place the rod, then twist clockwise until it holds tight. If you use it in a damp area, choose a rod with rust-resistant finish, like stainless steel or coated metal.
Tips to get the most from tension rods: keep a lightweight load for best grip. Use non-slip liners on the rod ends if the space is slick. Check the rod every week or so to verify it stays firm.
Common questions you might have: Will the rod leave marks? It can leave a tiny imprint if the surface is soft. Add felt pads on the ends to protect surfaces. Can I lift items easily? Yes, keep weight light or medium. Heavy jars are better kept on shelves.
Next steps: pick a few tight spots in your kitchen. Decide which items to corral first. Measure, install, and enjoy the extra space in minutes.
20. Use Tension Rods for Kitchen Supplies
Editor’s Choice

Black Shower Curtain Rod 31 to 80 Inch,1 Inch Diameter Adjustable Spring…

Bettli Spring Loaded Curtain Tension Rod Bit Holder Extensions Pack of 2…
Black Shower Curtain Rod 31 to 80 Inch,1 Inch Diameter Adjustable Spring…
21. Organize with Labels

Struggling to find what you need in a crowded kitchen? Labels save time and cut chaos. You will spend less time hunting and more time cooking. When you can spot content at a glance, you waste less food and stay organized.
Here is why labels work. They guide everyone in your home. A clear label on a jar shows what lives inside at a glance. Now, let’s break it down into easy steps.
– What to label first: Start with jars and containers you use every day, like oats, flour, rice, pasta, and coffee, so you can grab them fast.
– Label styles: A label maker gives crisp, durable results, while handwritten tags add charm.
– Color code: Use three colors to group items by type, such as red for spices, blue for grains, and green for snacks, so your eyes scan fast.
– Placement matters: Put labels on the front of jars or on the lid where you look first, and keep them at eye level for quick reach.
– Durability matters: Choose waterproof vinyl labels for glass and laminated paper labels for wood or plastic to withstand kitchens’ damp air.
– Maintenance: Wipe labels clean and replace fading ones during your monthly tidy to keep the system fresh.
– Labeling on curved jars: If a jar curves, use wrap-around labels or two short labels so the name stays readable.
– Kitchen zones: Color code by zone like pantry, fridge, and cabinet and keep labels consistent across the room.
– Spice rack care: Label spice jars with both name and best-by date to avoid old stock.
– Quick audit plan: Do a 15-minute scan weekly to check labels, rearrange items, and prevent crowding.
Next steps to put this into action:
1. Gather containers you use most and note what sits inside each.
2. Choose a labeling method and make or print the labels.
3. Apply labels and test for a week, then adjust.
Common questions come up. Will labels peel off? Use a clean, dry surface and a strong adhesive. Do curved jars cause problems? Wrap labels around the curve or apply several short labels so the name remains readable.
With labels in place, your kitchen runs smoother, looks tidier, and you waste less food.
21. Organize with Labels
Editor’s Choice
Nelko Label Maker Machine with Tape, P21 Bluetooth Label Printer, Wirele…
200 Pcs Bottle Labels 4×2 inch Printable Glossy White Waterproof Vinyl S…

Science Lab Labeling Tape Variety Pack, 500 Inches Long x 3/4 Inch Width…
22. Use a Pegboard for Tools

Struggling to keep tools off the counters? A pegboard can fix that fast. It gives you a wall or cabinet space where your tools live, ready to grab.
Why a pegboard works for kitchen tools
– You hang items instead of leaving them flat.
– You can move hooks and shelves as your cooking habits shift.
– It looks tidy and makes prep feel smoother.
Where to place a kitchen pegboard
Mount it on a free wall near your prep zone, or inside a cabinet door for a hidden setup. Choose a spot that saves steps and keeps knives, spatulas, and spoons within easy reach. Pick a pegboard that’s sturdy enough for your needs, and use proper anchors if you attach it to drywall.
How to set it up
– Measure the space and decide on a size.
– Gather pegboard hooks, small bins, and a tiny shelf.
– Plan your layout by task: group spatulas and tongs together, then place whisks and ladles nearby.
– Install the board with screws or anchors so it stays still as you pull tools off and on.
– Hang items in a logical order. For example, keep everyday tools at the front and lighter items near the top.
Want to adjust after a week? Move pieces until the flow feels right for you.
Smart layout ideas
– Front and center: daily tools like spatulas, wooden spoons, and kitchen tongs.
– Mid level: whisks, ladles, pastry brushes, and small measuring cups.
– Right side or top: can opener, scissors, peeler, and micro tools.
– Use small bins for things that tend to clutter, like zipper bags clips or recipe cards kept in a slim pocket.
Materials, styles, and how to pick
– Wood pegboards bring a warm look. They soak up moisture less than metal and feel sturdy.
– Metal or powder-coated boards resist humidity and wipe clean easily.
– Choose a neutral color to blend with your cabinets, or a bold shade to make tools easy to spot.
– Pick durable hooks and baskets meant for kitchen use. They should click on and off without snagging.
Maintenance and limits
Pegboards are low maintenance. Wipe them with a damp cloth to remove dust and spills. If you use heavy pots or large pans, a pegboard alone may not hold them. In that case, pair the board with a small shelf or wall rack for big items.
Next steps
Plan a quick layout today. Install the board, hang your most used tools first, and test the flow. Keep adjusting until you reach a setup that feels fast and calm every time you cook.
22. Use a Pegboard for Tools
Editor’s Choice

Keepo Pegboard Combination Kit, Pegboards and Accessories Modular Hangin…

300-Piece Pegboard Hook Set, Pegboard Organizer Accessories for Hanging,…

Pegboard Bins Kit 12 PACK Black Pegboard Parts Storage Tool Peg Borad Wo…
23. Create a Cleaning Supply Station

You want a clean kitchen fast. The right plan makes that possible. A dedicated cleaning supply station keeps every tool in one place. It helps you clean up after meals without hunting for items.
Here is why a station works. It saves time, reduces mess, and makes cleaning less of a chore. Even small spaces can fit a useful setup. You get a calm, clear spot for every job.
1. Pick the spot
Choose a cabinet near your prep area or a closet. Under the sink is common, but a small rolling cart can live on the floor too. The goal is easy access. You should reach what you need without leaving the room.
2. Gather the right supplies
Start with basics. An all‑purpose spray, a glass cleaner, a degreaser, sponges, microfiber cloths, rubber gloves, trash bags, and paper towels stay busy. If you mop, add a mop head or microfiber pad. You do not need every cleaner in the store.
3. Use labeled bins
Put similar items together in small bins or baskets. One bin for bottles, one for brushes and rags, one for spare sponges and gloves. Labels help you find what you need fast. When you put things back, you know the home.
4. Create a cleaning caddy
A portable tote keeps your go‑to items in one place. Put a spray bottle, a roll of towels, and a few rags inside. Take it to the sink, the stove, or the table as needed. It makes quick cleans simple.
5. Safety and access
Keep stronger cleaners out of kids’ reach. Use a simple latch if needed. Read labels for how to use products safely. Always keep lids on tight and store in a cool spot away from heat.
6. Keep the area tidy
Wipe the station down once a week. Refill supplies before they run out. Toss old sponges and rotate stock. A neat station invites you to clean up sooner.
Next steps
Decide where your station will live. Grab a couple of baskets, labels, and maybe a small rolling cart. Set up the bins, label them, and start using the station this week. You will notice the change right away.
23. Create a Cleaning Supply Station
Editor’s Choice

Casabella Plastic Multipurpose Cleaning Storage Caddy with Handle, 1.85 …

artsdi 11 Inch Storage Cube,Storage bin (Set of 10) Foldable Fabric Cube…

USANOOKS Microfiber Cleaning Cloth Grey – 12 Pcs (12.5″x12.5″) – High Pe…
24. Store Baking Sheets Vertically

If your baking sheets keep slipping to the back of the cabinet, you are not alone. The risk is clutter that makes a simple bake day slow. Vertical storage cuts the guesswork in half. You’ll reach for the sheet you need in seconds, not minutes.
Here is why this works. Stacking sheets creates tall piles that are hard to lift. A vertical setup keeps each sheet visible and easy to grab. It also frees up horizontal space for pans, lids, or racks. The result is a cleaner, calmer cabinet and fewer scraps of time wasted.
What you need
– A file organizer, magazine file, or adjustable dividers
– A shallow bin or a low, wide rack if your cabinet is tall
– Non-slip pads or a simple cloth liner to keep sheets from sliding
– A quick labeling method so you know what you have
How to set it up
– Clear the shelf. Take out all baking sheets and sort them by size.
– Choose a vertical solution. A metal file organizer, plastic dividers, or a set of magazine holders works well.
– Place the organizer inside the cabinet. Make sure it sits flat and won’t tip when you slide in a sheet.
– Stand sheets on edge. Slide each sheet into a slot or between dividers. Keep the most used sizes toward the front.
– Add a liner if you like. A thin cloth or silicone liner helps sheets stay in place while you open and close the door.
– Label the front or edge. Simple notes like “baking sheets 12×16” help you grab the right one fast.
Tips for best results
– Group by size. Keeping similar sizes together makes scanning quick.
– Leave a little air. Don’t cram sheets tight; you want a easy pull.
– Keep a spare space. A small slot for a cooling rack can free up other spots.
Common questions you might have
– Will this bend the sheets? Not if you stand them on edge and don’t push too hard.
– Will it fit in a shallow cabinet? Use a low rack or a slim file organizer to fit the space.
– Is it hard to switch back to horizontal? No. You can still store lids or trays on the shelf above.
Next steps. Measure your cabinet height and depth. Pick a vertical organizer that fits. Then set up and enjoy a cleaner, faster kitchen routine.
24. Store Baking Sheets Vertically
Editor’s Choice

Hanging File Organizer, Letter-Size File Holder with 5 Folders, Modern M…
Lzerking Drawer Divider 4 Pack, Kitchen Bamboo Drawer Organizers, 17-22″…
BAGAIL Drawer and Shelf Liner, 12 in X 10 Ft Non-Adhesive Shelf Liners f…
25. Seasonal Rotation of Kitchen Items

If your kitchen feels jammed with stuff you rarely use, you’re not alone. Seasonal rotation helps you keep only what you need, when you need it. It cuts clutter and makes room for what you truly use.
Here is why rotation works. It stops waste. It helps you find items fast. It keeps your space feeling calm and easy to cook in.
– Step 1 — Take stock Start with a quick sweep of your cabinets, drawers, and the pantry. Pull out items that you seldom touch. Set aside anything you forgot you owned or that sits past its date. You want a clear picture of what stays and what goes away for now.
– Step 2 — Decide a rotation cadence Pick a simple rhythm. A three-month cycle fits most kitchens. If your space is smaller, try a six-week cycle. The goal is regular checkups, not a long, boring project.
– Step 3 — Separate and store by season Put seasonal items out of sight when they aren’t needed. Holiday dishware can live higher on a shelf. Baking tools that you only use in fall and winter should sit with other off-season gear. Keep everyday items where you cook most often.
– Step 4 — Use clear, labeled storage Clear bins or baskets make it easy to see what’s inside. Label each bin with the season or month. A simple tag helps you know when to rotate again.
– Step 5 — Create a rotation plan for fast access Put items you use a lot where you reach most in the kitchen. Move rarely used gear to back shelves. Involve a quick reordering system so you never lose track of what’s on hand.
– Step 6 — Set reminders Add a calendar reminder every few months. A quick audit takes only a few minutes. Seeing a date trashs or rehomes items keeps the habit alive.
– Step 7 — Make it part of cooking prep During meal prep, check what you’ll need in the next few weeks. If you’ll not use something soon, swap it out. This keeps today’s tasks smooth and future months simple.
Practical examples to try. Store summer grilling gear in a back corner during winter. Move winter mugs and cozy cups near the coffee maker in cold months. Take out holiday-specific bakeware once the season ends and tuck it away until it returns.
What you gain is clear space and less stress. You’ll spend less time digging, less money on duplicates, and more time on what you love—cooking and sharing meals. If you hit a snag, adjust the cadence or where things sit. The system should serve you, not the other way around.
Next steps: pick a start date, pull out one category, and begin your first rotation. Simple steps now pay off with a calmer, brighter kitchen later.
25. Seasonal Rotation of Kitchen Items
Editor’s Choice
Vtopmart 6 Pack Clear Stackable Storage Bins with Lids, Large Plastic Co…
Nelko Label Maker Machine with Tape, P21 Bluetooth Label Printer, Wirele…
Conclusion

With these 25 kitchen cabinet organization hacks, you’re well on your way to creating a beautifully organized cooking space.
Implementing these ideas not only improves functionality but elevates your kitchen’s overall look. Enjoy the ease of cooking in a space that feels delightful and welcoming, and don’t forget to share your own organization tips with friends and family!
Note: We aim to provide accurate product links, but some may occasionally expire or become unavailable. If this happens, please search directly on Amazon for the product or a suitable alternative.
This post contains Amazon affiliate links, meaning I may earn a small commission if you purchase through my links, at no extra cost to you.
Frequently Asked Questions
What Are Some Simple Tips for Kitchen Cabinet Organization?
Starting with simple tips can make a world of difference in your kitchen cabinet organization! Consider using clear containers for dry goods to easily see what you have on hand. Implementing drawer dividers can help keep utensils in check, while tiered shelving maximizes vertical space. Each of these hacks can enhance functionality and reduce clutter!
How Can I Optimize My Kitchen Space If It’s Small?
If you’re working with a small kitchen, optimizing your space is key! Try using stackable containers to make the most of vertical space and consider over-the-door storage for added organization without cluttering your counters. Another great idea is to use a kitchen cart that can be moved as needed, providing both additional storage and workspace.
What Is the Best Way to Organize Spices in My Kitchen?
To keep your spices organized and easily accessible, a magnetic spice rack might be your best bet! It saves space and gives your kitchen a chic look. Alternatively, consider using a Lazy Susan in a cabinet to spin and find spices without the hassle of digging through clutter. Labeling your spices can also make finding them a breeze!
How Do I Keep My Kitchen Cabinets Clutter-Free?
Keeping your kitchen cabinets clutter-free is all about regular decluttering! Make it a habit to remove items you rarely use, and consider a seasonal rotation for kitchen items. Using baskets for grouping similar items can also help maintain order, while labels can guide everyone in the household to return items to their rightful spots. A little maintenance goes a long way!
Are There Any Creative Ways to Use Vertical Space in My Kitchen Cabinets?
Absolutely! Vertical space is often underutilized in kitchens. You can install pull-out shelves to make deep cabinets more accessible, or use tension rods to create extra space for utensils and kitchen supplies. Additionally, consider hanging pots and pans to free up cabinet space while adding a stylish touch to your kitchen decor!
Related Topics
kitchen cabinet organization
storage tips
decluttering hacks
small kitchen solutions
easy organization
DIY storage
pantry organization
vertical storage
magnetic spice racks
beginner friendly
seasonal organization
clear container storage
Leave a Reply to Kiet Lê Cancel reply