Are you craving a green paradise right in your backyard? This post is for anyone who wants to grow more food in less space, cut grocery bills, and enjoy fresh flavors all season. I pulled together 20 backyard vegetable garden hacks that cover water, soil, space, and pests, so you can turn a small patch into a thriving edible oasis.
Here is why I made this. I know how hard it is to start with a tiny yard, a busy life, and not much know-how. I want tips that work in real homes, not fancy demos. These hacks are simple, affordable, and doable on a weekend.
Who it’s for
If you’re a beginner, a busy parent, a renter with a balcony, or someone who loves clever space ideas, this is for you. If you care about fresh meals, saving money, and a smaller footprint, you’ll feel right at home here.
What you’ll get
You’ll get practical hacks that cover water use, soil health, space saving, and pest control. Each tip comes with a quick how-to and a setup you can try this week. The ideas help you save time, cut waste, and harvest more with less fuss.
For example, you can set up a rain barrel and run a simple drip line to beds. Mulch with shredded leaves to lock in moisture and keep weeds down. Build a low-cost raised bed or use cinder blocks to create a vertical garden. Install a trellis so cucumbers climb and free up ground. Start with fast growers like radishes, lettuce, and spinach to gain confidence. Make a tiny crop plan to rotate plants and keep soil healthy.
Next steps are easy. Pick one hack to start this weekend. Set a small goal, like installing a drip line or starting a batch of lettuce seeds. If you want, drop a note with your setup and I can help troubleshoot. Gardens grow with small, steady moves, and this guide is here to help you take the first ones.
Contents
- 1. Vertical Gardening
- 2. Companion Planting
- 3. Raised Garden Beds
- 4. DIY Composting
- 5. Drip Irrigation Systems
- 6. Crop Rotation
- 7. Planting Herbs
- 8. Natural Pest Control
- 9. Use of Mulch
- 10. Seasonal Planting
- 11. Soil Testing
- 12. Planting Cover Crops
- 13. Use of Plant Labels
- 14. Use of Shade Cloth
- 15. Harvesting Techniques
- 16. Save Seeds
- 17. Incorporate Wildlife
- 18. Experiment with Container Gardening
- 19. Use Time-Tested Methods
- 20. Celebrate Your Harvest
1. Vertical Gardening

If your yard is tight, you can grow a lot with vertical gardening. Putting plants up high saves ground space and lifts the burden off your knees. Here is why this setup works for small spaces. This guide shows a simple, sturdy way to start.
Vertical Gardening
Vertical gardening uses walls, trellises, shelves, and pots set off the ground. Tomatoes, cucumbers, and peas love this setup. Lifting plants lets air move around them and cuts some pests. You can make your own frame from wooden pallets or an old ladder. That saves money and adds a quirky look.
How to set it up
– Find a sunny wall or balcony with at least six hours of sun.
– Secure a frame that can hold wet soil and ripe fruit.
– Attach planters, pots, or baskets in a tiered layout.
– Water from the top or use a simple drip line to keep leaves dry.
– Choose crops that climb or spill, like tomatoes, cucumbers, beans, and lettuce.
– Plant flowers among greens to lure pollinators.
Tips:
– Make sure the frame is strong enough to hold ripening produce.
– Mix in flowers to attract bees and butterflies.
– Place taller plants toward the north side to avoid shading shorter ones.
Give this setup a try. You will see the plants climb in no time.
Elevate your gardening game! Vertical gardening not only saves space but also creates a stunning green backdrop. Transform your backyard vegetable gardens into a lush paradise with just a little creativity!
1. Vertical Gardening
Editor’s Choice

VECELO 5 Tier Vertical Garden Planter, Self Watering Stackable Planters …

Garden Obelisk Trellis for Climbing Plants Outdoor 6 Ft Rose Bush Round …

Rain Bird DRIPKITBAG Drip Irrigation Repair and Expansion Kit
2. Companion Planting

Wrestling with pests and patchy yields? Companion planting can help you rebalance your garden. You place certain crops near each other so they help one another. Some plants deter bugs. Others attract friendly insects. The result is a calmer bed and more steady harvest.
Here is why it works. A varied mix confuses pests and stops one bad year from wiping you out. It also keeps soil healthier. You can plant for flavor, not just cover.
Tips for choosing companions:
– Carrots and onions share space well. Onions deter pests that bother carrots.
– Lettuce and radishes grow fast together. Radish roots loosen the soil for lettuce.
– Beans and corn often grow in tandem. Beans fix nitrogen, feeding the corn, while the corn offers shade.
Next steps for a simple start:
– Sketch your bed. Mark where crops sit.
– Pair one crop with its friend in a small corner first.
– Observe two weeks. Note what bugs arrive and what looks healthier.
Let’s break it down: if you plant a mixed bed, pests hit one crop and miss others. Your overall harvest keeps rolling. With a little practice, you see fewer pests and healthier plants.
2. Companion Planting
Editor’s Choice

Vegetable Companion Planting Guide Poster Garden Poster Vegetable Variet…

Mighty Mint Gallon (128 oz) Insect and Pest Repellent Peppermint Oil – N…
3. Raised Garden Beds

Raised Garden Beds
If your back aches from bending to weed or plant, raised beds help. They bring soil to a comfortable height. You can stand and work with less strain. Drainage improves and roots stay healthier. The soil warms sooner in spring, so you can start earlier. Weeds stay tamed, and the bed keeps your garden neat.
Here is why you should try them. They look tidy in the yard and make planting simple. Watering is easier, and soil stays looser.
Let’s break it down with simple steps:
– Materials: choose a frame from treated wood, bricks, concrete blocks, or recycled pieces. Cedar and redwood last longer. Add a border or mesh to keep pests out.
– Size and depth: aim for about 4×6 or 4×8 feet. 12 to 18 inches deep works for most vegetables.
– Soil mix: fill with topsoil, compost, and a bit of coco coir or peat for moisture and air.
– Setup tips: pick a sunny spot with good drainage. Place the bed on level ground. Mulch the edges to slow weeds.
Benefits:
– Less bending, easier on your back.
– Better drainage and soil health.
– A defined space that makes the yard feel organized.
Limitations: higher upfront cost and some heavy lifting. It takes time to build and fill.
Next steps: plan crops, label rows, and start with easy picks like lettuce and radish.
3. Raised Garden Beds
Editor’s Choice

Land Guard Galvanized Raised Garden Bed Kit, Galvanized Planter Garden B…

SONGMICS Garden Kneeler and Seat, Multifunctional Garden Kneeling Bench,…

Rapitest Soil Test Kit for Gardens, Vegetables, Flowers and Lawns. USA d…
4. DIY Composting

Your backyard needs a boost, and you want less waste. Composting is a simple fix. It turns kitchen scraps and yard clippings into rich soil food that helps plants grow.
Turn kitchen scraps into garden soil gold! Composting feeds soil and cuts waste in one go. A well made pile or bin adds life to your beds and keeps nutrients where they belong.
Here is why it helps: it adds organic matter, improves water retention, and feeds microbes that plants rely on.
– Pick a spot that stays a little damp and away from the house.
– Use a simple pile or a sturdy bin.
– Layer greens and browns in roughly a two to one ratio.
– Turn the pile every week or two to add air.
– Keep it moist; it should feel like a wrung sponge.
– When it looks dark, crumbly, and smells earthy, it is ready.
– Mix it into garden beds or spread as mulch.
Tips:
– Do not add meat, dairy, or oily foods; they attract pests.
– Keep the pile moist, but not soggy.
– If it dries out, add water or green scraps.
– Consider a worm bin for nutrient rich vermicompost.
– Avoid weed seeds by composting only well-decomposed scraps.
Your garden grows.
4. DIY Composting
Editor’s Choice

Utopia Kitchen Compost Bin for Kitchen Countertop, 1.3 Gallon Compost Bu…

EJWOX Stainless Steel Compost Aerator Tool – Manual Turner & Mixer for C…

The Original Vermihut ® Plus 5 – Tray Worm Composter -Dark Green,Sustain…
5. Drip Irrigation Systems

Drip irrigation for your veggie garden
Struggling with wasted water and dry spots in your veggie garden? A drip irrigation system puts water right at the roots. It feeds the roots slowly and keeps leaves dry, so plants grow steady. You save water and cut waste. Here is why it helps and how you can set one up this season.
What you need
– A main supply line or hose that runs along your beds
– Drip tape or tubing with emitters near plant bases
– Connectors and adapters to fit your hose
– A filter and a pressure regulator
– A timer to run automatically
– Clips to hold lines in place
How to set it up
1. Map your beds and mark each plant
2. Lay a main line along the beds without stepping on it
3. Attach drip lines to the main line and place emitters at each plant base
4. Add the filter, regulator, and a timer
5. Turn on the system, look for leaks, and adjust flow
6. Mulch around beds to cut evaporation
Be mindful at first. Some soils drink quickly, others soak slowly. Water in the morning to cut waste. Check lines monthly for clogs and leaks.
With this setup you waste less water and grow tastier veggies. Give it a try and watch your garden thrive.
Peace of mind.
5. Drip Irrigation Systems
Editor’s Choice
Rain Bird DRIPKITBAG Drip Irrigation Repair and Expansion Kit

Orbit 62034 Mechanical Water Timer for Lawn and Garden Watering

5/8″ Drip Tape 1010FT, 6″ Spacing Roll,16 Mil Garden Irrigation Tubing H…
6. Crop Rotation

Your soil can get tired after a long season. Crop rotation helps keep it fed and strong. You switch the crops in a bed each year. This slows pests and reduces wear on the soil. Think of it as giving the soil a break while plants take what they need.
For example, if you plant nightshade veggies like tomatoes in Bed A this year, move legumes such as beans or peas into that bed next year. Different plants use different nutrients and resist pests in different ways. Rotation slows disease and keeps yields steady.
Unique Insight: A simple garden journal can make rotations easier. Jot down what you planted where and how it did. A quick map on paper or in a note app saves you from repeating the same bed with the same crops.
General Advice: Plan a 3- to 4-year rotation across beds. Pair rotation with simple companion planting to boost plant health, like basil near tomatoes or carrots with onions.
Next steps:
– Map beds and group crops by family.
– Pick a rotation cycle that fits your space.
– Start a simple notebook to track results.
6. Crop Rotation
Editor’s Choice

Rapitest Soil Test Kit for Gardens, Vegetables, Flowers and Lawns. USA d…
Vegetable Companion Planting Guide Poster Garden Poster Vegetable Variet…
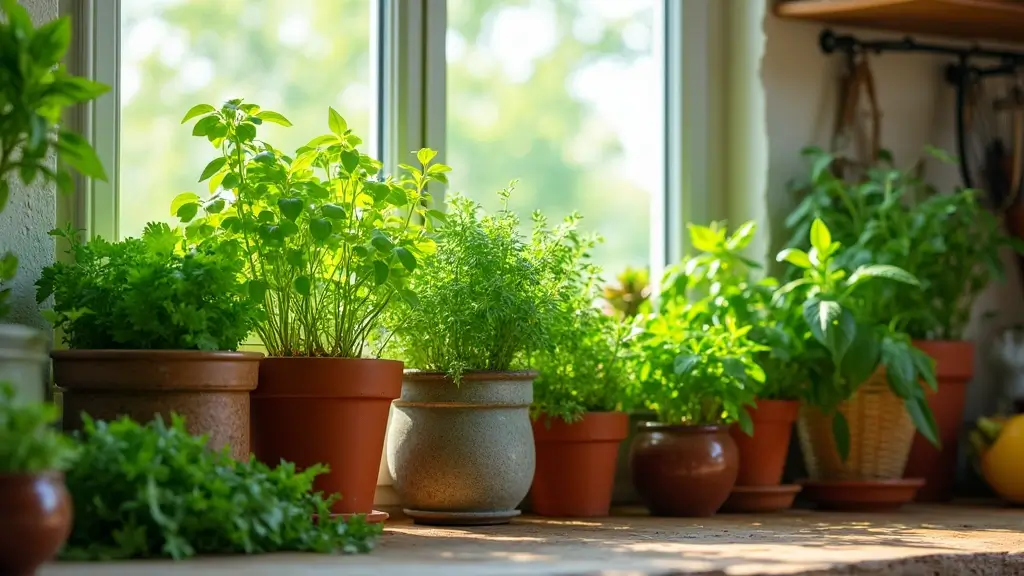
7. Planting Herbs

You want herbs that add flavor and function to your garden. Here is a simple way to get both. Herbs do more than taste good. They attract helpful insects and push back pests. Plant cilantro, basil, and parsley next to your veggies for color and a working bed. They fit in small spaces and can live in pots. If the weather turns cold, move them indoors and keep fresh leaves year round.
Here is why herbs help: they fill gaps, scent the air, and invite hoverflies that eat pests.
– Where to place them: around peppers and tomatoes, in a sunny yard corner, or on a balcony.
– In tiny yards, use shallow pots or window boxes.
– If you grow indoors, pick a bright spot and water regularly.
Tips:
– Regularly prune each herb to keep it bushy.
– Pair herbs with your vegetables. Basil with tomatoes, parsley with greens.
– Harvest leaves when you cook. Fresh or in oils or vinegars.
– Mint spreads. Grow it in a separate pot.
Next steps: choose a spot, pick a few herbs, and start a simple care routine. You’ll notice fresh flavor in every meal and fewer pests in your garden.
Enjoy the fresh herbs in meals and share them with friends. Your garden will feel calmer and more alive.
7. Planting Herbs
Editor’s Choice

9 Herb Indoor Garden Kit – Unique Kitchen Gift for Women, Men, Mom, Frie…

Indoor Self Watering Planters with Drainage Holes and Saucers, 8, 7, 6.5…

Sereniseed Certified Organic Herb Seeds (10-Pack) – Non GMO, Heirloom – …
8. Natural Pest Control

Natural Pest Control Without Chemicals
You want a safe garden and you want results. Natural pest control can help you fight bugs without harsh sprays.
Here is why it works. Beneficial insects like ladybugs and lacewings eat common garden pests. To draw them in, plant blooms that give nectar and pollen. Good picks include daisies, yarrow, cosmos, and nasturtiums.
That’s a form of organic pest control that fits small yards. Try simple homemade sprays. A garlic or chili spray, or neem oil mix, can deter many pests. Mix a small amount with water, then spray the undersides of leaves in the cool early morning. Test on a leaf first. Reapply after rain or heavy dew.
Companion planting adds another layer. Some plants scare pests away or attract helpful insects. For example, nasturtiums lure aphids away from vegetables. Marigolds can help with soil pests, and basil or chives near tomatoes can offer extra protection.
Suggestions:
– Regularly inspect your plants for early signs of trouble.
– Keep the garden clean and compost healthy to support beneficial life.
– Use row covers or netting to physically shield your crops.
Next steps: pick one tactic to try this week and watch how your plants respond.
8. Natural Pest Control
Editor’s Choice

Bonide Captain Jack’s Neem Oil, 32 oz Ready-to-Use Spray, Multi-Purpose …
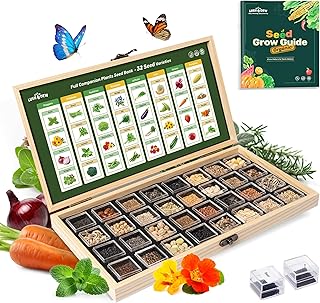
LUSH&DEW Full Companion Plants Vegetable Seed Bank, Gardening Gifts for …

Garden Netting, Jevrench Durable Ultra Fine Garden Netting, Garden Plant…
You might also like

9. Use of Mulch

Keep soil moist and curb weeds with mulch You want a garden that drinks less water and resists weeds. Mulch makes this easy. It acts like a soft blanket for your vegetables.
Materials to choose
– Straw, bark chips, or shredded leaves work well for mulch.
– Avoid fresh grass clippings in thick layers, as they can pack and stink.
How to apply
– Clear a small space around each plant.
– Spread a 2-3 inch layer of mulch.
– Keep a bit away from stems to prevent rot.
– Lightly press the mulch so it stays in place.
Benefits you’ll notice
– It helps soil stay moist, so you water less.
– It keeps soil temperature steady, protecting roots.
– It blocks sunlight, slowing weed growth.
– It slowly breaks down and feeds the soil.
Tips for best results
– Replenish mulch after heavy rain or during the season.
– Check the layer and add more if it thins.
– On slopes, add a touch more to slow erosion.
– For extra weed control, keep the mulch a bit thicker around bed edges.
Next steps
Choose a mulch you can get locally, apply this weekend, and watch your plants respond in a week.
9. Use of Mulch
Editor’s Choice

GardenStraw, 3 cu ft (20 lbs) Pack of 1 – All-Natural Mulch for Gardens,…

100% Natural Pine Bark Mulch Nuggets (12 Quarts), Small Chips for Indoor…

Back to the Roots 25.7qt (1 Cubic ft) Organic Premium Mulch
10. Seasonal Planting

Seasonal planting that keeps your garden busy
You want fresh veggies most months. The trick is to fit crops to the season. Some plants love cool air. Others thrive in heat. When you plant by season, you keep a steady flow of harvest.
Plan this way
– Know frost dates and your growing zone. This helps you time starts and transplants.
– Try succession planting. Sow or set out a new batch every couple of weeks for staggered picks.
– Group crops by season. In early spring, choose leafy greens. As soil warms, move in tomatoes and peppers.
– Add simple season extenders. A lightweight row cover or a small cold frame can push back frost.
Here is how it grows in practice
– Early spring: lettuce, spinach, radish
– Late spring: peas, beans
– Summer: tomatoes, peppers, zucchini
– Fall: kale, broccoli, carrots
Common questions
– How often should I plant the same crop? Every 2–3 weeks works for many greens.
– Do I need special tools? Not much—just seeds, starts, and a protective cover.
Next steps: check your frost dates, pick 2–3 crops per season, and sketch a simple yard map to place them.
10. Seasonal Planting
Editor’s Choice
Garden Netting, Jevrench Durable Ultra Fine Garden Netting, Garden Plant…

Clyde’s Garden Planner – Vegetable Planting Slide Chart, 2023, 5″ x 8.5″…

Outsunny 9′ x 3′ x 3′ Mini Greenhouse with Zippered Doors & Roll-up Wind…
11. Soil Testing

Here is why you need to test your soil. You want plants that grow strong. The base for success is soil. A soil test reveals three key facts: pH, nutrient levels, and texture. These facts guide what you plant and how you improve the soil.
Here is how to test it. Choose a testing method. Use a home kit or send a sample to a local lab. Take a representative soil sample from 6 to 8 spots in your garden bed. Mix the samples in a clean container. Send the mix for analysis or follow the kit directions. Read the results clearly. Look at pH, the levels of nitrogen, phosphorus, and potassium, and the texture result.
Vegetables respond to these numbers. For example, carrots grow best in sandy soil. Leafy greens thrive in a rich, loamy mix.
Next steps:
– If pH is off, adjust with lime to raise it or with sulfur to lower it.
– If nutrients are low, add organic fertilizers or compost based on the test results.
– Improve texture with well-rotted compost, aged manure, or mulch to help air and water flow.
Tips:
– Retest your soil annually or after a heavy crop season.
– Use the amendments the test suggests to feed the soil, not just the plants.
Great plants start with great soil! Testing your soil’s pH, nutrients, and texture is the secret ingredient to thriving backyard vegetable gardens. Dig deep, and let your garden flourish!
11. Soil Testing
Editor’s Choice
Rapitest Soil Test Kit for Gardens, Vegetables, Flowers and Lawns. USA d…

True Organic All Purpose Plant Food – Organic Fertilizer for Fruits, Veg…
Utopia Kitchen Compost Bin for Kitchen Countertop, 1.3 Gallon Compost Bu…
12. Planting Cover Crops

Struggling to keep soil healthy while your beds rest? Cover crops can help. They work while you wait. Think of clover, rye, and vetch as soil keepers. They slow erosion, crowd out weeds, and feed the earth as they break down.
Here is how to use them:
– What to plant: Clover fixes nitrogen and invites helpful bugs; Rye provides a sturdy winter cover; Vetch adds nitrogen and a light, quick-growing ground cover.
– When to plant: In cool regions, sow in late summer or early fall. In warmer areas, plant in autumn or early spring before the heat arrives.
– How to sow: Broadcast seeds or drill them just under the surface. Rake lightly, press, and water if needed. Keep the seed bed moist until germination.
– How to finish: Let the cover crop grow until it forms a good mat. Then till it back into the soil a few weeks before you plant your main crops in spring.
Benefits:
– Improves soil structure and fertility.
– Attracts beneficial insects and reduces pests.
– Breaks up soil compaction and slows erosion.
Next steps: plan a small bed this season and select one mix to try. You’ll feel the soil loosen and see fewer weeds come spring.
12. Planting Cover Crops
Editor’s Choice

No-Till Garden Farm and Garden Cover Crop Mix Seeds – 5 Lbs – Blend of G…

13. Use of Plant Labels

Keep track of your plants with simple labels
Staring out at your bed, you may forget what you planted where. Labels fix that. They save trips to guesswork and help when you try new varieties. Label with wooden stakes, stones, or scraps you have. The goal is simple: something you can read from a distance.
How to make labels last
Choose durable materials. Use waterproof markers or outdoor paint so the names stay clear after rain or watering. A thin coat of clear sealant helps wood stay legible longer. For a clean look, write in bold letters and keep the name short. Include the variety and a date if you want.
Where to place labels
Label rows or sections so you know what to expect at harvest time. Place labels at the end of each row or beside a new plant. If you plant in blocks, mark each block with the crop name. A quick garden map on paper or a chalkboard helps you remember what is where.
Tips to stay organized
– Create a simple plan that shows which plants live in each area.
– Update labels when you add new varieties or make changes.
– Use color codes or symbols to show plant families or harvest windows.
Next steps
Plant with confidence. Your garden will be easier to manage and more fun to grow.
A well-labeled garden is a happy garden! Keep track of your backyard vegetable gardens with simple, durable labels – your plants will thank you for it!
13. Use of Plant Labels
Editor’s Choice

KINGLAKE 100 Pcs 6 x10cm Plastic Plant T-Type Tags Nursery Garden Labels

Avery Marks A Lot UltraDuty Bullet Tip Permanent Markers, Water Resistan…

Mod Podge Spray Acrylic Sealer that is Specifically Formulated to Seal C…
14. Use of Shade Cloth

Shade cloth keeps tender plants safe from hot sun
If your greens and herbs are new, strong sun can burn their leaves. Shade cloth filters light and cools the air around them. You still get enough sun to feed growth, but with less stress.
Where to use it
Set up a small frame over a bench, or drape the fabric over a row of pots. Keep the cloth at least a few inches above the leaves so air can move.
Choosing the right shade level
Shade cloth comes in different levels like 30, 40, or 50 percent shade. For most seedlings, start with 30 or 40 percent. If the plants look pale or stretch toward the sun, add a bit more shade.
How to install quickly
– Build a light frame from PVC pipes or use simple hoops.
– Drape the cloth loose and skip direct contact with leaves.
– Secure edges with clips, weights, or rocks.
– Leave a small gap for air and water to pass through.
Tips for best results
Water in the morning. Check often on hot days. If you remove it on a cool afternoon, your plants will thank you.
Benefits at a glance
– Reduces sunburn and wilting
– Eases heat stress during heatwaves
– Helps soil stay moist longer
– Supports steady growth of seedlings
14. Use of Shade Cloth
Editor’s Choice

90% Shade Cloth for Garden -12 x 20 FT Durable Mesh Tarp with Grommets, …
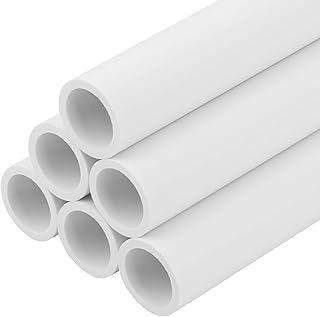
6Pcs 1/2 Inch PVC Pipe 17″ Long Sch40 Industrial Pipes for Home DIY, Gre…

100 Pcs Plant Support Clips,Plastic Clips for Securing Plants,Tomato Vin…
15. Harvesting Techniques

Harvesting Techniques
You want big yields and great flavor. The way you pick fruit matters.
Here is why proper harvesting helps your garden stay healthy. It reduces damage and keeps plants growing.
– Cut, don’t pull: use a clean, sharp knife or scissors to remove the fruit. A clean cut helps the plant seal the wound faster.
– Harvest in cool moments: pick in the morning or evening when the air is cool. That keeps flavors bright and textures tender.
– Pick at the right size: many vegetables taste best when young. Zucchini, beans, and peppers are a good example. If you wait, they can turn fibrous or seedy.
– Check every day: daily harvests often encourage more production.
– Leave a small stem: this protects the fruit and looks nicer on the plant.
– Handle with care: soft bruises invite rot. Gently place veggies in a basket or crate.
– Experiment with stages: try picking some a bit early and some a bit later to learn your preferred taste.
With these habits, you’ll keep plants healthy and get tastier harvests. Next steps: watch for ripe cues, adjust how you pick, and enjoy the fresh garden produce.
If a plant looks stressed, skip that fruit and give it time.
15. Harvesting Techniques
Editor’s Choice

Fiskars Bypass Pruning Shears, 5/8-Inch Cut Capacity Garden Clippers, Ga…

Fiskars Garden Harvest Basket – Container for Gardening and Harvesting w…

NISAKU NJP650 The Original Hori Hori Namibagata Japanese Stainless Steel…
You Might Also Like

16. Save Seeds

Save seeds for next season and keep your best flavors growing. It cuts costs and keeps your garden true to taste. You learn which plants pass their good traits to the next crop and how long seeds stay viable.
– Pick healthy plants. Choose seeds from disease-free plants. Strong leaves and sturdy stems help seeds stay true.
– Let them finish. Allow a few plants to go to seed. Beans and tomatoes are easy for beginners.
– Collect with care. Harvest seeds when pods dry. Remove seeds, rinse gently, and dry.
– Dry well before storing. Spread seeds on a clean surface and air dry. Keep moisture away.
– Label every batch. Note the variety and harvest date on a small tag. Clear labels save time next season.
– Store in the right spot. Use jars or envelopes in a cool, dark, dry place.
– Guard against cross pollination. Separate related plants if you want true seeds.
– Check germination. Test a few seeds on a damp paper towel to see sprouts.
– Know the limits. Open-pollinated and heirloom seeds stay true longer; hybrids may not.
With a little practice, seed saving becomes fast. Start small and add more plants as you gain confidence.
16. Save Seeds
Editor’s Choice

Bekith 4 Pack 15 FL OZ (450ml) Glass Food Storage Jar with Acacia Lids, …
KINGLAKE 100 Pcs 6 x10cm Plastic Plant T-Type Tags Nursery Garden Labels

150pcs Seed Saving Envelopes, 4.7×3.1 Inch Reusable Seed Kraft Storage O…
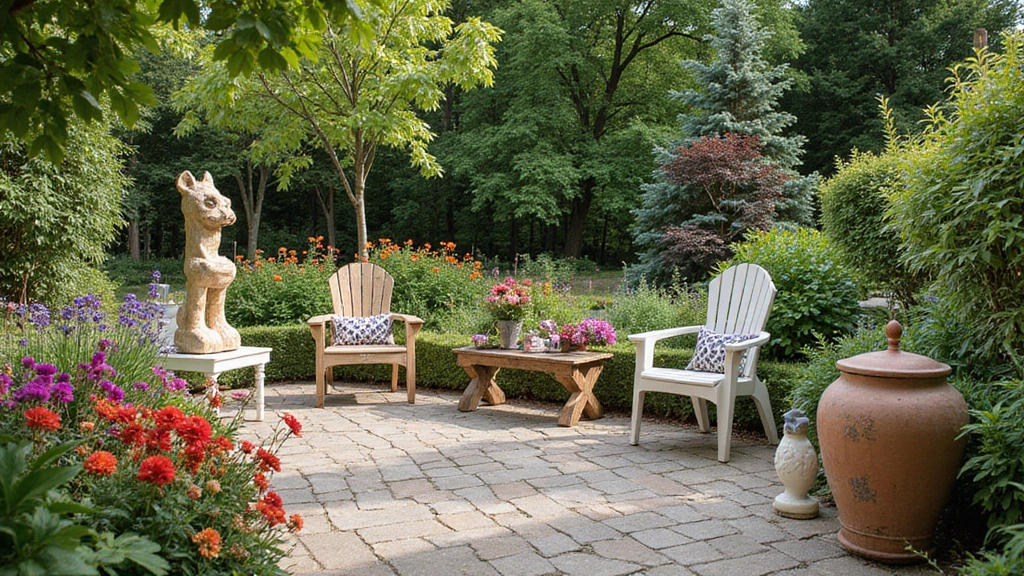
17. Incorporate Wildlife

Want a garden that helps itself? You can invite wildlife and watch the day come alive. A lively yard brings tastier veggies, fewer pests, and a morning chorus you can hear from the porch. You can build a space that welcomes birds, bees, and helpful critters.
Here is why this works. Plants feed wildlife, and wildlife feeds your garden. A steady flow of visitors keeps pests in check and helps pollination. You get better blooms and more color with less work.
– What to plant Choose native flowers and shrubs that fit your space. They attract bees, butterflies, and other helpful critters. Mix tall and low growing varieties for cover and a splash of color.
– Create shelter Leave fallen leaves in quiet corners, add a small brush pile, or install a birdhouse or a bee hotel. These little homes give birds and bees a safe place to rest and raise young.
– Provide water Set out a shallow bird bath or a tiny fountain. Moving water draws more wildlife and cools the garden on hot days.
– Care without chemicals Skip strong sprays in bloom time. If pests appear, try simple soap spray on a calm morning.
– Offer food year round Plant a mix of nectar-rich perennials and seed plants that feed wildlife through seasons.
– Keep it safe Avoid loud disruptions near feeding spots. A quiet path and gentle lighting invite night visitors too.
Next steps: start with one native plant, a water source, and a small bird shelter. See which visitors arrive and adjust as needed.
Benefits:
– A balanced garden helps plants stay healthier.
– You gain a natural soundtrack of birds and buzzing bees.
– You support local wildlife and keep biodiversity alive in your neighborhood.
17. Incorporate Wildlife
Editor’s Choice

Northeast Wildflower Seeds – Extra Large 1 Ounce Packet – Over 7,500 Nat…

Humming Bird Houses for Outdoor Hanging Small Bird Nesting Box – Wood Ne…

Bird Baths for Outdoors Heavy Duty, 38.5 in Detachable Birdbaths for The…
18. Experiment with Container Gardening

Turn tight spaces into a thriving vegetable spot with containers. If you have a small yard, a balcony, or a bright window, you can still grow your own food. Containers place vegetables where sun shines and soil stays fresh. Use pots, hanging baskets, or an old wheelbarrow as a planter.
Choose compact, dwarf varieties. They stay manageable in small pots and often give you harvests sooner. Start simple: two or three pots, a tote, and a hanging basket for greens.
How to set it up
– Pick pots with drainage holes so water flows out and roots stay healthy.
– Use fresh, lightweight potting soil. If you have compost, stir in a little.
– Fill pots fully so soil doesn’t settle. A thin layer of stones at the bottom helps drainage.
– Group pots by sun and water needs. This makes watering easier and keeps plants happier.
Care and maintenance
– Water regularly. Check the top inch and water when it feels dry.
– Feed every 2–3 weeks with a balanced fertilizer.
– Rotate plants every few weeks so they all get good light.
Next steps: sketch a quick layout, pick two crops, and test a couple of container styles.
18. Experiment with Container Gardening
Editor’s Choice

yarlung 6 Pack Self Watering Planter with Water Level Indicator, 5 Inch …

Burpee, 9 Quarts | Premium Organic Potting Natural Soil Mix Food Ideal f…

Miracle-Gro Water Soluble All Purpose Plant Food, Fertilizer for Indoor …
19. Use Time-Tested Methods

Time-tested methods that still work
Here is why you should trust old garden tricks. They fit small spaces, save work, and teach you what nature does well. You can mix a few simple ideas to see fast results.
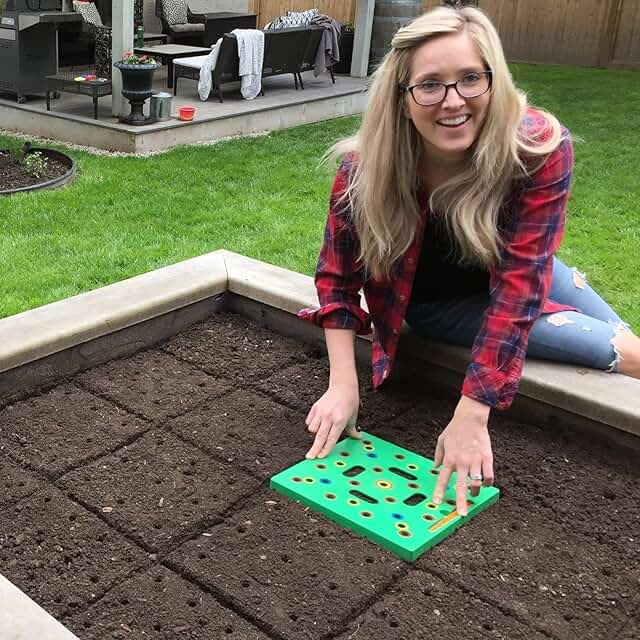
– Square foot gardening. Build a 4 by 4 foot bed and mark a light grid. Each square foot holds a different crop. Plant fast growers like radish and lettuce in a few squares, and leave space for slower crops. Keep soil rich with compost and mulch. Water gently to protect roots. Tidy beds that are easy to manage.
– The Three Sisters method. Plant corn, beans, and squash together. The corn gives height, beans fix nitrogen, and squash blankets the soil. Start with a small corn mound, plant beans at the base, then spread squash around them.
– Traditional row gardening. Plant in long rows for easy care. Rotate crops yearly. Mulch to curb weeds and keep soil moist. A drip irrigation line saves water and makes weeding easier.
– Suggestions: Research local historical gardening practices for ideas. Consider joining a community garden to learn from seasoned gardeners.
19. Use Time-Tested Methods
Editor’s Choice
Seeding Square – Patented Seed and Seedling Spacer Tool for Bigger Harve…

230FT Drip Irrigation System for Garden with 40 Nozzles & Emitters, Gard…
Utopia Kitchen Compost Bin for Kitchen Countertop, 1.3 Gallon Compost Bu…
20. Celebrate Your Harvest

Your hard work has paid off in color and flavor. Take a moment to enjoy the harvest you grew right in your backyard. A small celebration keeps your garden feeling alive all year.
Host a simple garden party or cook a meal that features your freshest vegetables. Let the tomatoes pop red, basil send a bright scent, and peppers glow on the plate. Eating what you grew makes every bite special.
Consider keeping a visual diary of your garden journey. Photograph the first ripe fruit, the neat rows, and the tricky weeks. A simple scrapbook lets you see progress, learn from losses, and treasure the quiet beauty of grow spaces.
Tips:
– Organize a neighborhood potluck to share the bounty and swap ideas.
– Create quick recipe cards that use what you harvested to inspire others.
Next steps: plan your harvest menu, set a date for a small gathering, and add a page to your garden diary after each harvest. Celebrate every season with gratitude and good food.
Your celebration keeps you rooted in the garden and ready for the next planting season. You can repeat this yearly, keeping the joy alive in your garden.
Celebrate your backyard vegetable gardens! Every harvest is a moment to savor – host a garden party or cook a meal with your freshest picks, turning each bite into a memory.
20. Celebrate Your Harvest
Editor’s Choice

Kate Aspen Tea Party Decorations, Colorful Pastel Plates And Napkins Gar…

YOJO Recipe Cards,50 Count Recipe Cards 4×6,Double Sided Cardstock for B…

icceemee Scrapbooking Supplies Kit, Brown Garden Scrapbooking Kit for Bu…
Conclusion

Transforming your backyard vegetable garden into a green paradise doesn’t have to be overwhelming.
With these 20 hacks, you can cultivate a space that not only looks good but thrives year after year.
Embrace the joy of gardening and watch as your fresh produce flourishes, making your meals even more delightful!
Note: We aim to provide accurate product links, but some may occasionally expire or become unavailable. If this happens, please search directly on Amazon for the product or a suitable alternative.
This post contains Amazon affiliate links, meaning I may earn a small commission if you purchase through my links, at no extra cost to you.
Frequently Asked Questions
What is vertical gardening, and how can it benefit my backyard vegetable garden?
Vertical gardening is a fantastic way to maximize space in your backyard vegetable garden! By growing plants upwards, you save ground space and make gardening easier on your back and knees.
This method allows you to grow more food in less space, making it perfect for small yards. Plus, it can create a stunning visual display, transforming your garden into a vibrant green paradise!
How does companion planting work, and what are its advantages?
Companion planting is all about placing certain crops near each other so they can help one another thrive. For instance, some plants can deter pests while others improve growth rates.
This strategy not only boosts your yields but also promotes a healthier ecosystem in your backyard vegetable garden. It’s a natural way to combat pests and improve your homegrown vegetables without chemicals!
What are the benefits of using raised garden beds in my vegetable garden?
Raised garden beds are a game-changer for your backyard vegetable garden! They bring the soil to a comfortable height, reducing strain on your back while gardening.
Additionally, they improve drainage, allow for better soil control, and can even help with pest management. It’s a simple hack that can make your easy gardening experience much more enjoyable!
How can I implement a DIY composting system in my backyard garden?
Starting a DIY composting system in your backyard is easier than you might think! You can turn kitchen scraps and yard clippings into nutrient-rich compost that feeds your vegetable garden.
All you need is a compost bin or a designated area, and you can layer your materials. This eco-friendly approach reduces waste and provides your plants with the essential nutrients they crave, ultimately enhancing your homegrown vegetables!
What are some effective natural pest control methods for my vegetable garden?
If you’re looking to keep your backyard vegetable garden chemical-free, natural pest control methods are the way to go! You can use beneficial insects, like ladybugs, to manage pests naturally.
Herbs like basil or marigolds can also deter unwanted bugs. By embracing these methods, you create a healthier environment for your plants and enjoy delicious, homegrown vegetables without harmful chemicals!
Related Topics
backyard vegetable gardens
easy gardening
vertical gardening
companion planting
raised garden beds
natural pest control
container gardening
seasonal planting
DIY composting
herb gardening
water-saving techniques
beginner friendly
Leave a Reply to Taha Cancel reply